Rate Tutorial
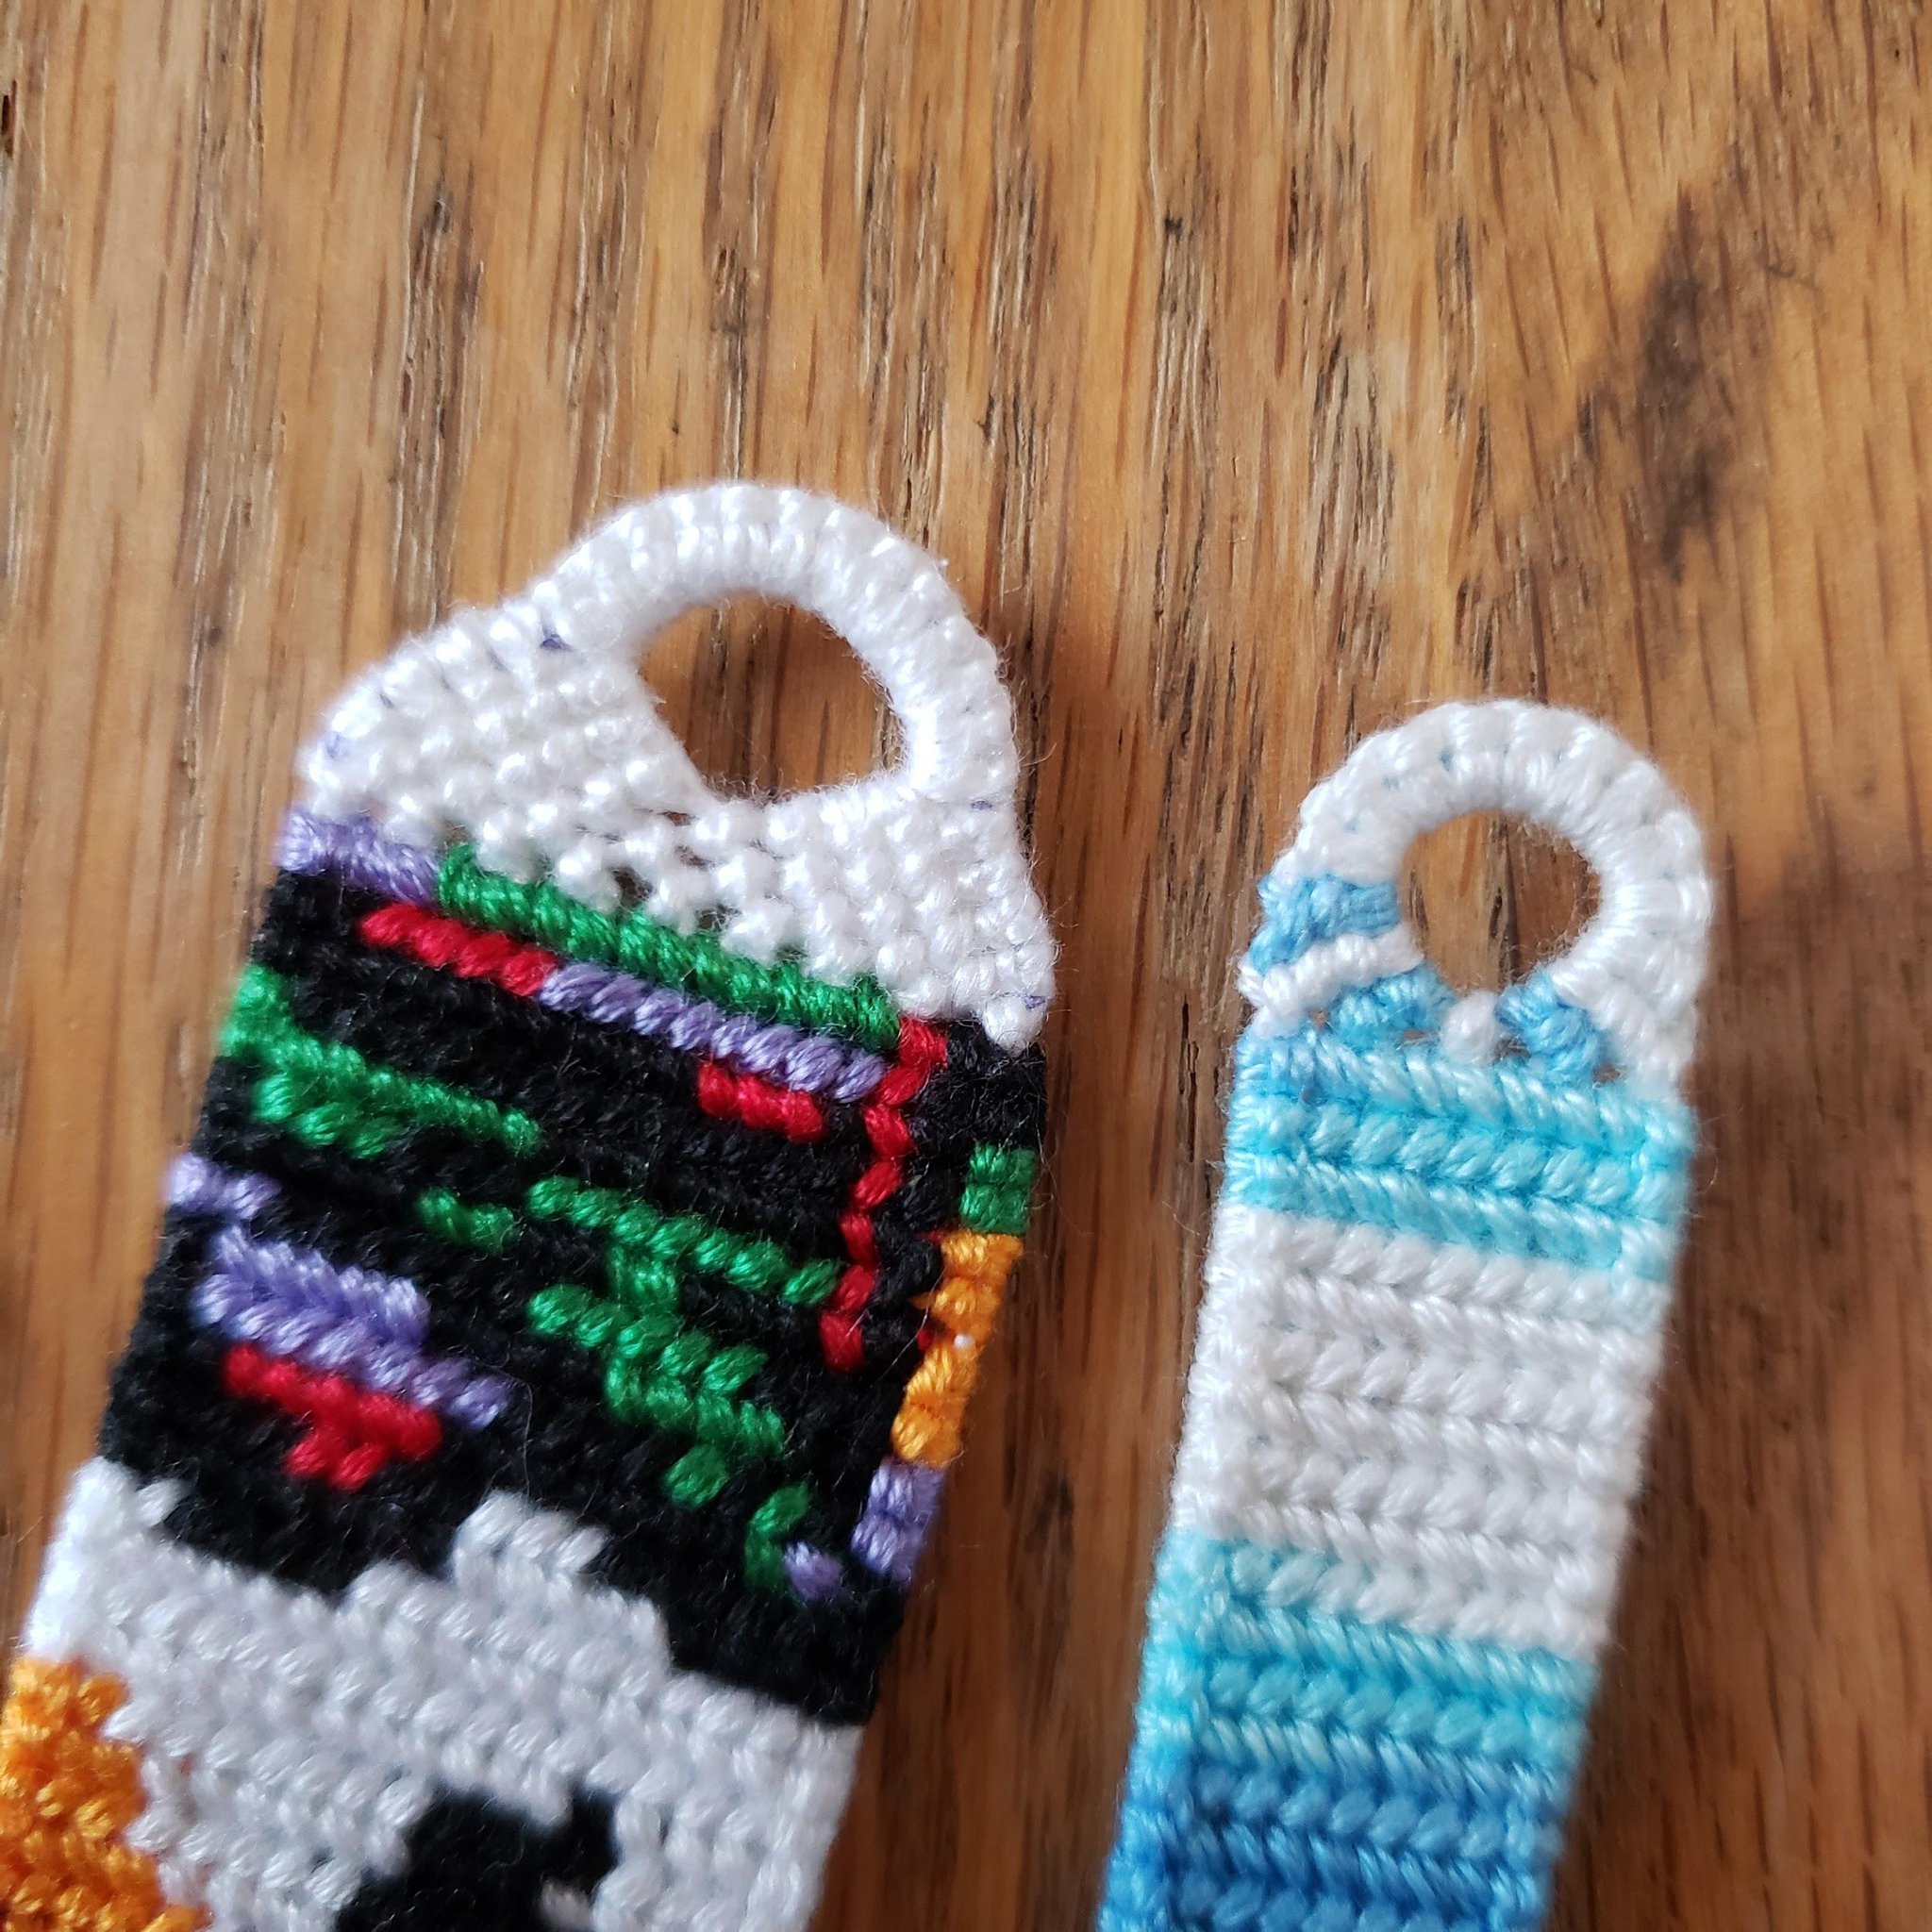
This tutorial will show two different kinds of starts and ends with this method: the double triangle start and end, and the teardrop start and end.
I recommend you watch this tutorial for triangle starts for Alphas (by @Racoon, or Masha Knots on YouTube) before following this tutorial, as this video will help you better understand what is explained here.
Double Triangle Start
This start is the most similar to the video I linked above, and is the easiest.
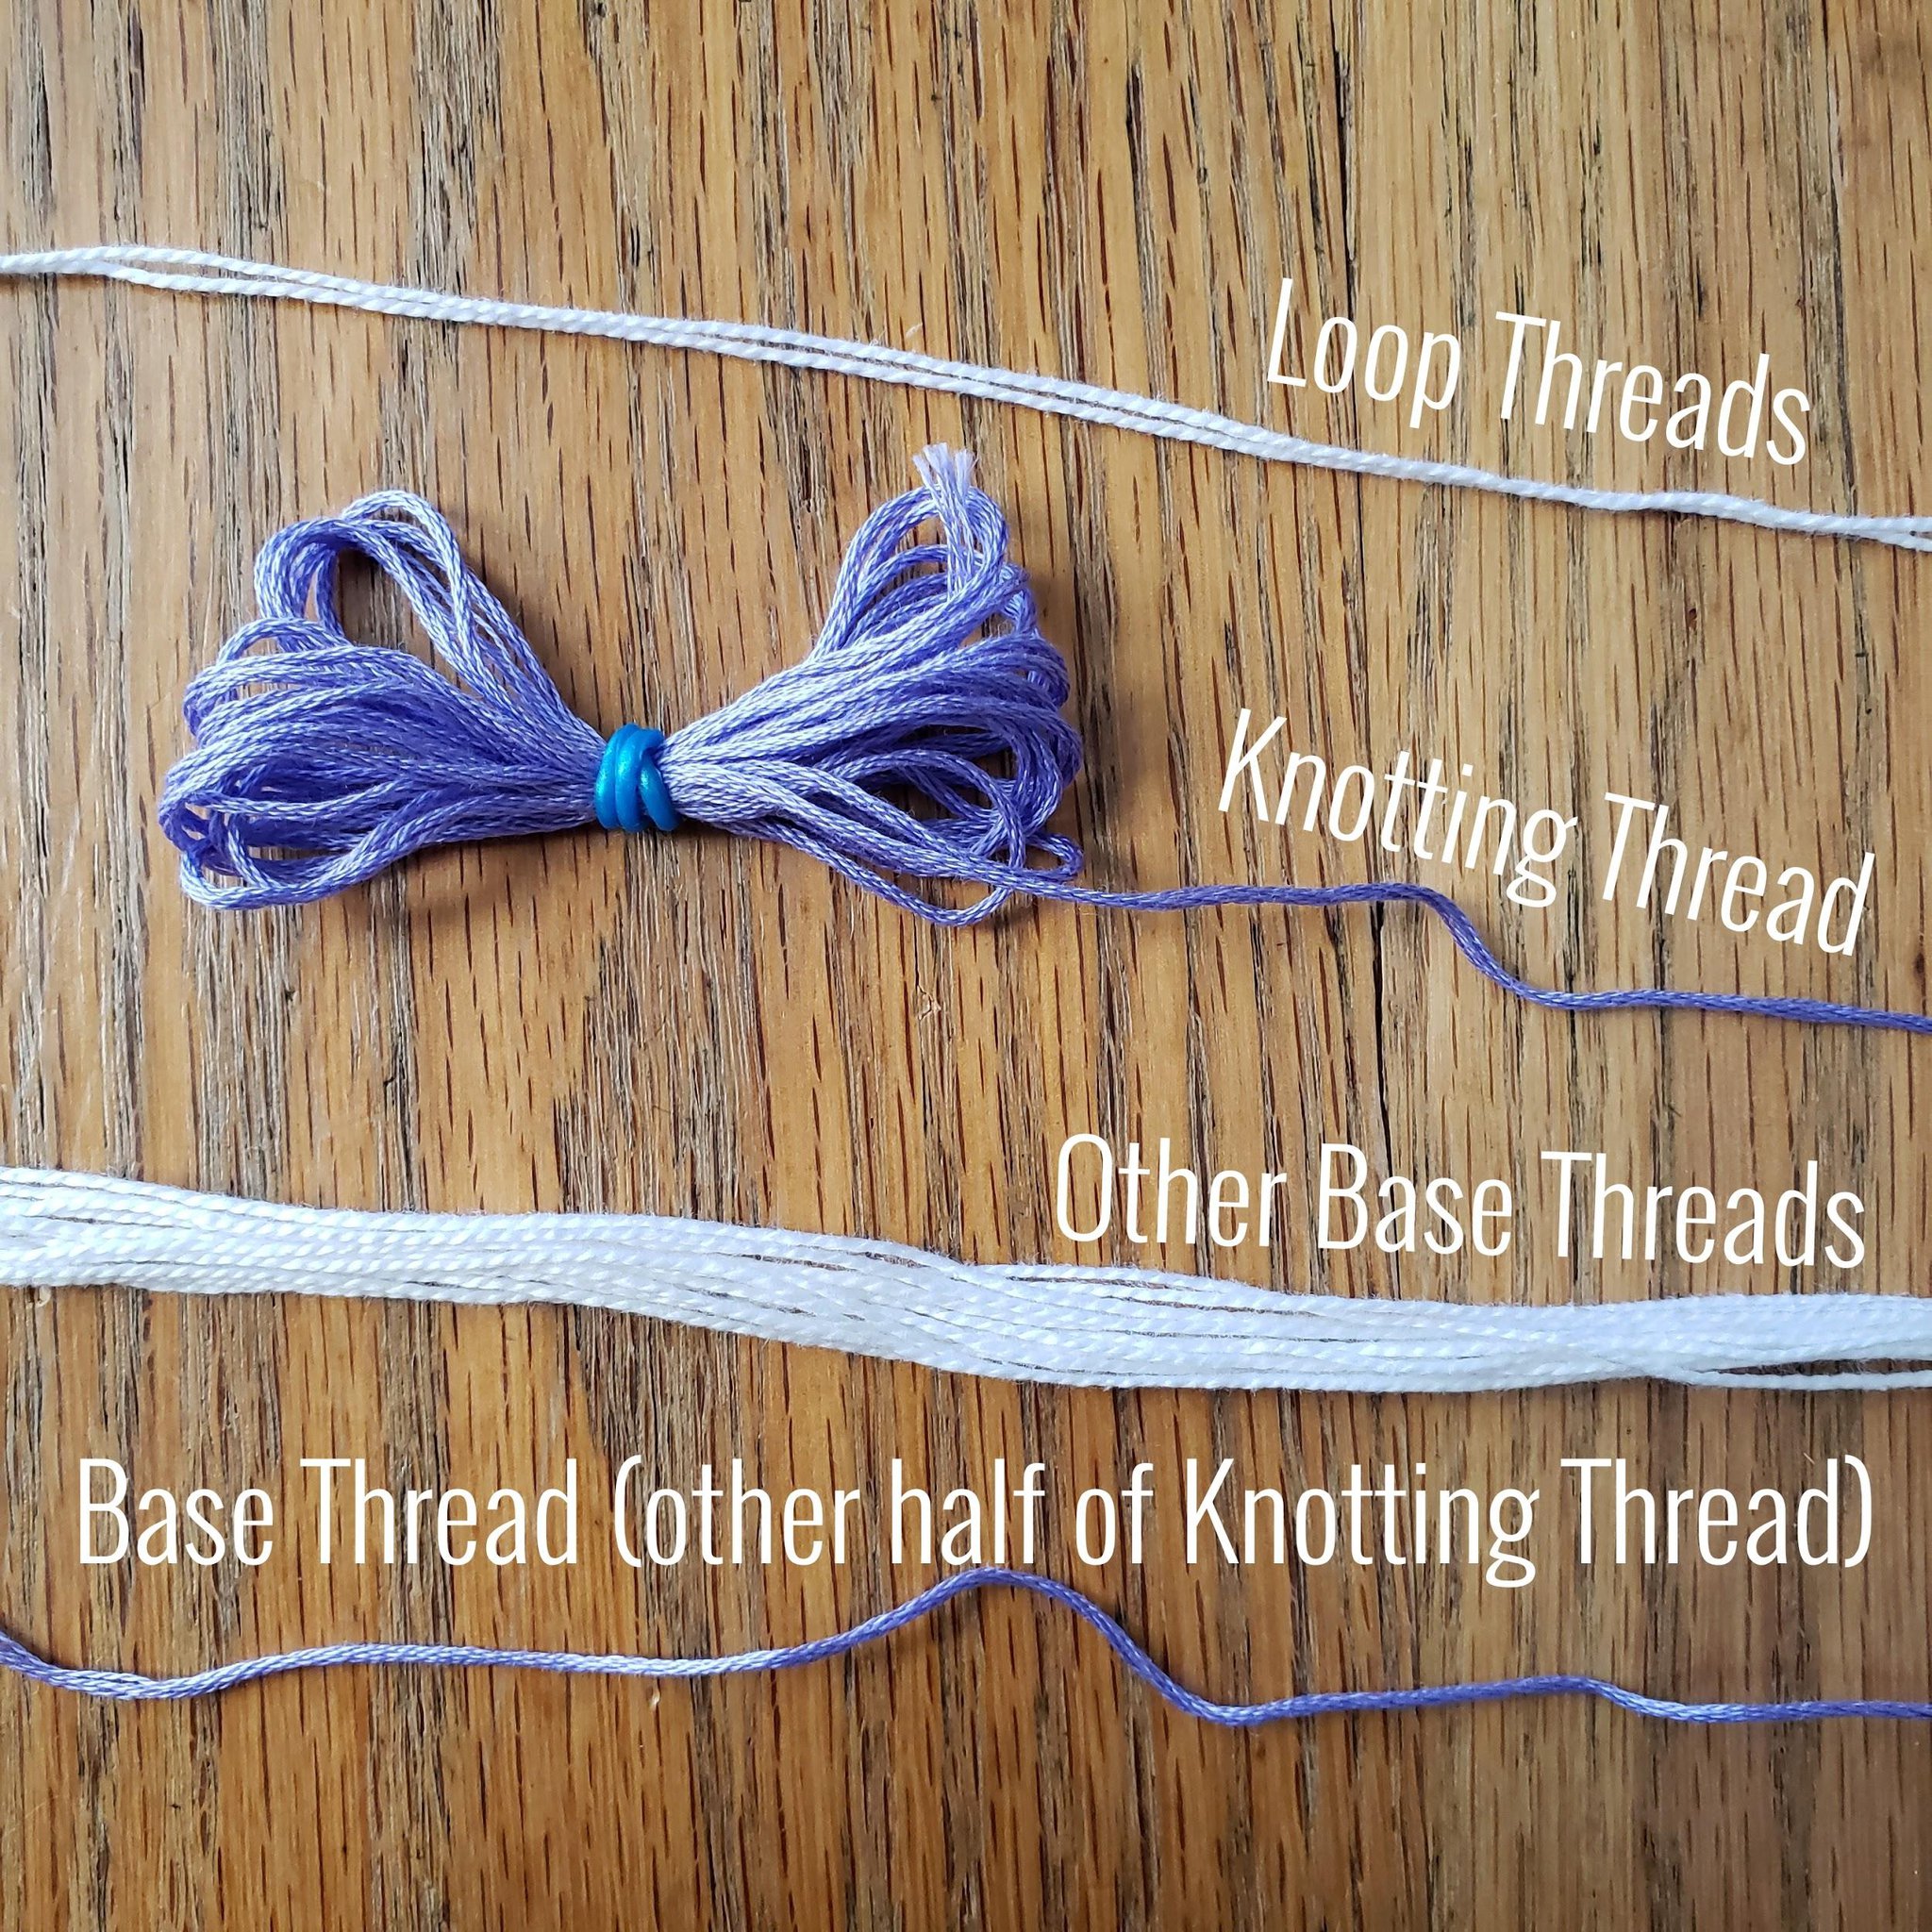
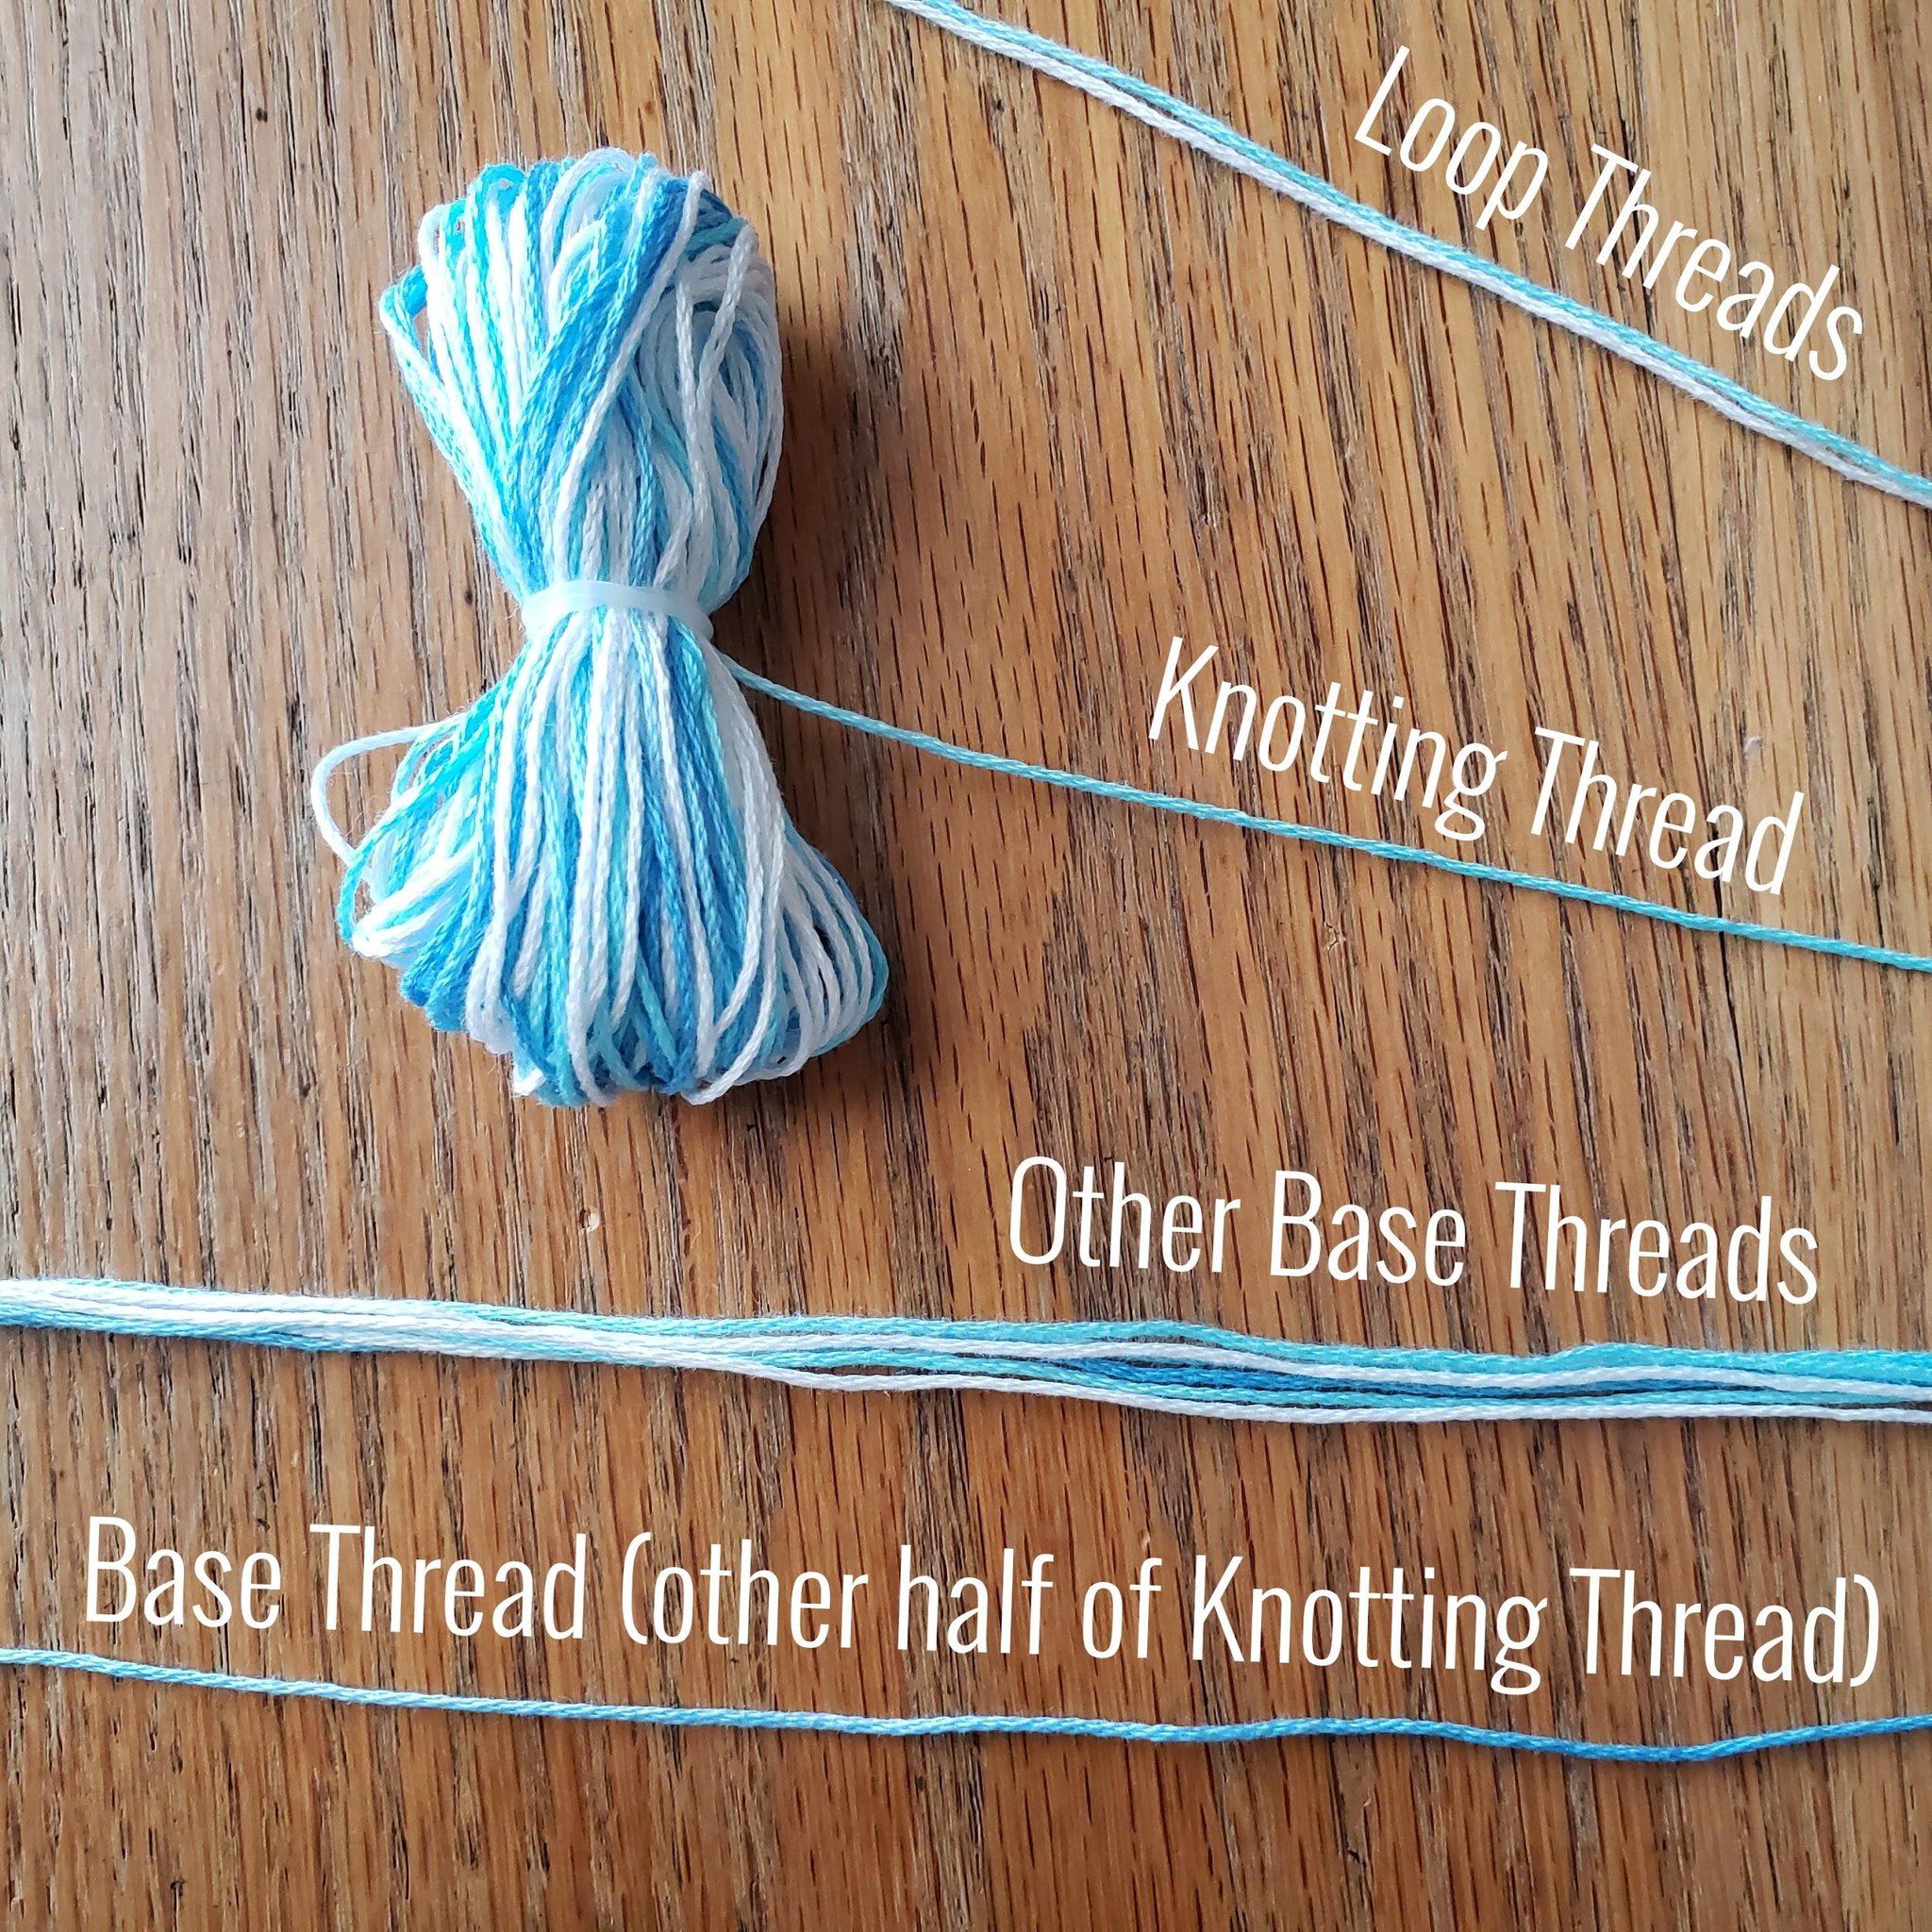
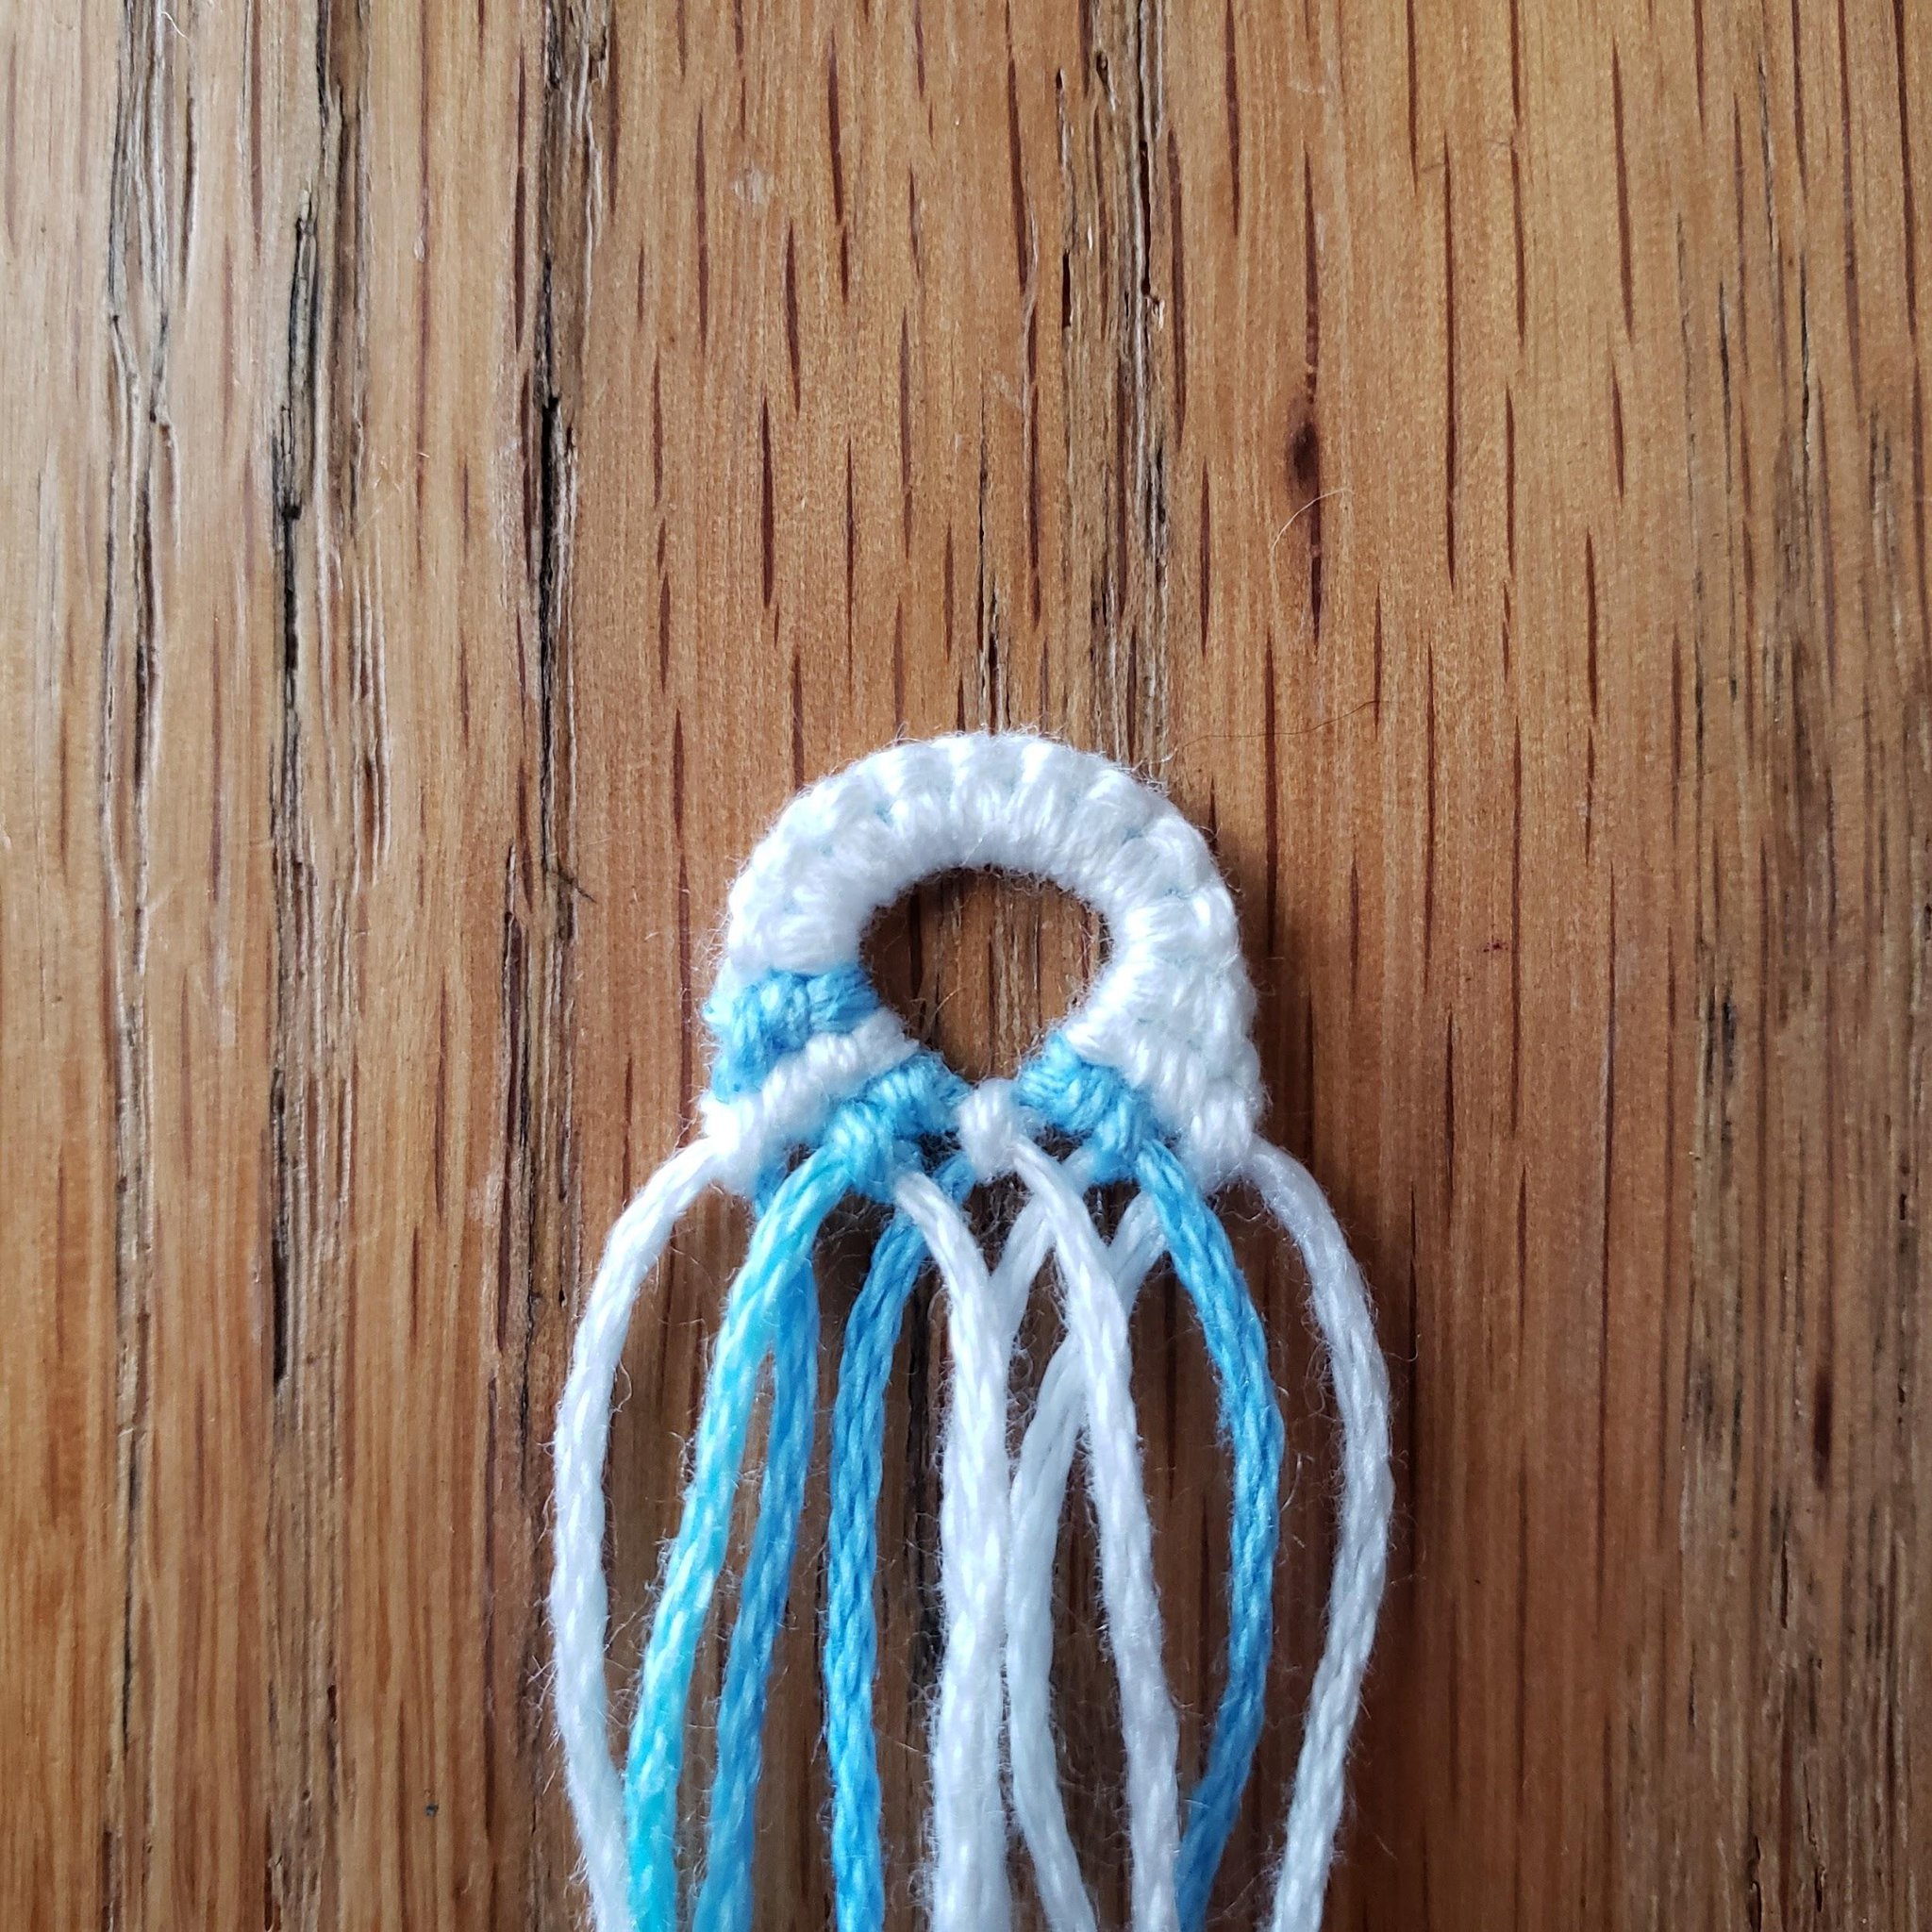
Prepare your threads for your bracelet, cutting them the same length you normally do. For this bracelet, I will need 17 base threads. I cut 8 threads for my base threads (making one a bit longer to knot my loop) and folded them in half. To create the remaining base thread needed, I included my knotting thread in my threads folded in half.
Prepare your threads for your bracelet, cutting them the same length you normally do. For this bracelet, I will need 17 base threads. I cut 8 threads for my base threads (making one a bit longer to knot my loop) and folded them in half. To create the remaining base thread needed, I included my knotting thread in my threads folded in half.
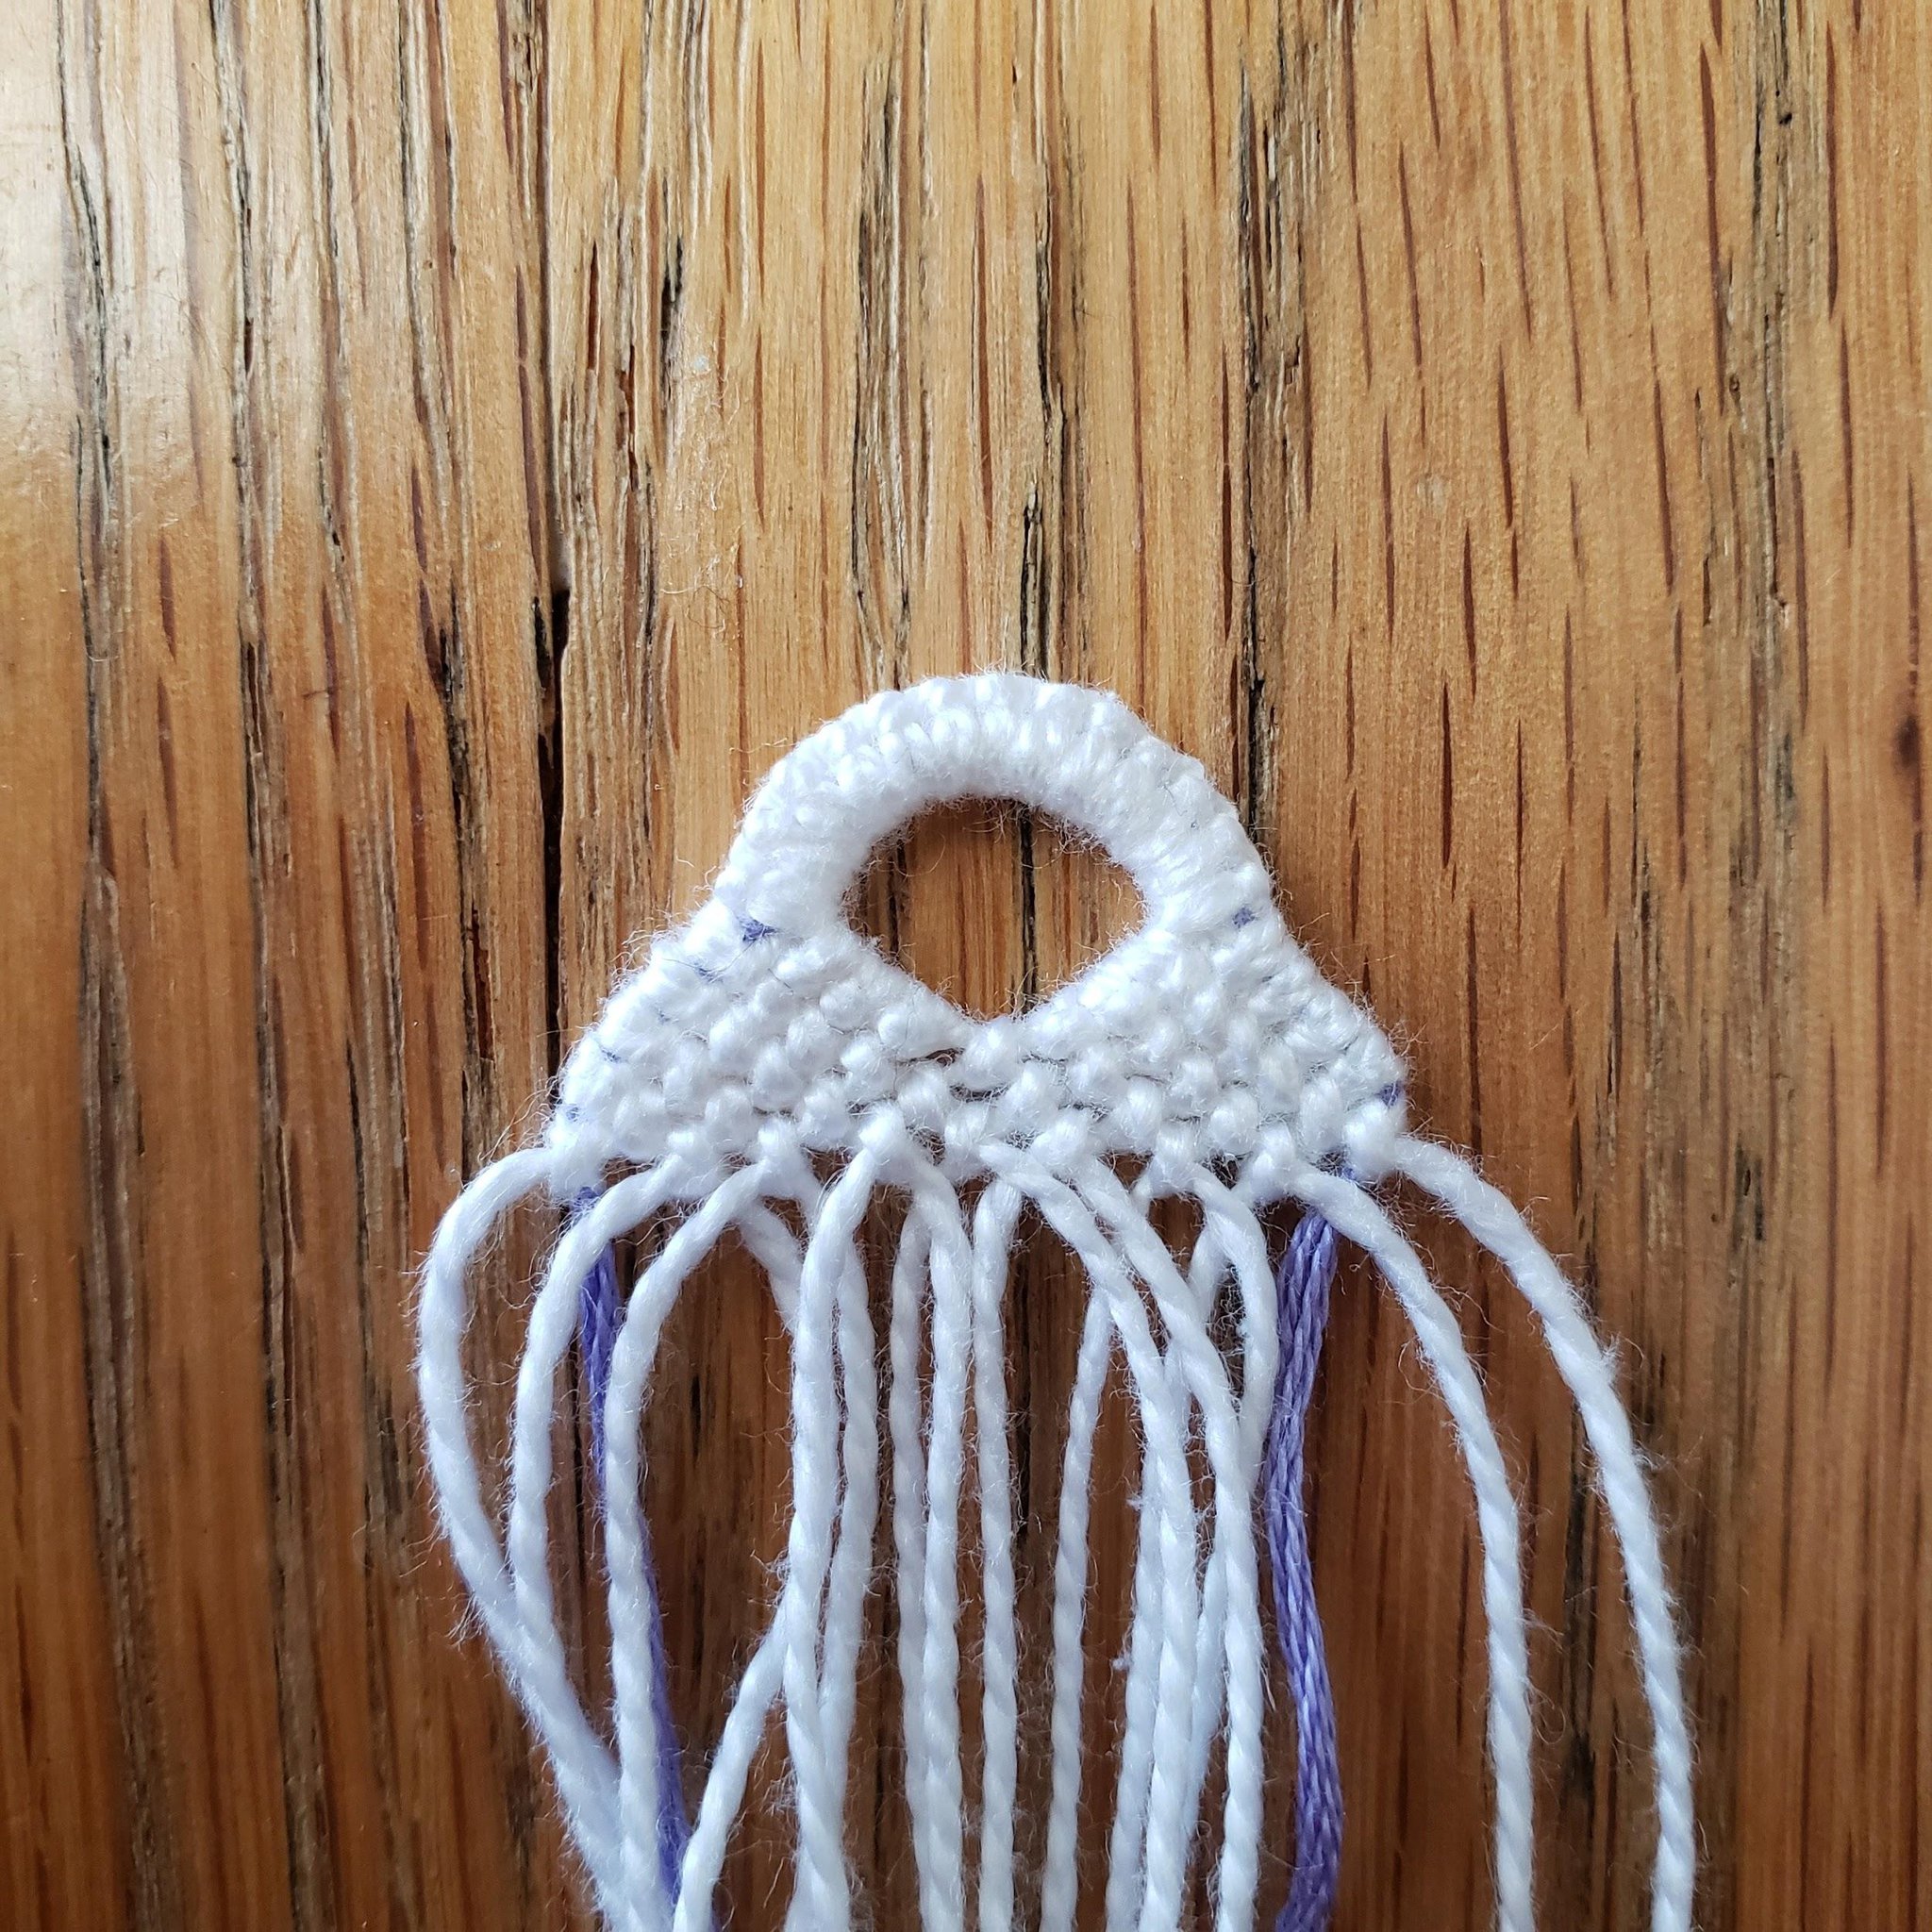
The process for this start is the exact same as the video linked. However, you need to make sure that the knotting thread and the base thread made with the other end of the knotting thread are second to the outermost threads after completing the double triangle start. The knotting thread should be on the left of the bracelet, and the base thread created from the other end of the knotting thread should be on the right of the bracelet. As of this step, these threads should not make any knots in the double triangle start of the bracelet, they should only be knotted onto.
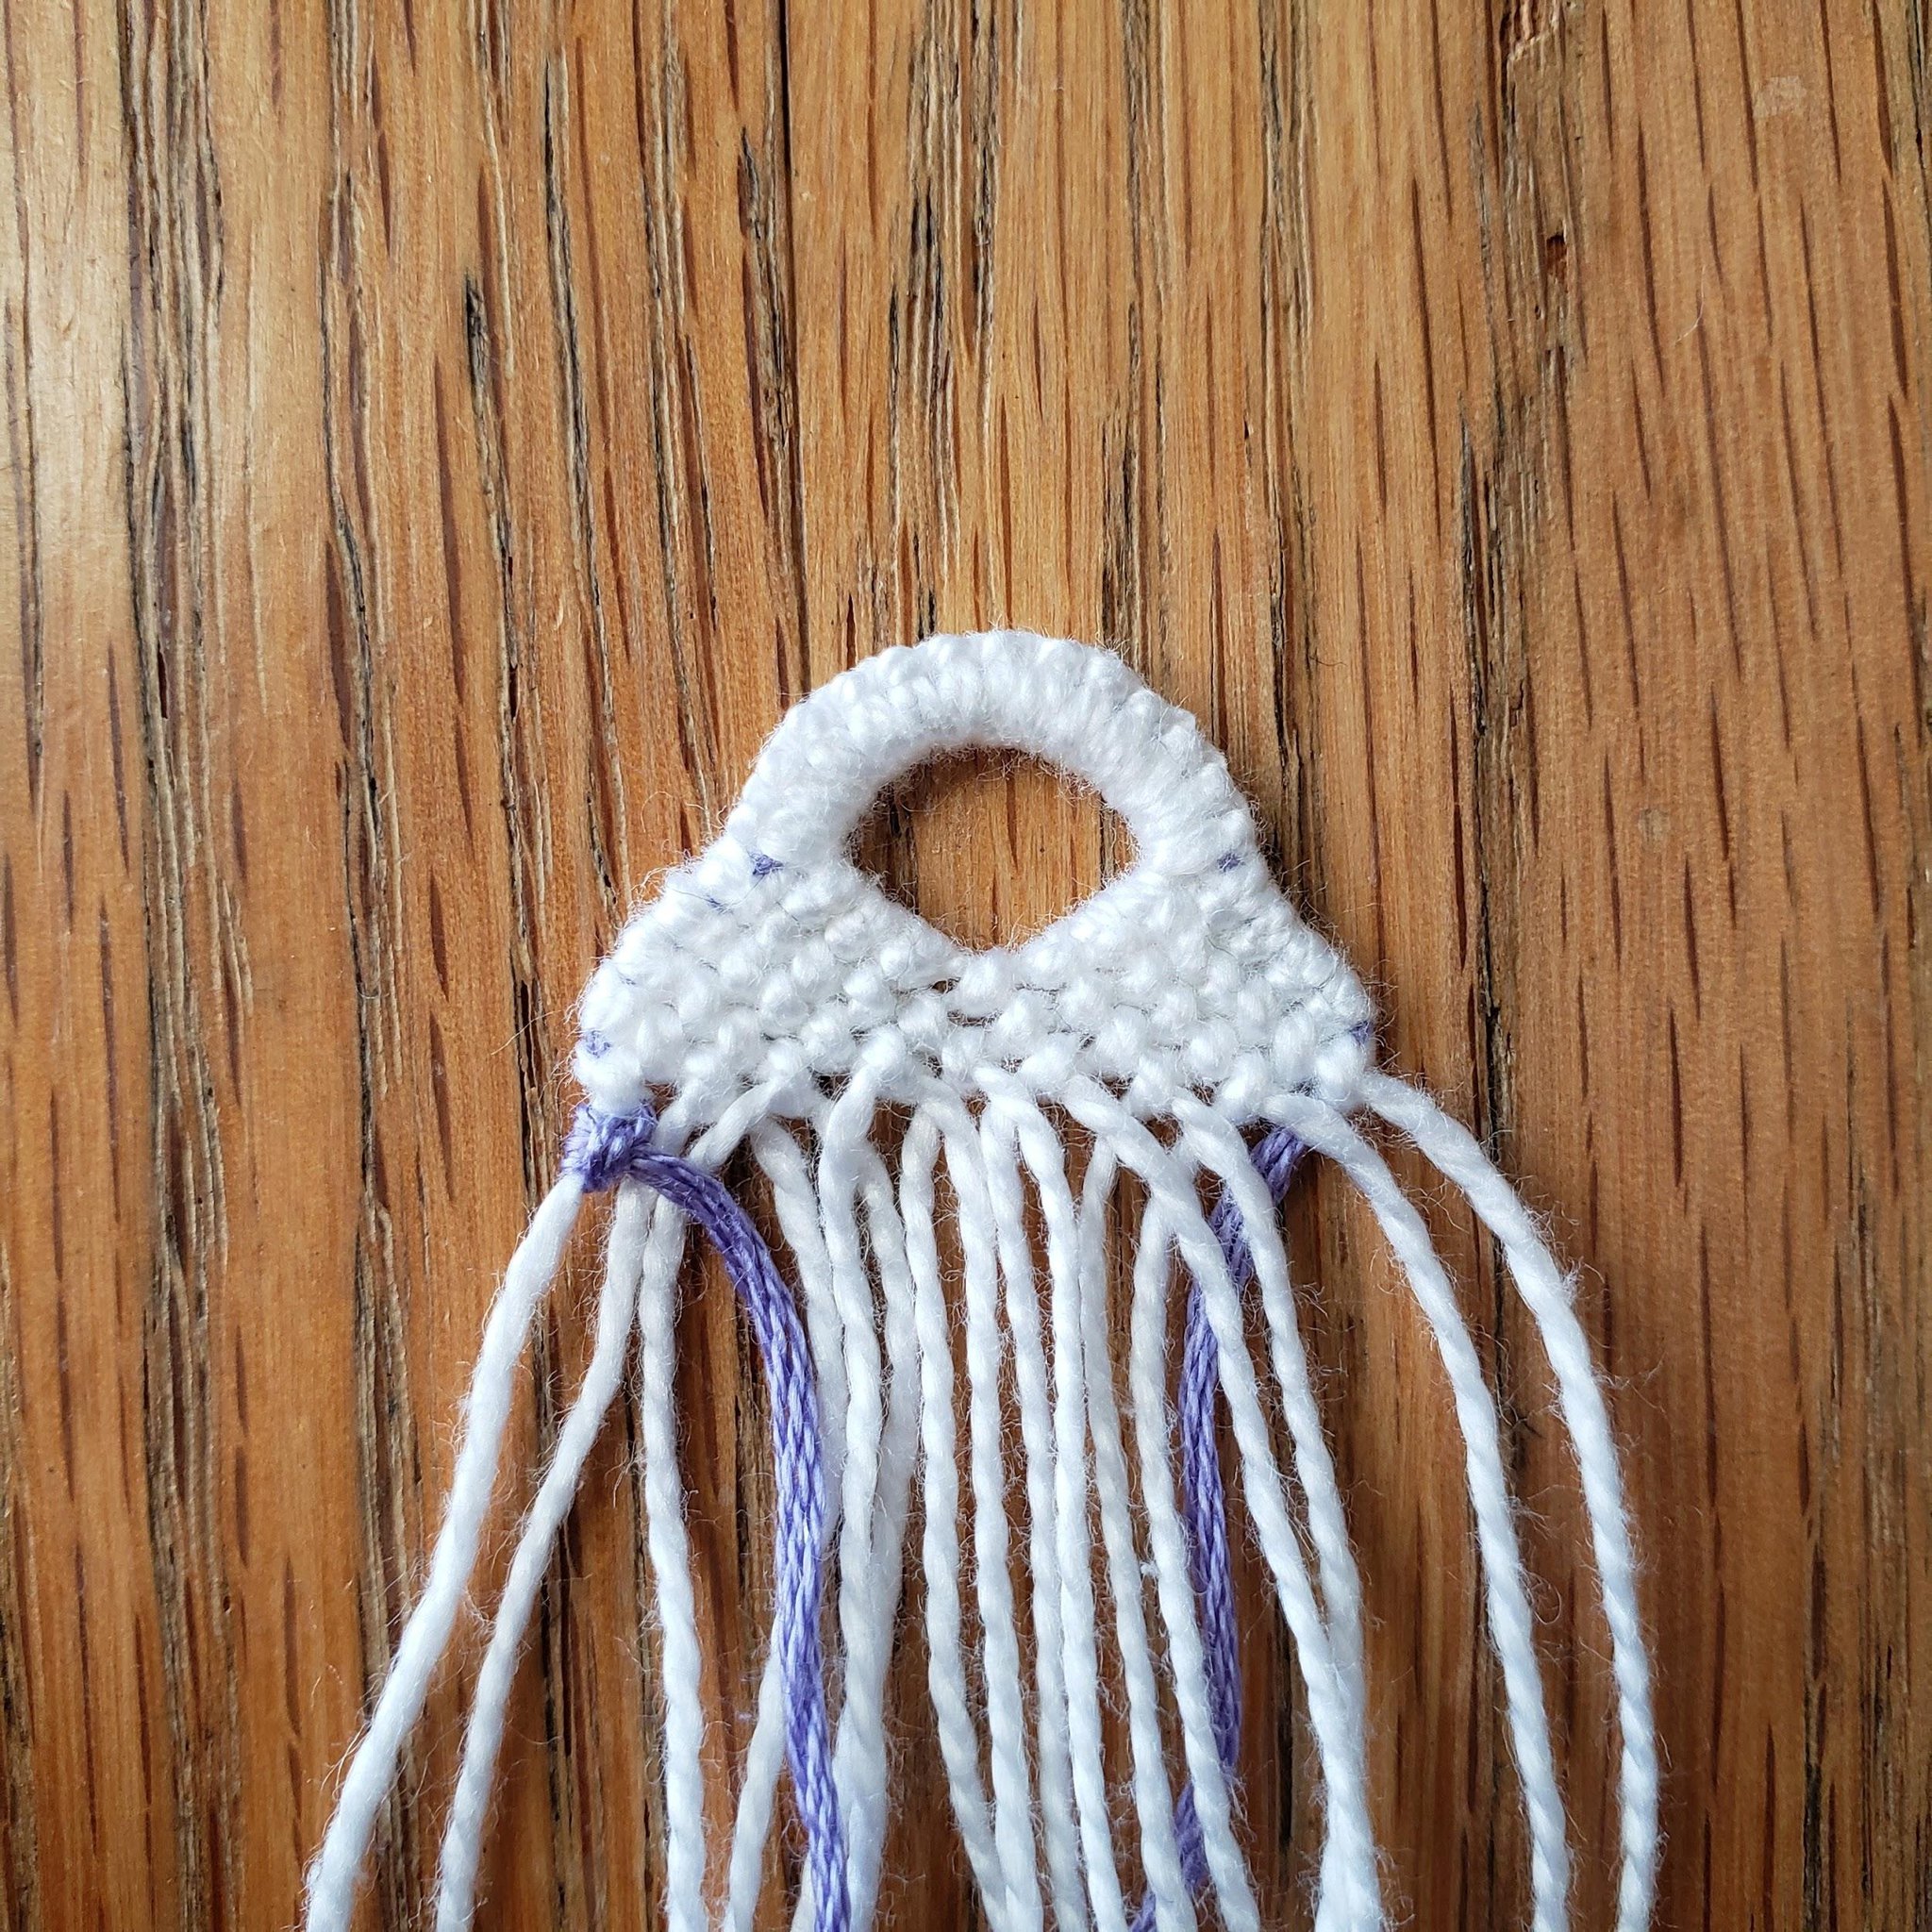
Using the second to leftmost thread (which should be your knotting thread), make a backward-forward knot onto the leftmost thread.
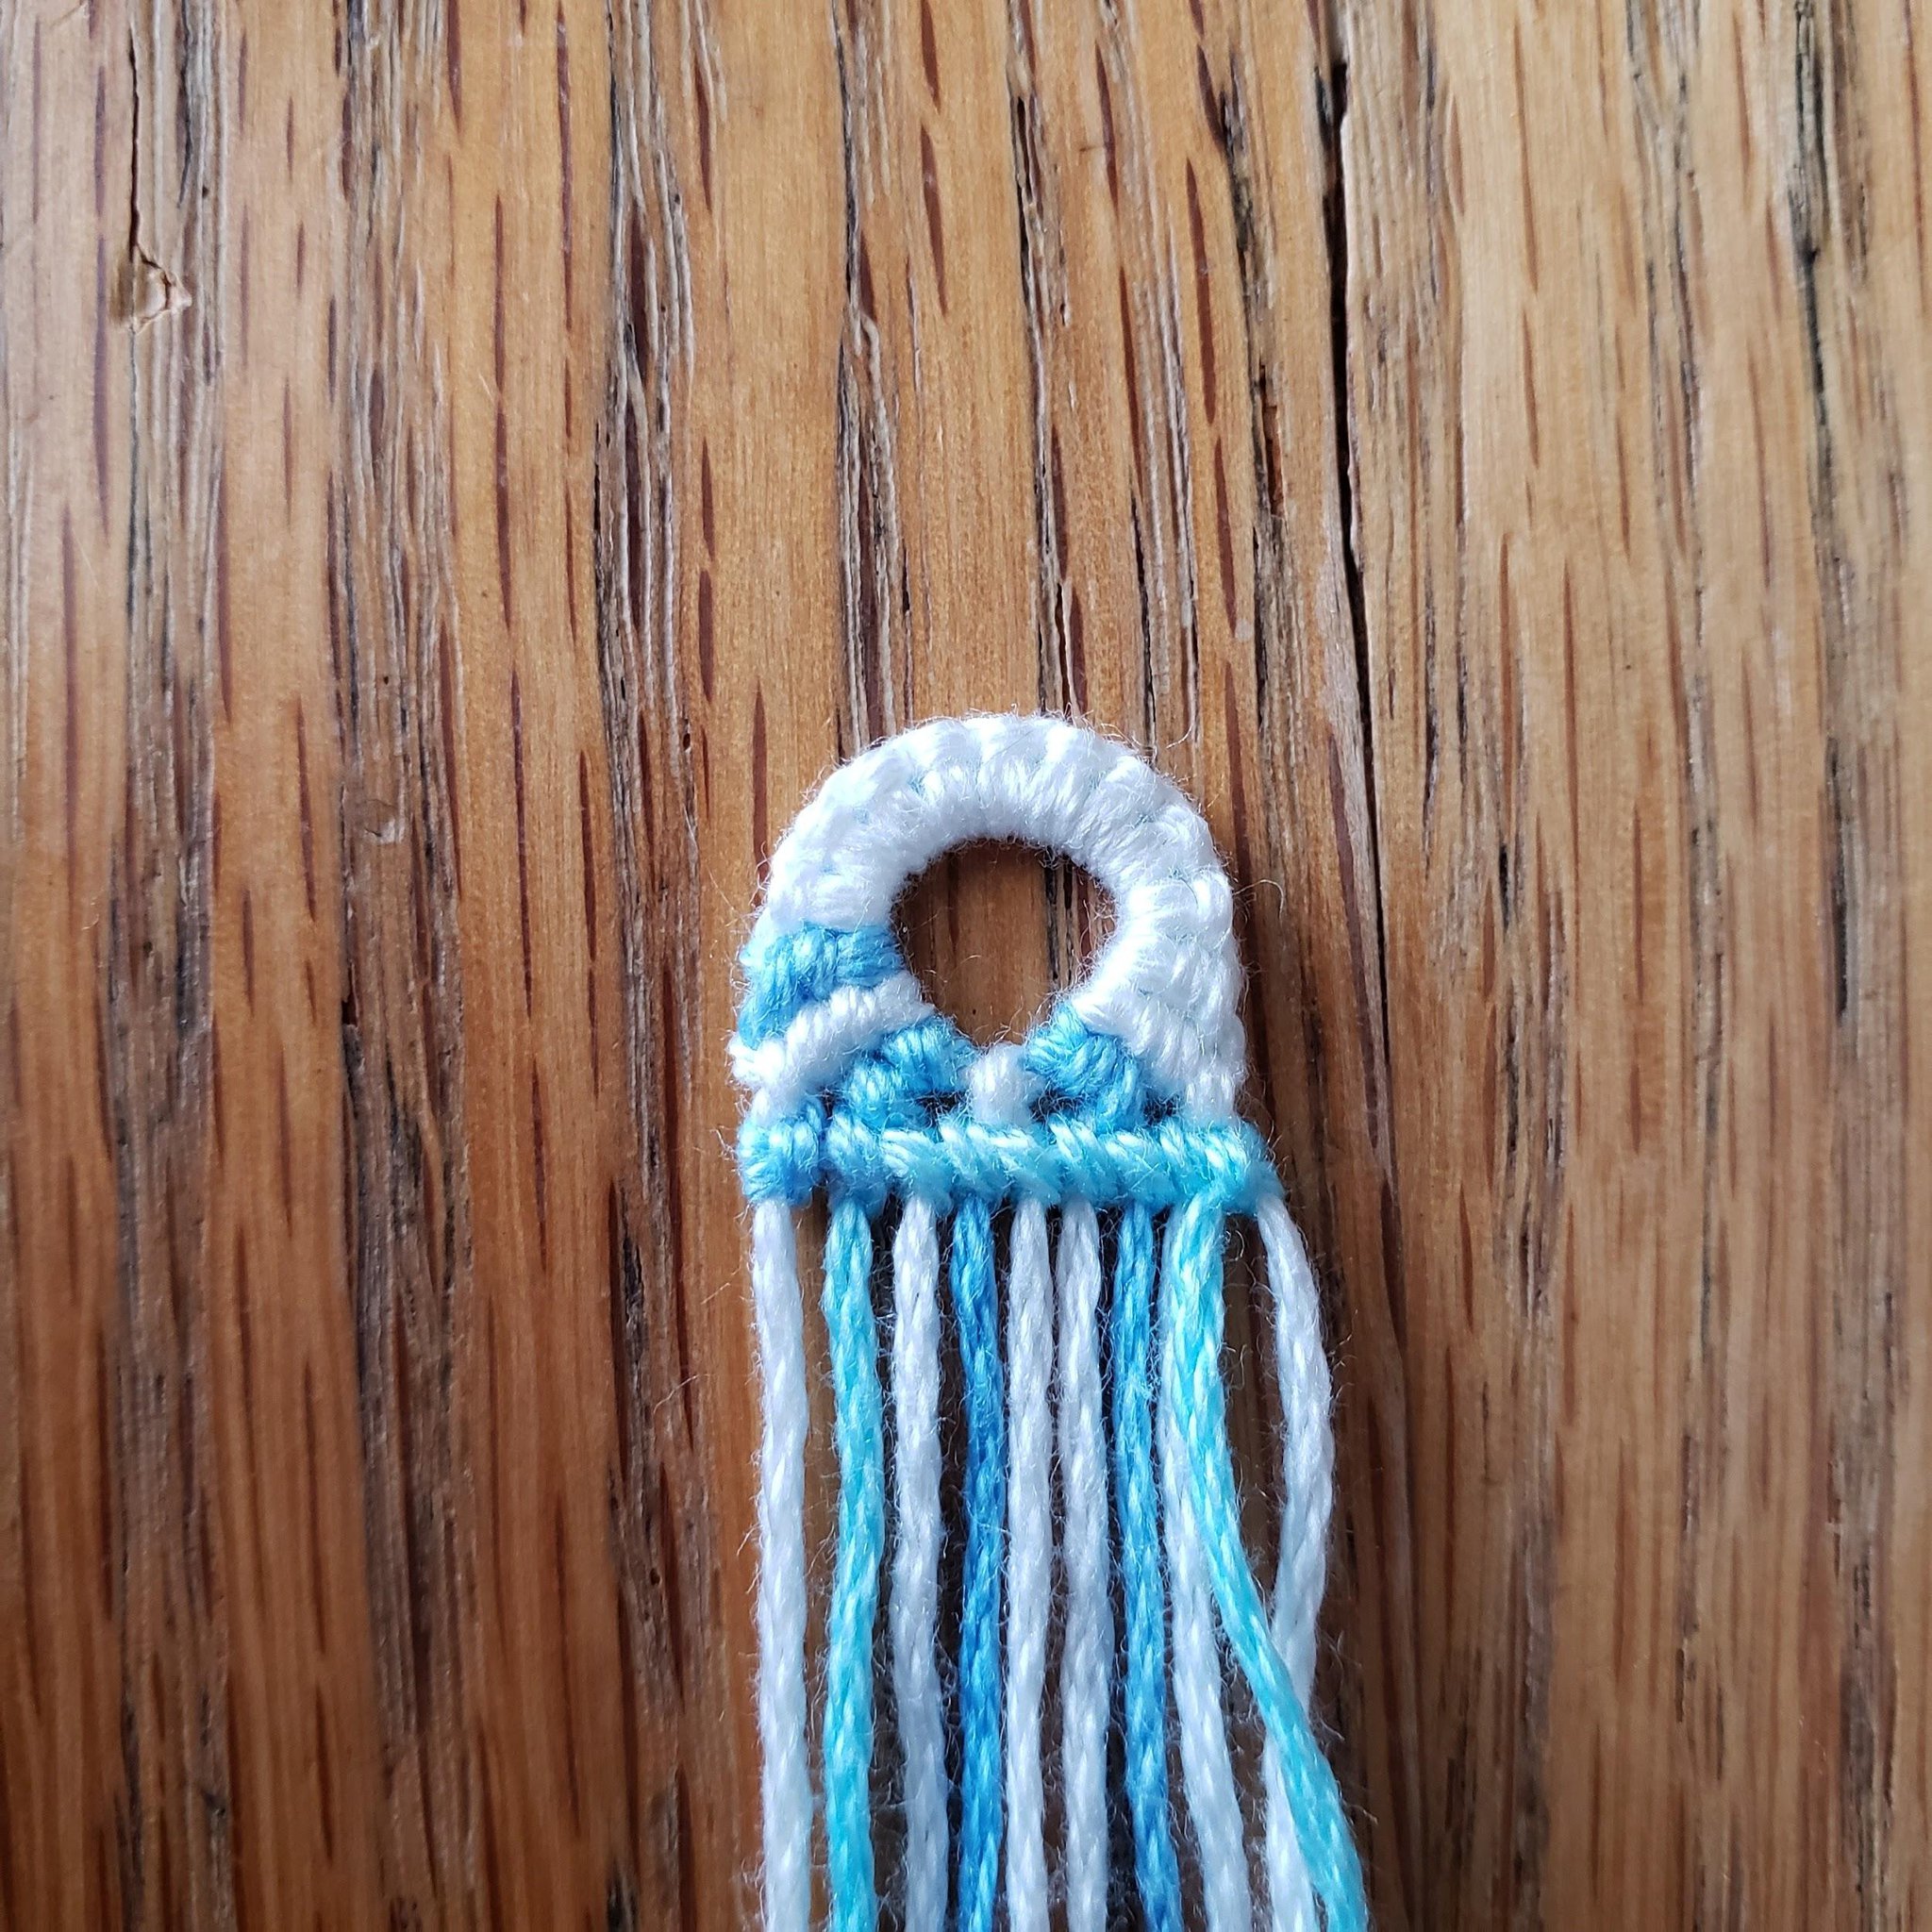
With the thread used to create the backward-forward knot, finish the first row of your Alpha how you normally would: making forward knots until the last knot of the row, a forward-backward knot.
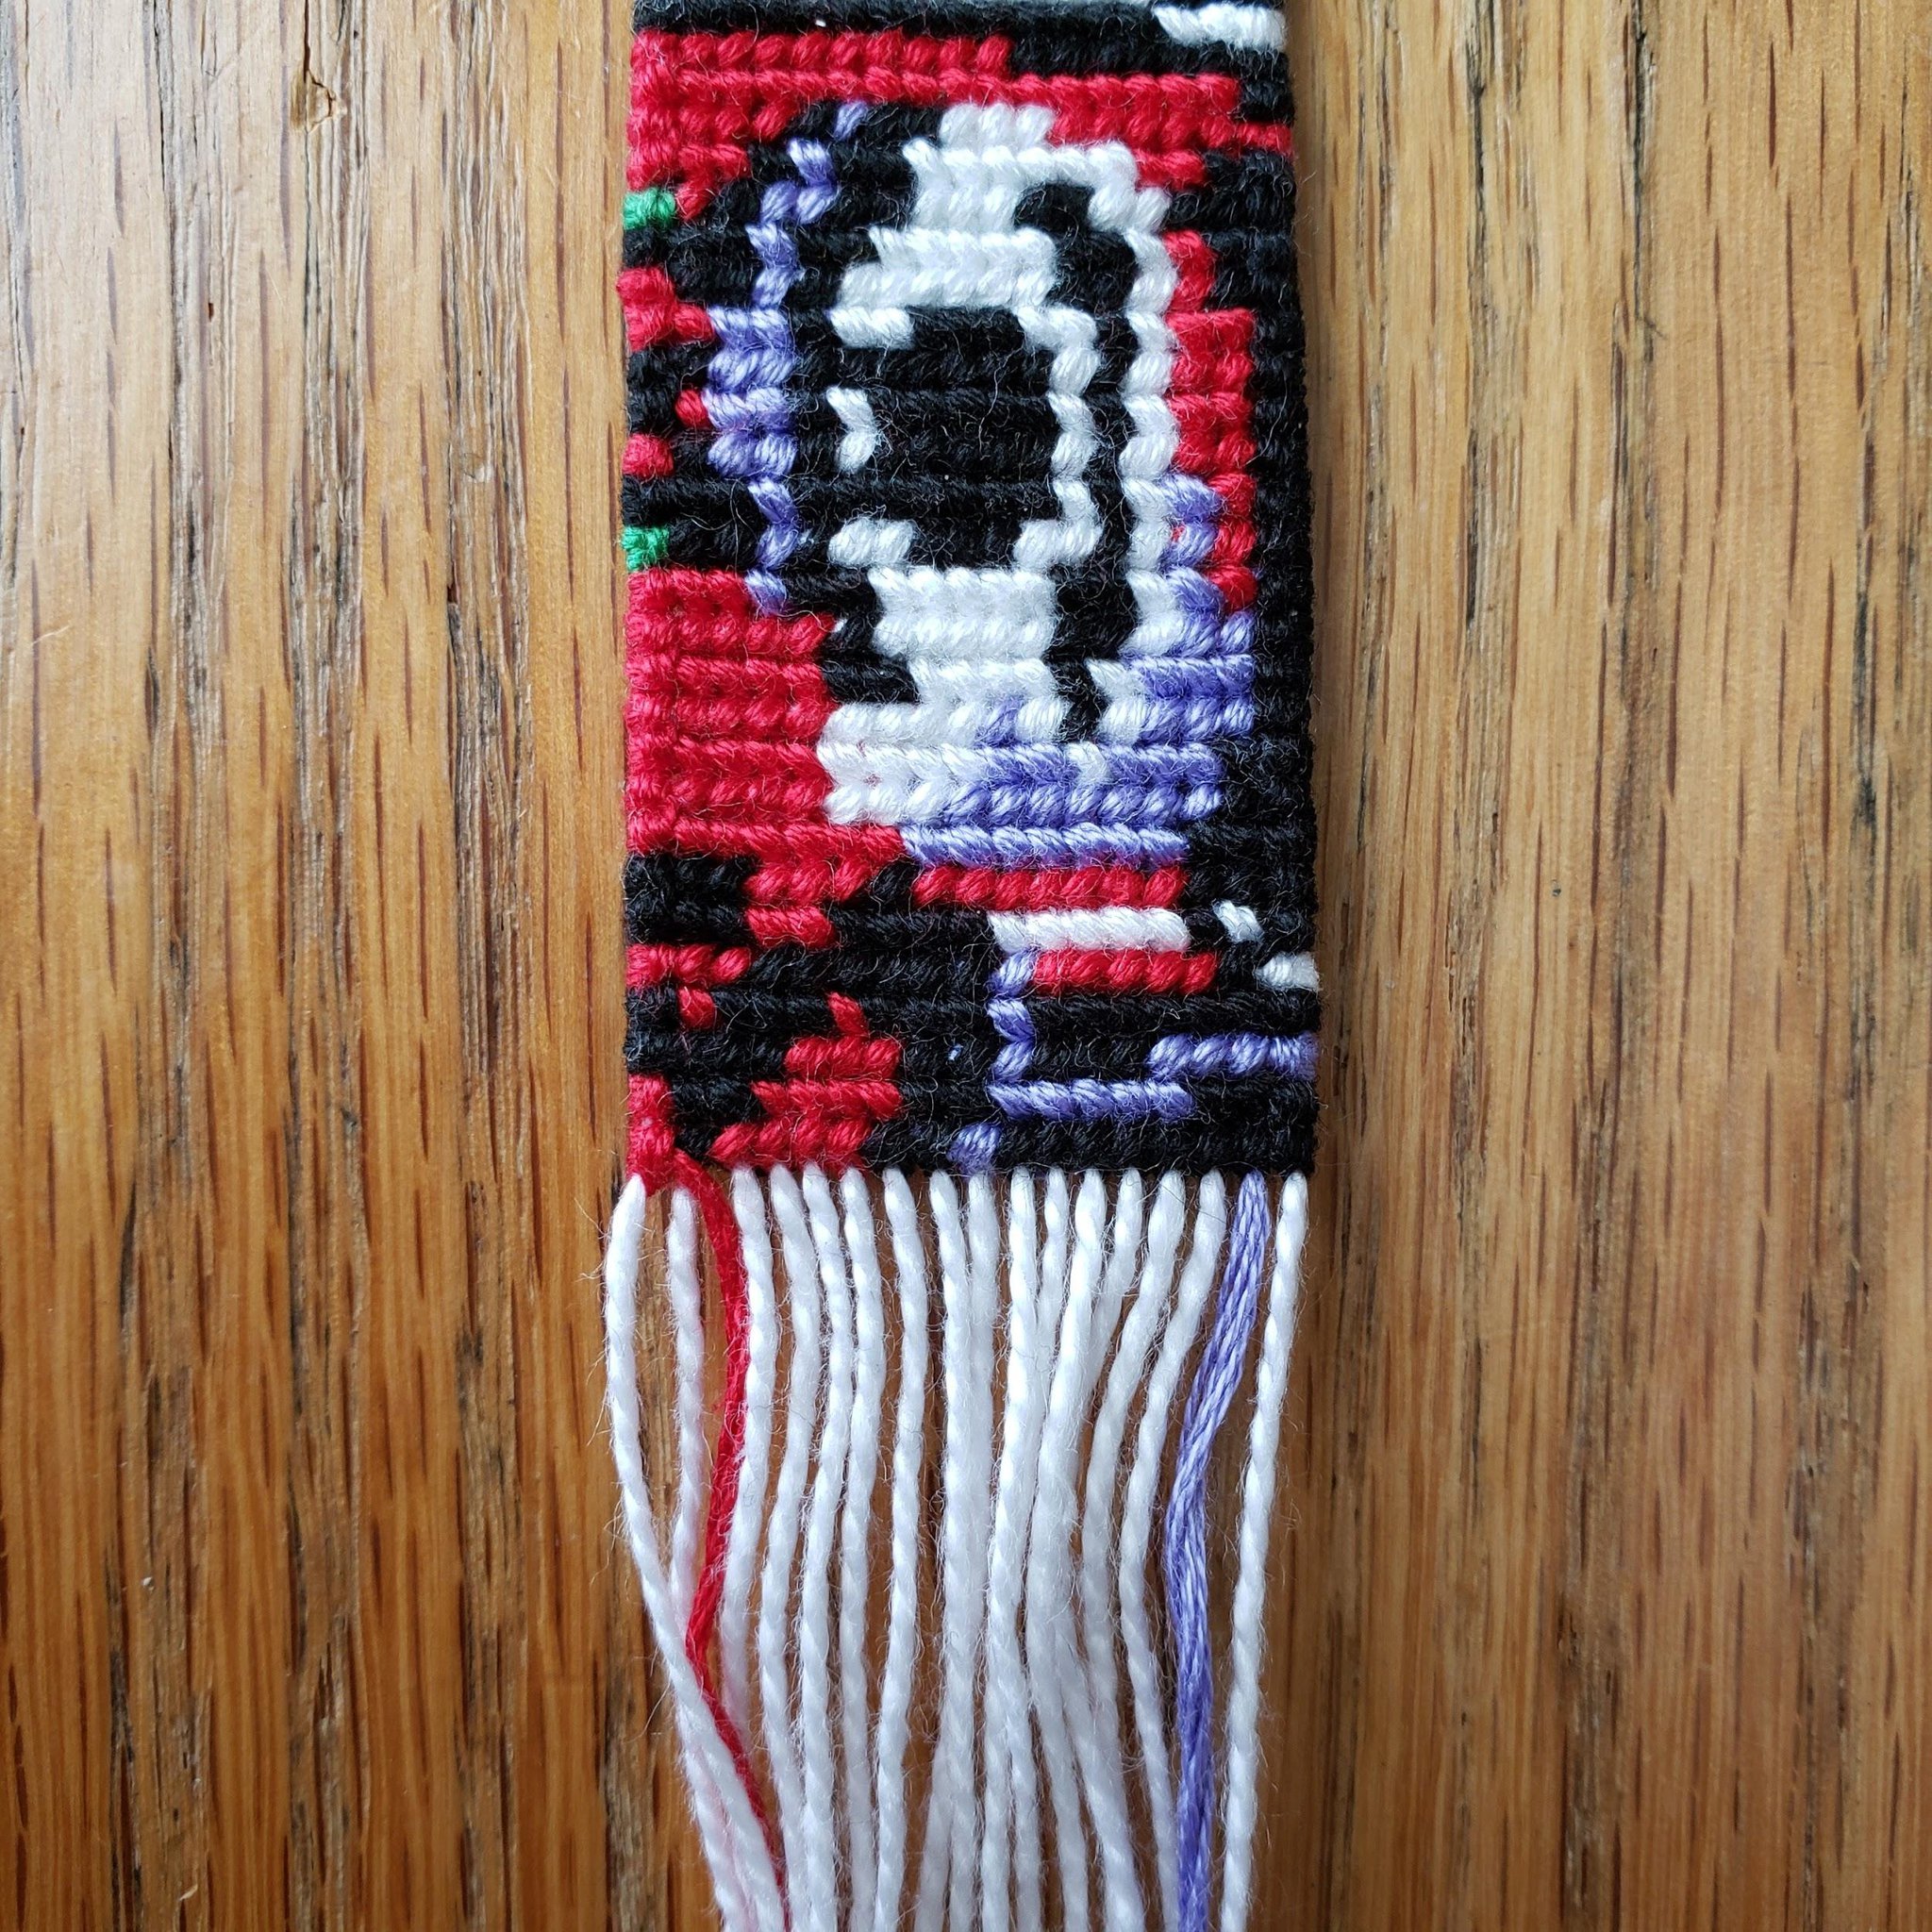
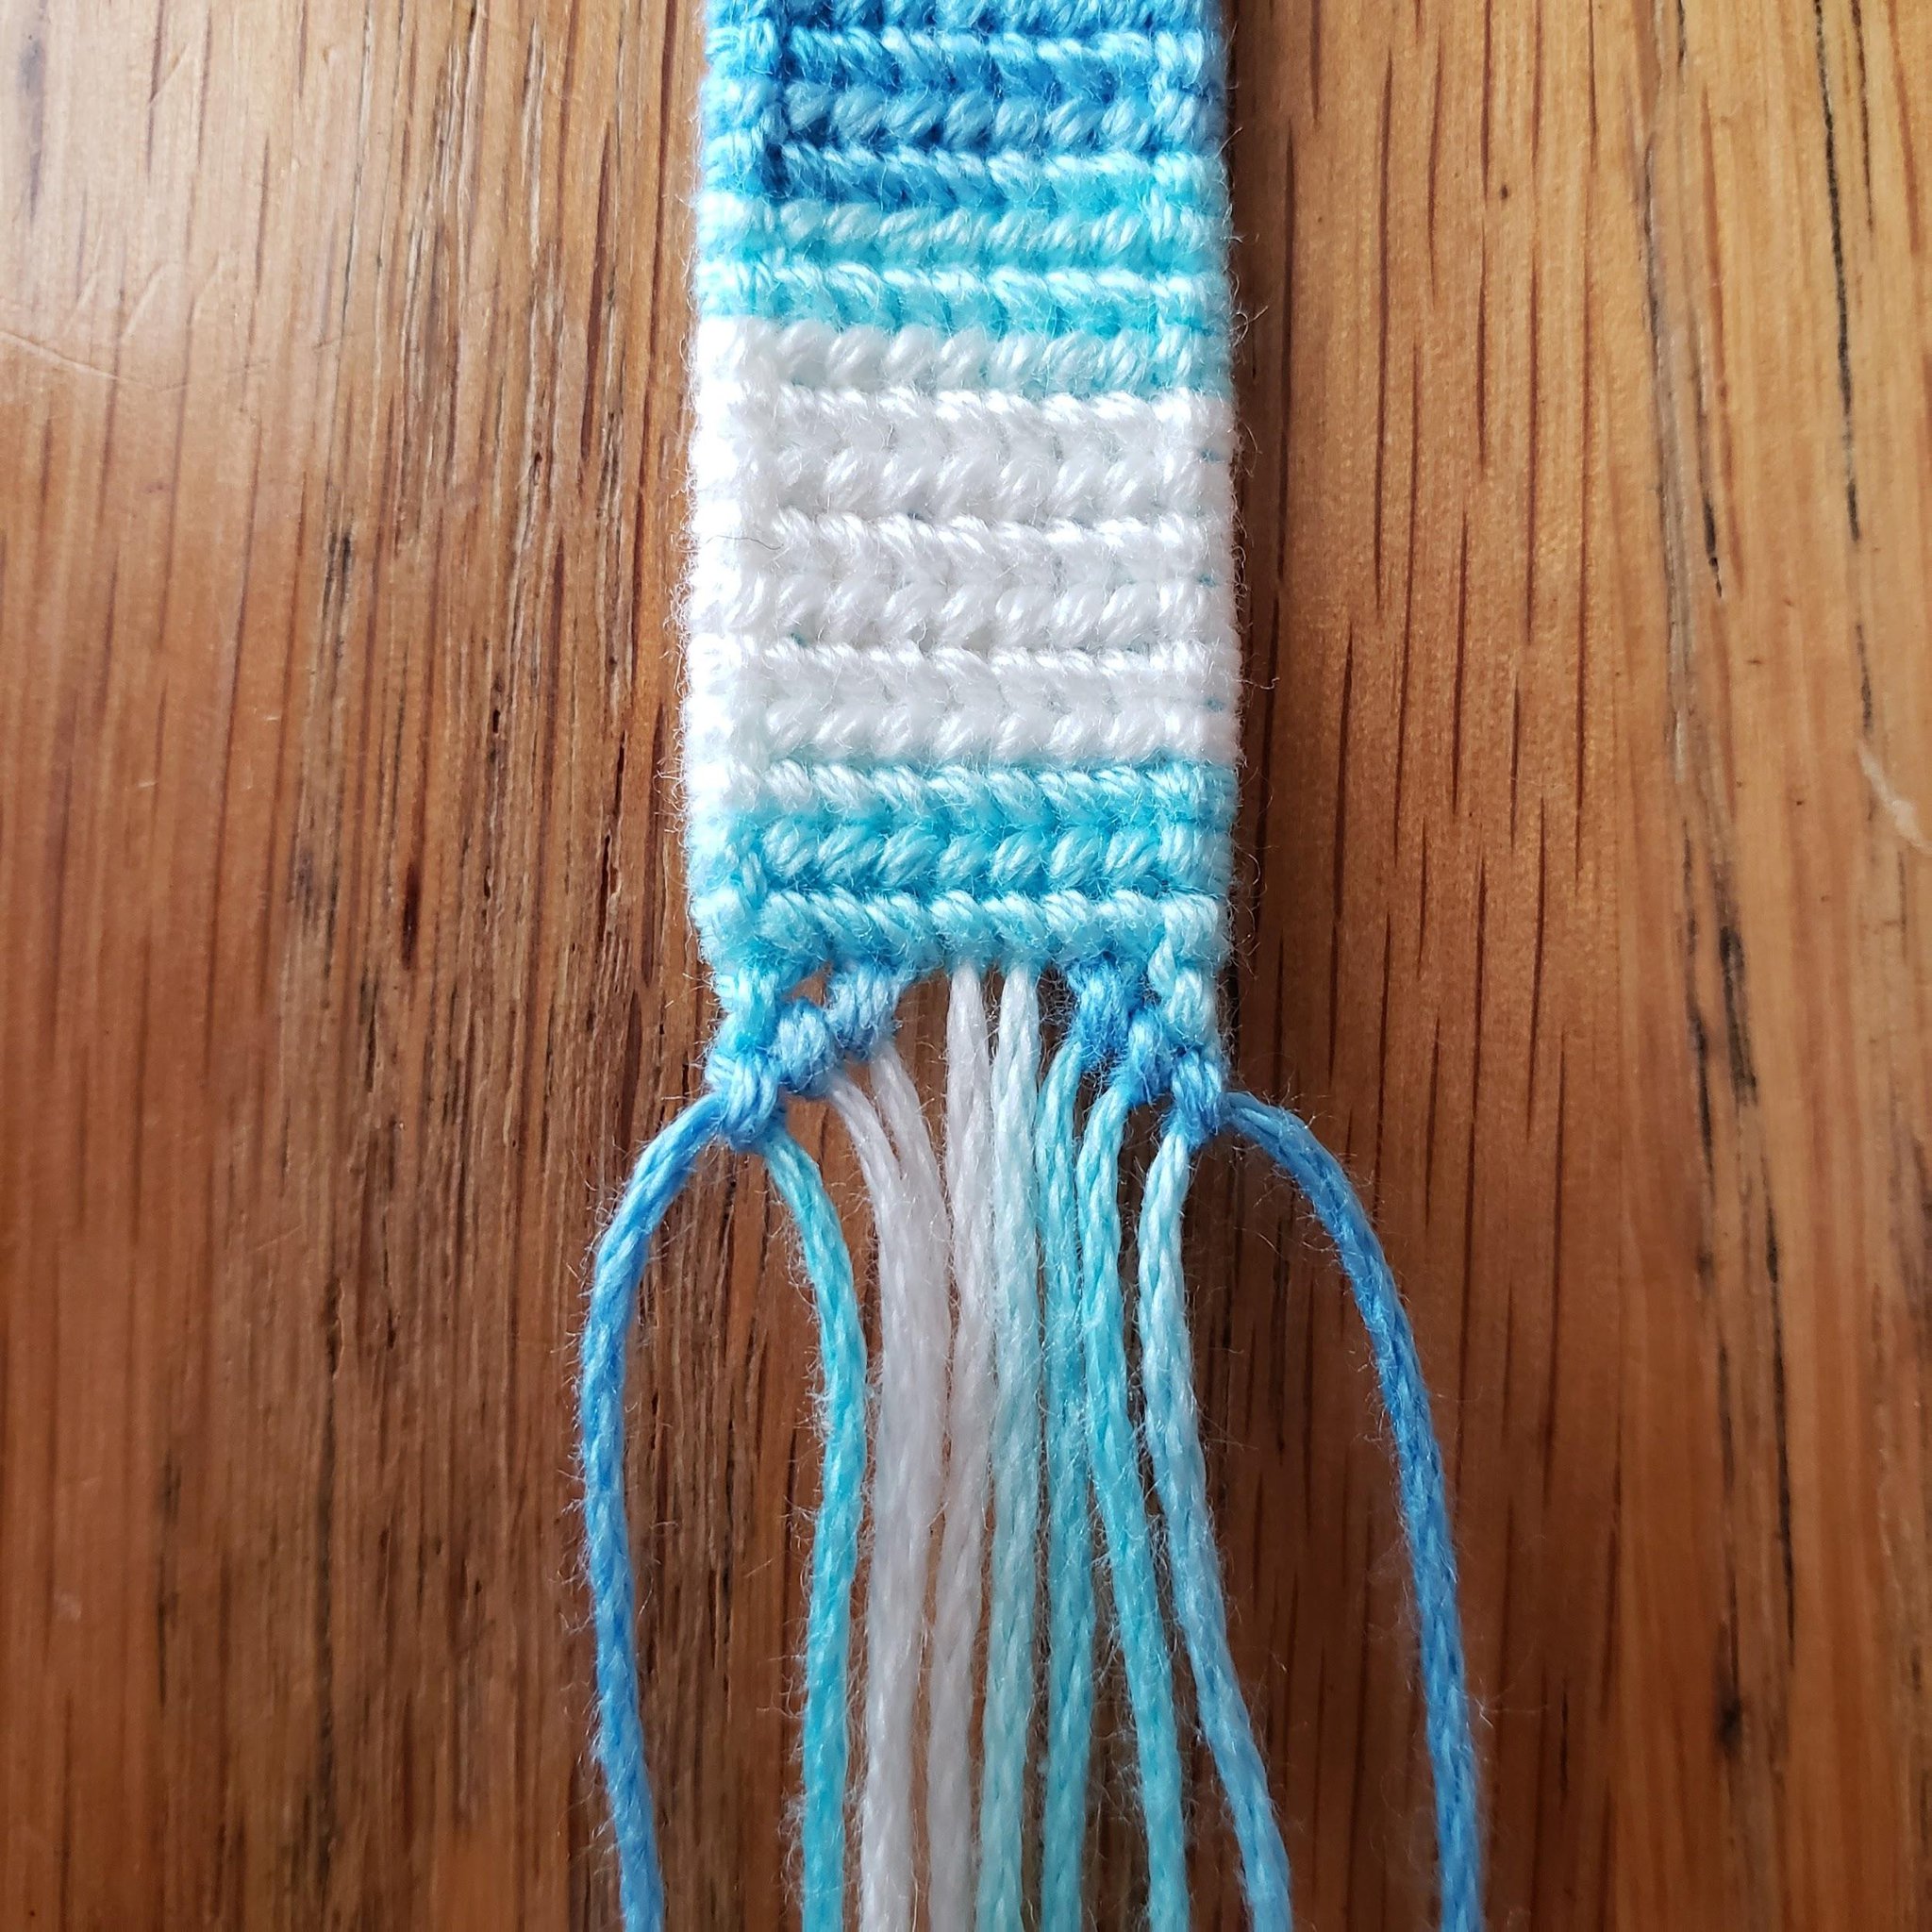
Knot your Alpha how you normally would until you reach the point where you want to begin your double triangle ends.
Knot your Alpha how you normally would until you reach the point where you want to begin your double triangle ends.
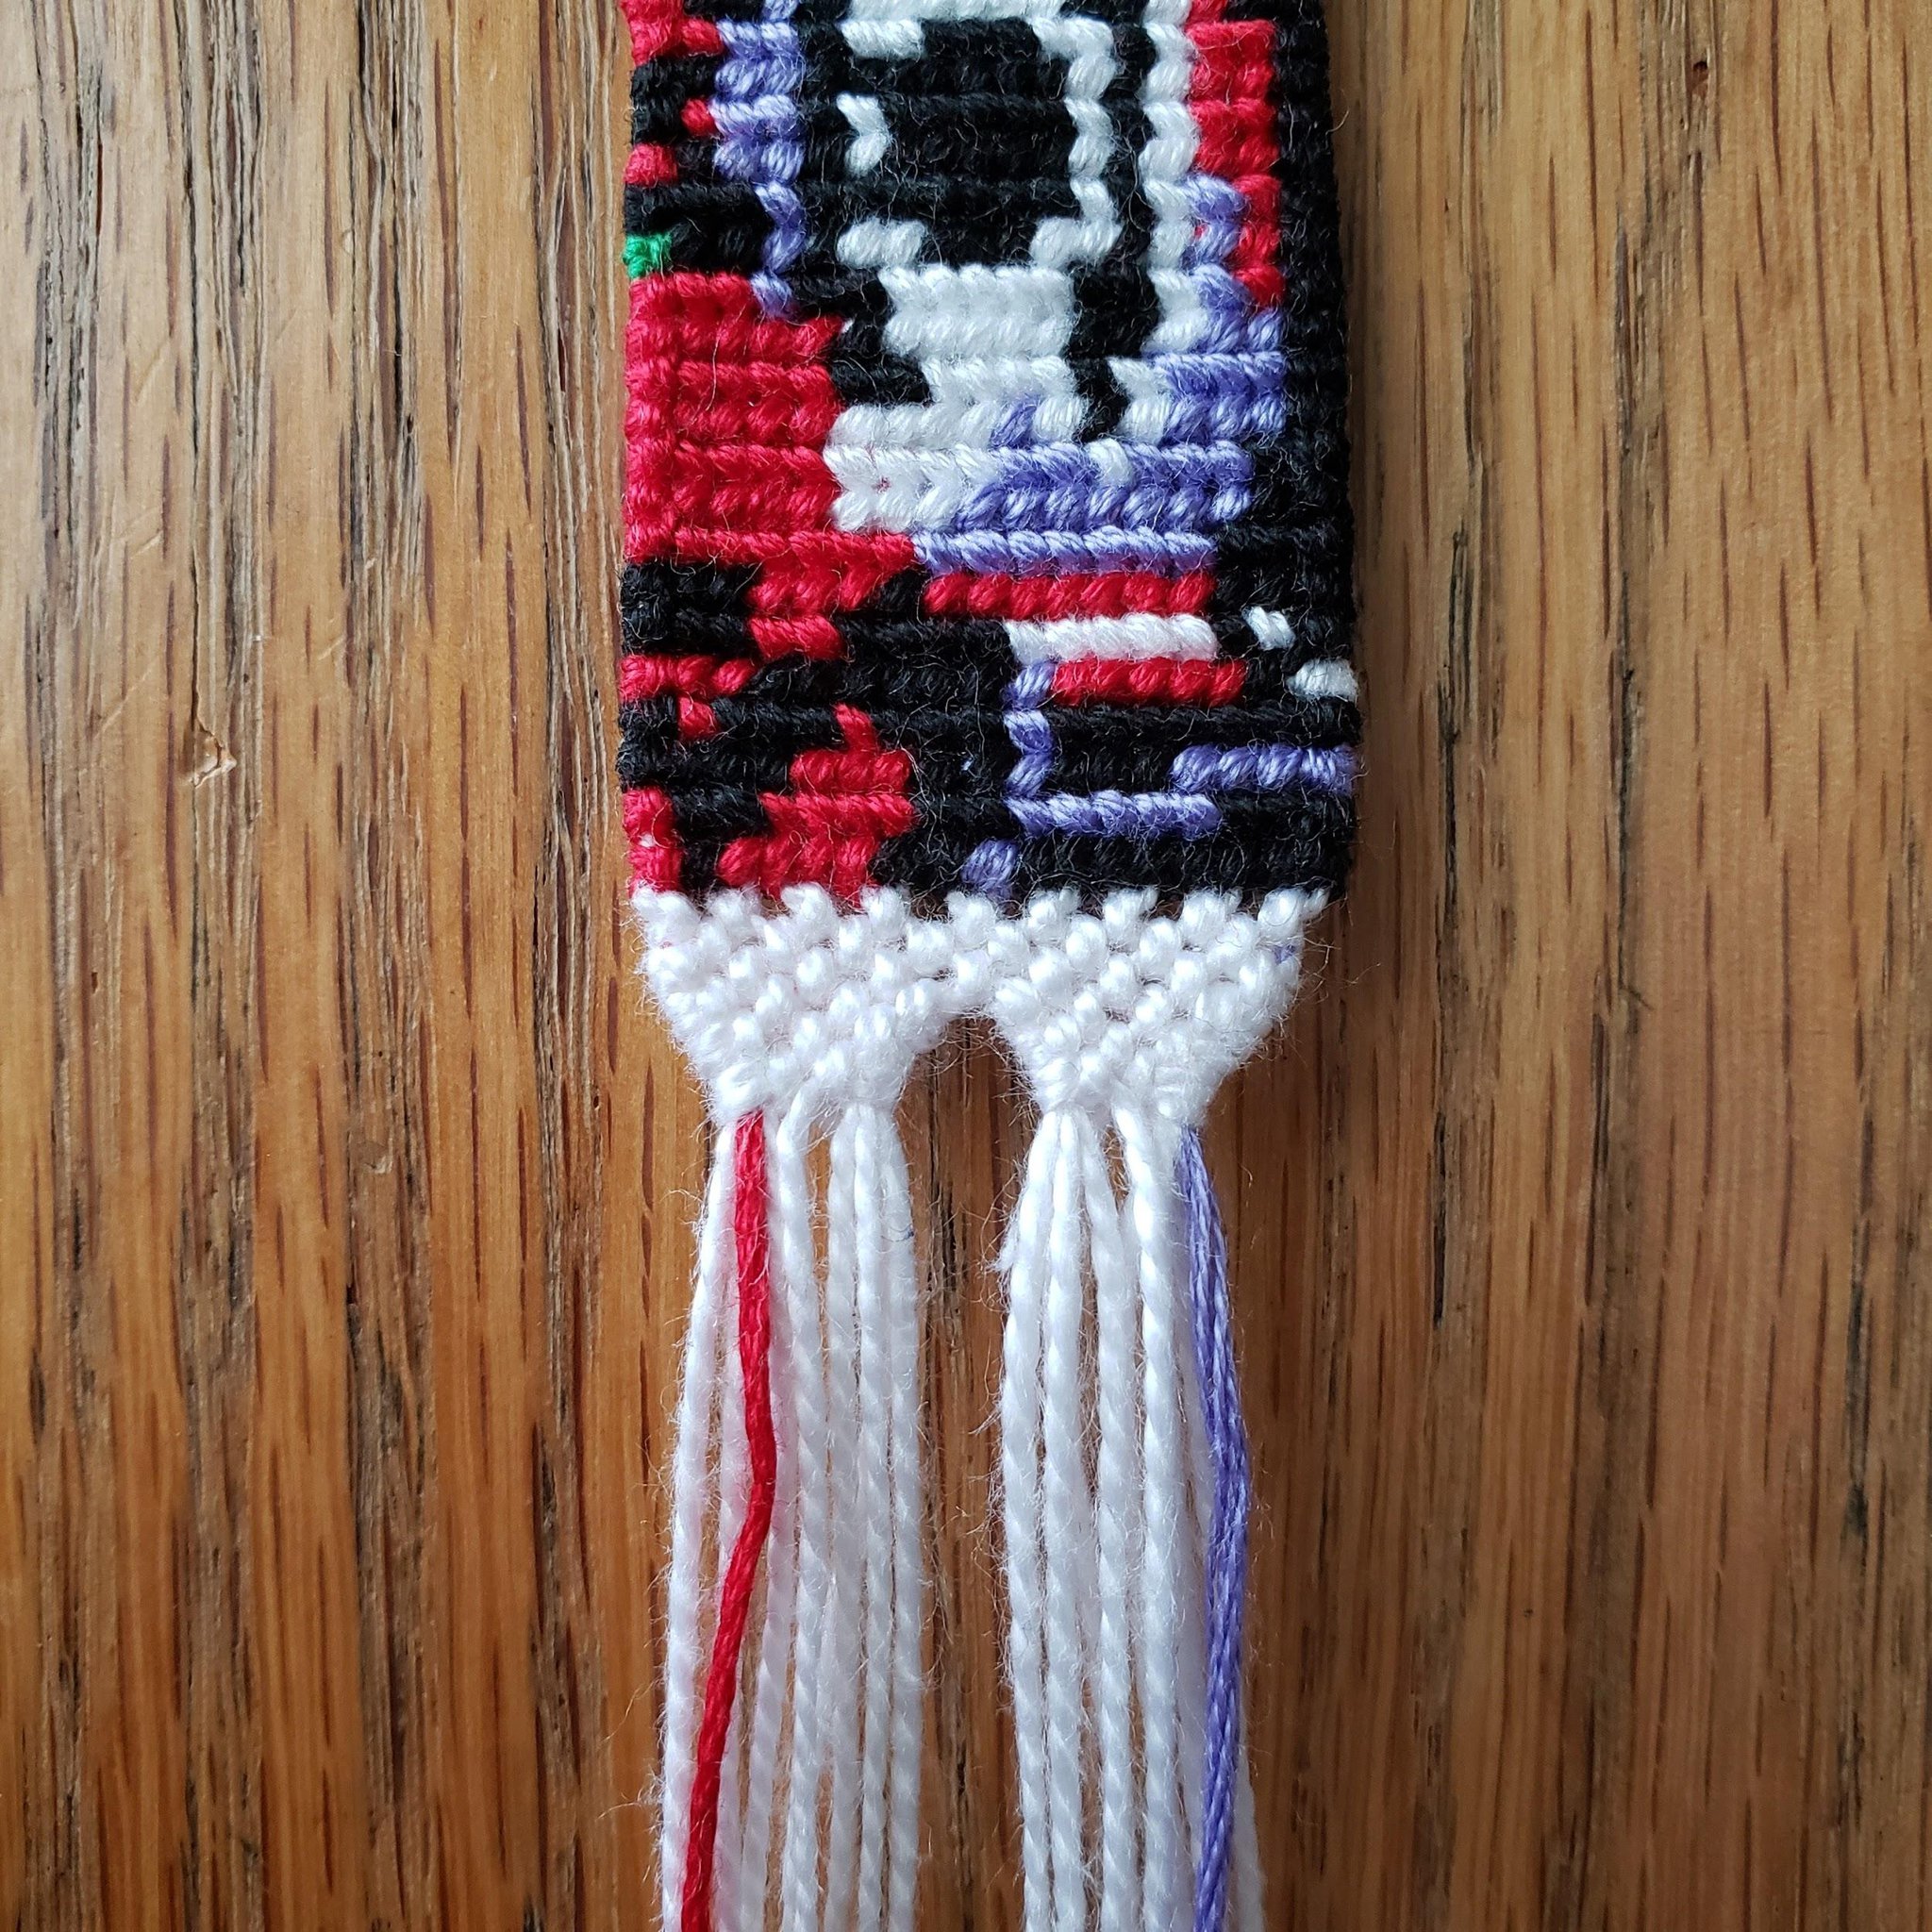
Double Triangle End
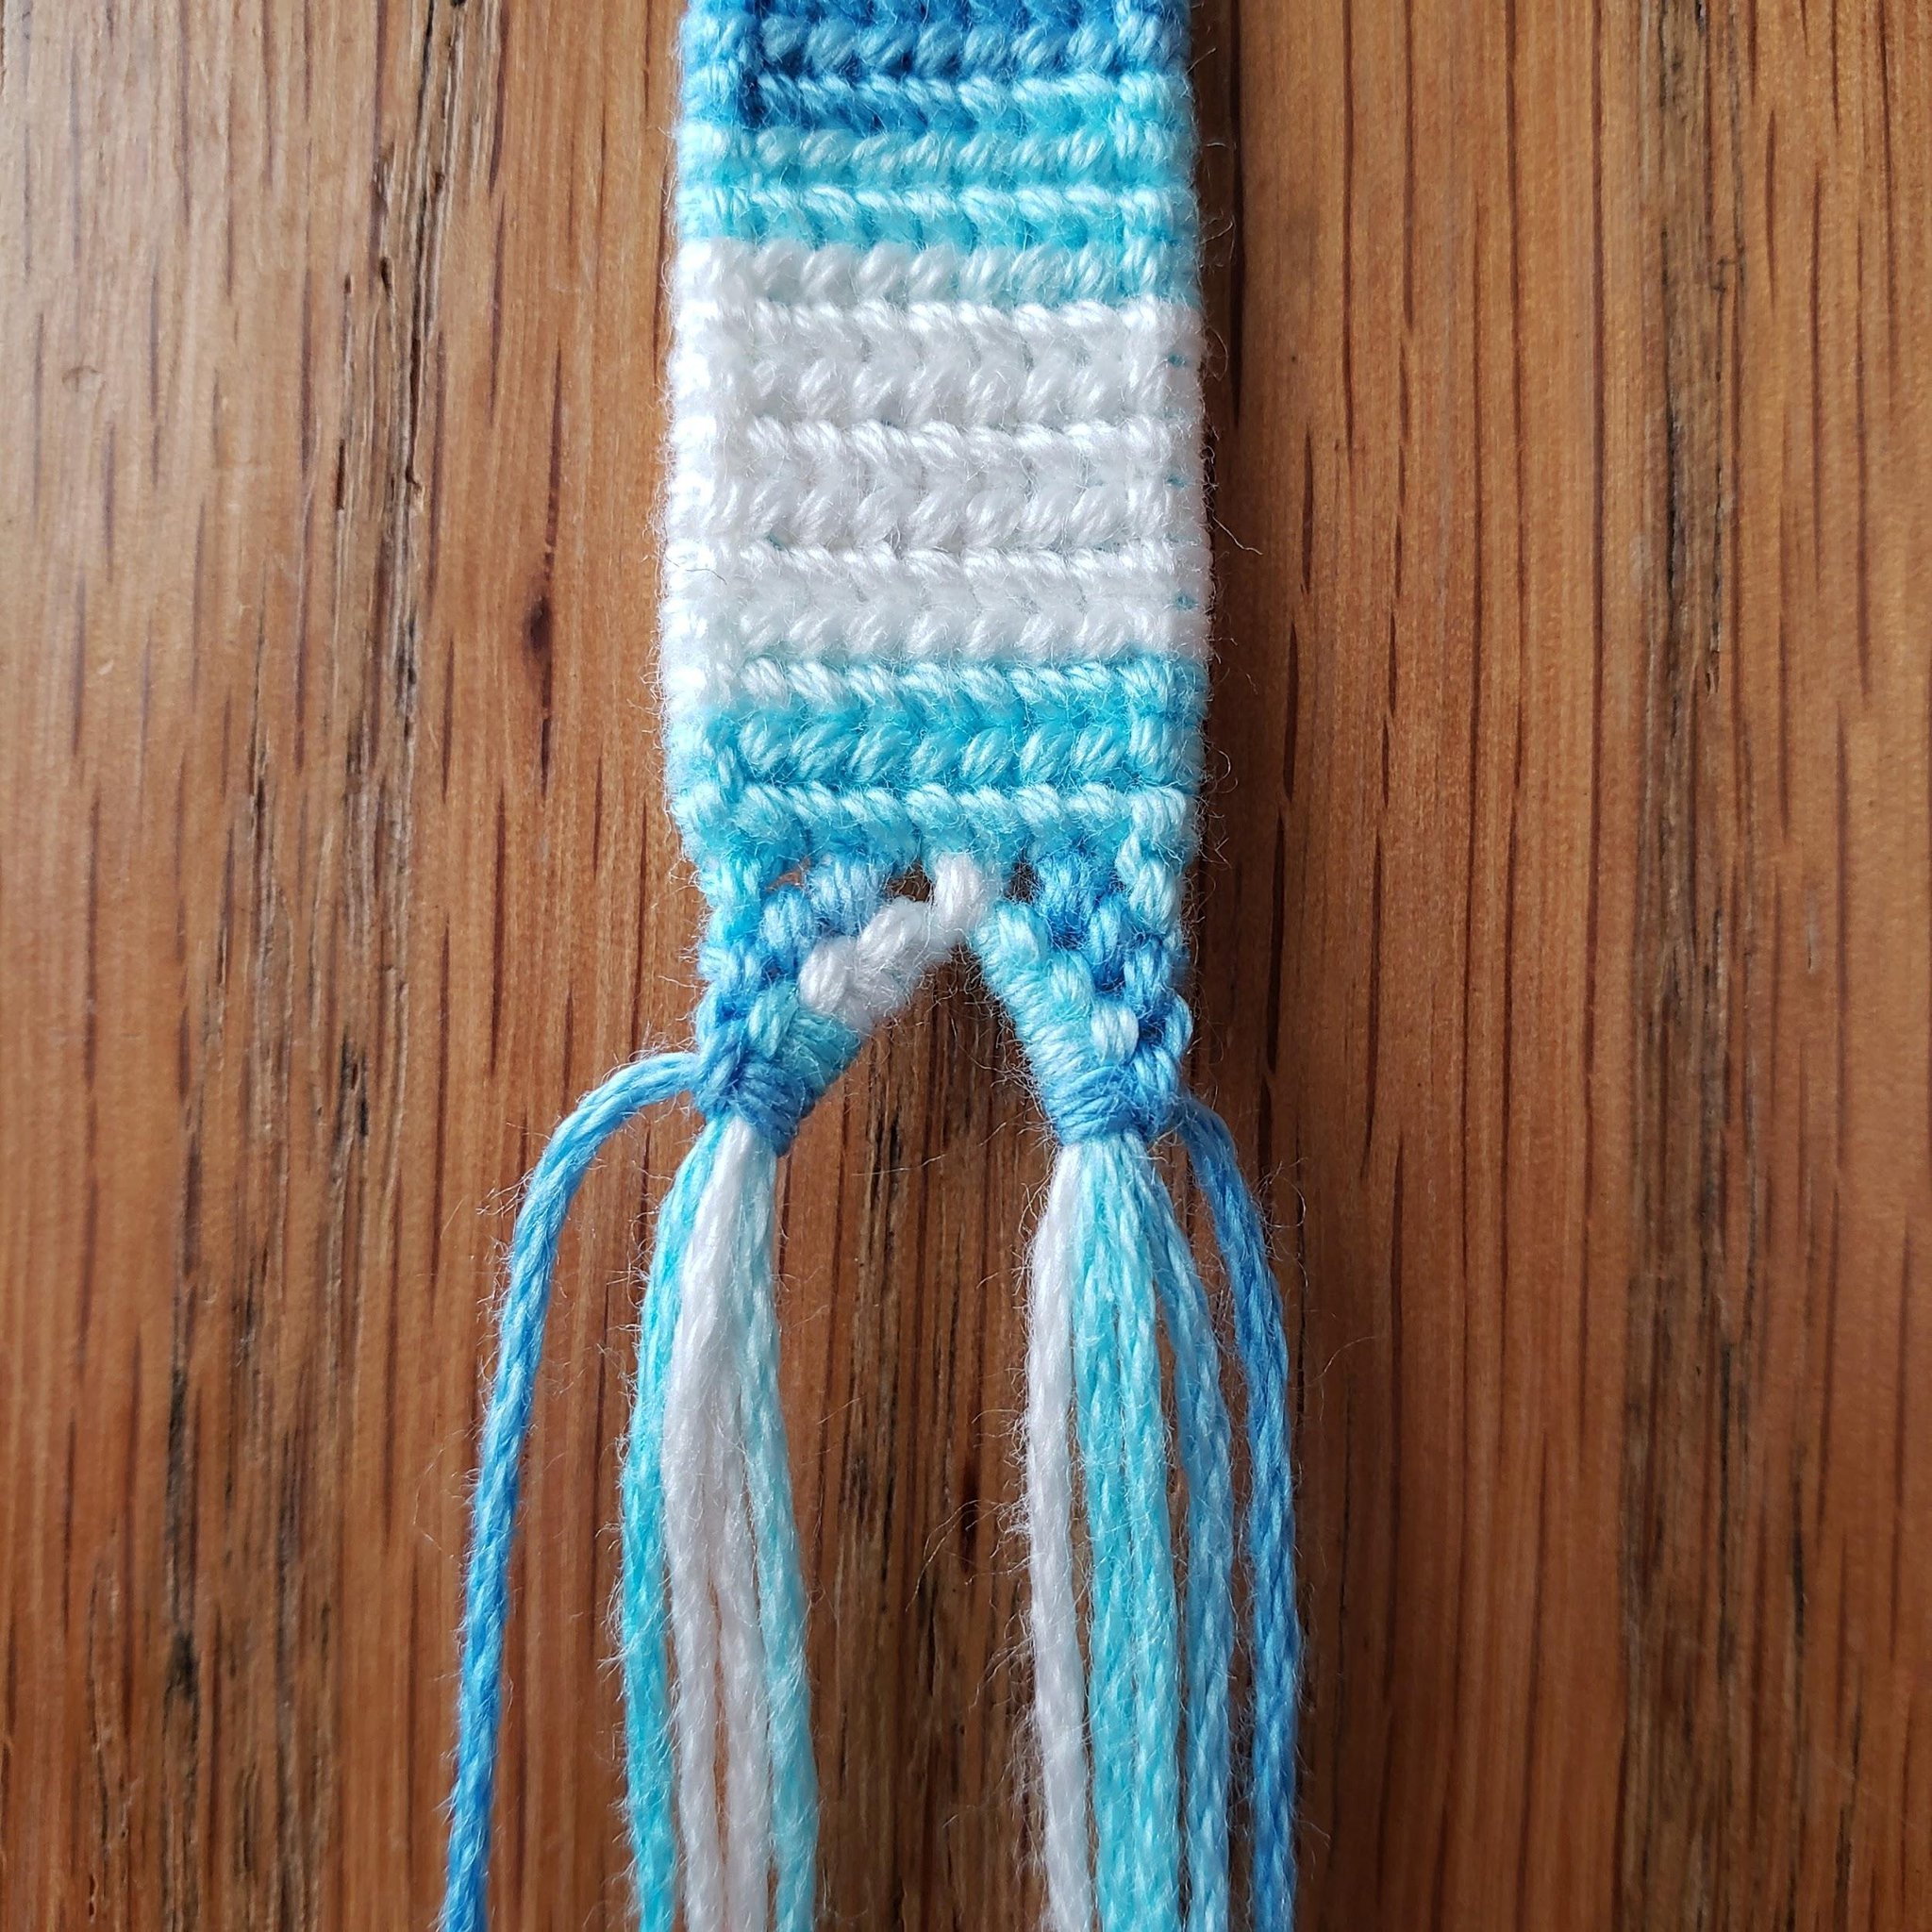
You will be including your knotting thread in your double triangle end, so make sure you do not trim and tie it off before your double triangle end.
Make your rightmost triangle. It does not matter what knots you make to achieve this shape, but I prefer to make all backward knots so my purple base thread does not show. Make the same amount of knots in the same shape as your starting right triangle.

Make your leftmost triangle. In this triangle, make sure you include your red knotting thread, treating it just like any other base thread. It does not matter what knots you make to achieve this shape, but I prefer to make all forward knots so my red base thread does not show. Make the same amount of knots in the same shape as your starting left triangle.
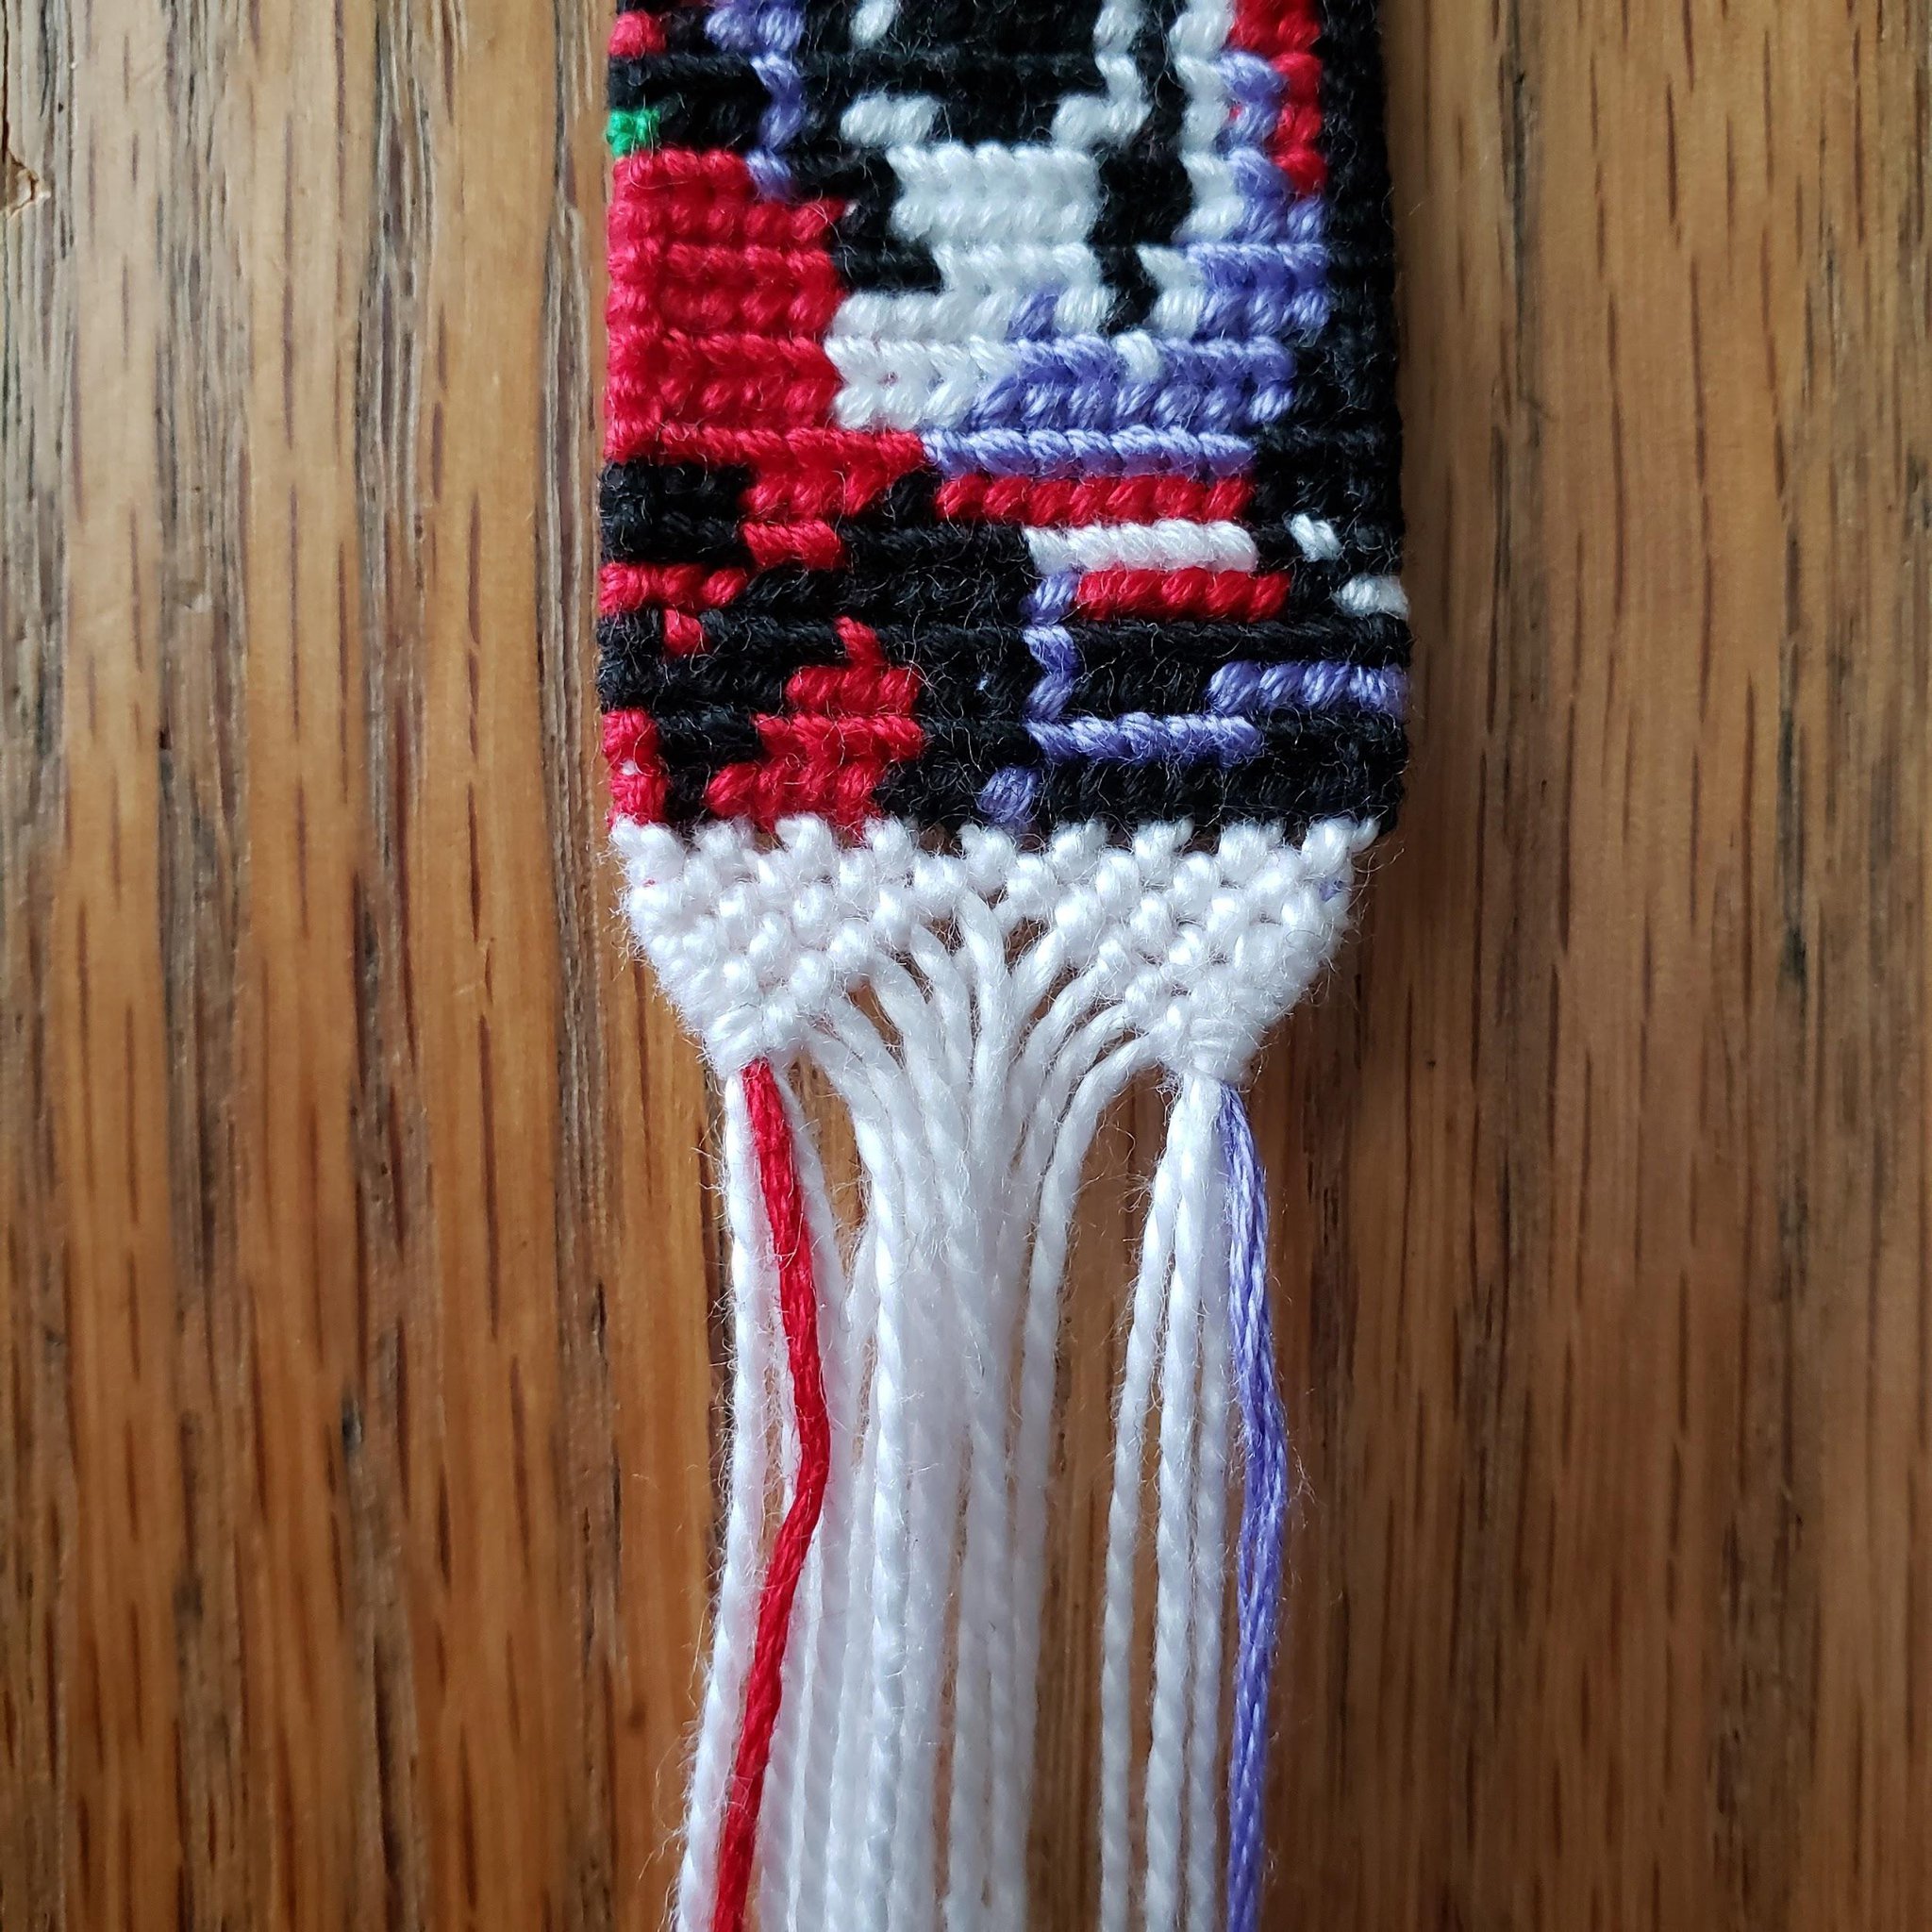
Finish the outer right triangle and the outer left triangle.
On the right triangle, make a forward-backward knot with the second to rightmost thread onto the rightmost thread. Repeat this process with each thread on the right side of the right triangle, making each new knot onto all the previously knotted threads until all the threads are knotted together.
On the left triangle, make a backward-forward knot with the second to leftmost thread onto the leftmost thread. Repeat this process with each thread on the left side of the left triangle, making each new knot onto all the previously knotted threads until all the threads are knotted together.
Finish the inner left triangle and the inner right triangle. Make a forward knot between the center two threads.
On the left triangle, make a forward-backward knot with the second to rightmost thread onto the rightmost thread. Repeat this process with each thread on the right side of the left triangle, making each new knot onto all the previously knotted threads until all the threads are knotted together.
On the right triangle, make a backward-forward knot with the second to leftmost thread onto the leftmost thread. Repeat this process with each thread on the left side of the right triangle, making each new knot onto all the previously knotted threads until all the threads are knotted together.
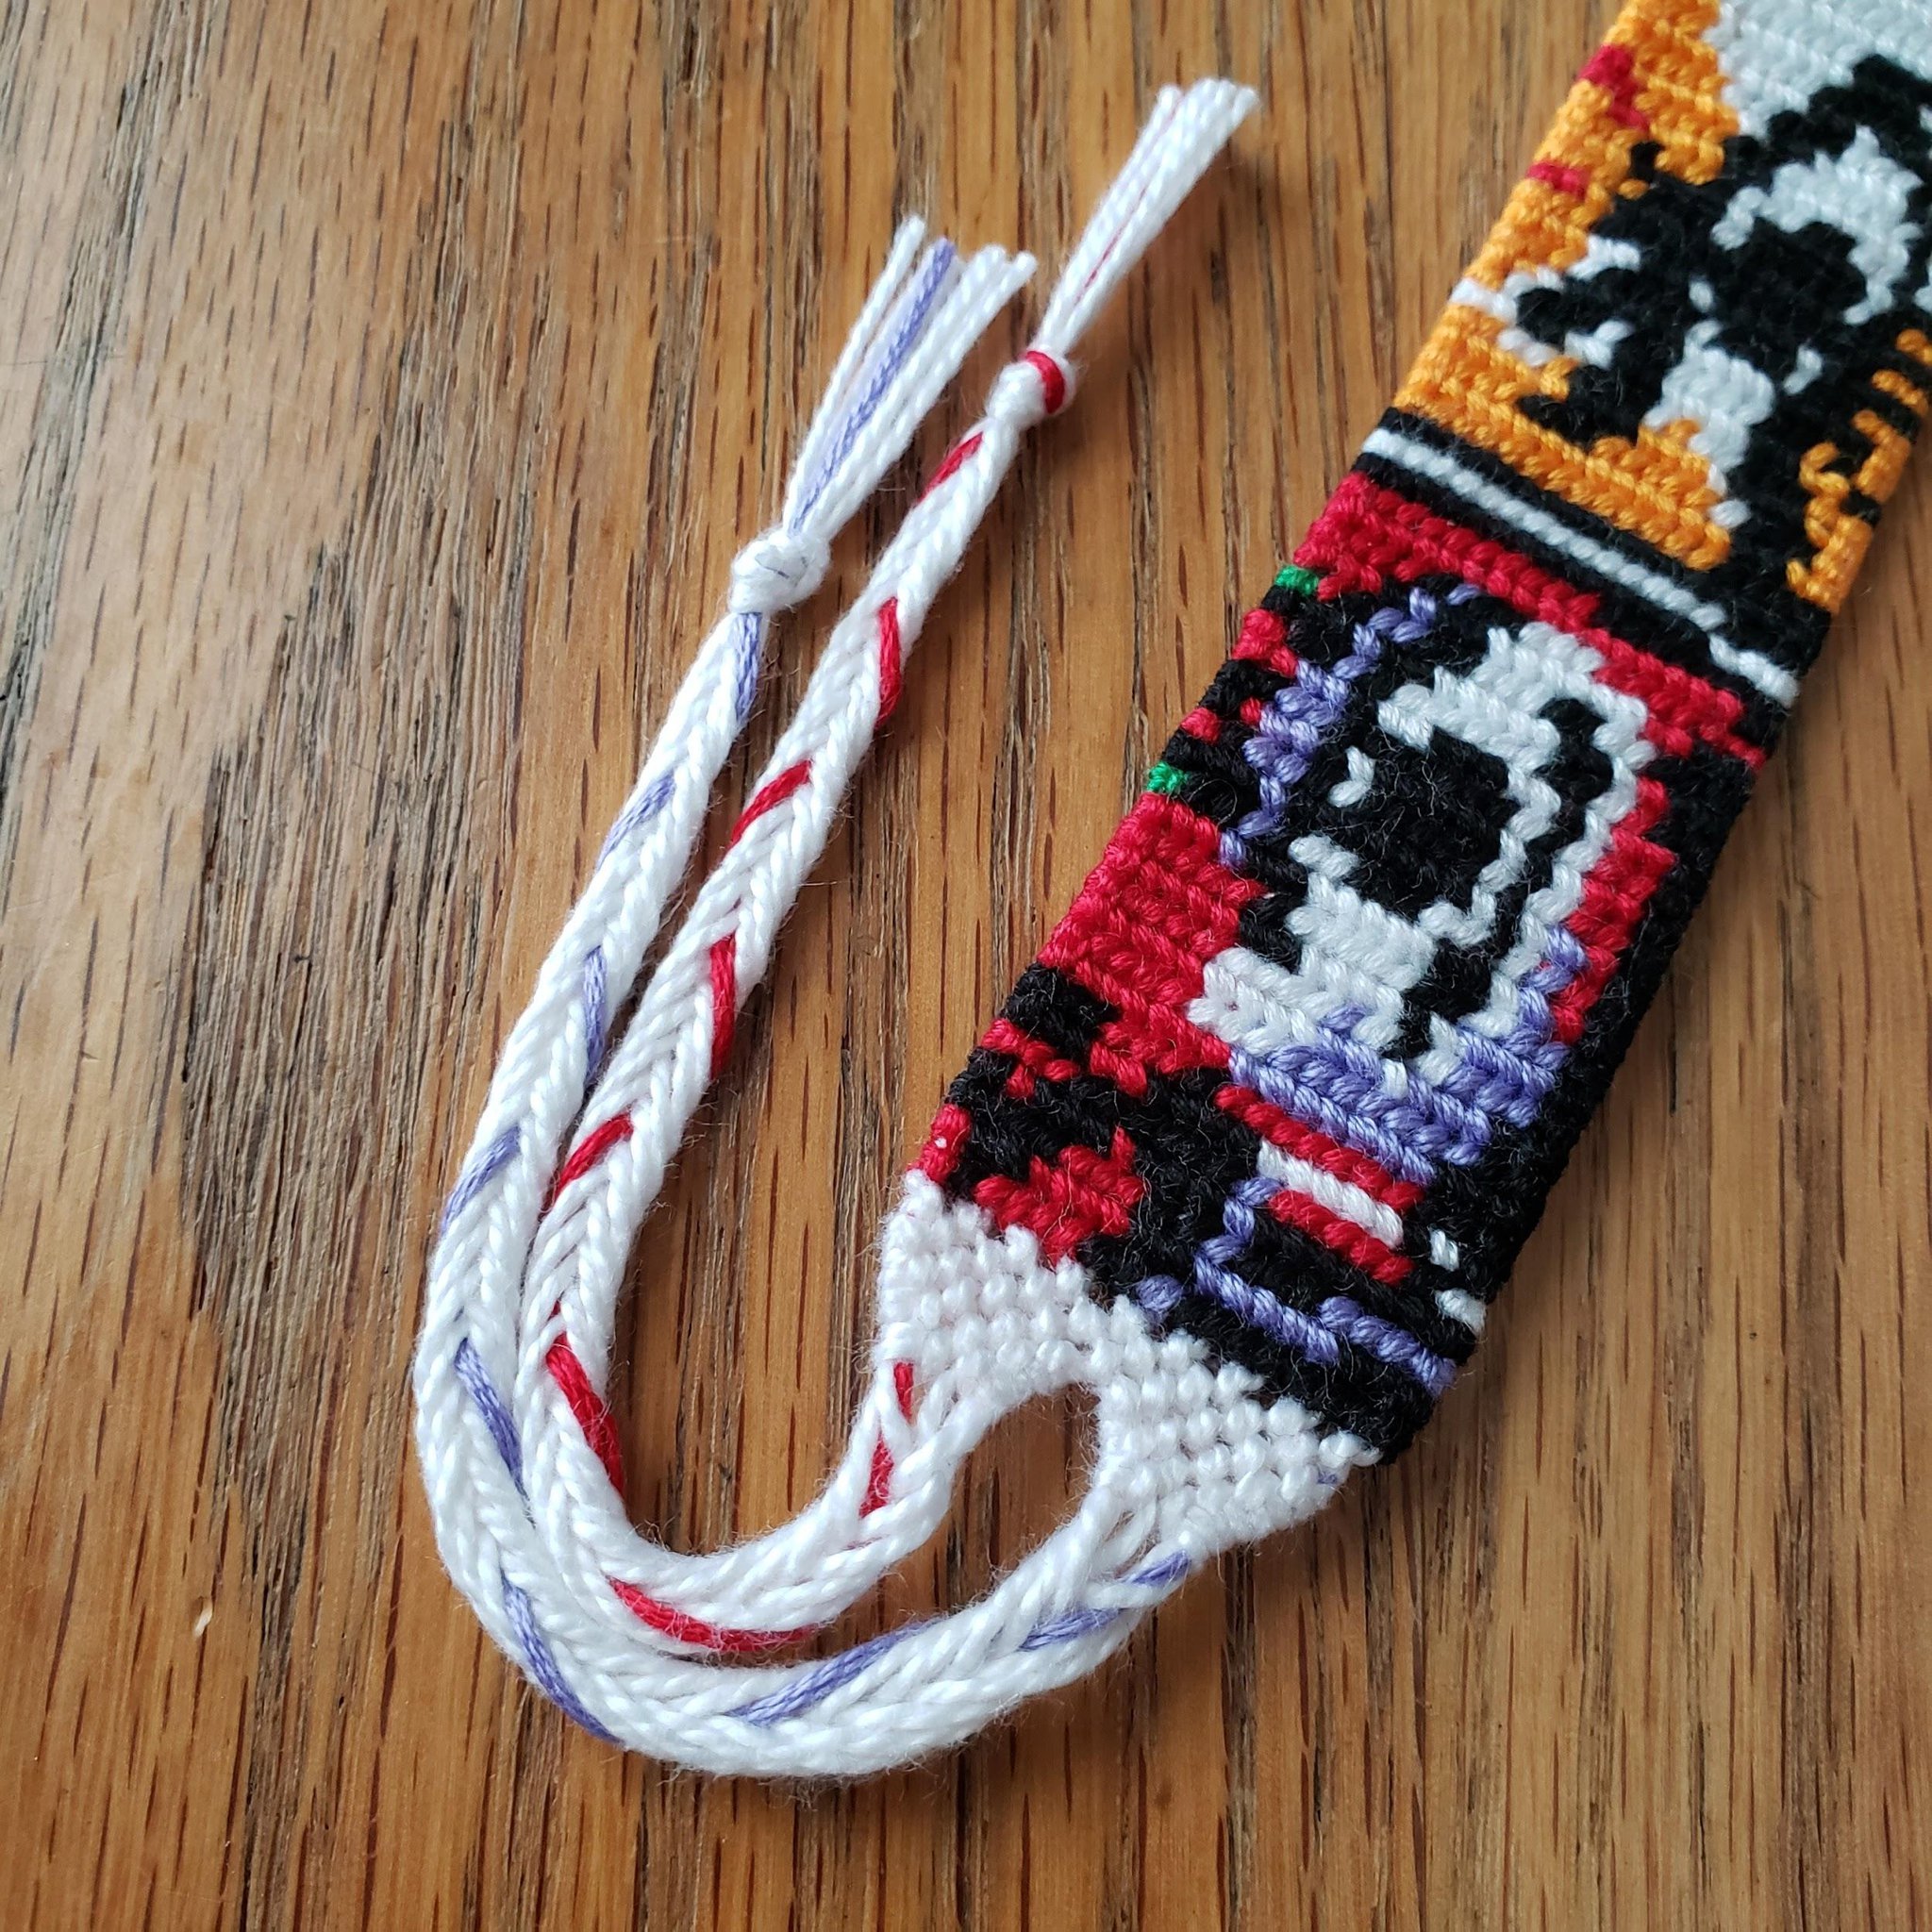
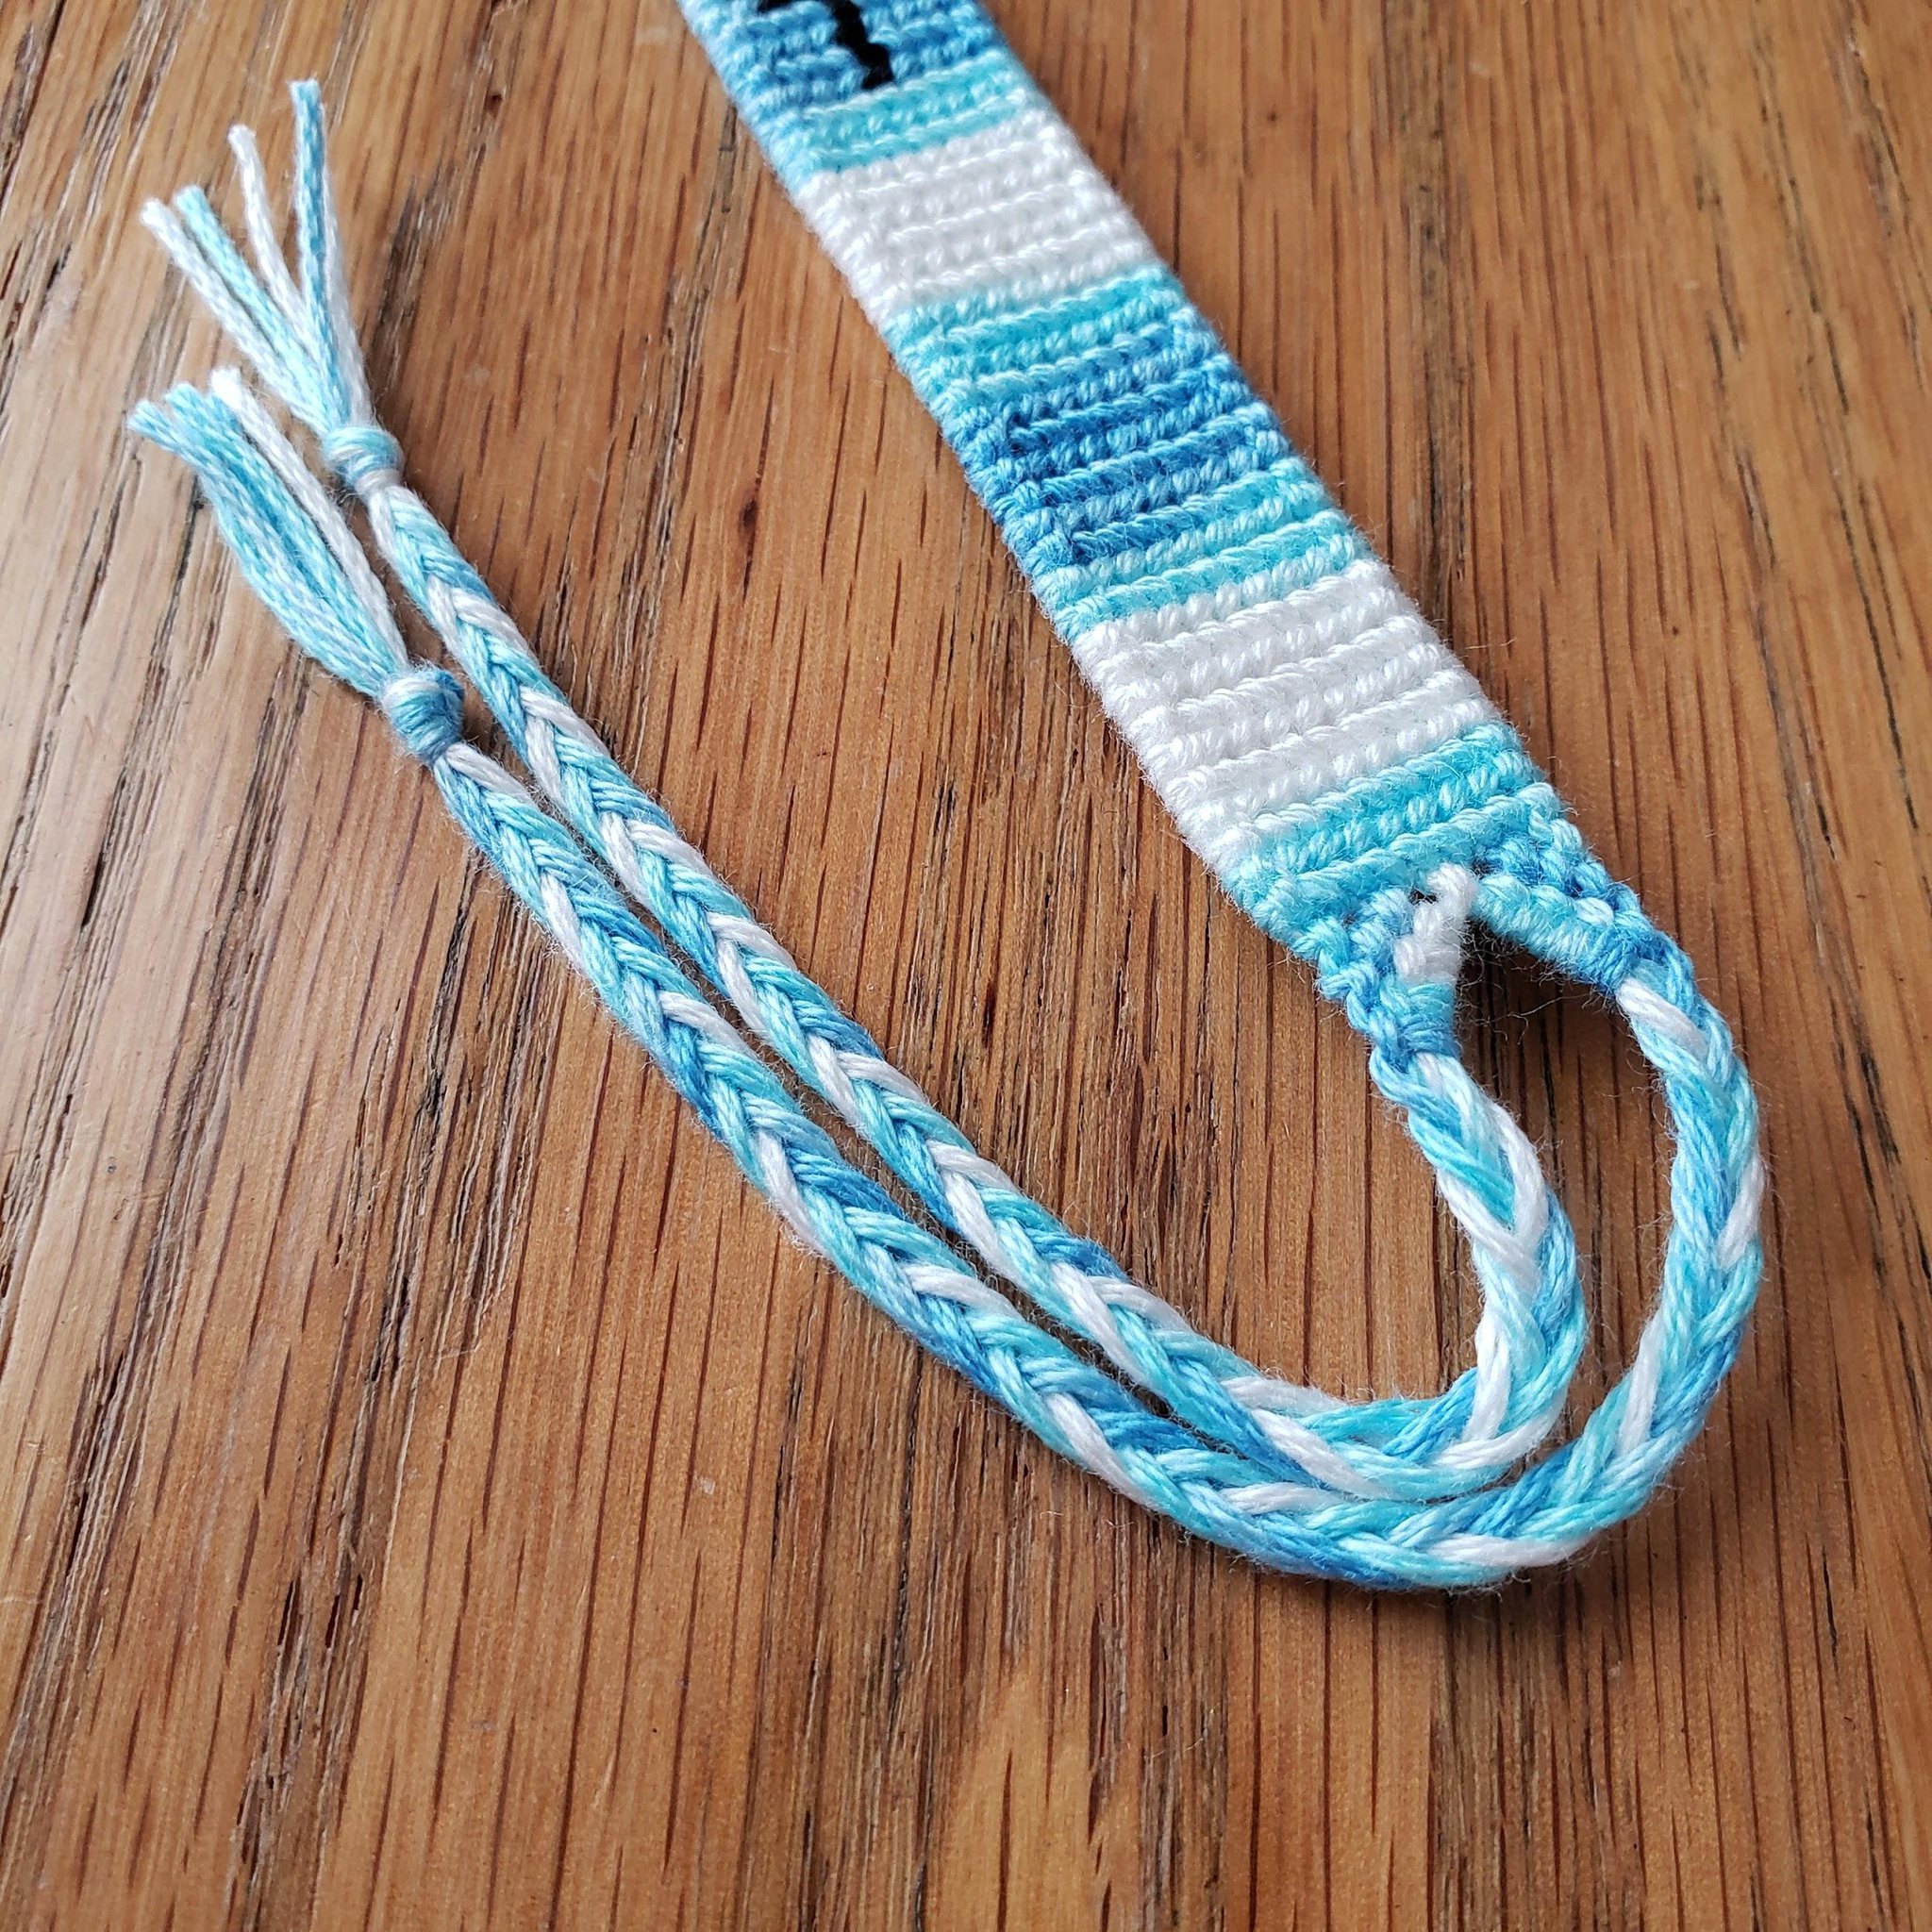
Finish your ties however you would like, and trim your threads.
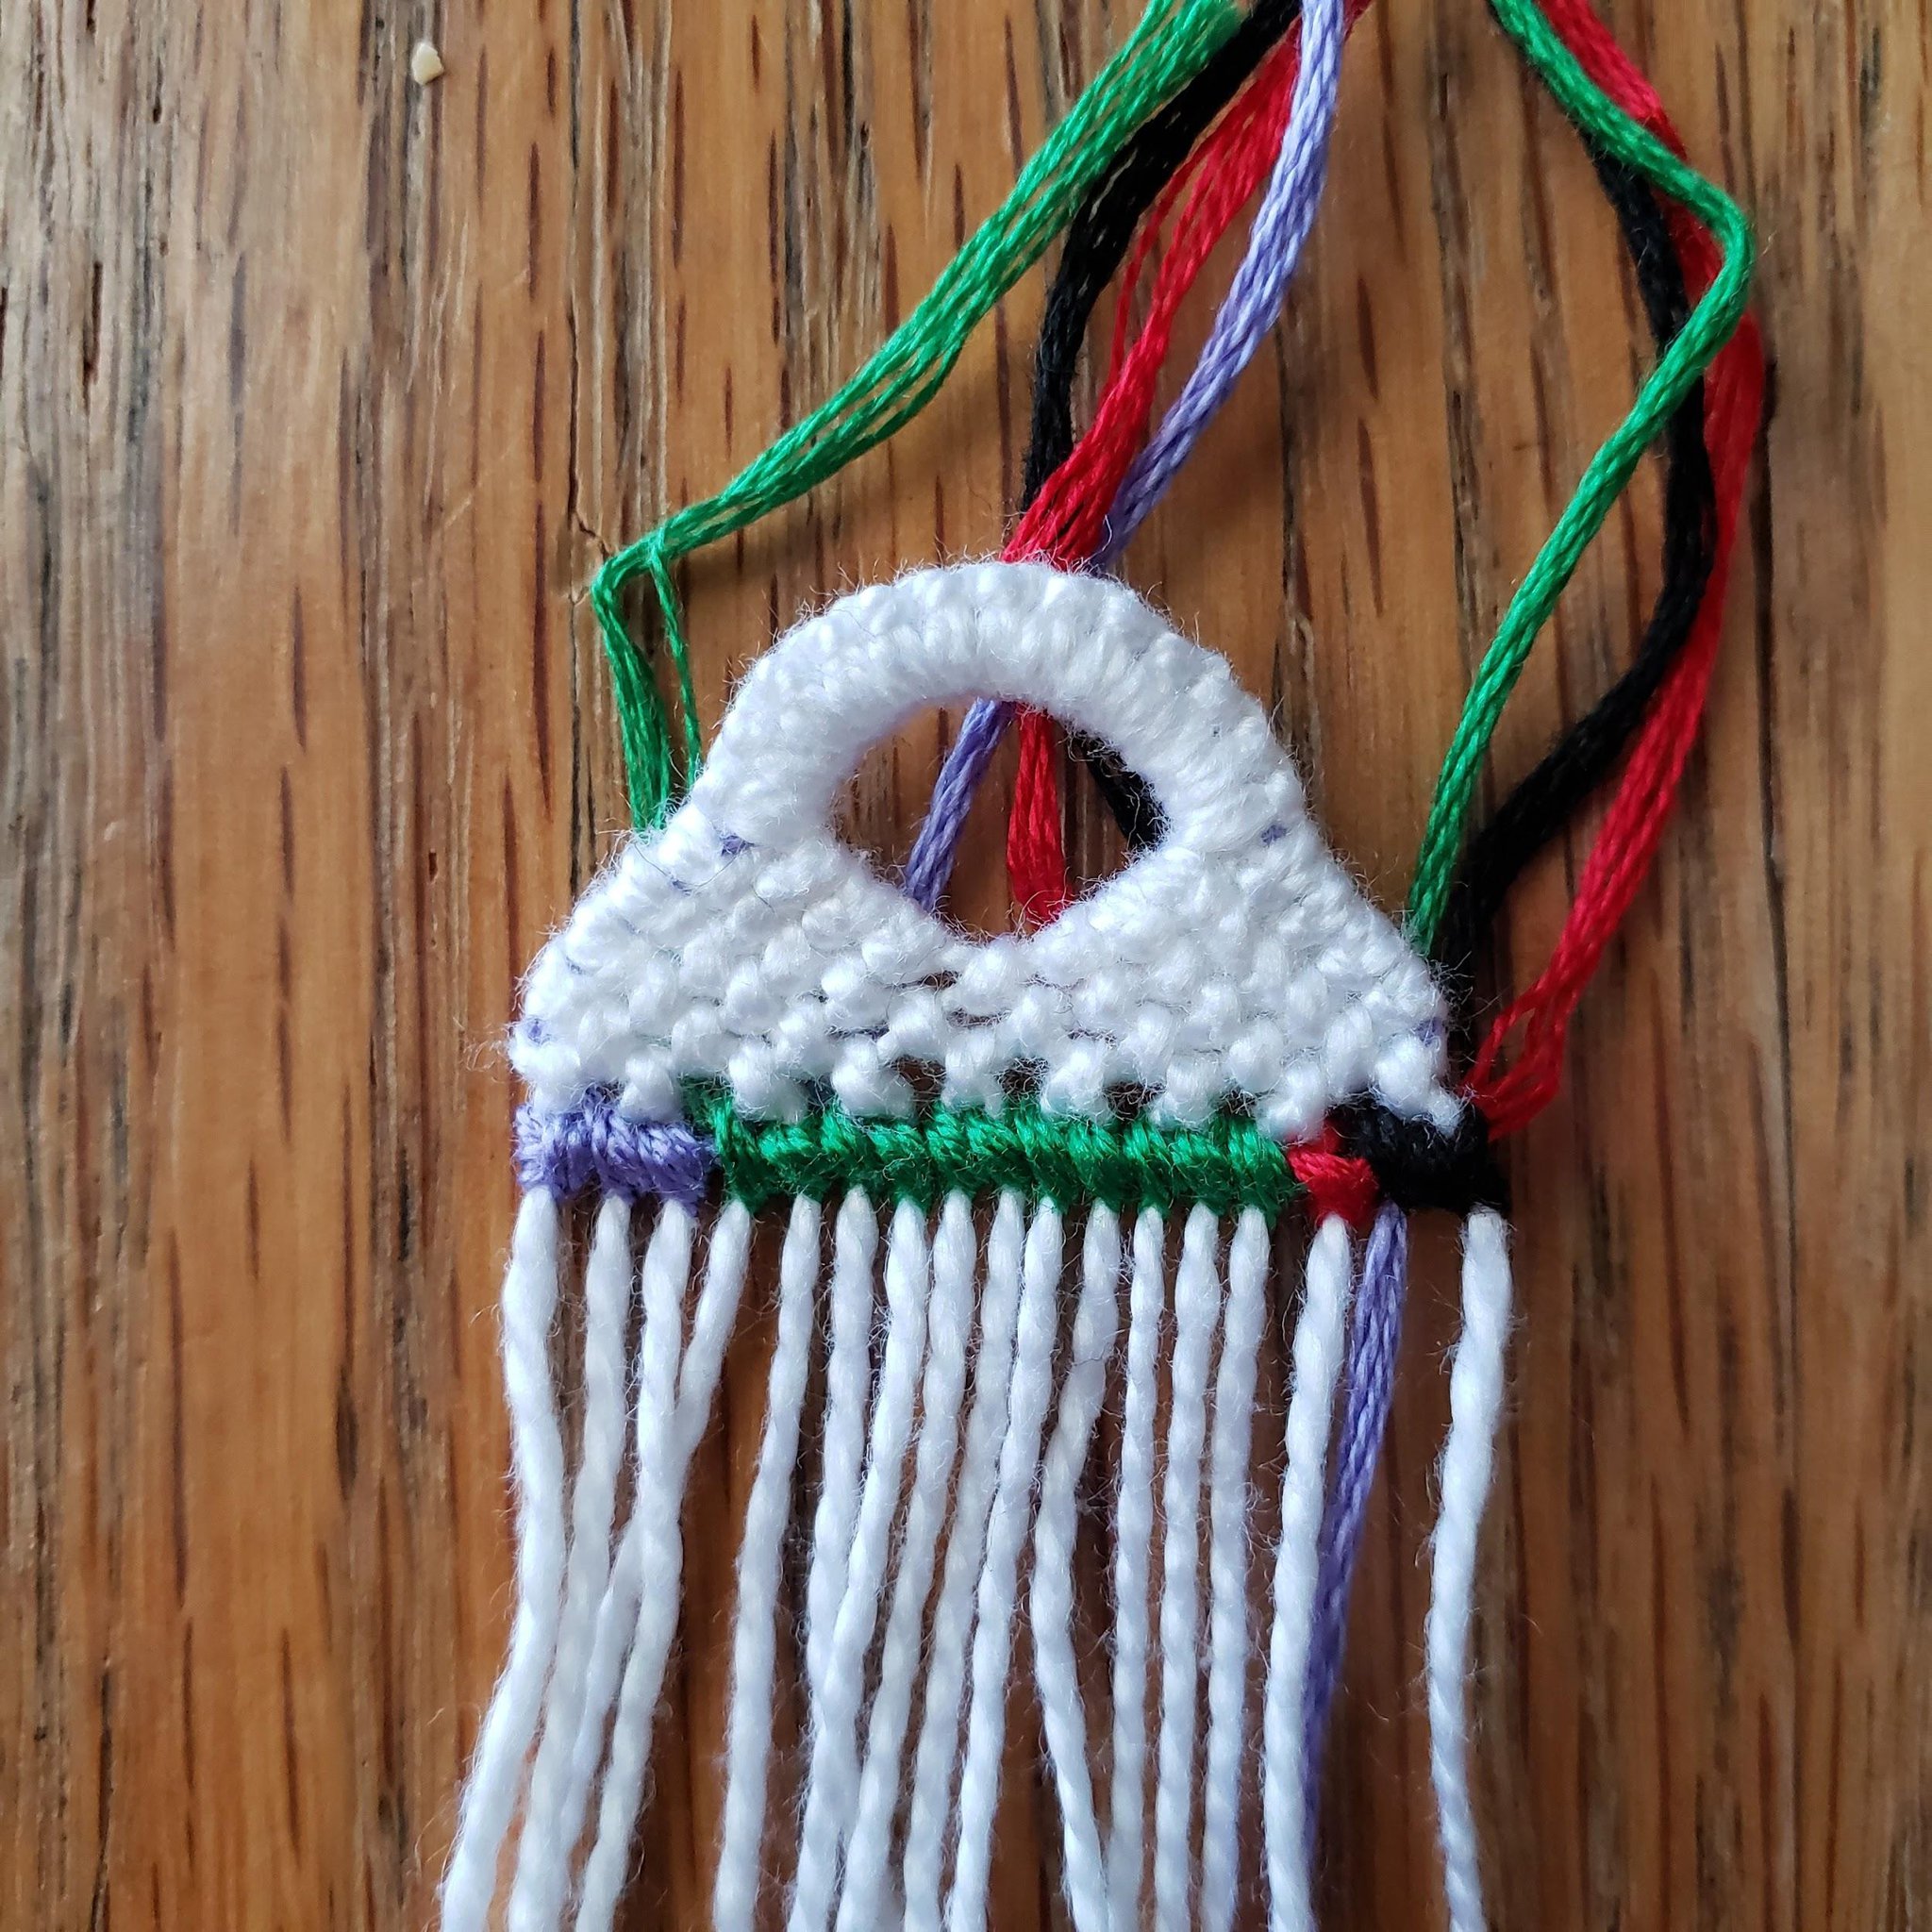
Teardrop Start
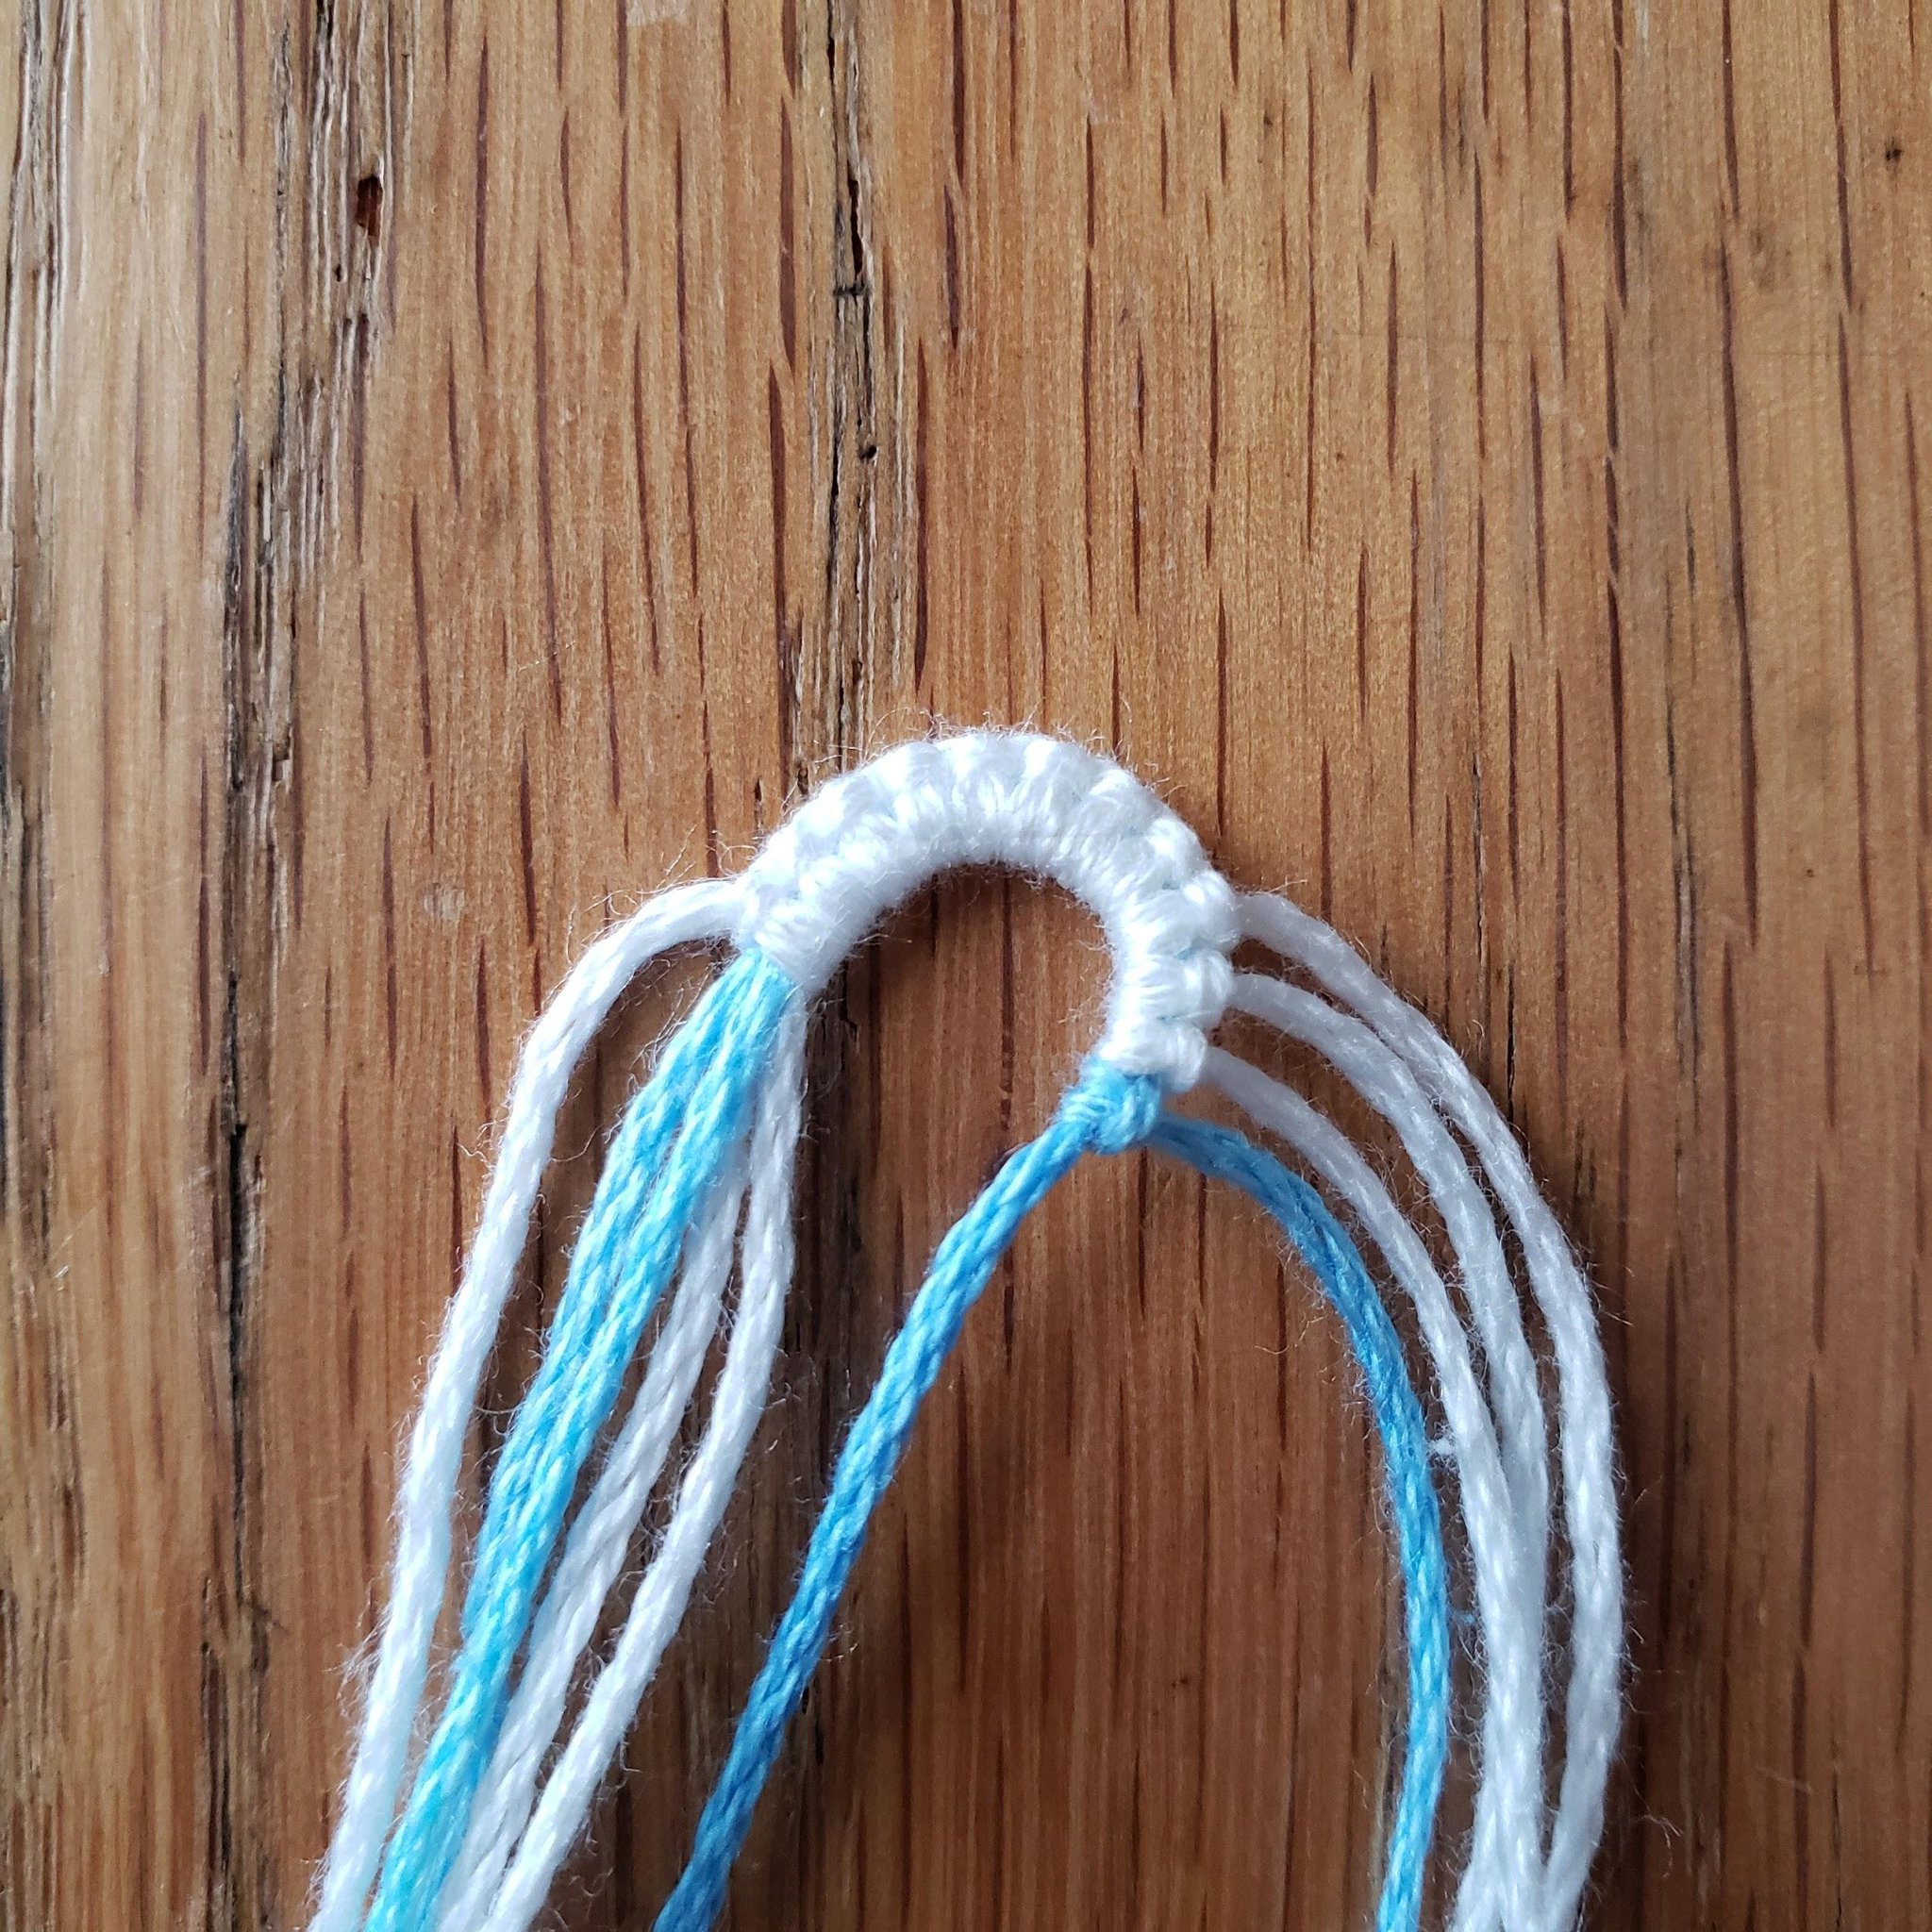
Prepare your threads for your bracelet, cutting them the same length you normally do. For this bracelet, I will need 9 base threads. I cut 4 threads for my base threads (making one a bit longer to knot my loop) and folded them in half. To create the remaining base thread needed, I included my knotting thread in my threads folded in half.
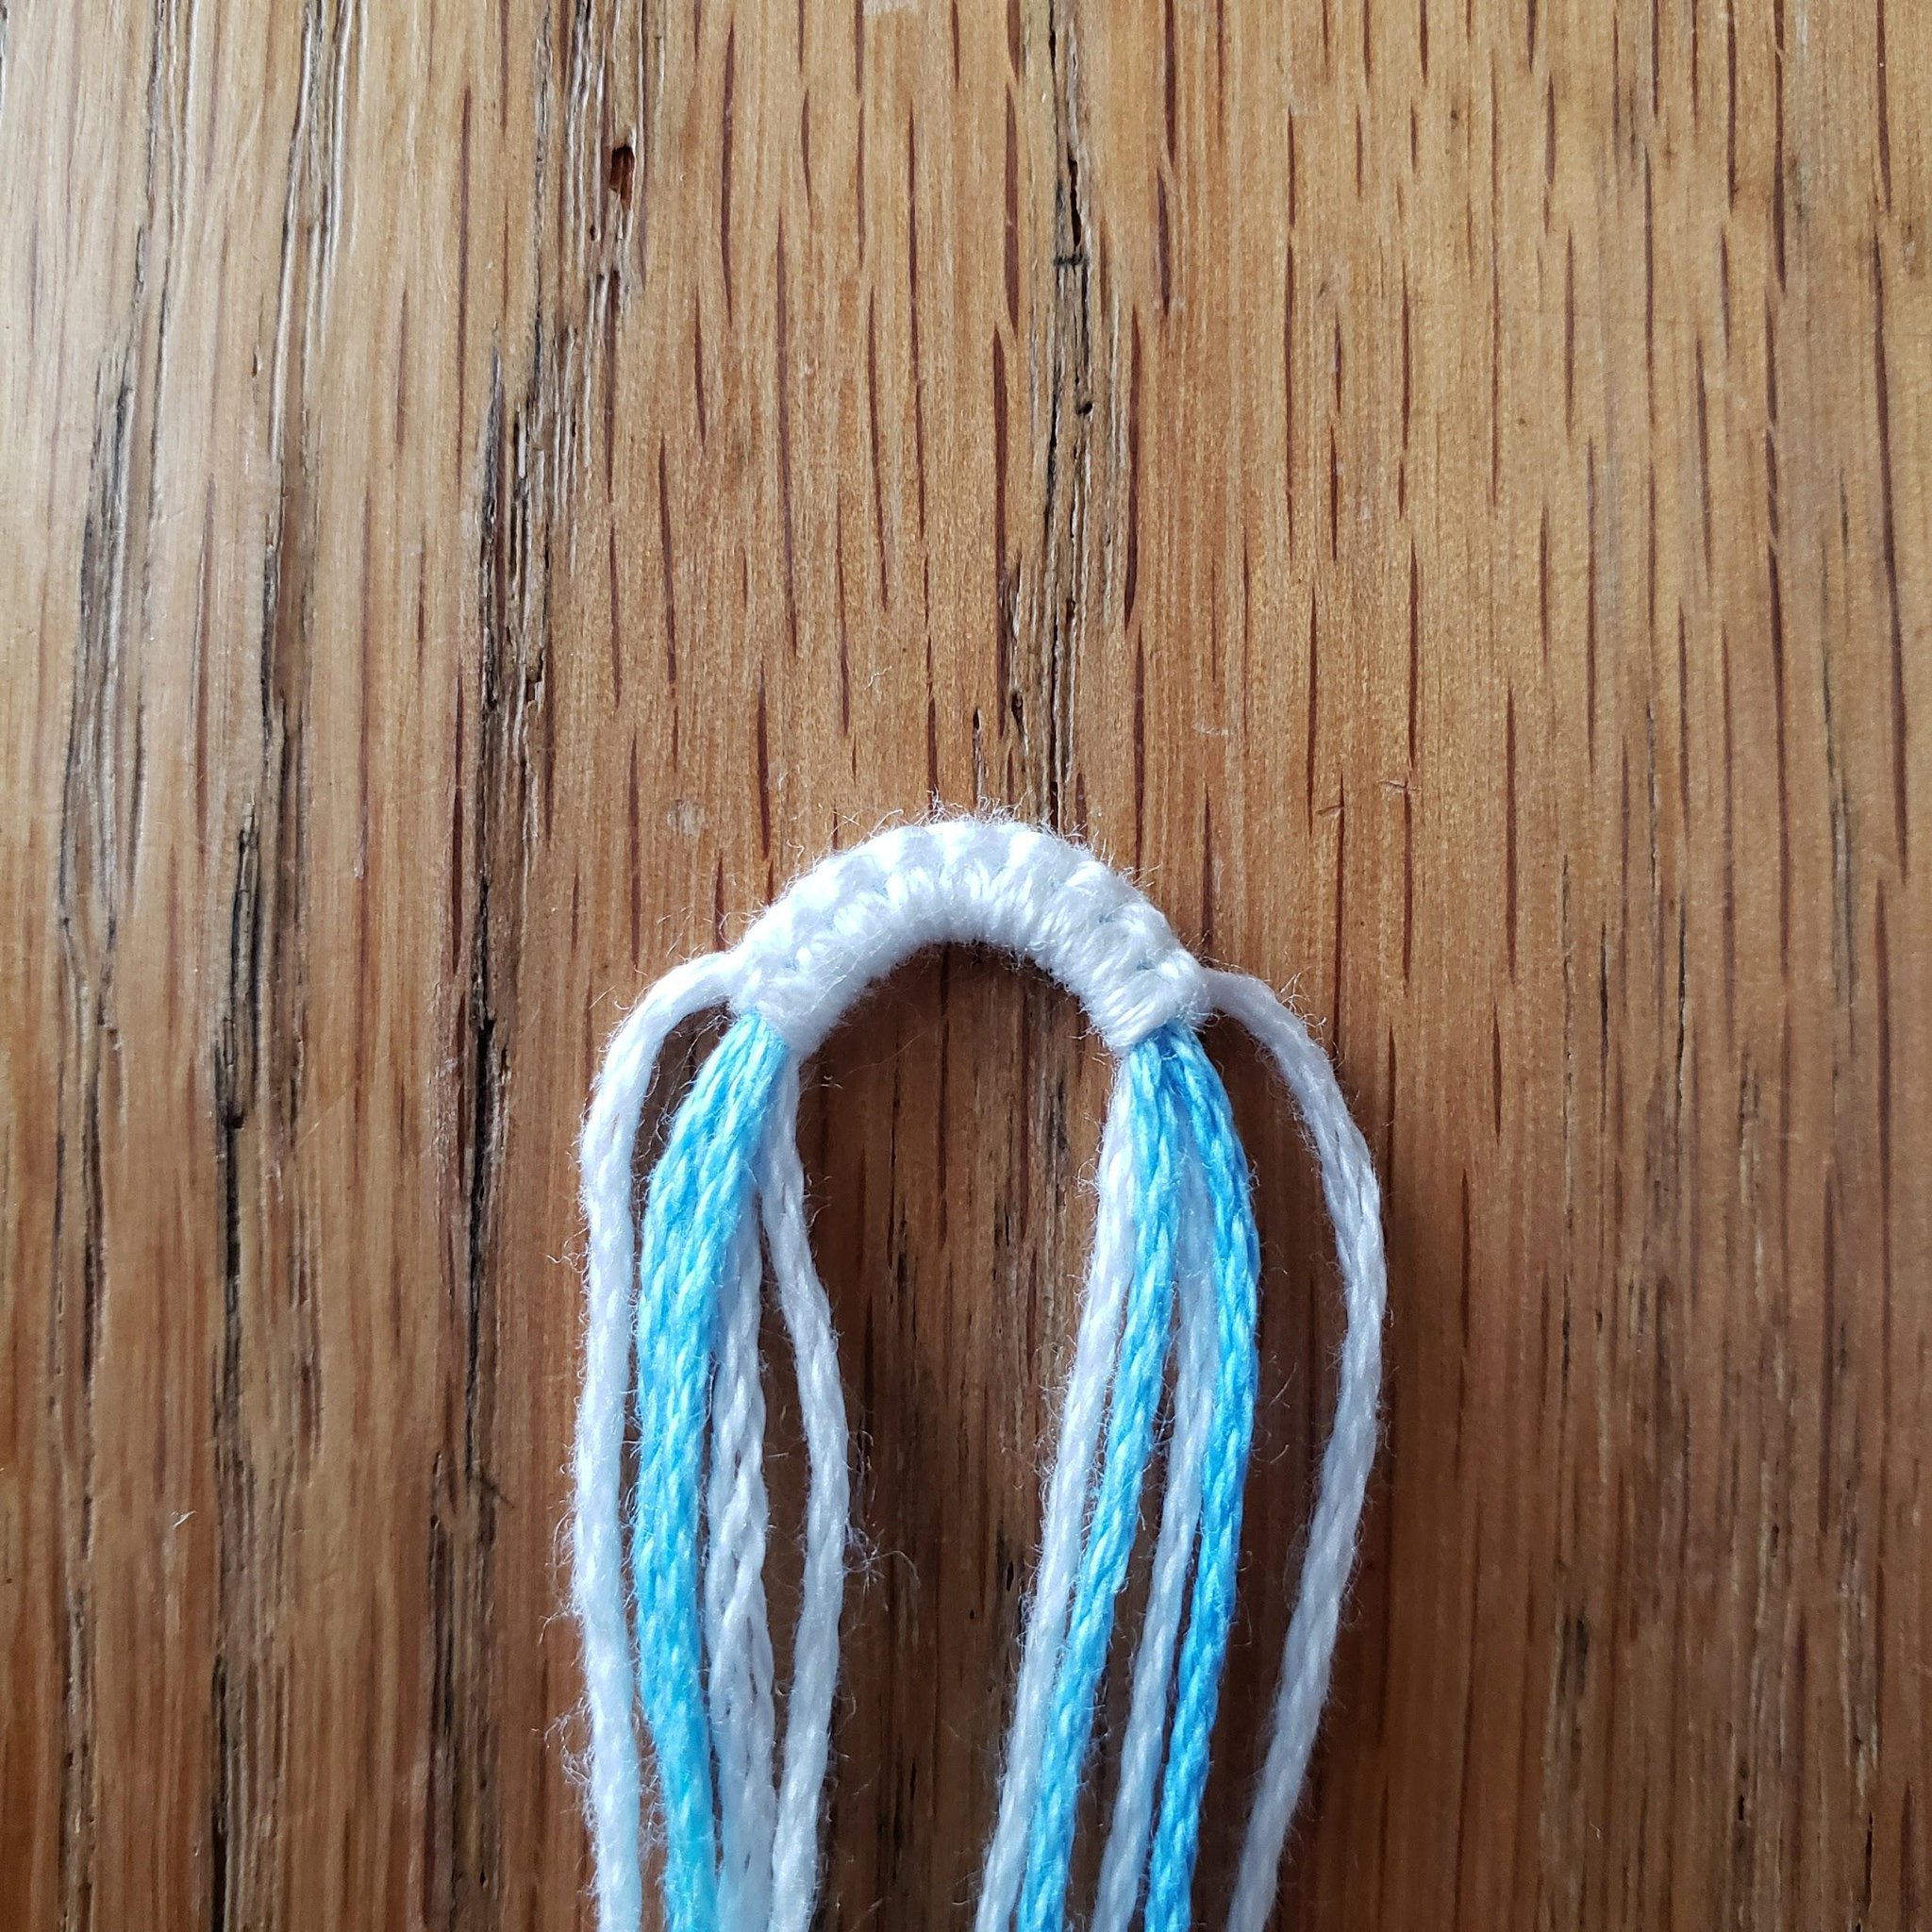
Create your loop how you normally would for your bracelet.
At this point, I have 10 threads coming from my loop. There should be 1 knotting thread on the left, and the rest of the threads should be base threads.
At this point, I have 10 threads coming from my loop. There should be 1 knotting thread on the left, and the rest of the threads should be base threads.
I used this tutorial to make mine.
With all the threads on your right side of the loop (not including the thread used to make the loop), make one backward-forward knot onto all your other base threads with 1 thread, leave that thread out, and repeat this process of knotting and leaving the knotting thread out with the remaining threads until 1 is left.
In my bracelet with 9 base threads, I made 3 backward-forward knots to create the “shaping knots.”
In my bracelet with 9 base threads, I made 3 backward-forward knots to create the “shaping knots.”
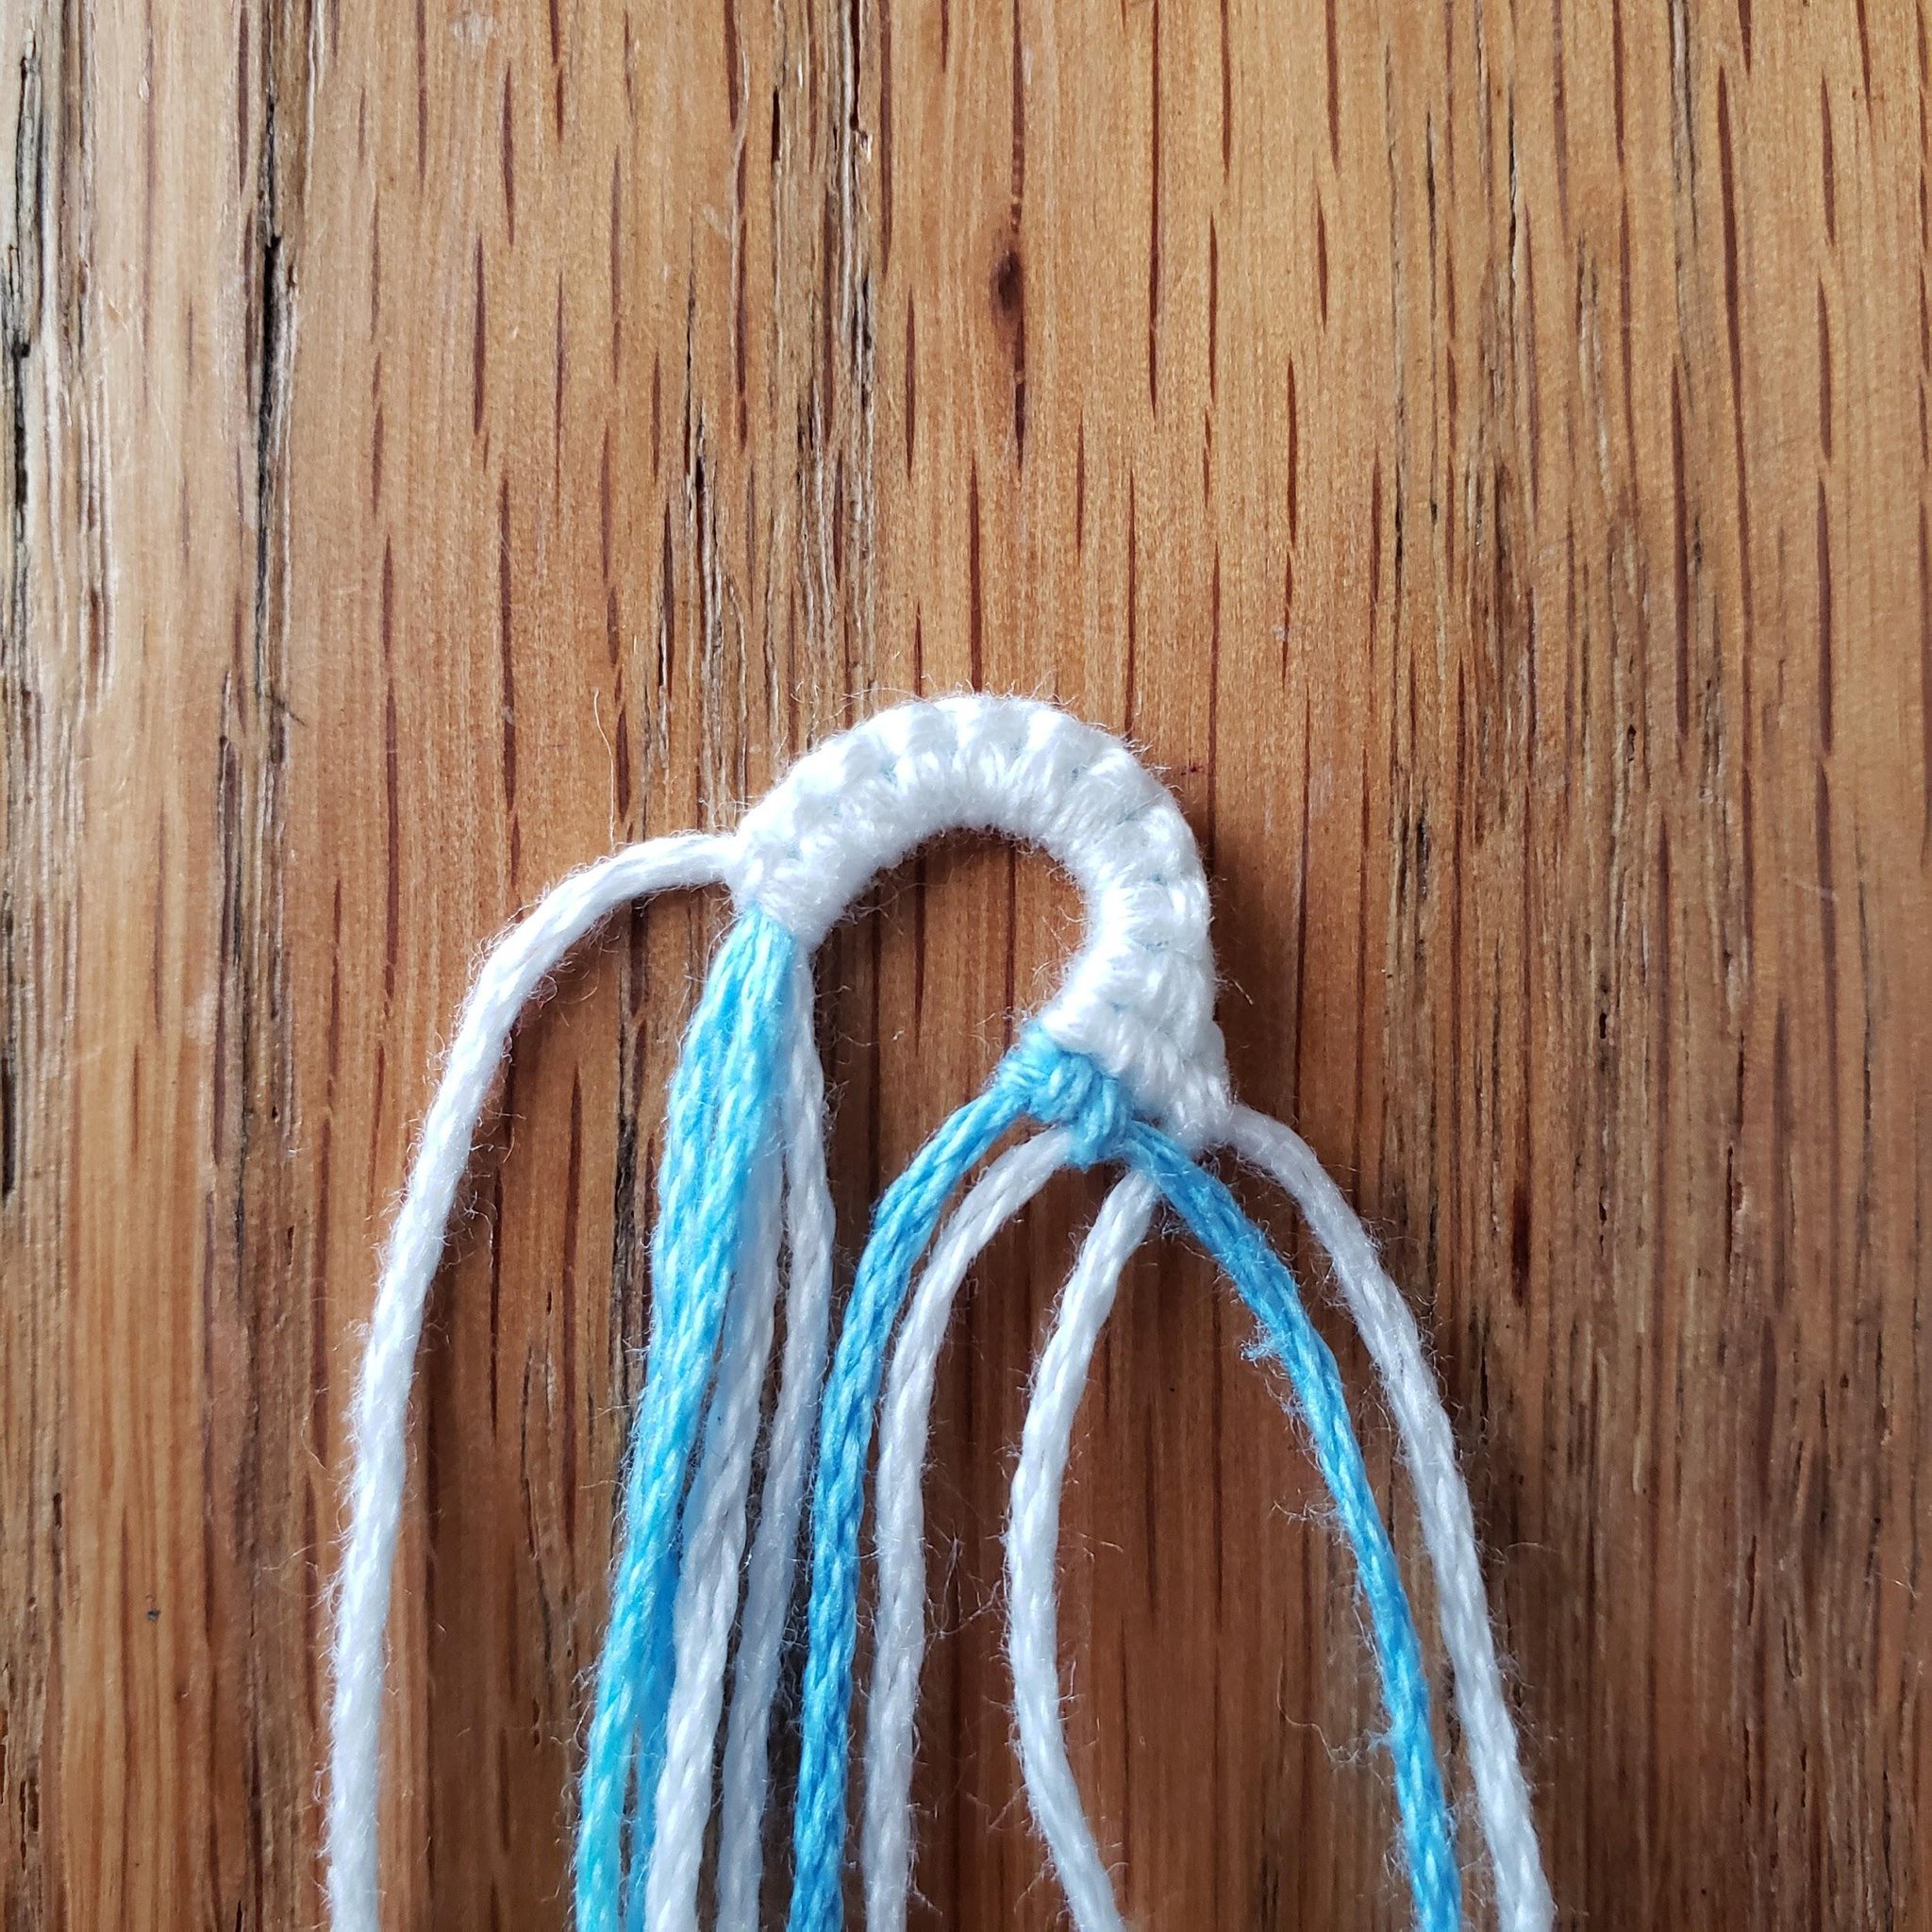
Create the forward knots that make up the right side of your teardrop. The amount of forward knots done is different depending on how many base threads you have: I just do however many I need to extend below the shaping knots.
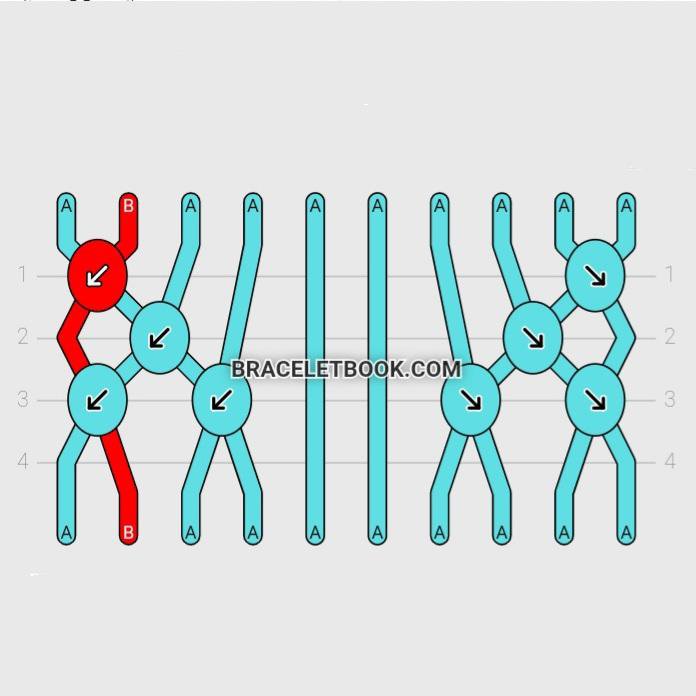
Before creating the left shaping knots, we need to figure out where the knotting thread needs to go in the order of shaping knots. Once our base threads are all spread out after all the teardrop knots are finished, the knotting thread needs to be the second thread from the left. This diagram shows that the knotting thread (indicated in red) must be the first thread to make the forward-backward knot onto the other base threads. The position of the knotting thread in the group of shaping knots varies depending on the amount of threads used, so it helps to make a diagram like this with however many threads you are using.
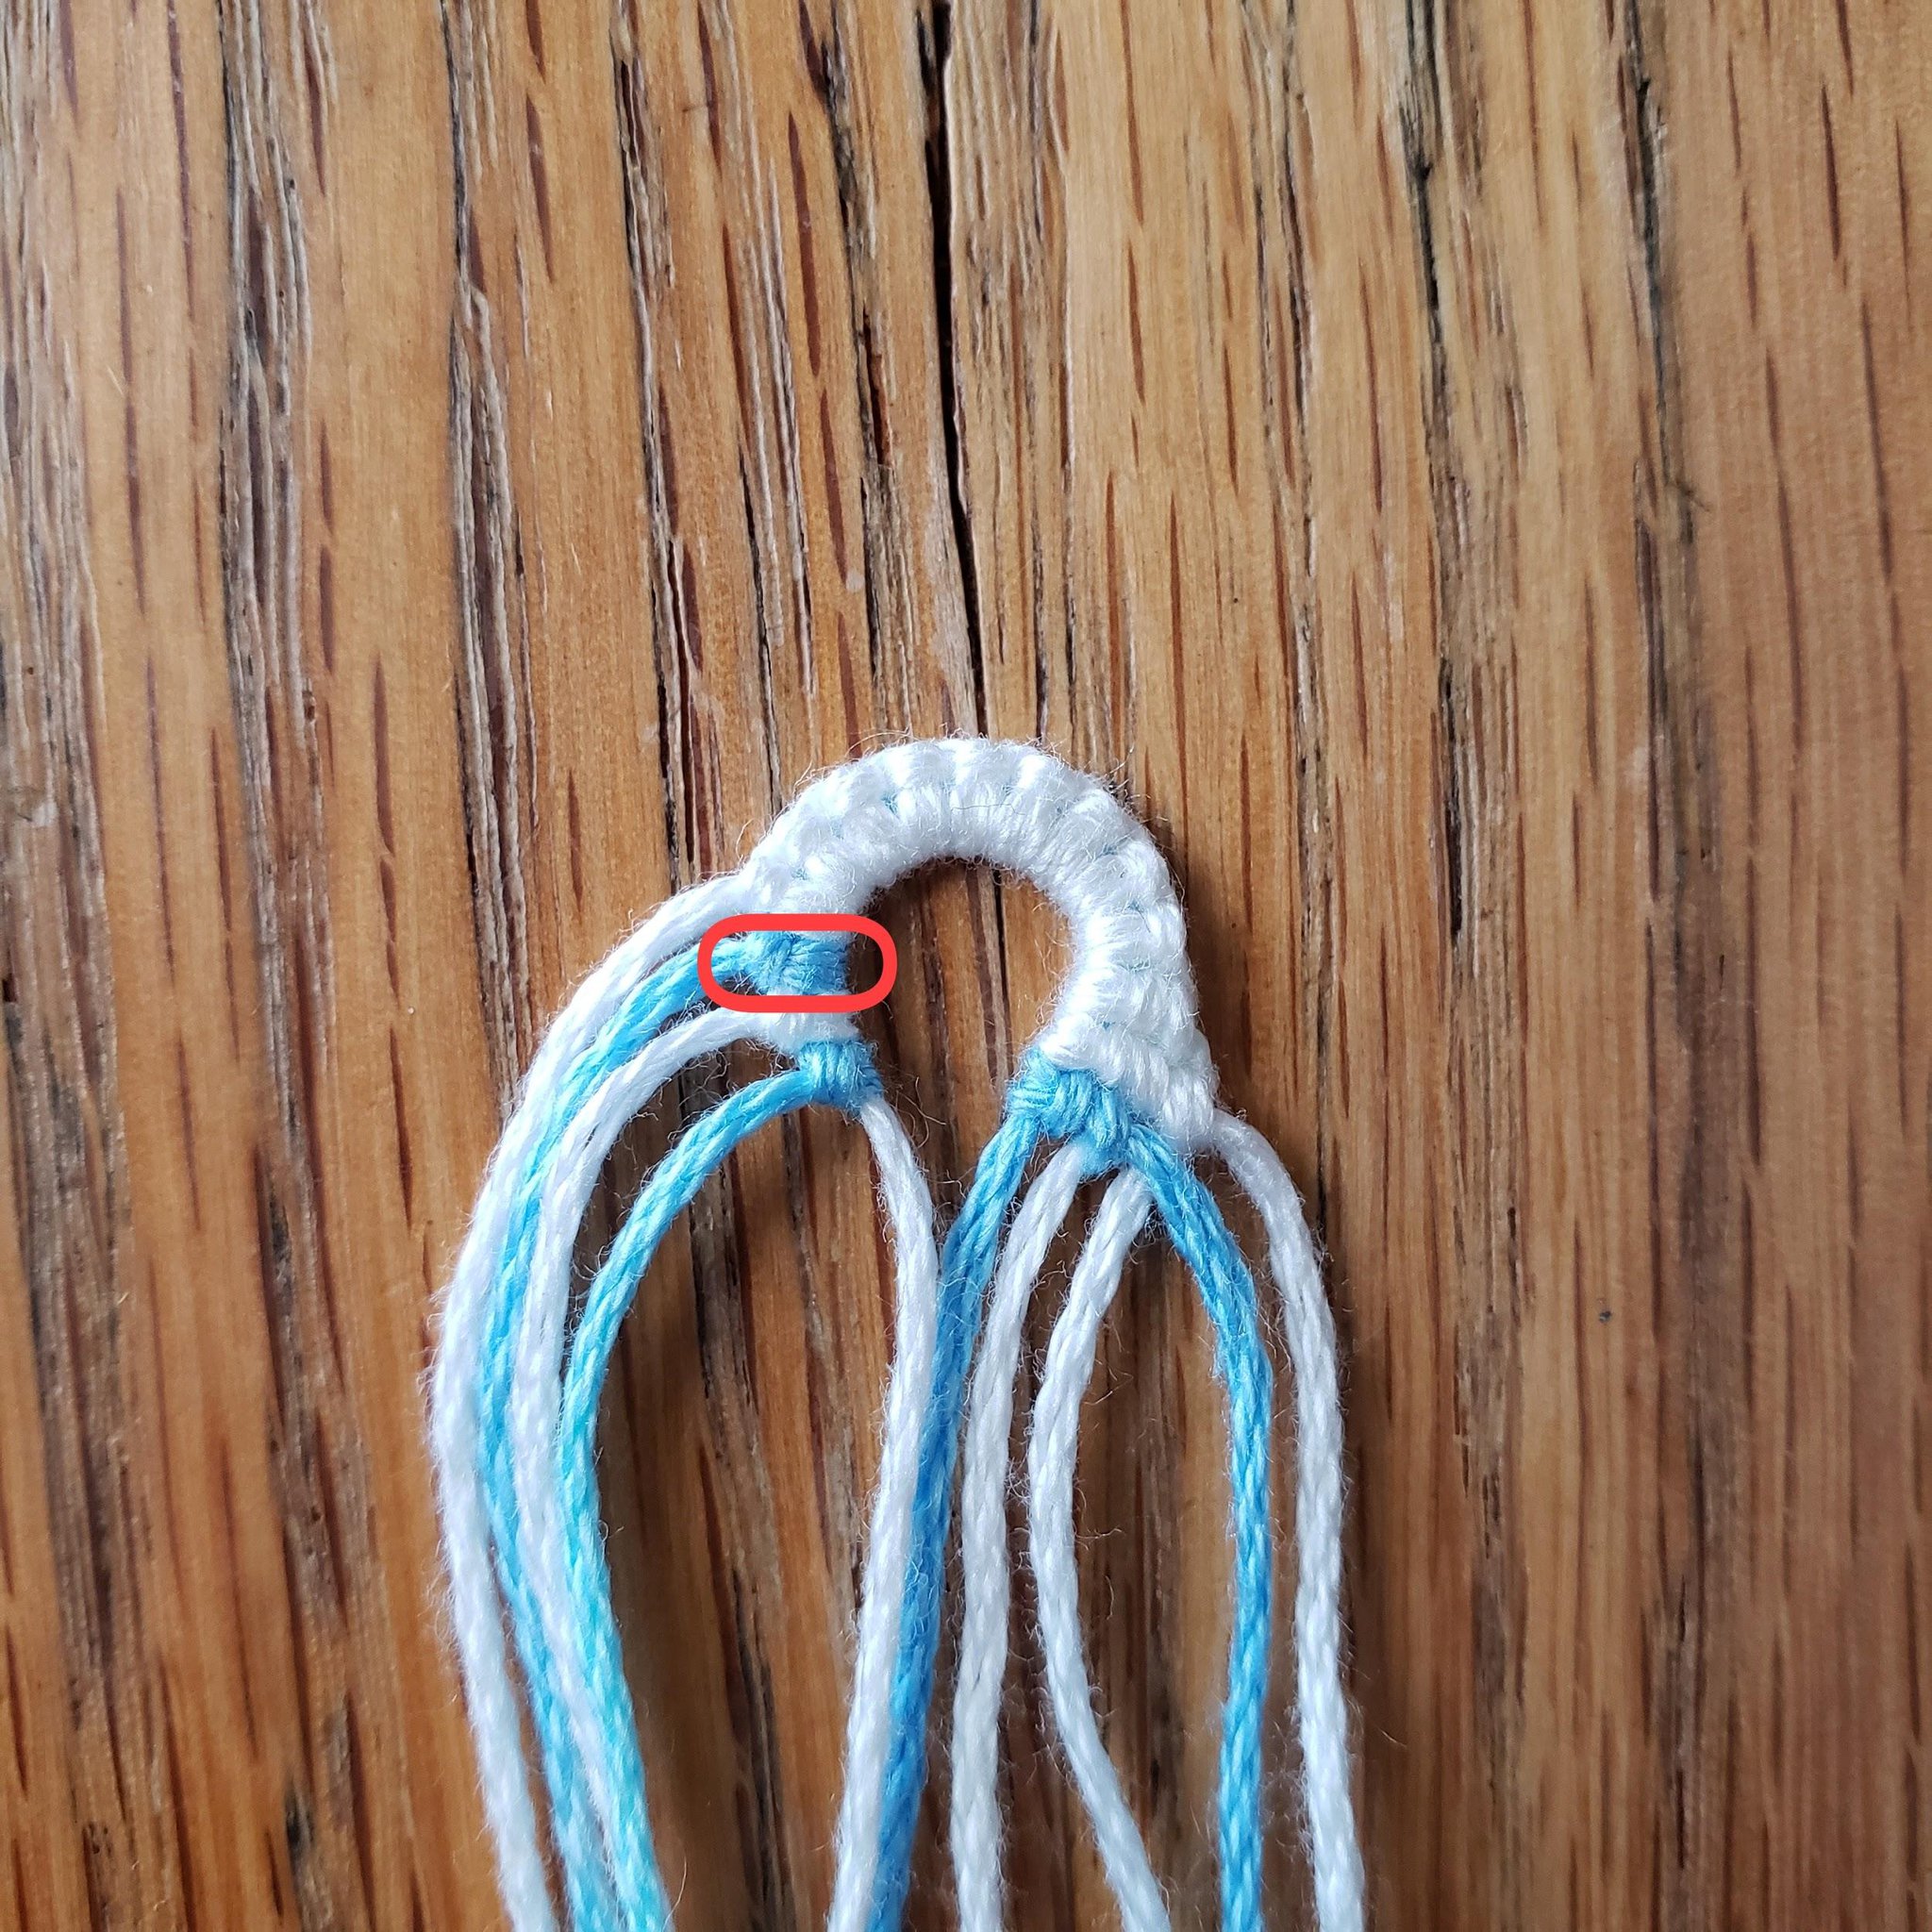
Create the left shaping knots, reversing the process used to make the right shaping knots. With all the threads on your left side of the loop (not including the thread used to make the loop), make one forward-backward knot onto all your other base threads with 1 thread, leave that thread out, and repeat this process of knotting and leaving the knotting thread out with the remaining threads until 1 is left.
In my bracelet with 9 base threads, I made 3 forward-backward knots to create the “shaping knots.” The circled knot is the knot made with the main knotting thread of the bracelet.
In my bracelet with 9 base threads, I made 3 forward-backward knots to create the “shaping knots.” The circled knot is the knot made with the main knotting thread of the bracelet.
Create the backward knots that make up the left side of your teardrop. The amount of backward knots done is different depending on how many base threads you have: I just do however many I need to extend below the shaping knots.
Make a forward knot between the center two threads to connect the two halves of the bracelet.
Make a forward knot between the center two threads to connect the two halves of the bracelet.

With your second thread from the left (which should be your knotting thread, if your teardrop loop was done correctly), make a backward-forward knot onto your leftmost thread.
With the thread used to create the backward-forward knot, finish the first row of your Alpha how you normally would: making forward knots until the last knot of the row, a forward-backward knot.
Knot your Alpha how you normally would until you reach the point where you want to begin your teardrop ends.
Knot your Alpha how you normally would until you reach the point where you want to begin your teardrop ends.

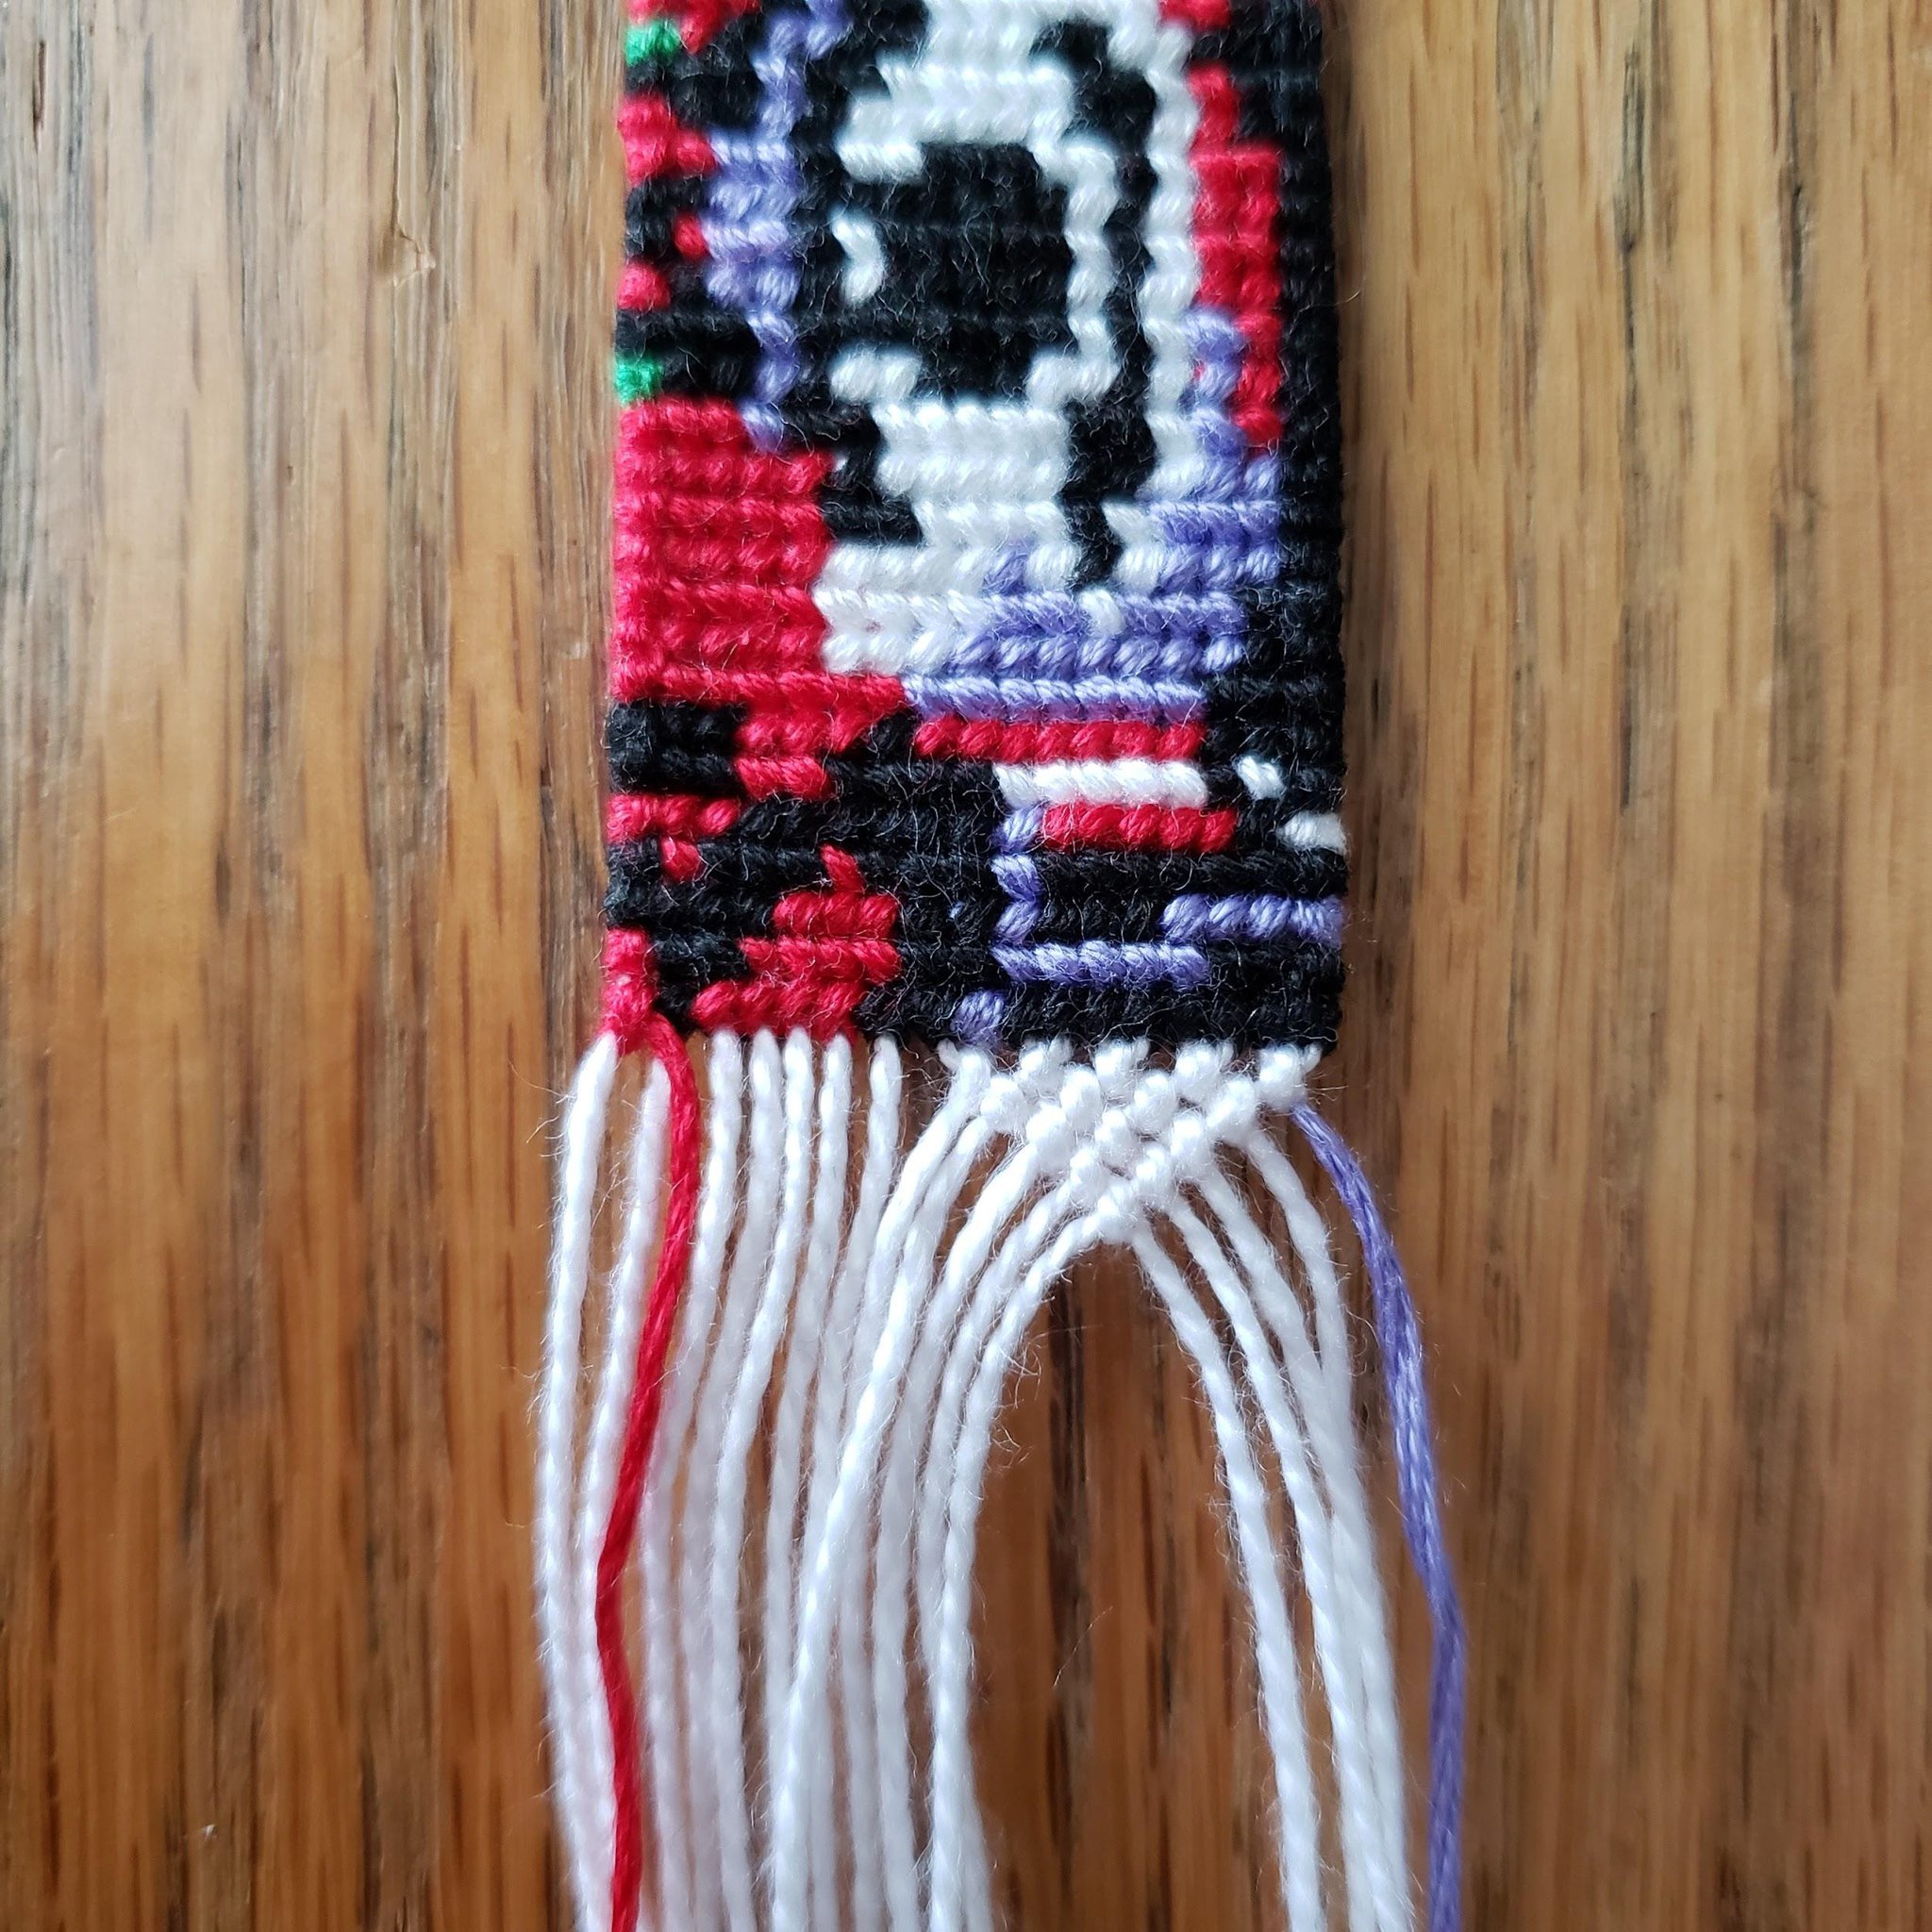
Teardrop End
You will be including your knotting thread in your teardrop end, so make sure you do not trim and tie it off before your teardrop end.
Reverse the process done for the teardrop loop. Start by making the forward knots on the right that make up the bulk of the teardrop end. Make the same amount of knots as you did in the loop. Make the backward knots on the left that make up the bulk of the teardrop end. Make the same amount of knots as you did in the loop.
Make a forward knot between the center 2 threads, then begin making your shaping knots. On the left, make a forward-backward knot with the thread closest to the left thread used in the center forward knot onto the left thread used in the center forward knot. Repeat this process with each thread on the left, making each new knot onto all the previously knotted threads until all the threads are knotted together.
On the right, make a backward-forward knot with the thread closest to the right thread used in the center forward knot onto the left thread used in the center forward knot. Repeat this process with each thread on the left, making each new knot onto all the previously knotted threads until all the threads are knotted together.
On the right, make a backward-forward knot with the thread closest to the right thread used in the center forward knot onto the left thread used in the center forward knot. Repeat this process with each thread on the left, making each new knot onto all the previously knotted threads until all the threads are knotted together.
Finish your ties however you would like, and trim your threads.