Rate Tutorial
How to do the starting triangle
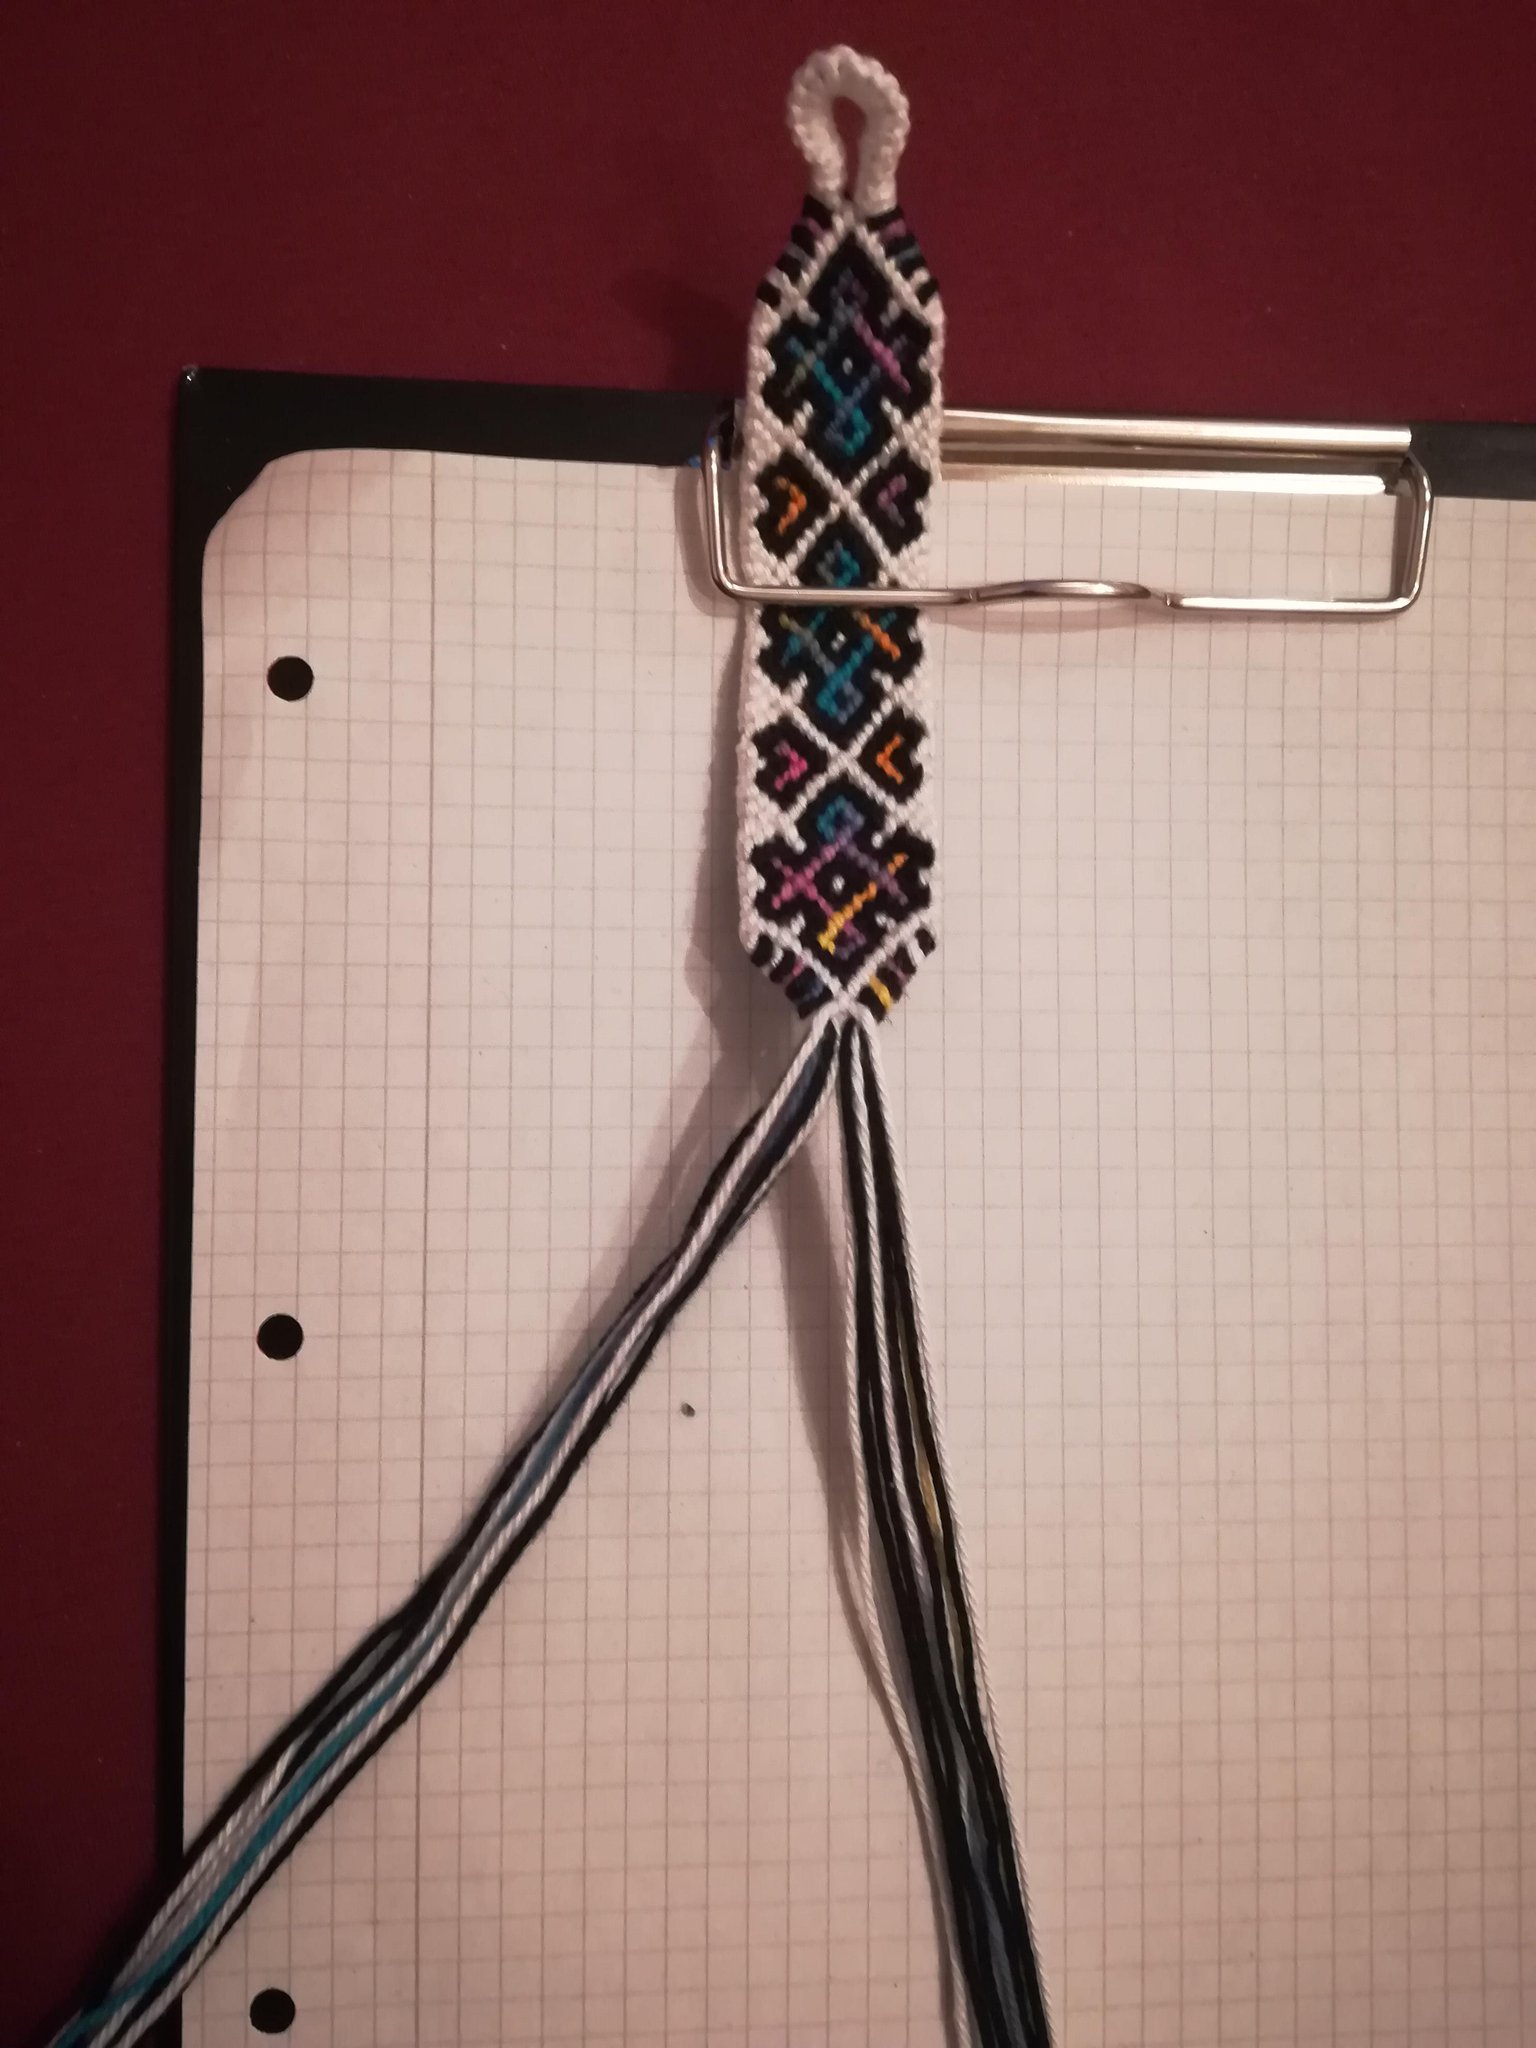
Before you do your triangle you can do different ties or a loop, whatever you prefer.
Step 1
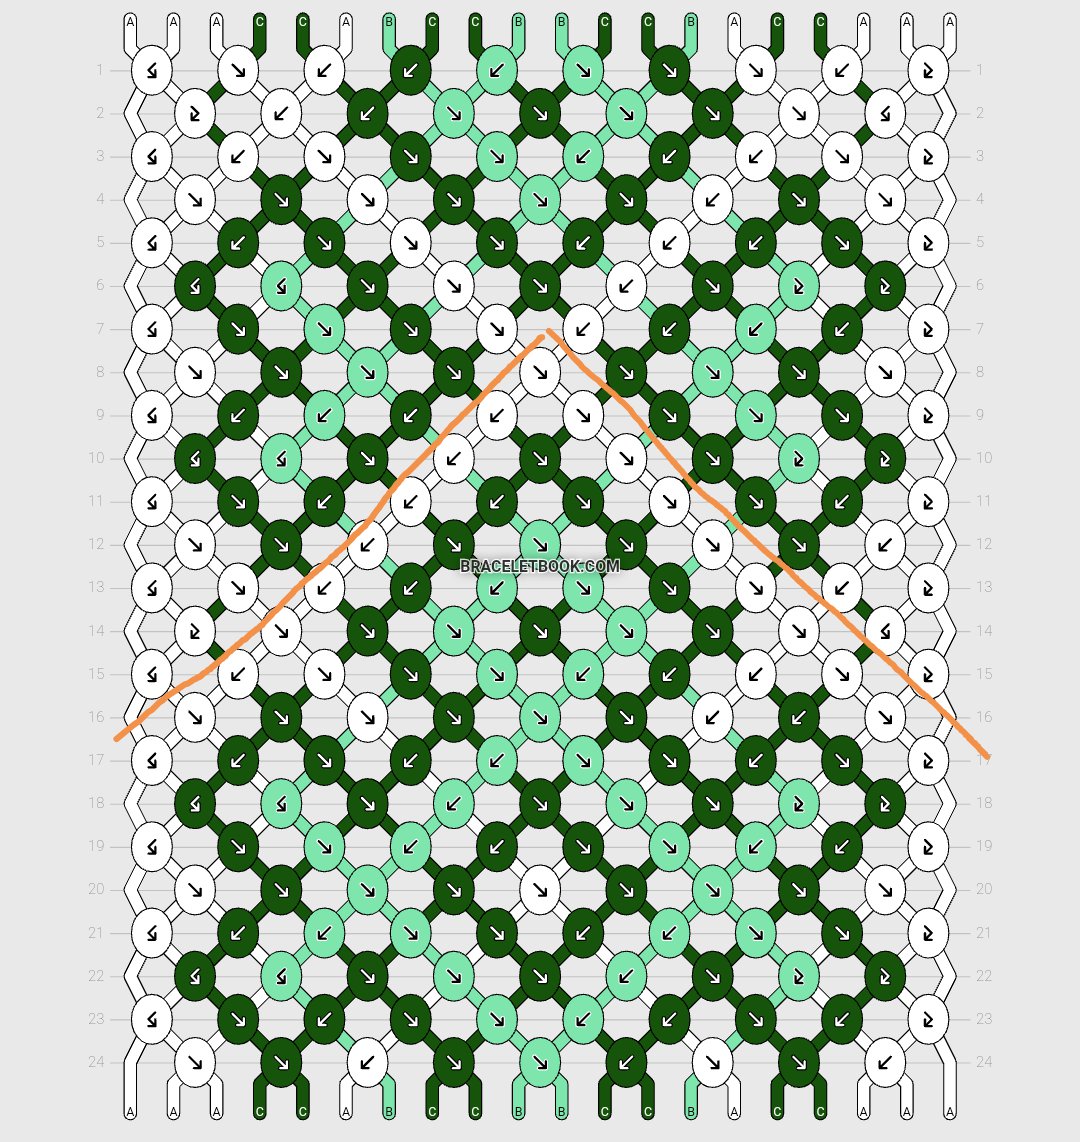
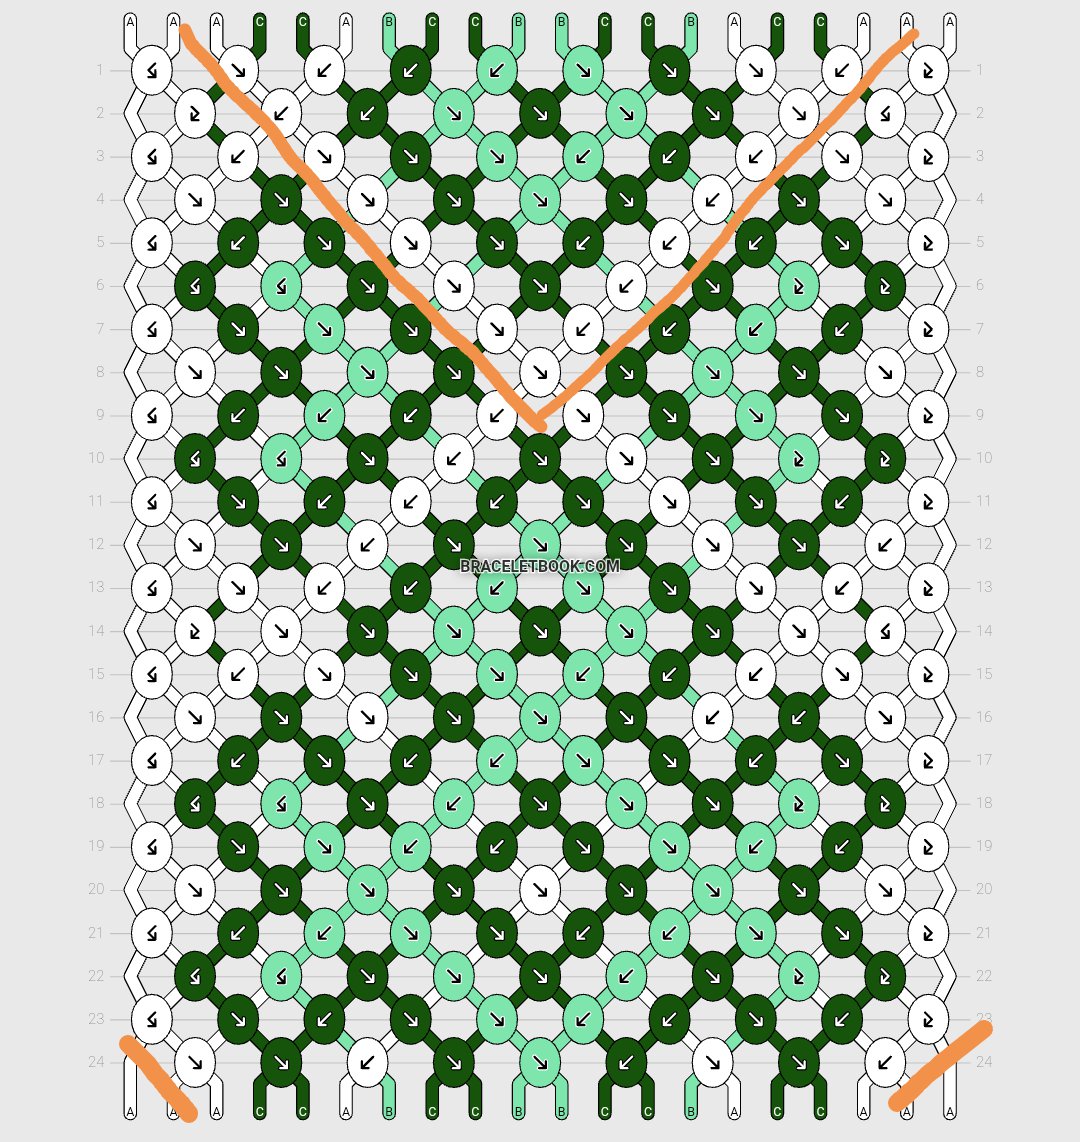
Find a upward-facing triangle you want to start with.
You can take any triangle from your pattern that you want but I recommend one where the pattern naturally forms a triangle.
You can take any triangle from your pattern that you want but I recommend one where the pattern naturally forms a triangle.
Step 2
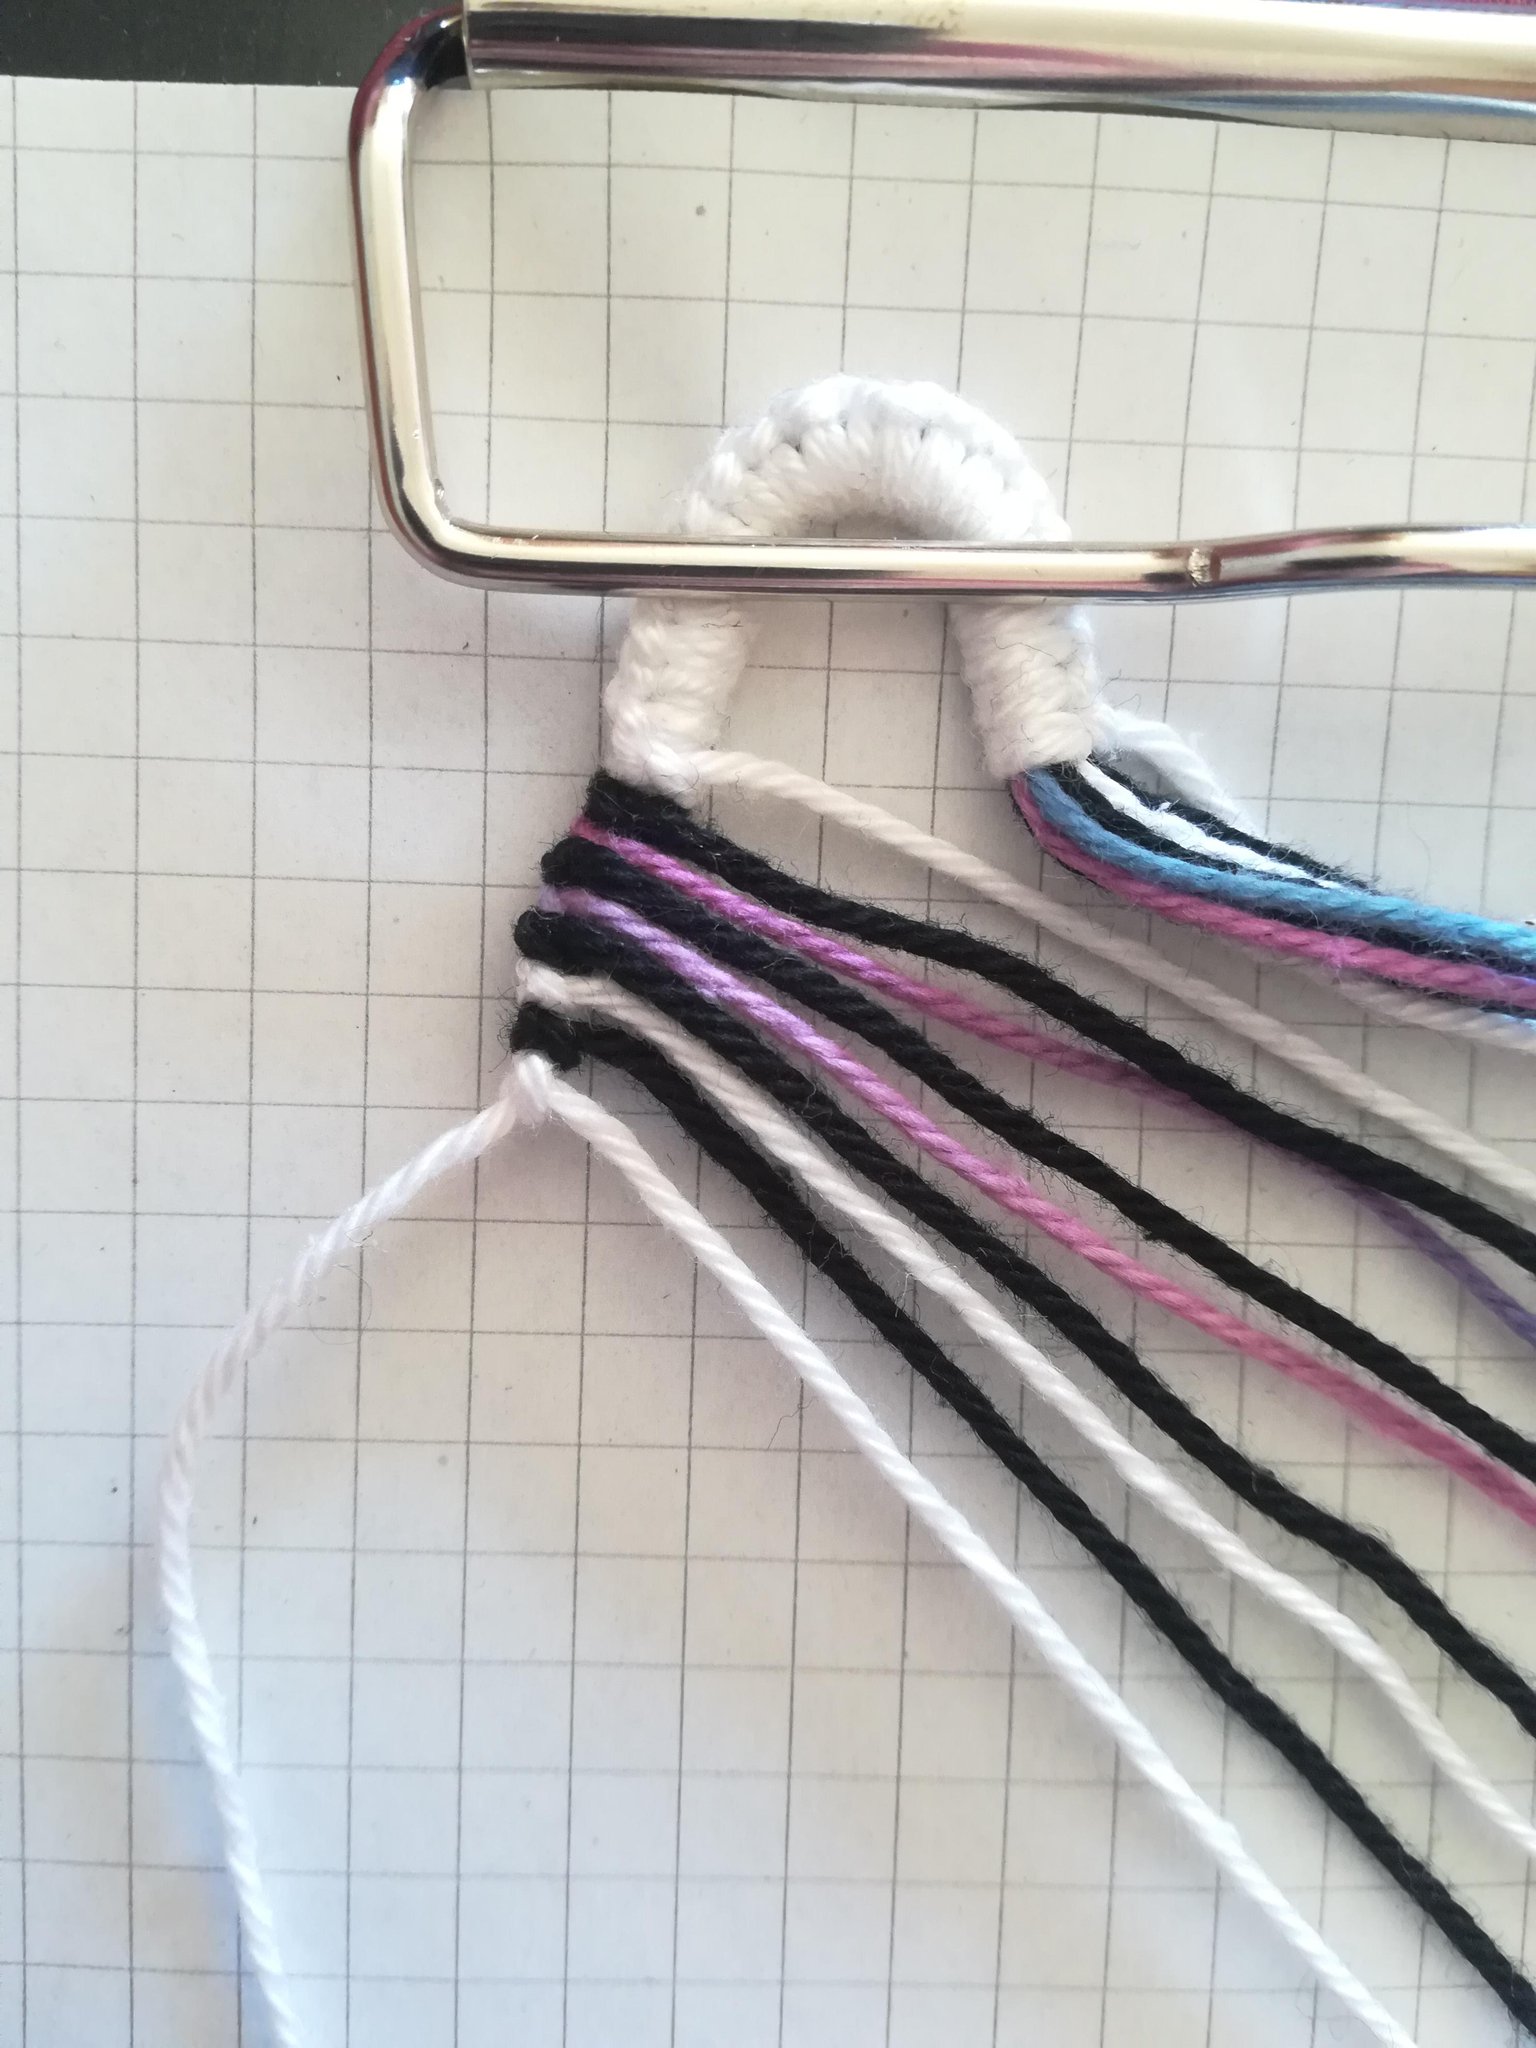
Divide your strings into two halves.
Divide the strings so that all the strings that are on the left side of that triangle are on the left and all strings on the right side are on the right.
We're going to start with the left half, so you only need the strings of the left half for the next step.
Divide the strings so that all the strings that are on the left side of that triangle are on the left and all strings on the right side are on the right.
We're going to start with the left half, so you only need the strings of the left half for the next step.
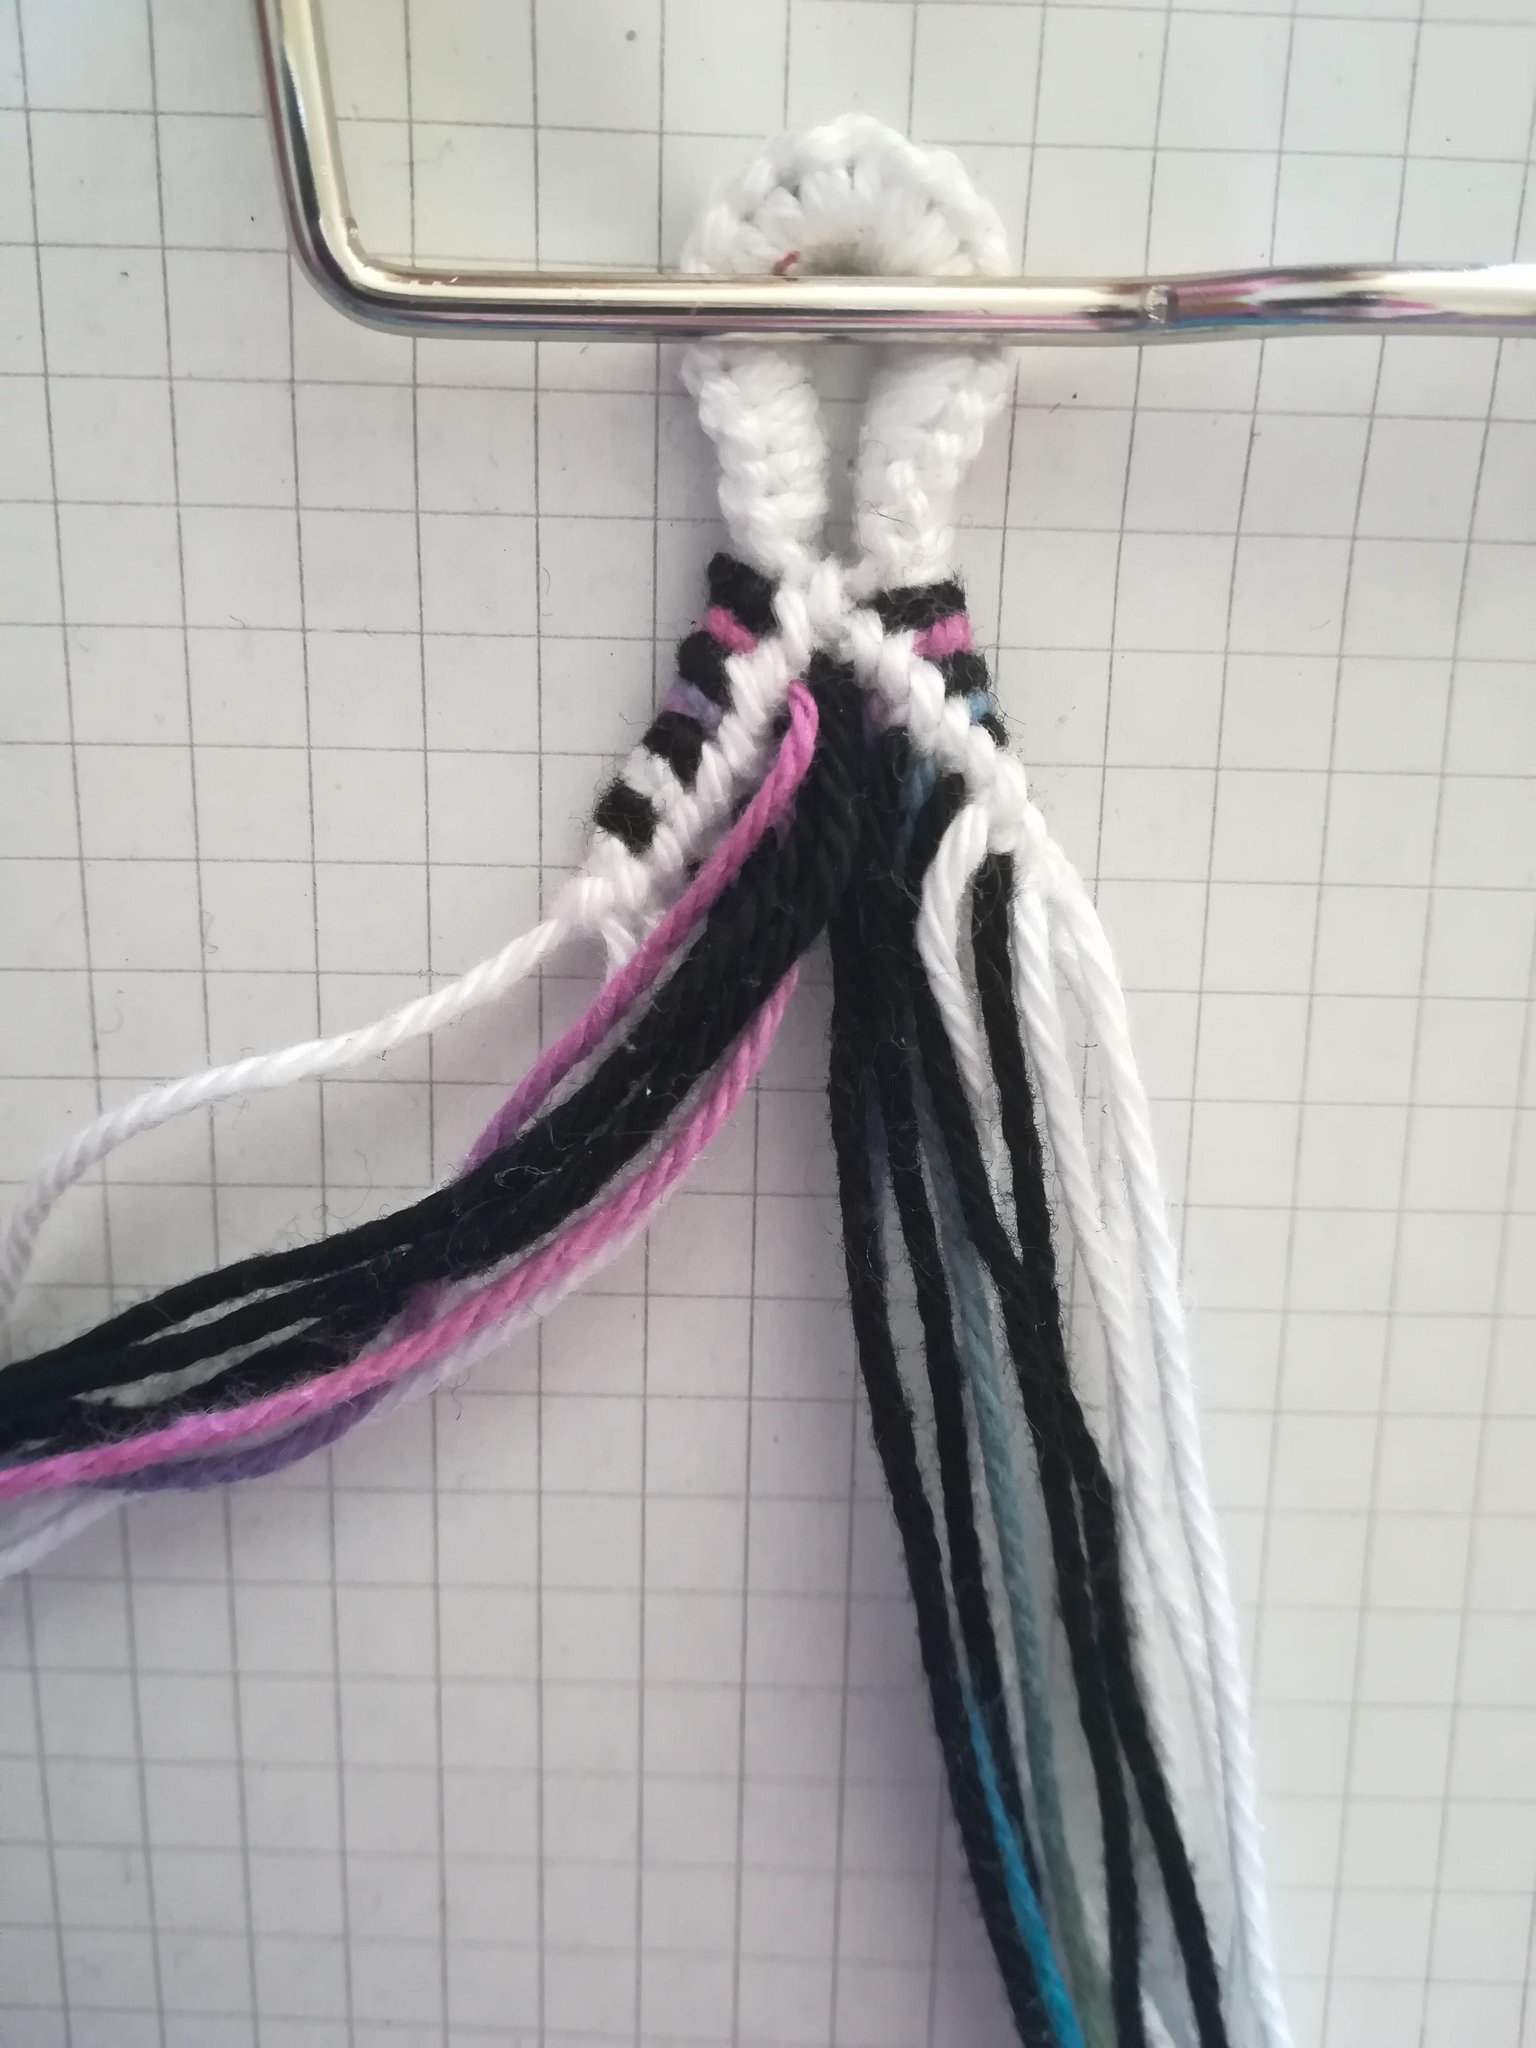
Step 3
Look at the order in which the strings cross the left side of your triangle.
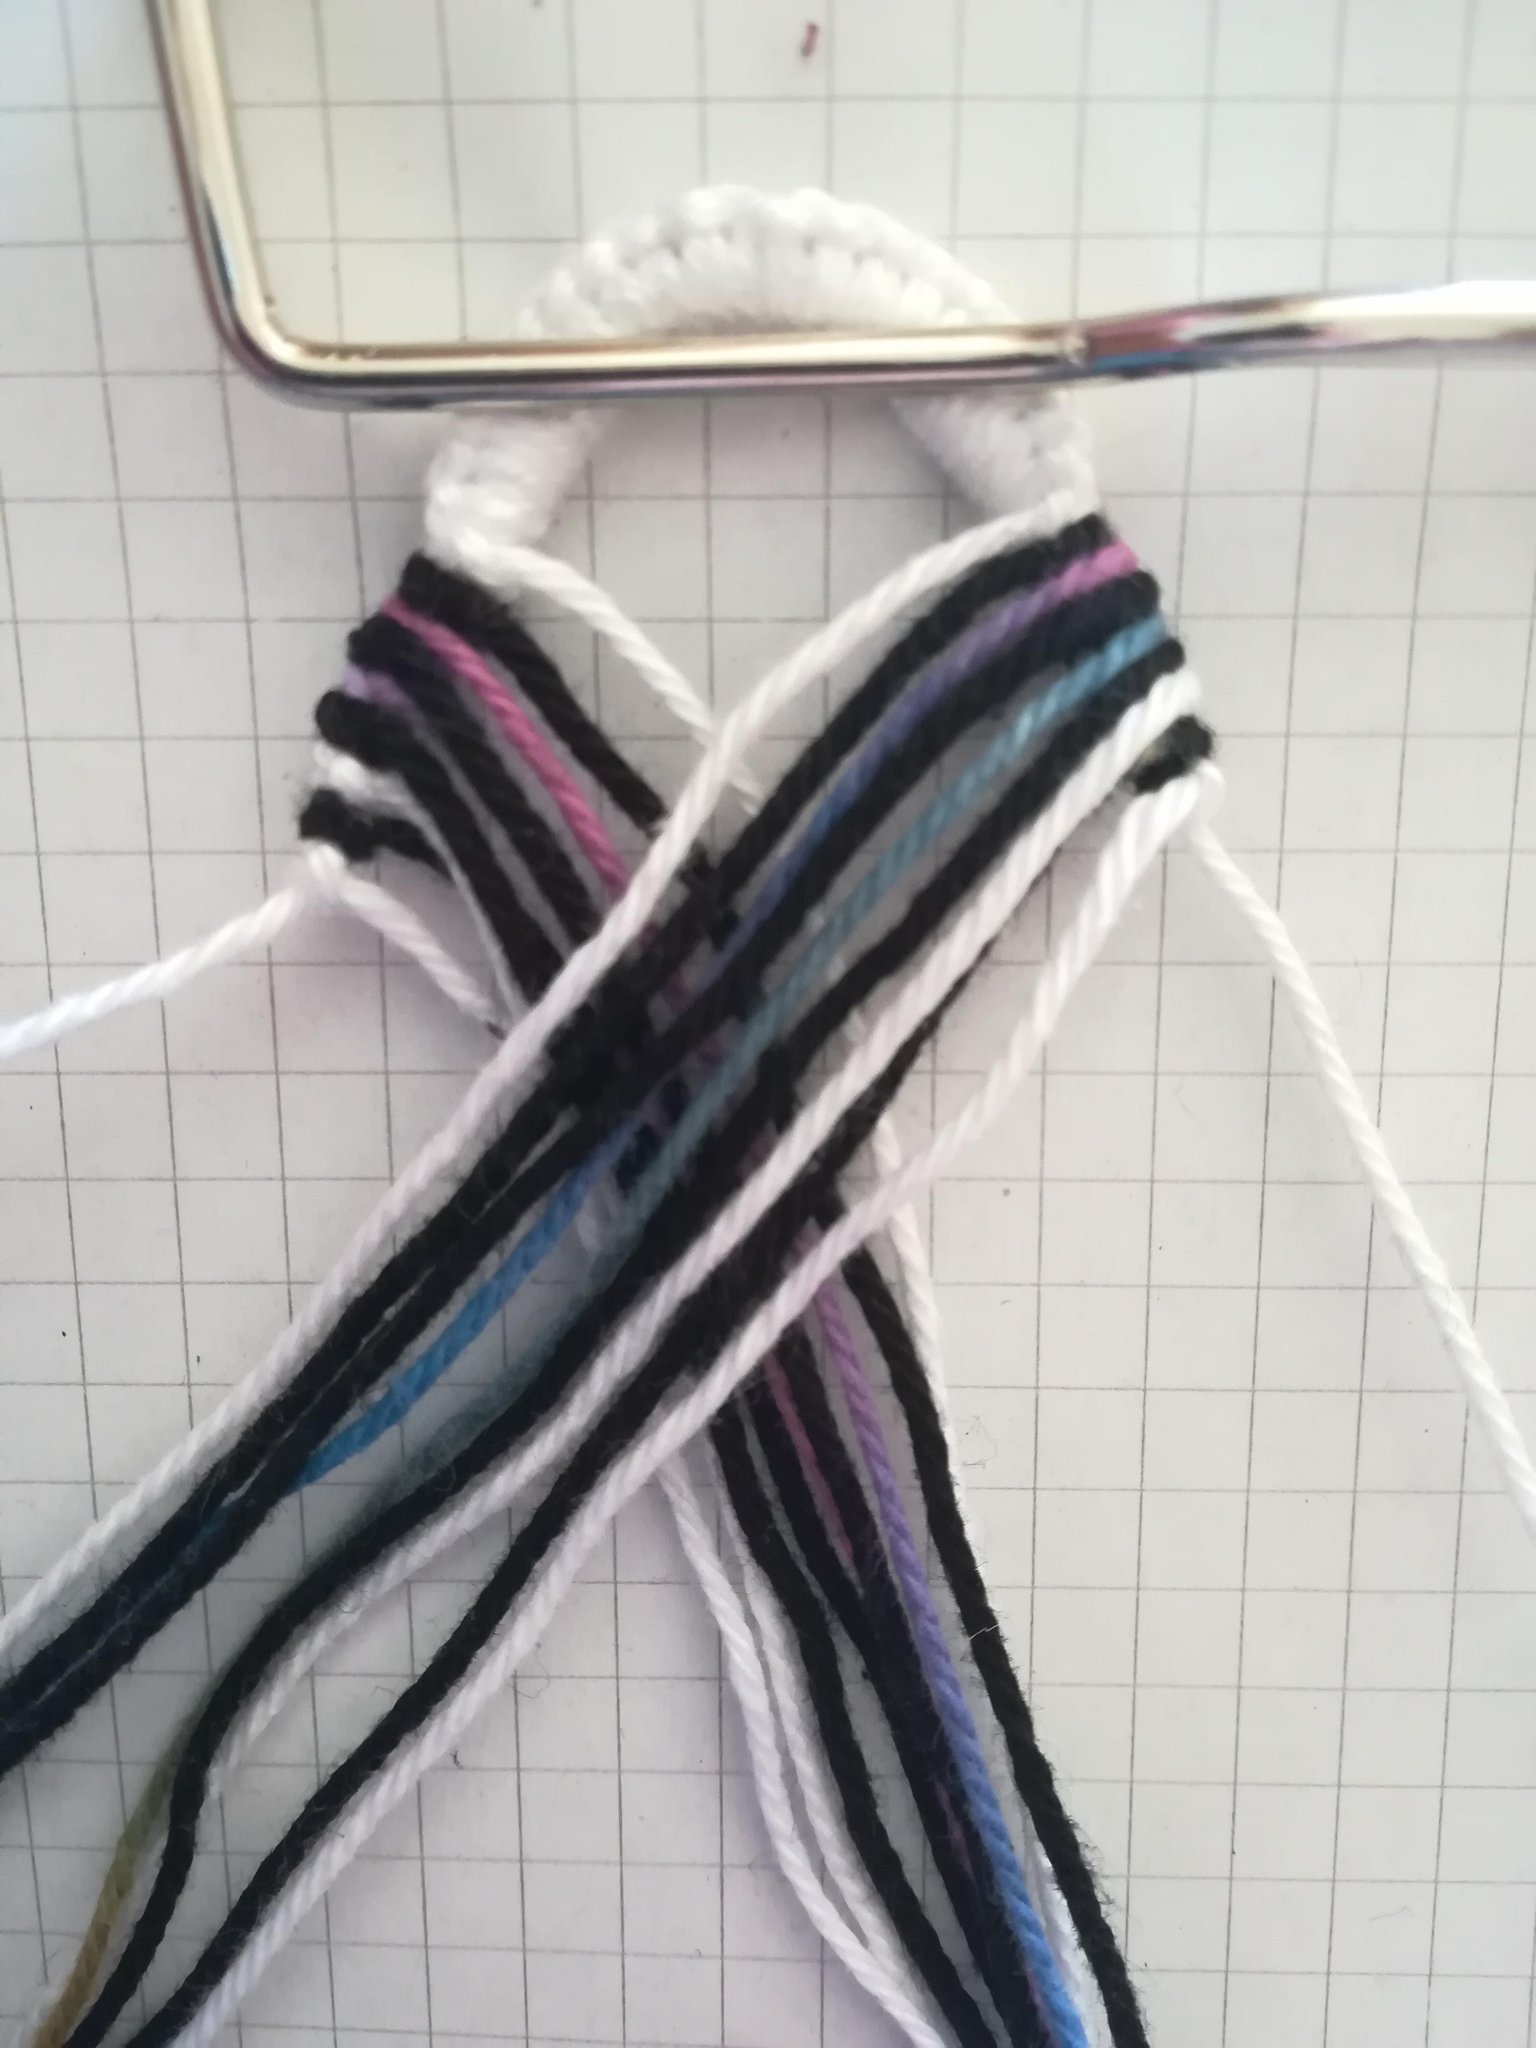
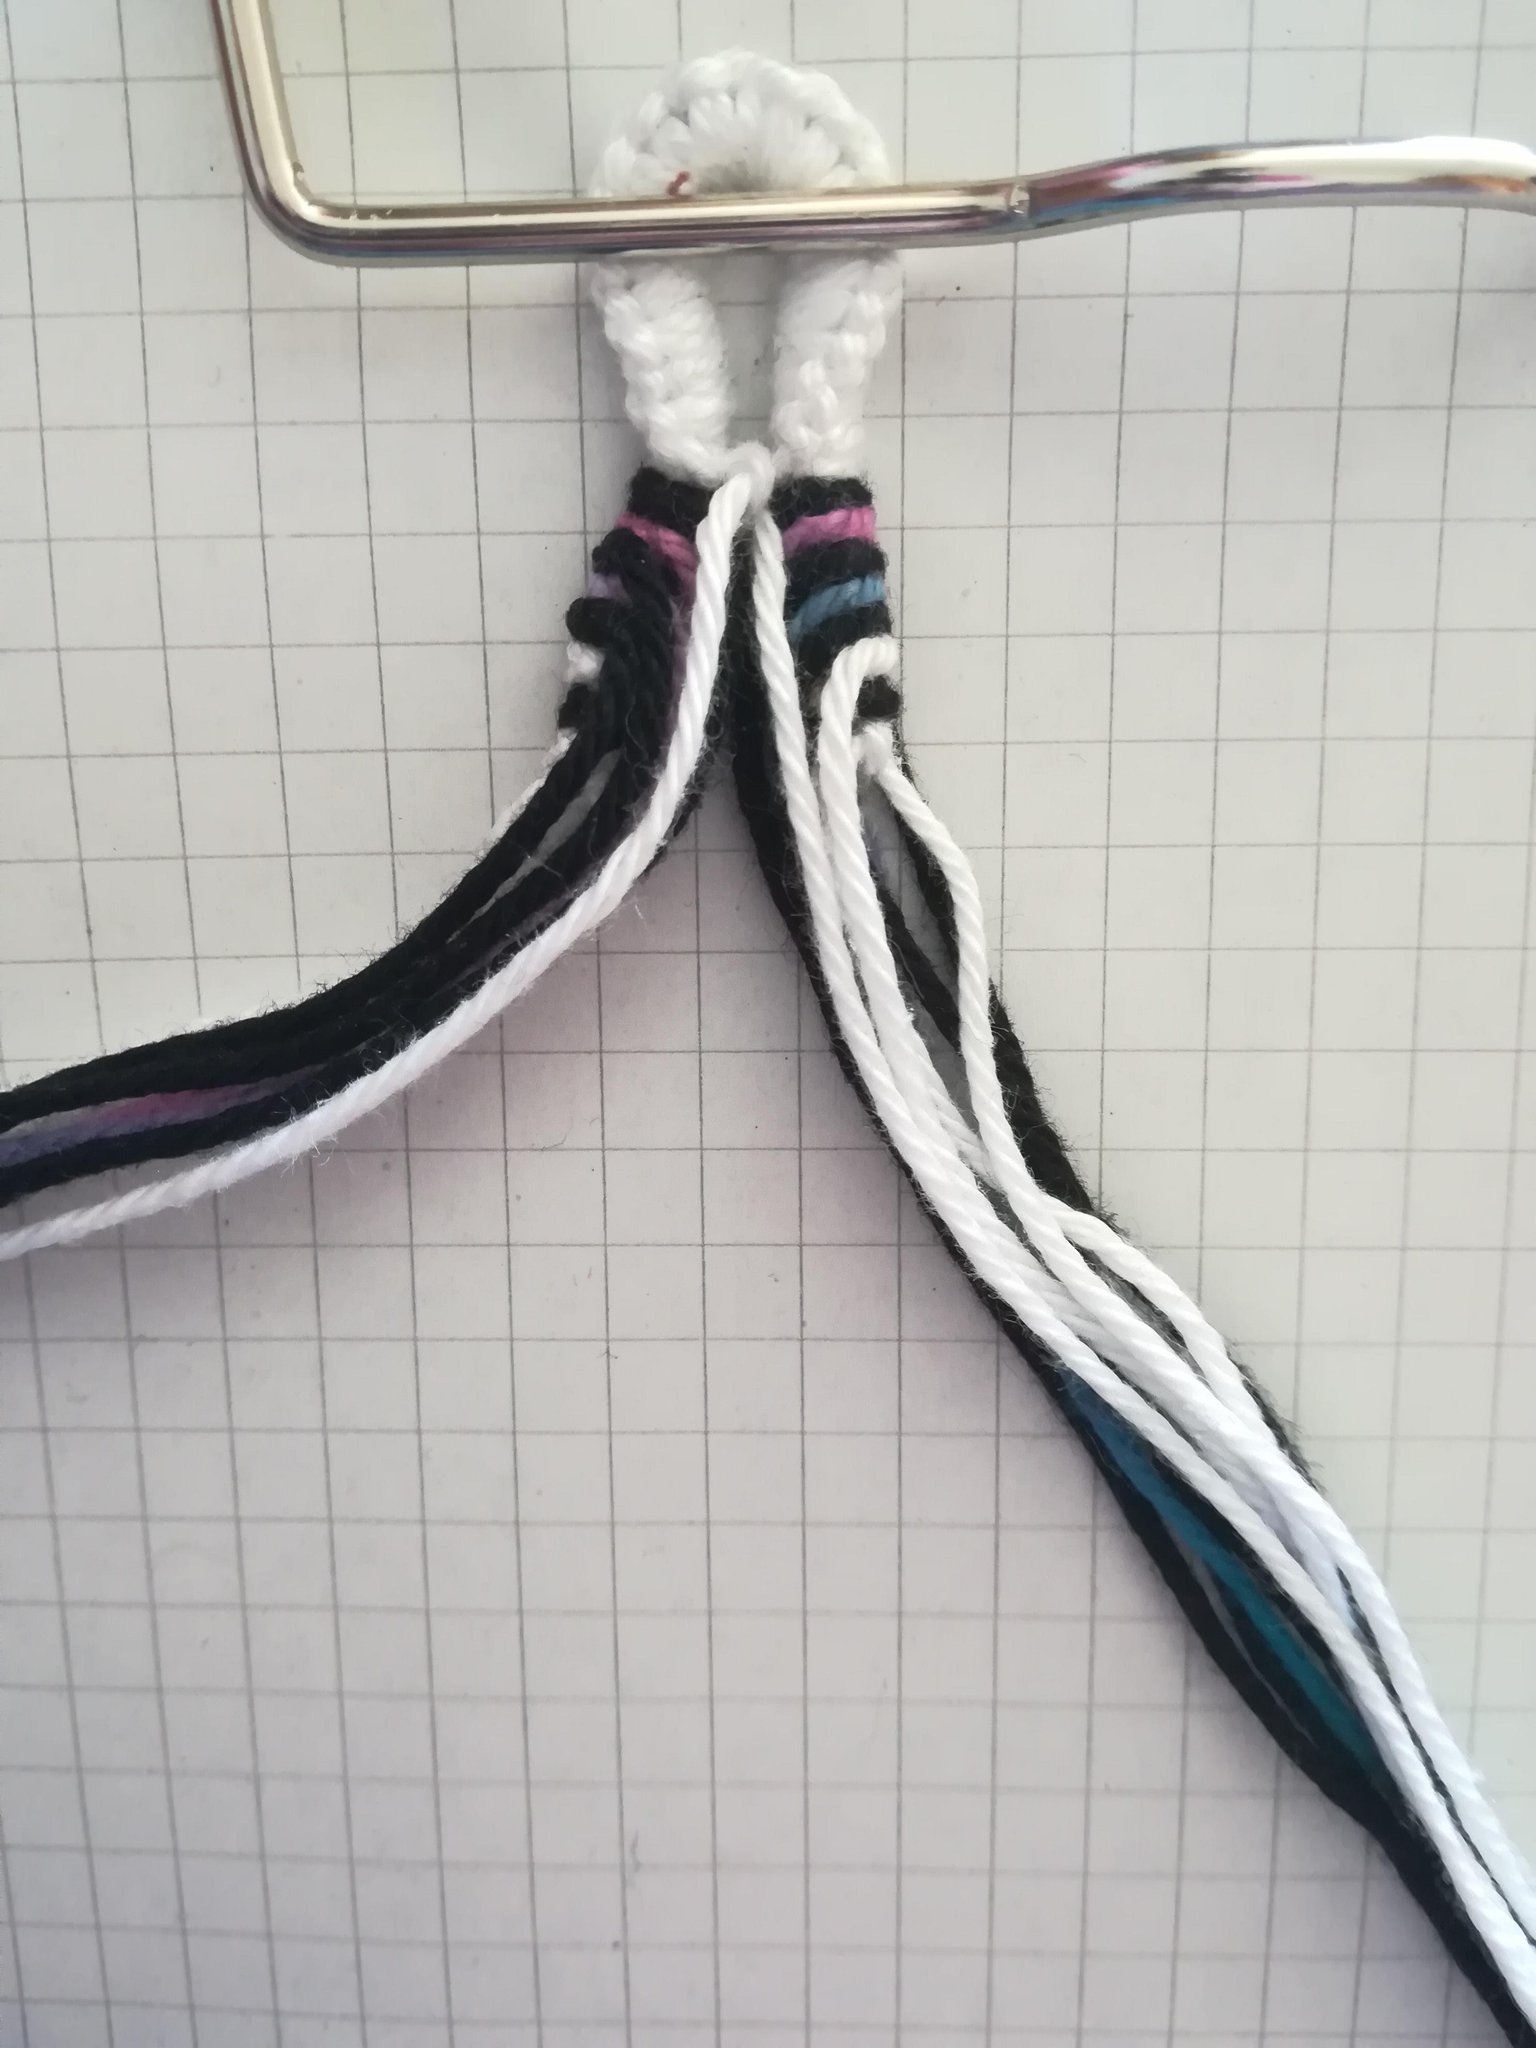
Take the string that crosses first and do a forward knot onto all other strings on the left side.
Take the second string and do a forward knots on all strings except the first one.
Take the third string and do a forward knot on all strings except the first and the second string.
Continue doing this with all strings on the left side.
Step 4
Do the right side of the triangle.
Repeat step 3 on the right side. You now need to do backwards knots instead of forward knots.
Repeat step 3 on the right side. You now need to do backwards knots instead of forward knots.
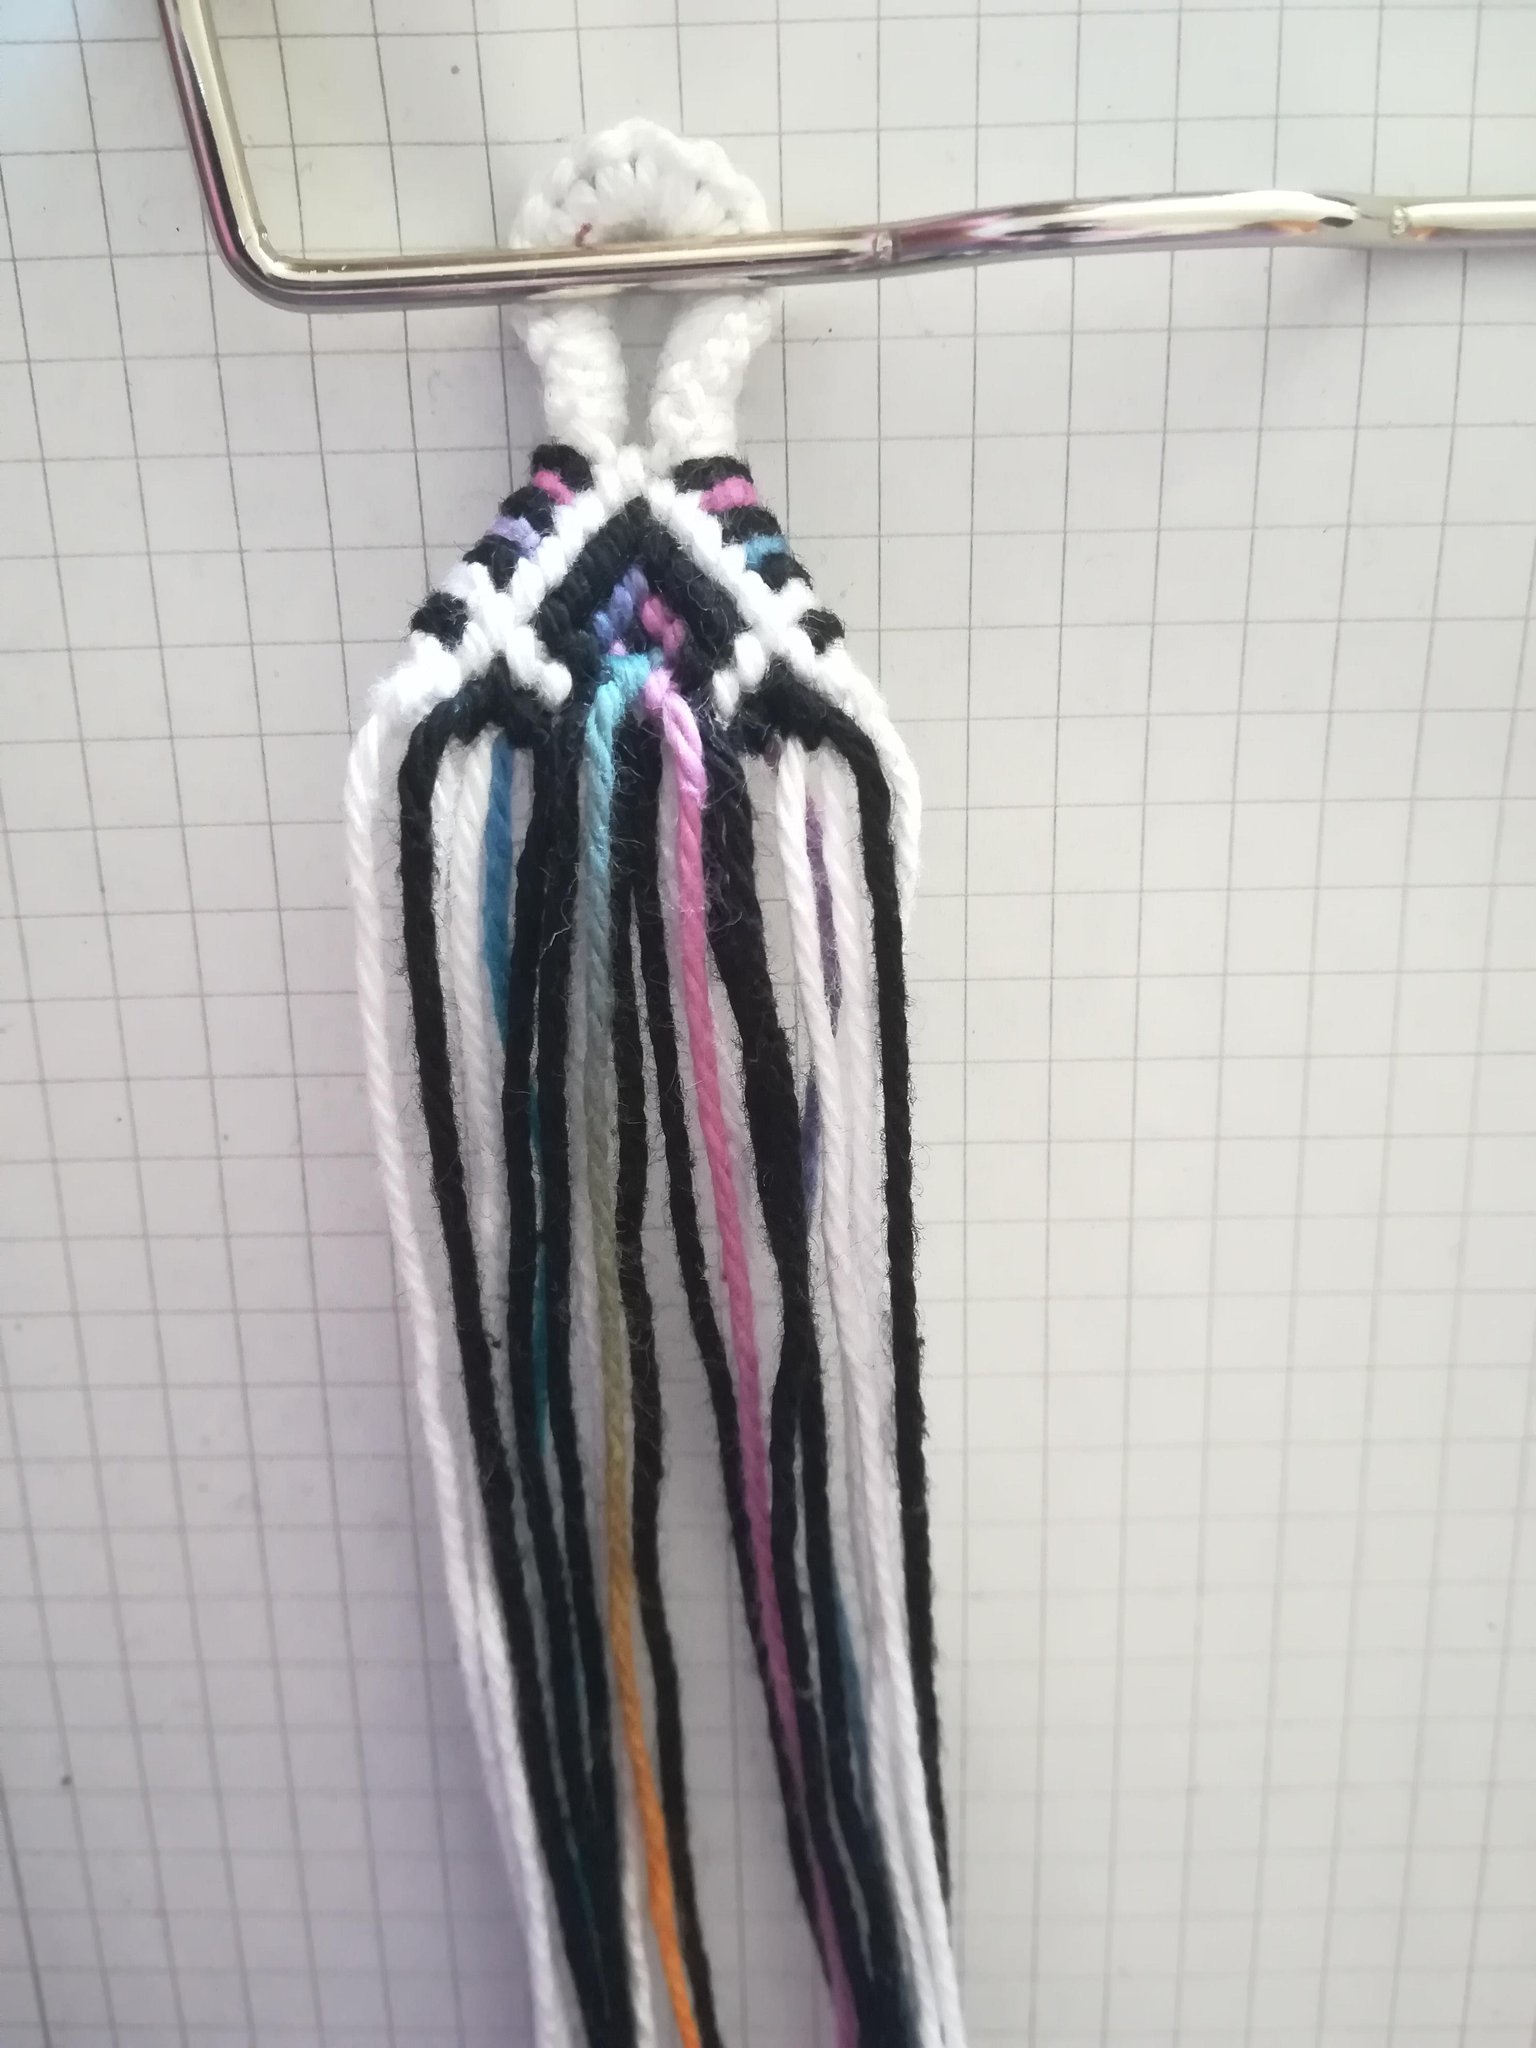
Step 5
Do the middle knot.
Do the knot that's on the tip of your triangle. It will connect the left side and the right side of your triangle.
It can be a bit tricky to do especially if you've made a loop before it. Try to make it as close to the top as possible.
Do the knot that's on the tip of your triangle. It will connect the left side and the right side of your triangle.
It can be a bit tricky to do especially if you've made a loop before it. Try to make it as close to the top as possible.
Step 6
Do the outline of your triangle.
Step 7
Do the knots inside of your triangle.
Look at all the knots within the triangle and do them. You can go row by row or in segments. I prefer segments.
After that you continue knotting your bracelet like you usually would.
Look at all the knots within the triangle and do them. You can go row by row or in segments. I prefer segments.
After that you continue knotting your bracelet like you usually would.
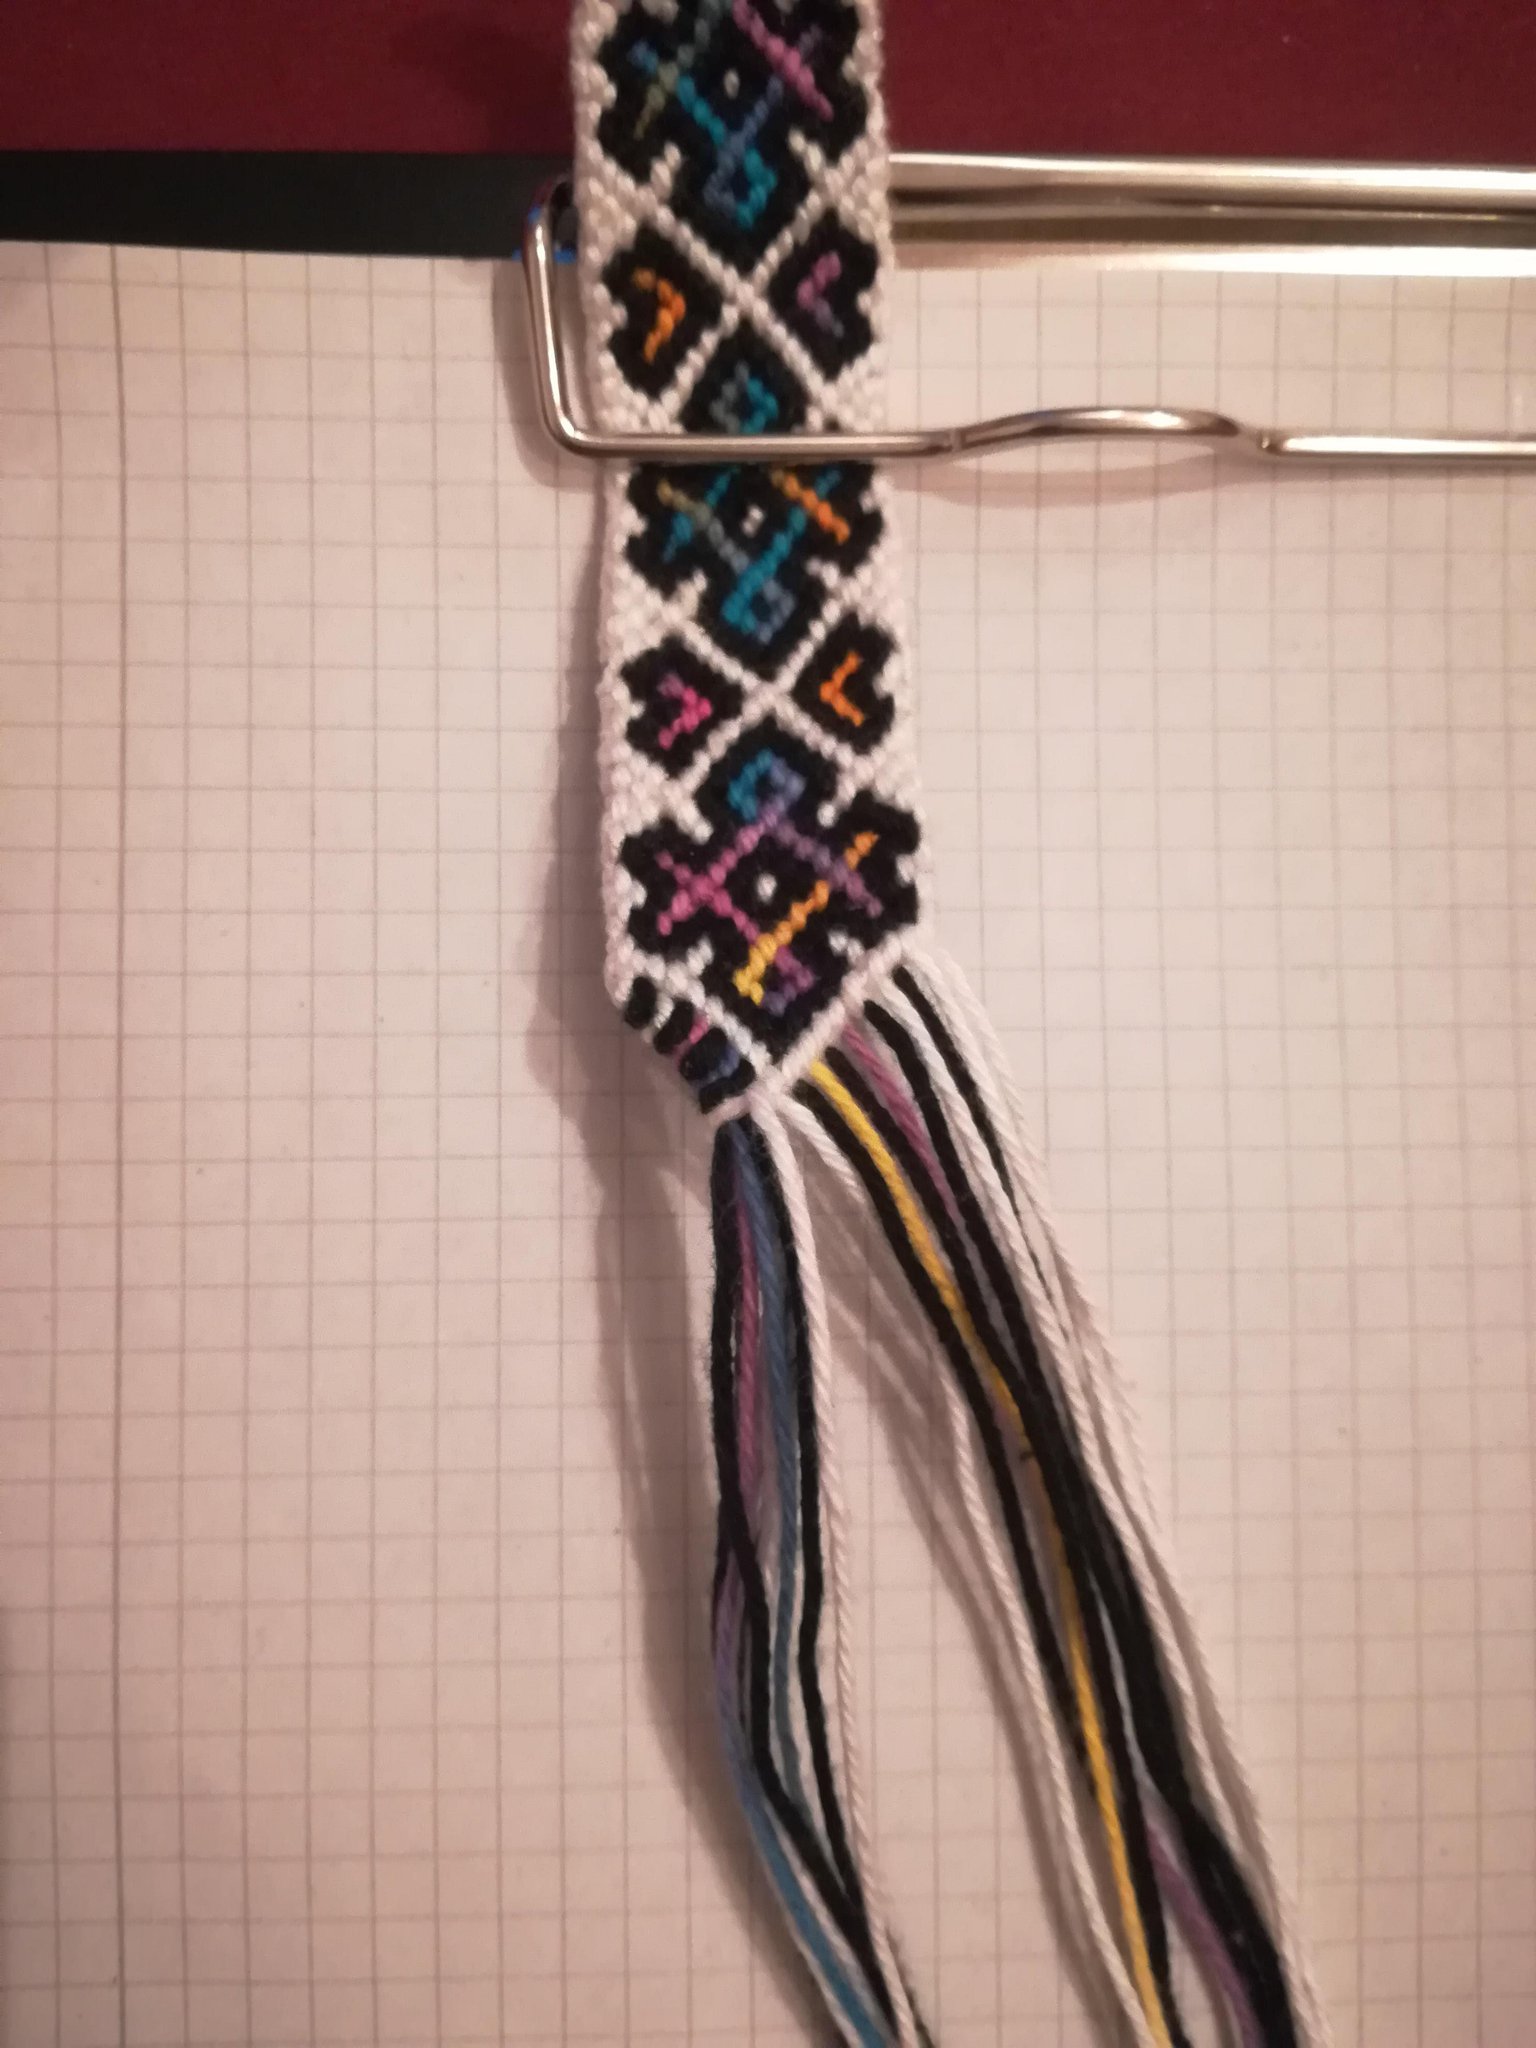
How to do the ending triangle
When your bracelet is finished, you can start making the ending triangle.
Step 1
Find a downward-facing triangle.

Step 2
Do all the knots inside the triangle.
After you did all your knots your going to work with the left side and the right side separately again. We'll start with the left side again.
After you did all your knots your going to work with the left side and the right side separately again. We'll start with the left side again.
Step 3
Do the left side of the triangle.
Take the second string that sticks out of the left side of the triangle and do a backwards knot on the first string.
Take the third string and do a backwards knot onto the first and second string at once.
Continue like this until you did a backwards knot with the last string onto all other strings on the left side.
Step 4
Do the right side of the triangle.
This step is similar to the previous step. Instead of doing backwards knots on the left side of your triangle you now do forward knots on the right side.
After that you can finish off your bracelet with any tie you like.
This step is similar to the previous step. Instead of doing backwards knots on the left side of your triangle you now do forward knots on the right side.
After that you can finish off your bracelet with any tie you like.