Rate Tutorial
This tutorial is inspired by the #83023 pattern made by @halokiwi and their photo of it. I don’t recommend making smaller cubes than made in this pattern, but it doesn't mean they are impossible to make, of course 😉. Patterns for bigger cubes can be found on my profile or other simply using the ‘Keywords’ box in the Patterns section and searching for ‘cube’.
For the pattern of @halokiwi you will need:
- 30 strings in 3 colours (10:10:10), 50 cm each (19.7 inches each)
- a lot of rather strong tape to stick the strings in place e.g. to a desktop
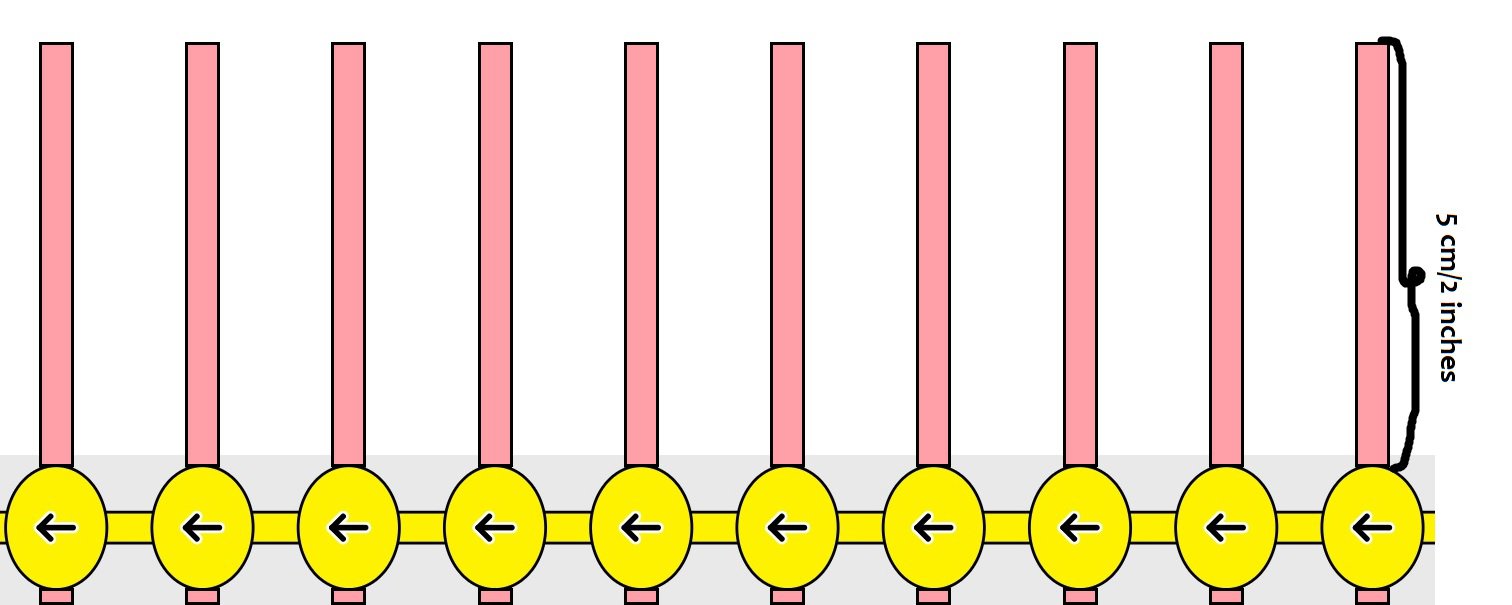
I recommend leaving 5cm (roughly 2 inches) of each string before making the first row of knots (it applies to EVERY string).
(Also, I recommend reading the whole tutorial first and then try doing it, to get the correct idea of everything 😉. )
For the pattern of @halokiwi you will need:
- 30 strings in 3 colours (10:10:10), 50 cm each (19.7 inches each)
- a lot of rather strong tape to stick the strings in place e.g. to a desktop
I recommend leaving 5cm (roughly 2 inches) of each string before making the first row of knots (it applies to EVERY string).
(Also, I recommend reading the whole tutorial first and then try doing it, to get the correct idea of everything 😉. )
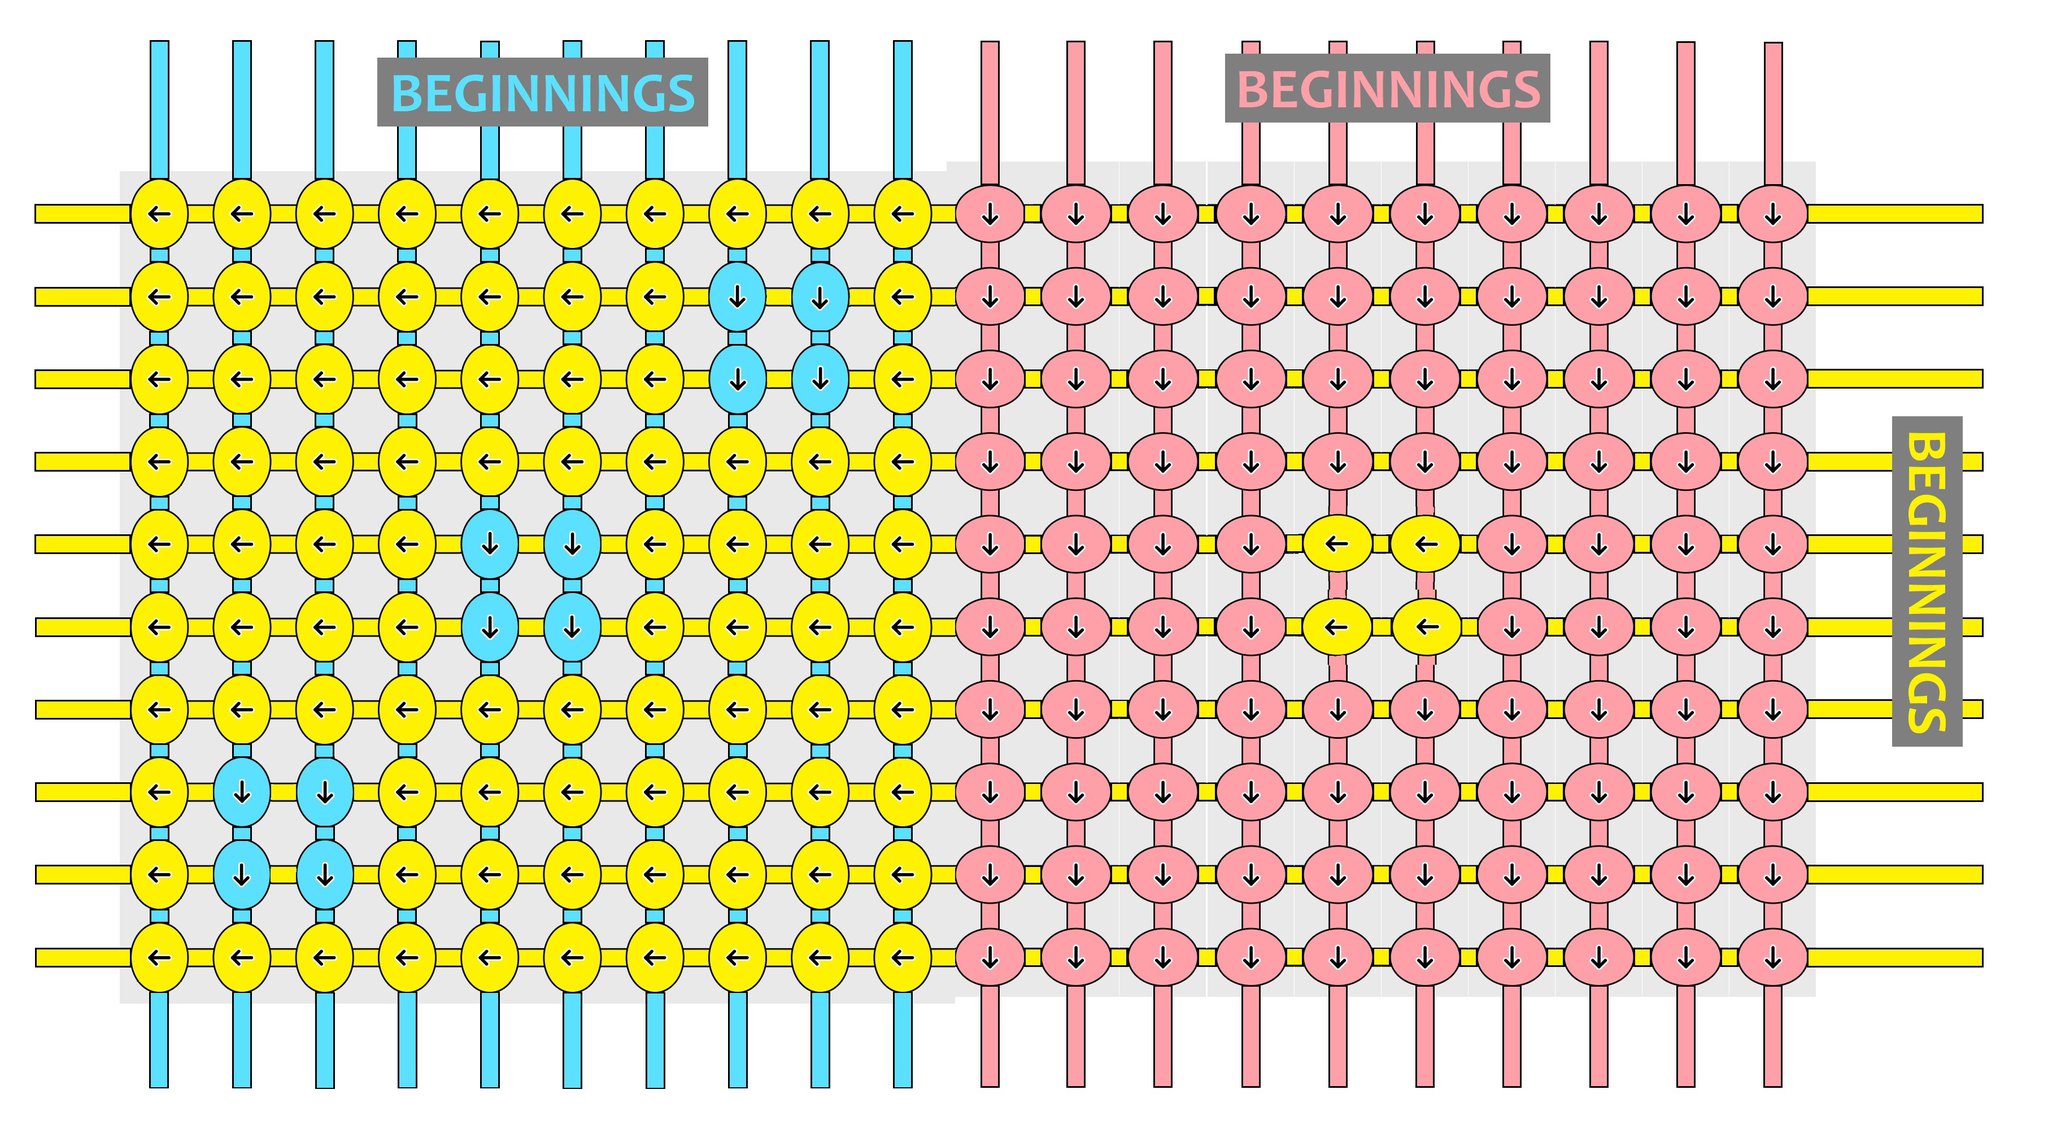
Now, whenever phrase ‘beginnings’ appears in the picture, it means there should be taped 5cm-long beginnings of the strings of given colour, also when ‘endings’ appears, it means there should be long parts of the strings of given colour.
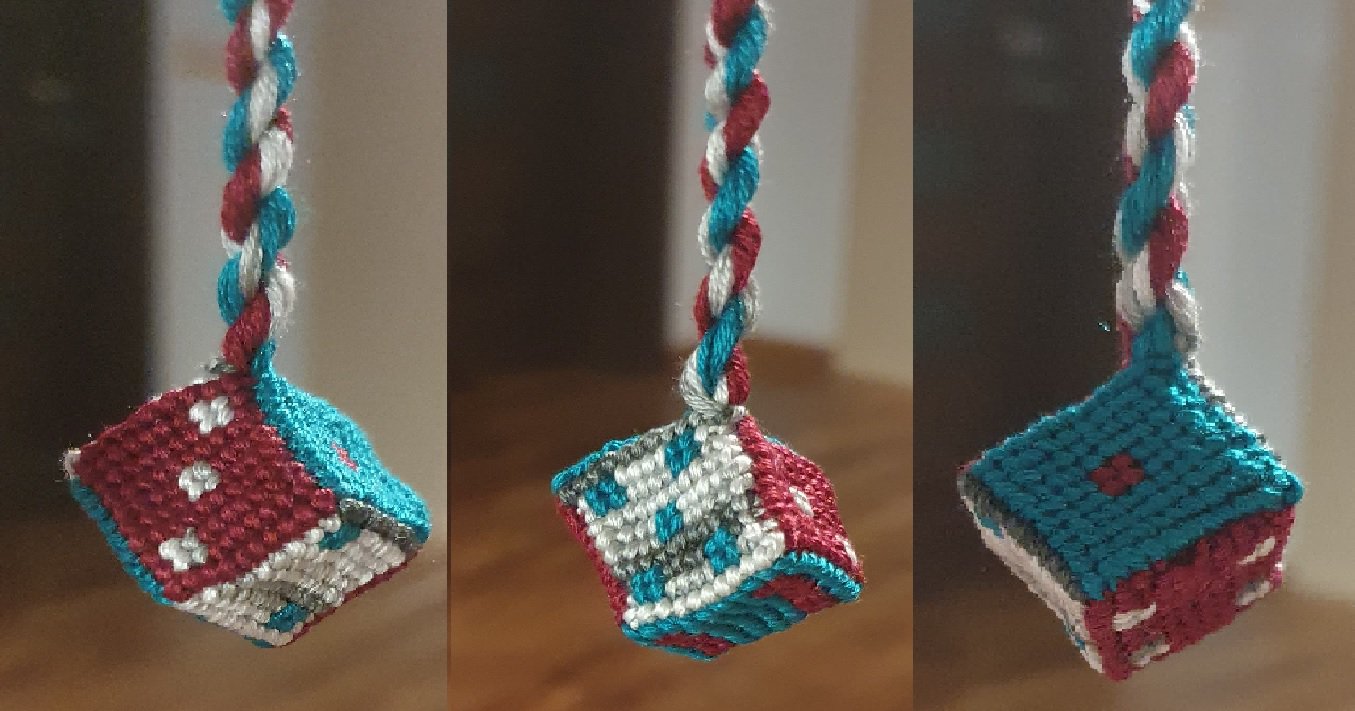
First, I began taping yellow and red strings as in the picture and making a side of the cube with one dot on it. Then I taped on blue strings and made the side with three dots, as shown on the picture.
First, I began taping yellow and red strings as in the picture and making a side of the cube with one dot on it. Then I taped on blue strings and made the side with three dots, as shown on the picture.
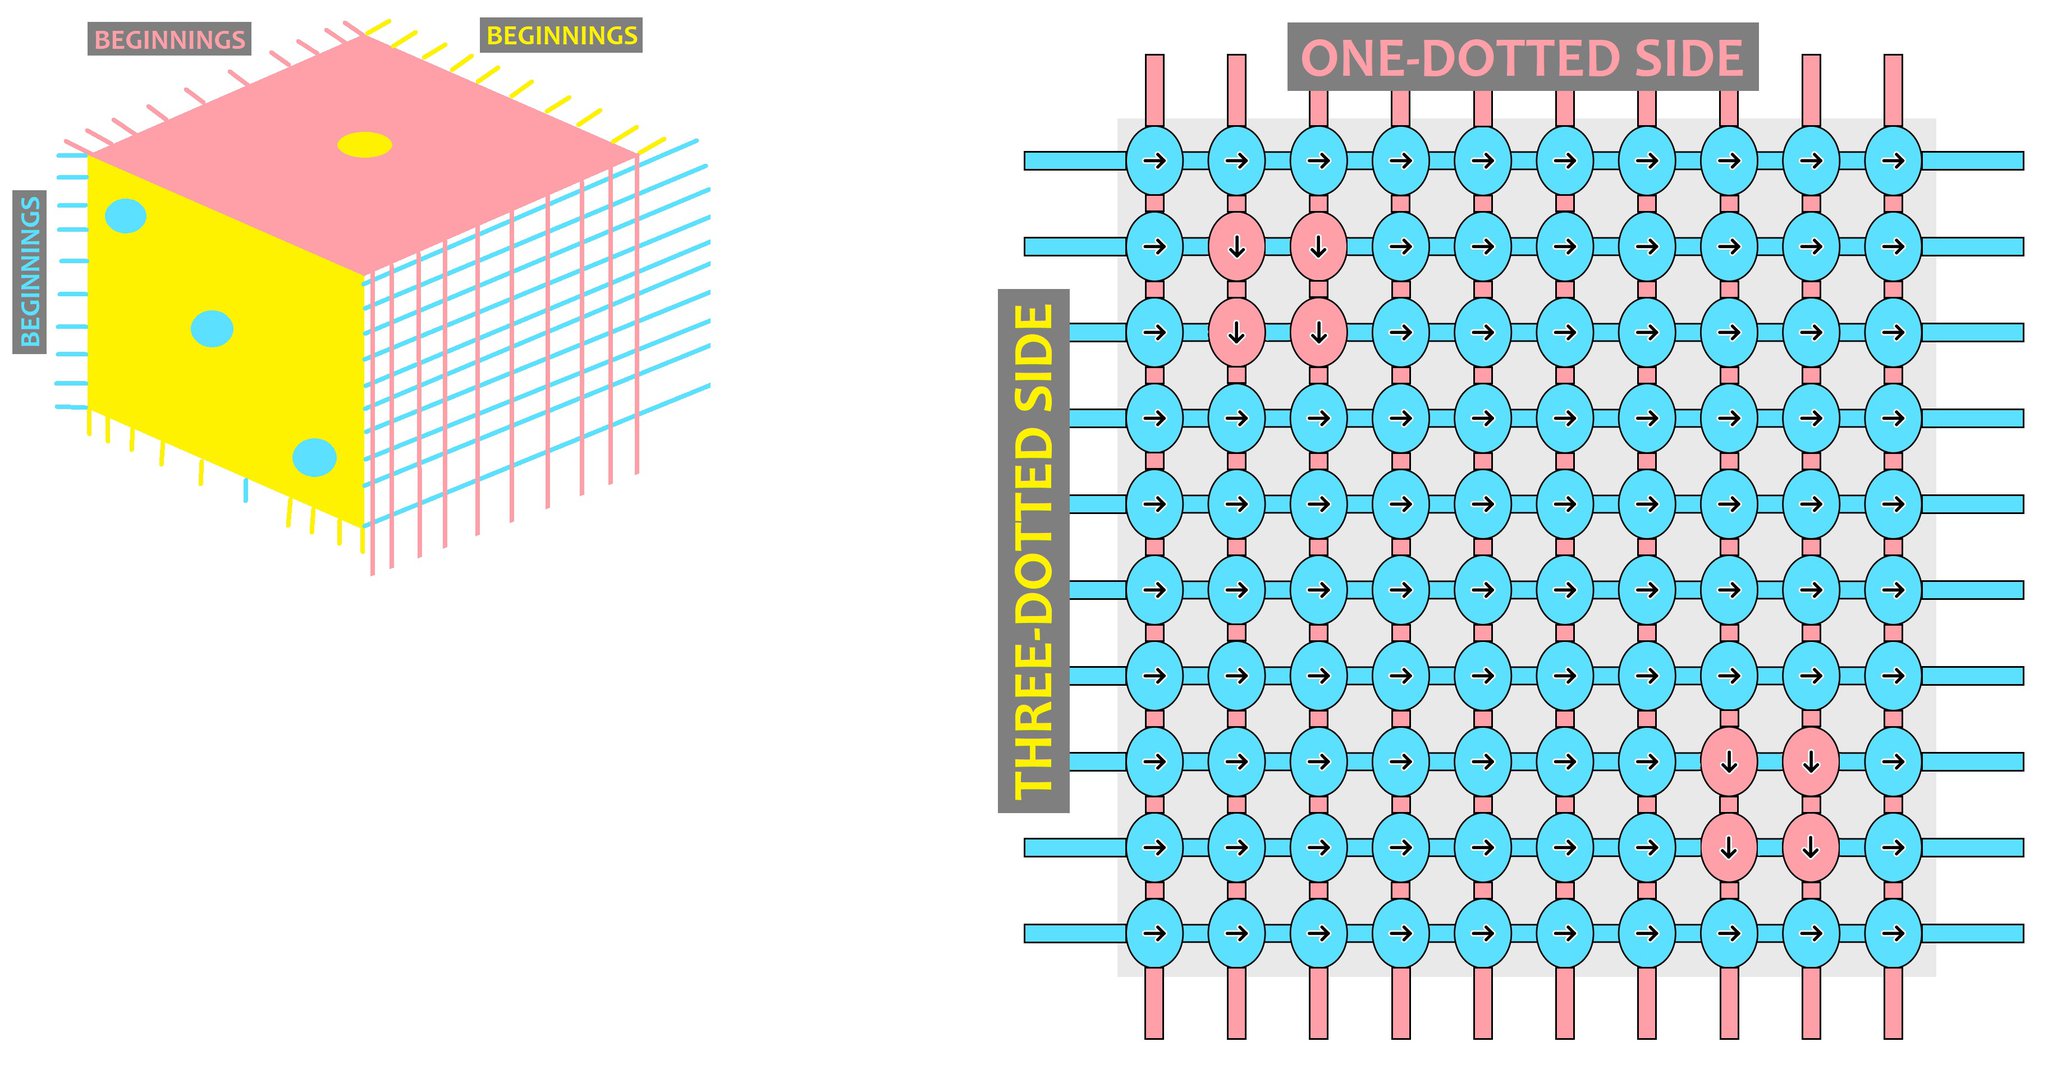
The next step is to fold the two sides that are made in a 90 degree angle, just as shown in the illustrative picture. Tape the whole project in place in a way that you will be able to make a two-dotted side out of blue and red strings (recommend taping red and blue beginnings).
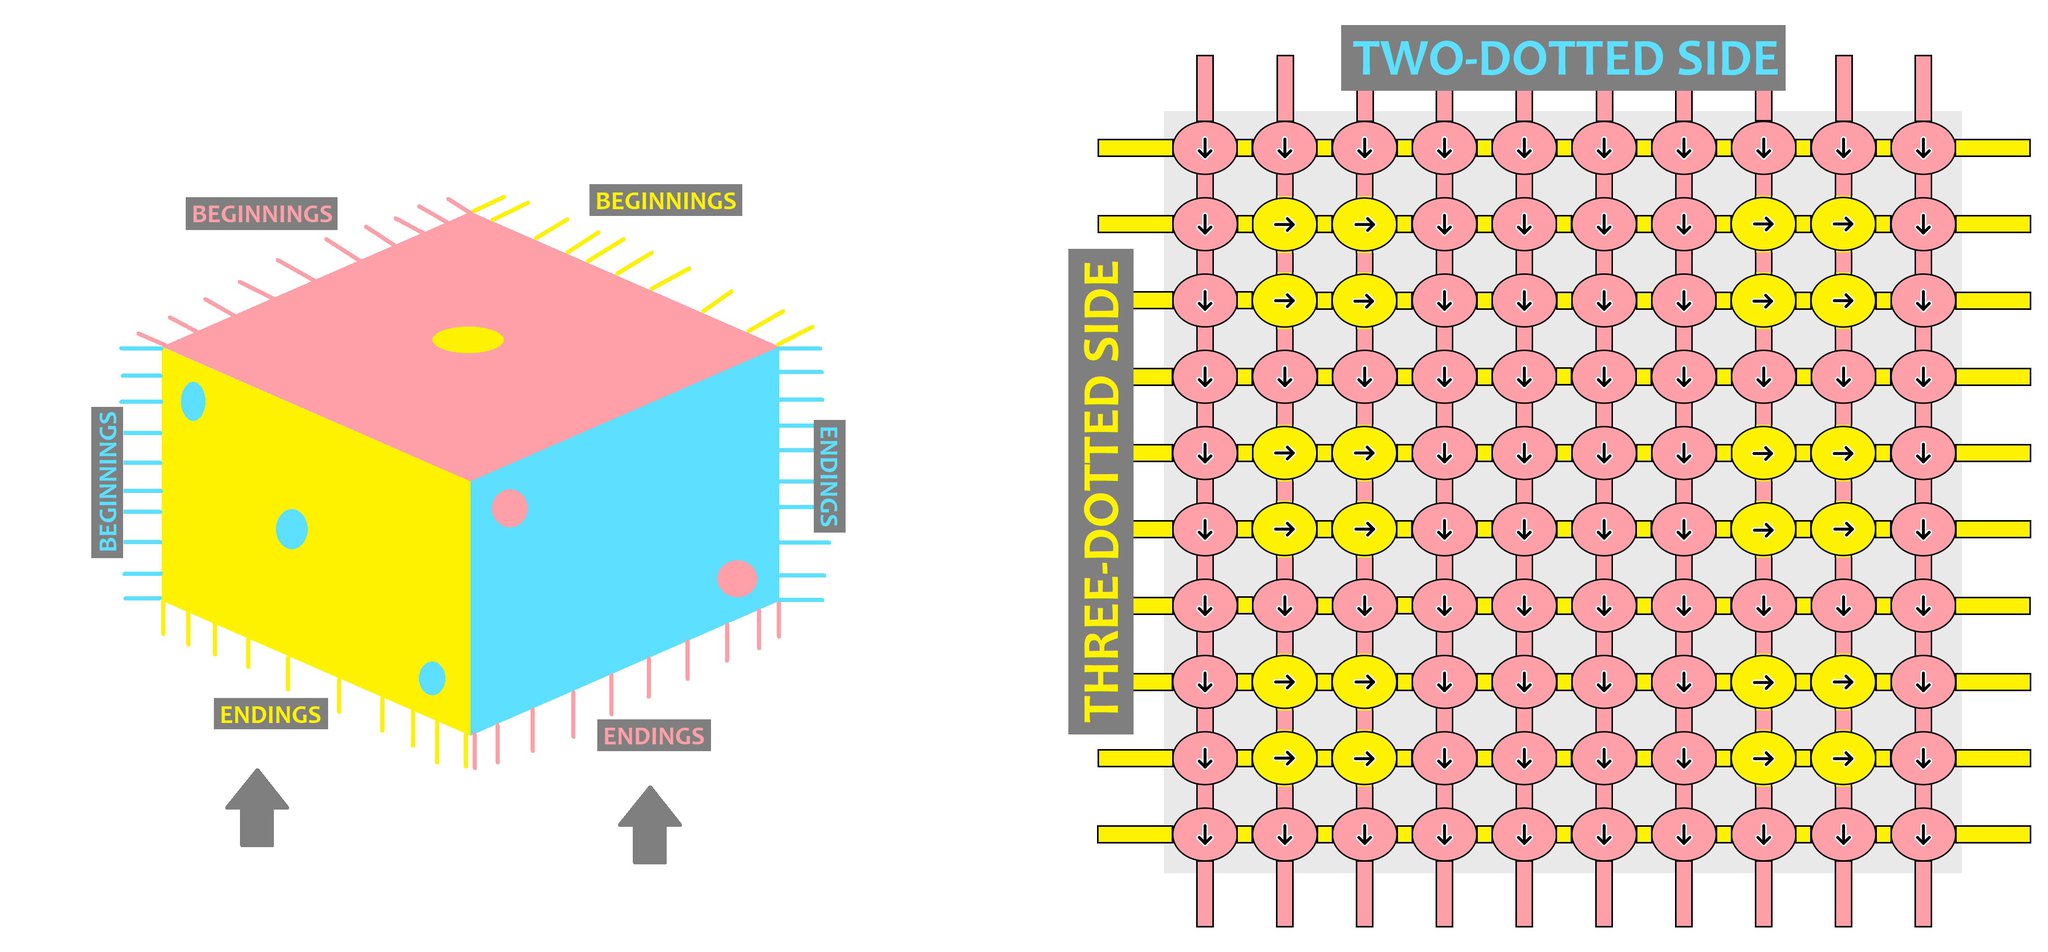
After finishing the two-dotted side, the whole project should look like in the following picture. Next step is to make a six-dotted side made out of red and yellow strings.

For the moment your cube should have four sides and look somewhat like in the picture. It doesn’t matter which side will be next either four-dotted one, or five-dotted, but I chose to do the four-dotted side first. The whole project should be turned as shown in the illustrative picture.

From one of the angles the beginnings and endings of yellow strings meet. Tie each string beginning and ending into a knot the way that the strings coming out of the knot end up ‘inside’ of your somewhat cube. You can cut short these ends (those that already ended up ‘inside’). You should end up with 10 knots, because you started with 10 yellow strings. If you want a braid or twist coming out of your finished cube with yellow colour, you should leave approx. 3 strings long and push them somewhere aside or into one corner. The last side is the five-dotted one and may be made as shown in the picture.
Now that every side of a cube is made, you can tie red and blue strings just like the yellow strings. If you decide to make a braid/twist, push every left-long string into one corner and just make it 😉
Hopefully my tutorial was helpful! Feel free to ask questions in the comments 😉
Hopefully my tutorial was helpful! Feel free to ask questions in the comments 😉