Rate Tutorial

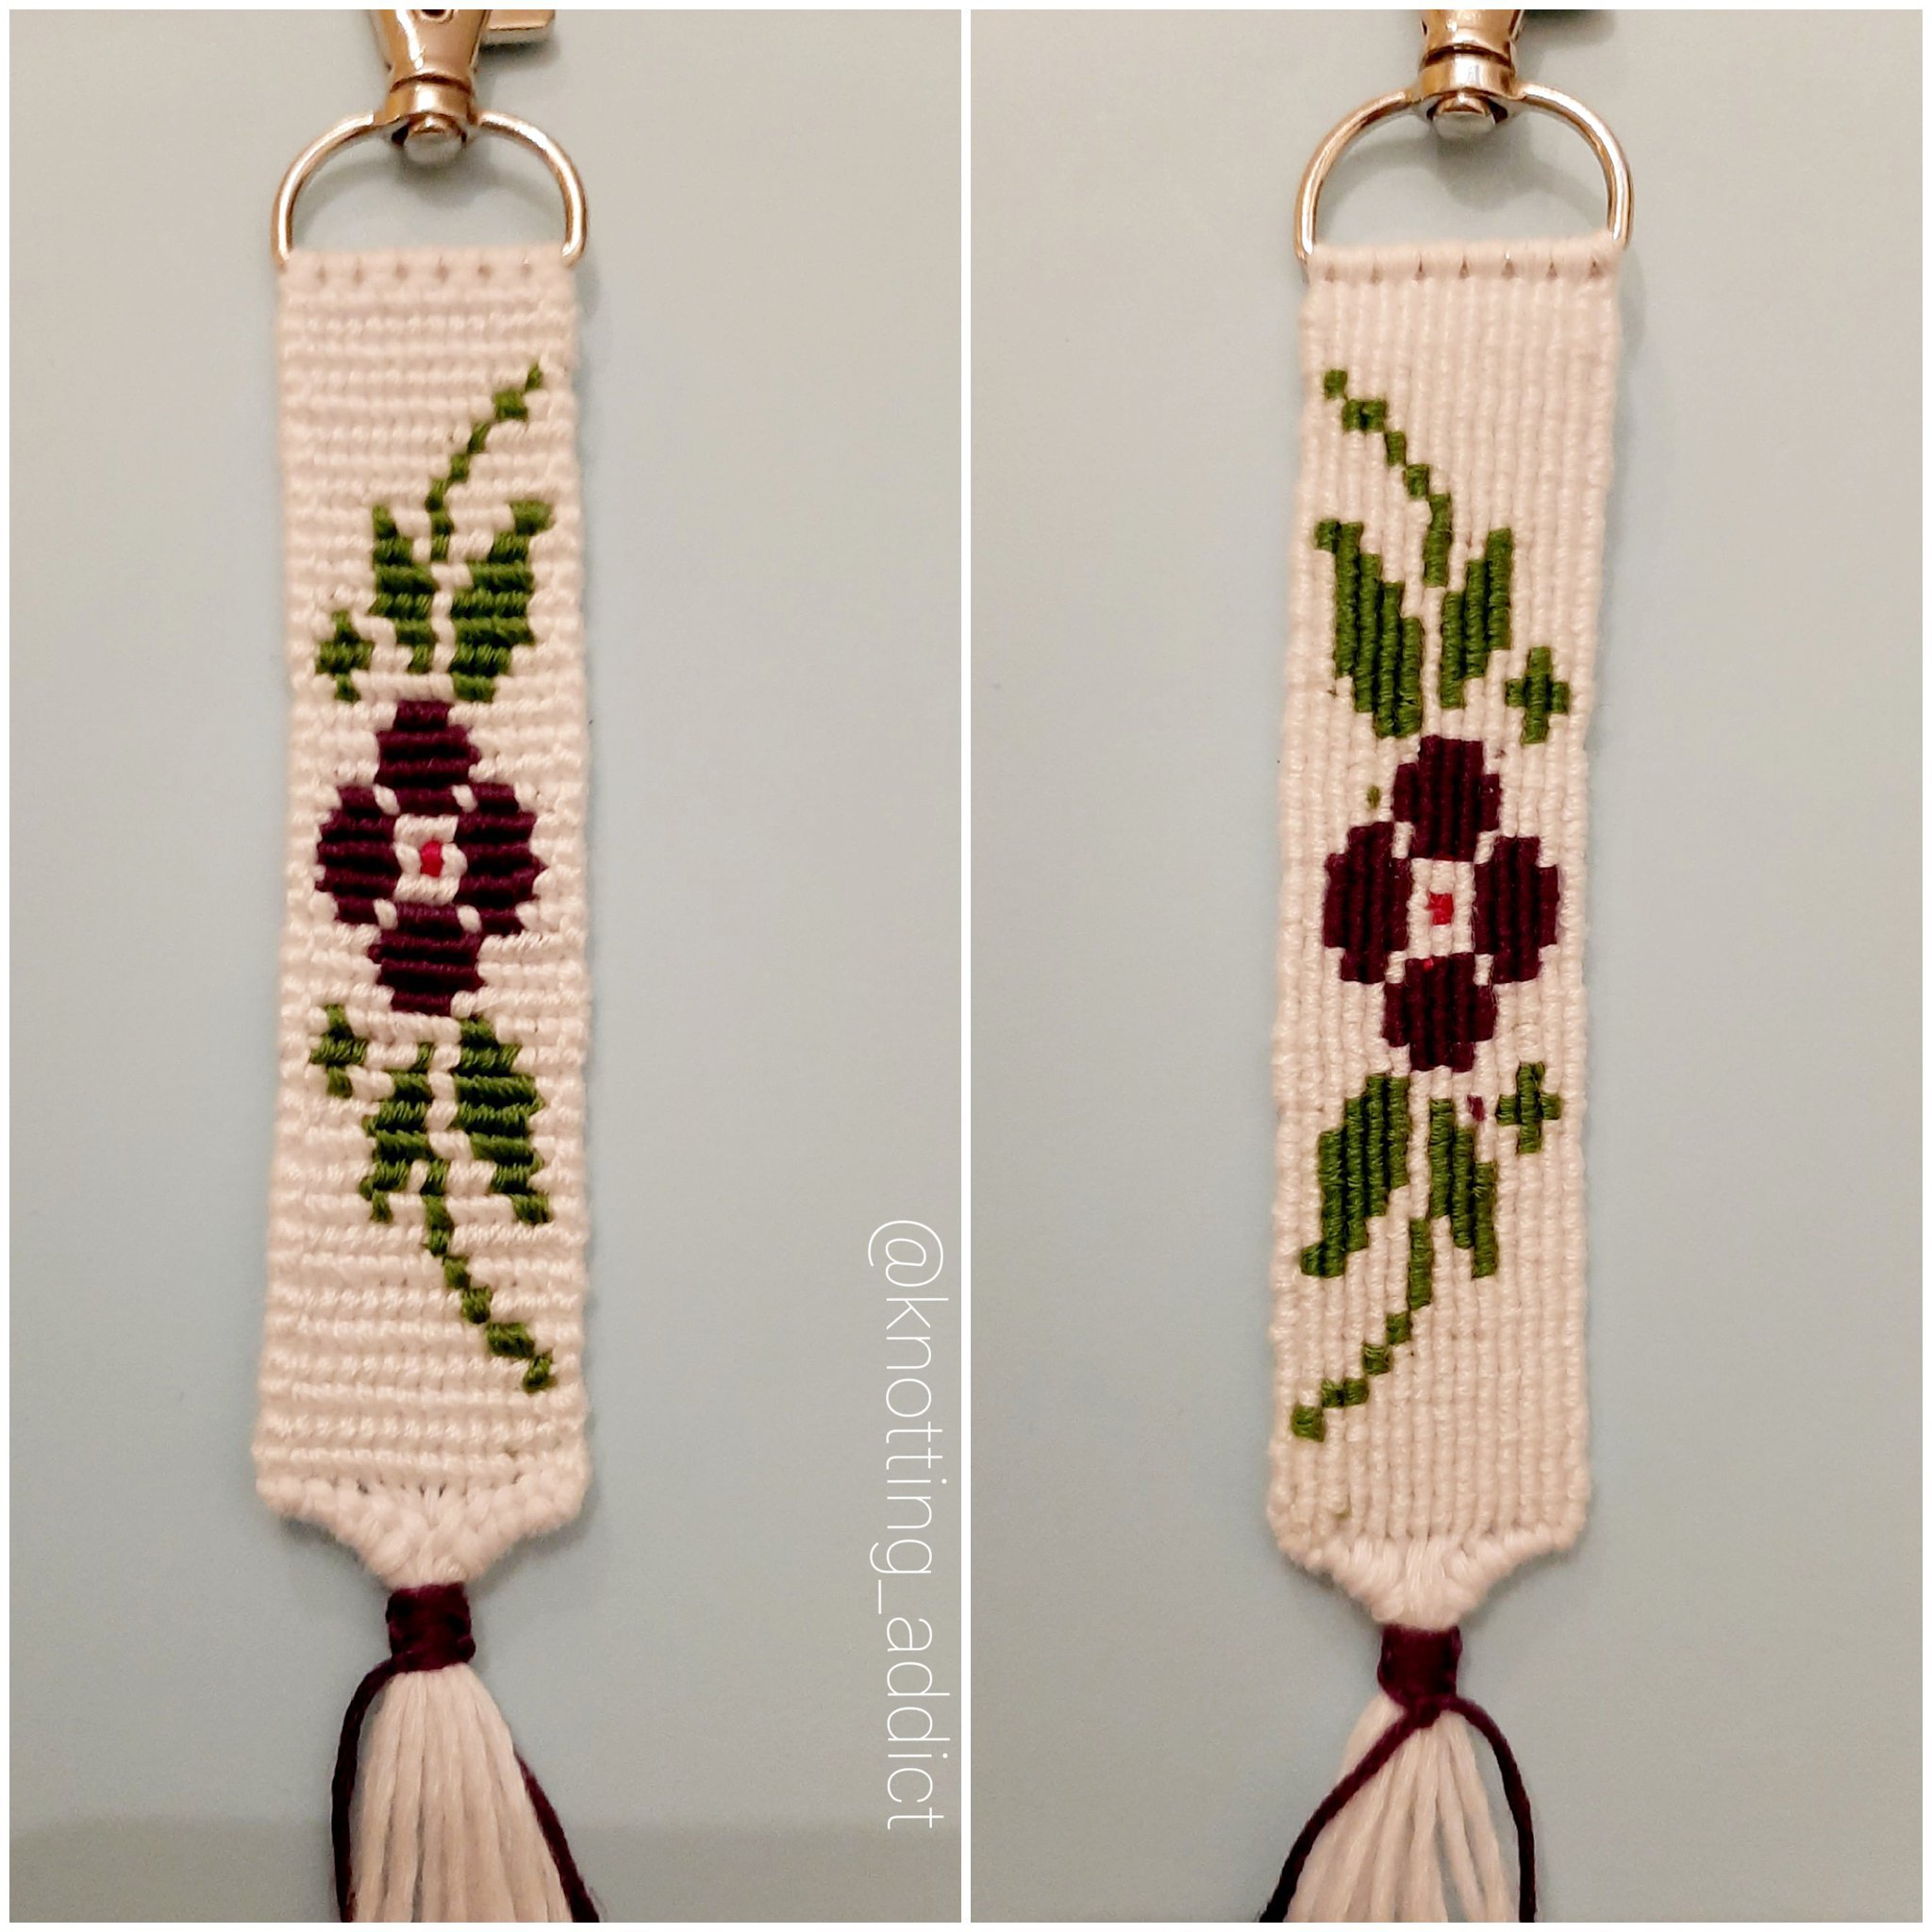
This tutorial explains how you can make a clean back alpha.
This is an alpha that has no strings running across the back.
This technique is especially useful for keychains, since both sides are visible. It can be used on alpha’s that do not have too many colour switches. It is helpful if you know the flat alpha technique since that uses the same technique.
I will first explain the basics and after that show you an example based on pattern #33800.
Have fun knotting and tag me when you make a clean alpha!
Kind regards,
Marjolein (@mjlgvw)
Basic technique
The basic principle is as follows:
- you feed the string that you do not need inside other knots
- you add in new colours one knot/row before you need them than normally
- you leave out colours you do not need anymore one knot/row later than normally
- for horizontal hidden knots you use the flat alpha technique
- for vertical hidden knots you double up with base strings
- for cornered hidden knots you combine flat alpha and base string knots
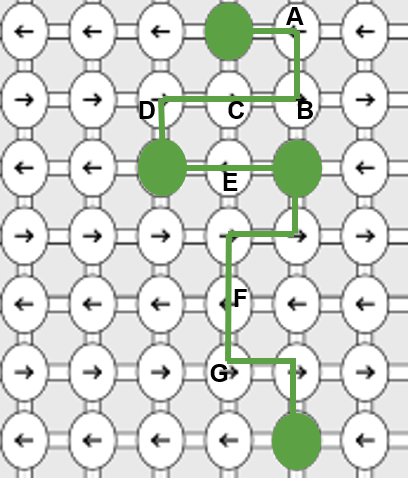
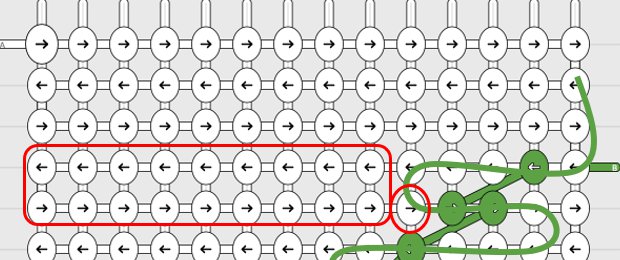
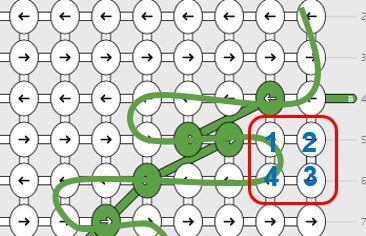
In this grid you can see the basic ‘hidden knots’ that you need to learn when you want to make a clean back alpha.
A knot: right and down
B knot: down and left
C knot: left
D knot: left and down
E knot: right
F knot: down
G knot: down and right
They will be explained next using pattern #33800.
A knot: right and down
B knot: down and left
C knot: left
D knot: left and down
E knot: right
F knot: down
G knot: down and right
They will be explained next using pattern #33800.
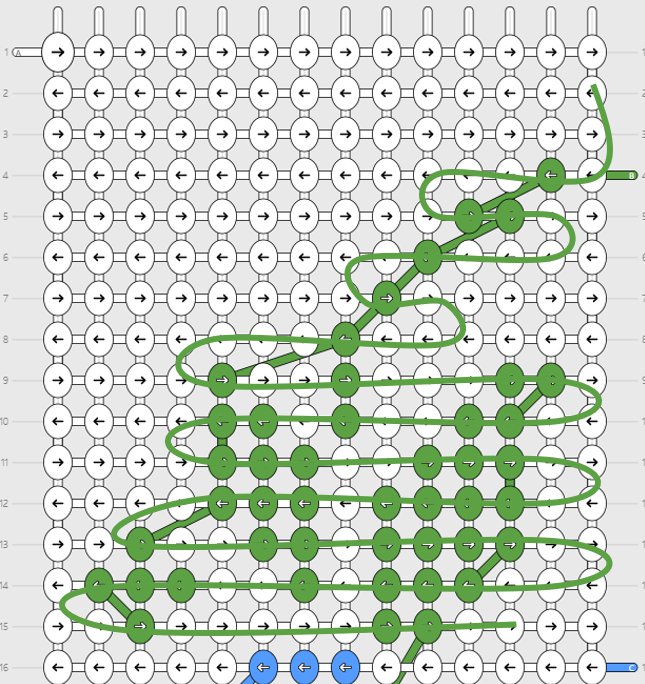
Your green string will follow this route through the white knots and will not be visible on the back of your work.
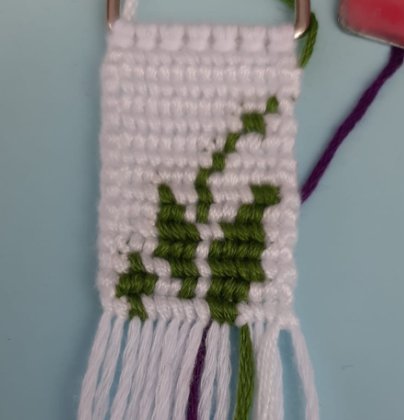
We start by making this part of pattern #33800.
We will be introducing the green string and making the first ‘hidden knots’.
We will be introducing the green string and making the first ‘hidden knots’.

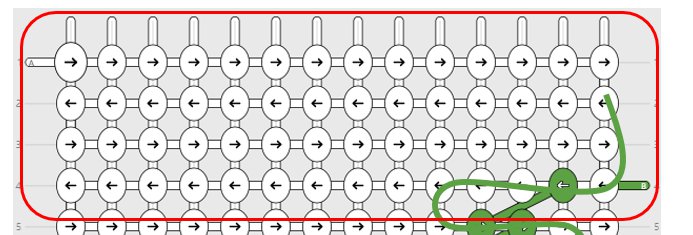
Prepare your base strings.
Knot the first row from left to right.
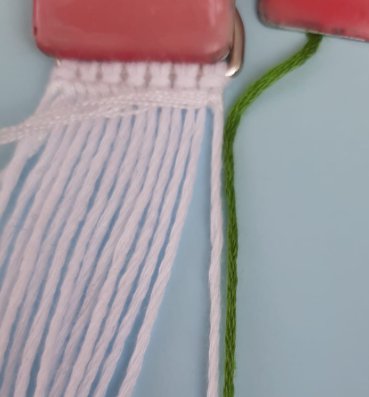
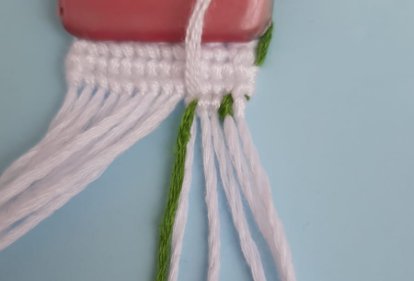
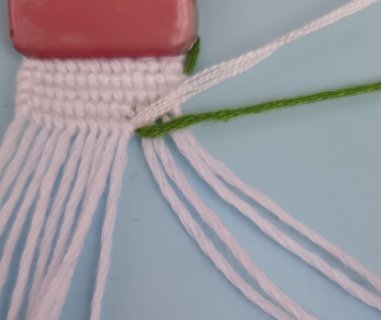
Prepare the green string by taping or clipping it to your board.
Align the green string next to the outside right string.
We add the green string before we need it so after you finish you can cut it with a pair of scissors as close to the knot as possible and it won’t get loose.
Prepare the green string by taping or clipping it to your board.
Align the green string next to the outside right string.
We add the green string before we need it so after you finish you can cut it with a pair of scissors as close to the knot as possible and it won’t get loose.
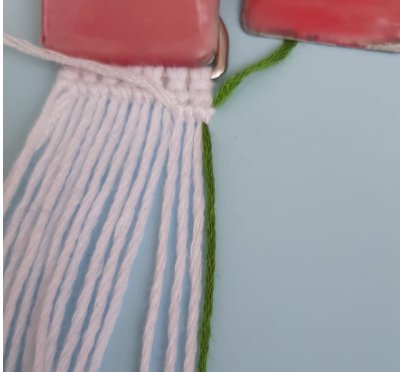
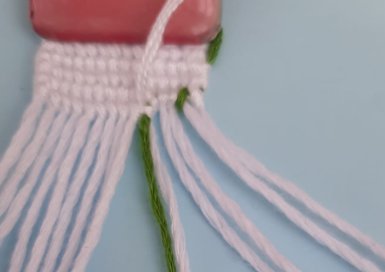
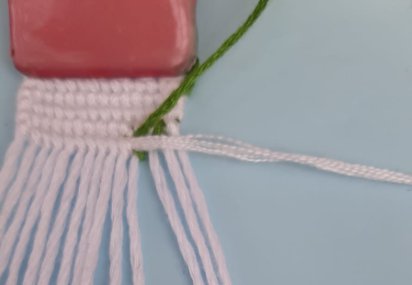
Knot the first knot of the second row over both the outside base string and the green string. This is an F knot (see above) where you just feed the hidden string down.
Repeat for row 3.
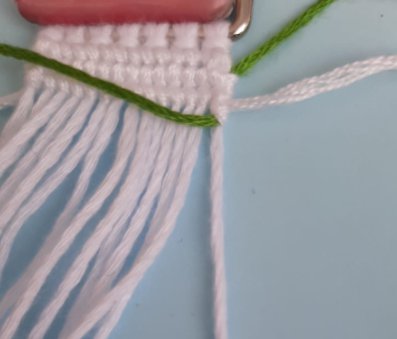
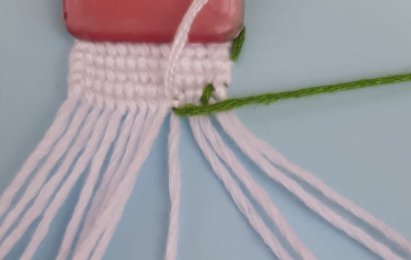
For row 4 start with a white B knot (see above):
- Step 1: Knot the first half of the right outside knot over both the base string and the green string.
- Step 2: pull the green string to the left
For row 4 start with a white B knot (see above):
- Step 1: Knot the first half of the right outside knot over both the base string and the green string.
- Step 2: pull the green string to the left
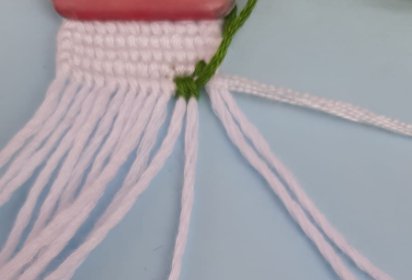
- Step 3: make the second half of the knot over only the base string.
You end up with both a green and a white leading string sticking out of the knot on the left side.
You end up with both a green and a white leading string sticking out of the knot on the left side.

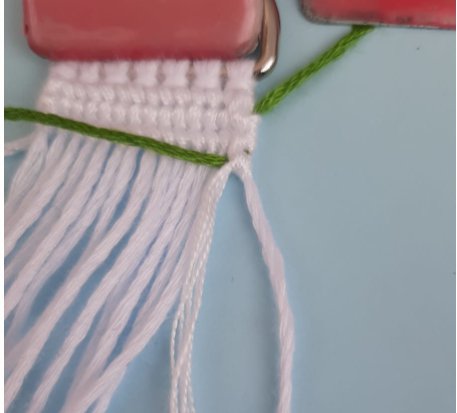
Now you will be making a green C knot.
- Step 1: make the first half of the knot with the green
- Step 1: make the first half of the knot with the green

- Step 2: pull the white string to the left

- Step 3: make the second half of the green knot where you knot over the horizontal white string (flat alpha technique).
You end up with both a green and a white leading string sticking out of the knot on the left side.
You end up with both a green and a white leading string sticking out of the knot on the left side.

Now we need two more C knots.
You feed the green string through the white knots using the flat alpha technique.
You end up with both a green and a white leading string sticking out of the knot on the left side.
You feed the green string through the white knots using the flat alpha technique.
You end up with both a green and a white leading string sticking out of the knot on the left side.

Now we need a D knot to feed the string down.
Make the D knot as follows
- Step 1: make the first half of the knot
- Step 2: pull the green string down along the base string
- Step 3: make the second half of the knot over both the green string and the base string together
You end up with both a green and a white leading string sticking out of the knot. The white continues left. The green string goes down.
Continue making the white rows until you reach the place where the green string comes down from the previous row.
Now we need to make a white knot to hide the green and feed it right. We will make a G knot.
- Step 1: Make the first half of the white knot onto both the base string and the green string.
- Step 1: Make the first half of the white knot onto both the base string and the green string.
- Step 2: pull the green string to the right
- Step 3: make the second half of the white knot onto the base string
You end up with both a green and a white leading string sticking out of the knot on the right side.
You end up with both a green and a white leading string sticking out of the knot on the right side.
Then we need two green knots and hide the white string. We will do this making two E knots.
- Step 1: make the first half of the green knot
- Step 2: pull the white string to the right
- Step 1: make the first half of the green knot
- Step 2: pull the white string to the right
- Step 3: finish the second half of the green knot hiding the white string (flat alpha technique)
Repeat for the next green string.
Repeat for the next green string.
Continue making the following knots:
1. A knot (hide green feeding it to the right and down)
2. Regular outside white knot
3. Regular outside white knot
4. B knot (hide green feeding it down and left)
1. A knot (hide green feeding it to the right and down)
2. Regular outside white knot
3. Regular outside white knot
4. B knot (hide green feeding it down and left)

Continue using this technique. Here you can see which knots you would have to make in the next few lines. By then you probably figured it out.

This continues all the way down to the end of the green.
Make sure you add the colour of your flower in line 15.
This way you secure it so after you finish you can cut it with a pair of scissors as close to the knot as possible and it won’t get loose.
This way you secure it so after you finish you can cut it with a pair of scissors as close to the knot as possible and it won’t get loose.
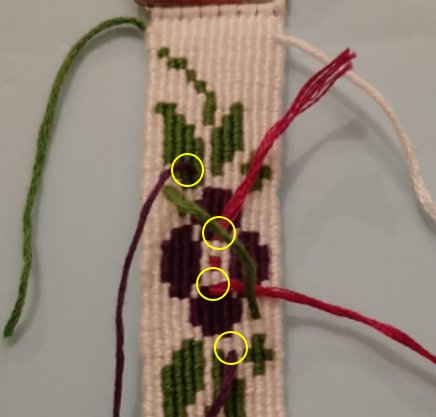
Make the flower continuing this technique.
Make sure you add the colour of the flower center in one row before and leave it our one row later, so after you finish you can cut it with a pair of scissors as close to the knot as possible and it won’t get loose.
Make sure you add the colour of the flower center in one row before and leave it our one row later, so after you finish you can cut it with a pair of scissors as close to the knot as possible and it won’t get loose.
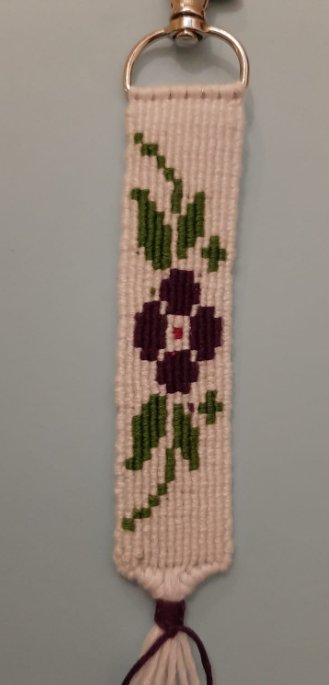
After you finish, cut off all the excess string from the back and you are done 🙂.