Rate Tutorial

Hello! In this tutorial, I'd like to teach you how to add charms to friendship bracelets or how to start a bracelet based on a charm. It's really easy and for one of these techniques, the charm is removable if you wish to remove it.
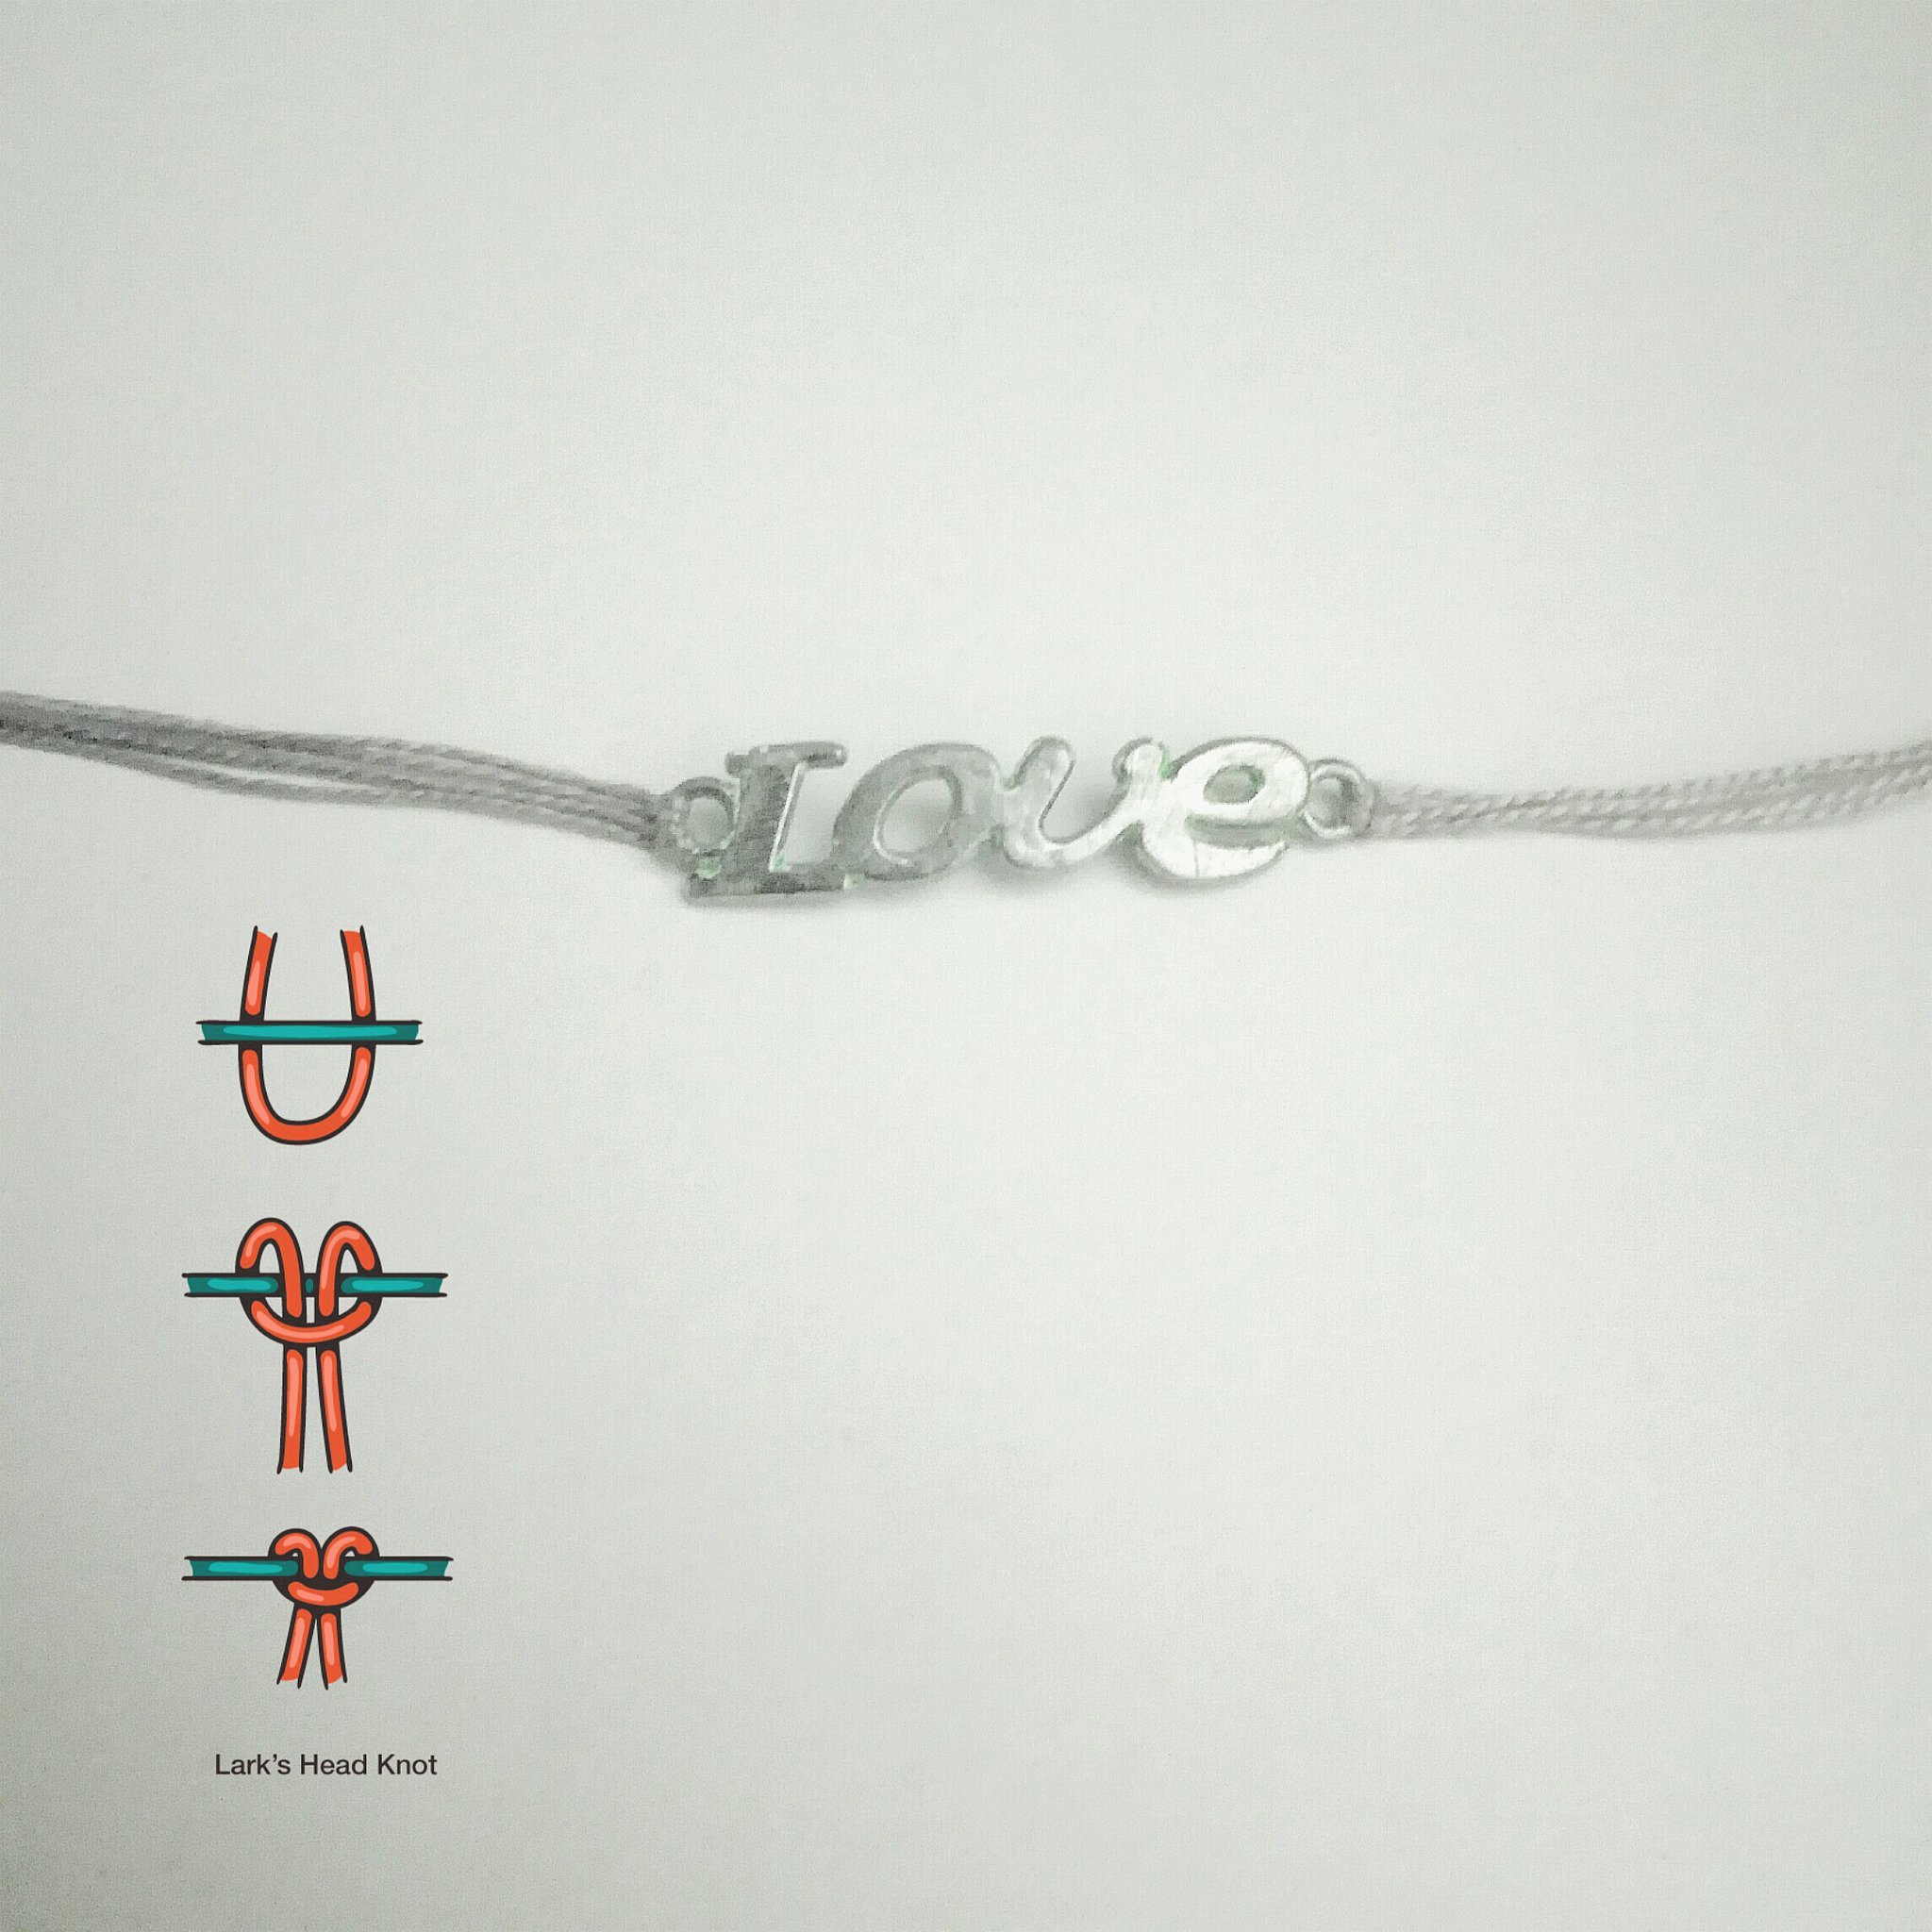
Part 1: How to start a bracelet based on a charm
Step 1: Tie your string to the charm using Lark's Head knot.
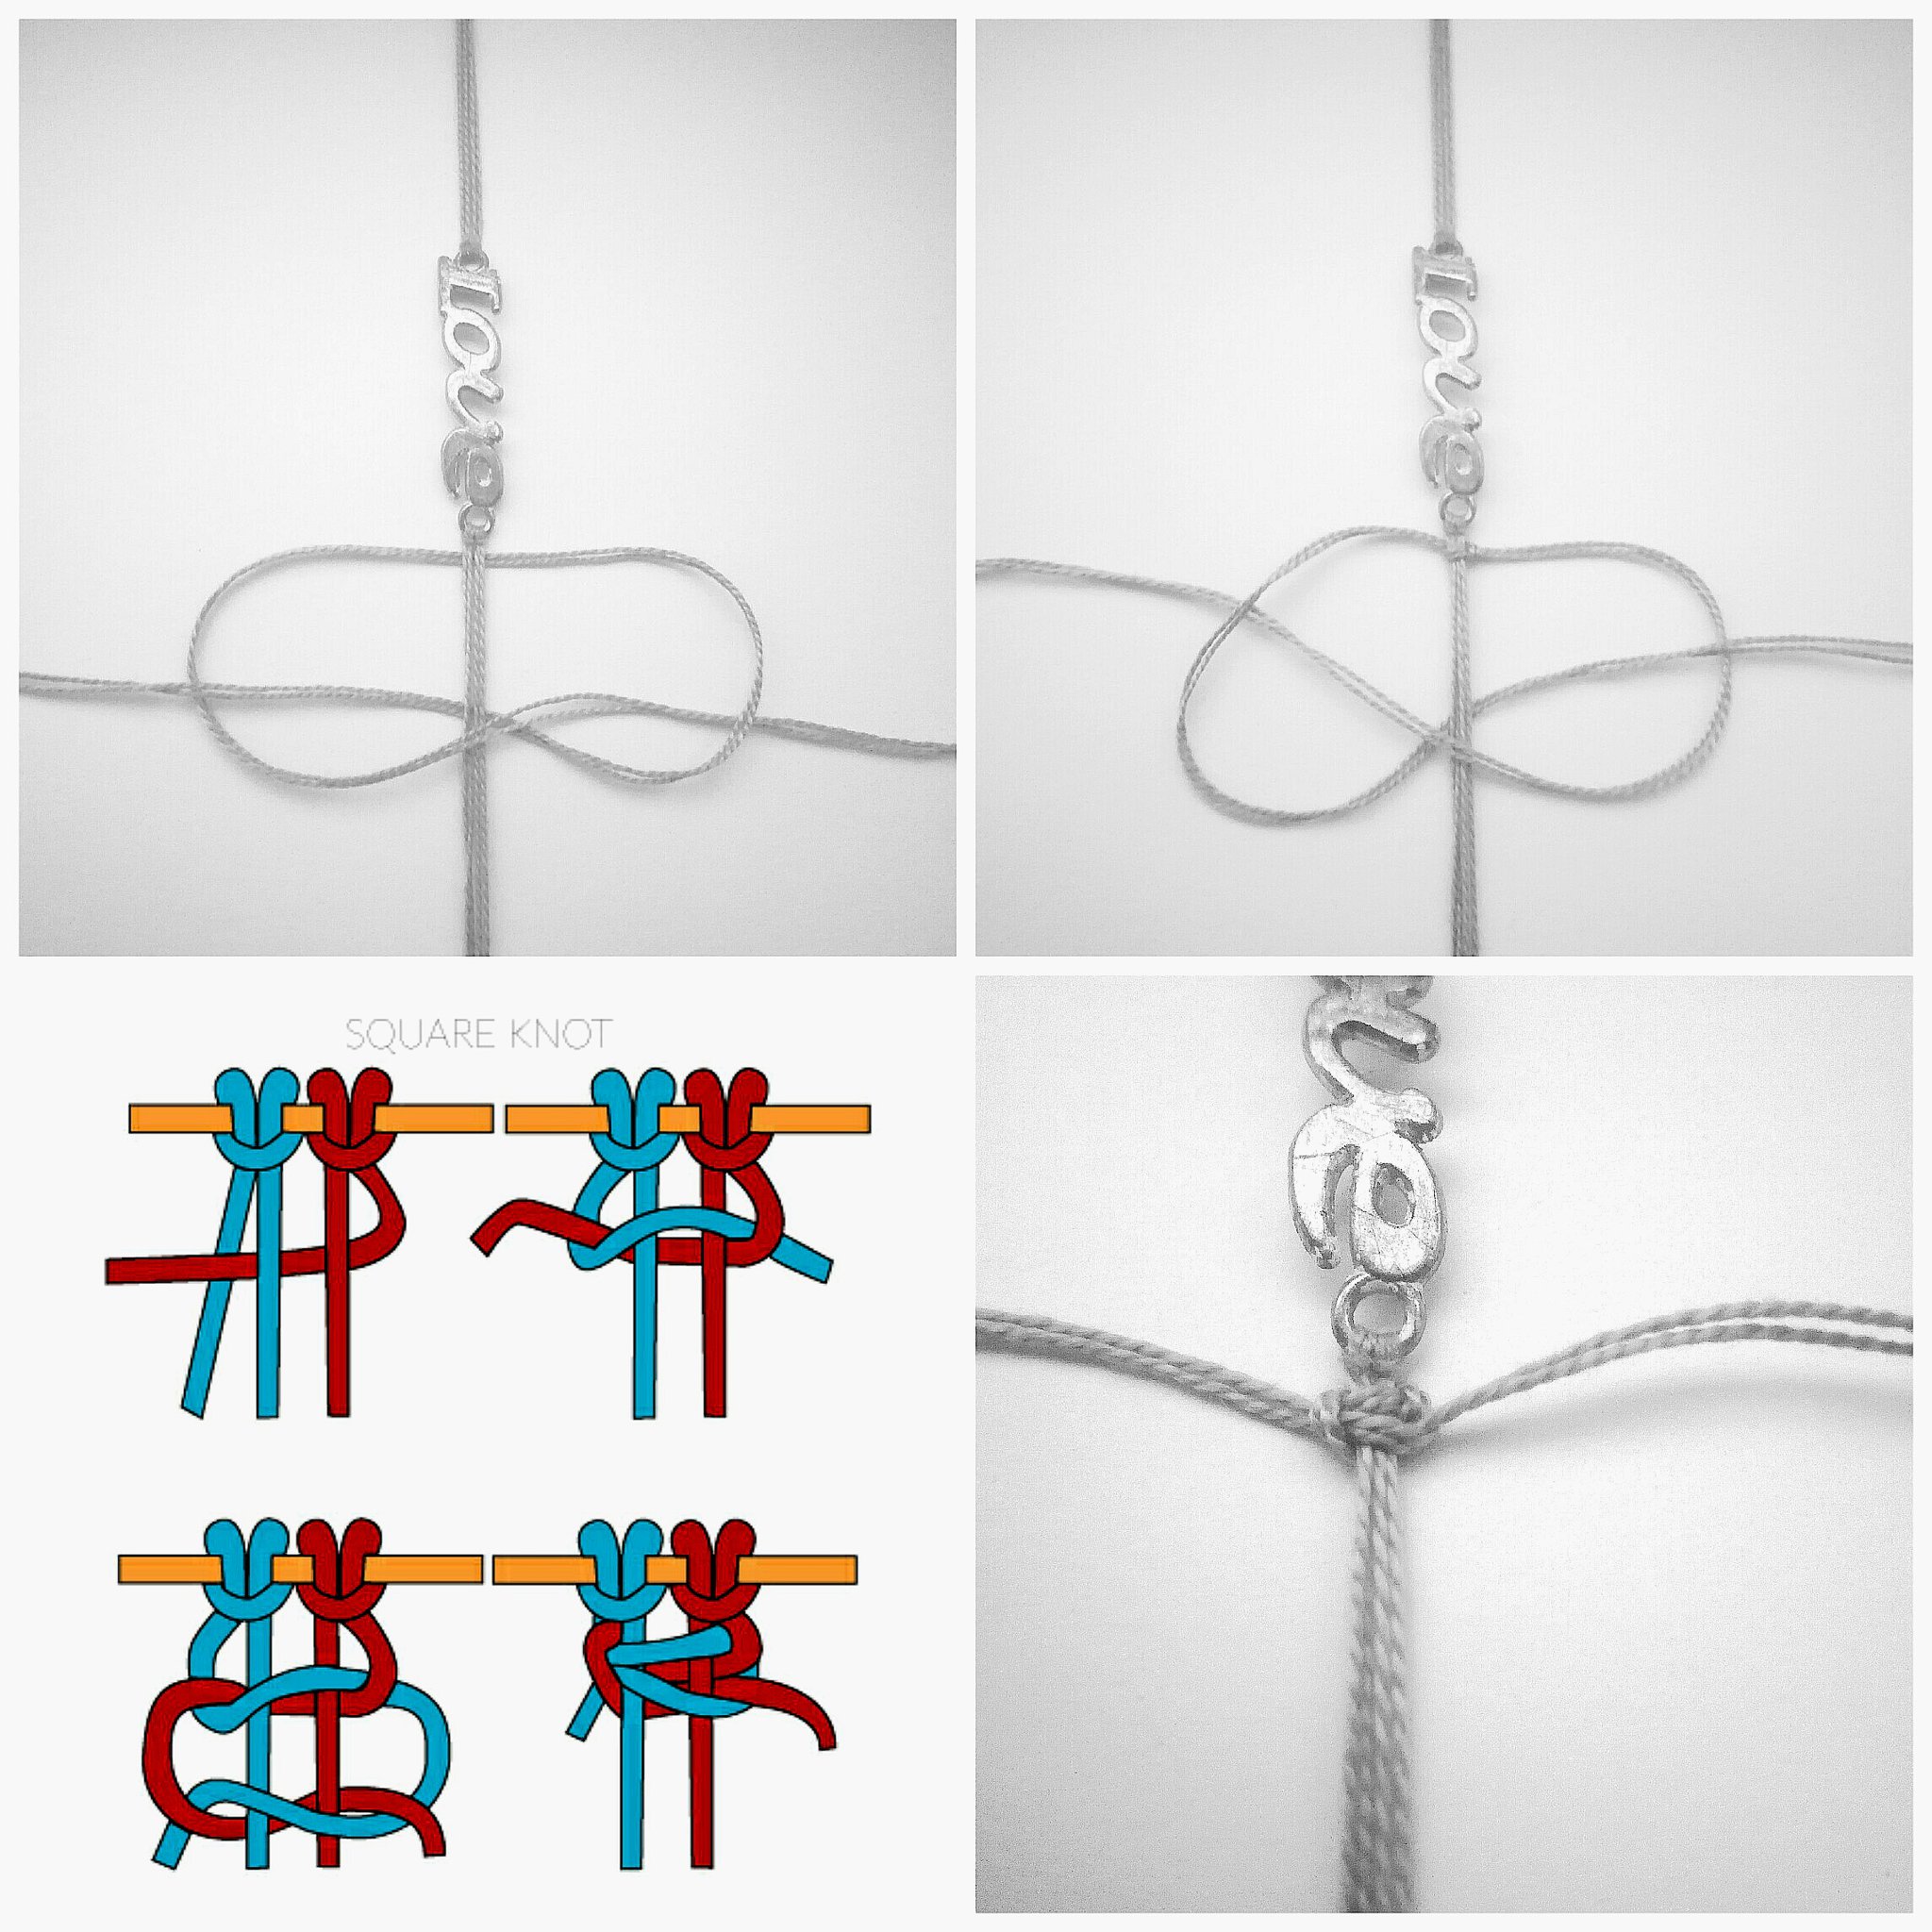
Step 2: Continue your bracelet accordingly – you can choose multiple ways. I chose to make a macramé bracelet using square knots, but if your charm is bigger, you can choose to do a normal, alpha, kumihimo or any other bracelet type. The options are endless! The important thing to remember is that the charm should be in the middle of the bracelet. So, make sure to make only a half of it and then make your preferred ending (plain string, twist, braid, maybe triangle ends etc.).
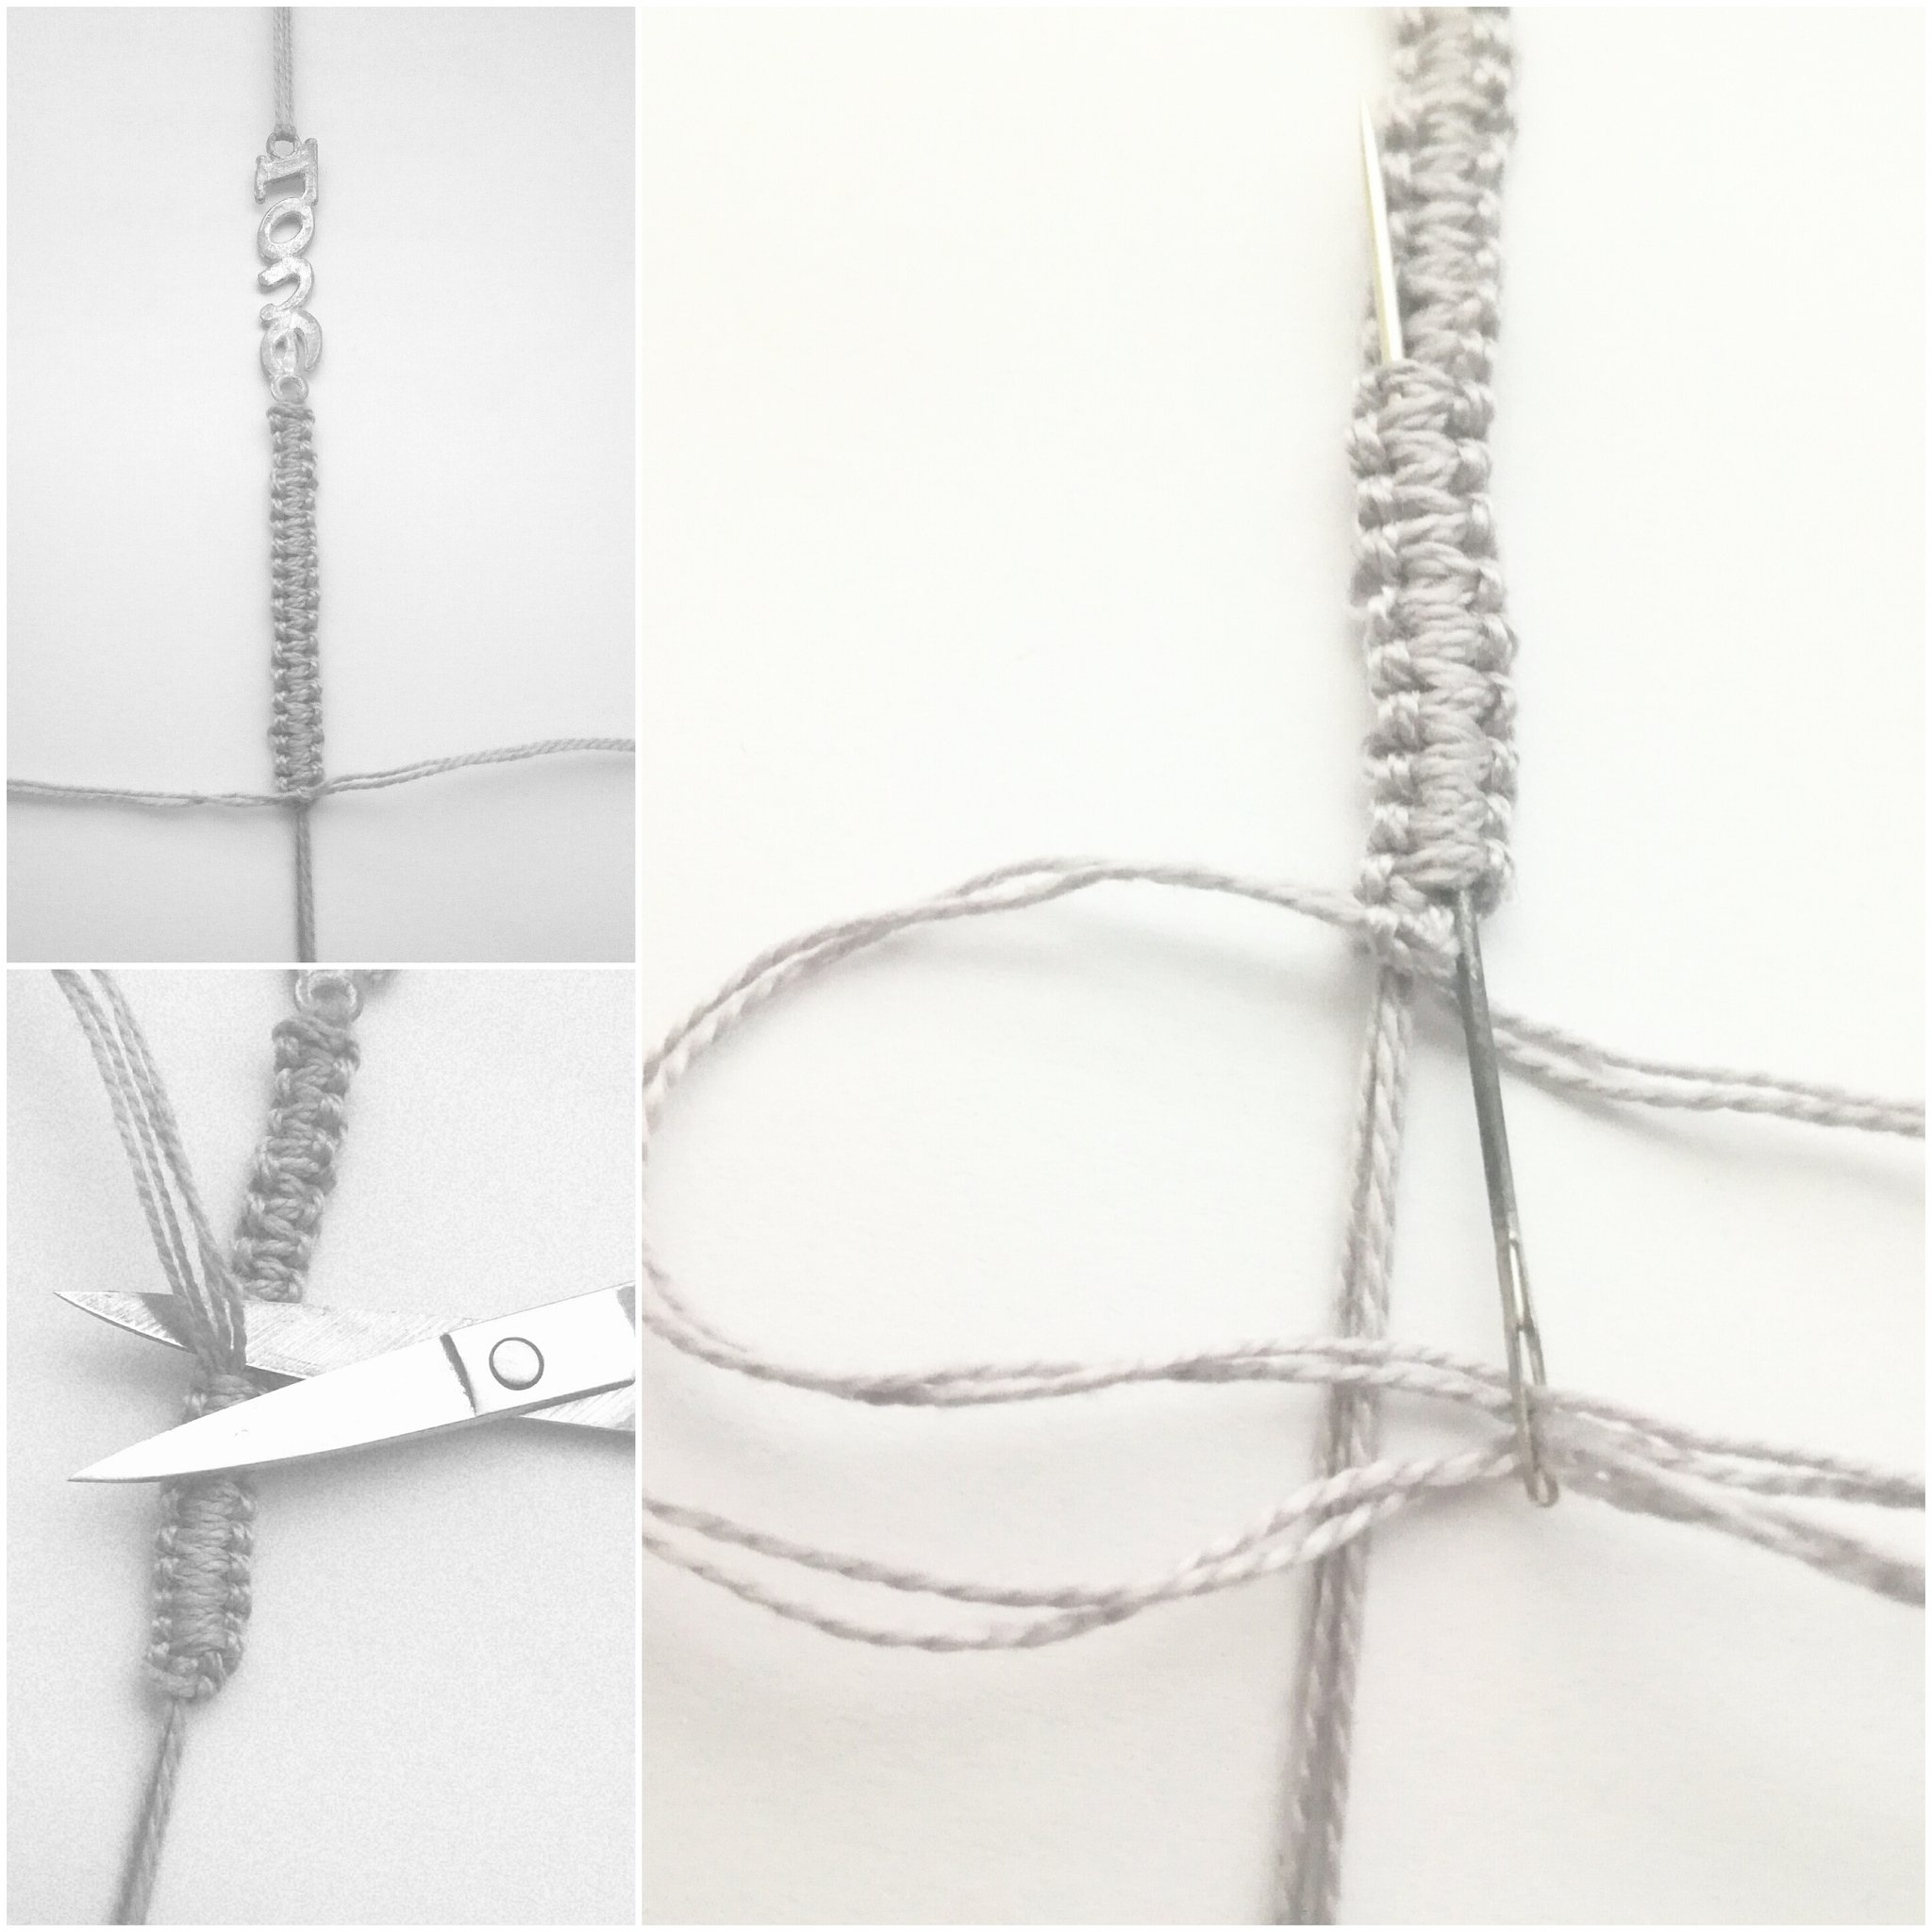
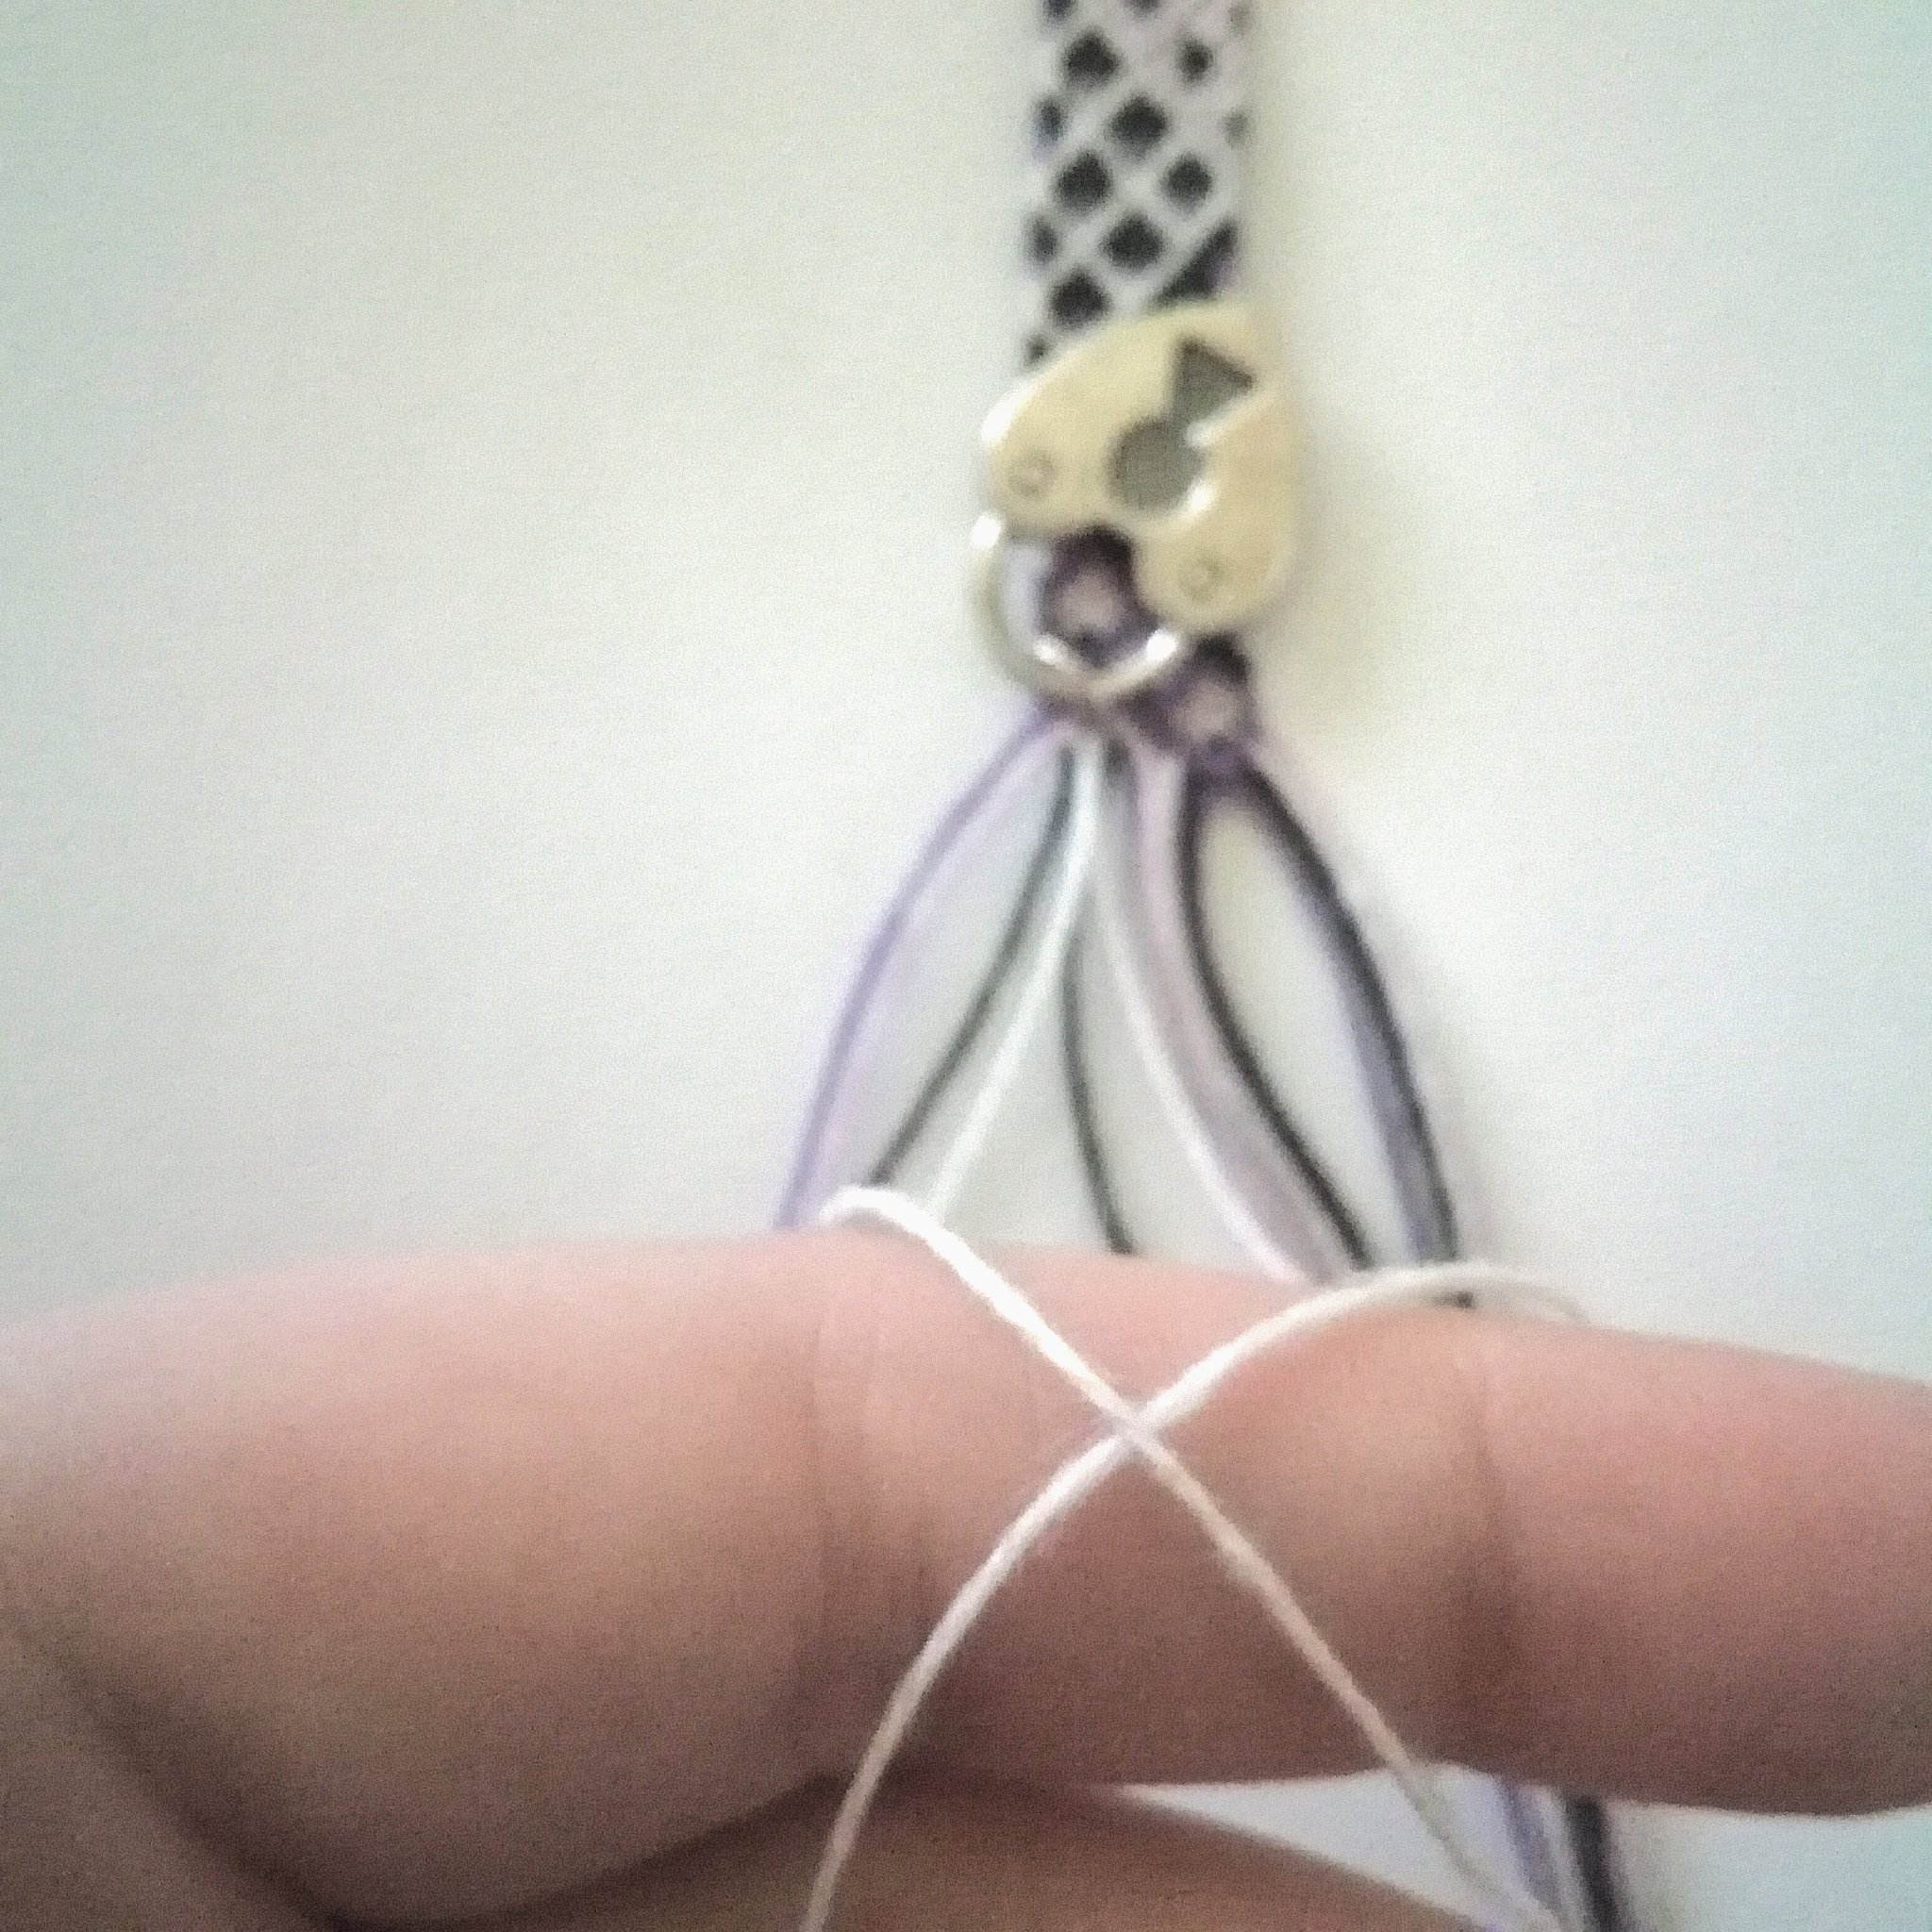
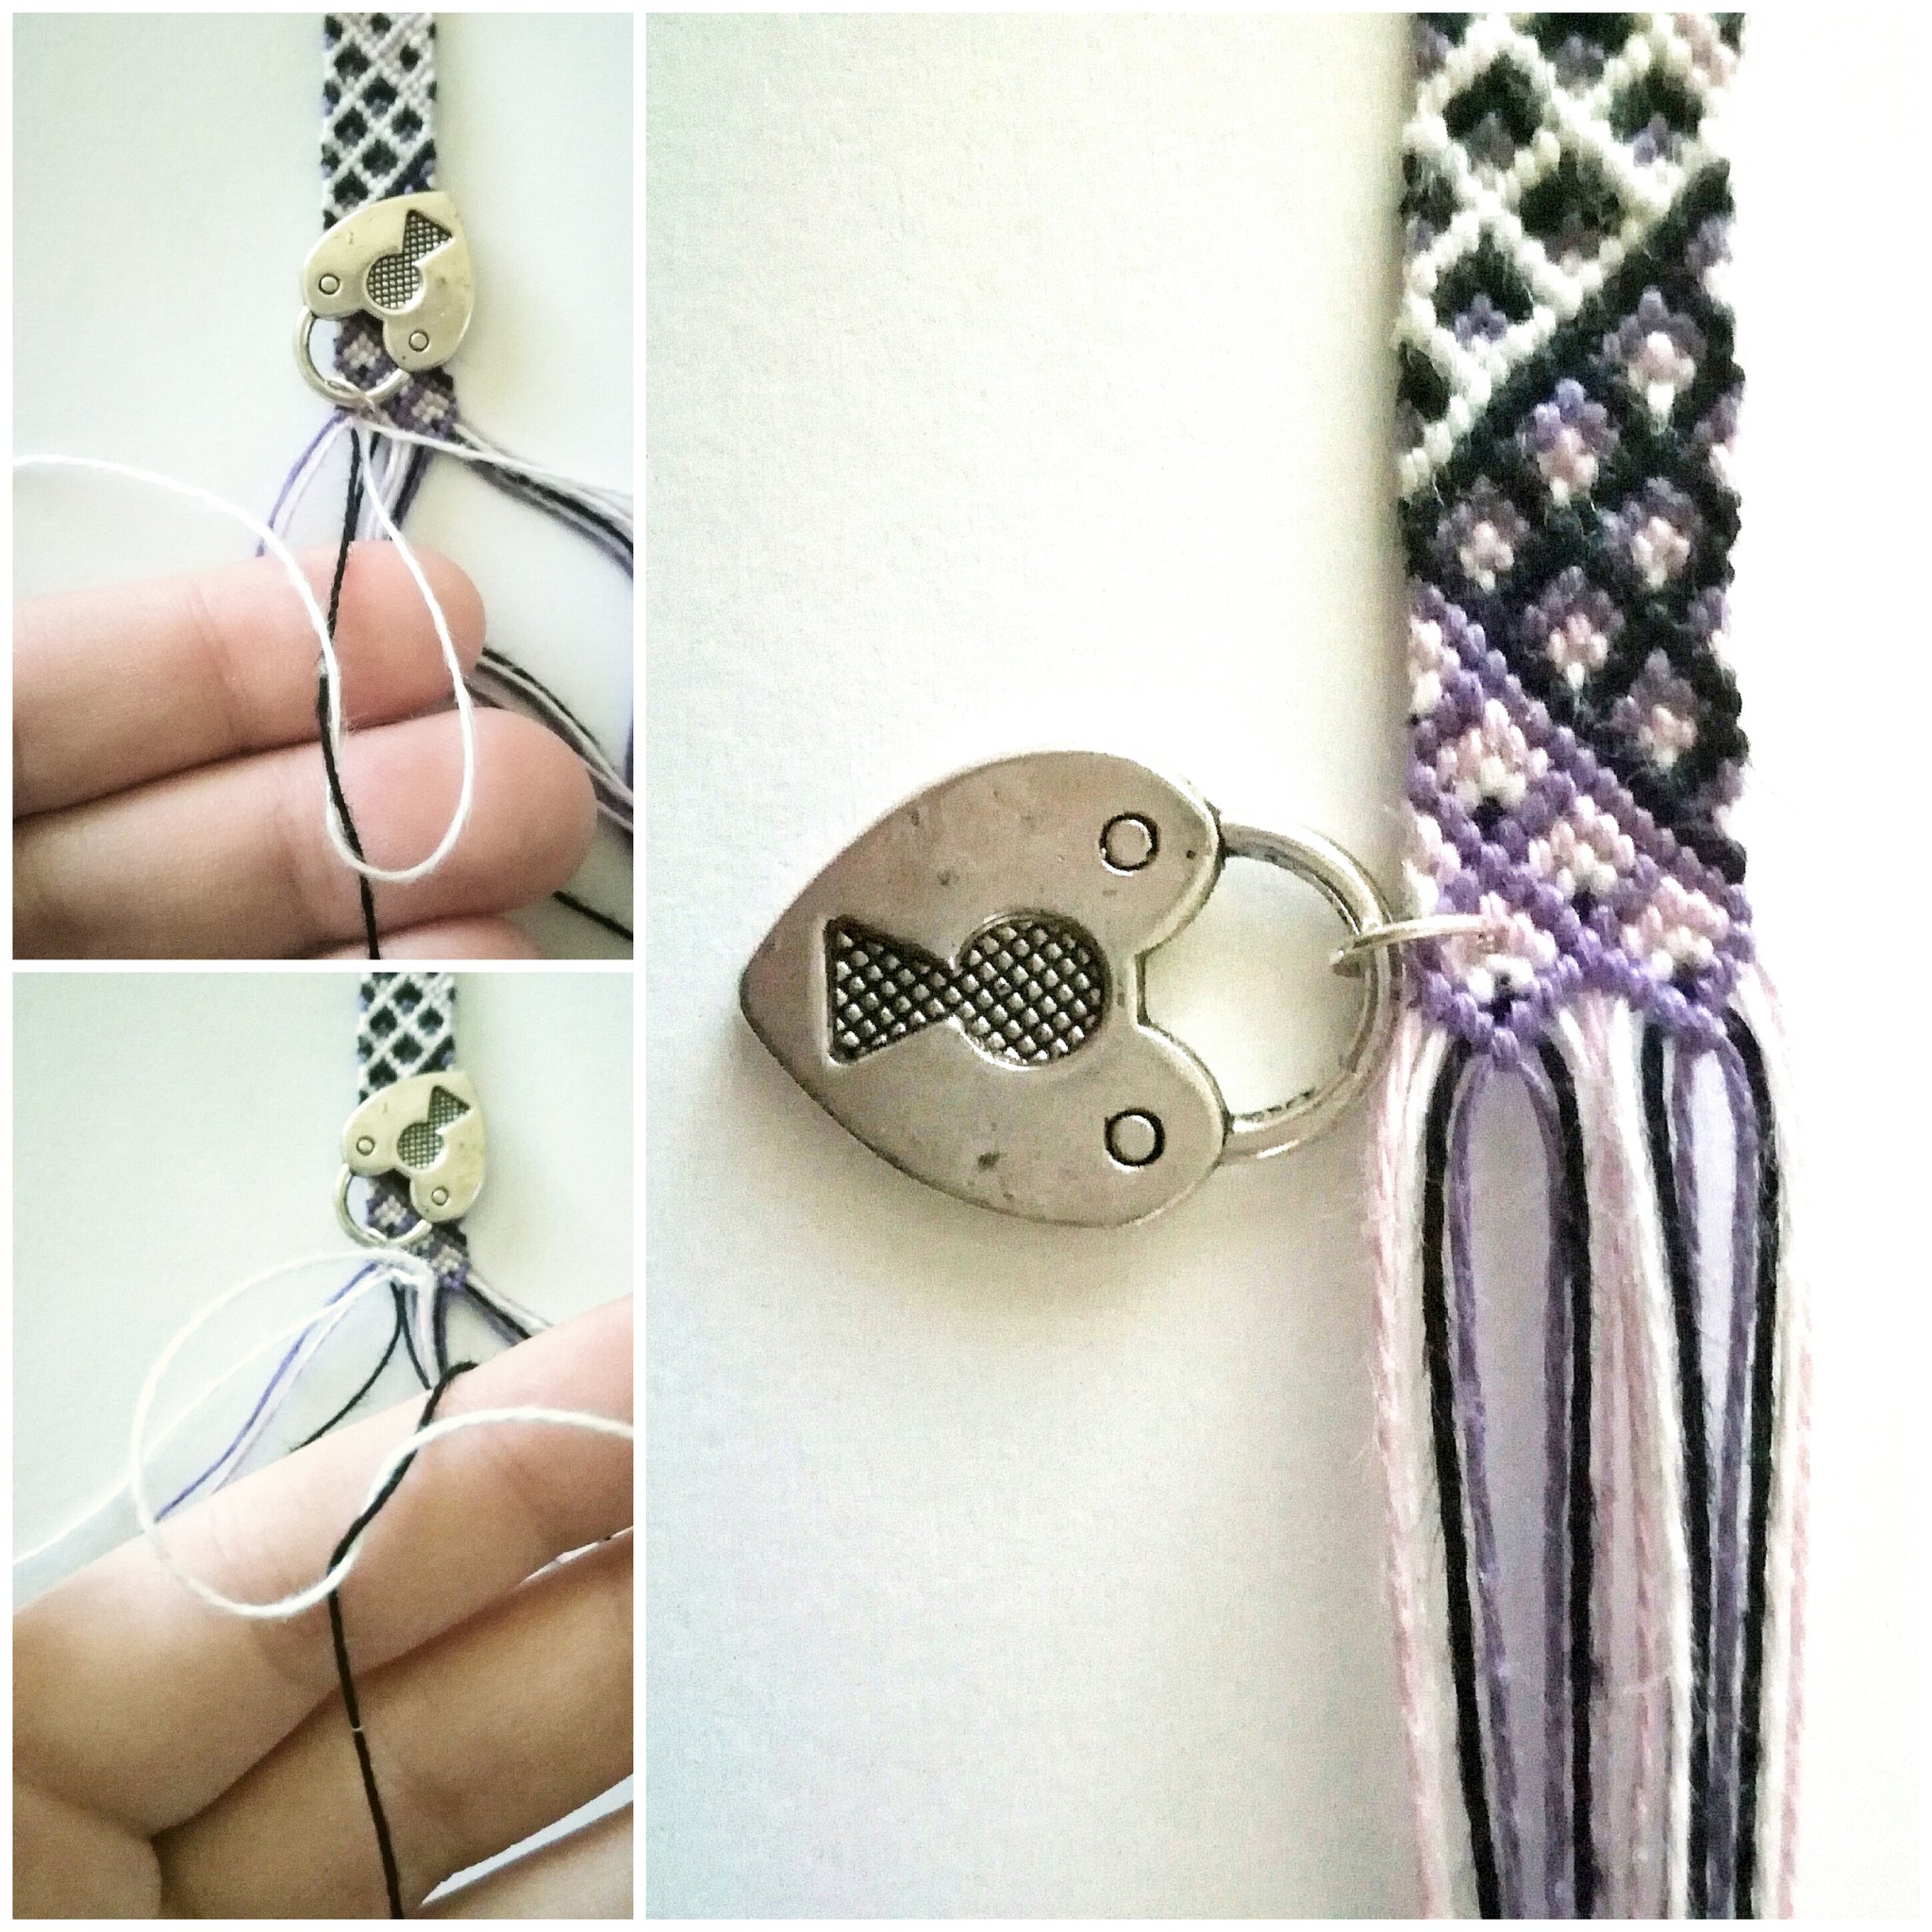
Tip for step 2: If you are doing the macramé one, thread your needle by crossing your strings, hide the strings in the bracelet and then cut them off - as shown in the photo. This will also come in handy if you want to make an adjustable closure (optional step 4).
Step 3: Repeat step 1 & 2 – finish the second half the same way. Make sure both sides are the same length.
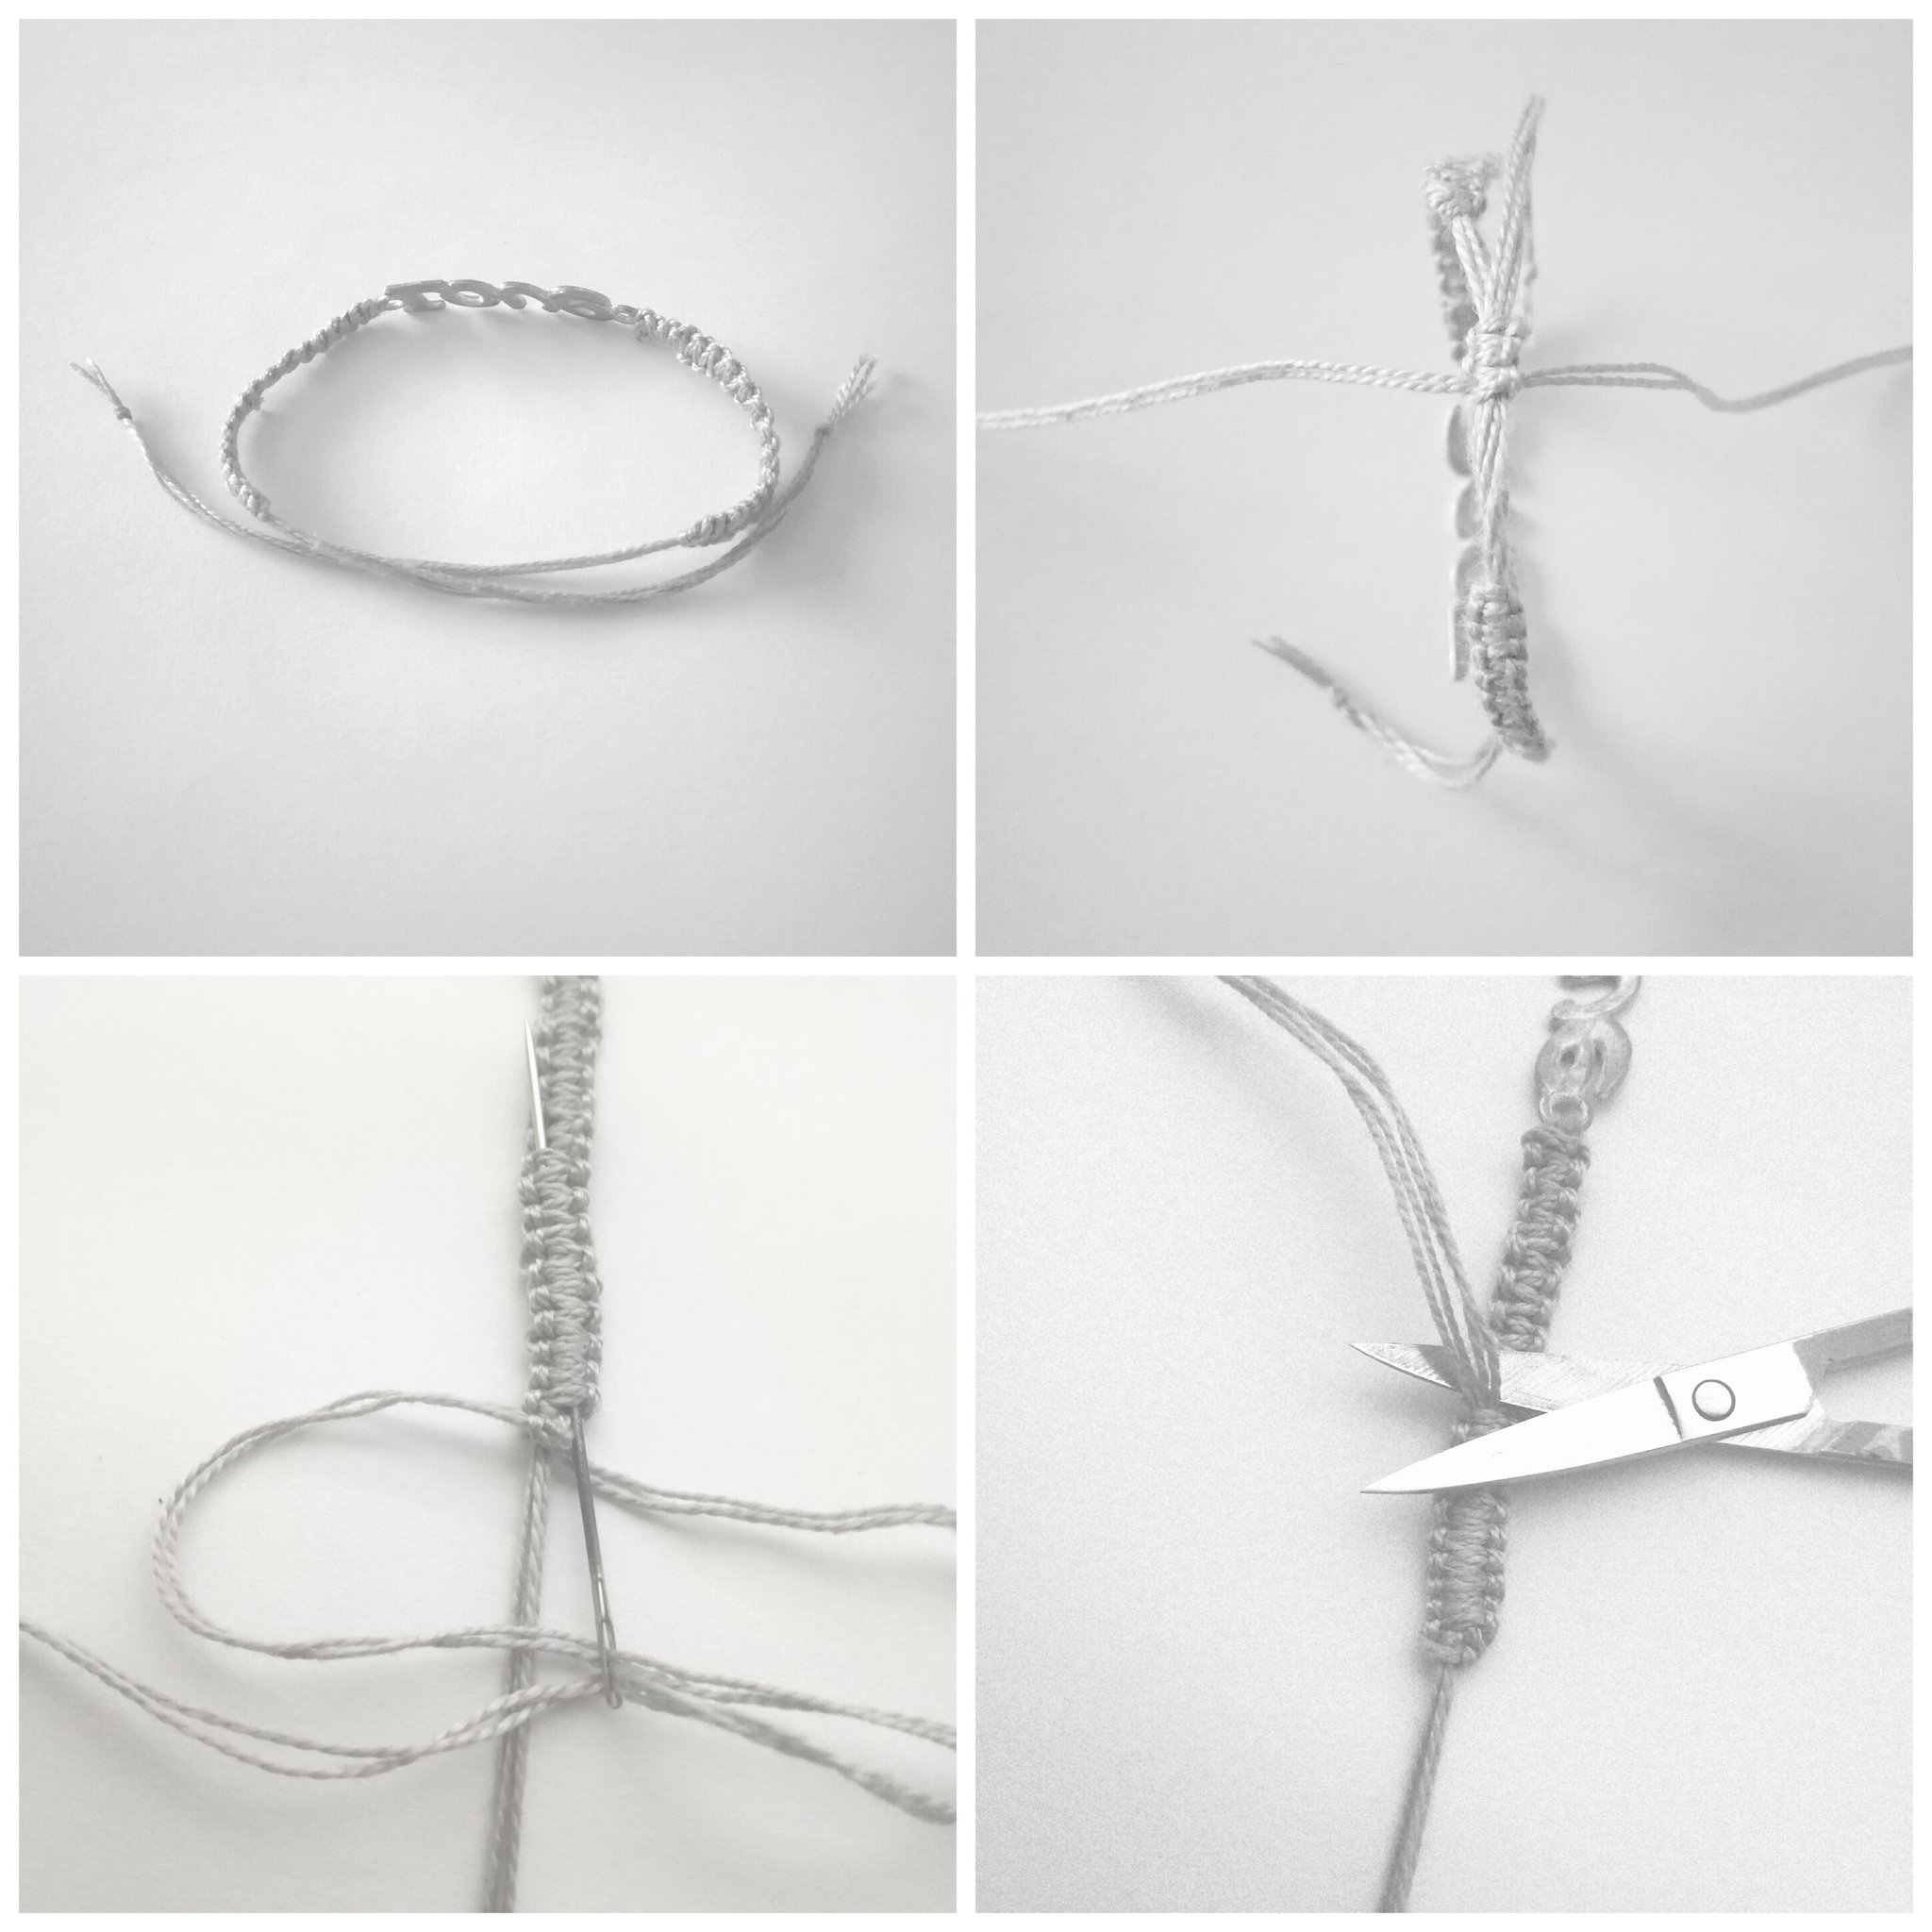
Optional step 4: To make an adjustable bracelet that you don't have to re-tie every time you wear it or take it off, bring your two ends together as shown in the photo and make a few square knots with more thread. Bring the thread inside and cut it off.
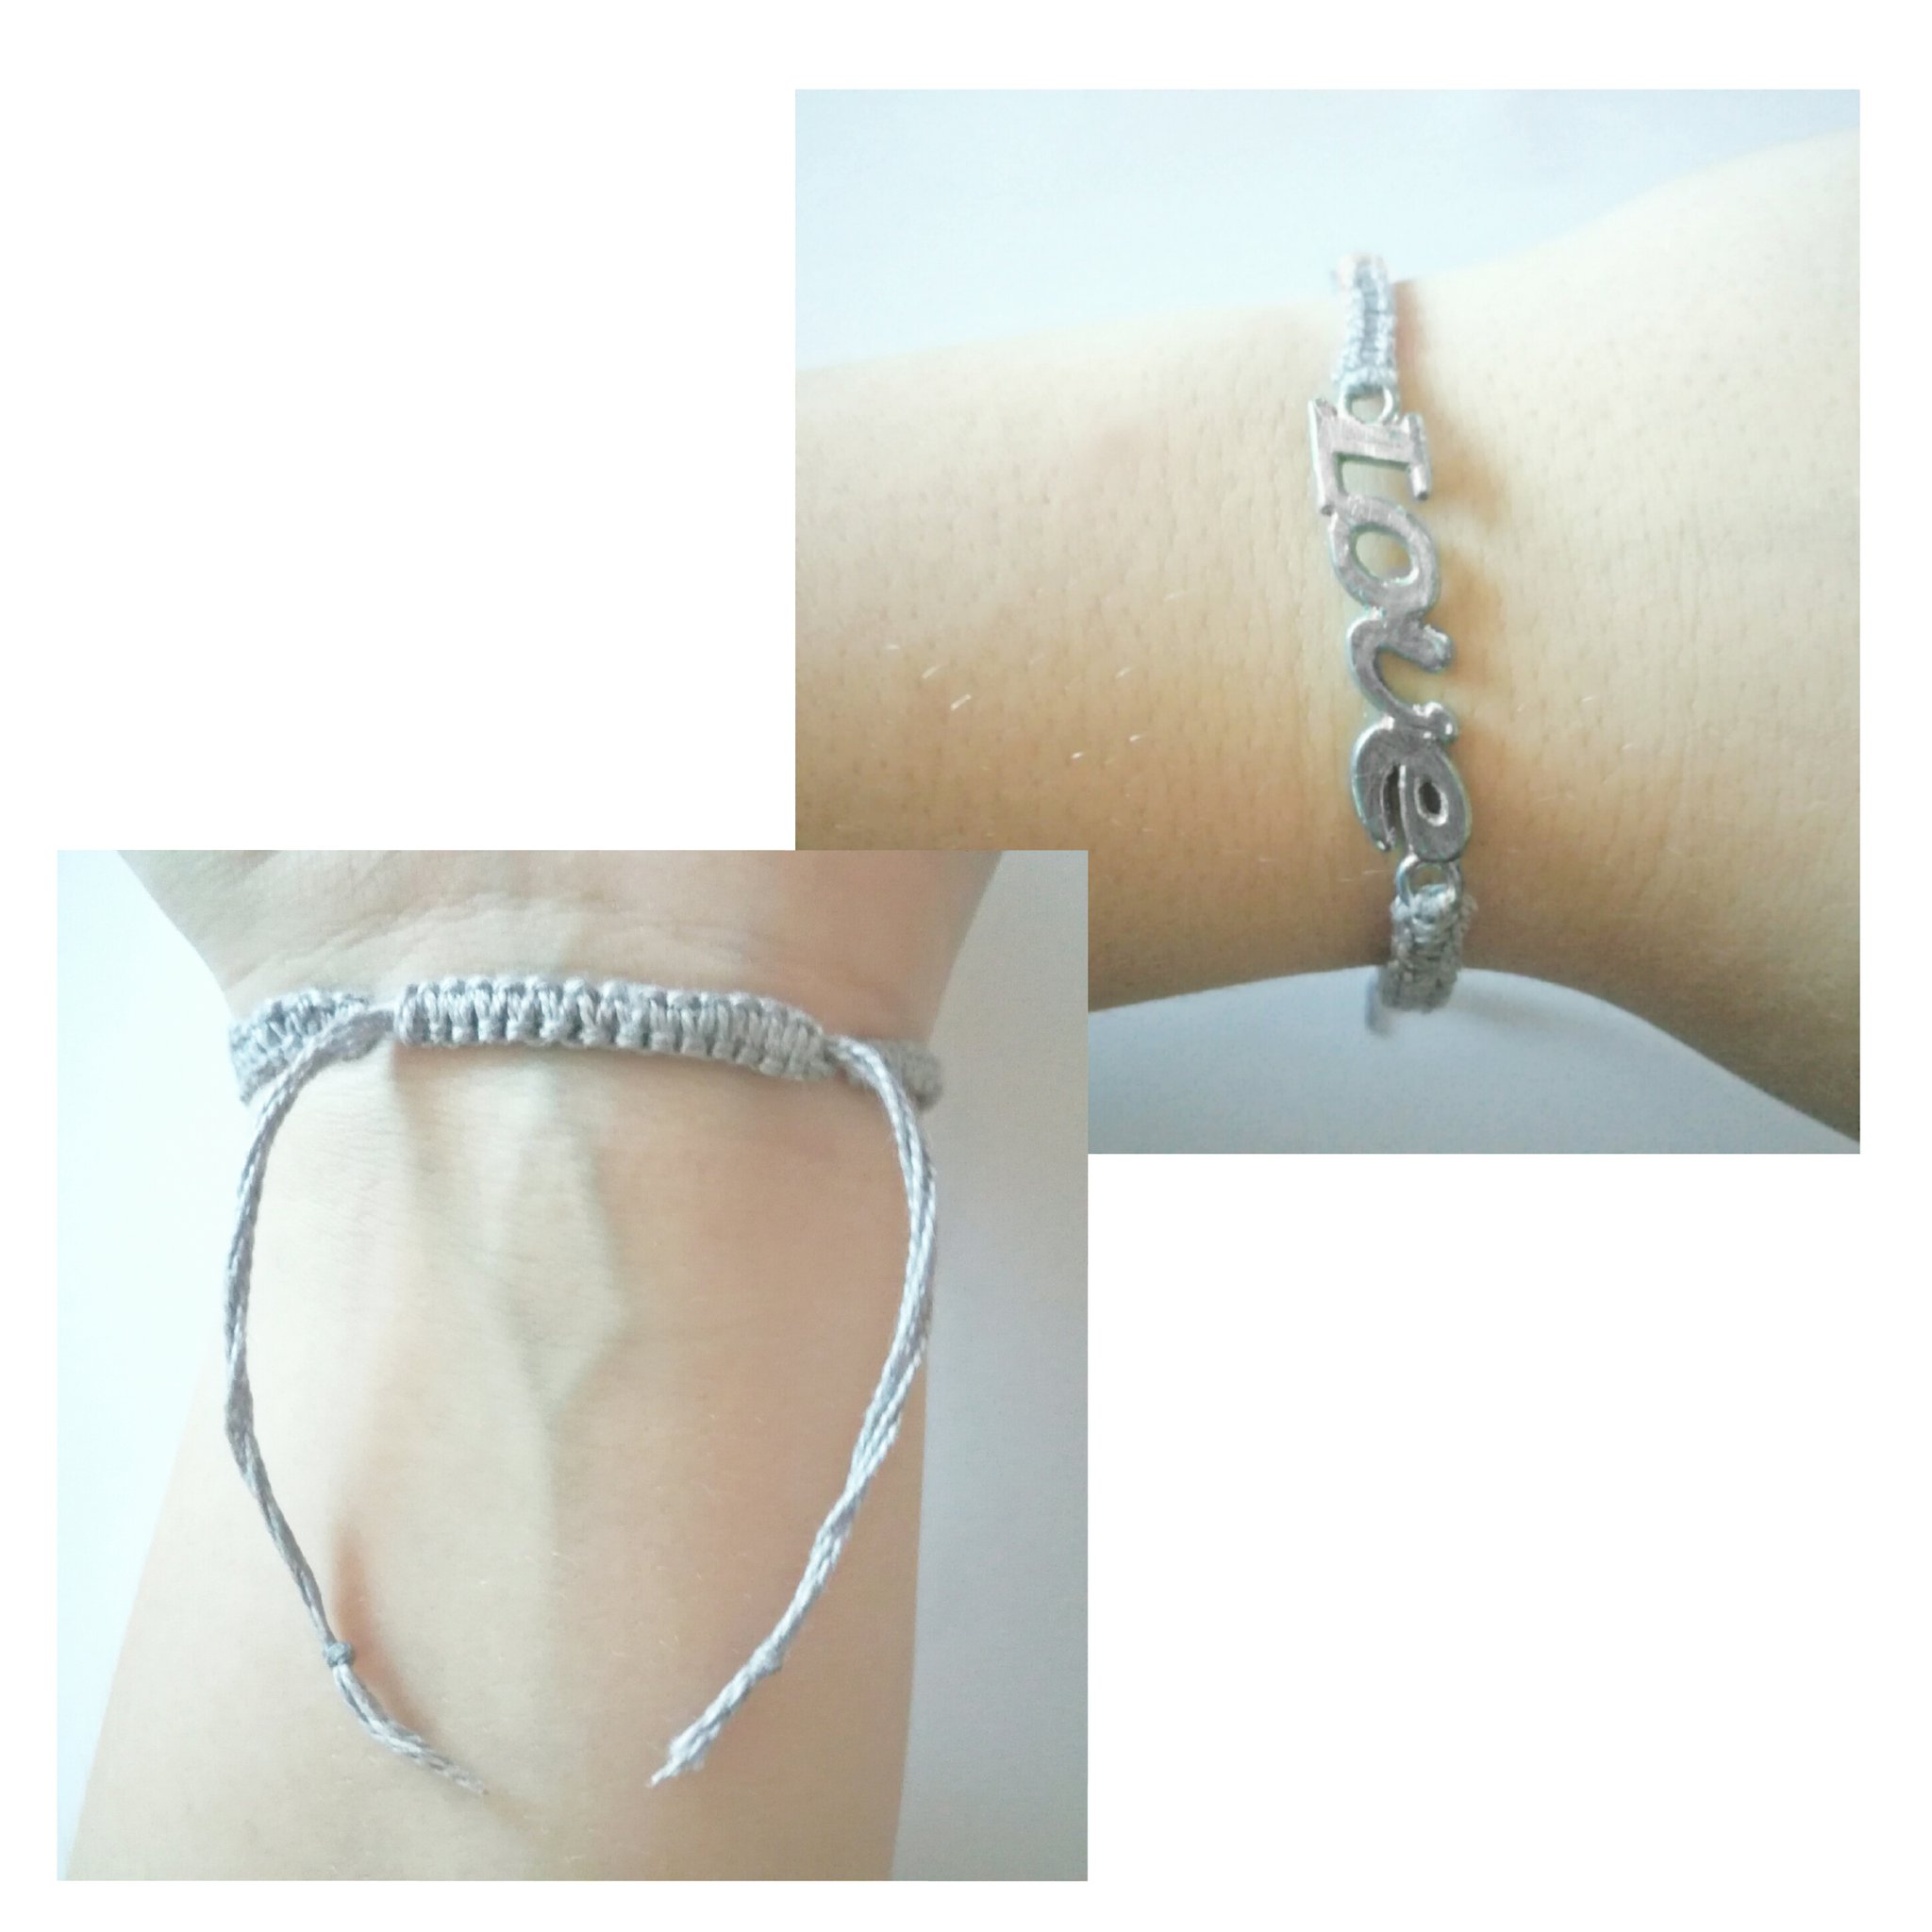
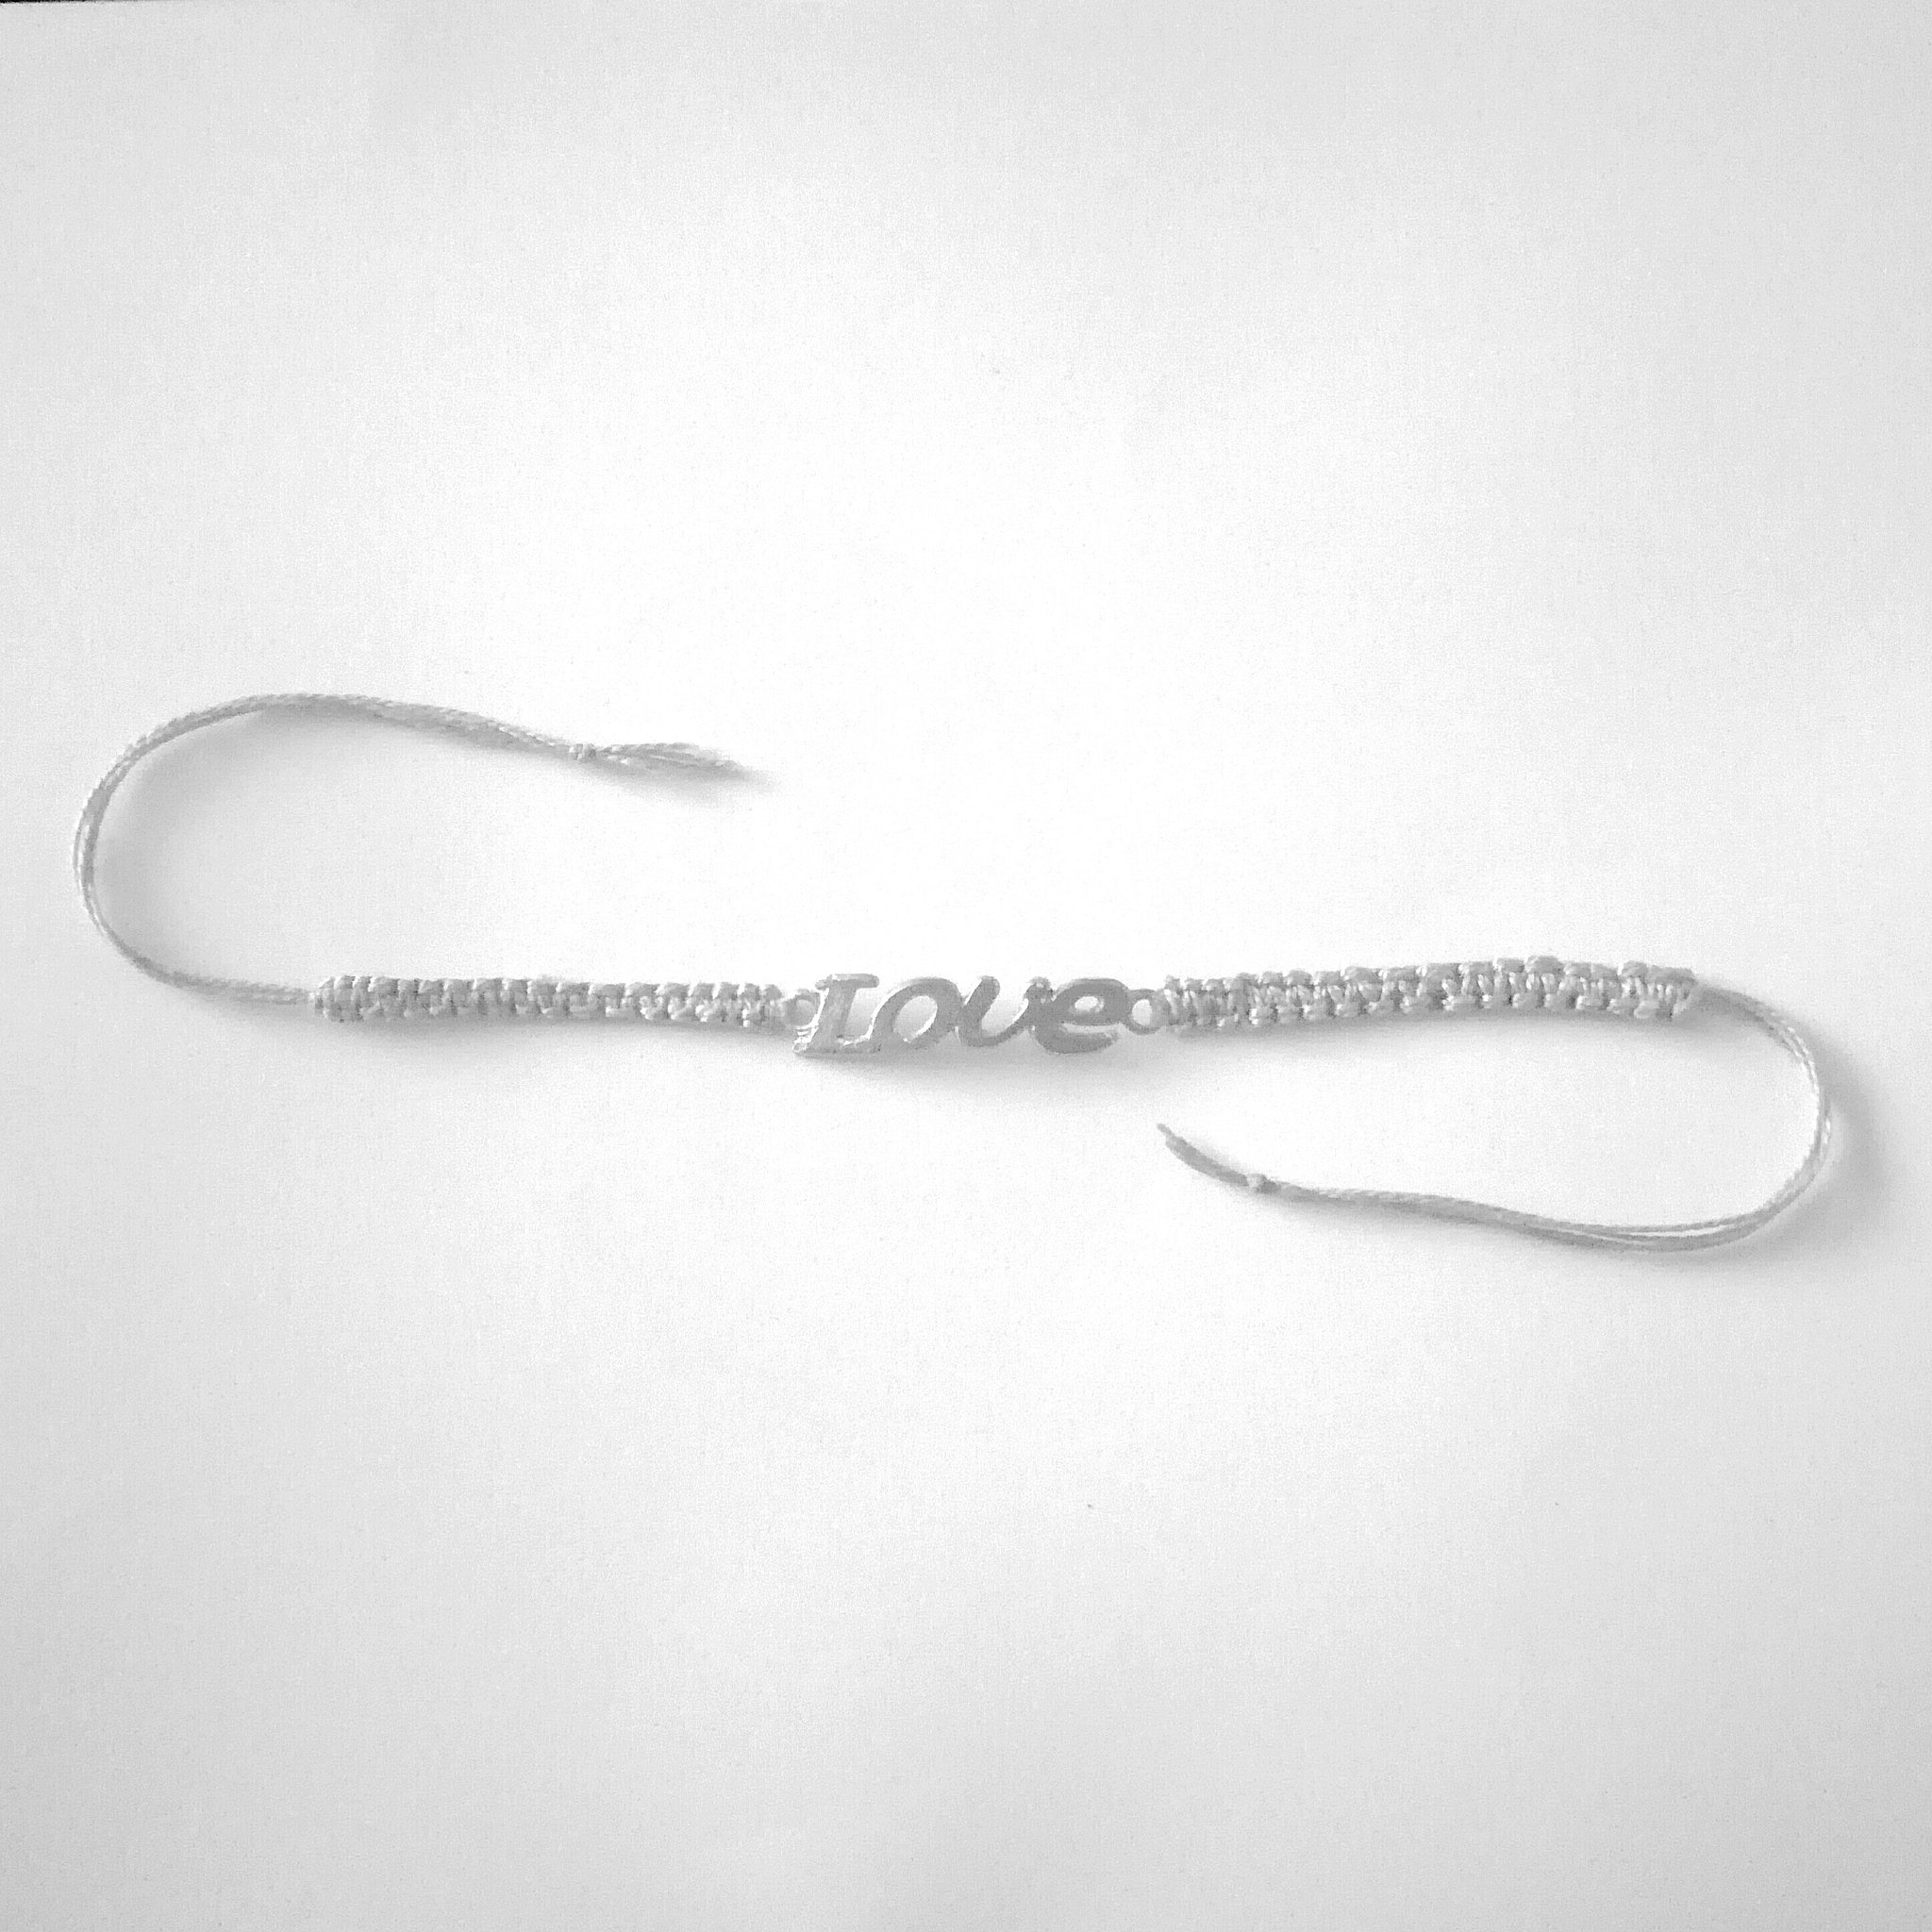
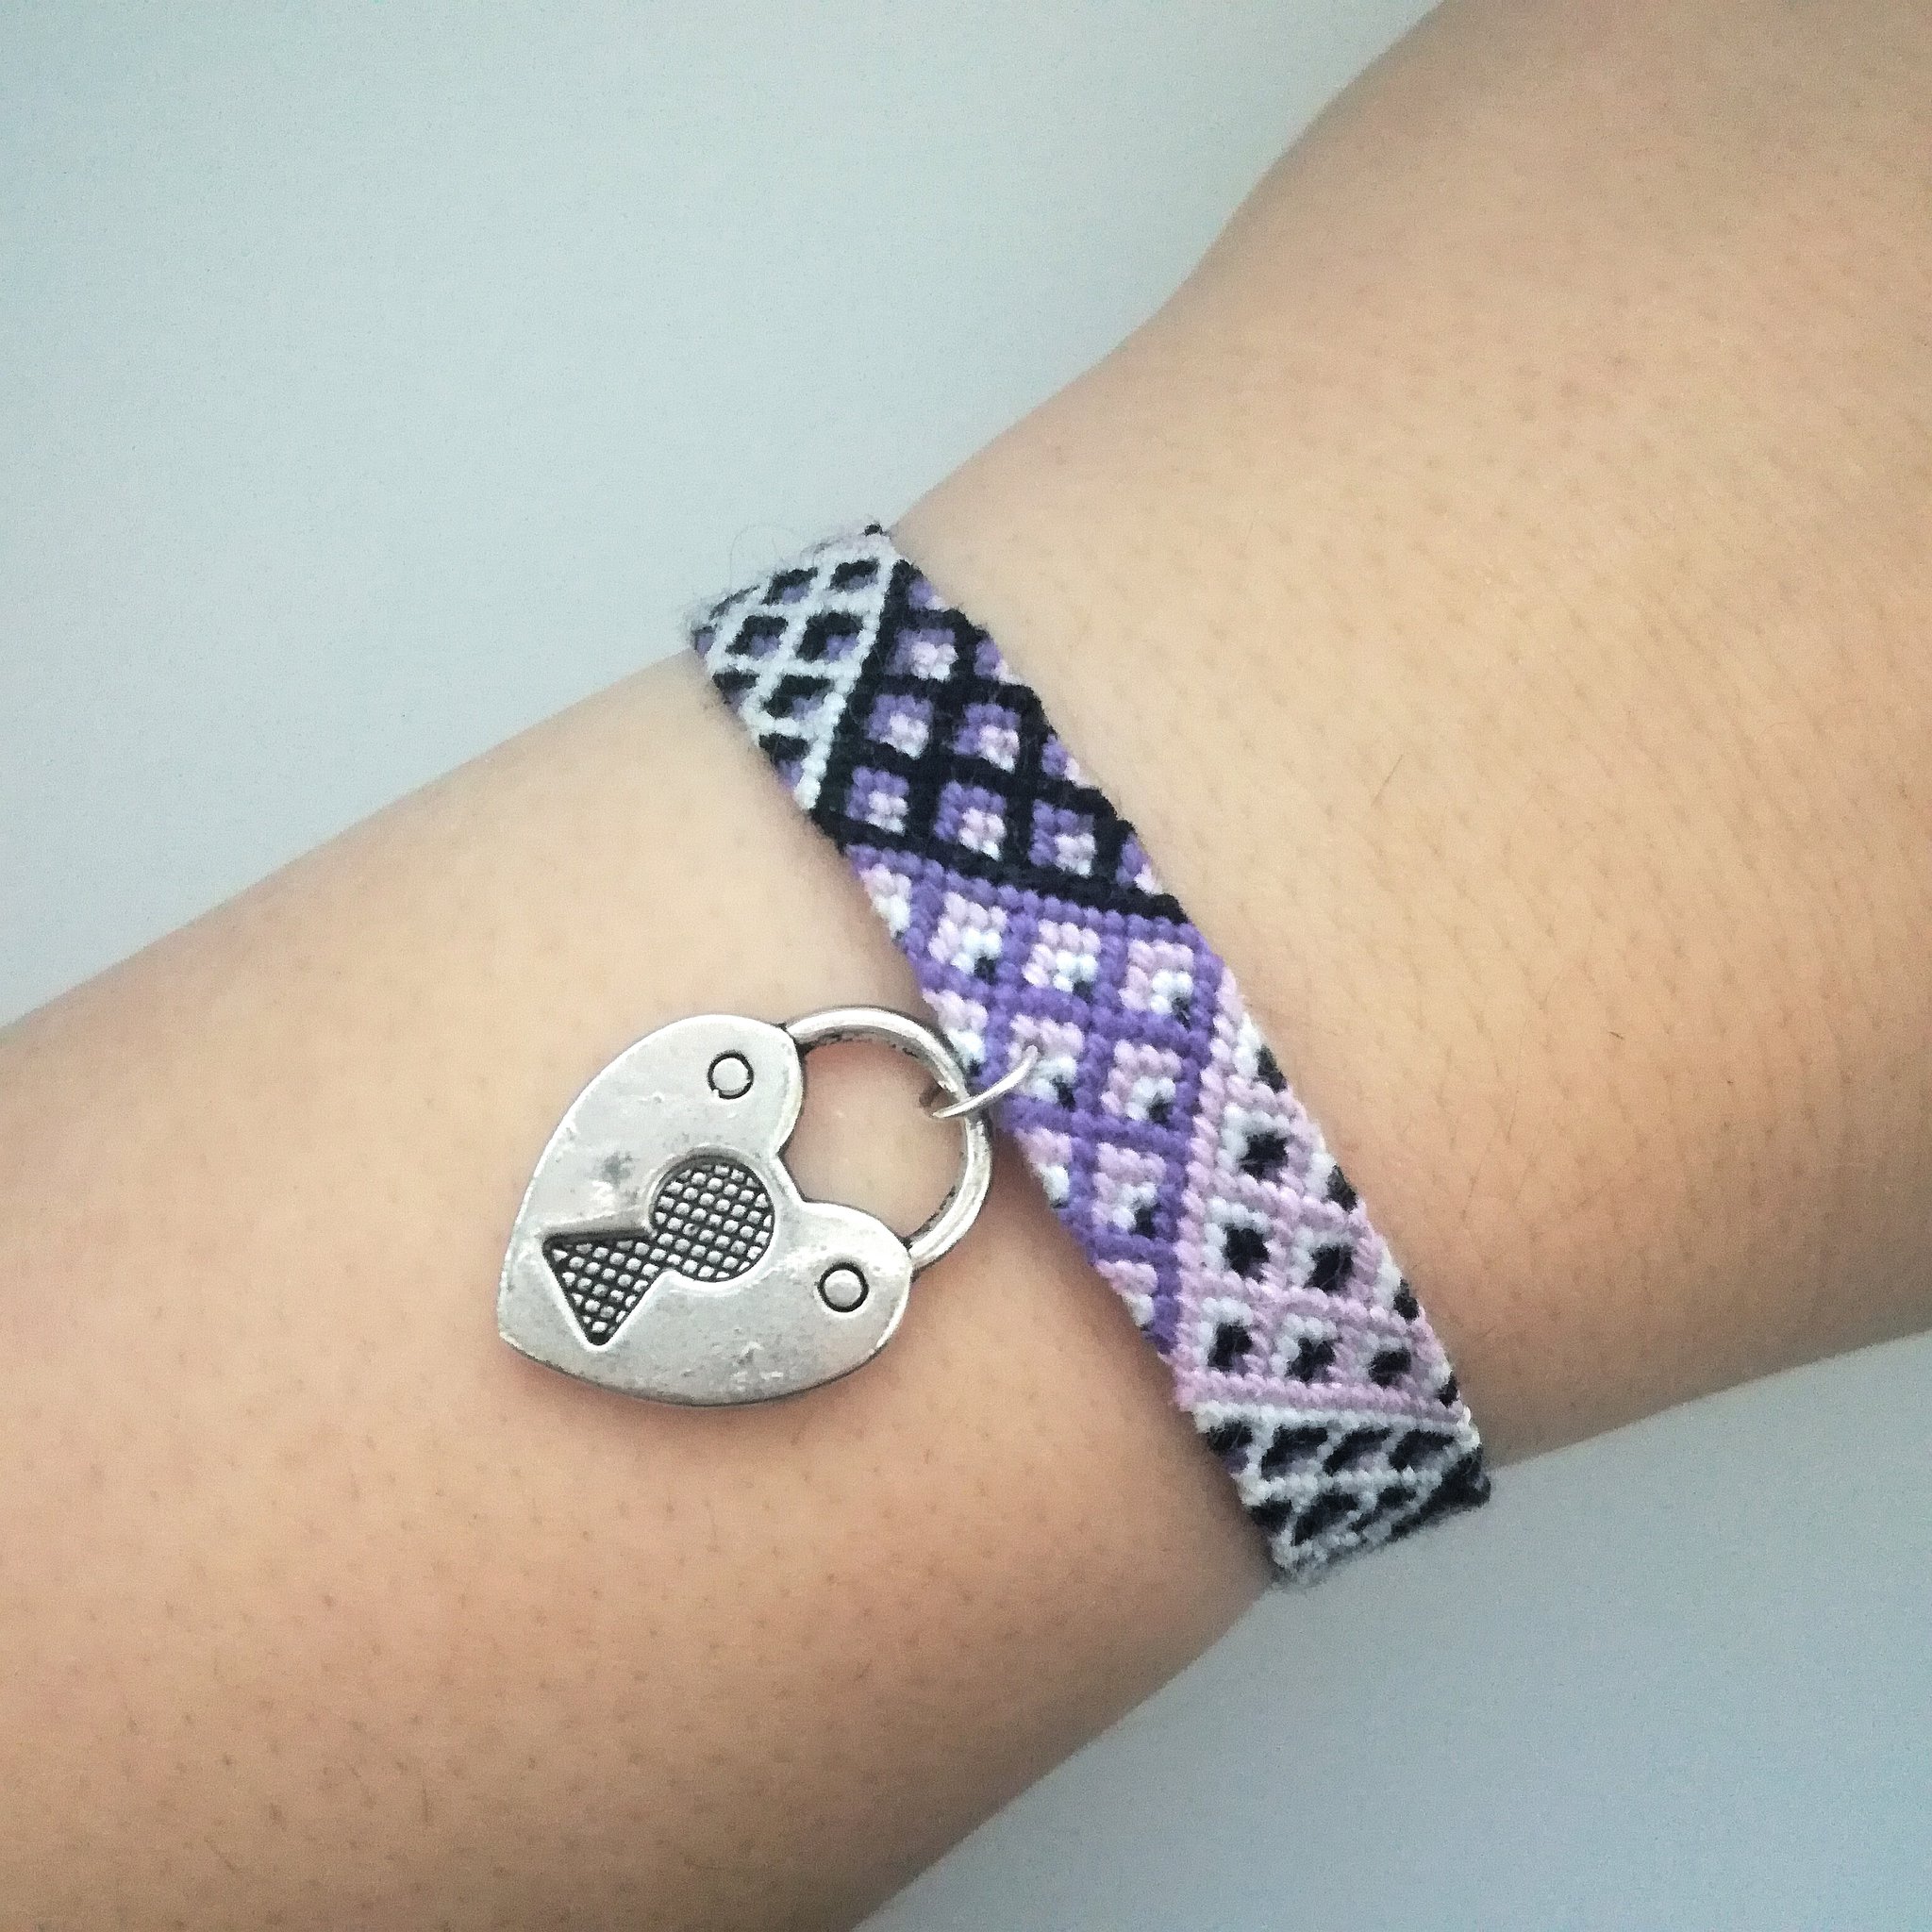
Yaaay! This is the finished bracelet! I hope my instructions were clear and easy to follow. If you have any questions, don't hesitate to comment or write me a private message!
Part 2: How to add a charm in the middle
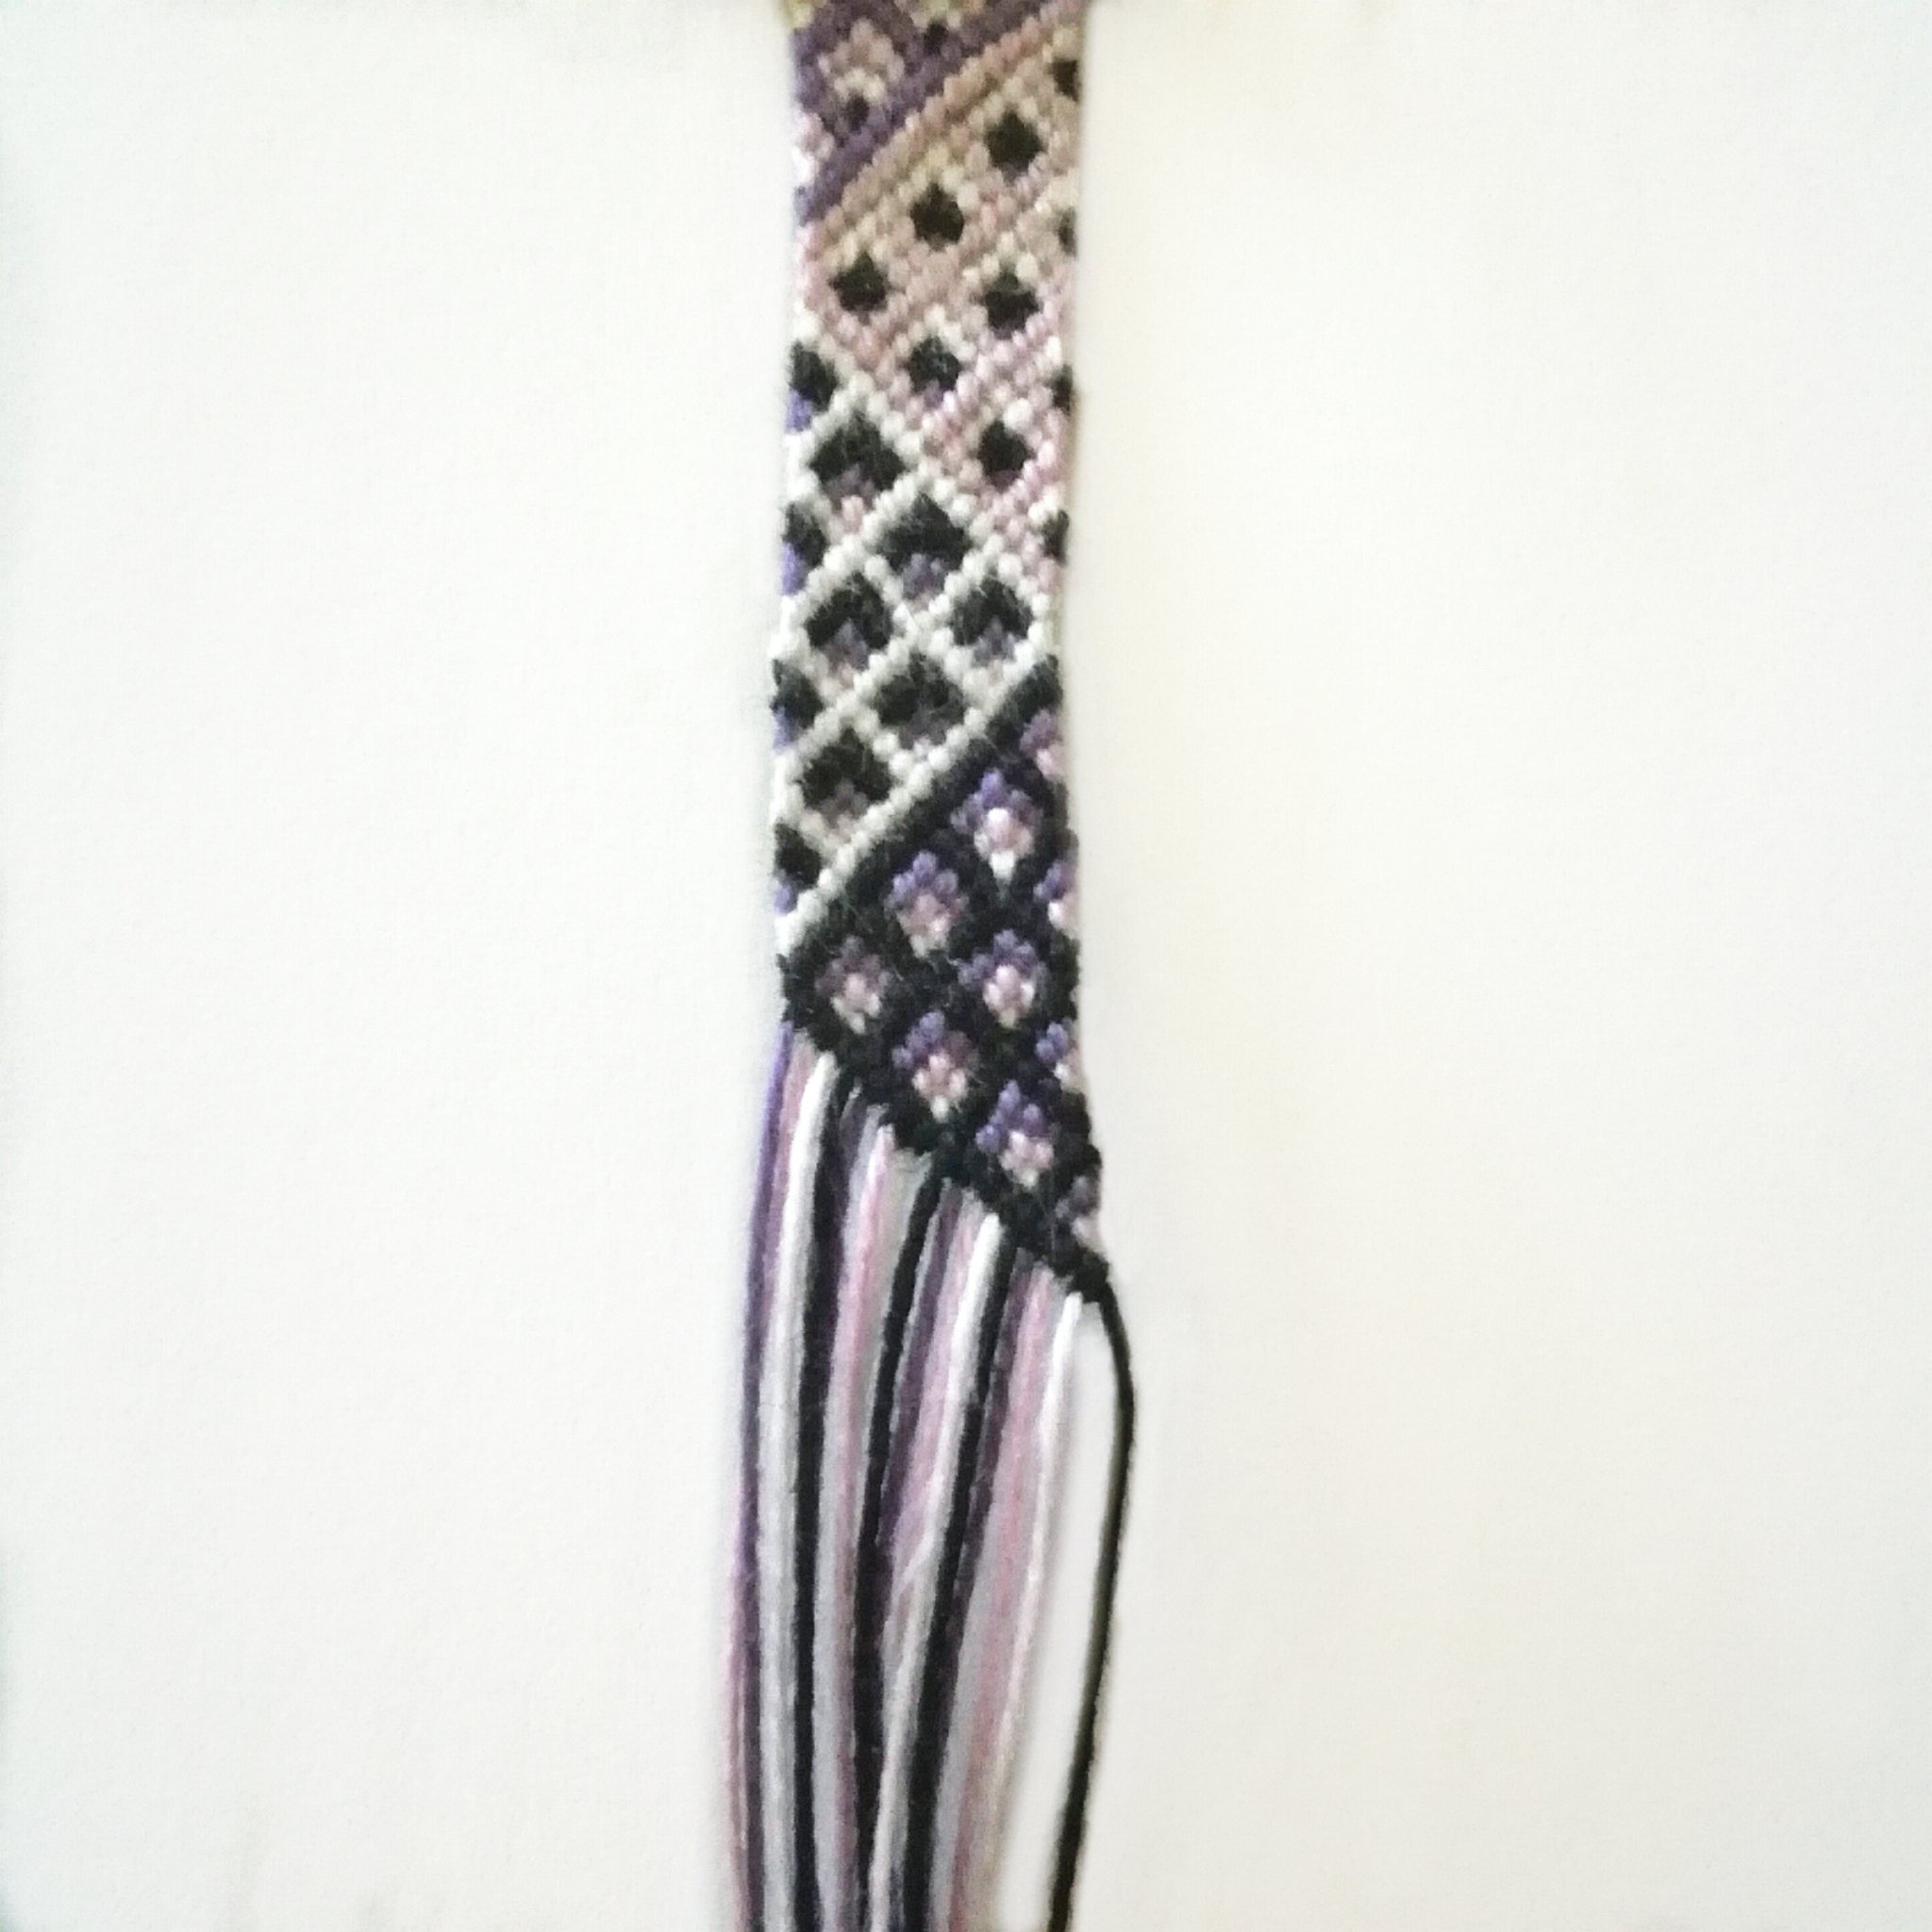
Step 1: Choose your bracelet type + pattern and knot almost half of it. Mine is #23555.
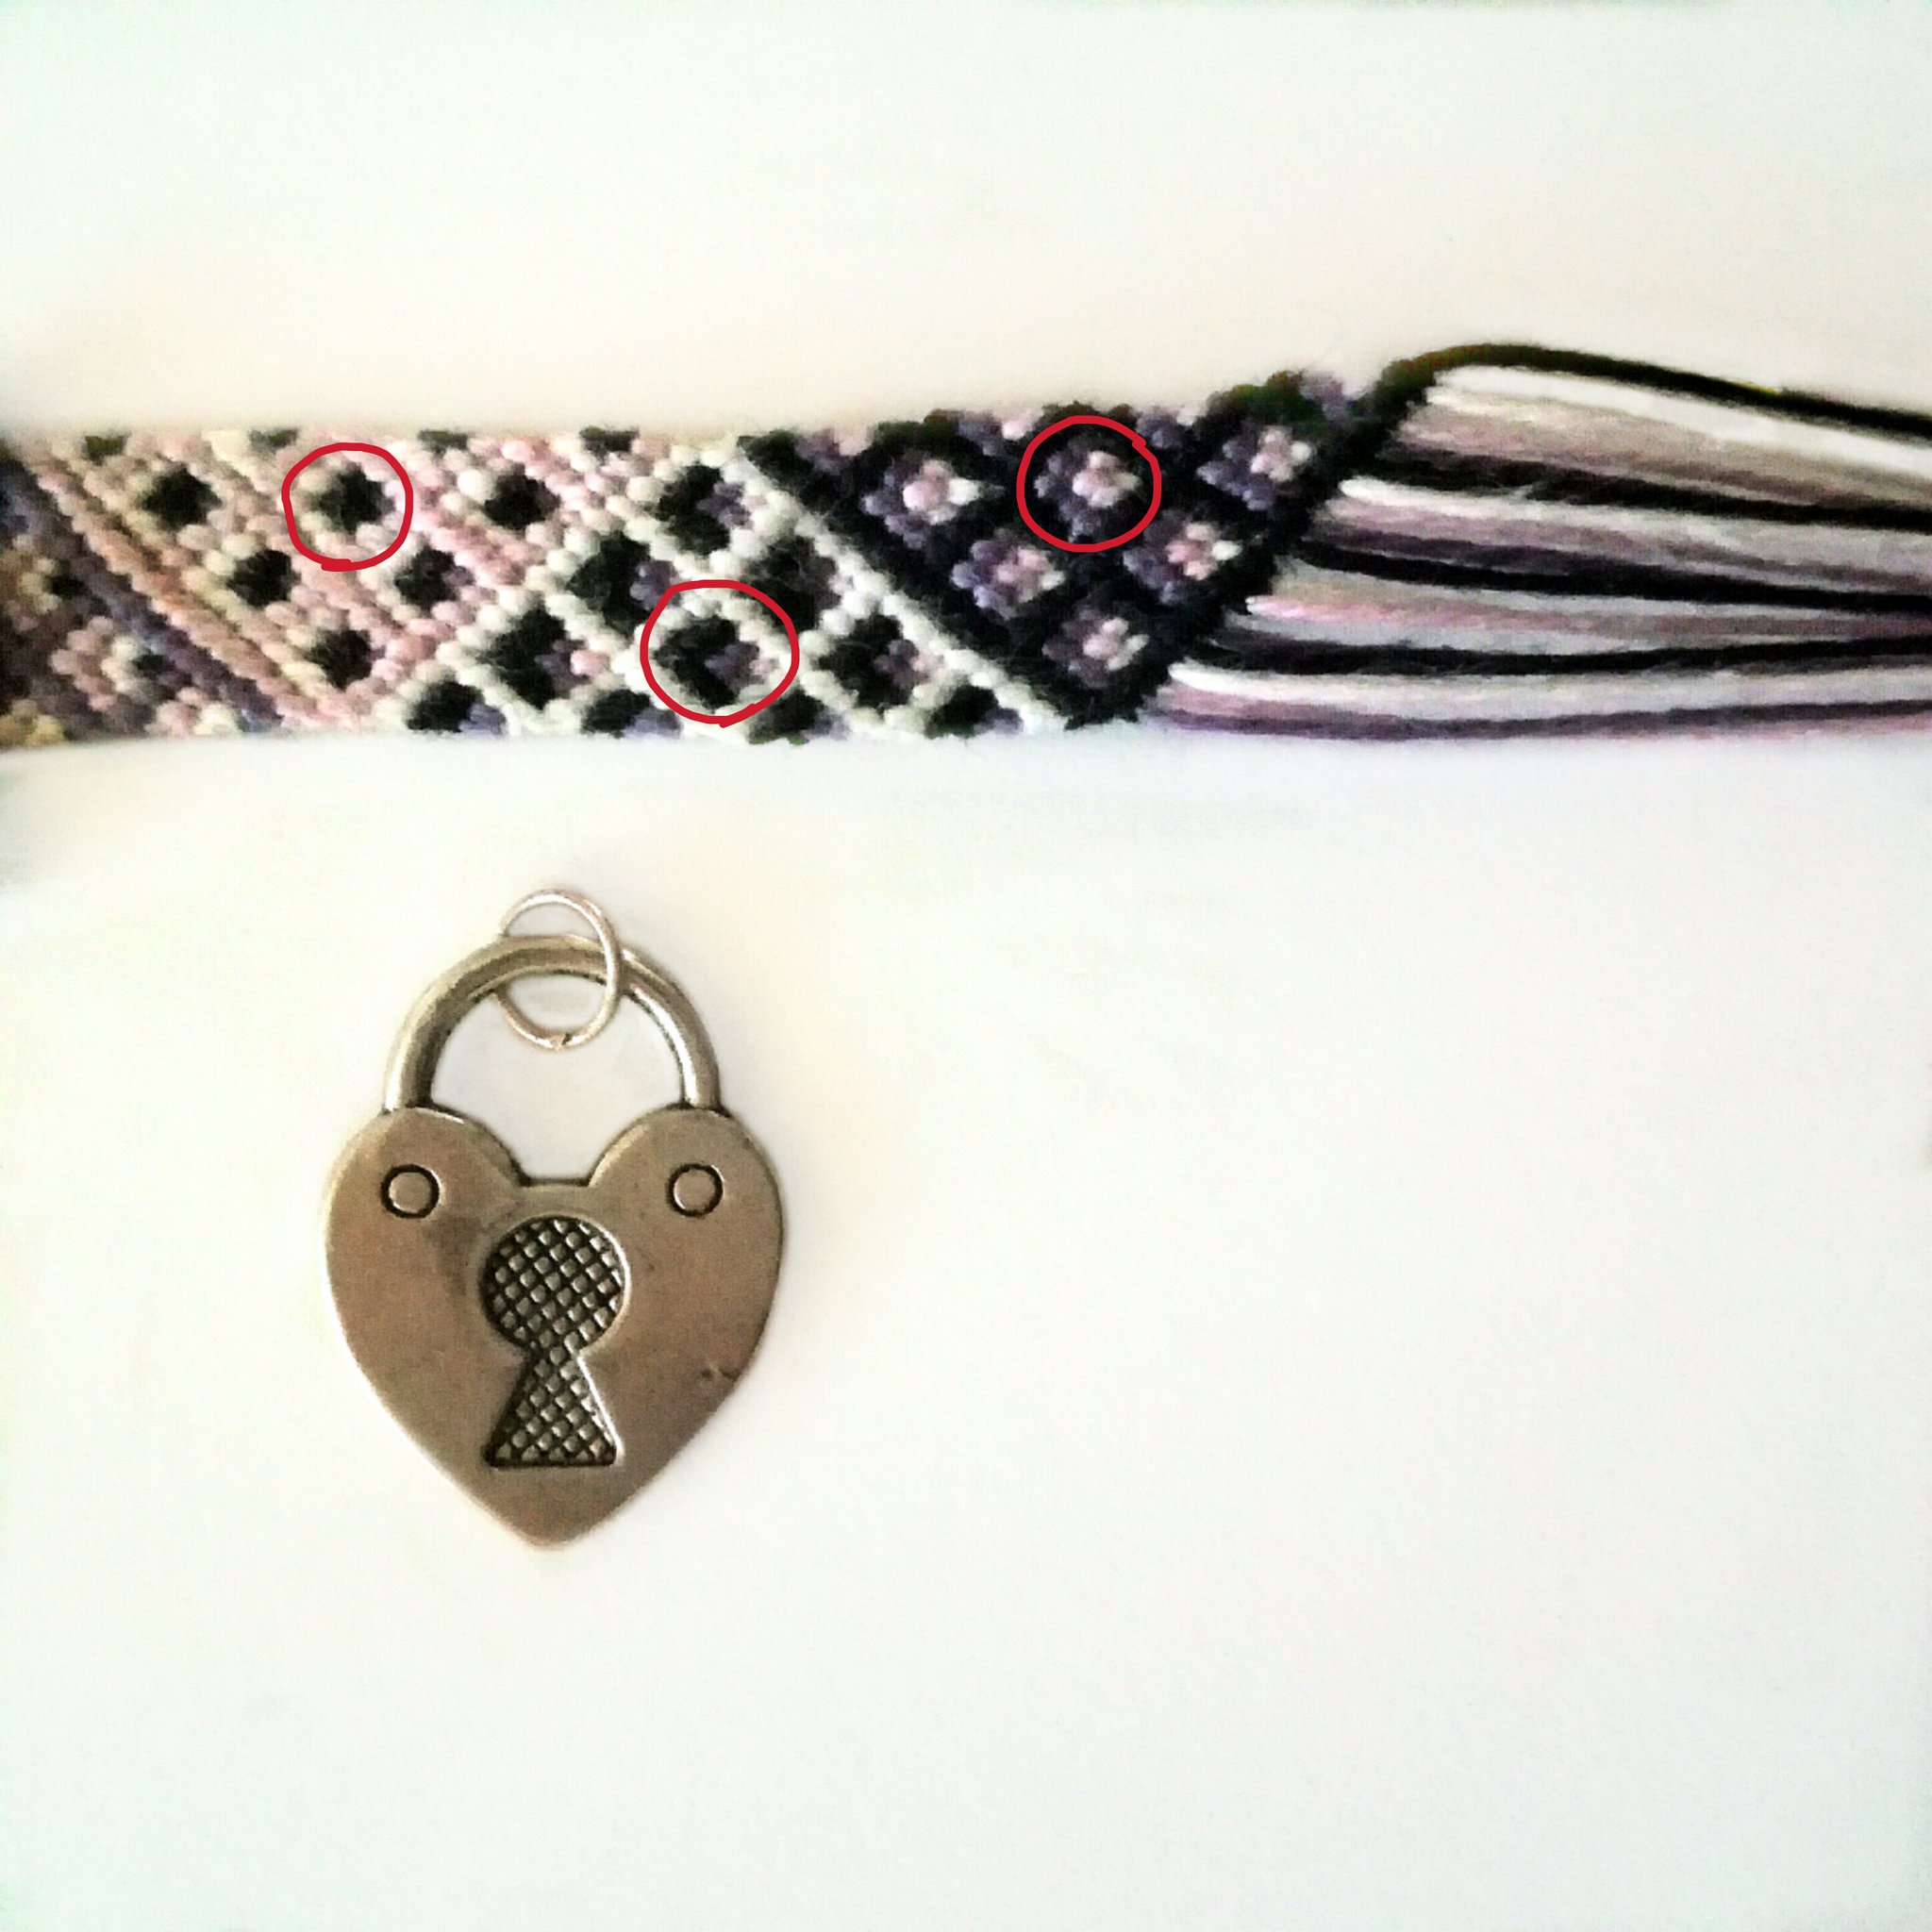
Step 2: Figure out where you would add the charm. For mine, I would add it into the (repeating) spot circled in red. Continue working on your pattern until you reach the spot.

Step 3: Thread the charm between your strings where you want it to go. It should go exactly between two strings that you would normally tie together.
Step 4: Switch your strings as shown, especially if you have two different thread colors in place of the knot you're omitting.
Step 5: Continue working on your bracelet normally. Here's the steps I took in this pattern and how the diamond in the pattern looks with the jump ring.
Yaaay! This is the finished bracelet! If you ever want to remove the charm, just open the jump ring and take it out. The switch in step 4 should make a small cross in the spot where you omitted the knot and it won't be as visible that something is missing.
I hope my instructions were clear and easy to follow. If you have any questions, don't hesitate to comment or write me a private message! Have a wonderful day!