Rate Tutorial
What you will need
- pen
- graph paper
- graph paper
What is a shaped bracelet?
A shaped bracelet is a bracelet made from a pattern that leaves knots out. These left out knots get substituted using a similar technique you'd use for triangle ends. If you want to know how this technique works you can look at the tutorial “How to make a diamond shaped bracelet” by @Adik or the tutorial “the shaped bracelet technique” by @arf820. You can also watch the video “shaped bracelet tutorial” that @Racoon did for pattern #23580.
How do you leave knots out when writing a pattern?
There are different kinds of knots in a bracelet. Each knot has a different letter (combination) or number.
F = forward knot
B = backward knot
FB = forward backward knot
BF = backward forward knot
0 = leaving out a knot
You can either manually enter the knots and separate them using commas or you can use the corresponding buttons on the pattern generator.
For the kind of shaped bracelet pattern I'm going to teach you, you only need f, b and 0 knots.
How do you create a square shape in a pattern?
I will talk you through my process of creating a pattern for a shaped bracelet using 12 strings:
The easiest kind of shaped bracelet is one that consists of a square shape in the middle. You need an even amount of strings.
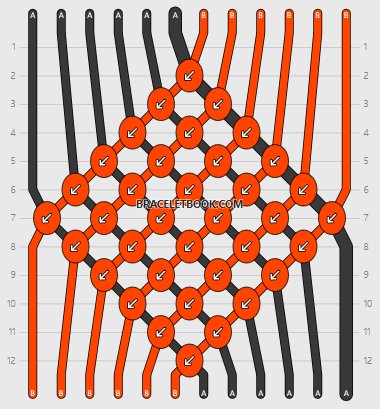
To create a square shape you need to start by making a knot between the two strings in the middle. In the next row you do two knots using the four strings that are currently in the middle. Each row you do one more knot until you made knots between all strings in a row. Then you start making one knot less each row until you get to just one knot.
Here is the structure for twelve strings. You can copy it and use it to create your own patterns. For any other amount of strings you can follow:
0,0,0,0,0,0
0,0,b,0,0
0,0,b,b,0,0
0,b,b,b,0
0,b,b,b,b,0
b,b,b,b,b
b,b,b,b,b,b
b,b,b,b,b
0,b,b,b,b,0
0,b,b,b,0
0,0,b,b,0,0
0,0,b,0,0
The easiest kind of shaped bracelet is one that consists of a square shape in the middle. You need an even amount of strings.
To create a square shape you need to start by making a knot between the two strings in the middle. In the next row you do two knots using the four strings that are currently in the middle. Each row you do one more knot until you made knots between all strings in a row. Then you start making one knot less each row until you get to just one knot.
Here is the structure for twelve strings. You can copy it and use it to create your own patterns. For any other amount of strings you can follow:
0,0,0,0,0,0
0,0,b,0,0
0,0,b,b,0,0
0,b,b,b,0
0,b,b,b,b,0
b,b,b,b,b
b,b,b,b,b,b
b,b,b,b,b
0,b,b,b,b,0
0,b,b,b,0
0,0,b,b,0,0
0,0,b,0,0
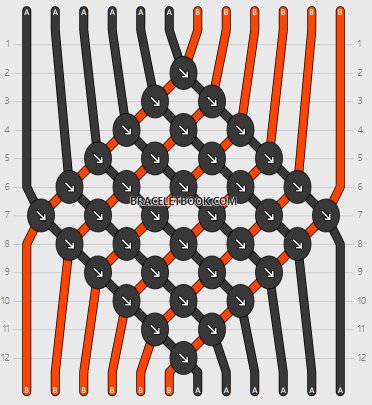
Once you've done the first square the strings will have switched places. That means that if you want to create a square of the same color you need to do f knots instead of b knots (or b knots instead of f knots).
0,0,0,0,0,0
0,0,f,0,0
0,0,f,f,0,0
0,f,f,f,0
0,f,f,f,f,0
f,f,f,f,f
f,f,f,f,f,f
f,f,f,f,f
0,f,f,f,f,0
0,f,f,f,0
0,0,f,f,0,0
0,0,f,0,0
0,0,0,0,0,0
0,0,f,0,0
0,0,f,f,0,0
0,f,f,f,0
0,f,f,f,f,0
f,f,f,f,f
f,f,f,f,f,f
f,f,f,f,f
0,f,f,f,f,0
0,f,f,f,0
0,0,f,f,0,0
0,0,f,0,0
Now you know how to make bracelet patterns with squares of one colour (or stripes if you use string of different colours), now I'm going to teach you how to make patters that have pictures on them.
Here are some example patterns
#17565 heart (14 strings)
#23578 pawprint (14 strings)
#23580 snowflake (14 strings)
#28456 airplane (14 strings)
#28463 pride flag (12 strings)
#28803 eternity sign (18 strings)
#28860 mickey mouse (24 strings)
#29991 braceletbook logo (10 strings)
#30045 cactus (16 strings)
#30049 cherry (20 strings)
#30095 hamburger (10 strings)
@The_arabic has made many more patterns like these.
How to make 2 color patterns
I will talk you through the process of me creating pattern #30128 (moon circle, 12 strings).
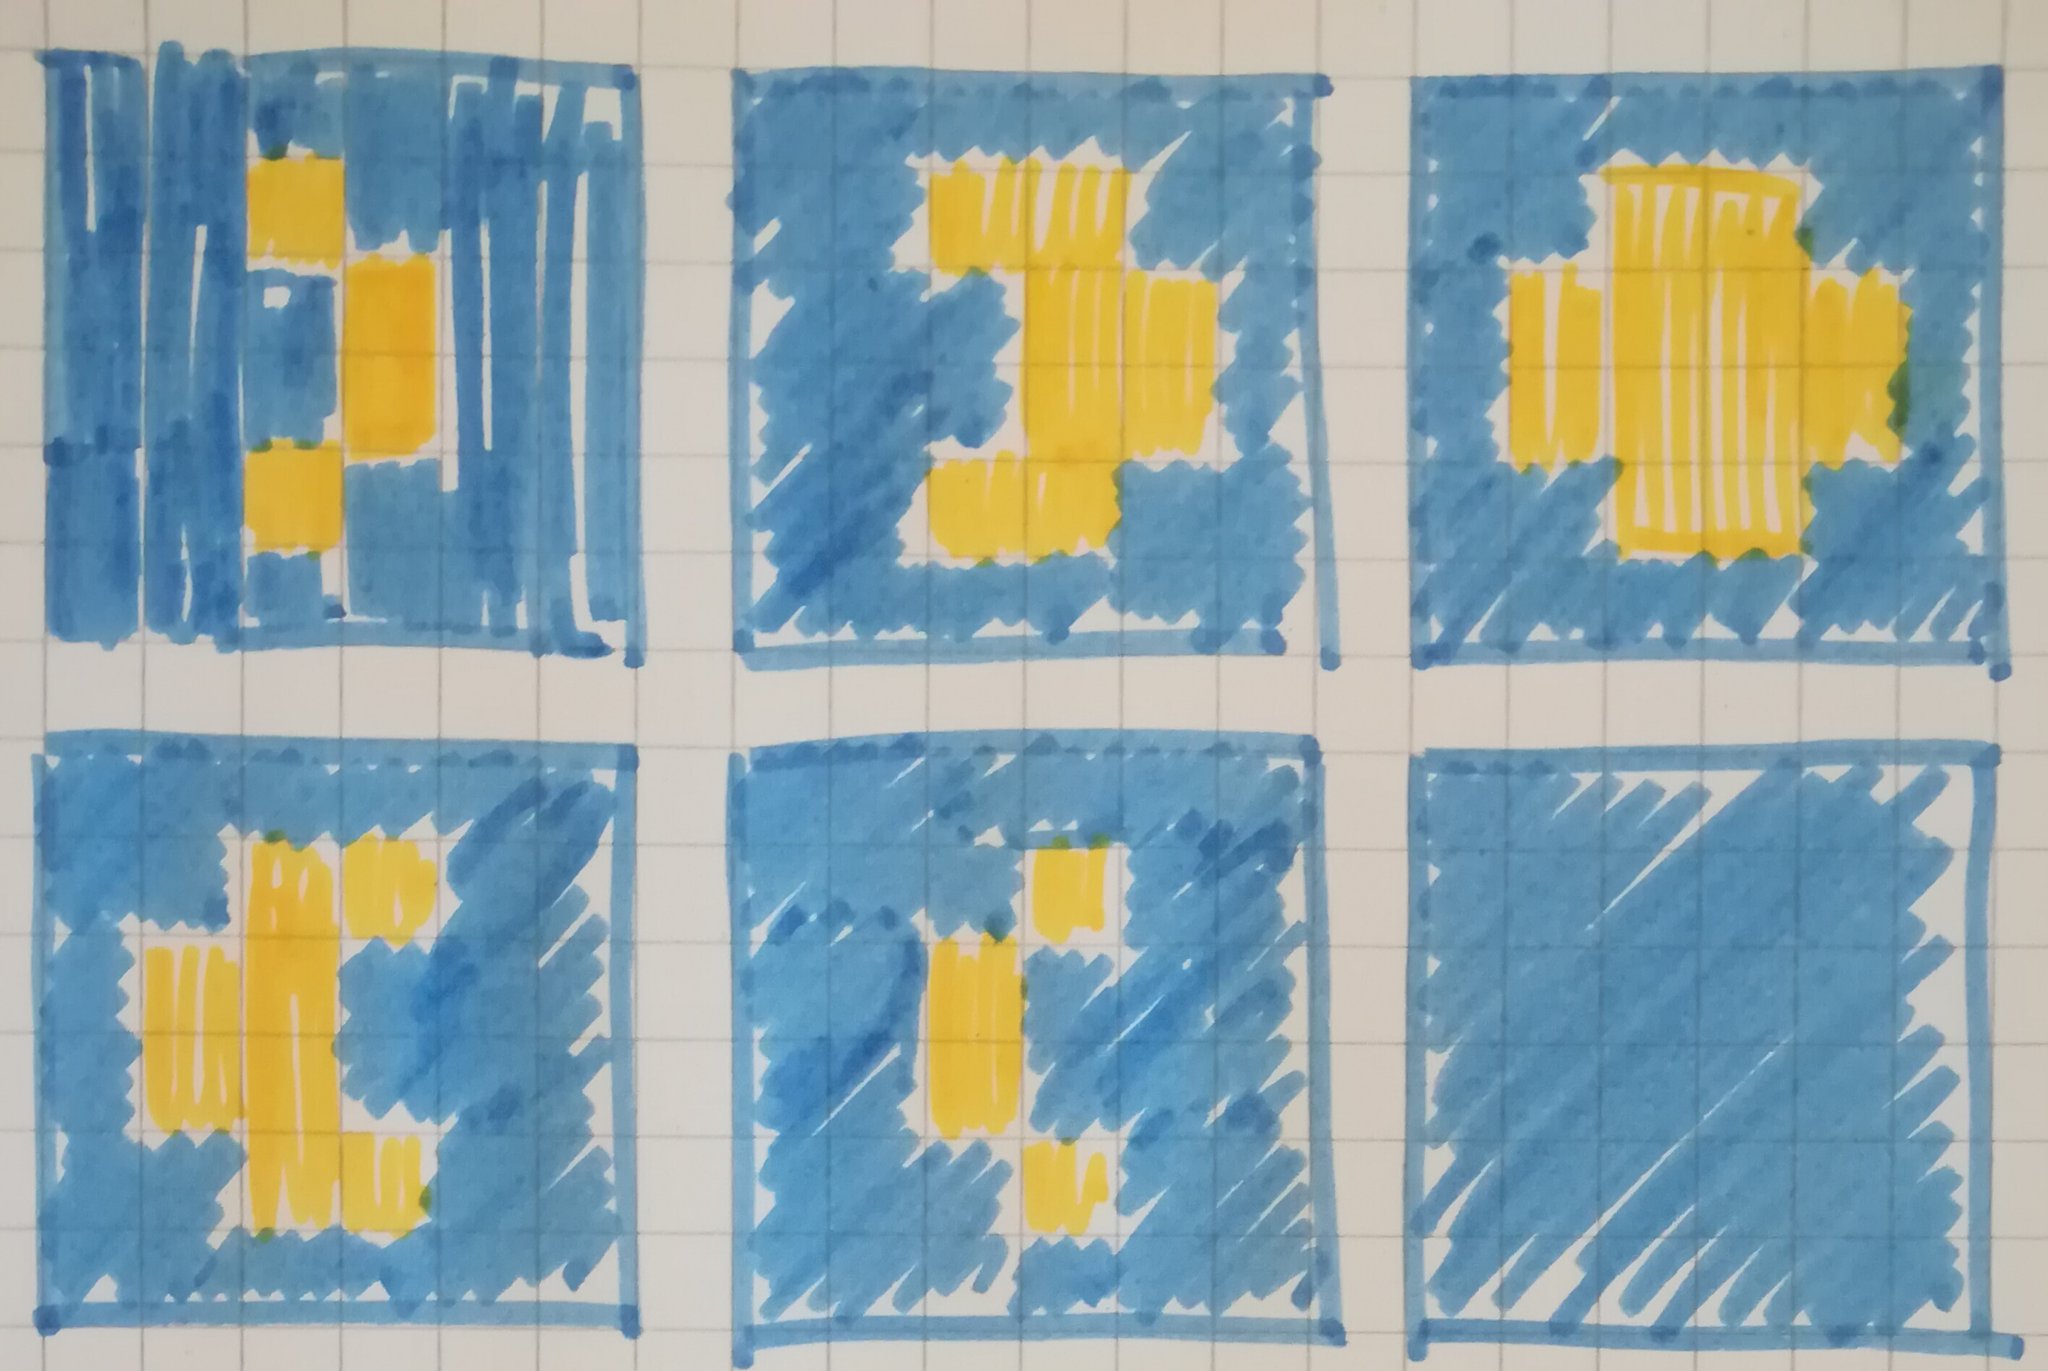
Step 1: Make a sketch
Make a sketch of what image you want to have on your bracelet. Remember to keep it square shaped. The amount of strings you'll need depends on how big your square is. For a 6x6 square you'll need 12 strings, for a 5x5 square you'd need 10 ...
Here is my sketch. I decided to make a moon circle.
Here is my sketch. I decided to make a moon circle.
Step 2: Determine which knots you need to change
At the moment all your knots have one colour. This will be the color of the background (in my case the sky). The colour of the other string will be the colour you want your image to be (in my case the moon). To get knots of the other colour you change a b knot to a f knot or the other way around.
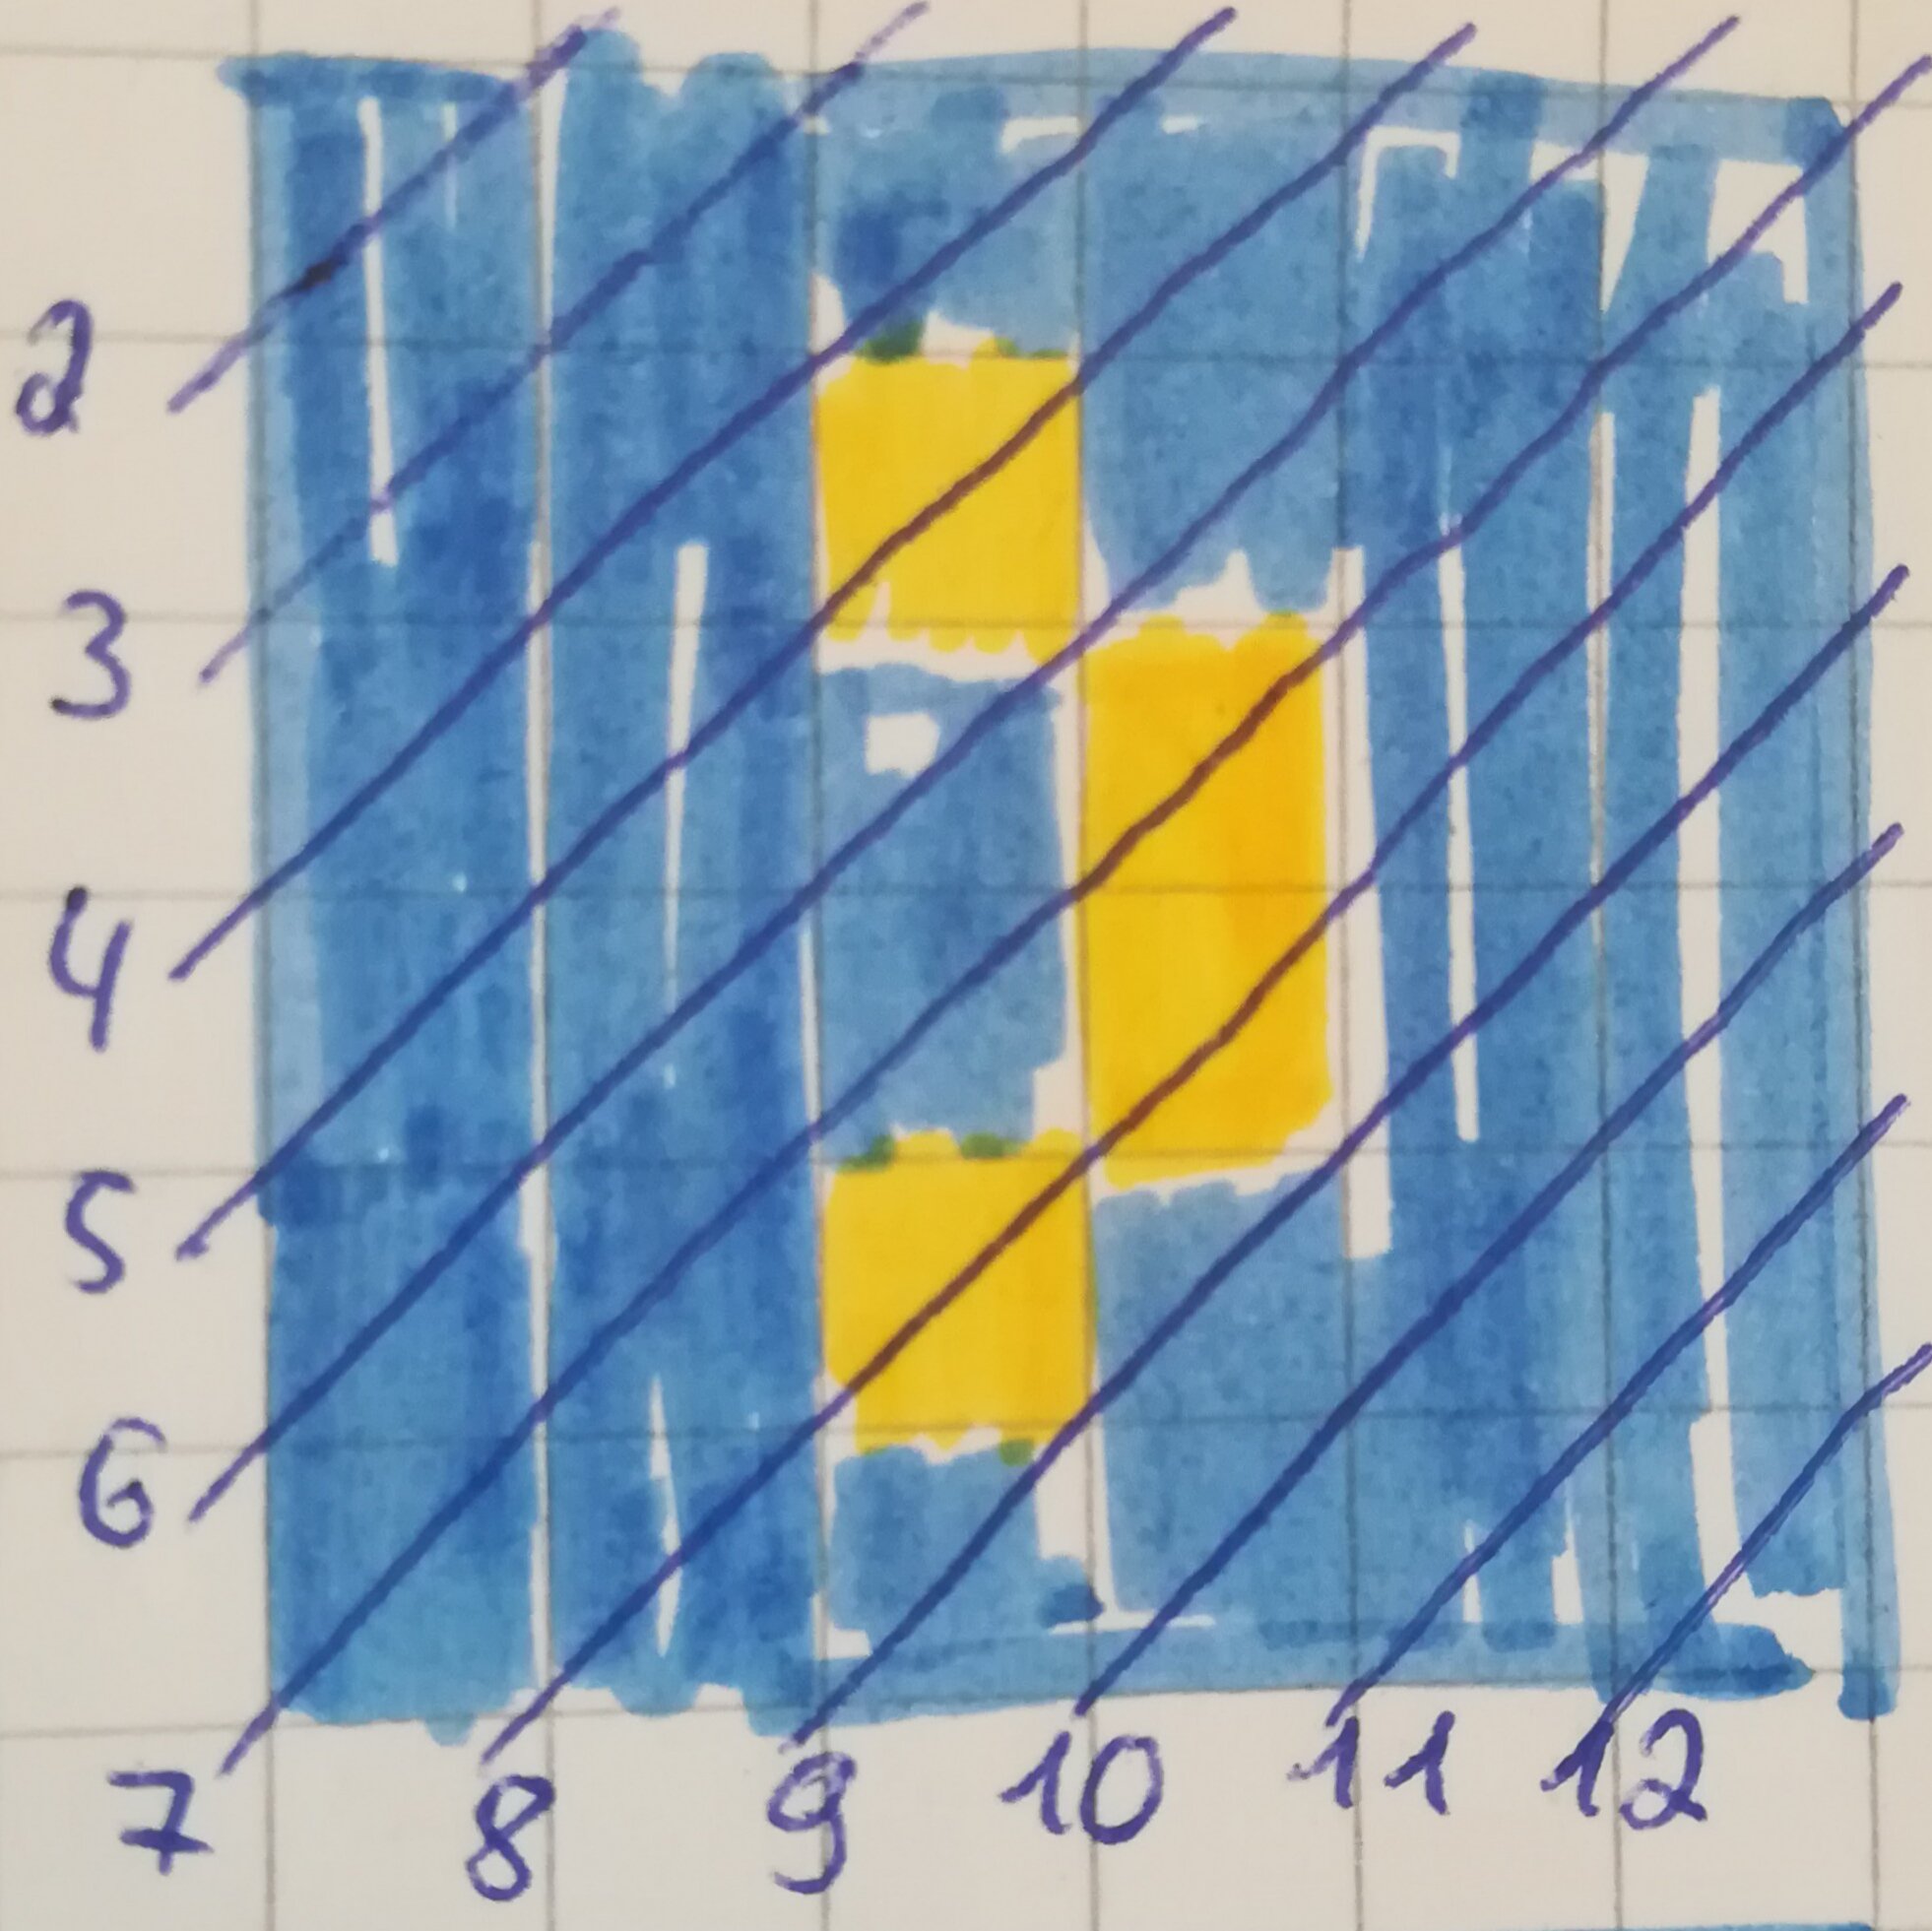
Take your sketch. Start at one of the upper corners. Check diagonal by diagonal which colours your knots have. If your knots have the colour of the background you can leave them as they are. If your knots have the colour of your picture you need to change the knot.
I've marked the lines in my first sketch. In the pattern the square starts forming in row 2, so the first diagonal in my sketch is already the second line in the pattern. You can do this too in your own sketch.
Looking at my sketch you can see that the first 3 diagonals only have blue knots. That means you don't need to change anything in row 2 to 4.
Looking at the 4th diagonal you can see that the 3rd knot is yellow. That means in row 5 you have to change the 3rd knot (not counting the left out knots).
You continue doing this diagonal by diagonal until you reach the end of the square. After that you continue to the next square and do the same thing. If you have only one square and you want it to repeat you have to do this step twice for your square.
My recommendation for you is to regularly save your pattern while writing it. Check regularly if the pattern is turning out how you want it to turn out. It's easy to get confused with the rows and diagonals. But don't let yourself be discouraged. You can do it!
If you have any questions feel free to ask!
If you have any questions feel free to ask!