Rate Tutorial
The shaped bracelet technique uses triangle starts and ends to achieve a bracelet shaped like individual diamonds, giving a very unique finish to it. Many of my recent patterns use this technique, although it is not a requirement. In this tutorial, I am going to teach the shaped bracelet technique using one of my shaped patterns: #40777.
Preparation
Before we begin, choose your colors and make sure you have the right amount of strings per color as indicated by the pattern. Then, make a starting loop or secure your strings to your workspace without a loop. We are now ready to start making the pattern!
Step 1: Locate your triangle start
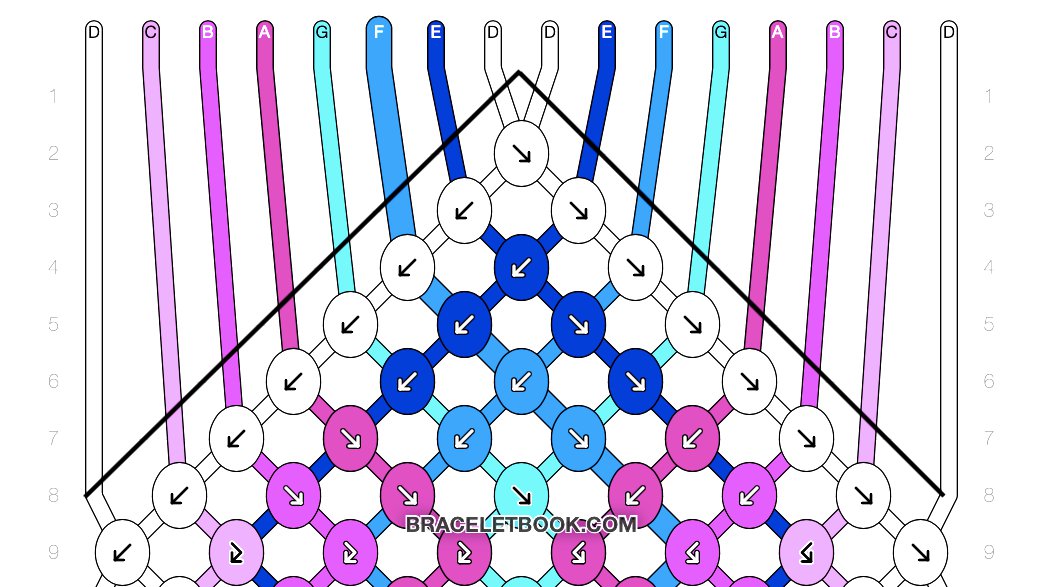
Shaped bracelets are a great way to start learning how to do triangle starts and ends, because the knot structure of shaped bracelets very clearly shows which string to use next in your triangle start and end. In the diagram, you’ll see an upside down V shape, outlined by the black lines. You split your strings in half: 2 white strings and 1 color of both the pink and blue gradients on one side, and same on the other side.

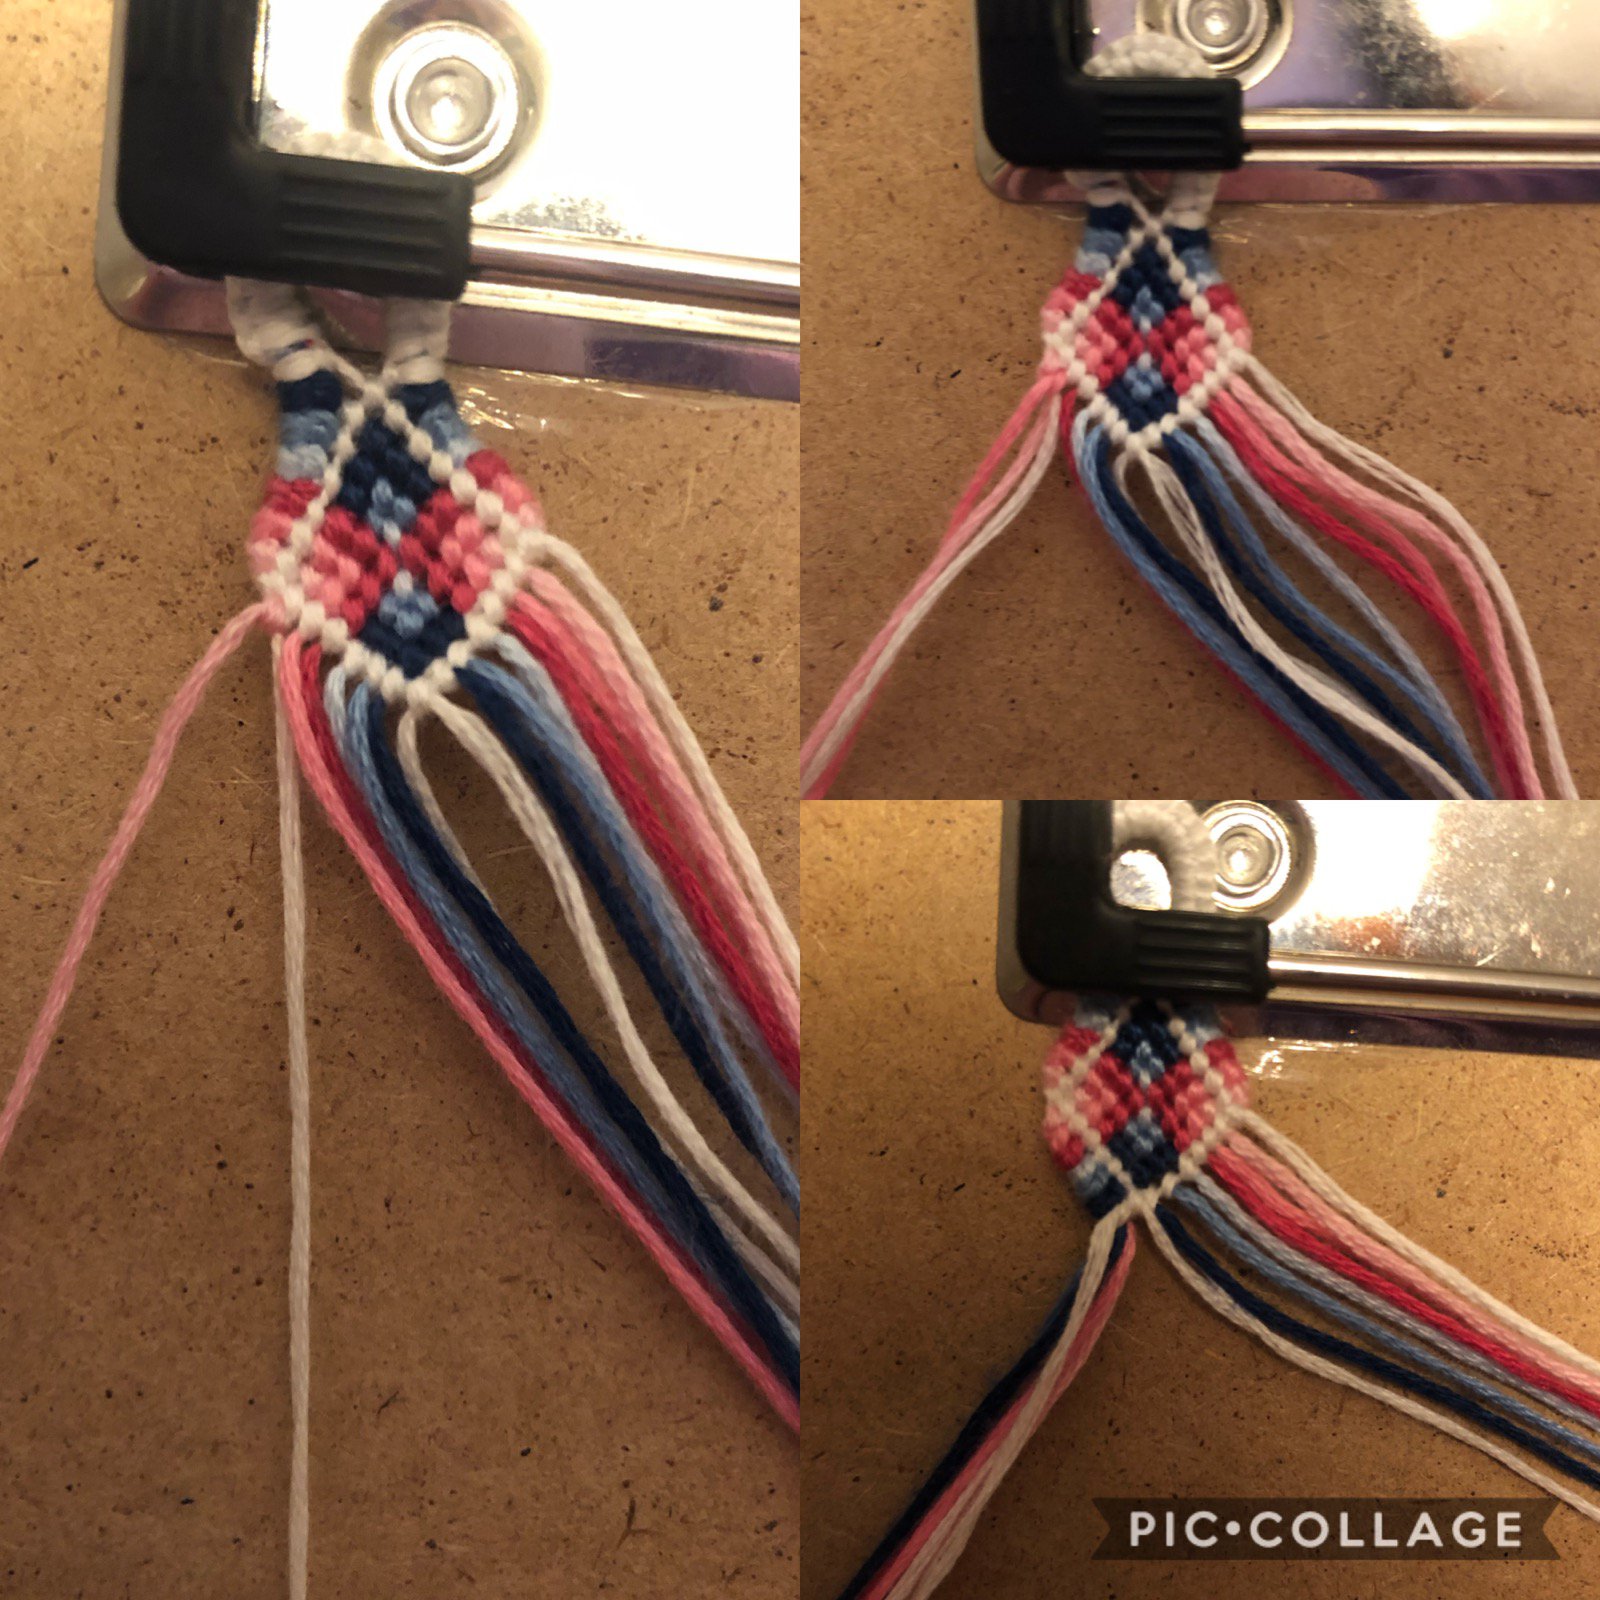
Step 2: Knot your triangle start
Once you have split your strings in half, it is time to start knotting your triangle start. Starting on the left side, make a forward knot or a backward-forward knot with one of the white strings over all the strings you have on the left side. Then with the darkest blue string, do the same, excluding the first white string. Same with the next blue.
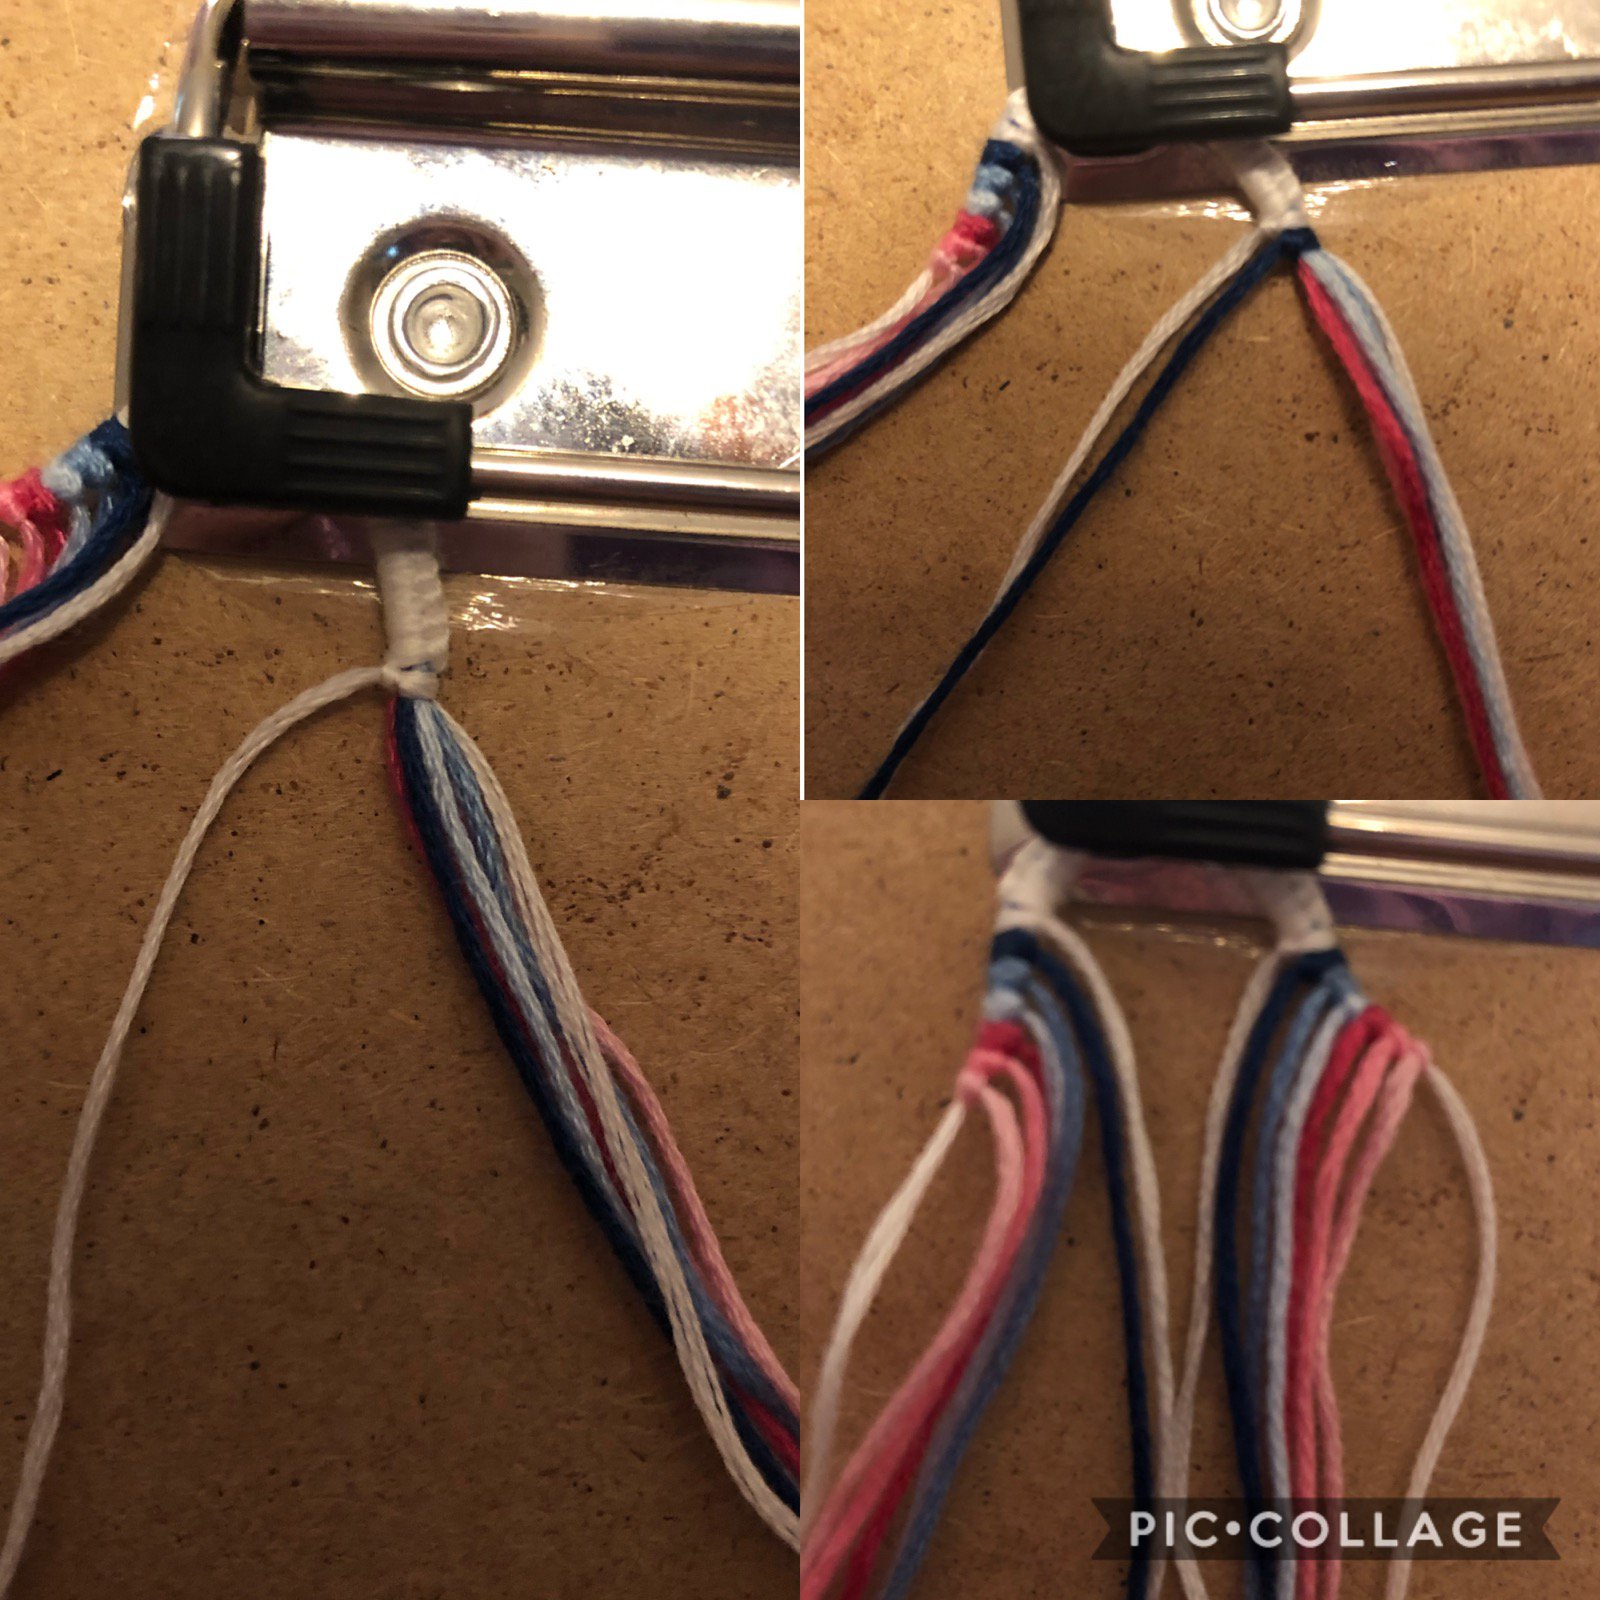
Repeat until you have made the final knot with the lightest pink over the white. Mirror on the right. Instead of doing forward knots or backward- forward knots, on the right, make backward knots or forward-backward knots. The top collage is the left side, and the bottom collage is the right side.
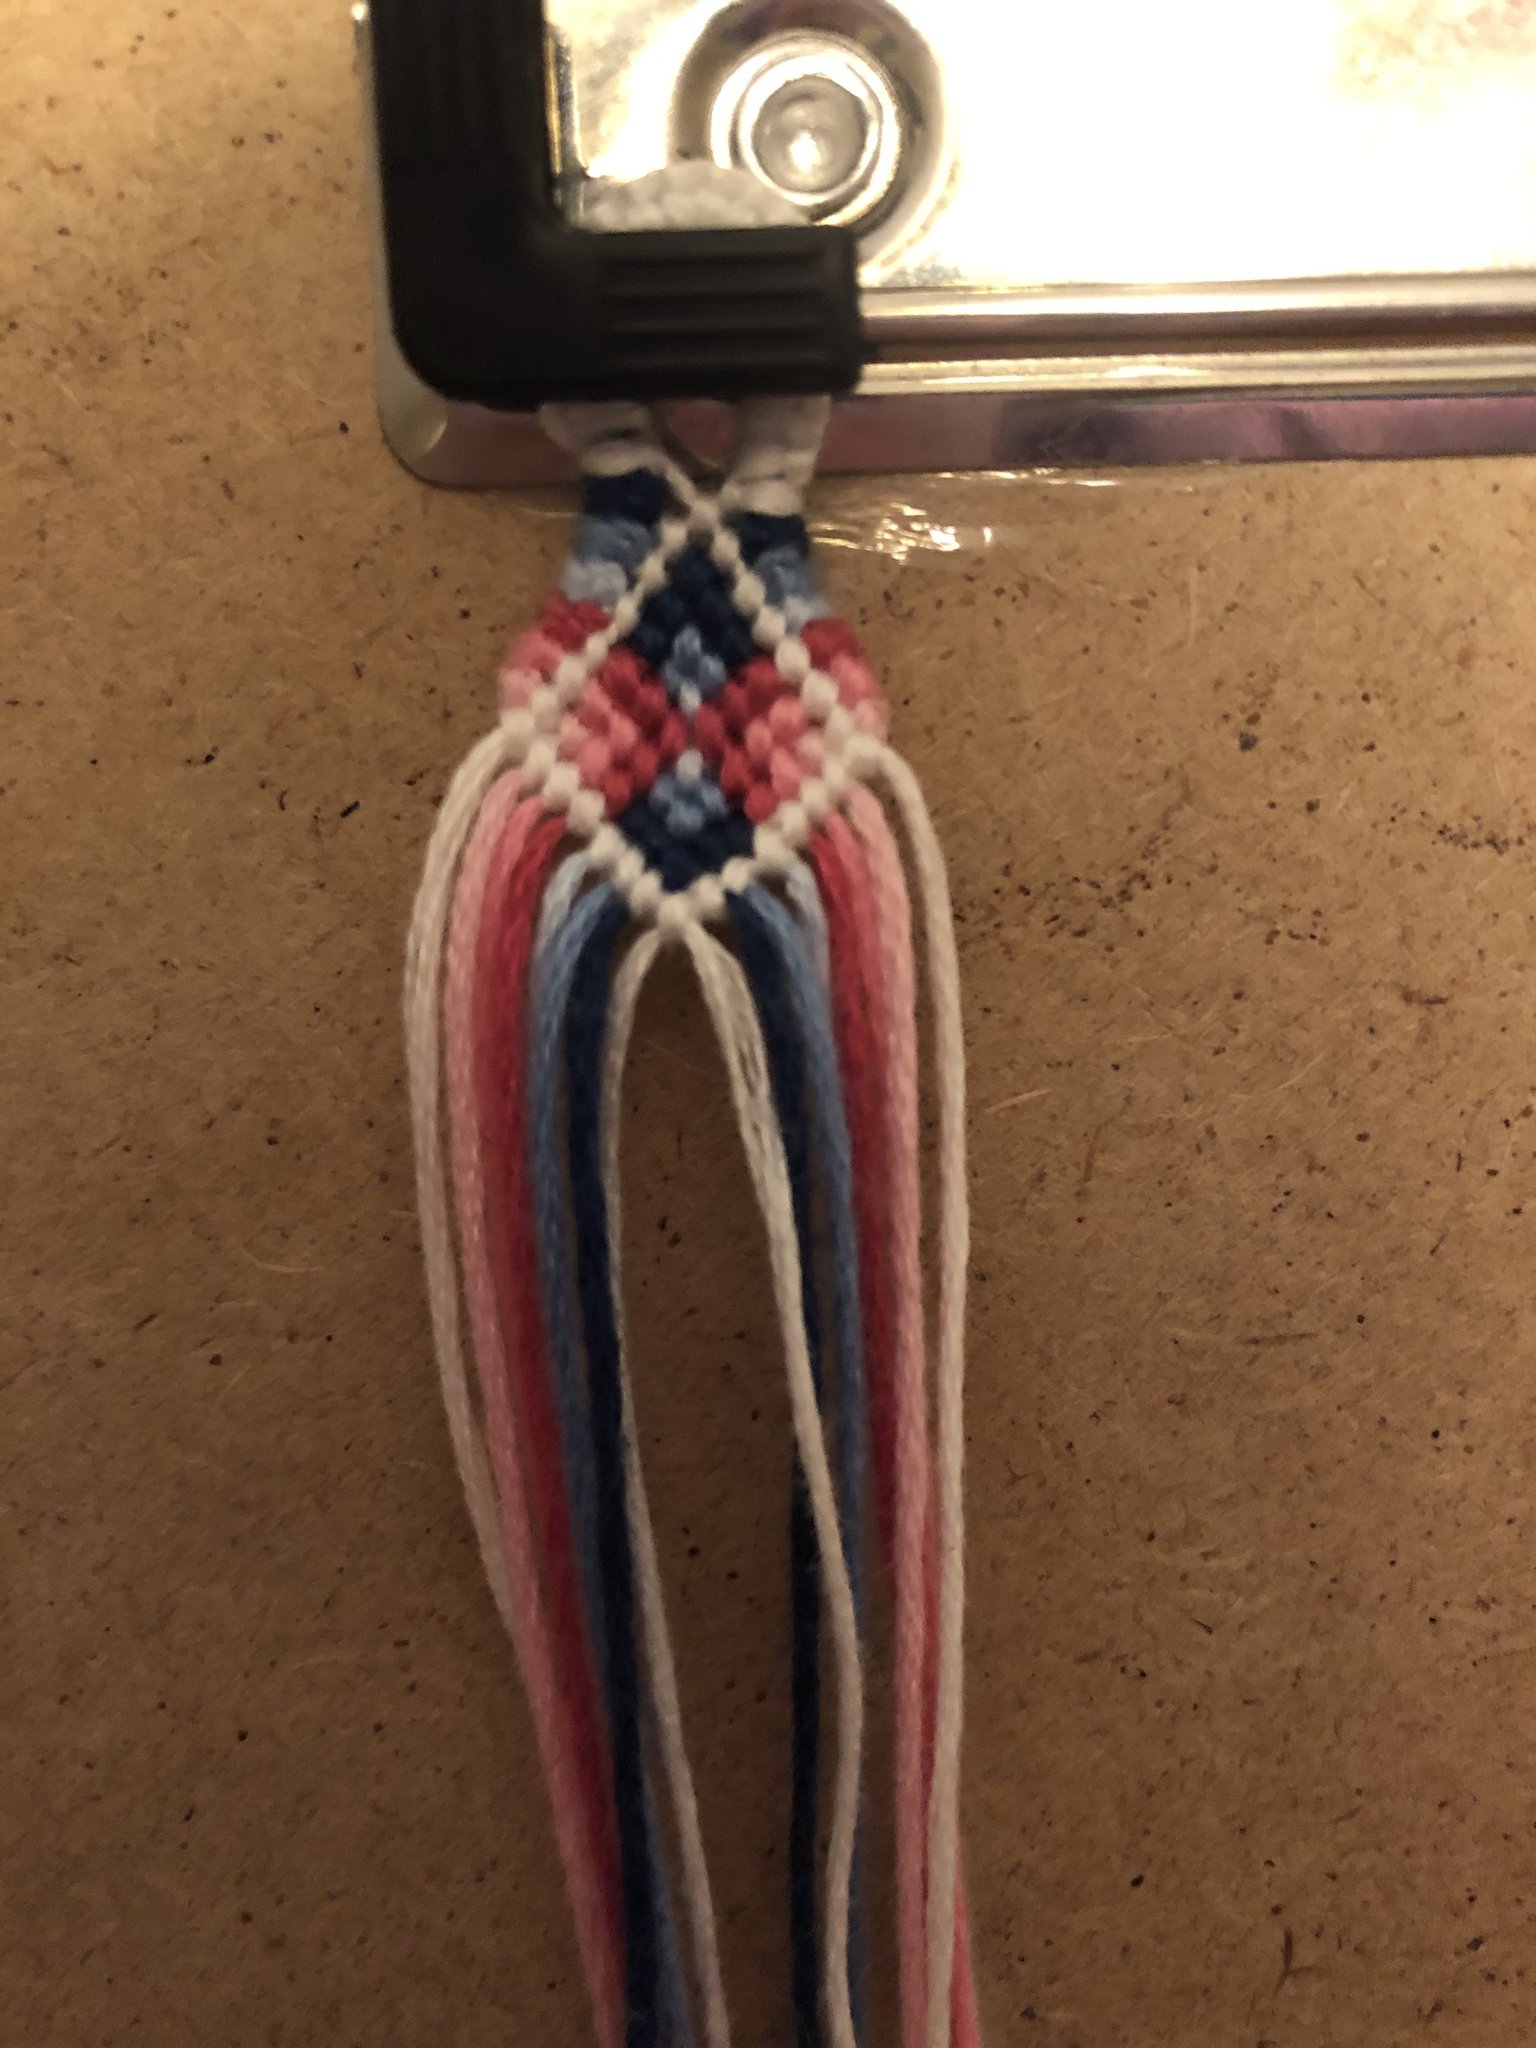
Step 3: Knot the actual diamond part
Since this is not a tutorial on this particular pattern, I will not be teaching you how to segment knot this pattern. Basically, to knot the actual diamond part, you can do segment knotting or row by row knotting. You could even knot in chevrons or in candystripes, whichever you prefer. How you knot the actual diamond part is completely up to personal preference.
Step 4: Locate your triangle end
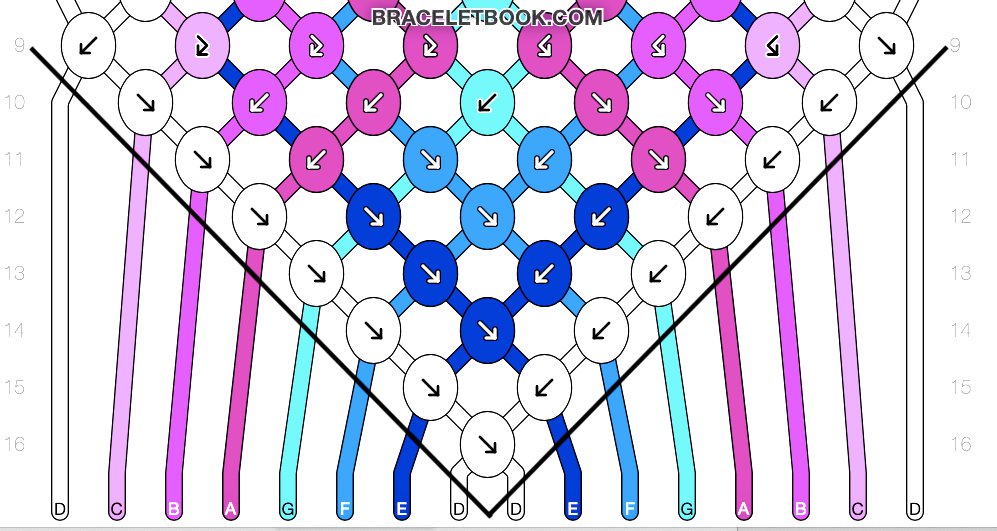
After you have finished Step 3, it is time to finish off your first diamond with a triangle end. To locate the triangle end, do the same thing as with a triangle start, but with a regular V shape. The V shape is outlined by the black in the diagram to the left.
Step 5: Knot your triangle end
The process for this is basically the same as the process for knotting your triangle starts, except in reverse. Starting on the left side, make a backward knot or a forward-backward knot with the lightest pink over the white. Do the same with the next pink over both the white and the lightest pink.
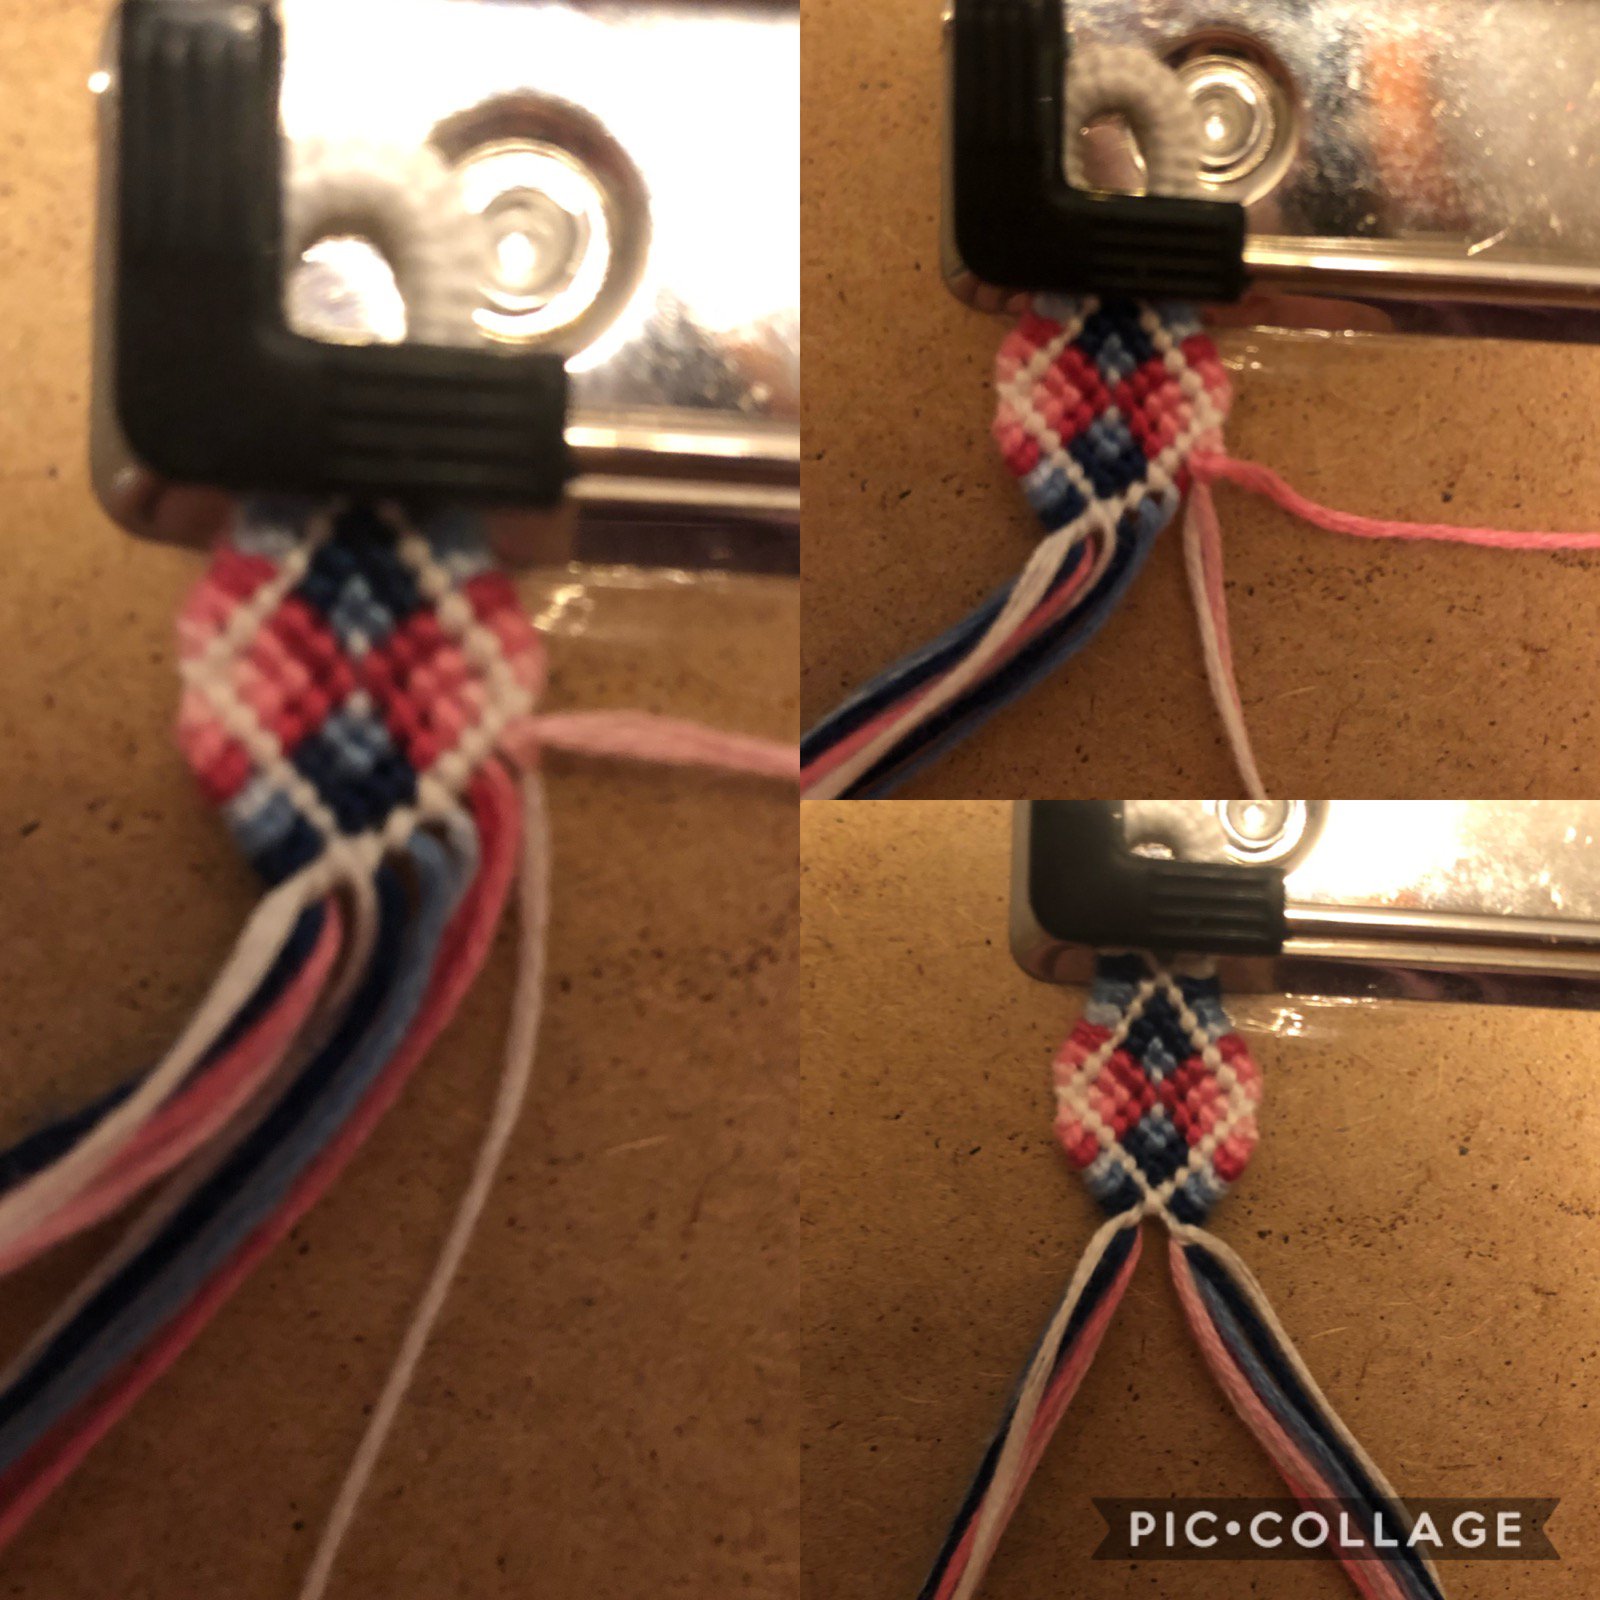
Continue until you have made the final knot with the white string in the middle over the whole bundle. Mirror on the right. Instead of doing backward knots or forward-backward knots, on the right, make forward knots or backward-forward knots. The top collage is the left side, and the bottom collage is the right side.
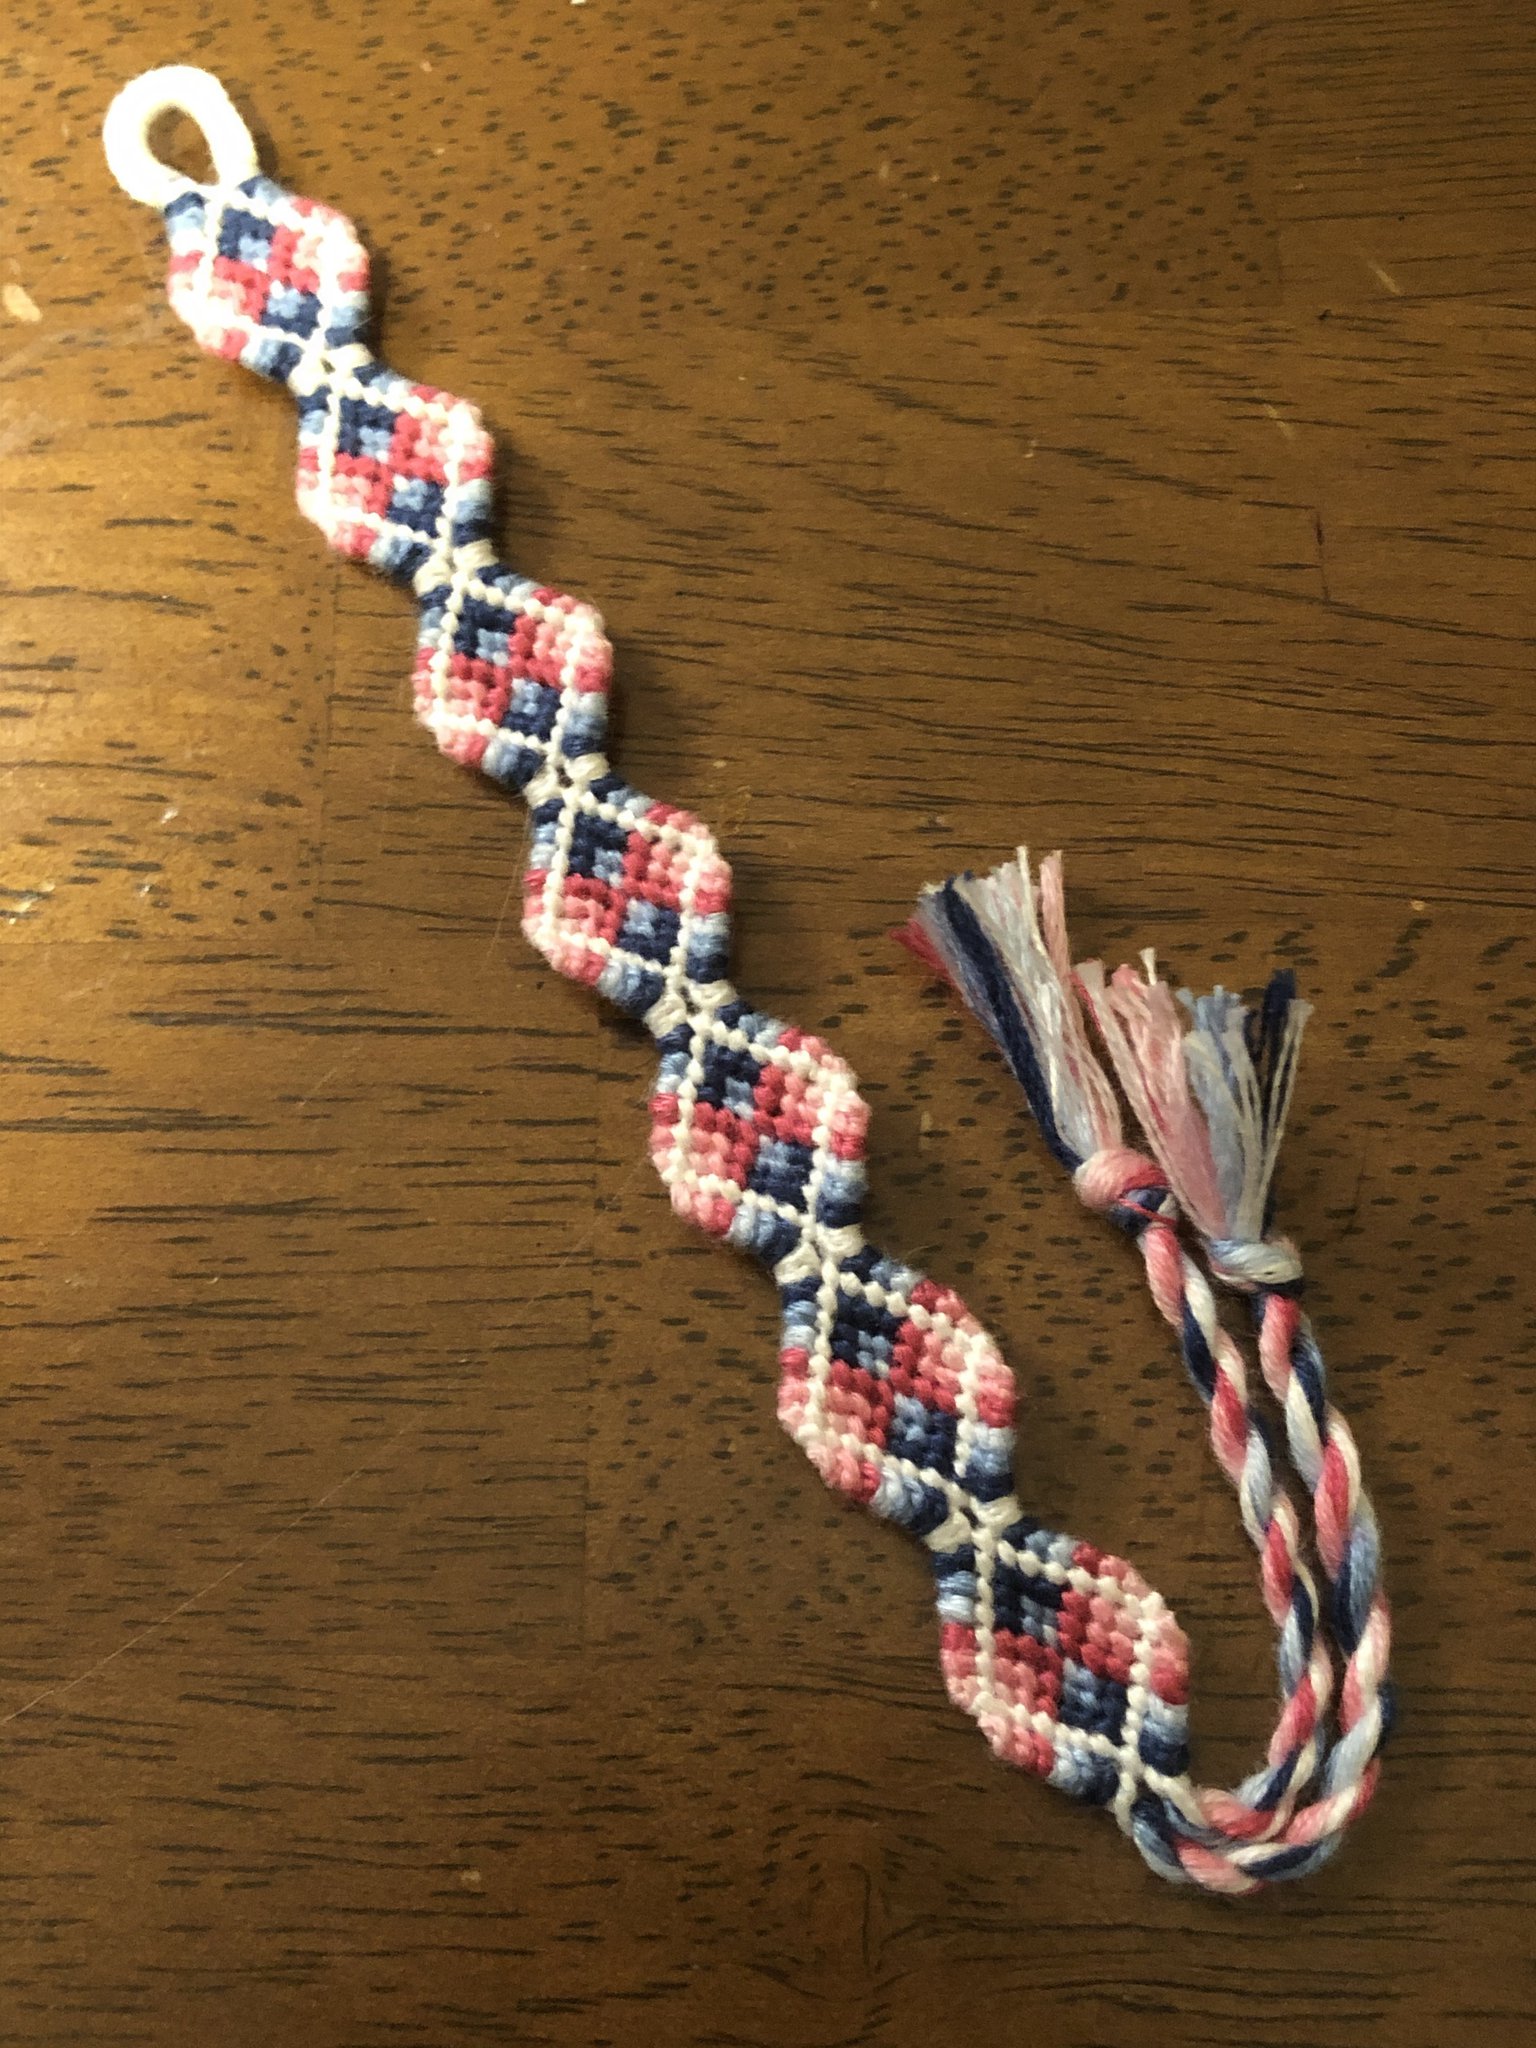
Step 6: Repeat and finish
To continue the process, repeat steps 1-5 to the desired length and make ties. My finished bracelet for this pattern is shown on the left.
Another option
As I said at the top, the shaped bracelets technique is not required for this type of bracelet.
Another option is leaving the strings loose to the side by only knotting the diamond part (step 3). That way, you do not have to worry about making triangle starts or ends, but you have to be aware of your knot tension, especially on the edge of the diamonds. Doing the bracelet this way will result in a bracelet with loose string surrounding each individual diamond. While I personally prefer using the shaped bracelet technique with the triangle starts and ends, this other way will achieve beautiful results as well.
Another option is leaving the strings loose to the side by only knotting the diamond part (step 3). That way, you do not have to worry about making triangle starts or ends, but you have to be aware of your knot tension, especially on the edge of the diamonds. Doing the bracelet this way will result in a bracelet with loose string surrounding each individual diamond. While I personally prefer using the shaped bracelet technique with the triangle starts and ends, this other way will achieve beautiful results as well.
Here is a link for a Youtube tutorial by Masha Knots on the shaped bracelets technique.
I hope this tutorial was helpful for those who are confused with what to do when there are patterns with loose string. If you have any questions, please feel free to private message me, and I will answer your questions to the best of my ability. Have a great day everybody and happy knotting!!! 😄❤️