Rate Tutorial
The straight edges technique is a technique that makes the edges of a bracelet appear straighter. This is archived by making bf knots on the left edge and fb knots on the right edge. This technique can be used in both normal and alpha patterns.
Disclaimer: The straight edges technique isn't the ultimate solution to keeping your bracelets straight. You can make straight bracelets without the straight edges technique and bracelets for which you used the straight edges technique can still turn out wonky.
The straight edges technique only affects the edges of your bracelet and how they look, not the overall knotting structure. It has an affect but it's not as big as you might hope.
Some people struggle doing fb and bf knots and they turn out wonky. Doing the straight edges technique might even affect your bracelet negatively if that's the case for you.
Some tricks for keeping your bracelets straight
- Make tight knots/have a consistent tightness. The tightness of your knots is determined by the first half of your knot. Pull it tight before doing the second half of the knot. The second half will secure the knot in place.
- Don't pull the bracelet to the side while knotting it. Always make sure you pull the bracelet straight down.
- Balance out f and b knots. This is not possible for every pattern. Try knotting towards the middle if possible. That means on the left side whenever there are two strings of the same colour you do a f knot and on the right side a b knot.
The straight edges technique on alpha patterns
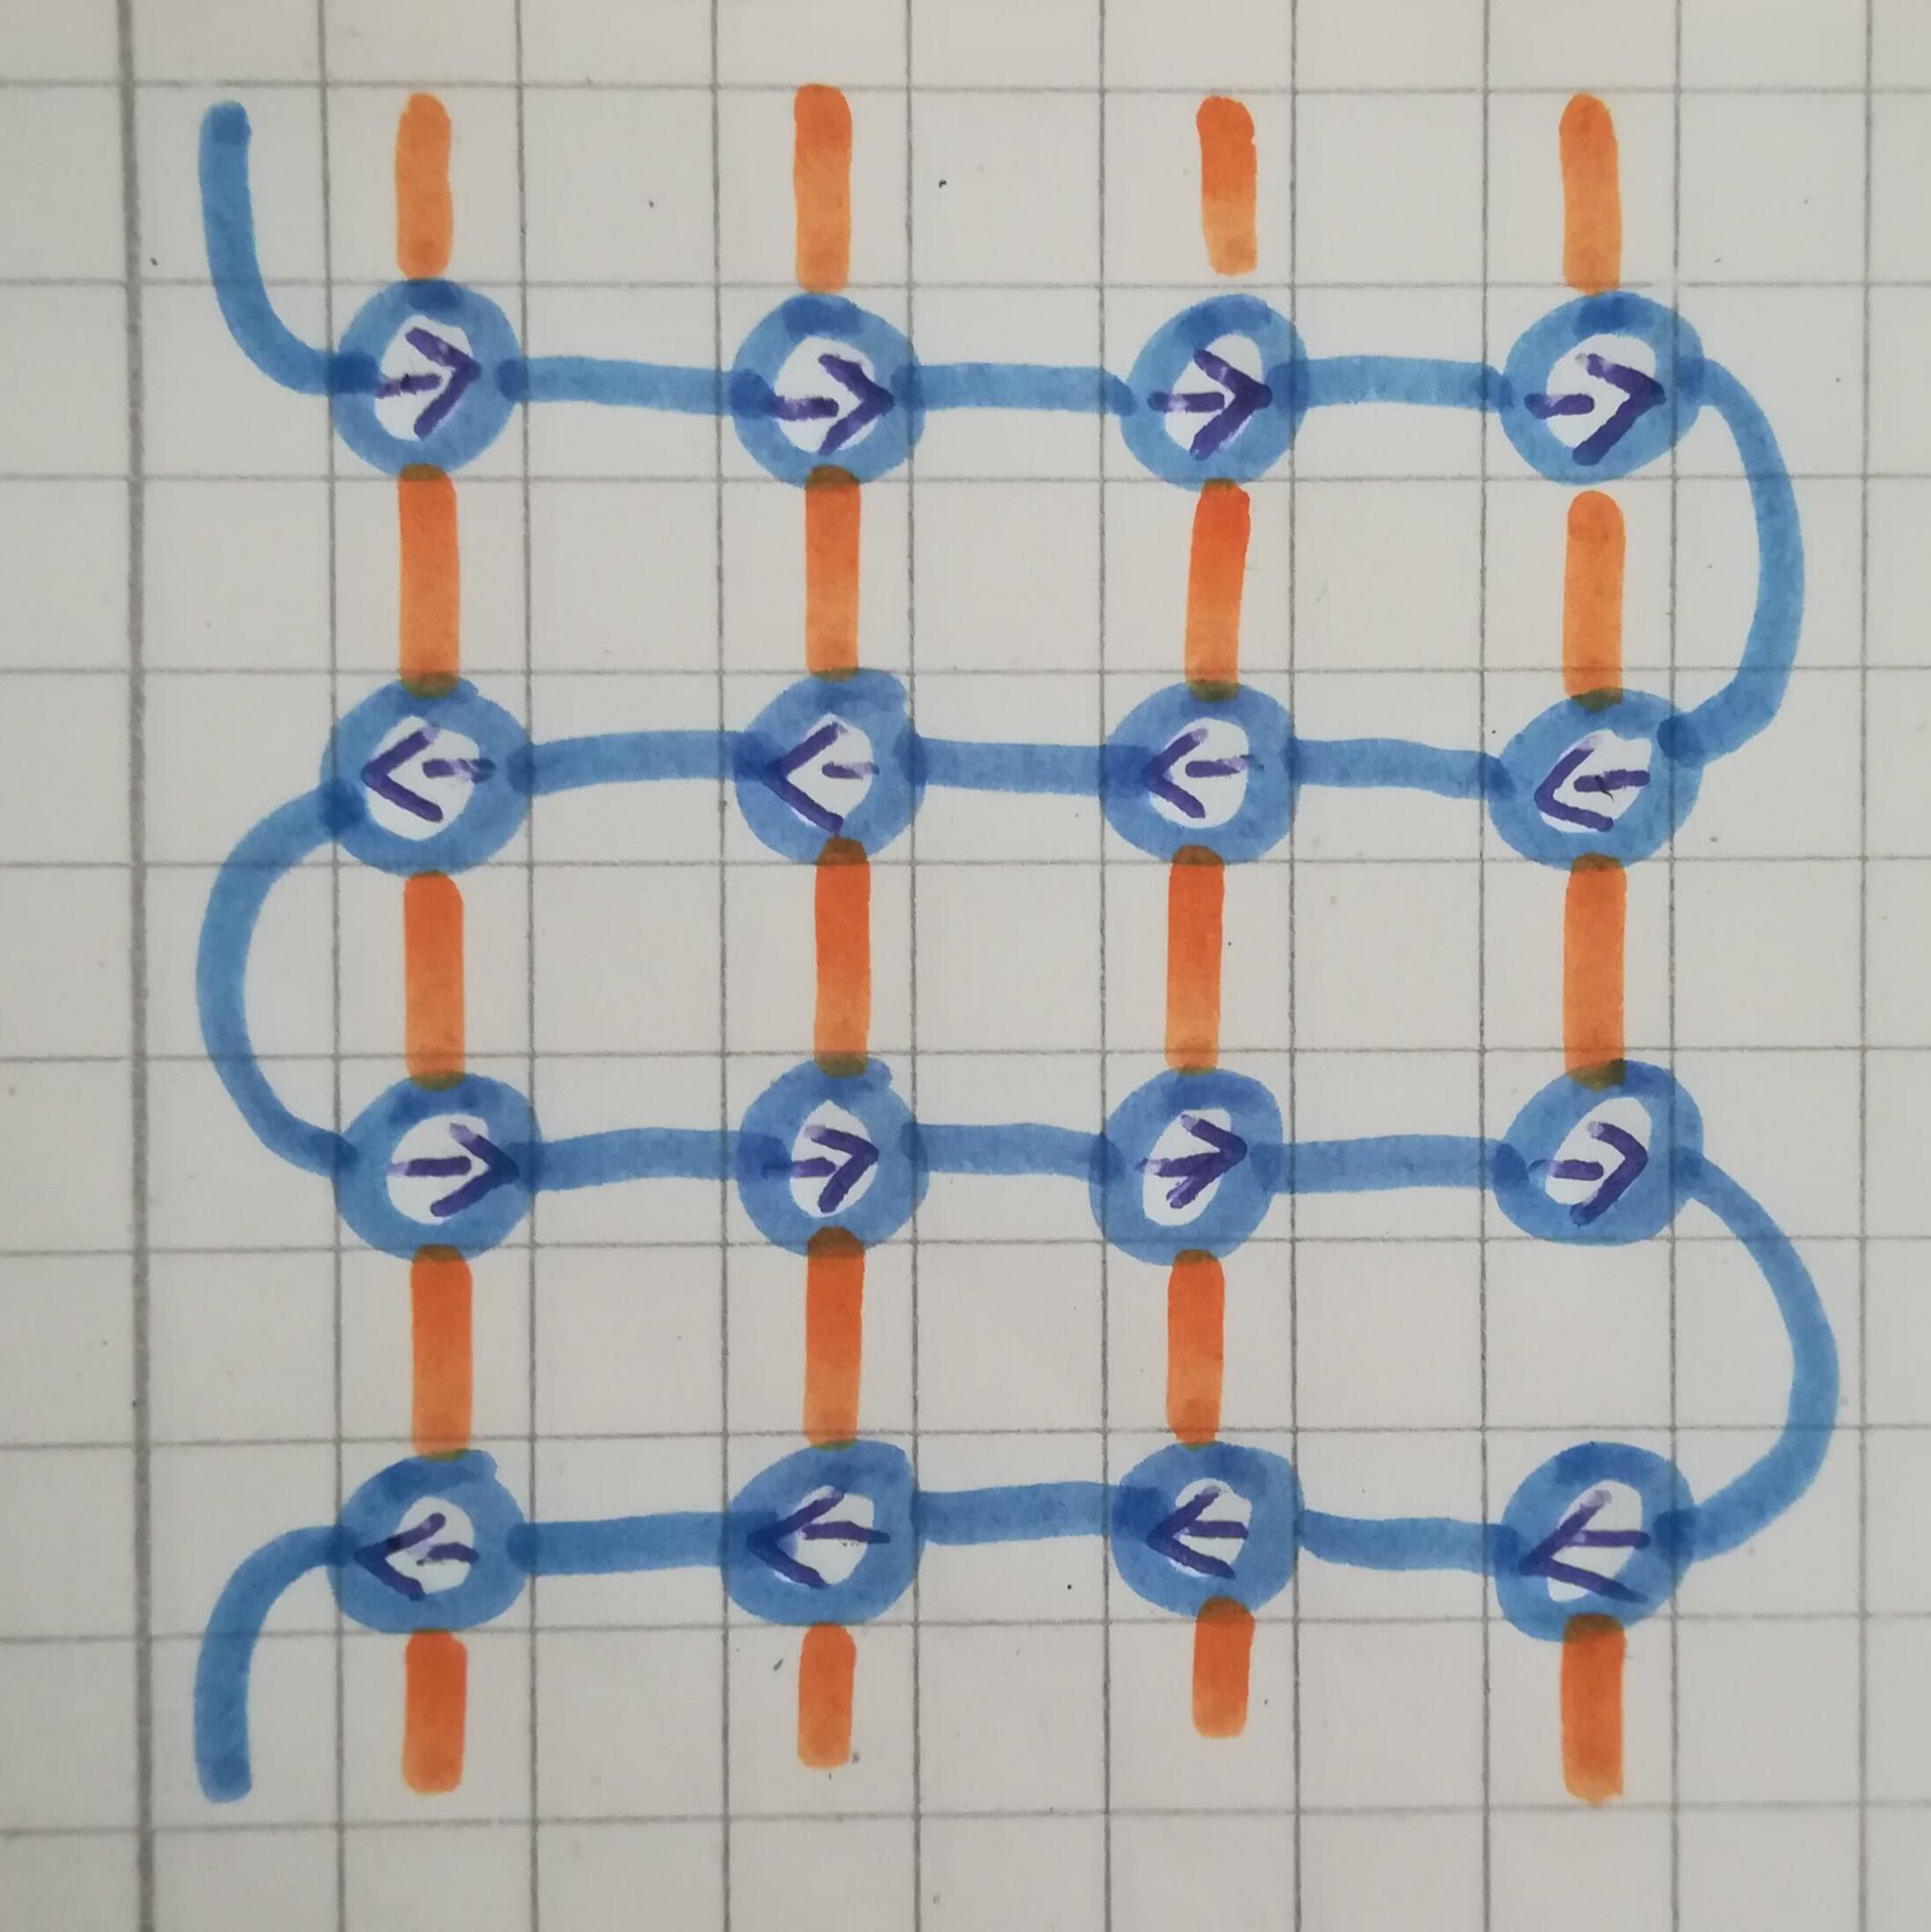
Alpha patterns are knotted row by row. A row of b knots from right to left is followed by a row of f knots from left two right.
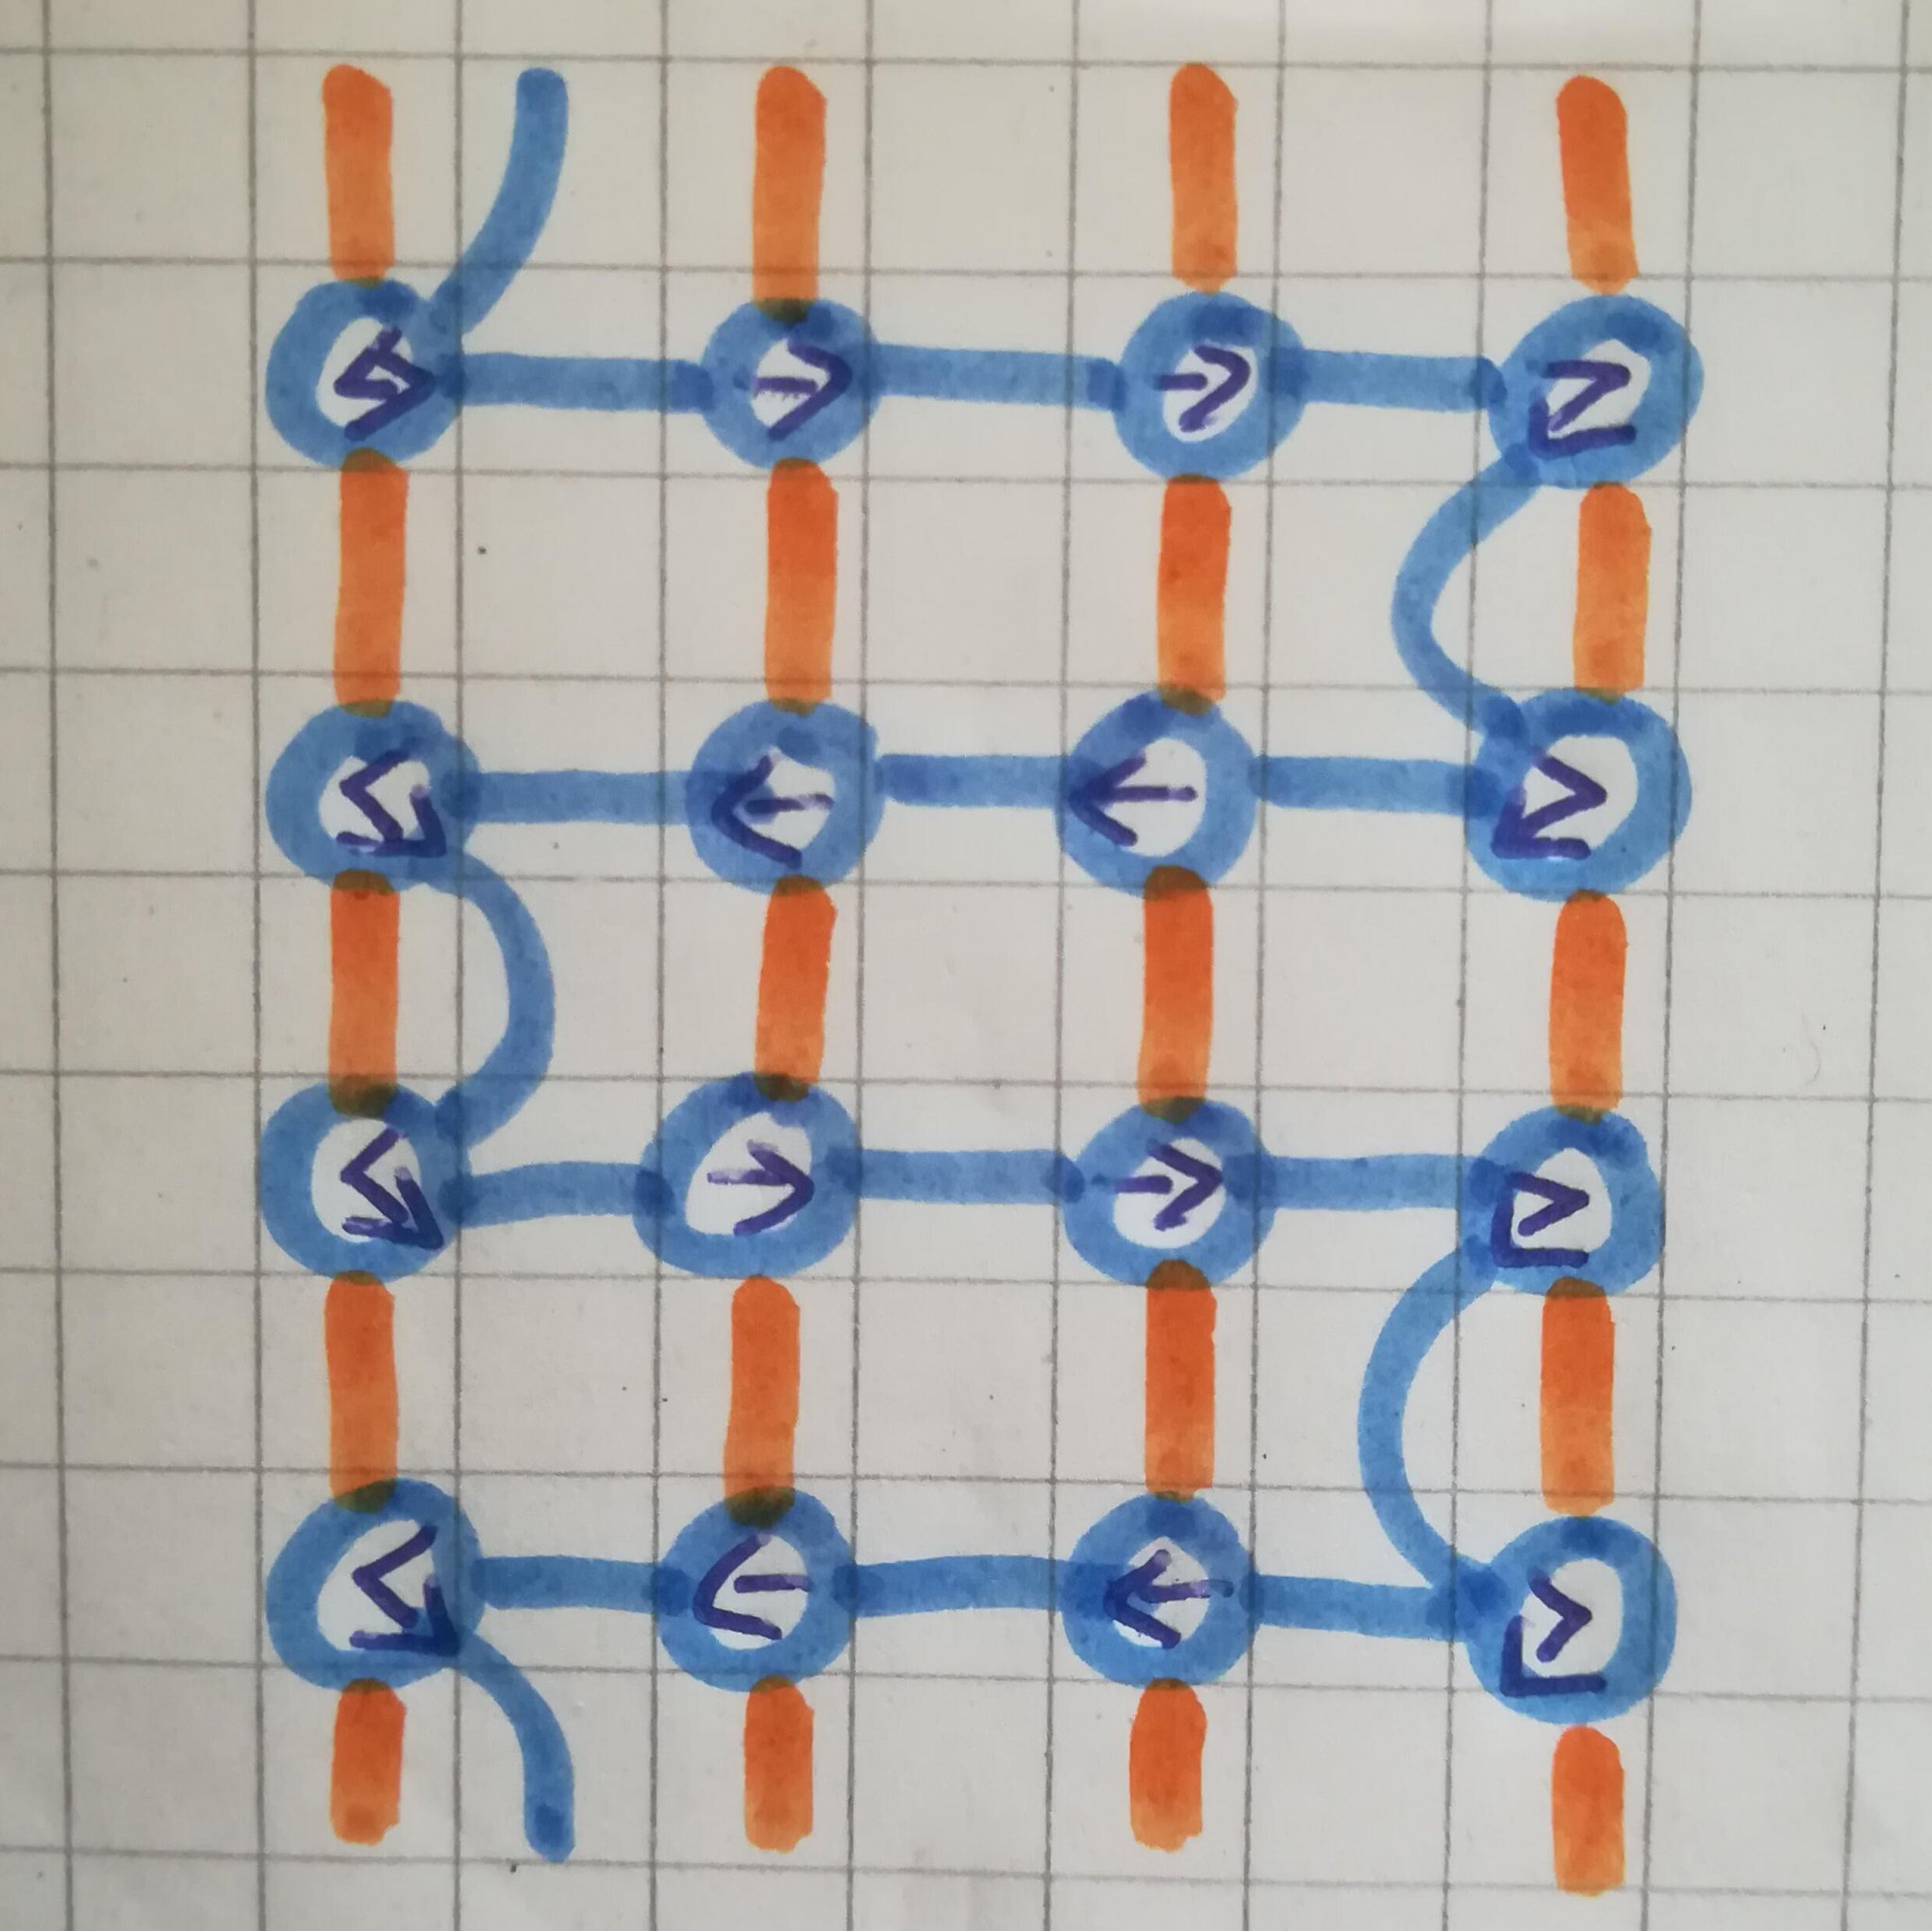
To incorporate the straight edges technique the last and the first knot of each row need to be changed. On the right edge both the f and b knot need to be changed to fb knots and on the left side both the f and the b knot need to be changed to bf knots.
As you can see that means you have to make two bf or fb knots onto the same string right after each other. Don't forget your second knot because it will make the rows curve.
As you can see that means you have to make two bf or fb knots onto the same string right after each other. Don't forget your second knot because it will make the rows curve.
The straight edges technique on normal patterns
The straight edges technique can be done with any normal pattern. For most patterns you need to add an extra string as the edge string but for some you don't need to. In the patterns where you don't need to add an extra string the string at the edge turns into the edge string.
The edge string won't be visible in your bracelet (only in the ties) because you only knot onto it, not with it. The edge string doesn't need to be as long as your regular strings for the same reason. Imagine it like the base string in an alpha. It only needs to be the length of the bracelet plus the ties.
The edge string won't be visible in your bracelet (only in the ties) because you only knot onto it, not with it. The edge string doesn't need to be as long as your regular strings for the same reason. Imagine it like the base string in an alpha. It only needs to be the length of the bracelet plus the ties.
Patterns where you need an extra string
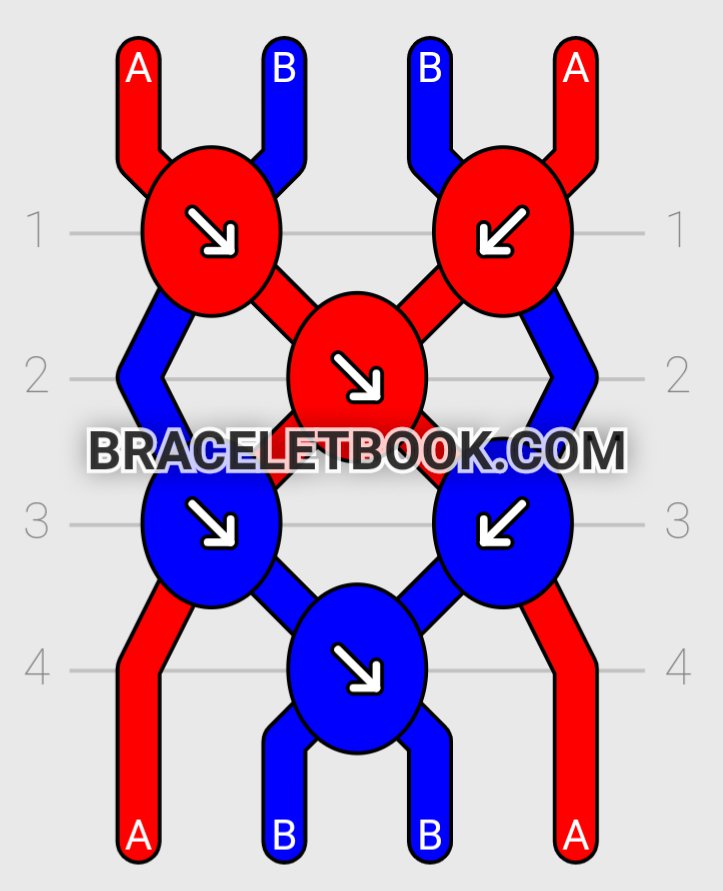
I'll first explain what to do with patterns where you need to add an extra string. That is the case if the knots at the edges are between strings of different colours and therefore can't be changed to bf or fb knots because it would affect the look of the pattern.
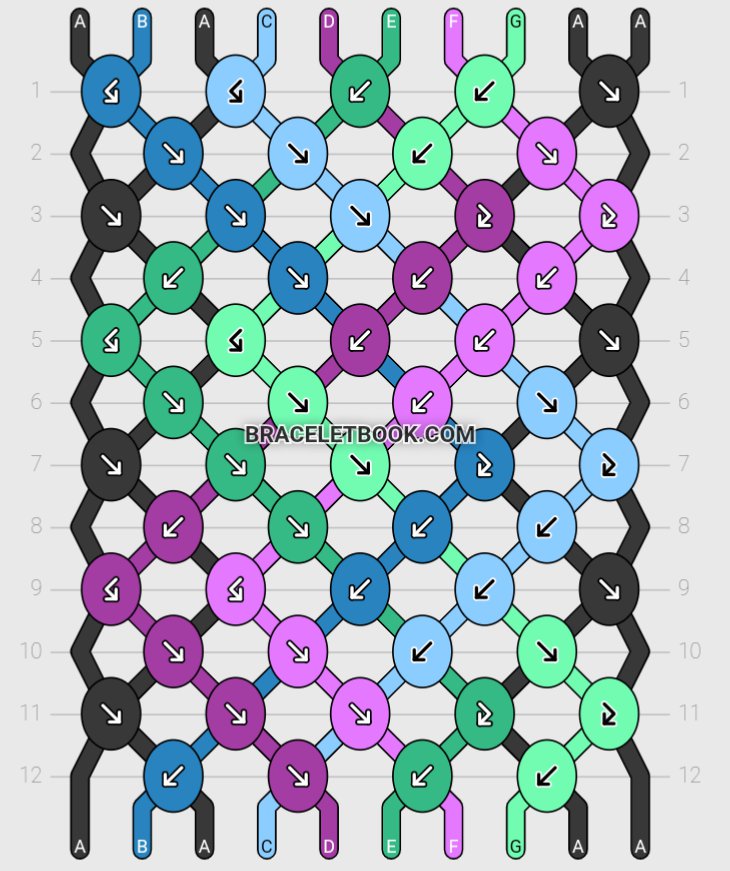
The pattern I took as an example is pattern #682.
The pattern I took as an example is pattern #682.
To make the straight edges technique you need to add an extra string on each side. At the points where the string sticks out to the sides (the blue string in row two and the red string in row 4) these strings need to make a bf knot on the left side and fb knot on the right side on the added edge string.
The pattern you get when doing this is pattern #35008. As you can see what was row one in the original pattern is now row two. When doing the straight edges technique you have to keep in mind that the uneven rows become even rows and the even rows become uneven rows. That doesn't matter as much when tying the pattern but it does matter when you're trying to put the pattern in the generator.
To solve this you take the last row of your original pattern and put it as your first row of your new pattern. You have to pay attention that you put the strings in the order they had before the original last row and of course add the edge string. Then you add in your now even rows one bf knot on the left side and one fb knot on the right side.
Patterns where you don't need an extra string
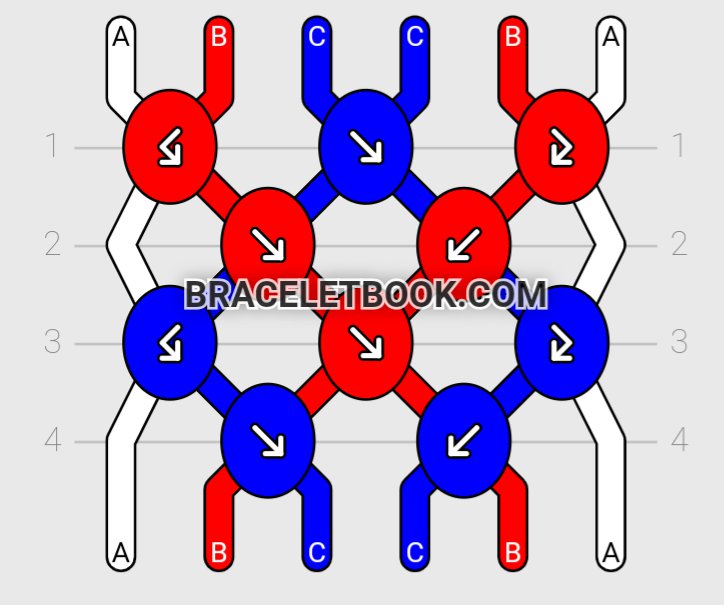
The patterns where this is the case are very rare because they need to meet a specific criteria. The knots a the edges all need to be between strings of the same colour or they already need to be a bf knot on the left and a fb knot on the right if they're between strings of different colours.
I'll explain the technique with pattern #23319.
I'll explain the technique with pattern #23319.
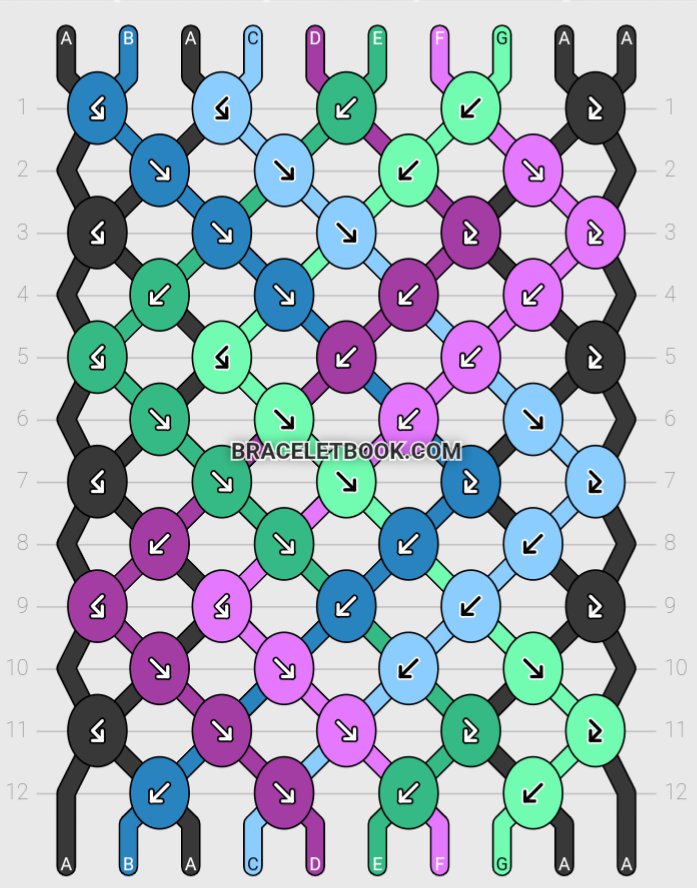
As you can see on the left edge there are only bf a f knots. The f knots are all between two black strings. That means you can just change them to bf knots without it having any effect on the appearance of the pattern.
On the right edge you can only see fb and f knots. The f knots again are always between two black strings which means you can change also change them to fb knots.
On the right edge you can only see fb and f knots. The f knots again are always between two black strings which means you can change also change them to fb knots.
More resources
If you want to learn more about the straight edges technique you can also check out these videos:
Normal pattern by @pattncraft.
Normal pattern by @Racoon.
Alpha pattern by @Racoon (It's the video on the flat alpha technique but she also explains the straight edges technique in it).
If you have any questions feel free to ask and I'll give my best to answer!