Rate Tutorial

Description
Are leprechauns stealing the safety pin that you use to take out your mistakes? Do you drop your safety pin often? With this tutorial, you will be able to easily see and hopefully will never lose your safety pin!
Prerequisite knowledge needed: Larks Head Knots, FB/BF knots, and the ability to make an alpha.
Prerequisite knowledge needed: Larks Head Knots, FB/BF knots, and the ability to make an alpha.
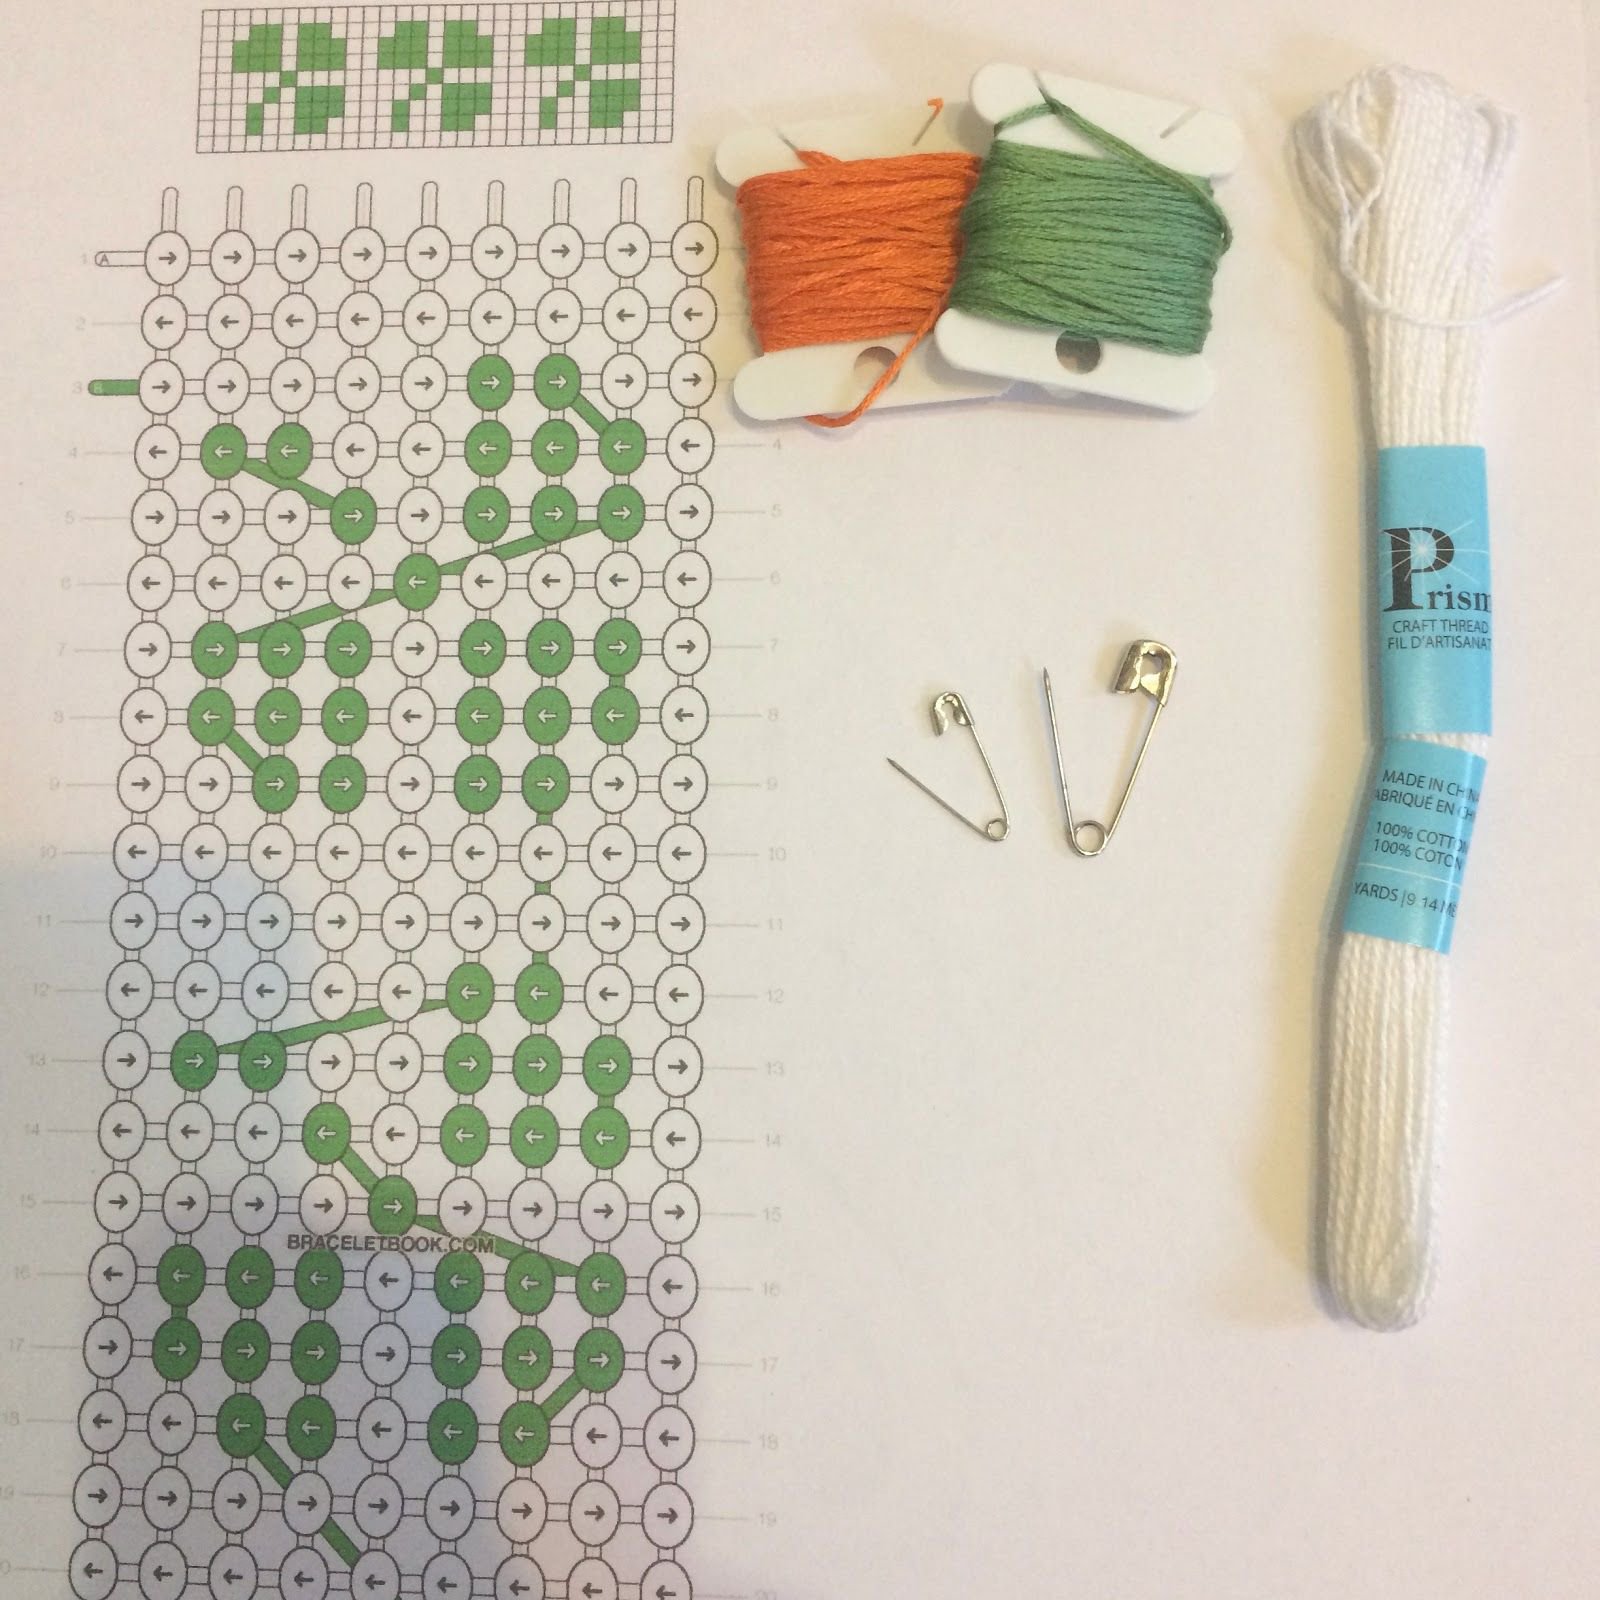
You will need
1 small Safety Pin
1 Larger Safety pin
Alpha Pattern of Choice (I used pattern #4269 by BraceletBook user @Peanut)
Embroidery Floss (I used DMC floss in Irish colors for good luck!)
If choosing your own alpha, I would recommend an alpha 9-13 strings wide and 30-40 rows long.
You can find safety pin assortments at your local dollar store but my craft store also carries them.
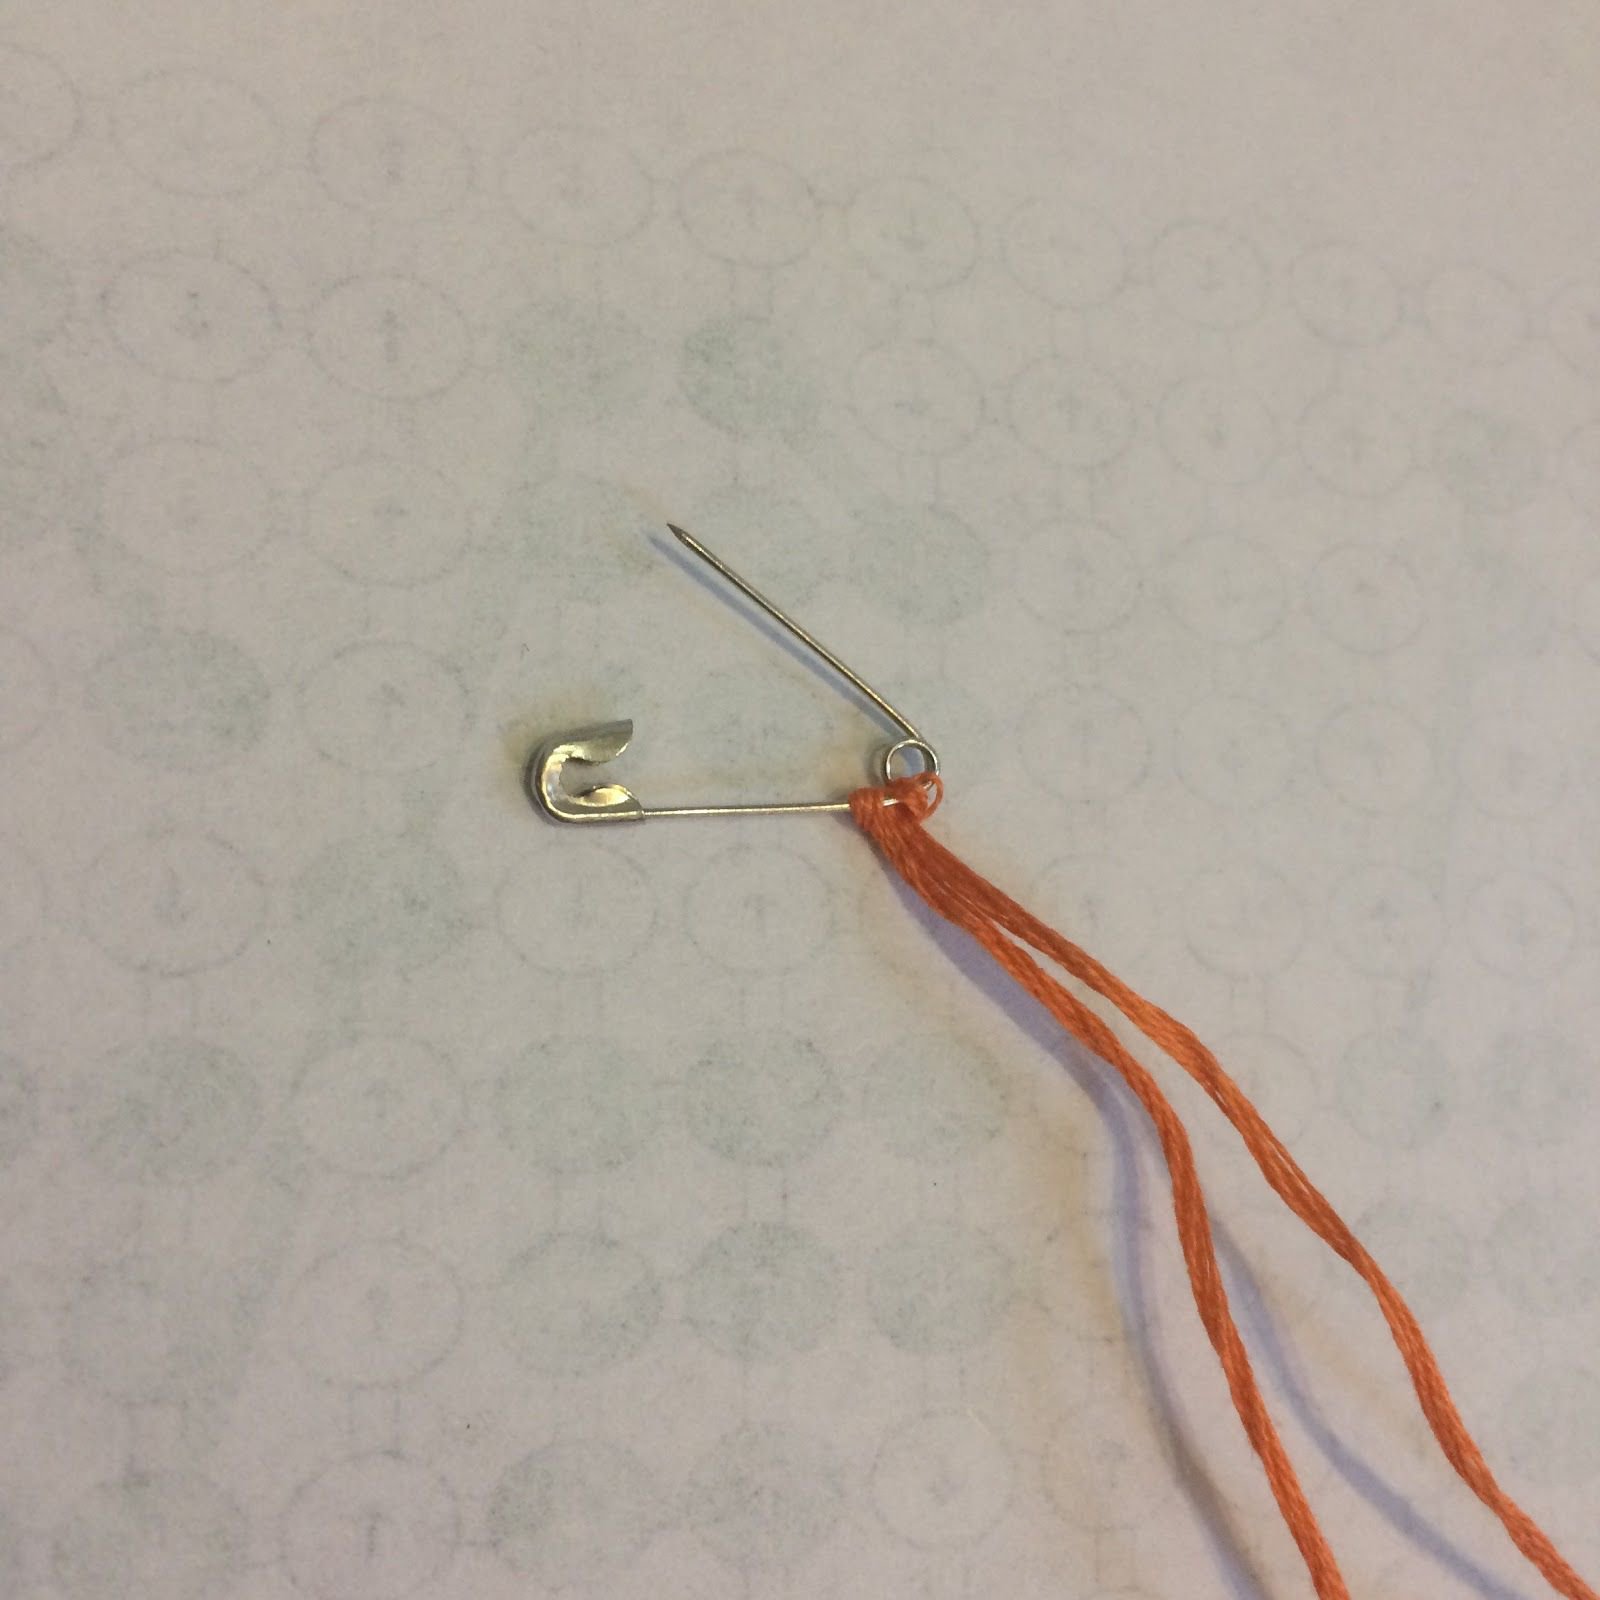
Step 1
Using a larks head knot, knot your strings onto the NON-OPENING side of the small safety pin. These will be your alpha base strings.
If your pattern requires an odd number, add one string to the width. This pattern used 9 base strings. I made 5 larks head knots, equalling 10 base strings total.
If your pattern requires an odd number, add one string to the width. This pattern used 9 base strings. I made 5 larks head knots, equalling 10 base strings total.
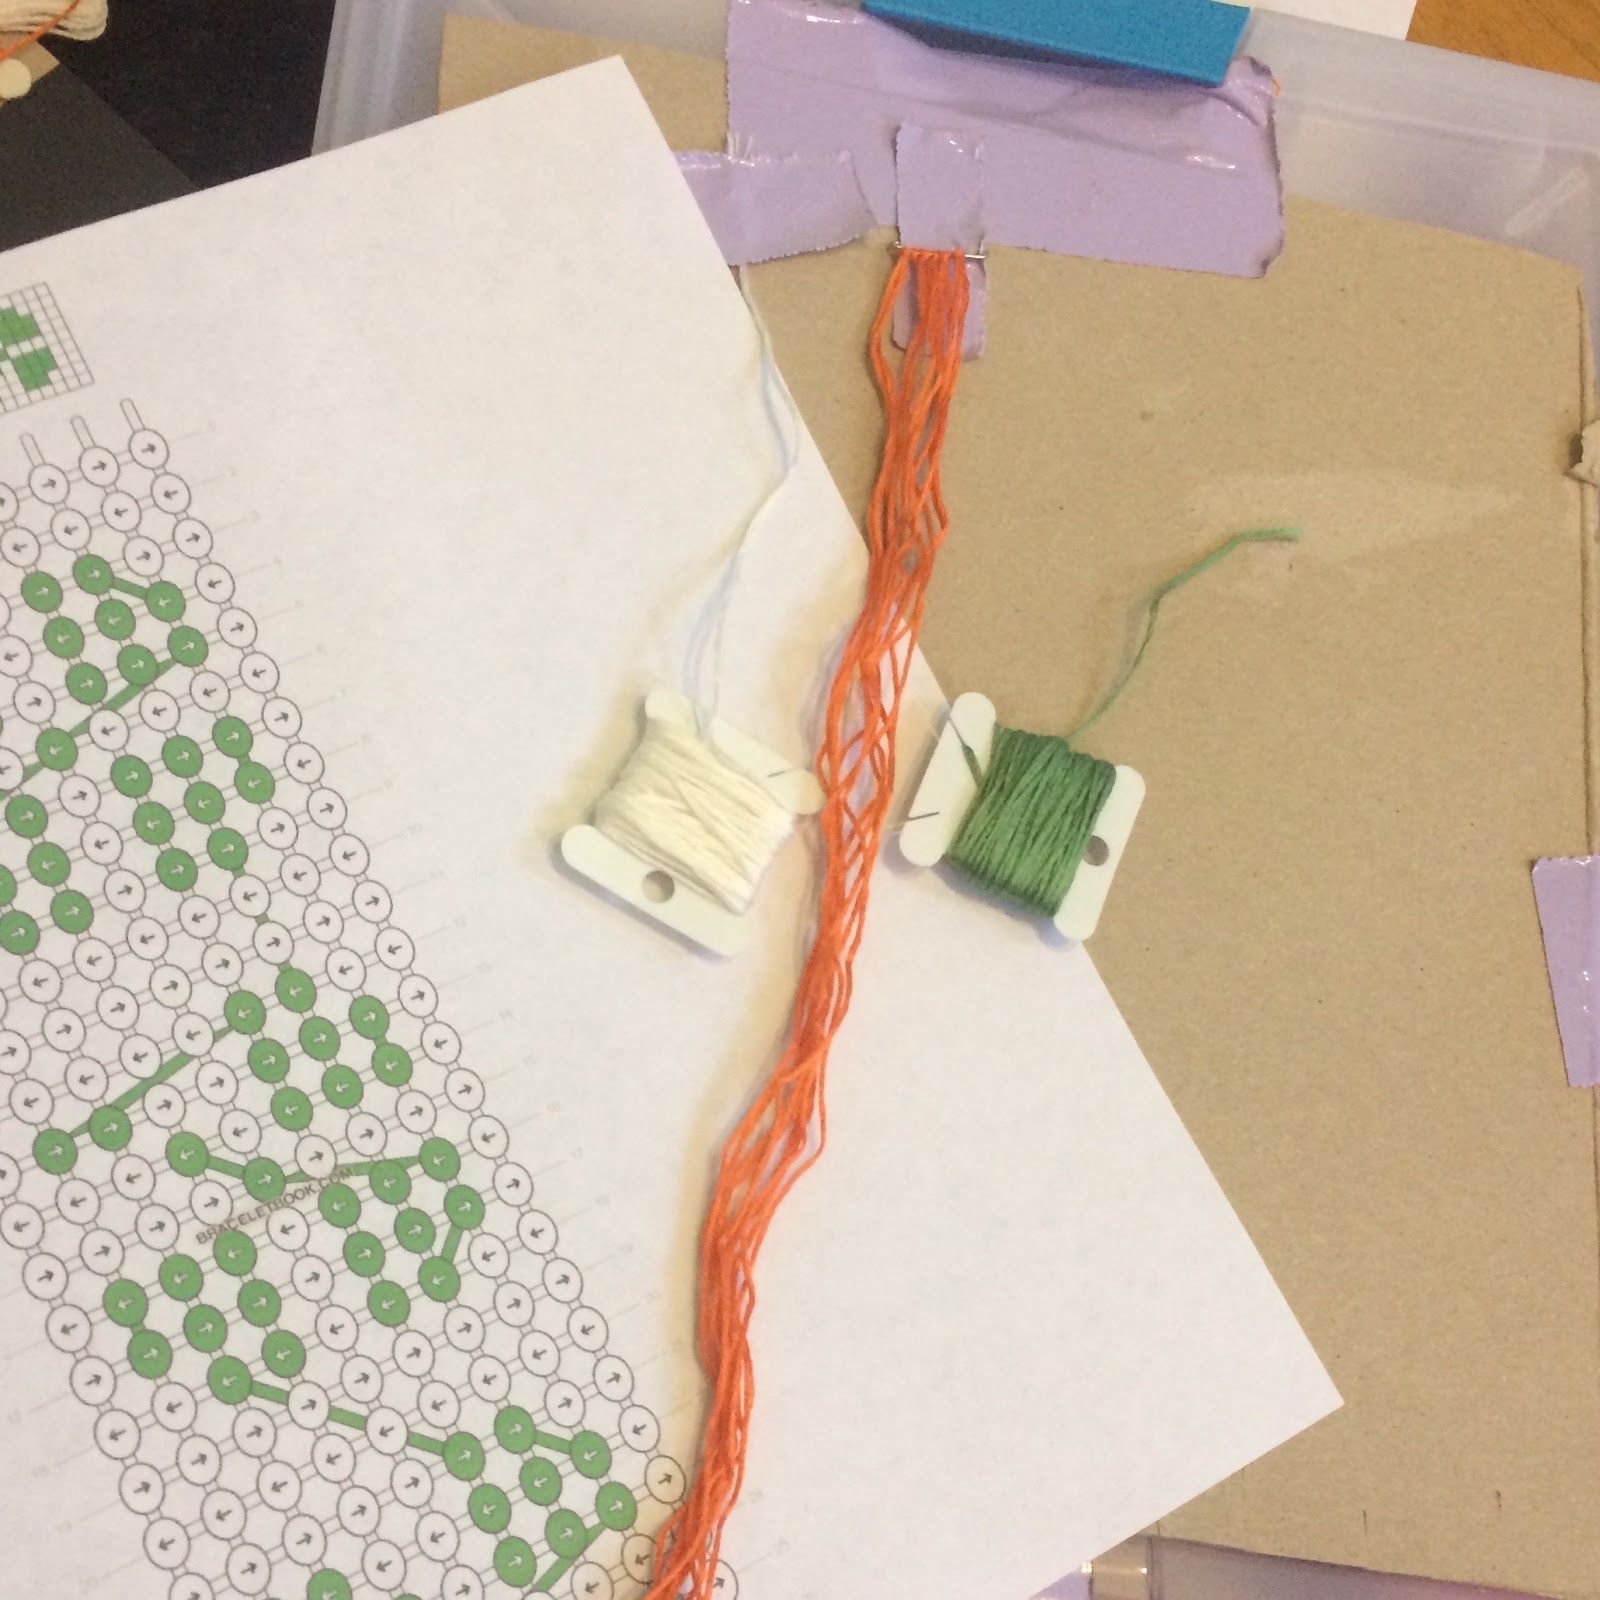
Step 2
Start making an alpha as you normally would. If your bracelet has an odd number of strings, hold two strings together and count them as one.
IMPORTANT: Tape your safety pin down or put in a clip board instead of the safety pin itself to anchor the alpha. Smaller sized safety pins will bend easily if you put too much weight on them.
IMPORTANT: Tape your safety pin down or put in a clip board instead of the safety pin itself to anchor the alpha. Smaller sized safety pins will bend easily if you put too much weight on them.
Step 3
Knot like a regular alpha.
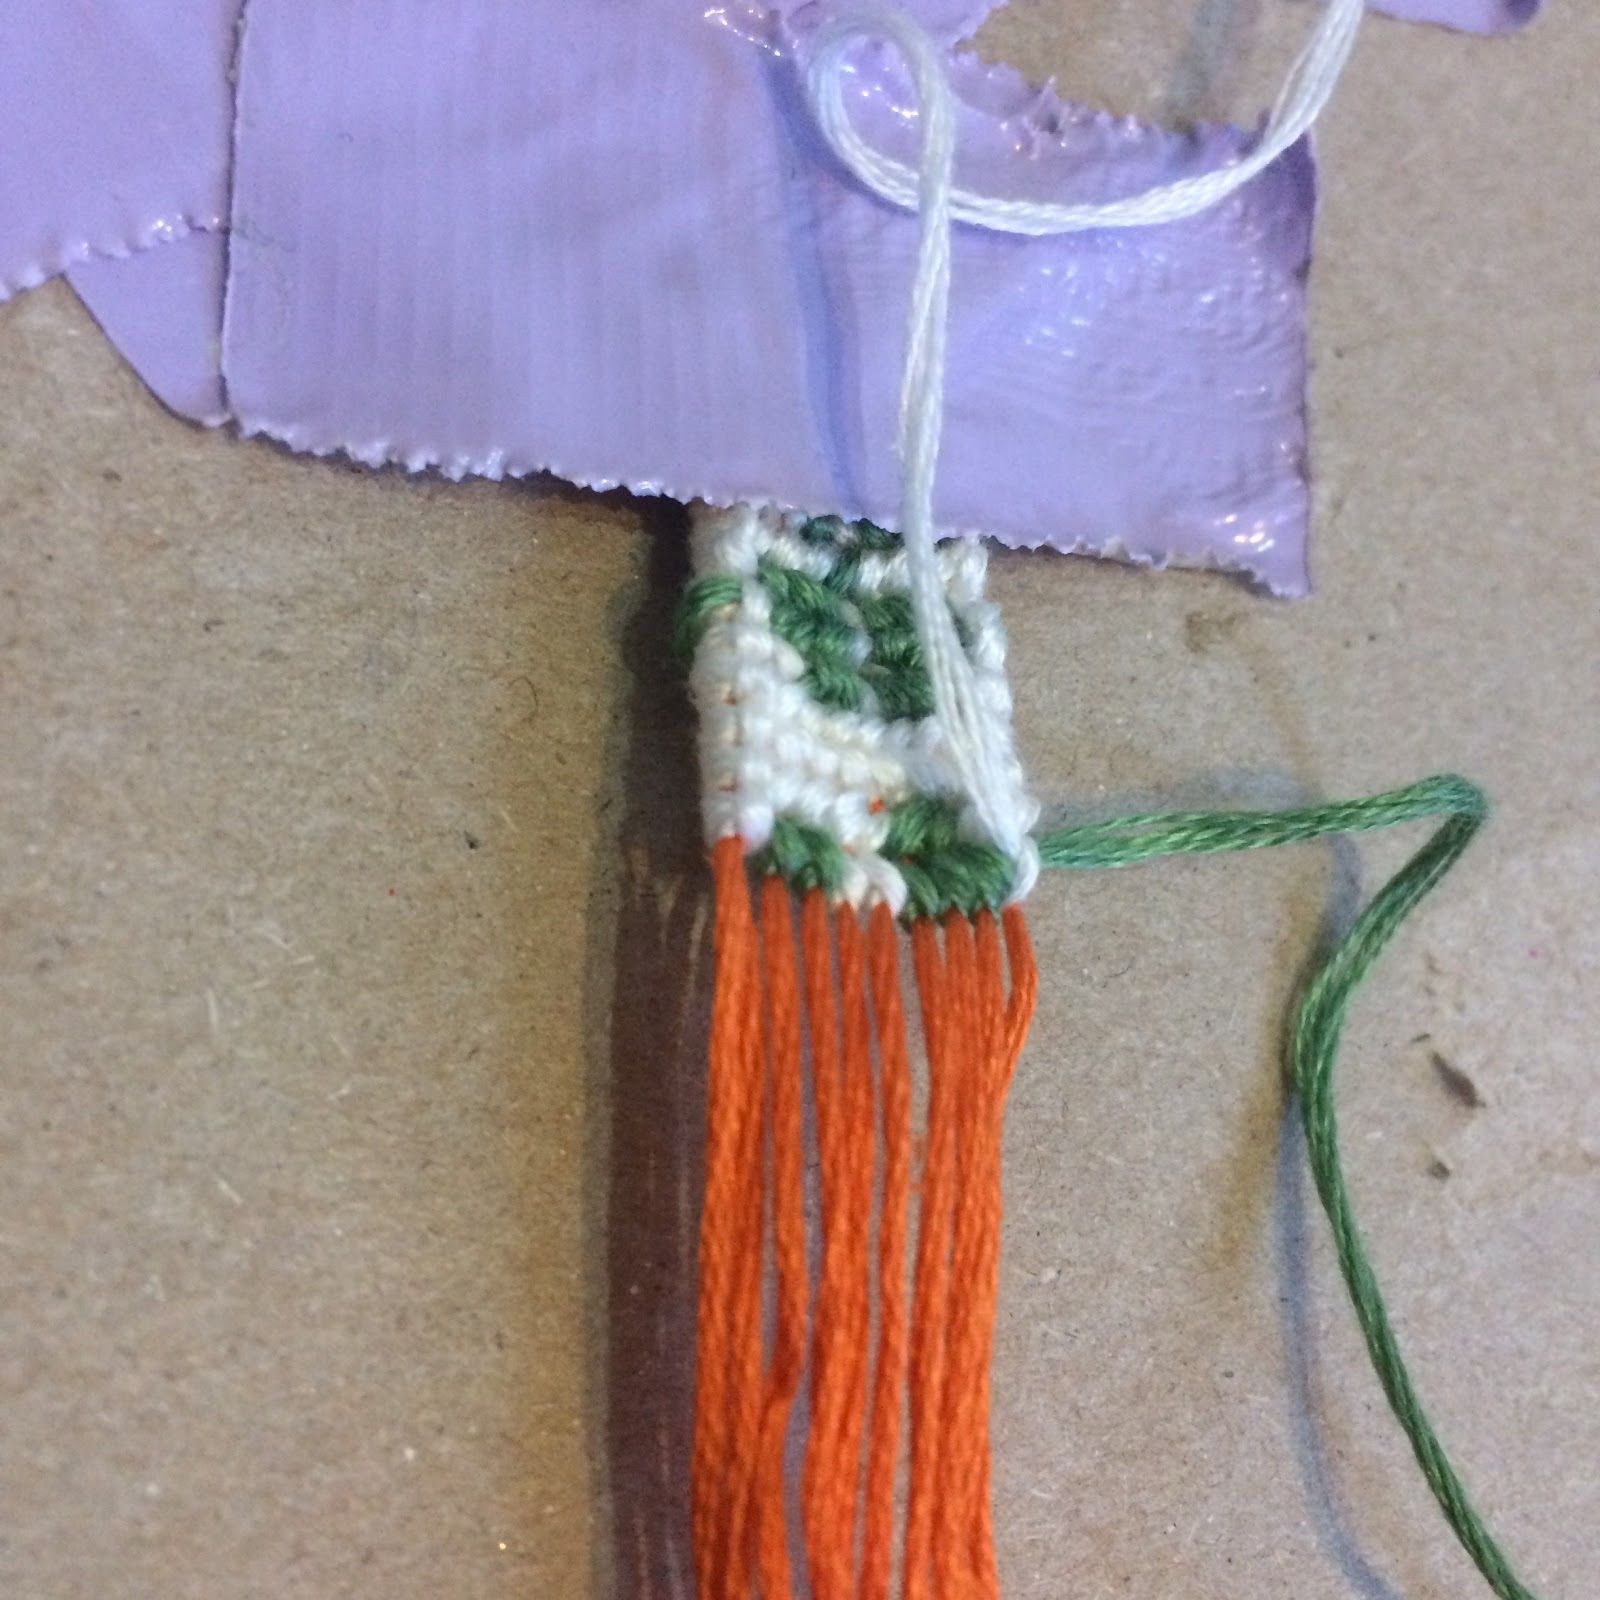
Step 4
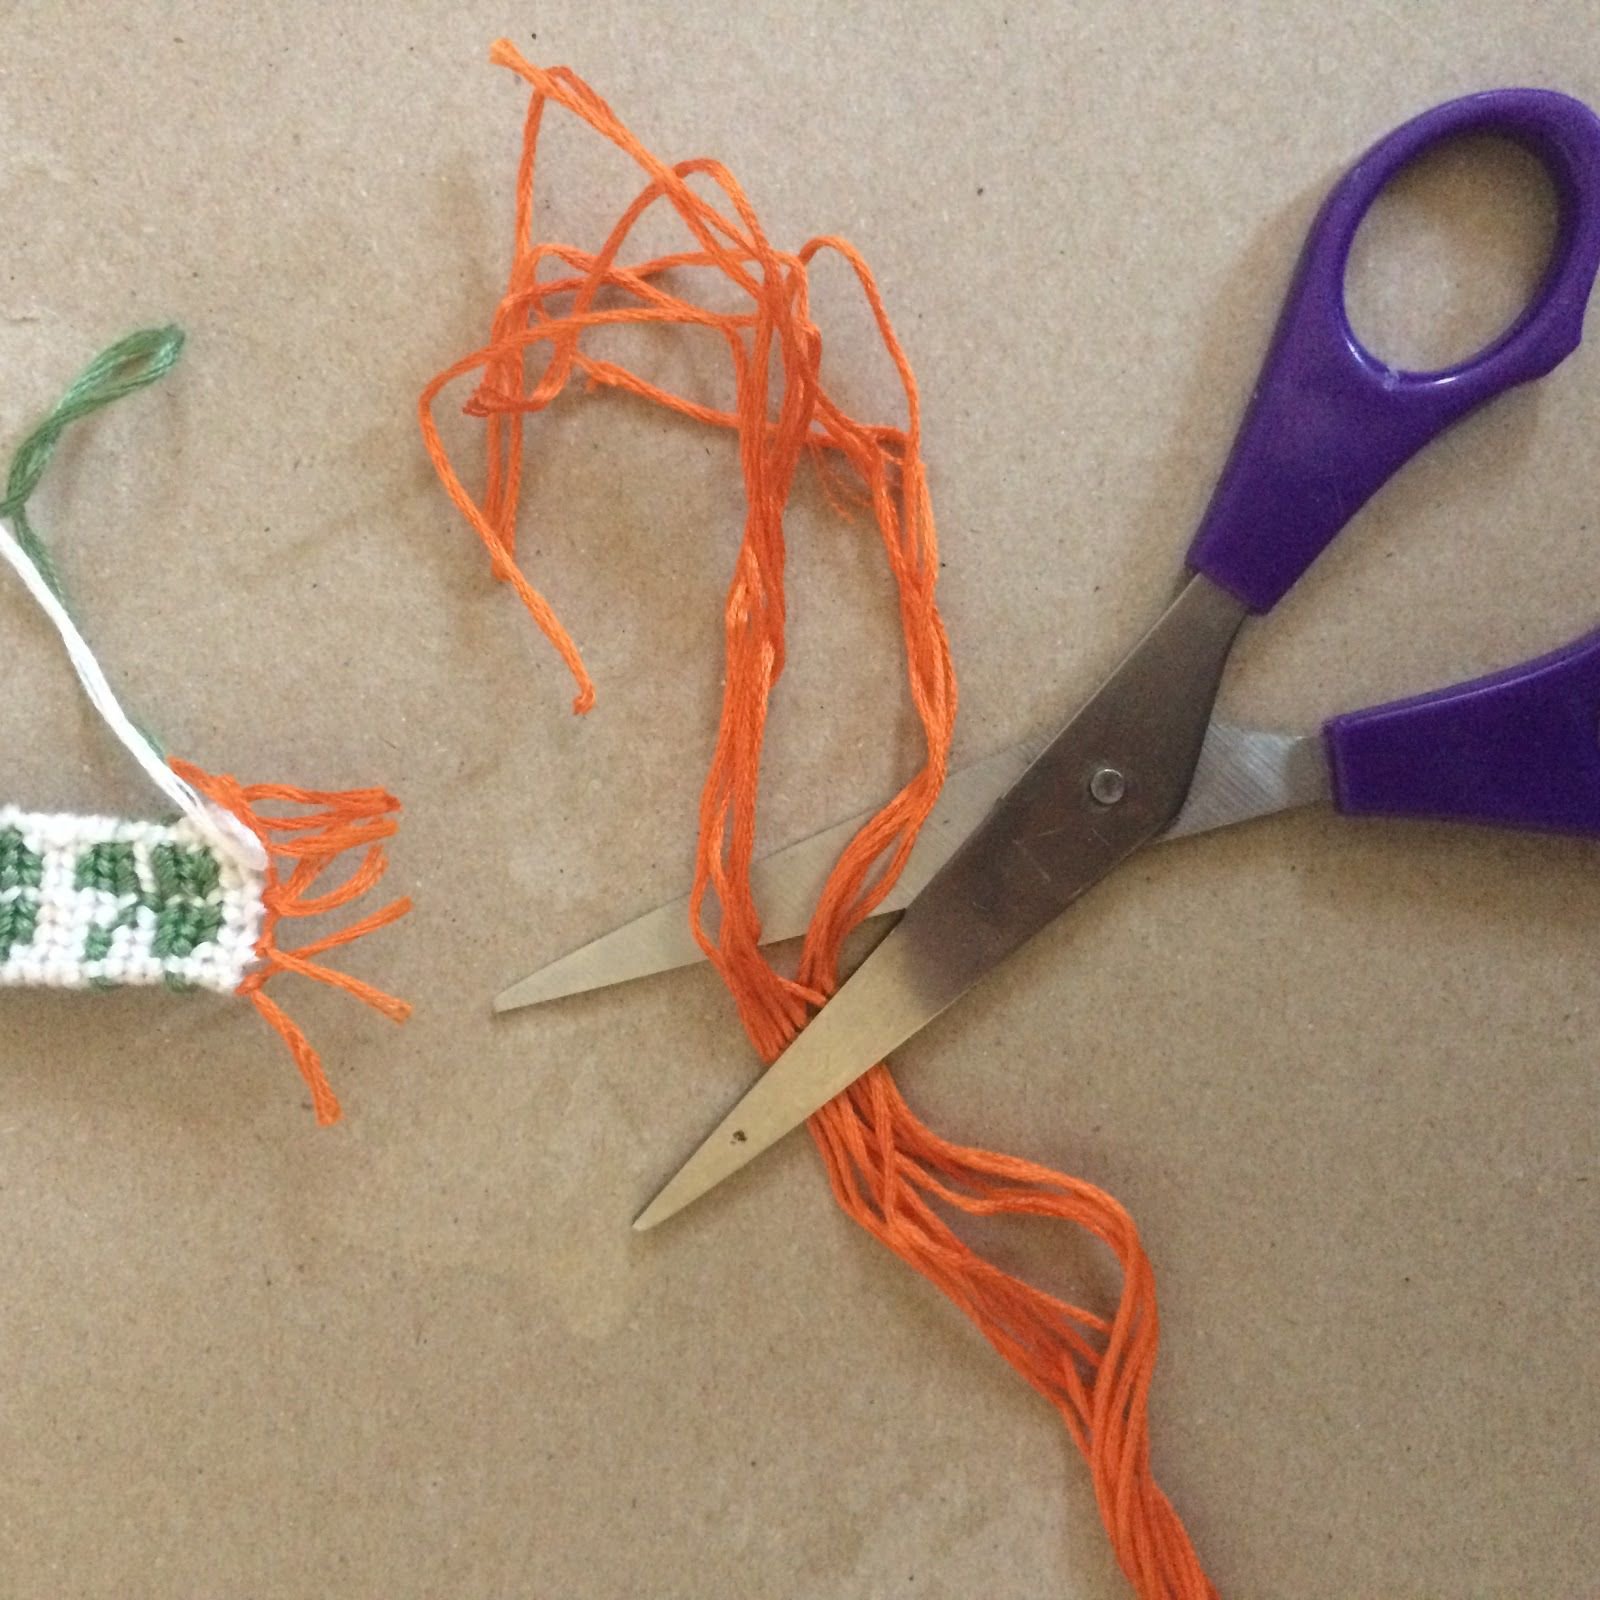
When you finish, separate your base strings into groups of two.
TIGHTLY fb/bf knot each group of two and then cut the excess string you have.
Leave room for tassels on the end. The strands will separate over time making it look more natural and full.
TIGHTLY fb/bf knot each group of two and then cut the excess string you have.
Leave room for tassels on the end. The strands will separate over time making it look more natural and full.
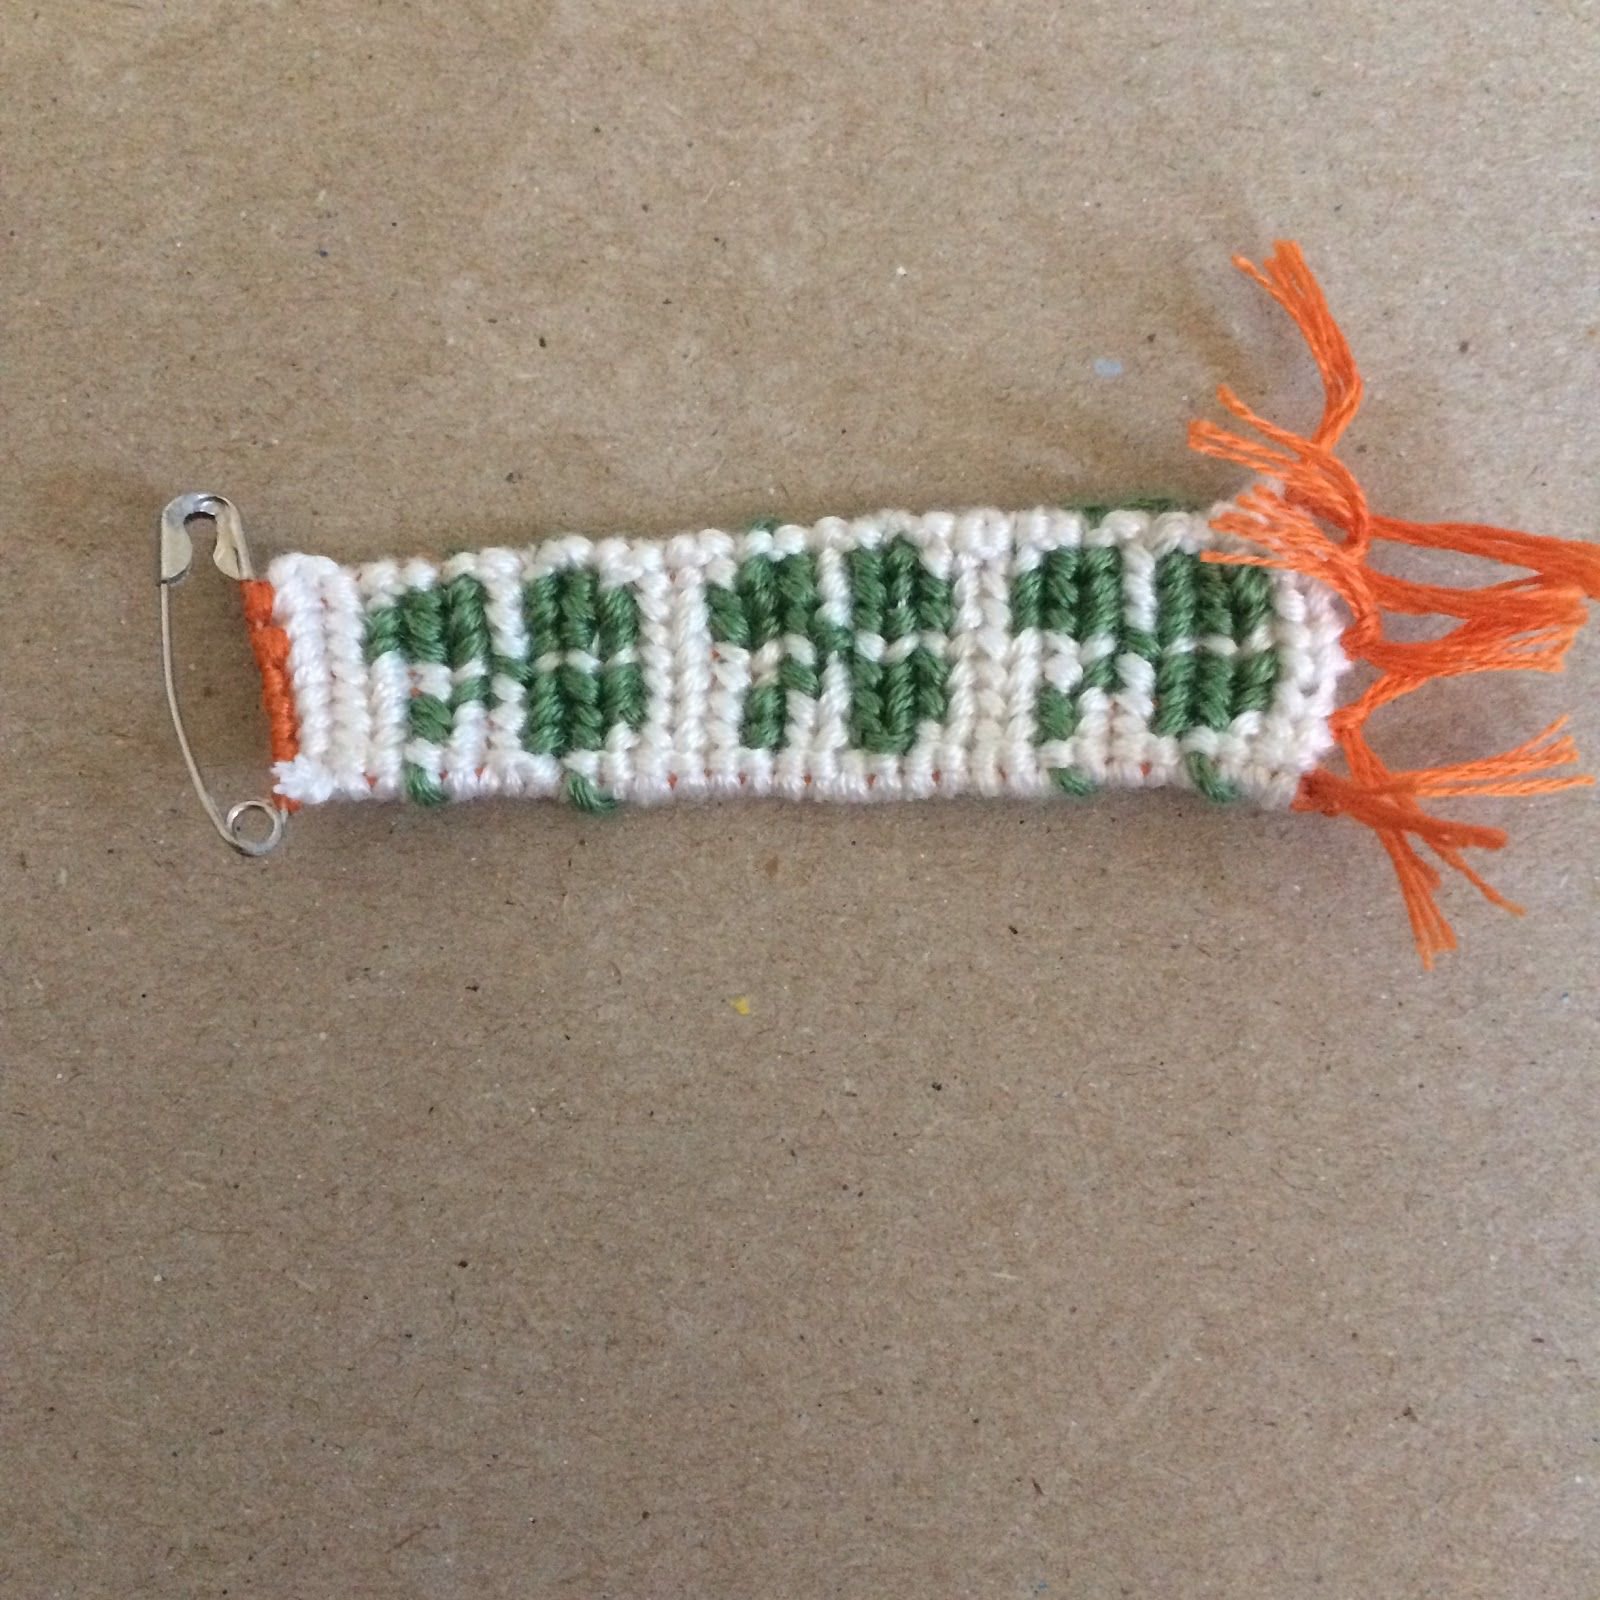
Step 5
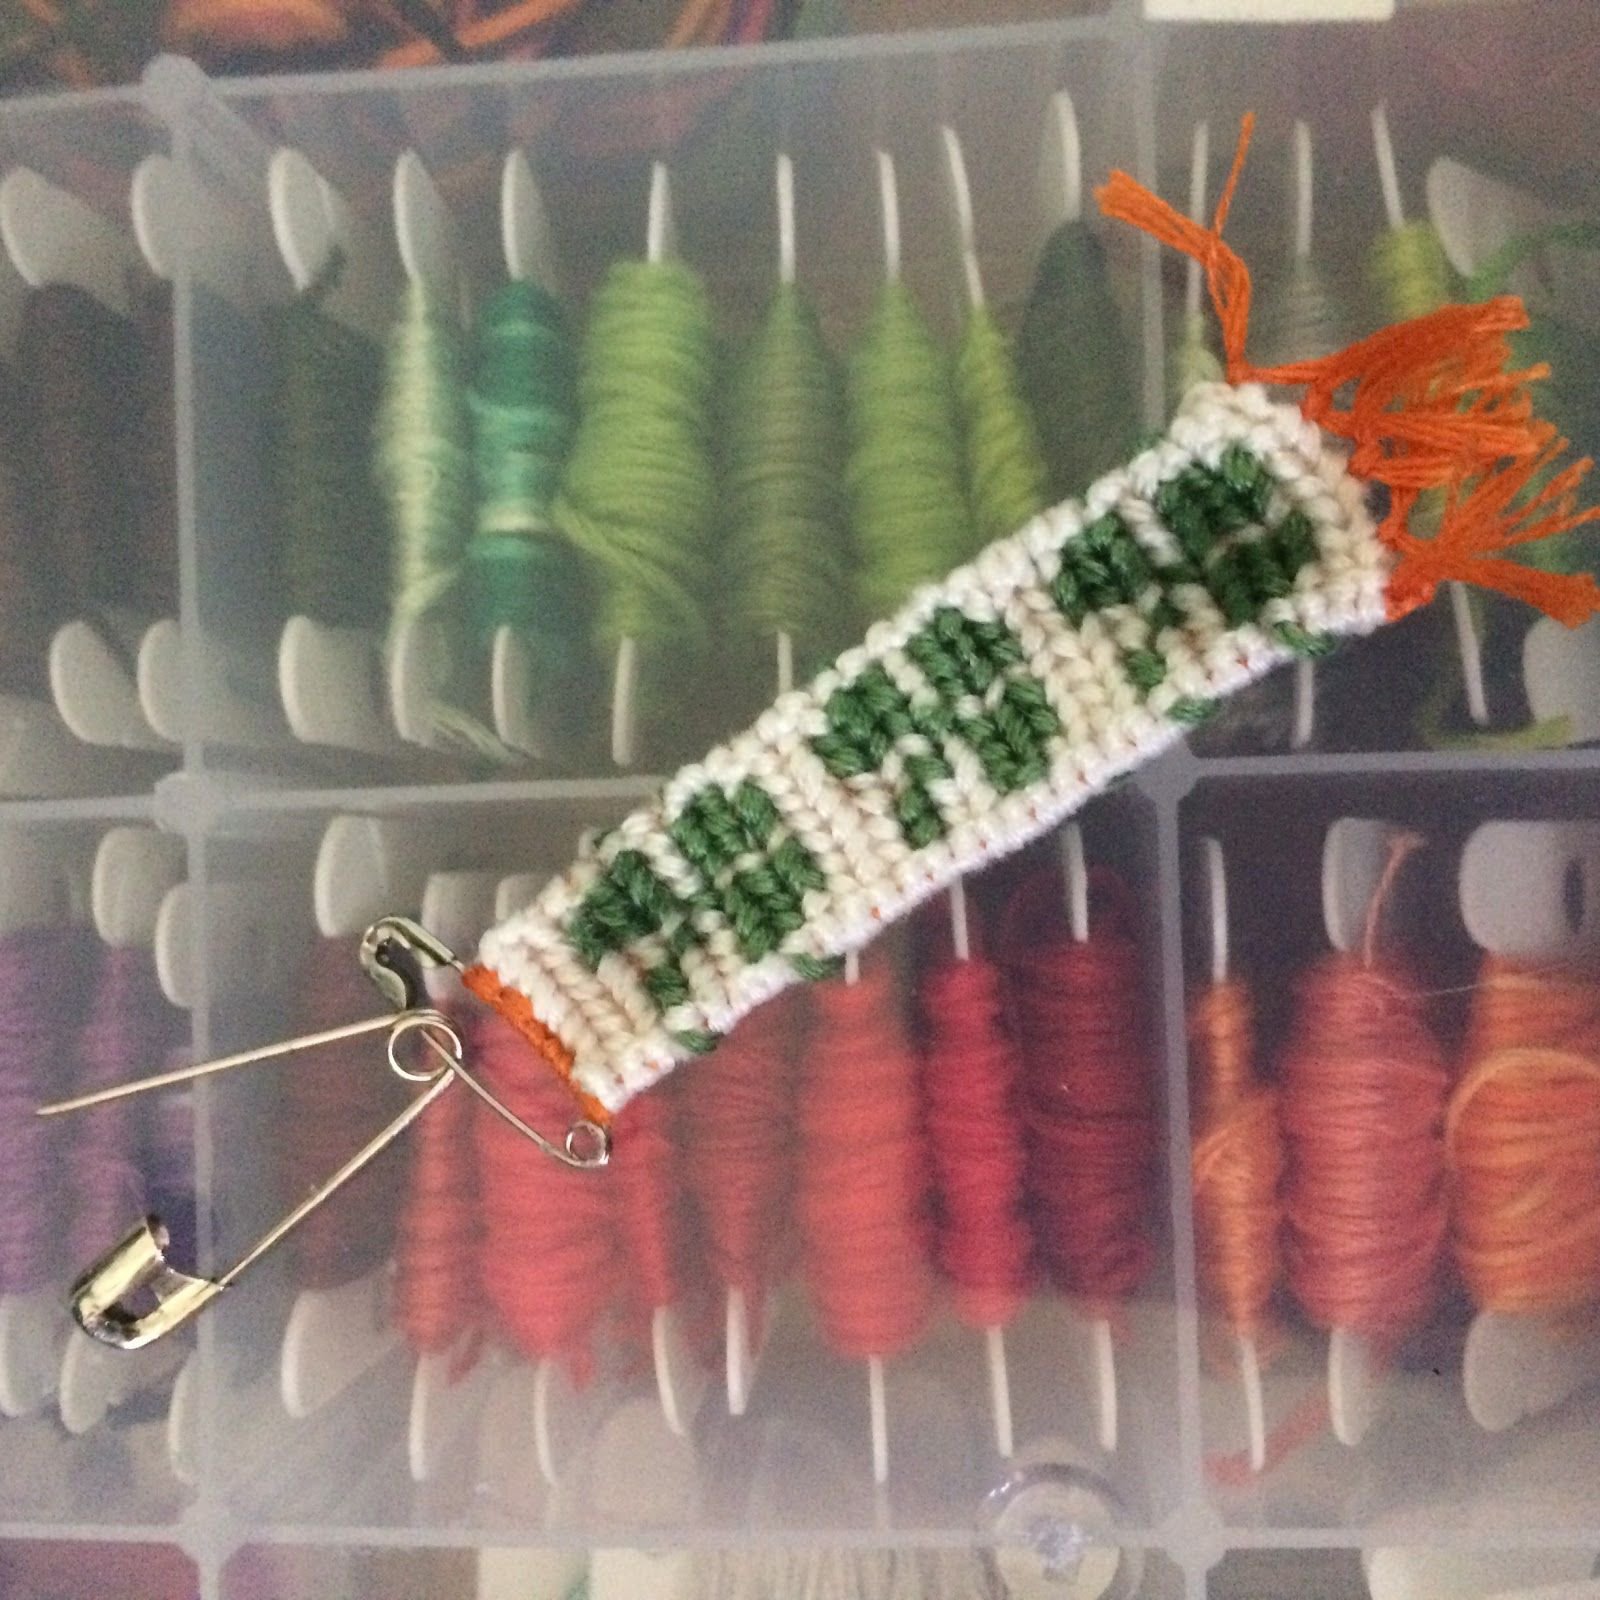
This is what it should look like now.
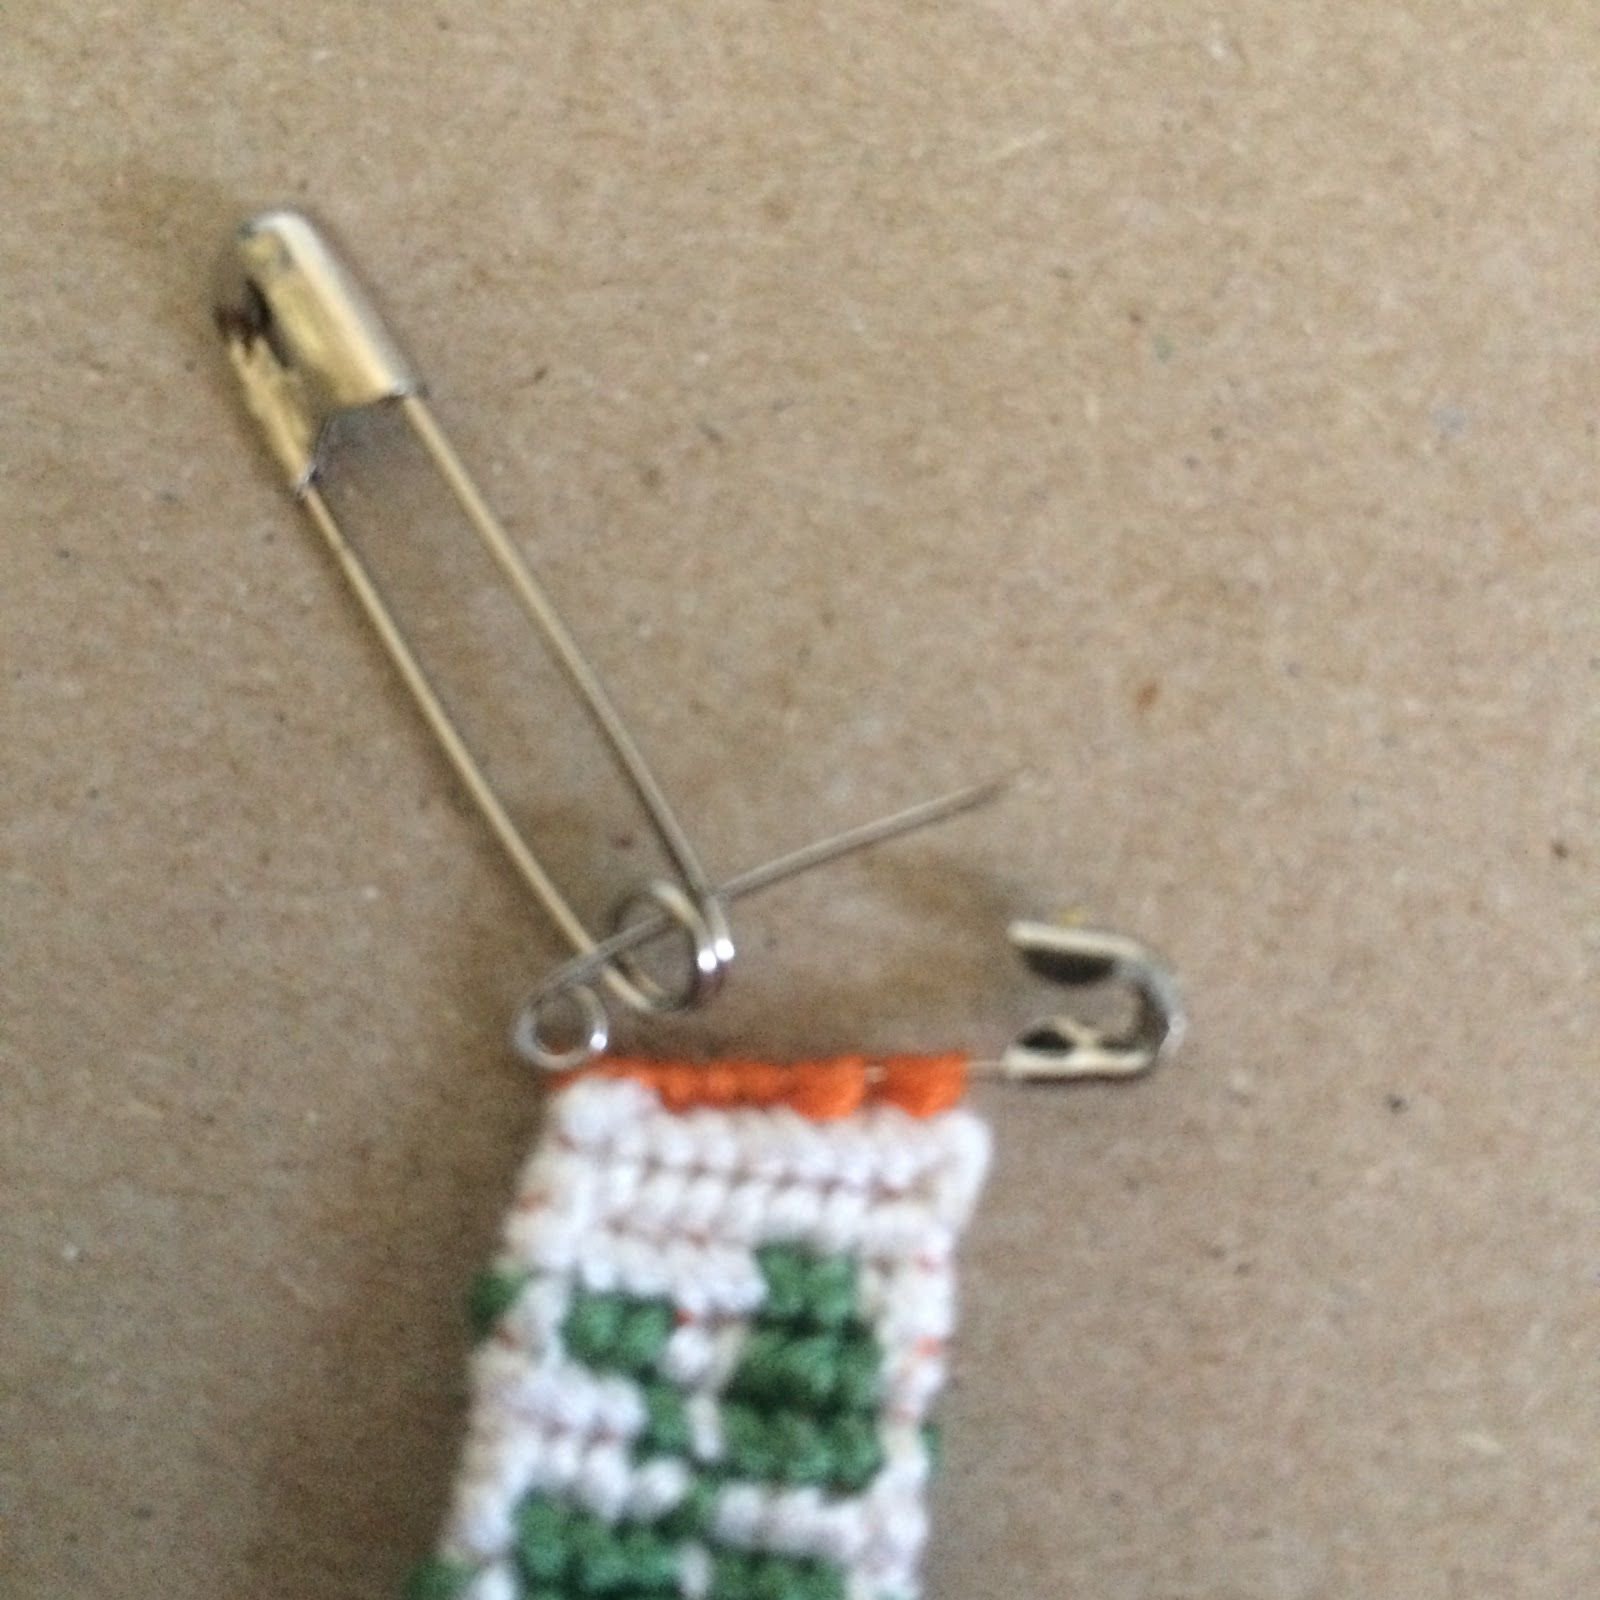
Step 6
Open the small safety pin. Insert the opened safety pin into the hole of the larger safety pin and secure it shut.
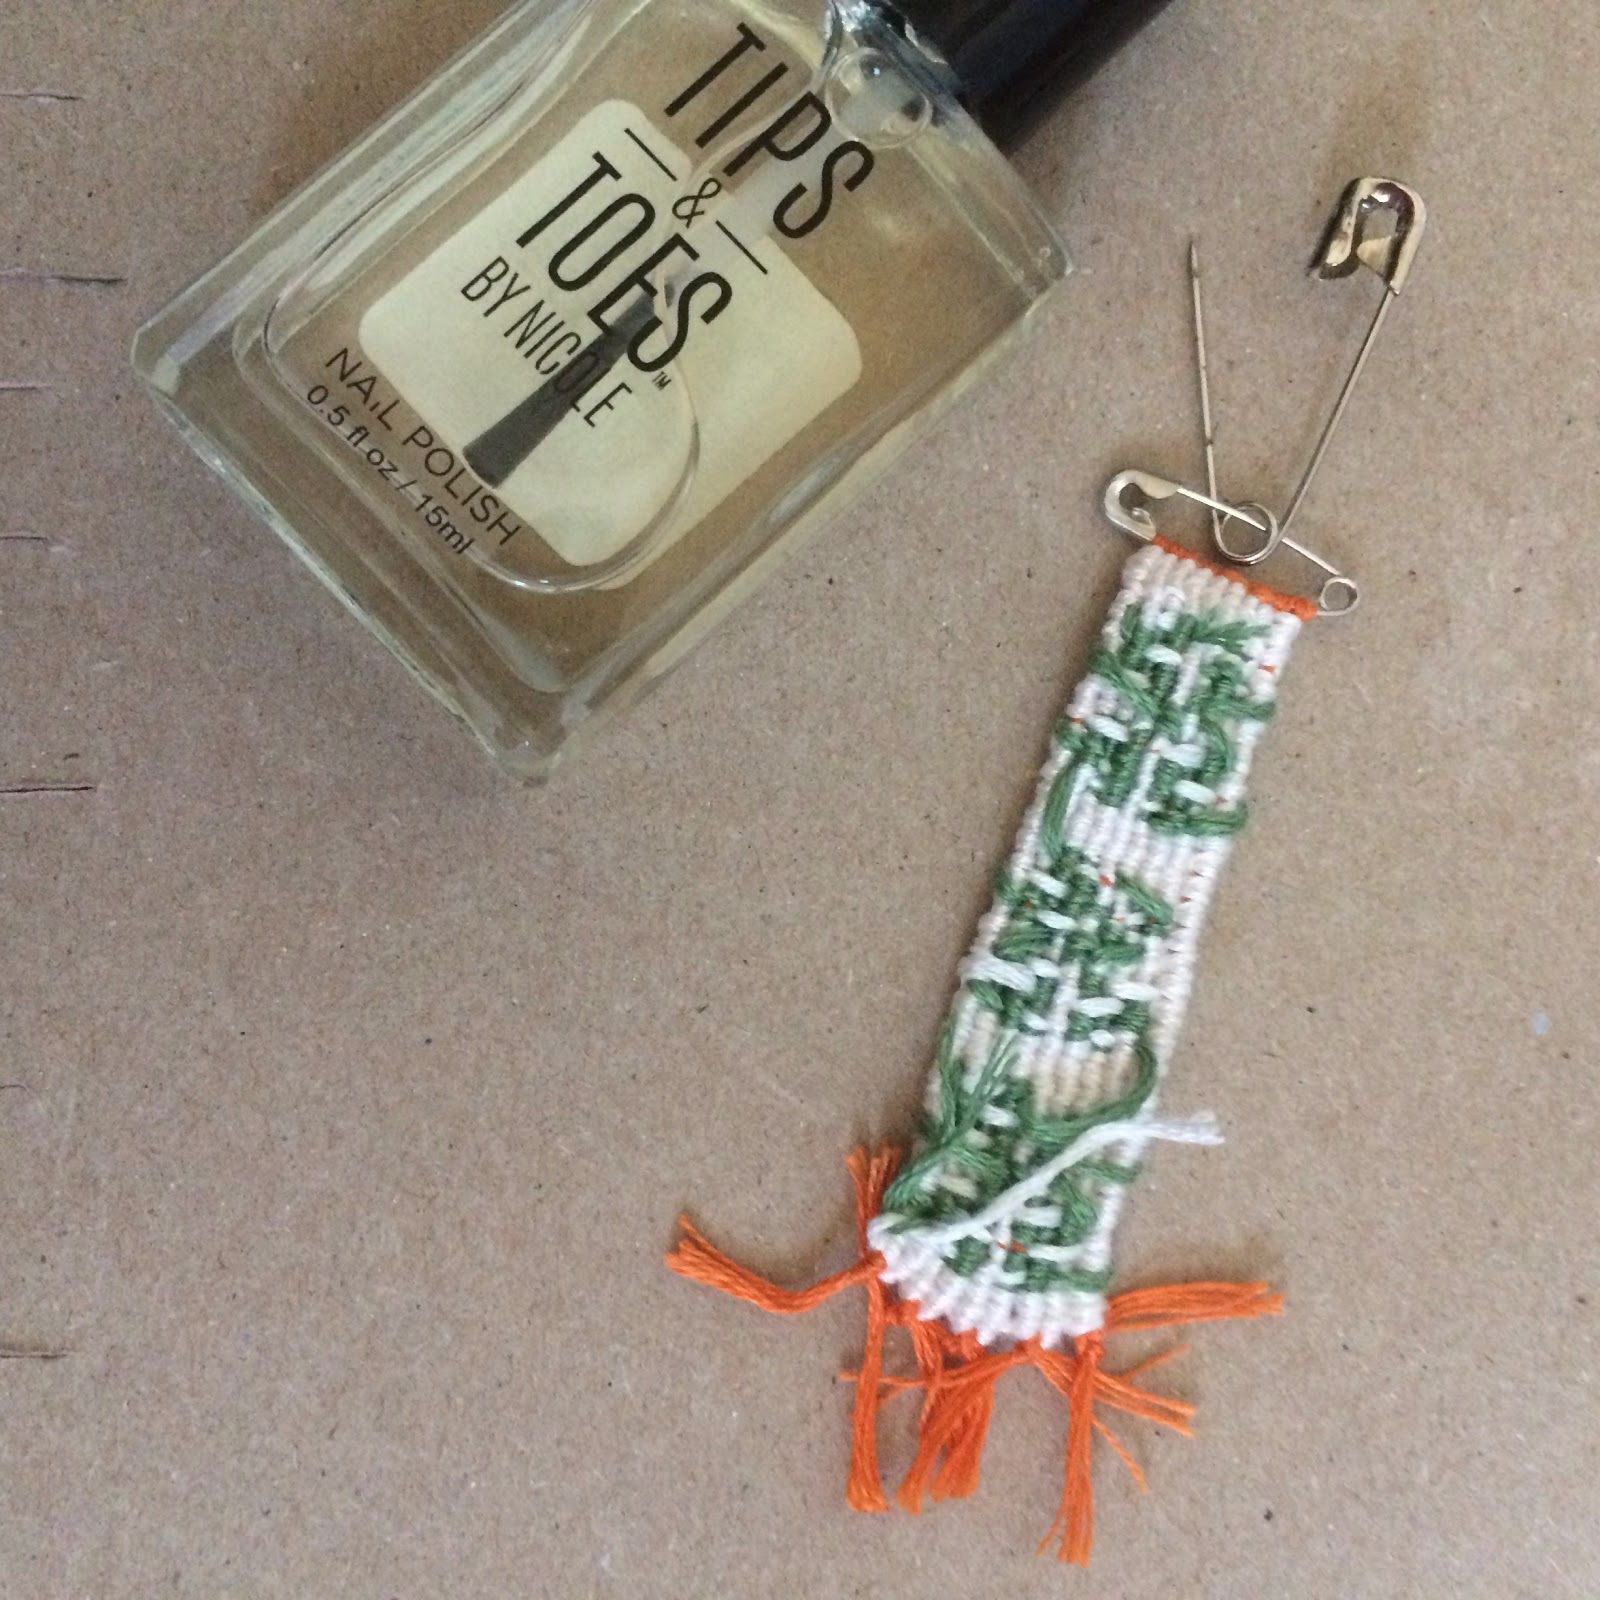
Step 7
Secure the back, ending tassel knots, and the closure of the small safety pin with your choice of glue. I use clear nail polish but you can use any clear drying glue.
Finished
Here is the finished product!
Other options
1. You can end this in any way you would like. I chose tassel knots because it looked cute but you can do whatever ending you want!
2. If you find that the keychain is getting in the way when you are using the larger safety pin to pull out your messed up sections, you can add a string of more safety pins to create a longer distance between the keychain and the usable safety pin.
3. This could be done with a normal pattern as well but is easiest with an alpha.
4. If you just wanted a keychain, you could also skip the steps where you add the second safety pin.