Rate Tutorial
Introduction
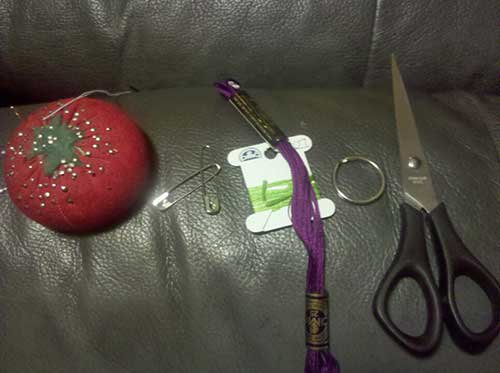
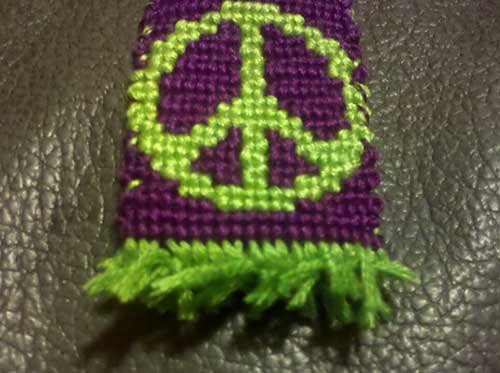
In this tutorial, I'm going to make the reversible alpha keychain! This makes a sturdier keychain, hides the messy backs, and is much more durable than using the larks head knot. This method will let your key ring spin freely and won't tear up your strings. Here's the things you'll need: your pattern (for this tutorial I'm using pattern #6951), all the floss your pattern calls for, scissors, straight pins, two safety pins, and one key ring.
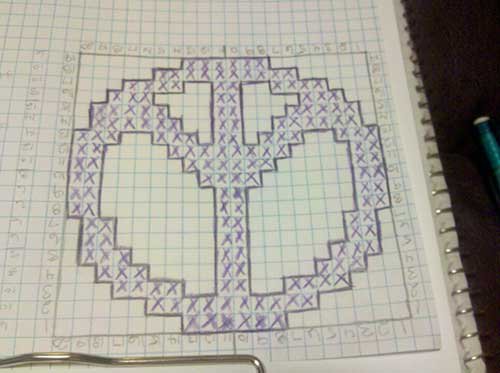
The first thing you do is turn your pattern upside down. You don't have to draw out your pattern like I did, I'm just old fashioned. Printing out the pattern works too. I always like to have a hard copy of the pattern so that I can mark on it.

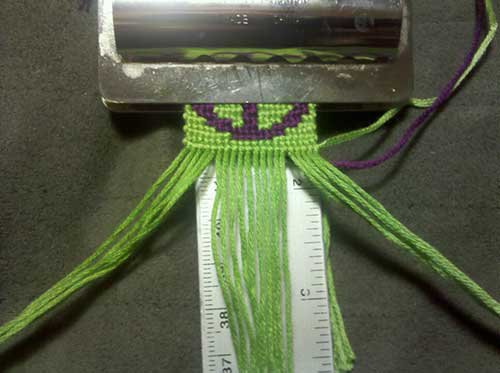
Now it's time to cut your base strings! The pattern I'm using has 20 base strings, so cut 20 separate strands (or however many your pattern calls for). A lot of people want to know how long to cut strings, and I'm going to tell you! A good rule to remember: 12 rows is equal to about one inch. So because this pattern is about 40 rows total (you're going to tie it twice), you're going to tie something that's about 4 inches long. I cut my base strings at 12 inches a piece. I know I'm using green base strings AND a green knotter here, but that's because I'm using the multi-colored, substitution method. Personally, I think it looks better, and it really is the easier way to tie these key chains. That way, you'll never tie a knot with your base strings, and their length won't change. Because we don't have to fold the strings, lay them out flat and neat. Measure out the top few inches (4 inches should be enough), and secure with your tape or clipboard. We're going to need those 4 inches at the end, so make sure you leave enough string!
Tie two background rows (for this half, mine are green); tie your pattern like normal, just upside down; then tie 2 more background rows. After you've got that part done, separate out your 10 center strings. With this pattern being 20 strings, you'll take 10 from the middle, leaving 5 on each side. If you're using a pattern with an odd number of strings, pull out your middle 11 strings. That will make sure you've got the same number of strings on both of the outer sides.
Now that you've got your strings separated, we're going to start tying again. I'm going right to left here, so starting with the right side, tie knots over strings R1, 2, 3. The hold strings R4 and 5 together and tie a single knot over those two strings. Then hold strings R6 and 7 together and tie another single knot over those two strings; just like you did with strings R4 and 5. Tie one knot per string for the middle strings. In this pattern, I have 6 middle strings. Then repeat the process for the left side. Hold strings L6 and 7 together and tie a single knot over both strings. Then L4 and 5 together with a single knot over both strings. Finish the row with a single knot over strings L1, 2, 3. You WILL have gaps in your row, but we'll need those gaps for the key ring to fit.
You are now done with the first half of the pattern, and need to change colors for your other half. I can promise, this is one of the most important tricks you'll learn! DO NOT cut your strings to start a new background color. I'm going to be trading out my green background knotter for purple here. So, flip up your base strings, and pull your knotter string (mine's green) under your base strings, all the way through to the other side. Leave it there for now. We'll get back to it in a second.
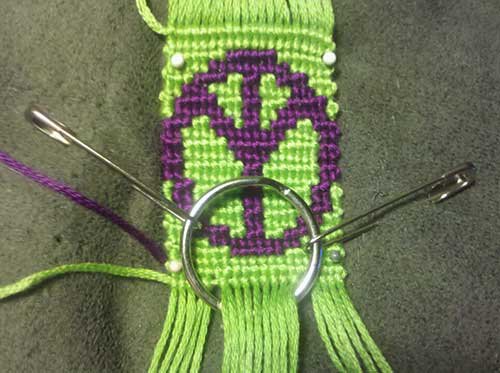
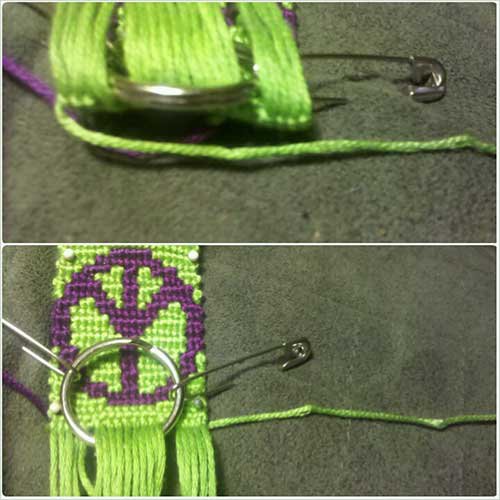
It's time to add the key ring! First, pin your piece to a pillow (or cork board, whatever works for you). One pin in each corner will do the trick. Pull out your center strings again, and thread them through the key ring. Move your key ring all the way up, so that it fits in the gaps we made earlier. You need to hold the key ring in place while you tie the next row. But you don't have three hands. This is where your safety pins come in! Use one safety pin on each side of the key ring to pin the key ring in place. Just pin them to the pillow and your ring will stay in place!
Pull your new knotter string down (now mine's purple) and repeat the last row you tied. Holding together strings 4 and 5, then 6 and 7 to create the gaps needed to hold the ring. It may feel a bit awkward, like your knots aren't quite straight, but that will come back when you start tying more rows. Then tie 2 more background rows. We don't need to create gaps this time, so just one string per knot. Your key ring should now stand up straight, so you can unpin it from your pillow now.
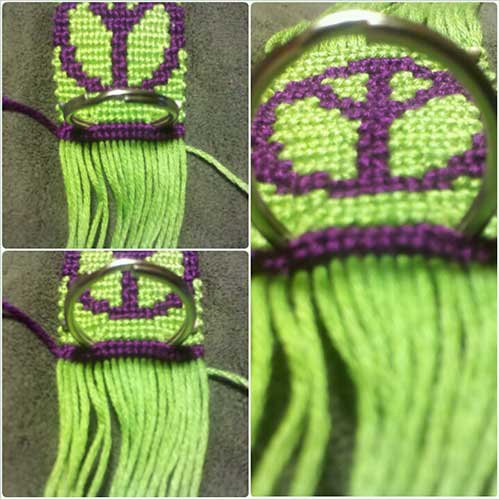
Turn your pattern right-side-up and tie like normal. You want to tie the exact number of rows as you did with your first side. And since we started with 2 green background rows, we need to finish with 2 purple back ground rows.
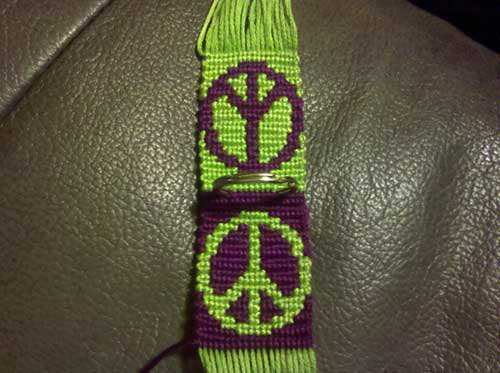
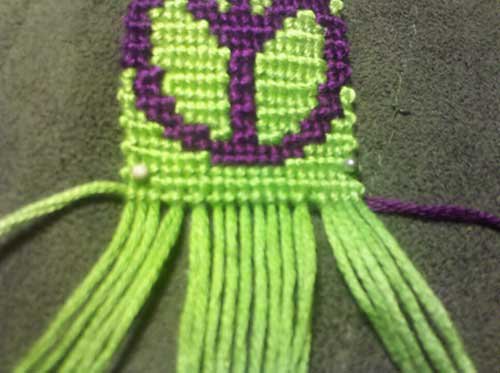
This is what you'll have when you're done tying your patterns. Two patterns, colors flipped, a key ring in the middle.
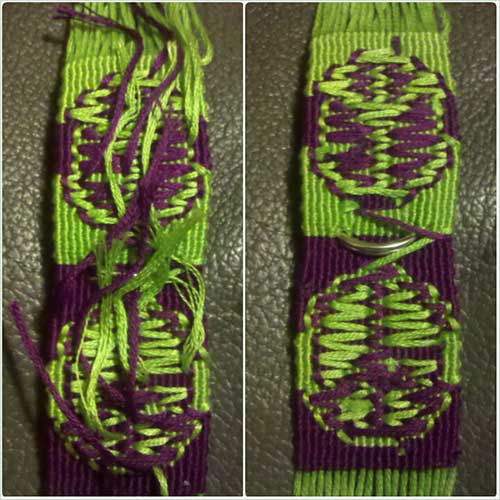
Clean up the back if you have to. It's going to be hidden, so it doesn't have to be perfect. But if you've got long strings hanging out, clip those off.
Now fold it in half and line up all your rows. You don't NEED to sew up the sides, but I find that it helps keep the shape. It also makes it really sturdy. So, I personally recommend sewing it up.
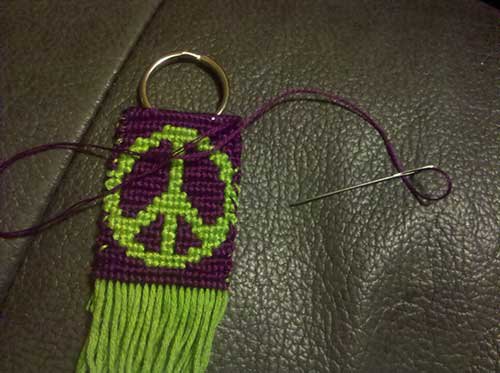
Once you're all lined up, it's time to join all your end strings. Here, I just did a series of forward and backward knots. Make sure you grab one string from the back, and one from the front and join those together. Otherwise, your bottom will be open and your key chain won't hold its shape.
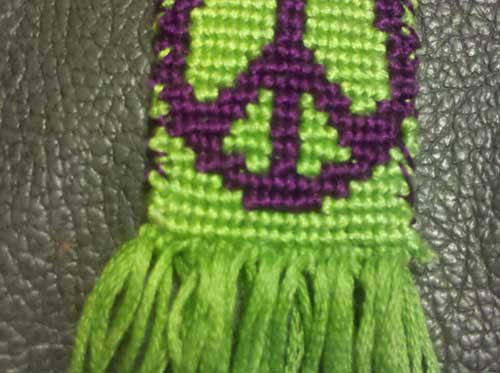
Cut your extra string to a short fringe.
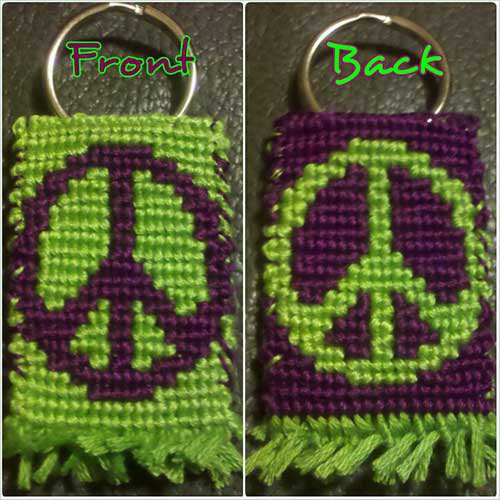
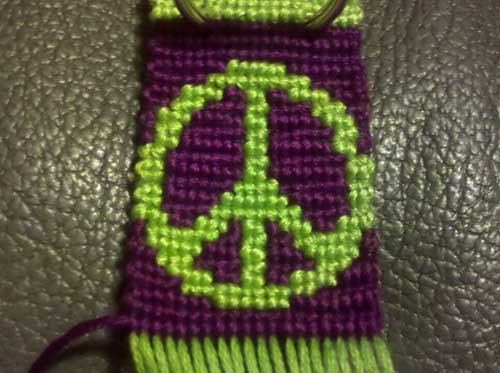
And now you've got a 2-sided, reversible, alpha key chain!