Rate Tutorial
You will need
You will need a clipboard or a safety pin for this bracelet.
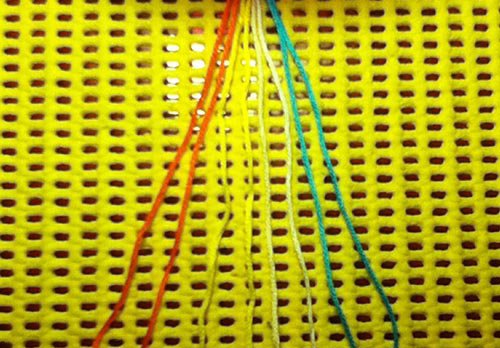
Step 1: Gather Your Strings
You can use either 3 or 4 strings, but you need two of each color that you are using. About 65 inches of floss makes a 6 1/2 inch bracelet. Put the strings in the "double" order, like PPYYWWBB.
Note: if you use three, (PPYYBB) the first and last colors will be the zig zags.if you use four, (PPYYWWBB) the second and last colors will zig zag and the third won't be seen.
Note: if you use three, (PPYYBB) the first and last colors will be the zig zags.if you use four, (PPYYWWBB) the second and last colors will zig zag and the third won't be seen.
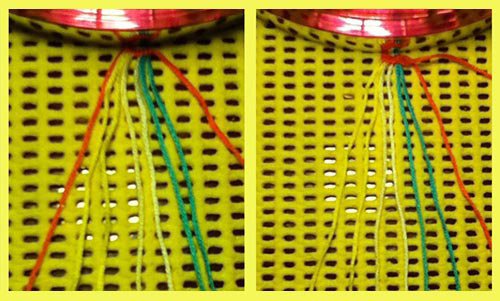
Step 2: Begin
Take the pink string that is farthest to the left and make forward knots over all of your other strings. It should now be on the right side. Take the next string (it should be the same color, it's pink in the pictures) and repeat.

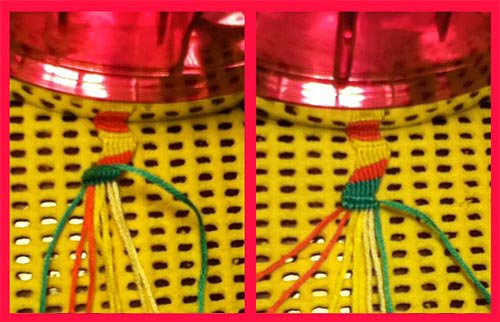
Step 3: Right Zig Zag
Take the leftmost string, mine is yellow, and make a row of forward knots. Take the next string on the left side (it should be yellow still) and make forward knots until you get to the rightmost string. Now you make one forward backward knot. Now you make backwards knots with both of the strings until they are on the left side.

Step 4: Continue
You need to make two rows of backward knots with the next color group (pink) to get them to the left side.
Step 5: Left Zig Zag
Take your rightmost string (my blue string) and make a row of backward knots. Now take the next string and make backward knots on all but the last string, on which you make a backward-foward knot. Use this string to finish the row of foward knots. Take the other blue string and make a row of forward knots with it, too.Keep doing this until the bracelet is long enough. It's better to zig zag every other color because it makes the zig zags more "dramatic" 🙂.