Rate Tutorial
You will need
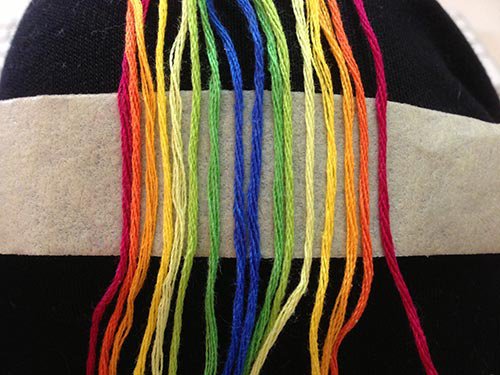
- 16 strings in 8 colors or 8 strings folded in half
- tape or something for attaching the bracelet to your working space
- tape or something for attaching the bracelet to your working space
Step 1
Lay your strings in this order:
ABCDEFGH HGFEDCBA
Order your colors in the order you want them on the diamond shaped part of the bracelet. Note that you will only get your first four colors in the diamond.
ABCDEFGH HGFEDCBA
Order your colors in the order you want them on the diamond shaped part of the bracelet. Note that you will only get your first four colors in the diamond.

Step 2
Divide your strings into two sections.
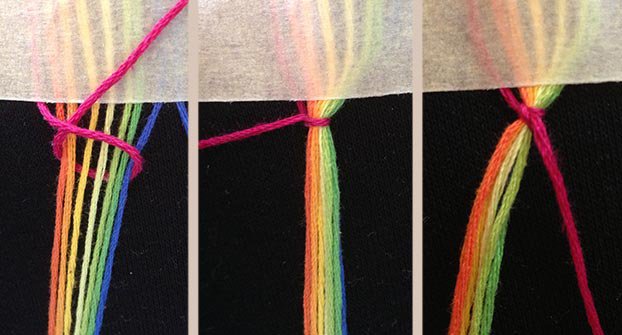
Step 3
Take your left string and make a forward knot over the rest of your left section strings.
Step 4
Take your right string and make a backward knot over the rest of your right section strings.
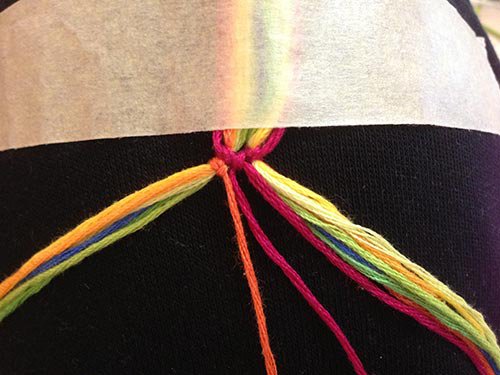
Step 5
Connect the two groups with a forward knot in the middle.
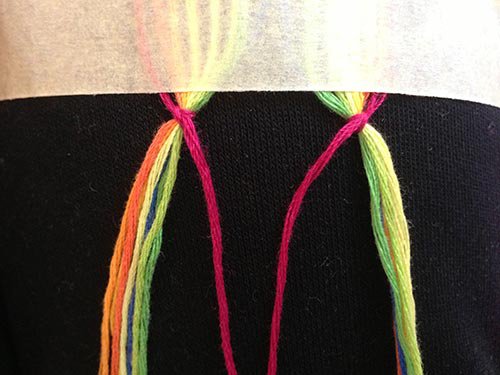
Step 6
Take your B string (second diamond color) and make a forward knot over the rest of your left strings, leaving out the middle strings.
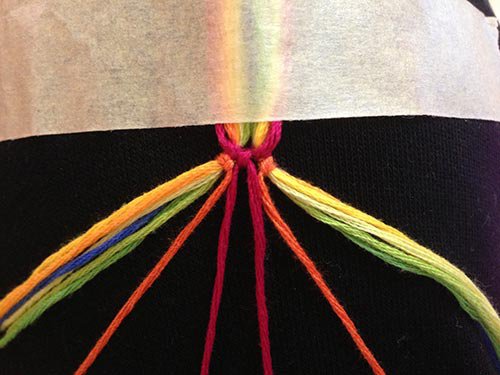
Step 7
Repeat with a backward knot on the other side.
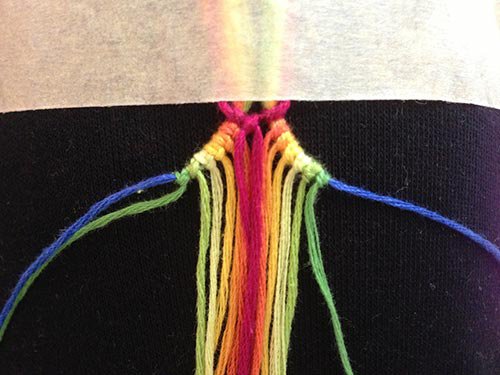
Step 8
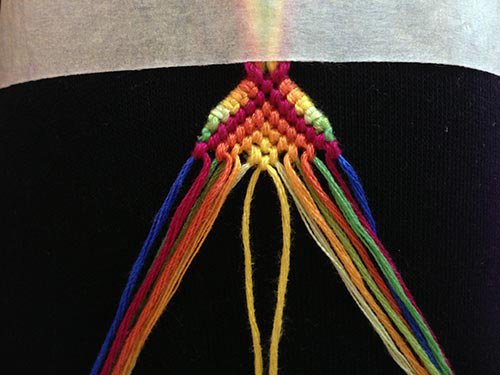
Repeat steps 6 and 7 until you end up with this.

Step 9
Take your left middle string and make backward knots over all of your left strings. End it with a backward-forward knot to create the diamond shape.

Step 10
Repeat on the other side, ending with a forward-backward knot.
Step 11
Repeat steps 9 and 10 three times.
Step 12
Make a forward knot with your middle strings.
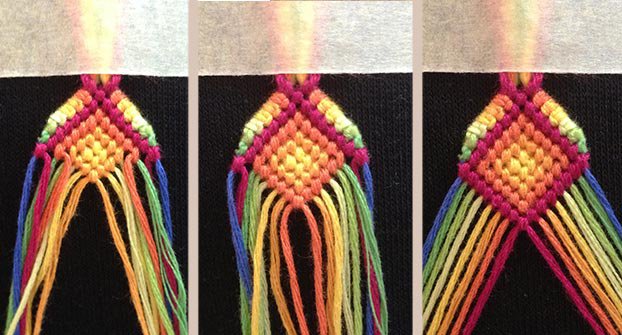
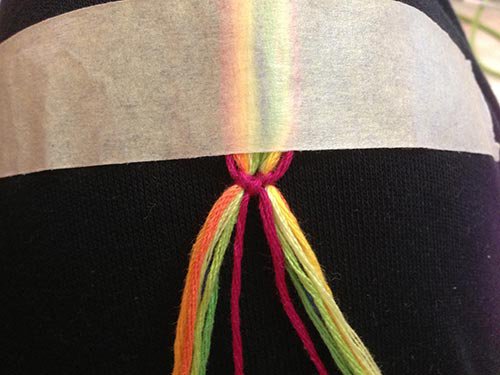
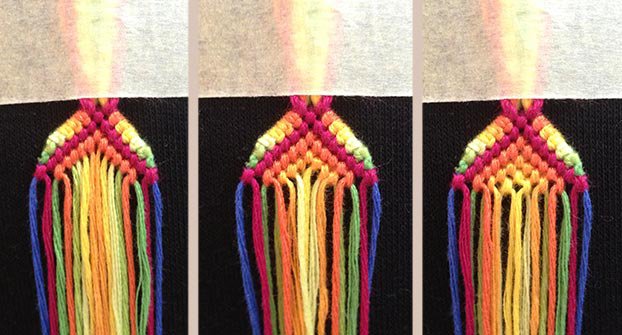
Step 13
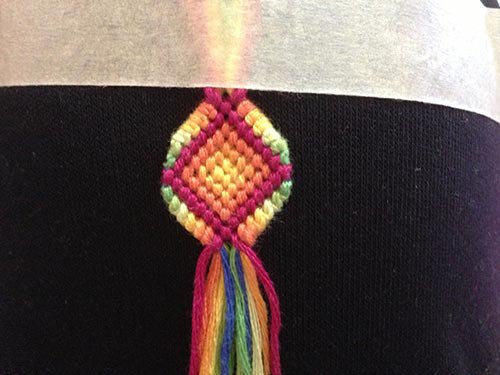
Finish off your diamond shape like this.
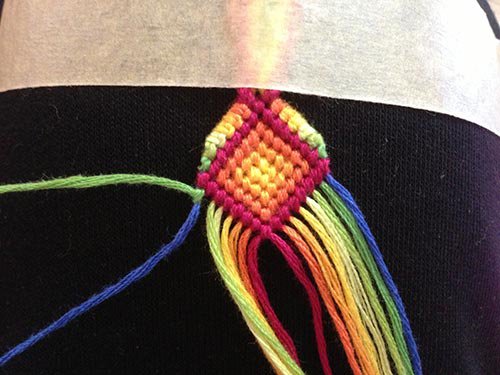
Step 14
Take your second string and make a backward knot over your first string.

Step 15
Take your next string in order and make a forward knot over both of your left strings.
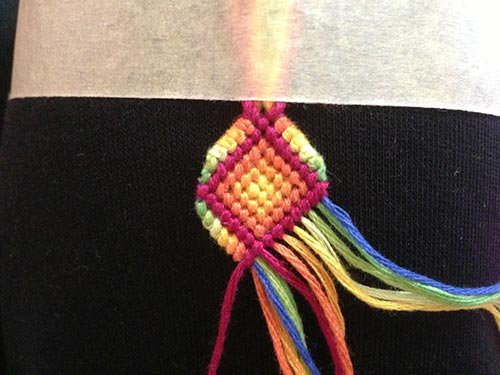
Step 16
Repeat with each string except the middle one. Finish the left side off by making a backward knot with your middle string.
Step 17
Repeat on the other side to finish your fist diamond shaped part.
Step 18
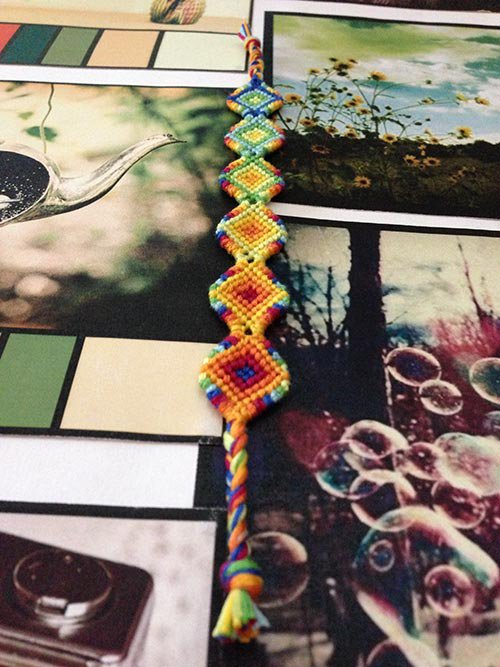
Repeat the steps until your bracelet is long enough.
Happy tying!
Adik
Happy tying!
Adik