

Rate Tutorial
Material:
- Your usual thread.
- Cardboard and pins to hold your work.
- Patience as the work need about 3x the usual time.
- Cardboard and pins to hold your work.
- Patience as the work need about 3x the usual time.
Pattern:
I'm using pattern #214367.

Step 1: Leading Loop
We need a loop to attach the base strings, so make a loop, and pin it down.

Like this.

Step 2: Add base string
Using Lark’s head knot, add the base string to the loop.
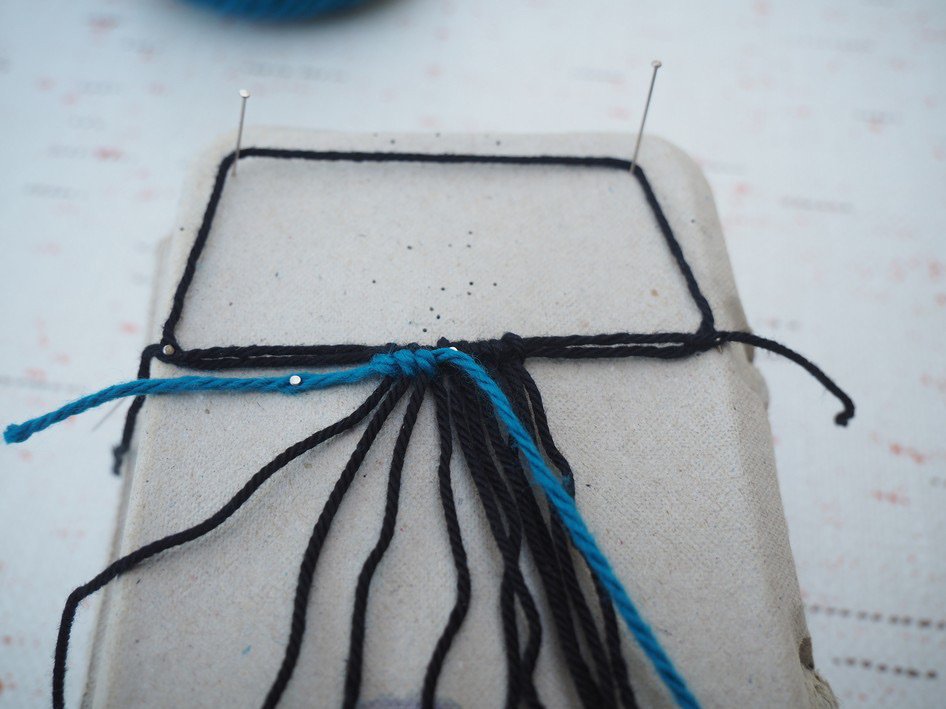
Step 3: Knot the pattern
This part is what you do for every alpha bracelet, just add all the knots.You can use quite long working string as the pattern will repeat.

You can use quite long working string as the pattern will repeat.
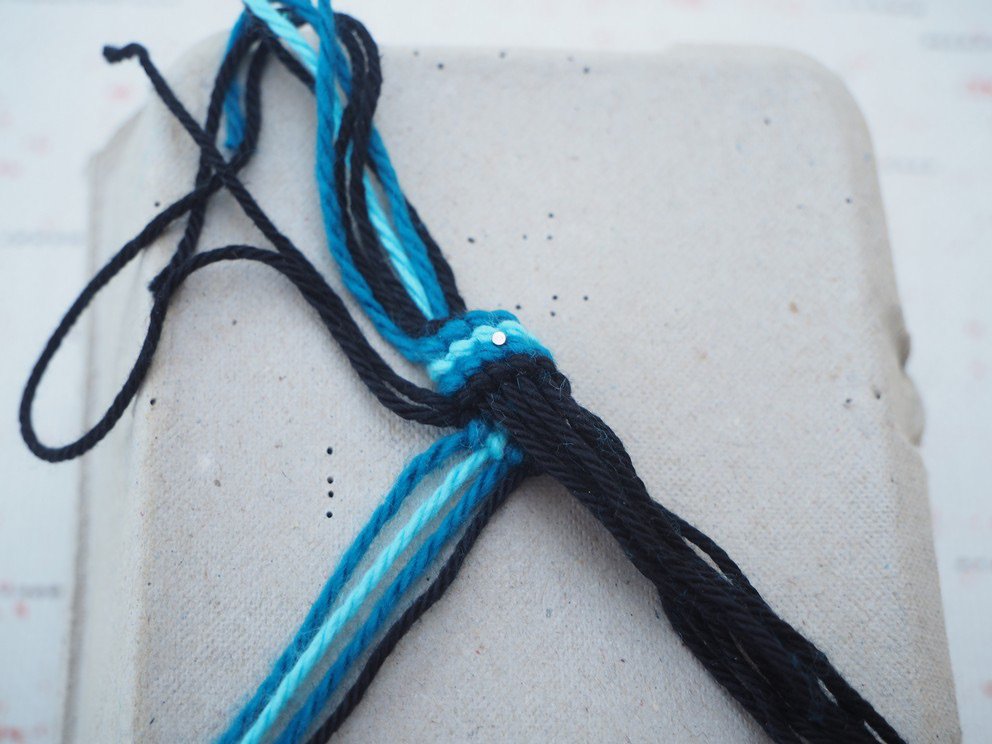
Step 4: Folding
Fold the bracelet around in order to have the working strings facing the base strings.

Then knot the pattern again (tie well the first knot of the new pattern iteration to avoid any gap in the pipe).
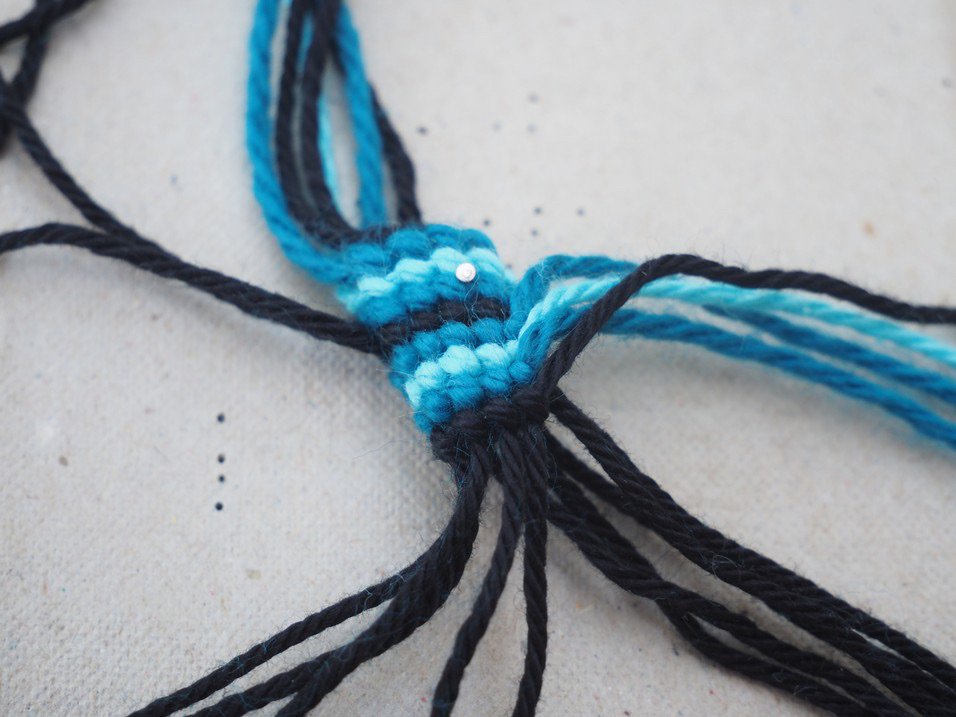
Step 5: Rotate and repeat
Now that the pipe is formed, carry on with the pattern. Once done, do it again and again until you reach the desired length. On the left, one can see the pipe after 2 iterations of the pattern and, on the right, the inner part of the pipe with the base strings scattered and the working strings.

Like this.

Step 6: (Optional) Changing thread
You may run out of working thread. No problem: the pipe is quite stiff (see left picture), you can just pin your new thread on it and make the usual thread swap.

Then, push the loose ends into the pipe.

Step 7: Finishing starting side
• Trim the loose ends of the working strings to ~3cm/1in and hide them into the pipe.
• Tighten the loop.
• Tighten the loop.

Step 8: Finishing ending side
• Tie the base string using forward/backward knots (from the normal pattern) on a new loop. See the left picture. The rod inside the pipe is here just to have a better view but does not help in the process. Note the knot (untightened so it is easy to see) around the 2 threads of the loop.
• Trim the loose ends of the working strings to ~3 cm / 1 in and hide them into the pipe.
• Trim the loose ends of the working strings to ~3 cm / 1 in and hide them into the pipe.
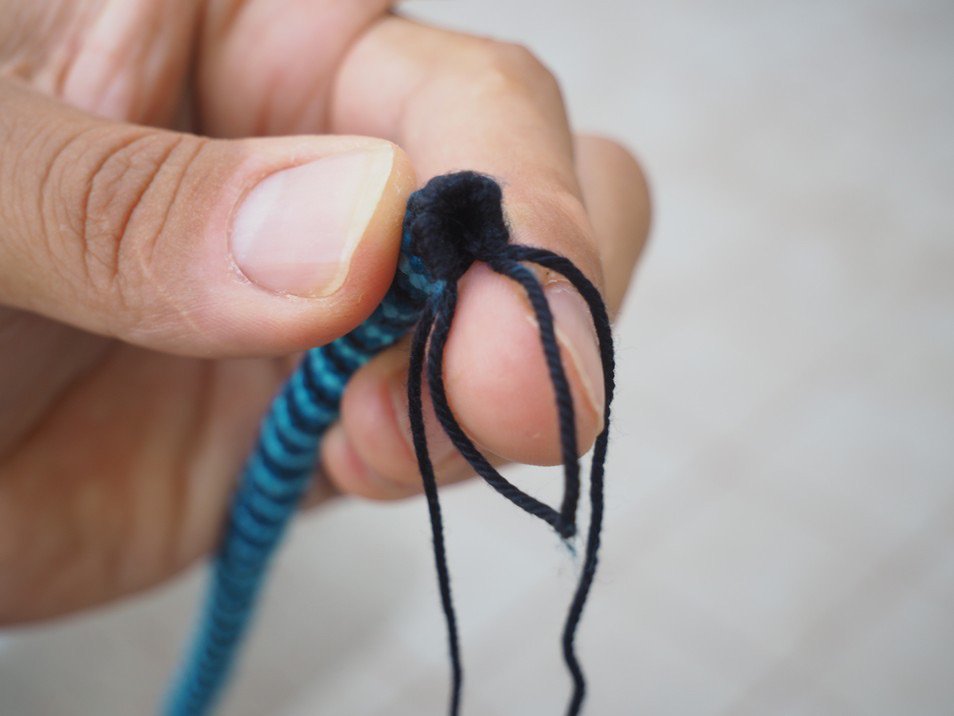
• Tighten the loop. The last picture shows the work during tightening of the loop: the loose ends are already into the pipe and the loop has been partially shrunk.

Final result:
Looks like this.
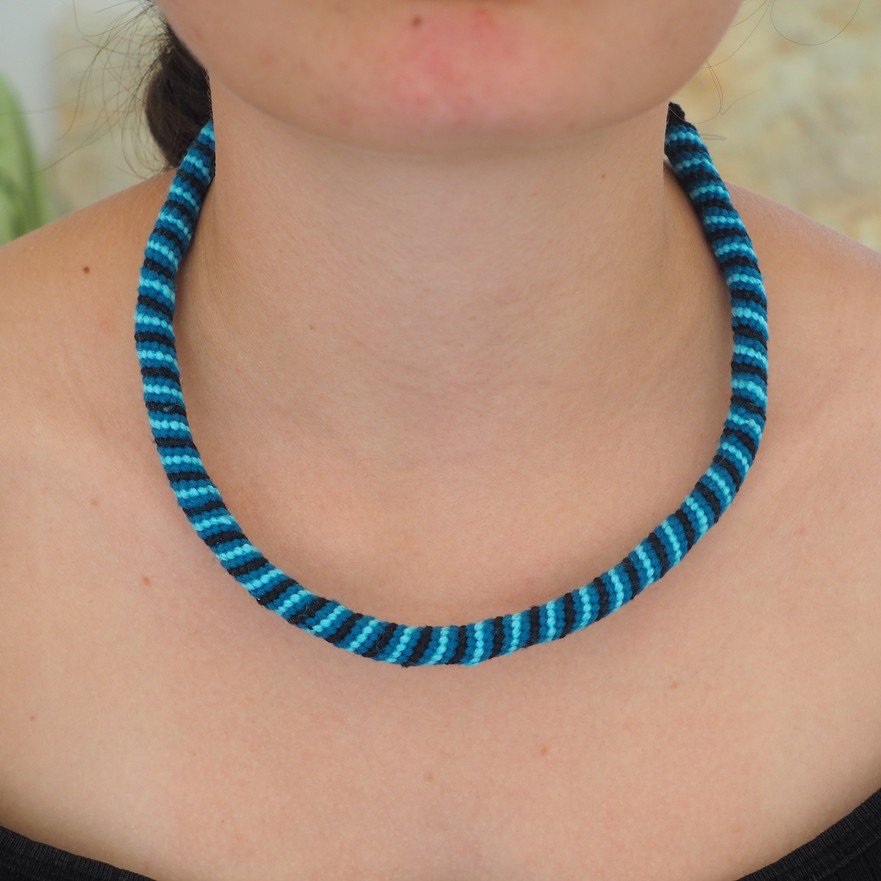
Here’s how to wear it.
To go further:
Some ideas to play with:
• You can change the diameter of the pipe by adding/removing base strings. It is even possible to do that while knotting, having a pipe blowing, then shrinking again. I do advise not to go below 7 base strings if you want a smooth pipe.
• In this tutorial, the pattern spirals around the pipe, starting over every 4 rows. It is possible to add 2 repeats of the pattern on the first 8 rows before folding the work. In this case, you will have 2 spirals instead of 1, and the angle they follow on the pipe will be different.
• By placing a wire into the pipe, you can shape it. Who will make the first candy cane?
• One can use much more complex alpha patterns; this will be the subject of another tutorial.
• You can change the diameter of the pipe by adding/removing base strings. It is even possible to do that while knotting, having a pipe blowing, then shrinking again. I do advise not to go below 7 base strings if you want a smooth pipe.
• In this tutorial, the pattern spirals around the pipe, starting over every 4 rows. It is possible to add 2 repeats of the pattern on the first 8 rows before folding the work. In this case, you will have 2 spirals instead of 1, and the angle they follow on the pipe will be different.
• By placing a wire into the pipe, you can shape it. Who will make the first candy cane?
• One can use much more complex alpha patterns; this will be the subject of another tutorial.


