Rate Tutorial
Hi! In this tutorial, I’m going to be teaching you how to make an alpha bookmark start, or the hole at the top of a bookmark that you can loop a tassel through and a tassel. I learned the bookmark start technique from @_kinseyb’s YouTube tutorial.
Pattern requirements:
- It must be an alpha.
- It must be at least ten base strings wide.
- I recommend using a pattern without a border because it’ll be easier without color switches.
- It must be at least ten base strings wide.
- I recommend using a pattern without a border because it’ll be easier without color switches.
What you’ll need for the bookmark start:
- pattern more than ten base strings wide (I’m using pattern #41140)
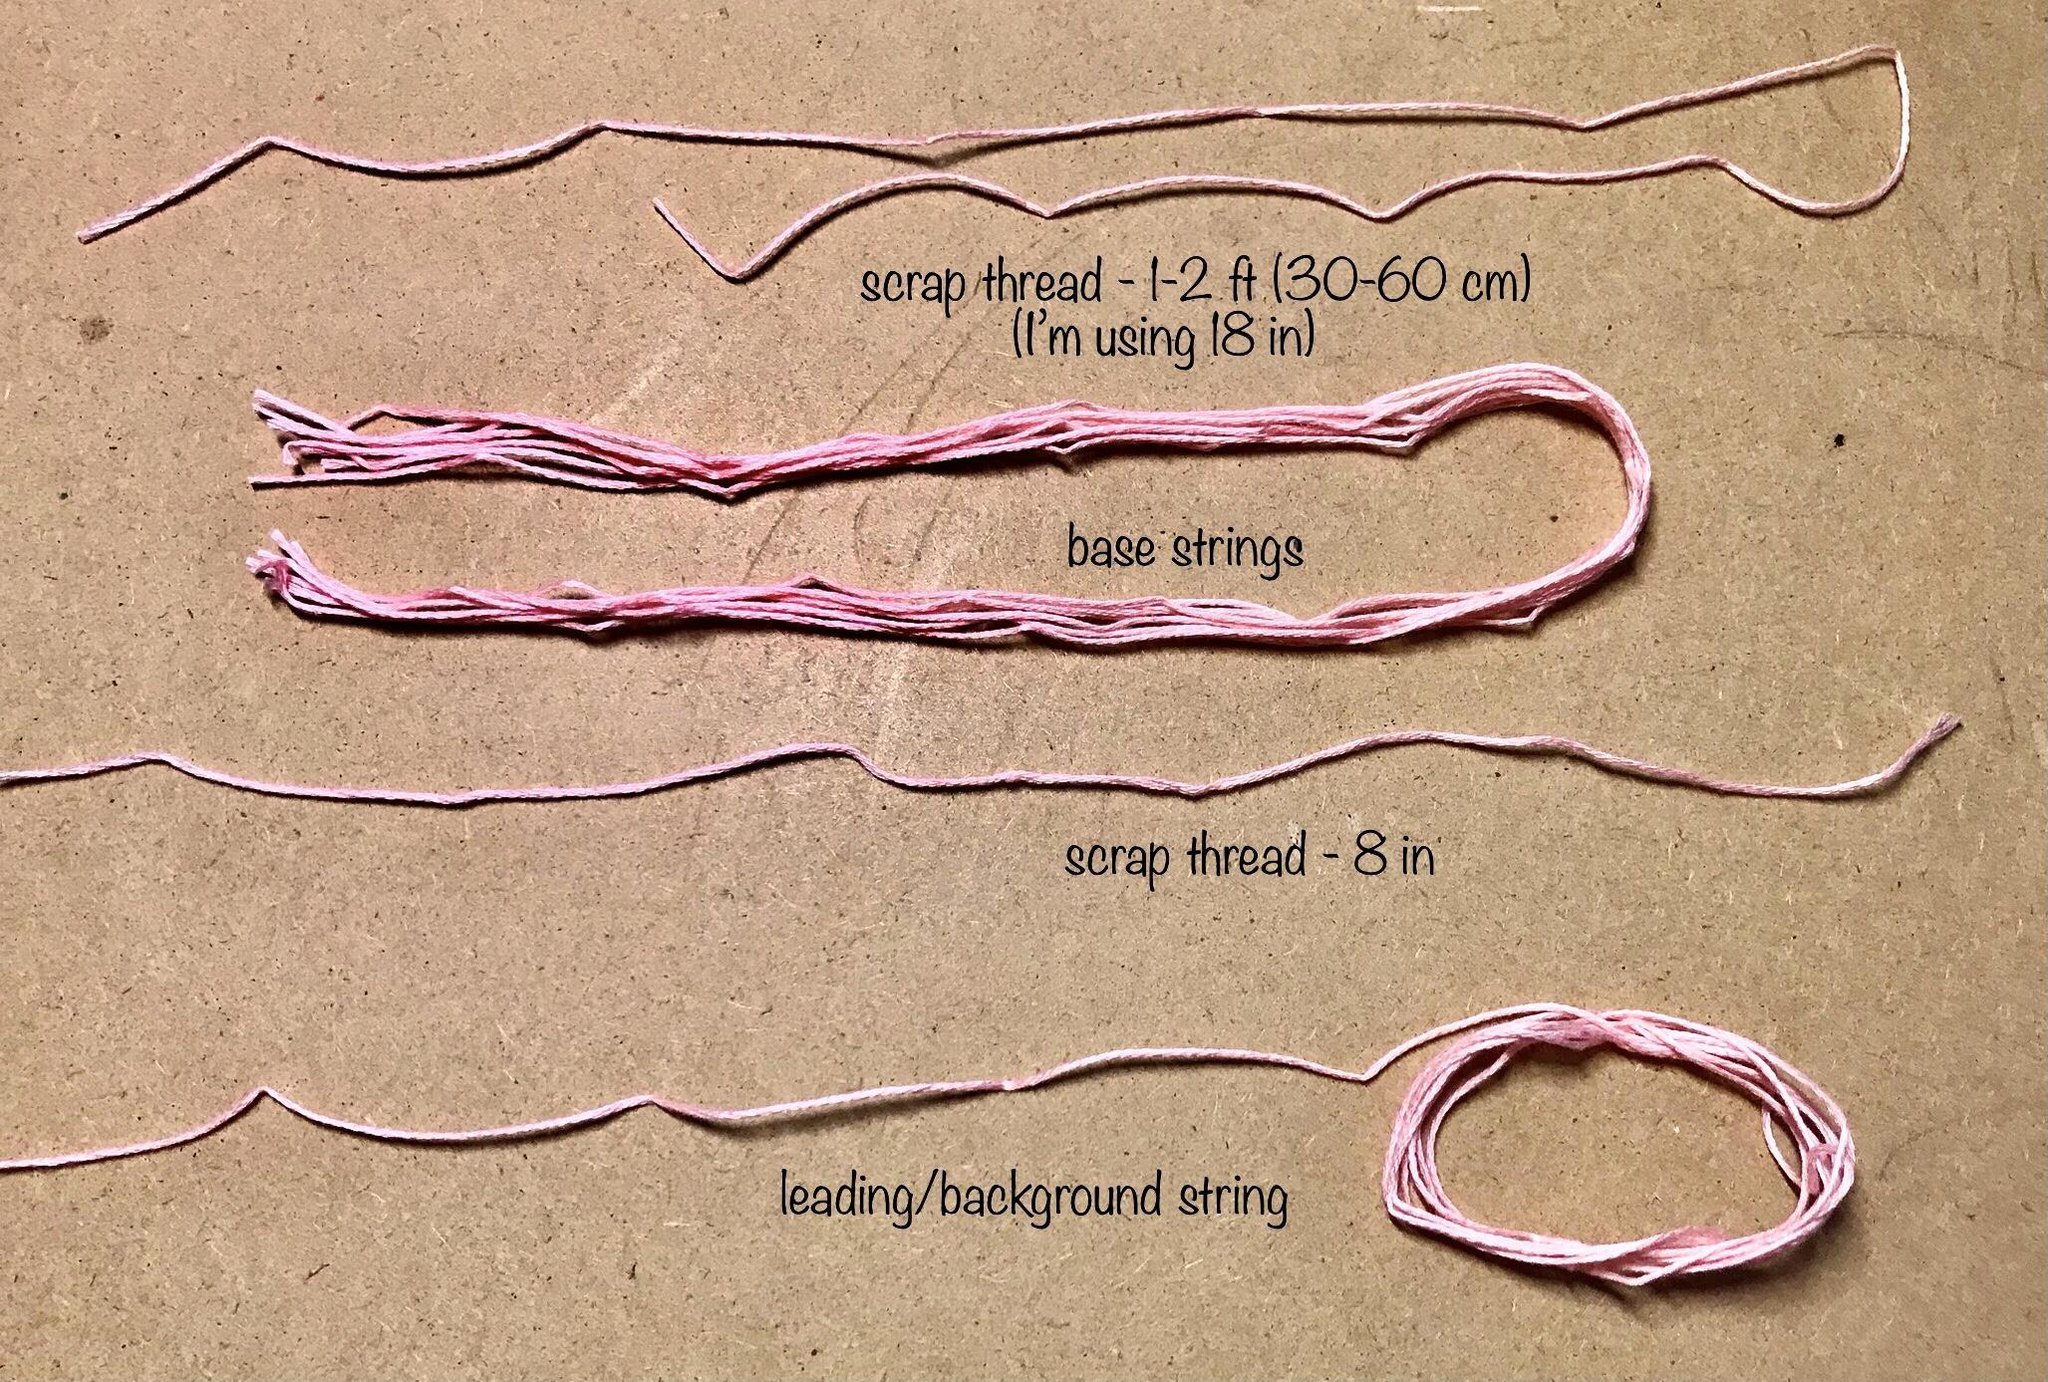
- scrap thread (about 8 in/20 cm will do)
- more scrap thread (about 1-2 ft/30-60 cm)
- your base strings (twelve rows is about an inch-learned that from @SBilbrey’s tutorial “The reversible alpha keychain”) - need to be the same color as the background unless you want an outline of the hole, the threads will be folded over, so cut half as many as it says, but twice as long (example: if I have fourteen base strings that are 5 inches long each, I would cut seven base strings that are 10 inches long each)
- background/leading string
- tape
- scissors
To make the bookmark start:
I’m going to start with if you have an even amount of base strings, but at the bottom of each step, I’ll add a couple of additional info for if you have an odd number of base strings.
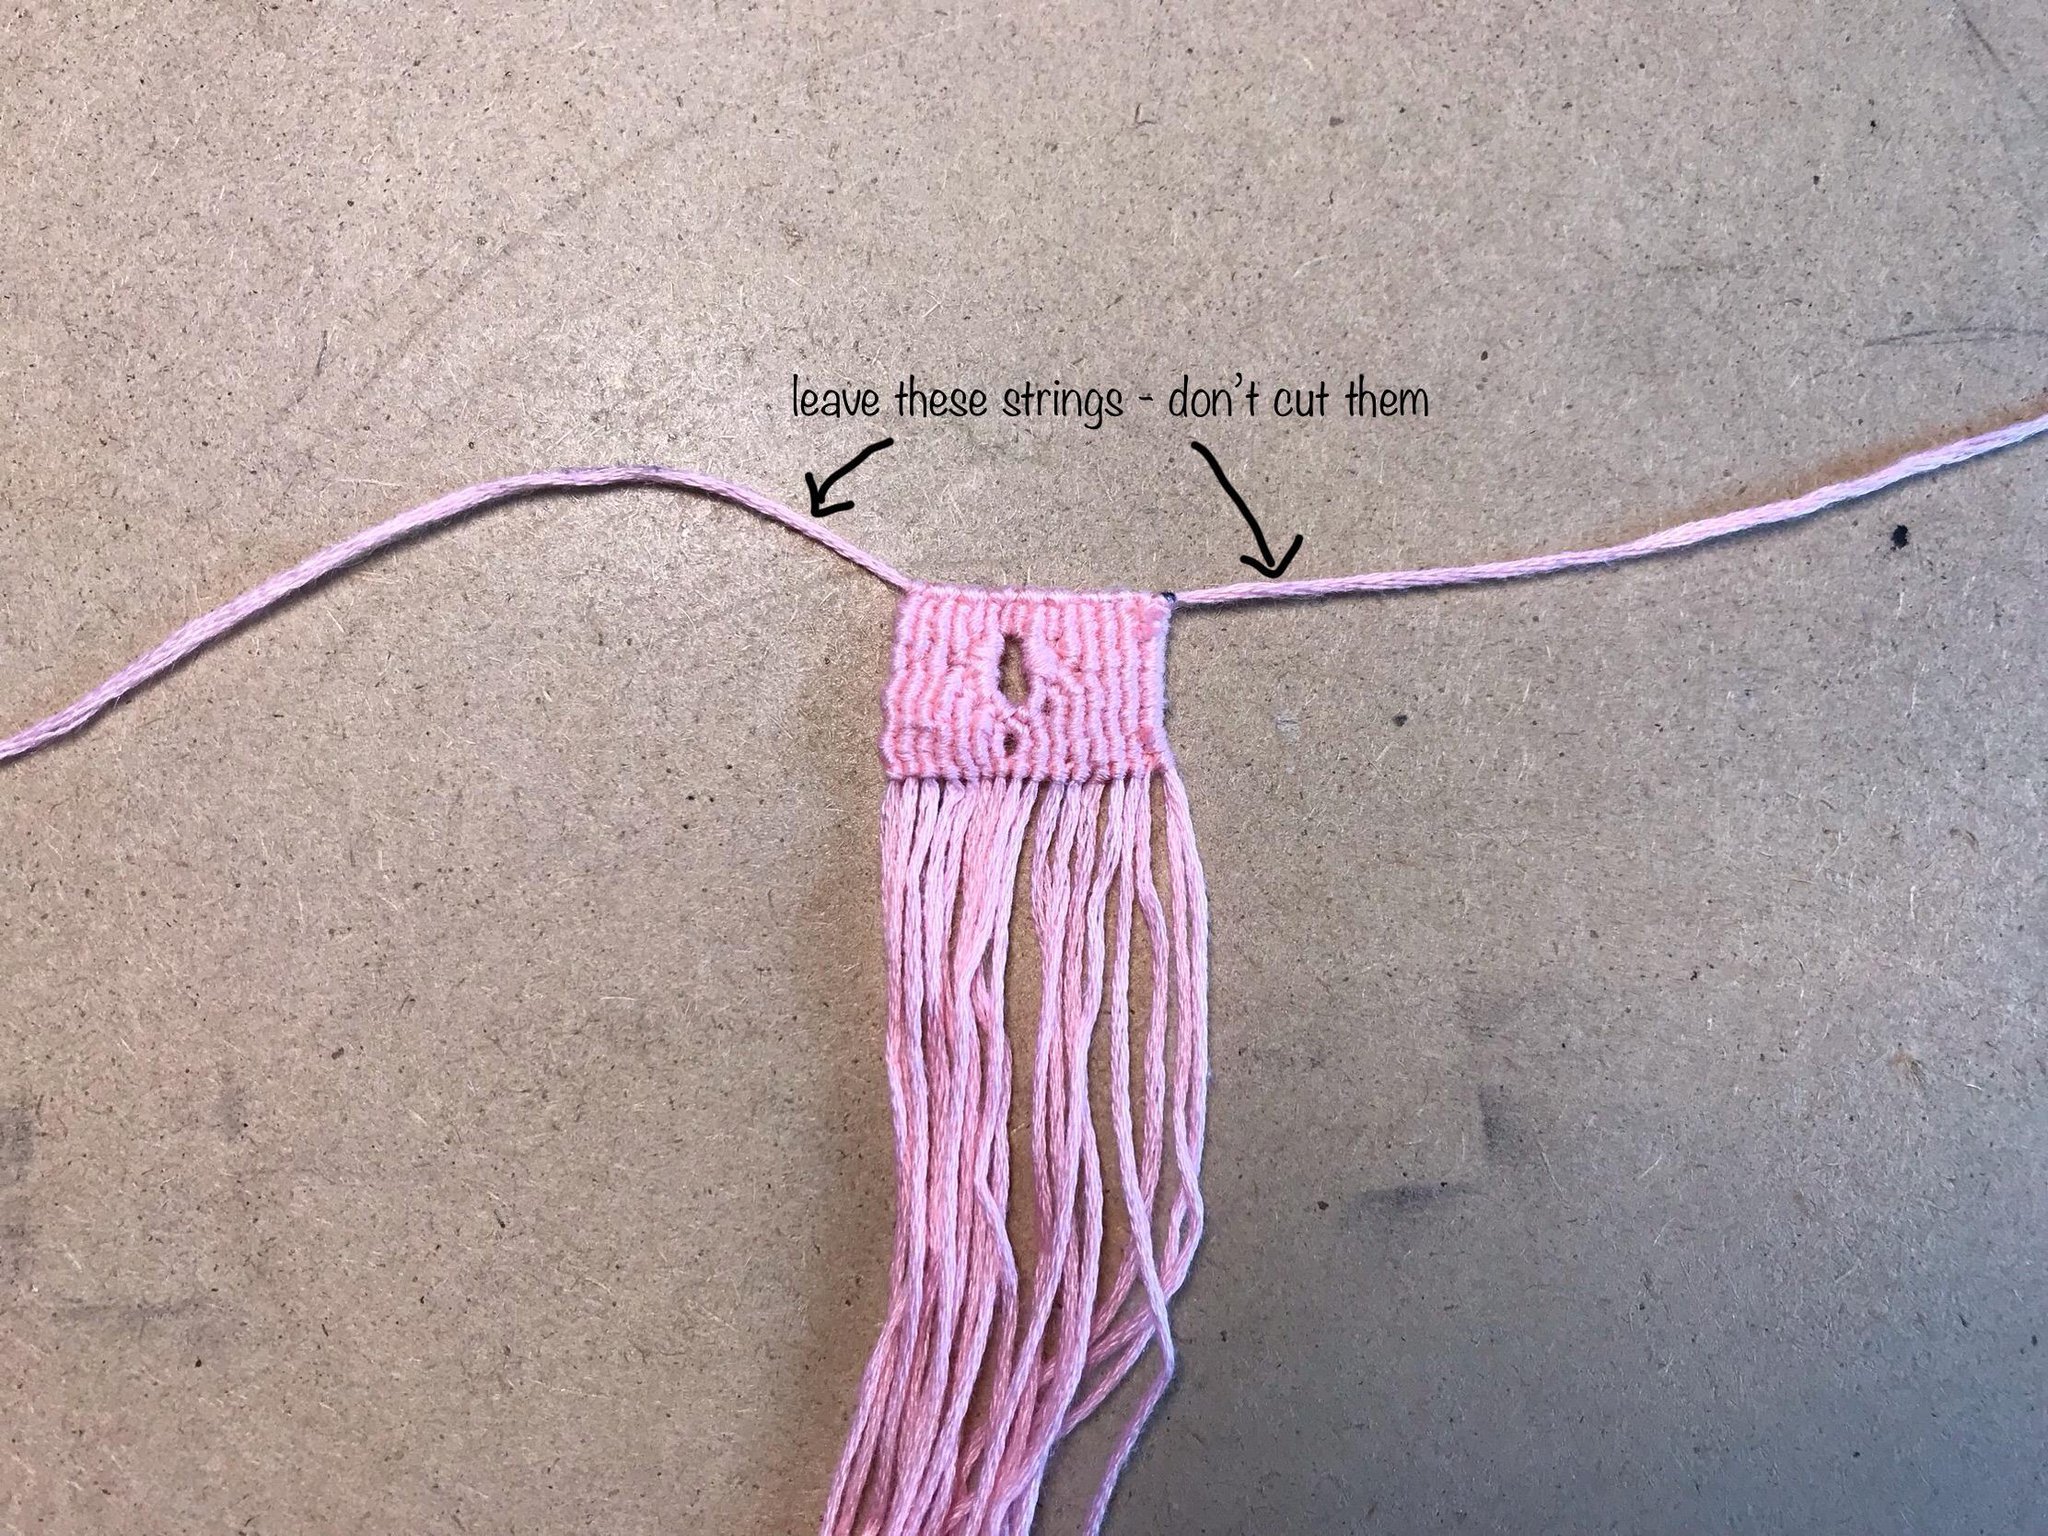
Step 1:
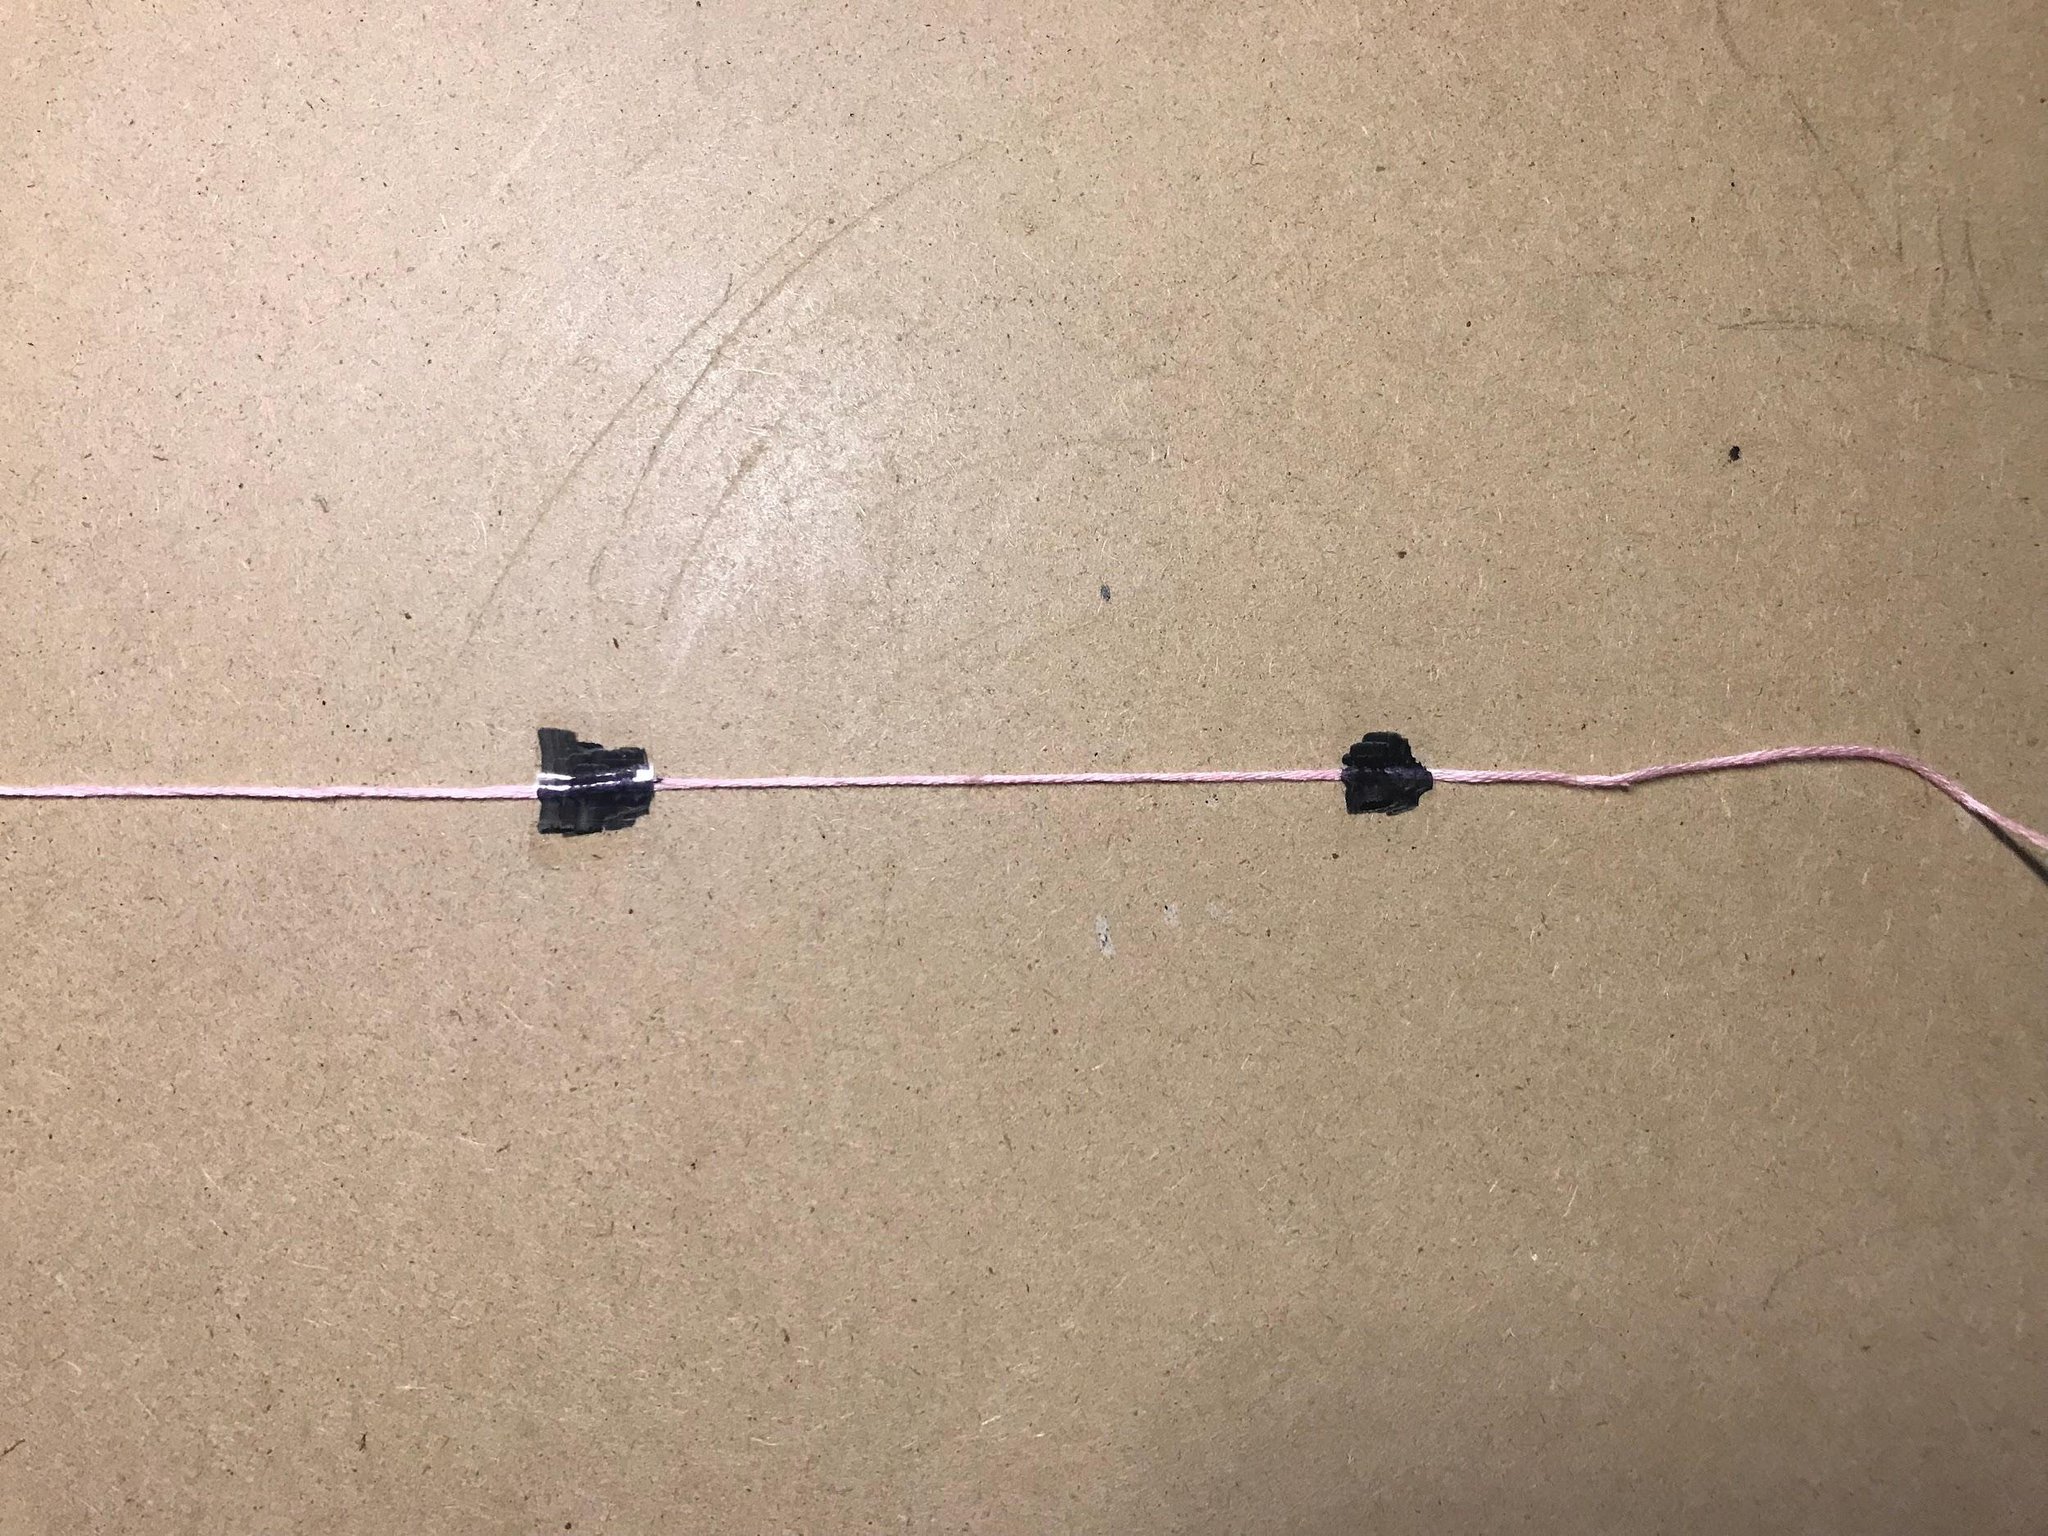
Tape the scrap thread horizontally onto your workspace with two pieces of tape-one on the right side, and one on the left side. Put them a reasonable distance apart, as in between is where your base strings will go. And pull them TIGHT. I’ve marked the tape with a black marker so you can see how far apart I’m placing them for fifteen base strings.
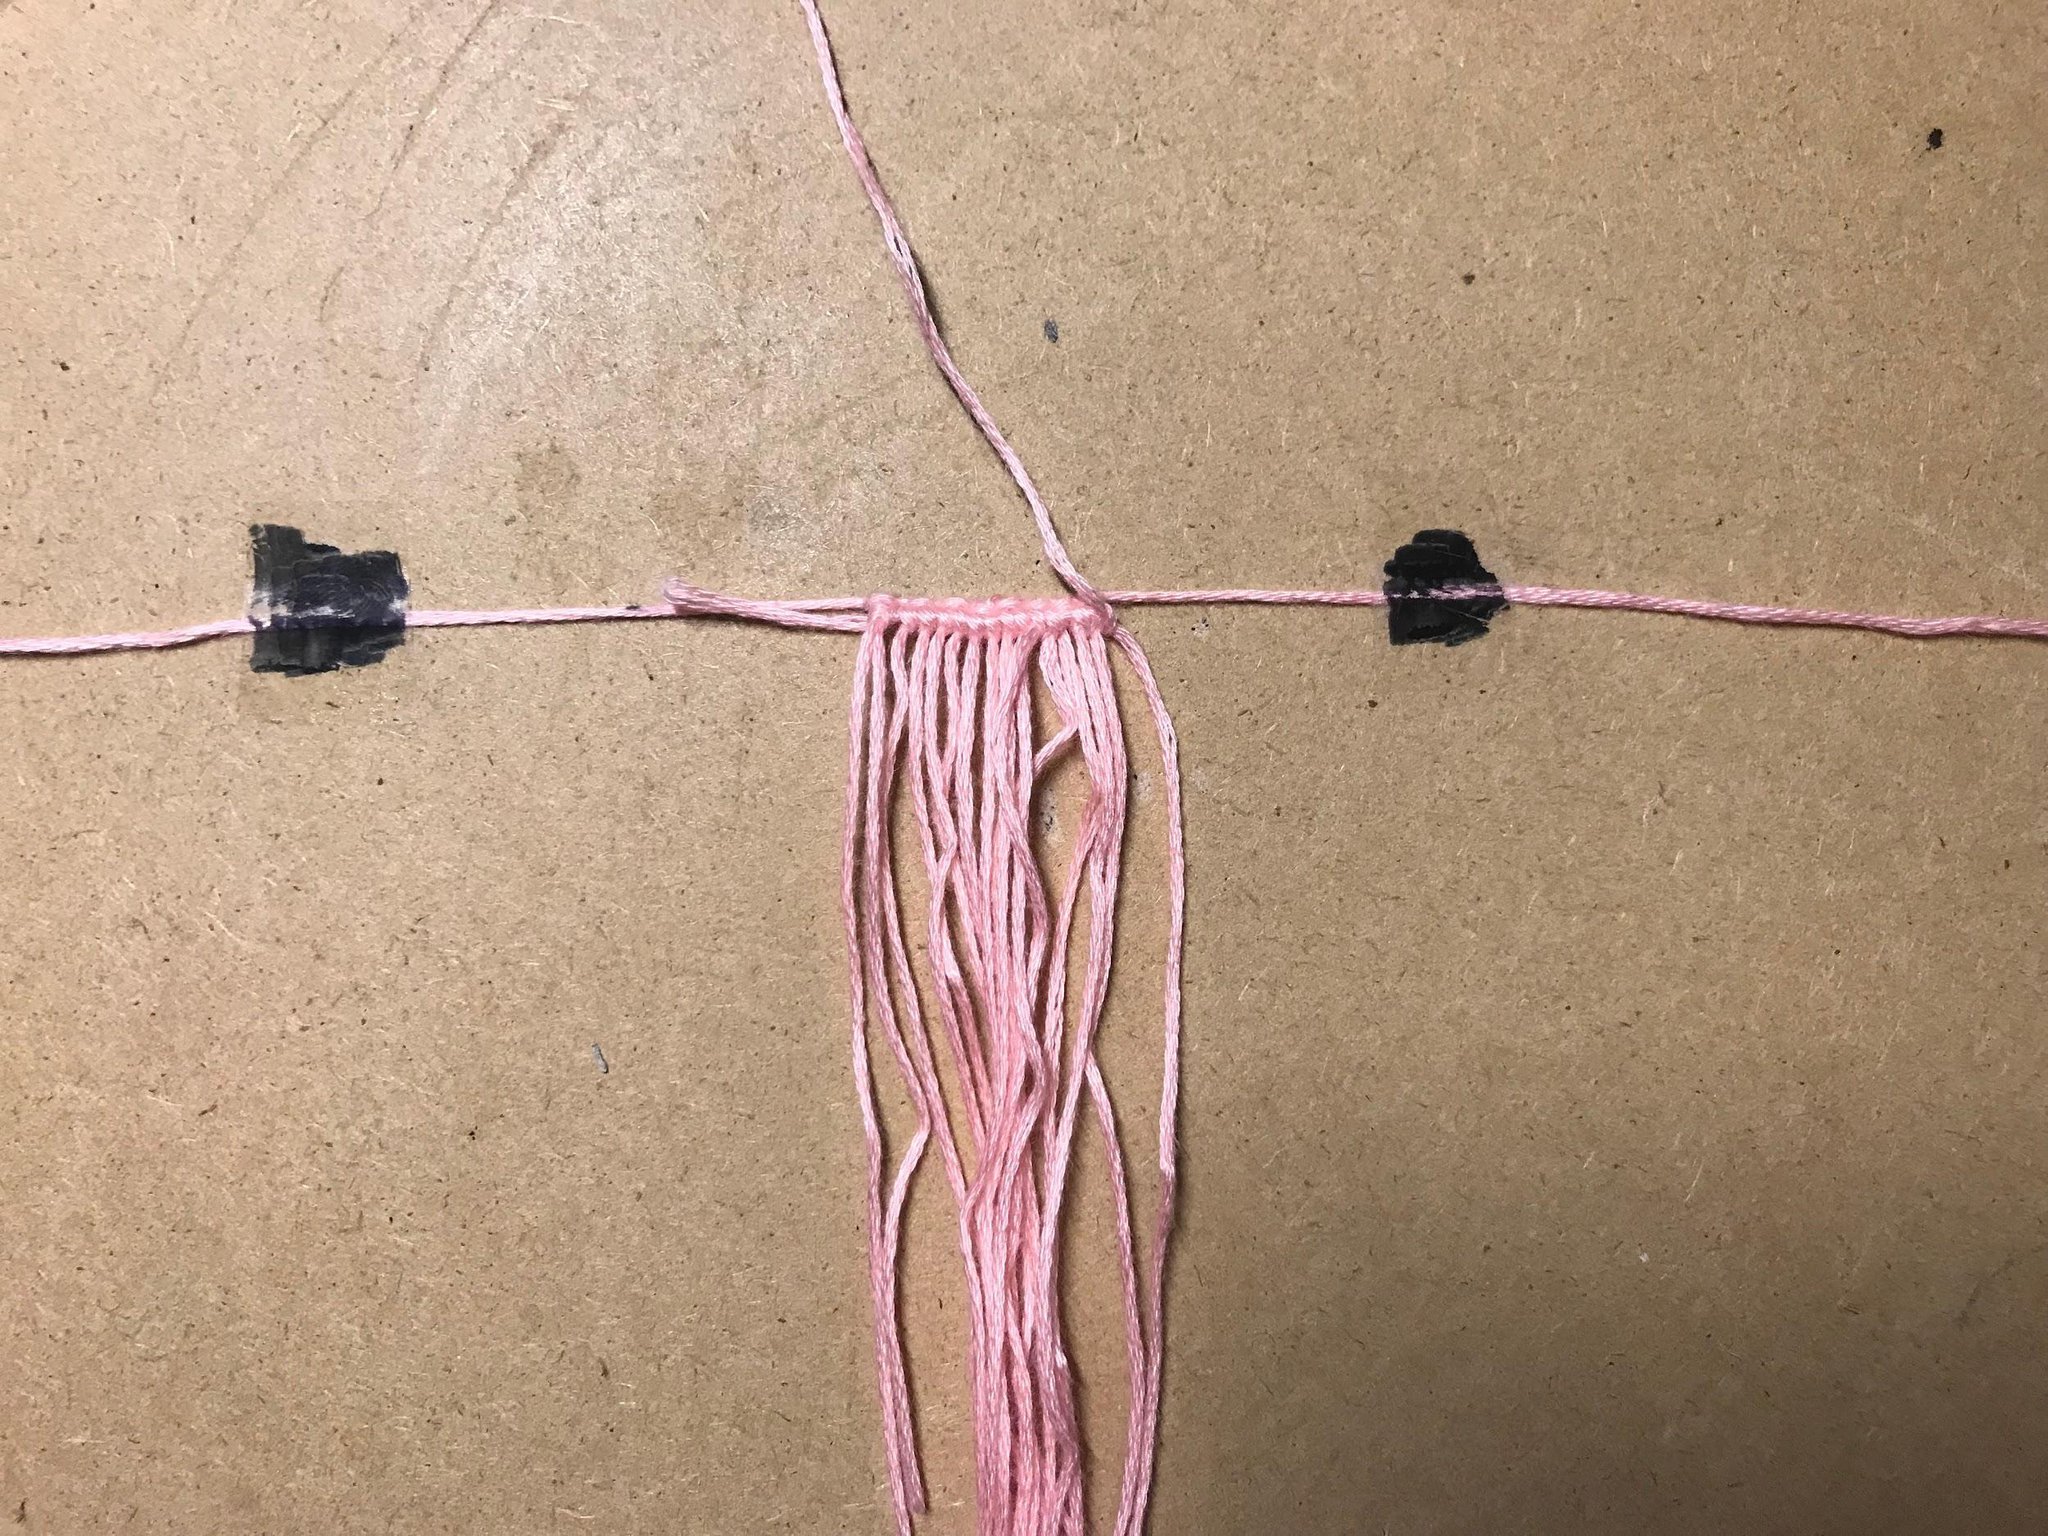
Step 2:
You know how when you do a wall hanging, you tie lark’s head knots onto the wooden dowel? Well, you’re going to be doing lark’s head knots onto the scrap thread. Pulling the scrap thread tight will really come in handy here.
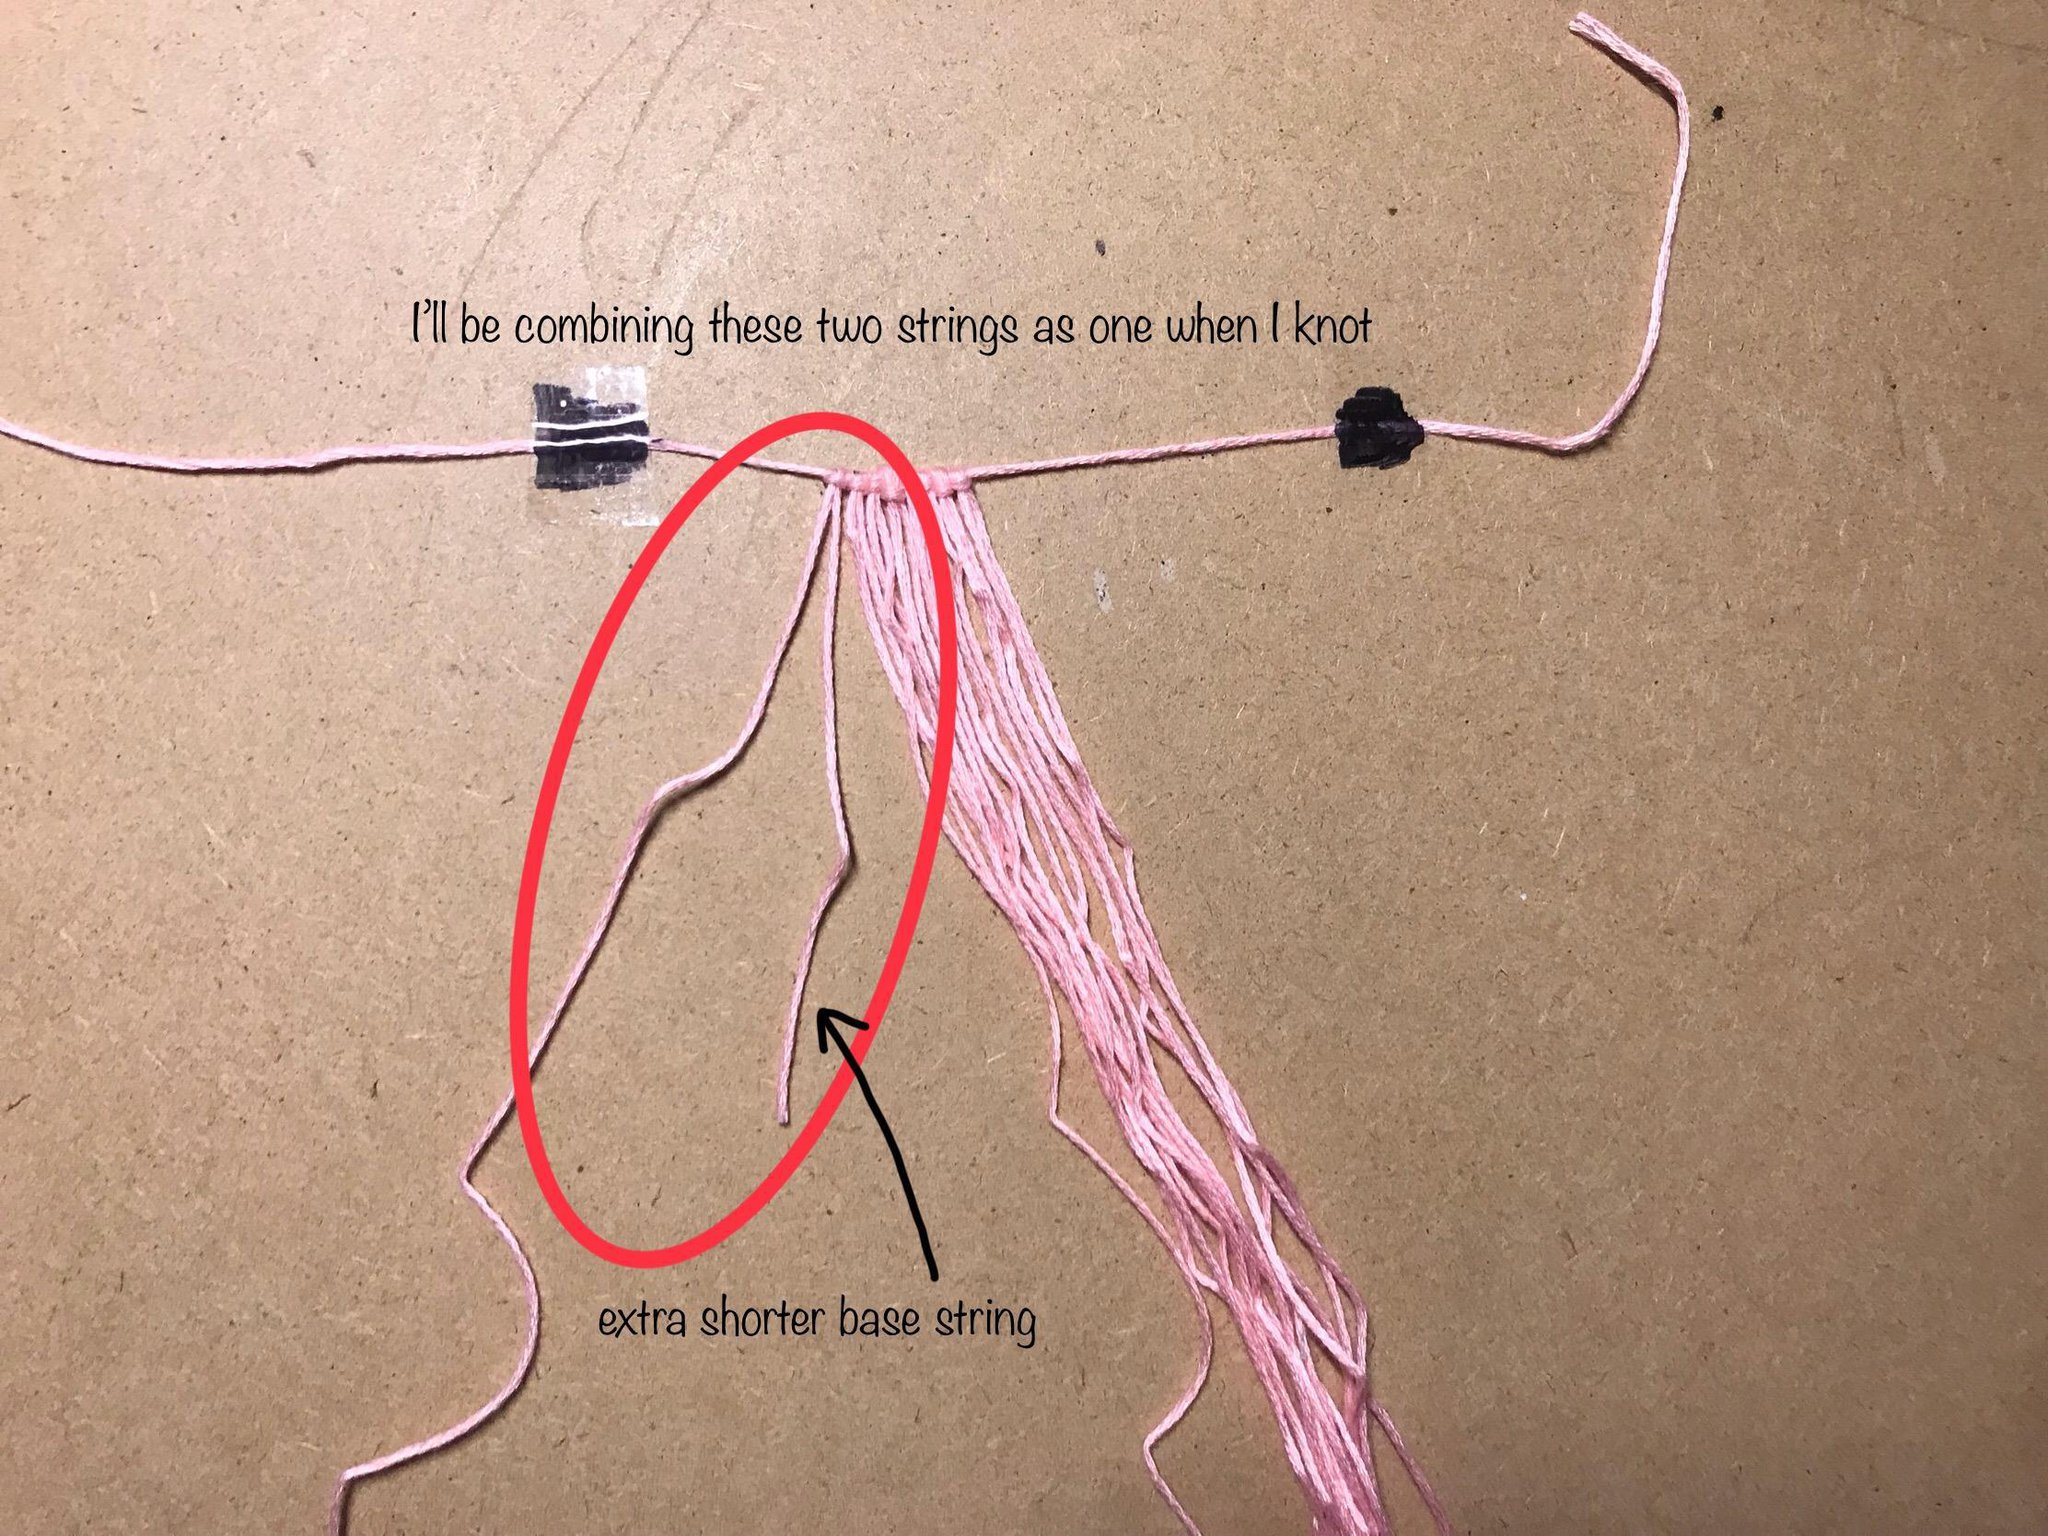
For odd numbers:
Cut one more thread than you would actually need. (example: I have fifteen base strings, so I would cut eight strings but cut one of them shorter so I’m not wasting string when I cut off the shorter side) Then, when you get to that string, just knot over both of them as if they were one string. My alpha has fifteen strings, and to demonstrate, I’ll pick these out to show you.
Step 3:
Using your background string, tie one normal alpha row across the base strings. Your background string should now be on the right.
For odd numbers:
Knot over the first two base strings as if they were one string.
For odd numbers:
Knot over the first two base strings as if they were one string.
Step 4:
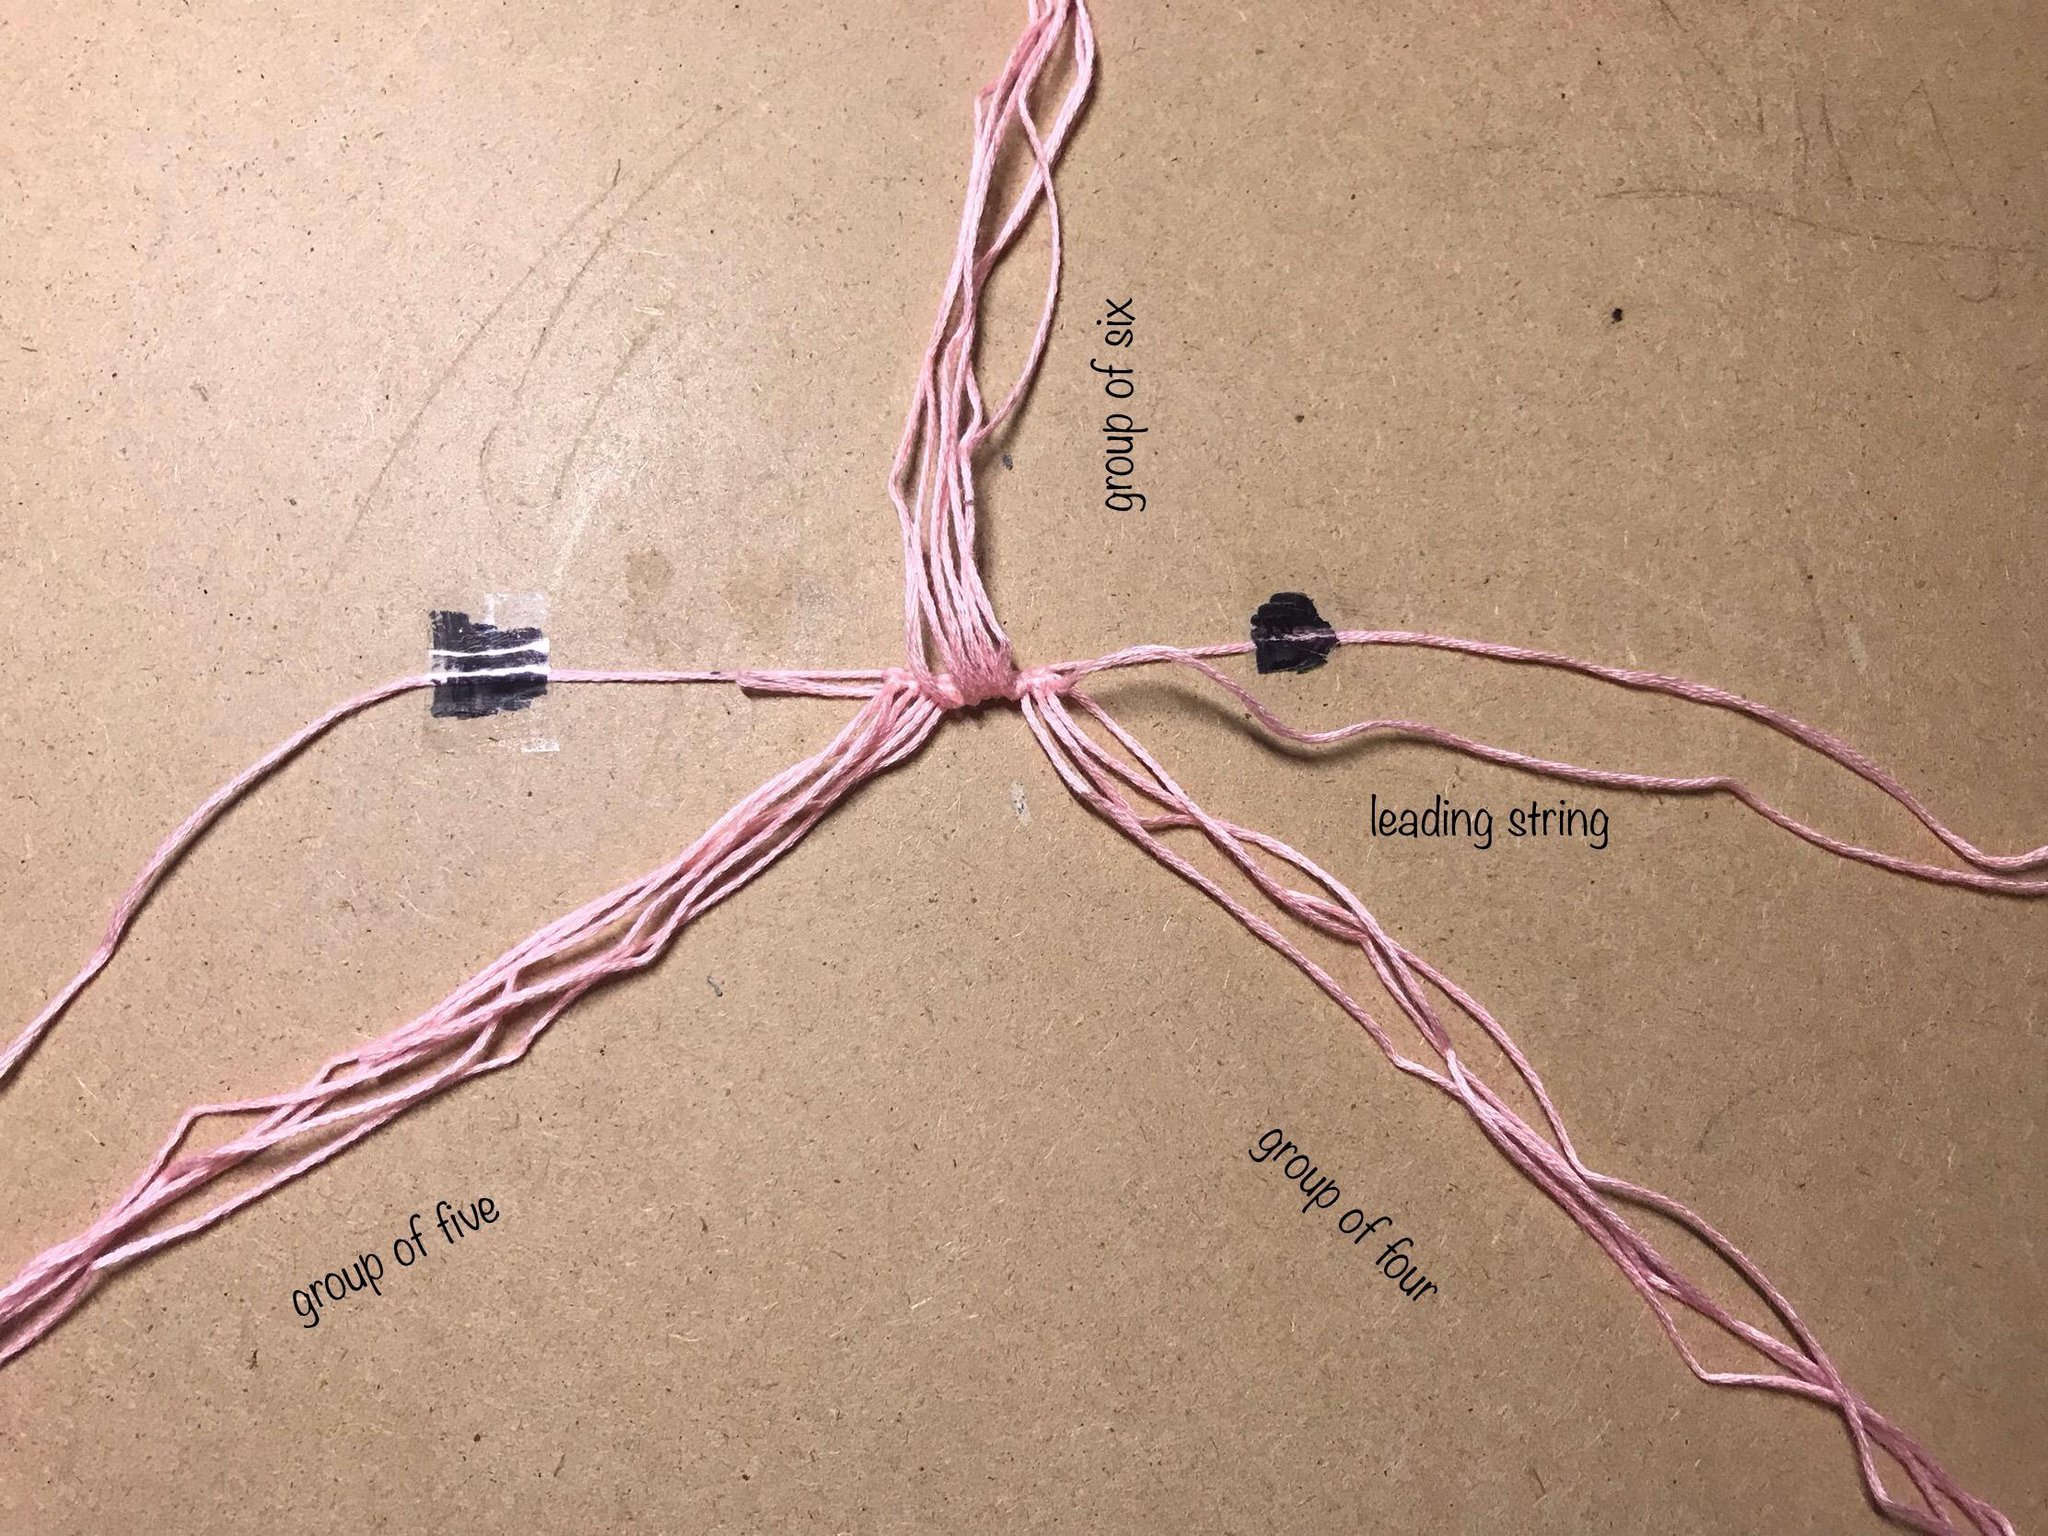
Section off 6 of the middle base strings. You will have 3 sections and the left amount should be equal to the right amount. Then there’s the middle with the 6 strings. Flip those 6 strings up and out of the way. We’ll worry about those later.
For odd numbers:
The left and right side will not be even. Don’t worry about that. They can be one off from each other. (I have 15 strings, so I’ll have a group of five, a group of six, and a group of four.) *Note-the double base string counts as one.
For odd numbers:
The left and right side will not be even. Don’t worry about that. They can be one off from each other. (I have 15 strings, so I’ll have a group of five, a group of six, and a group of four.) *Note-the double base string counts as one.
Step 5:
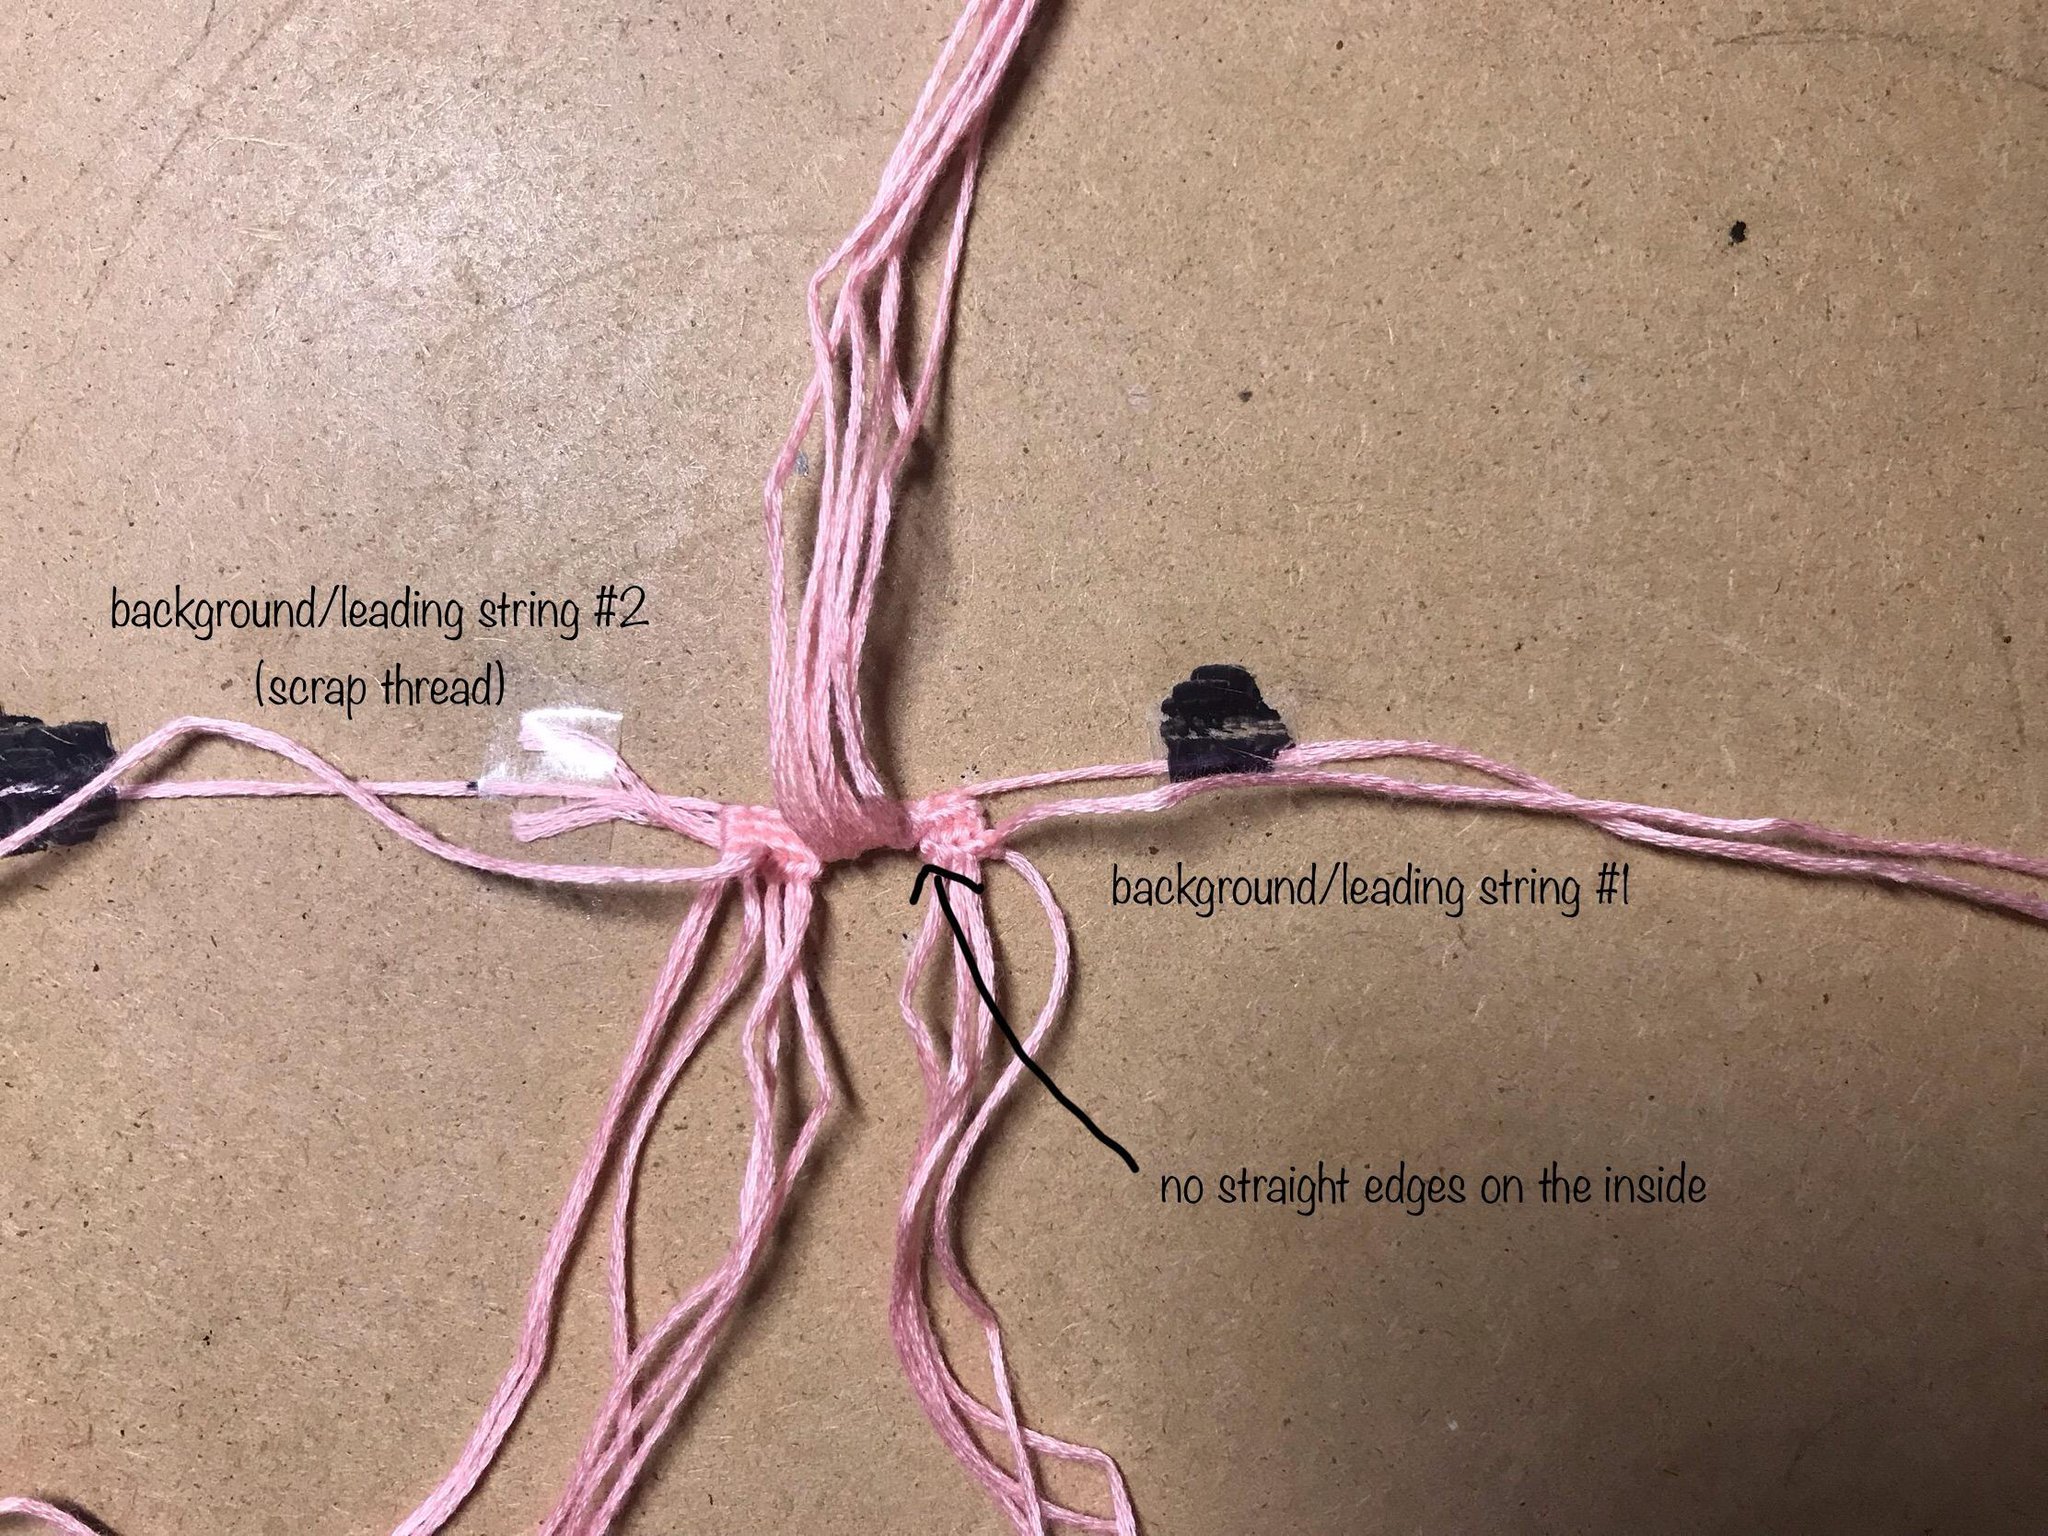
Now on the left and right side, you’re going to knot 2 rows for each side. The background thread should be on the right, so knot 2 normal alpha rows, stopping when you hit the middle 6, then turn back. IF YOU ARE USING THE STRAIGHT EDGE TECHNIQUE, ONLY USE THEM ON THE OUTSIDE, NEVER ON THE INSIDE. On the left side, you’re going to use your scrap thread that’s 1-2 ft long (30-60 cm) and knot those 2 rows. Basically, there’s going to be 2 background strings, one on the left, one on the right, and a gap in the middle.
Step 6:
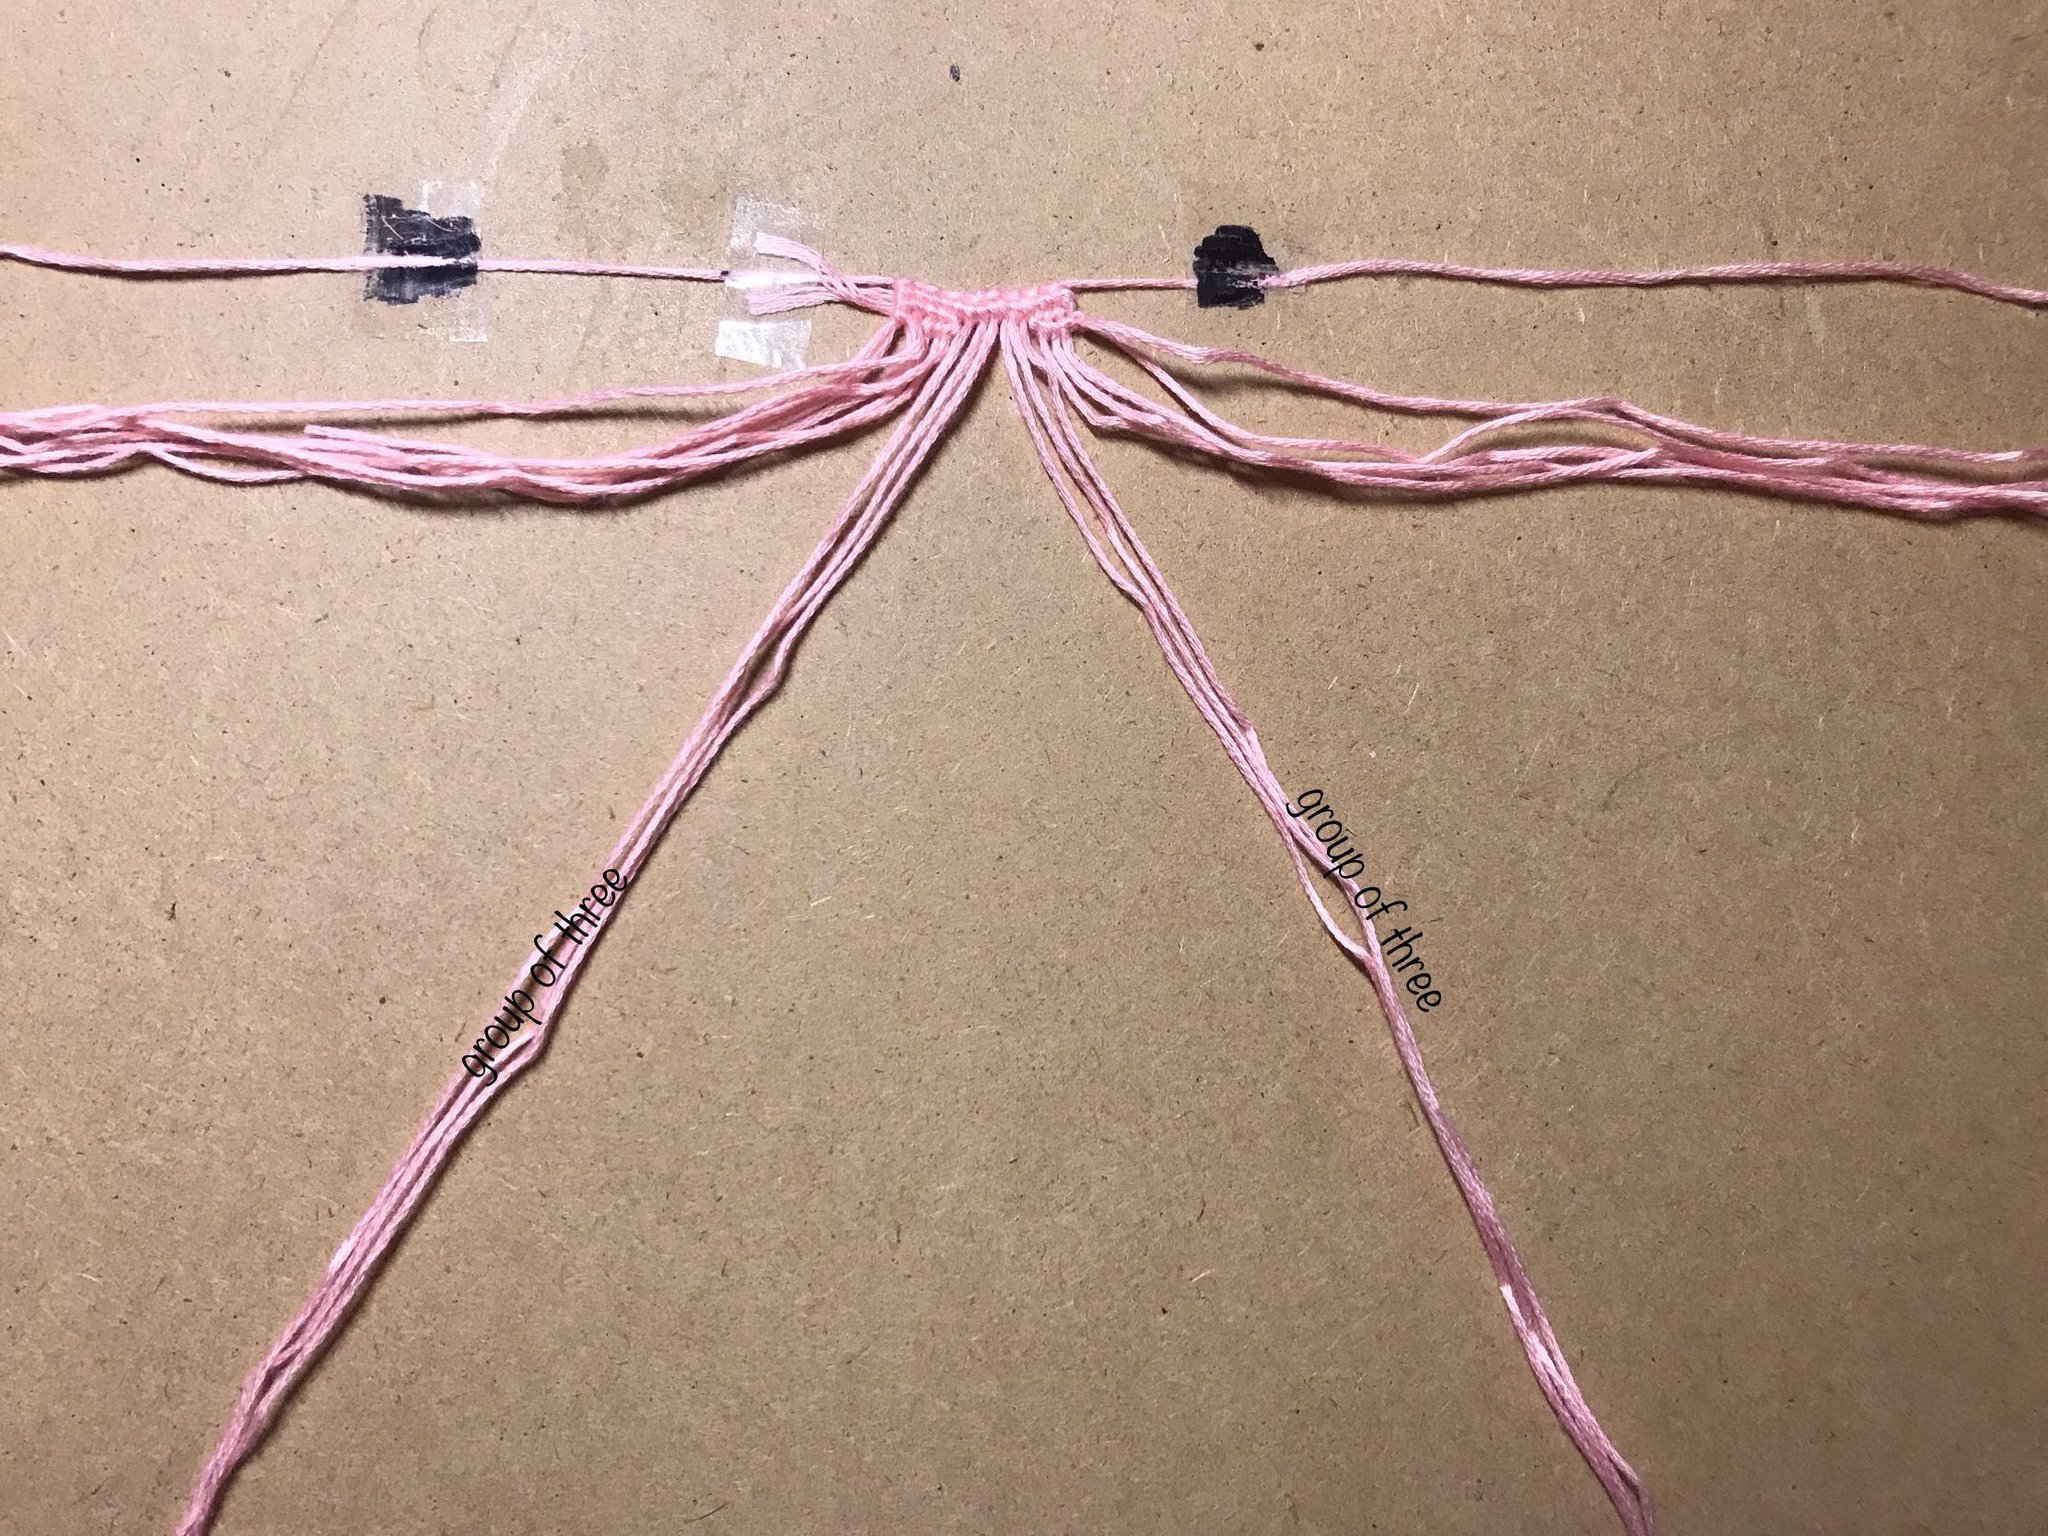
Now we’re going to set the left and right side aside and out of the way. Bring down the middle 6 strings. Separate them into 2 groups of 3.
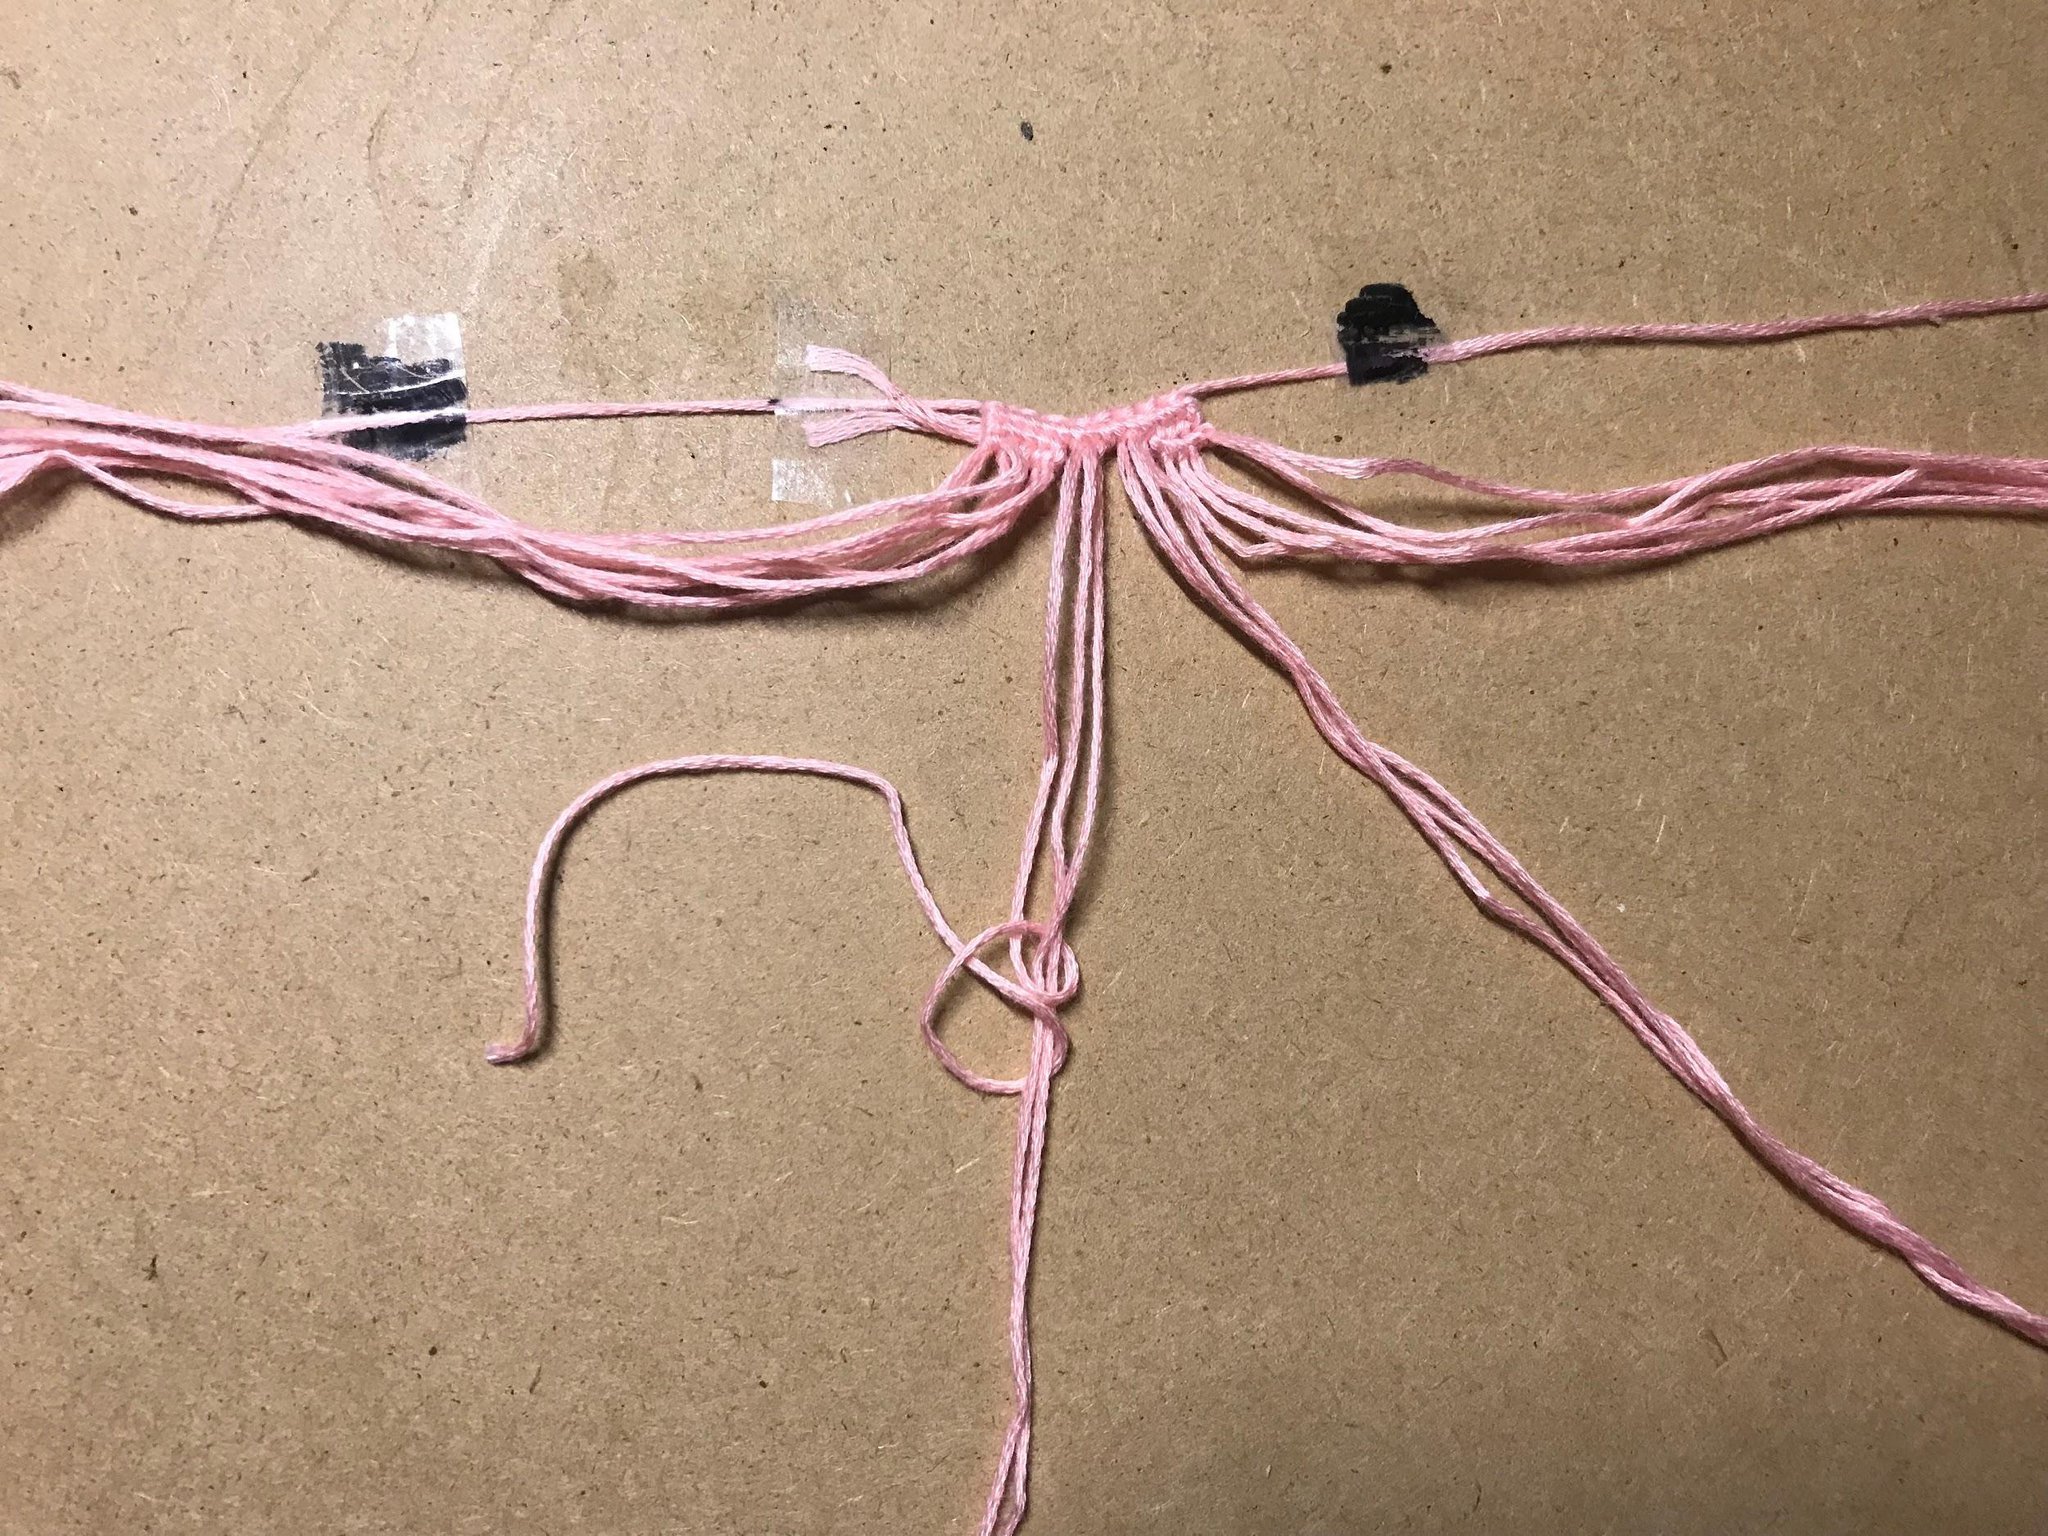
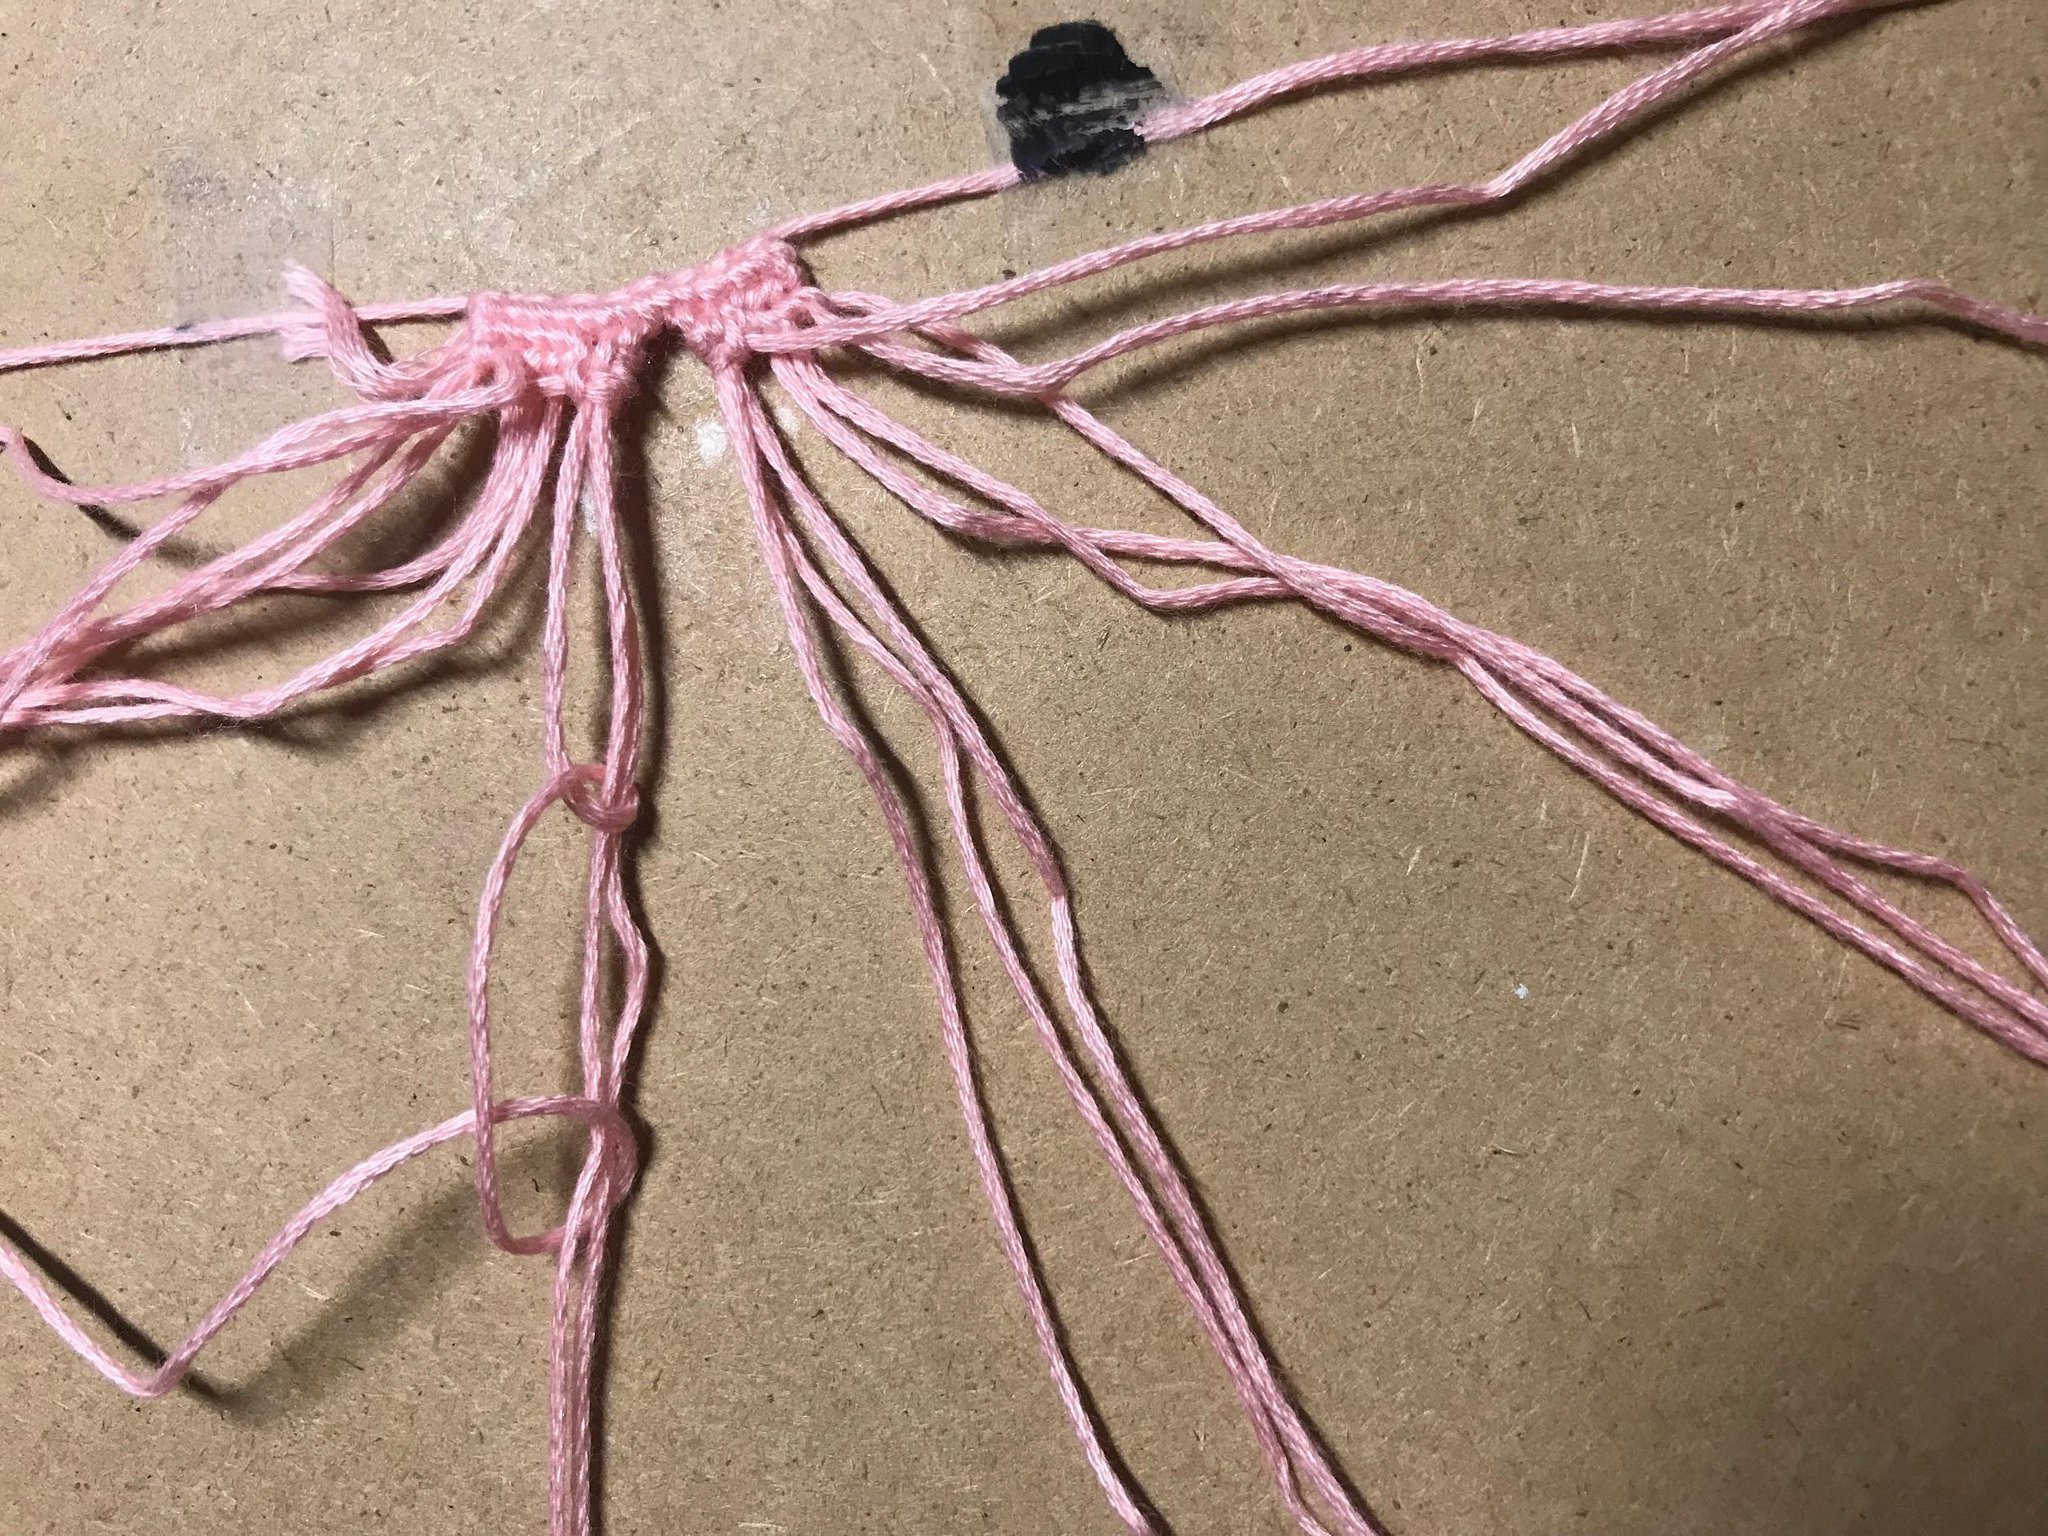
Step 7:
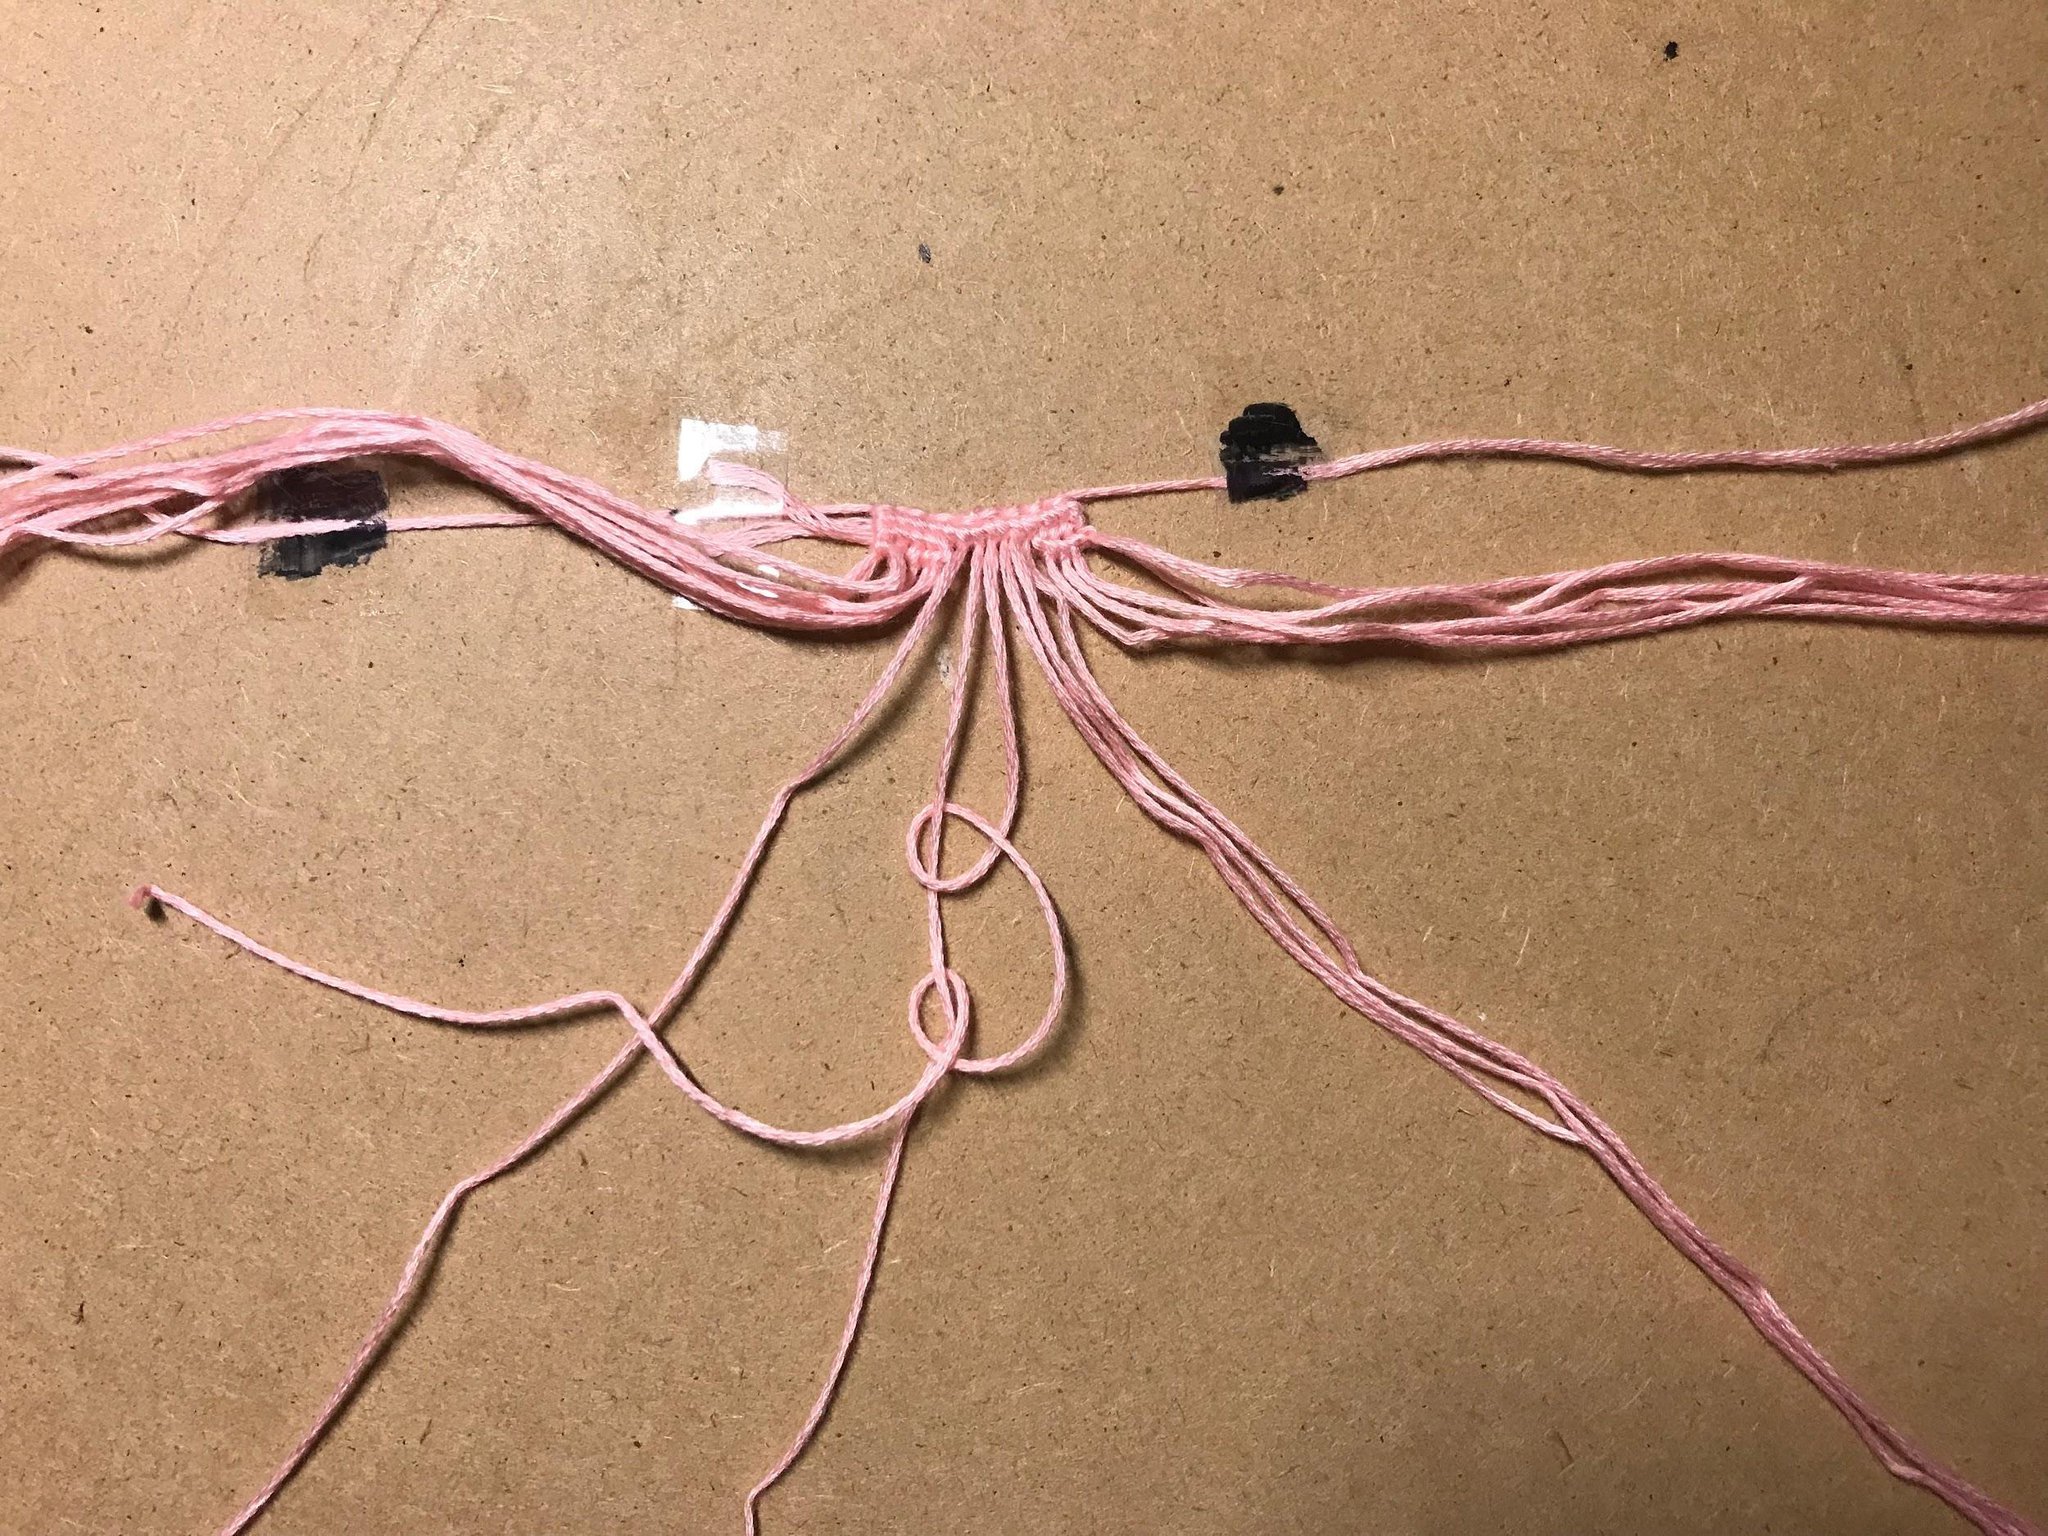
Here comes the actual hole-making part. On the left group of 3, (we’re just focusing on the left group of 3 right now) take the rightmost string on the left group of 3 and tie a backward knot onto the string behind it, which is the middle string in the left group of 3.
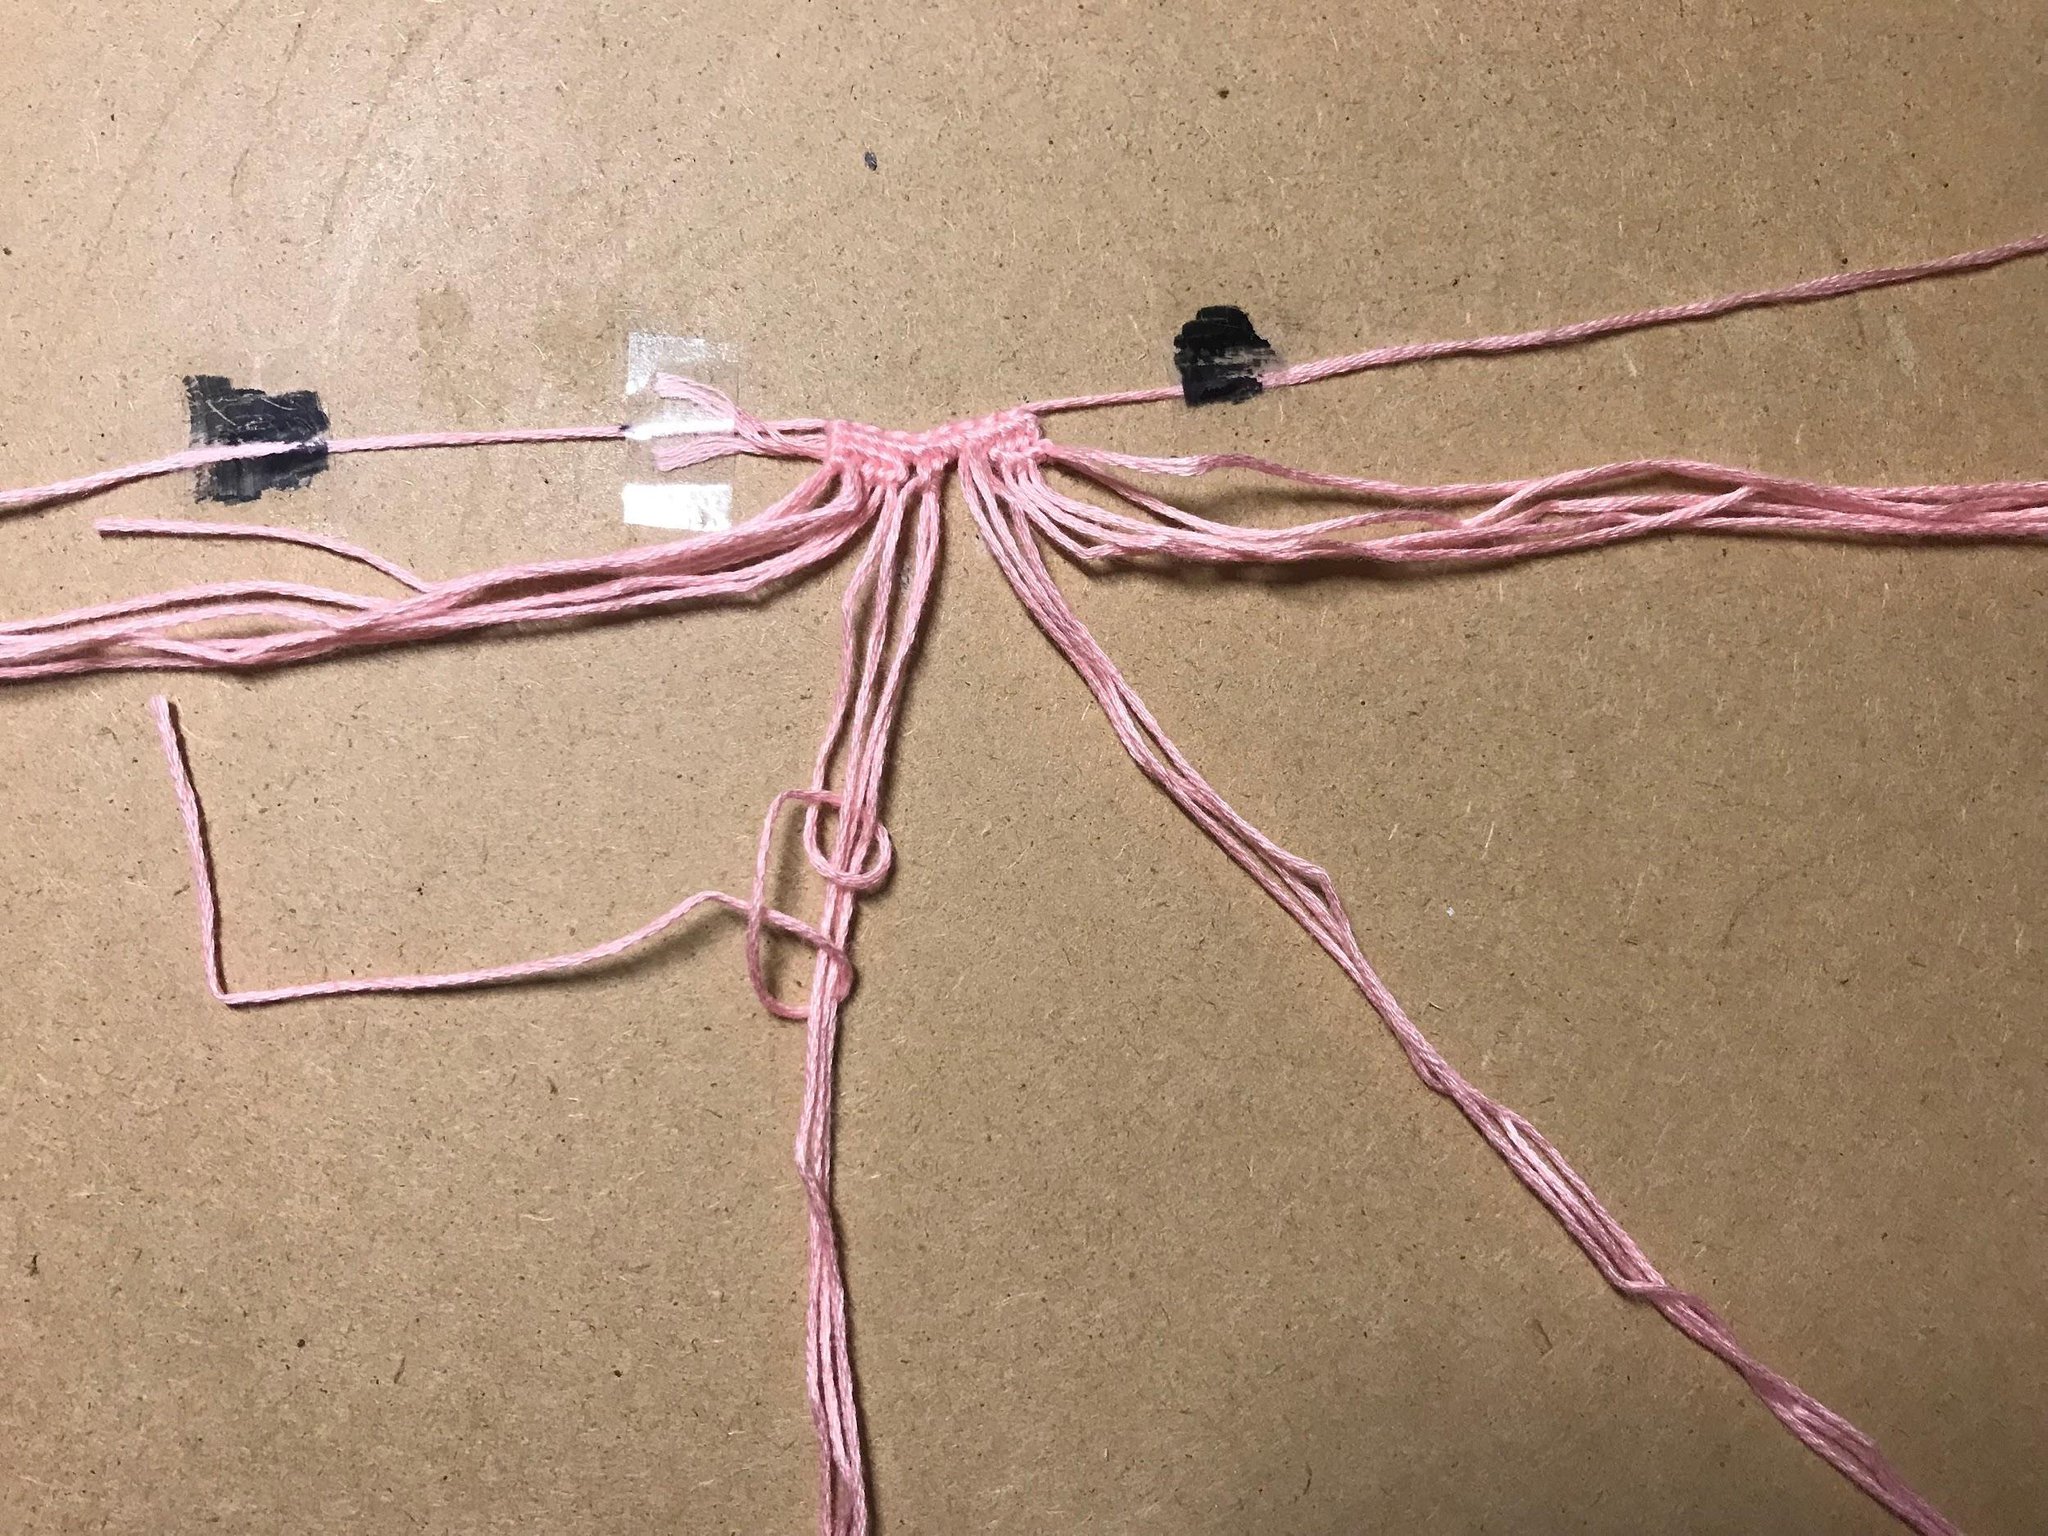
Step 8:
Now taking the left string in the left group of 3, tie a
forward-backward knot onto the other two strings. Again, we’re only focusing on the left group of 3 right now.
forward-backward knot onto the other two strings. Again, we’re only focusing on the left group of 3 right now.
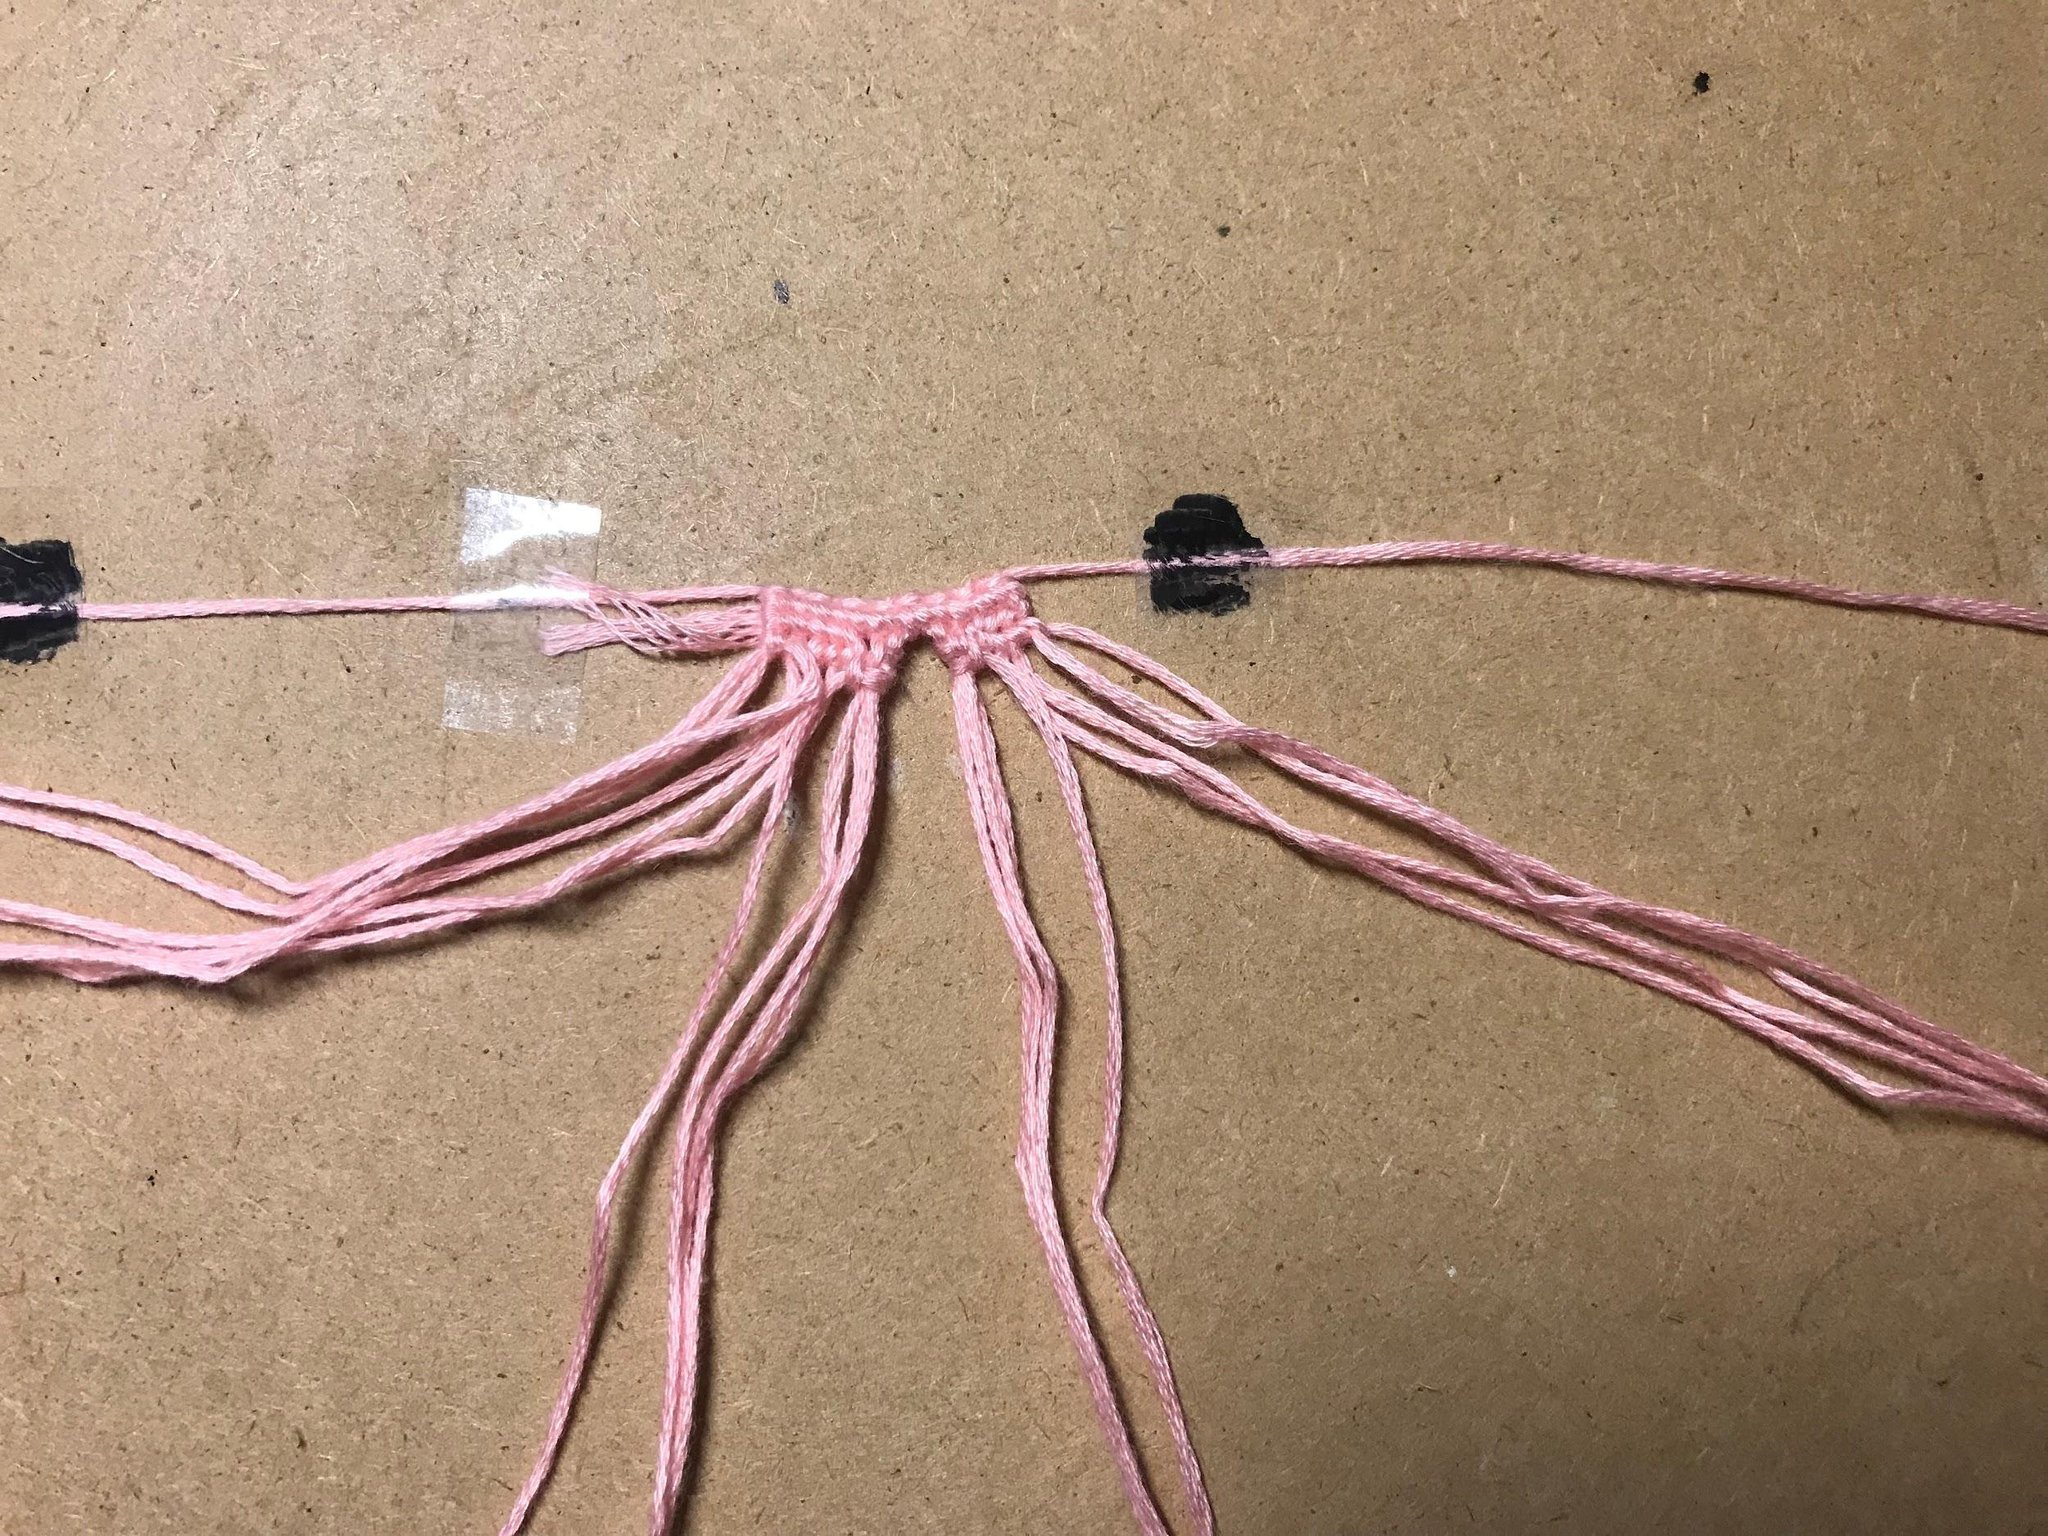
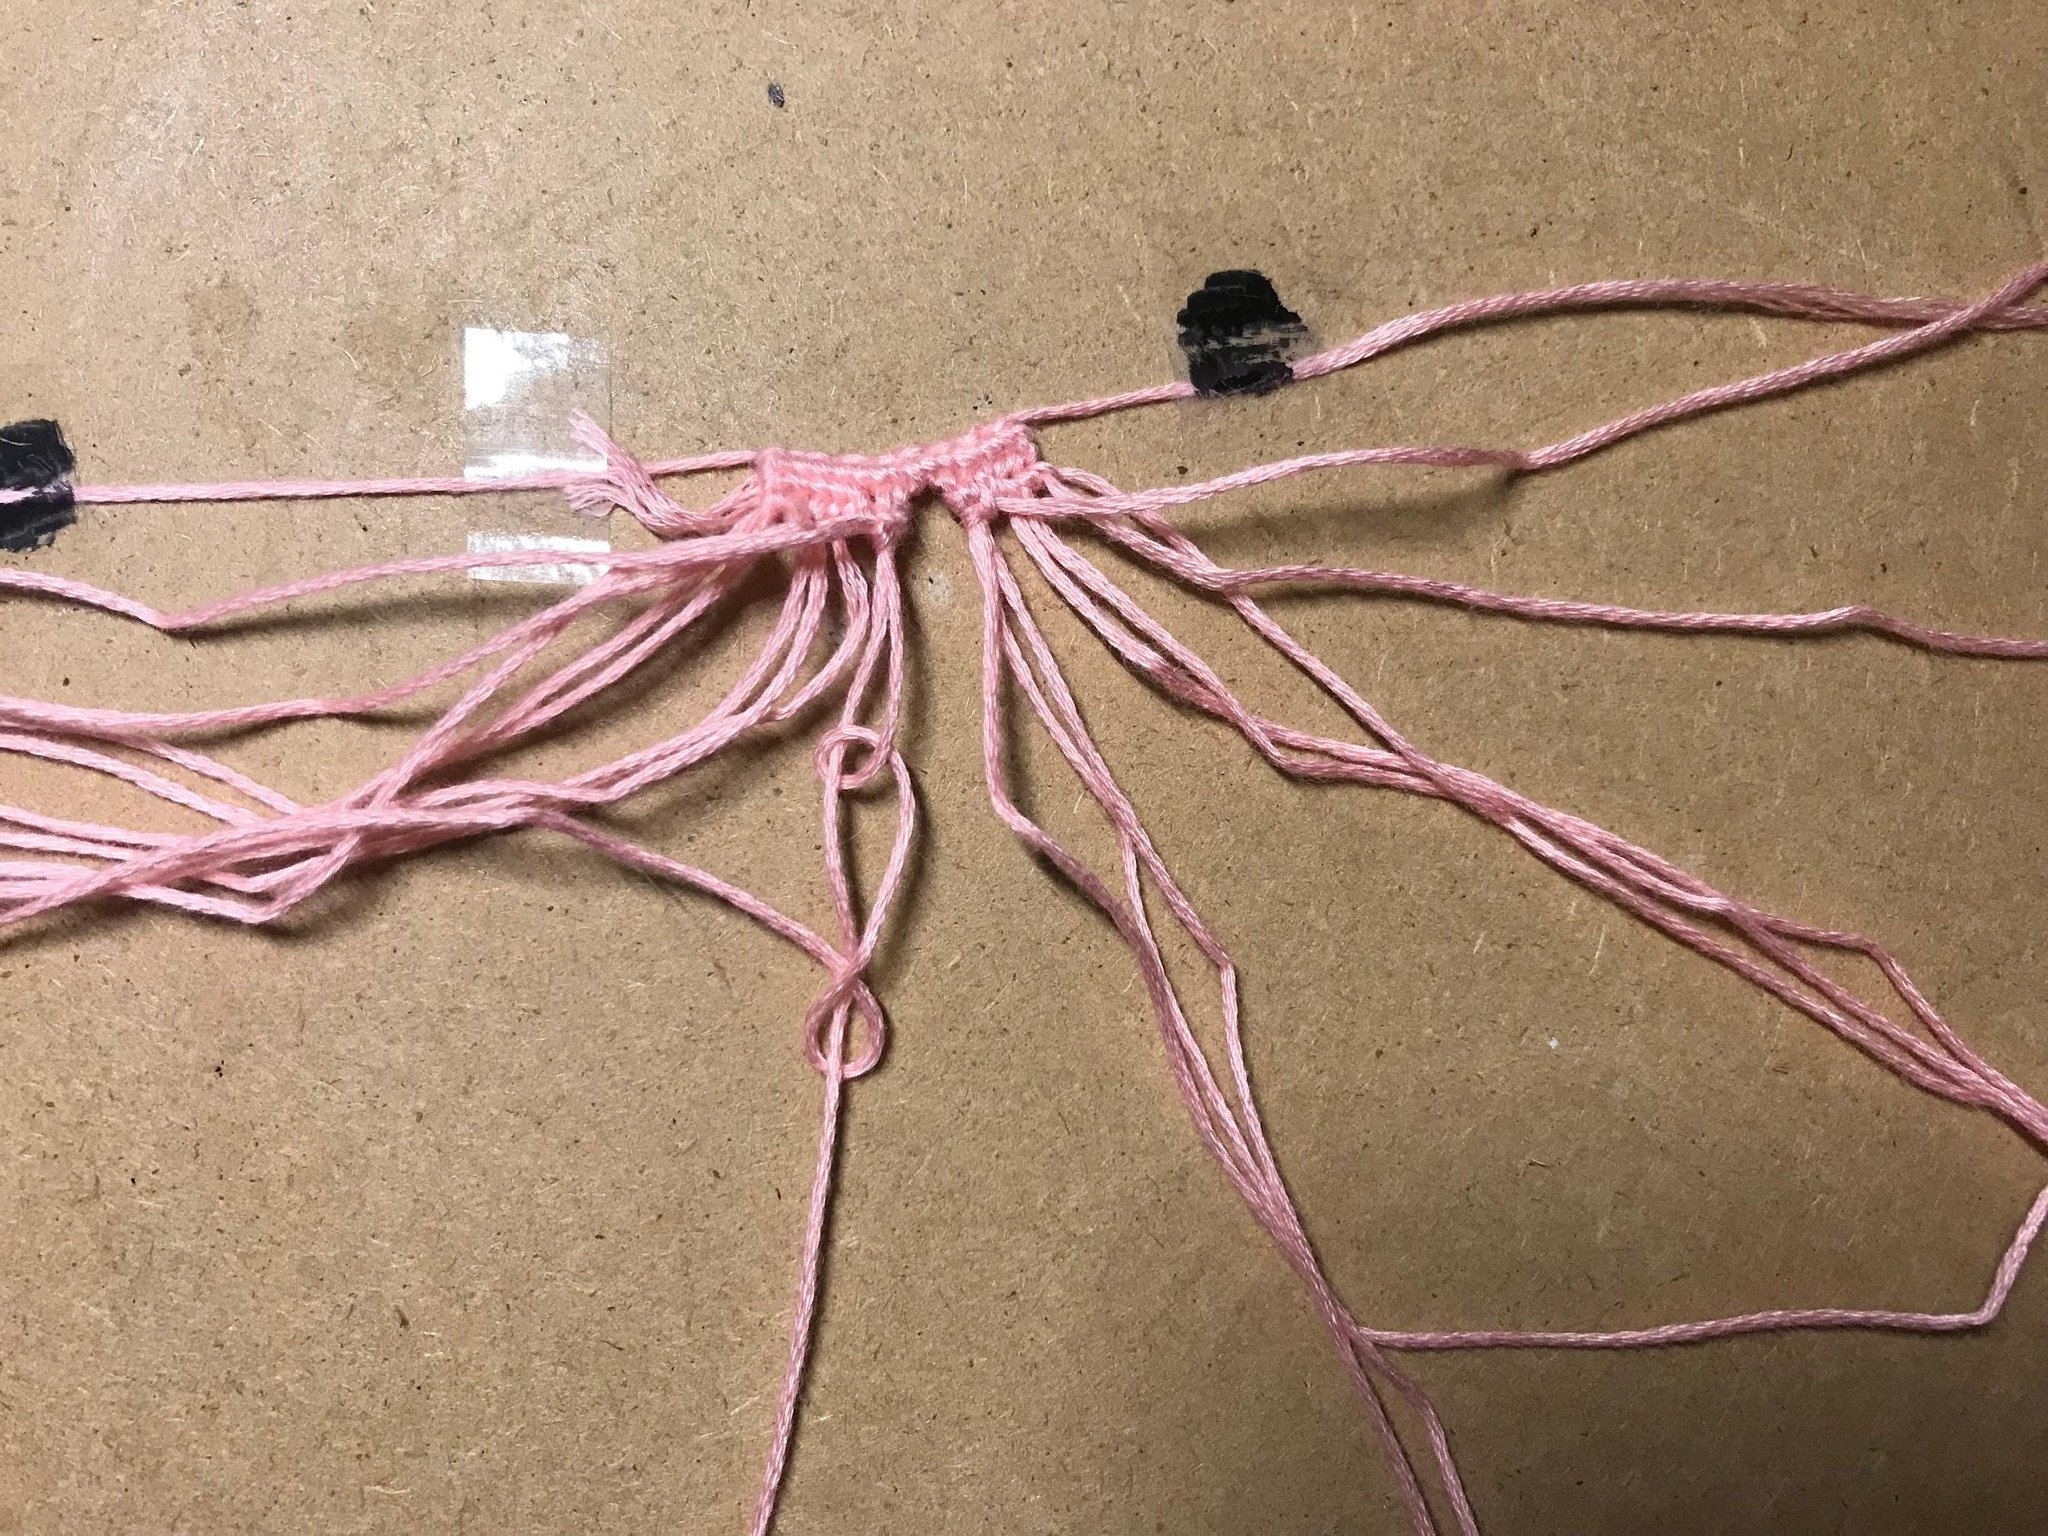
Step 9:
Bundle all the strings in the left group of 3 together and take the next string behind it, which is going to be in the actual left group, and tie a forward-backward knot onto the bundle of 3 strings.
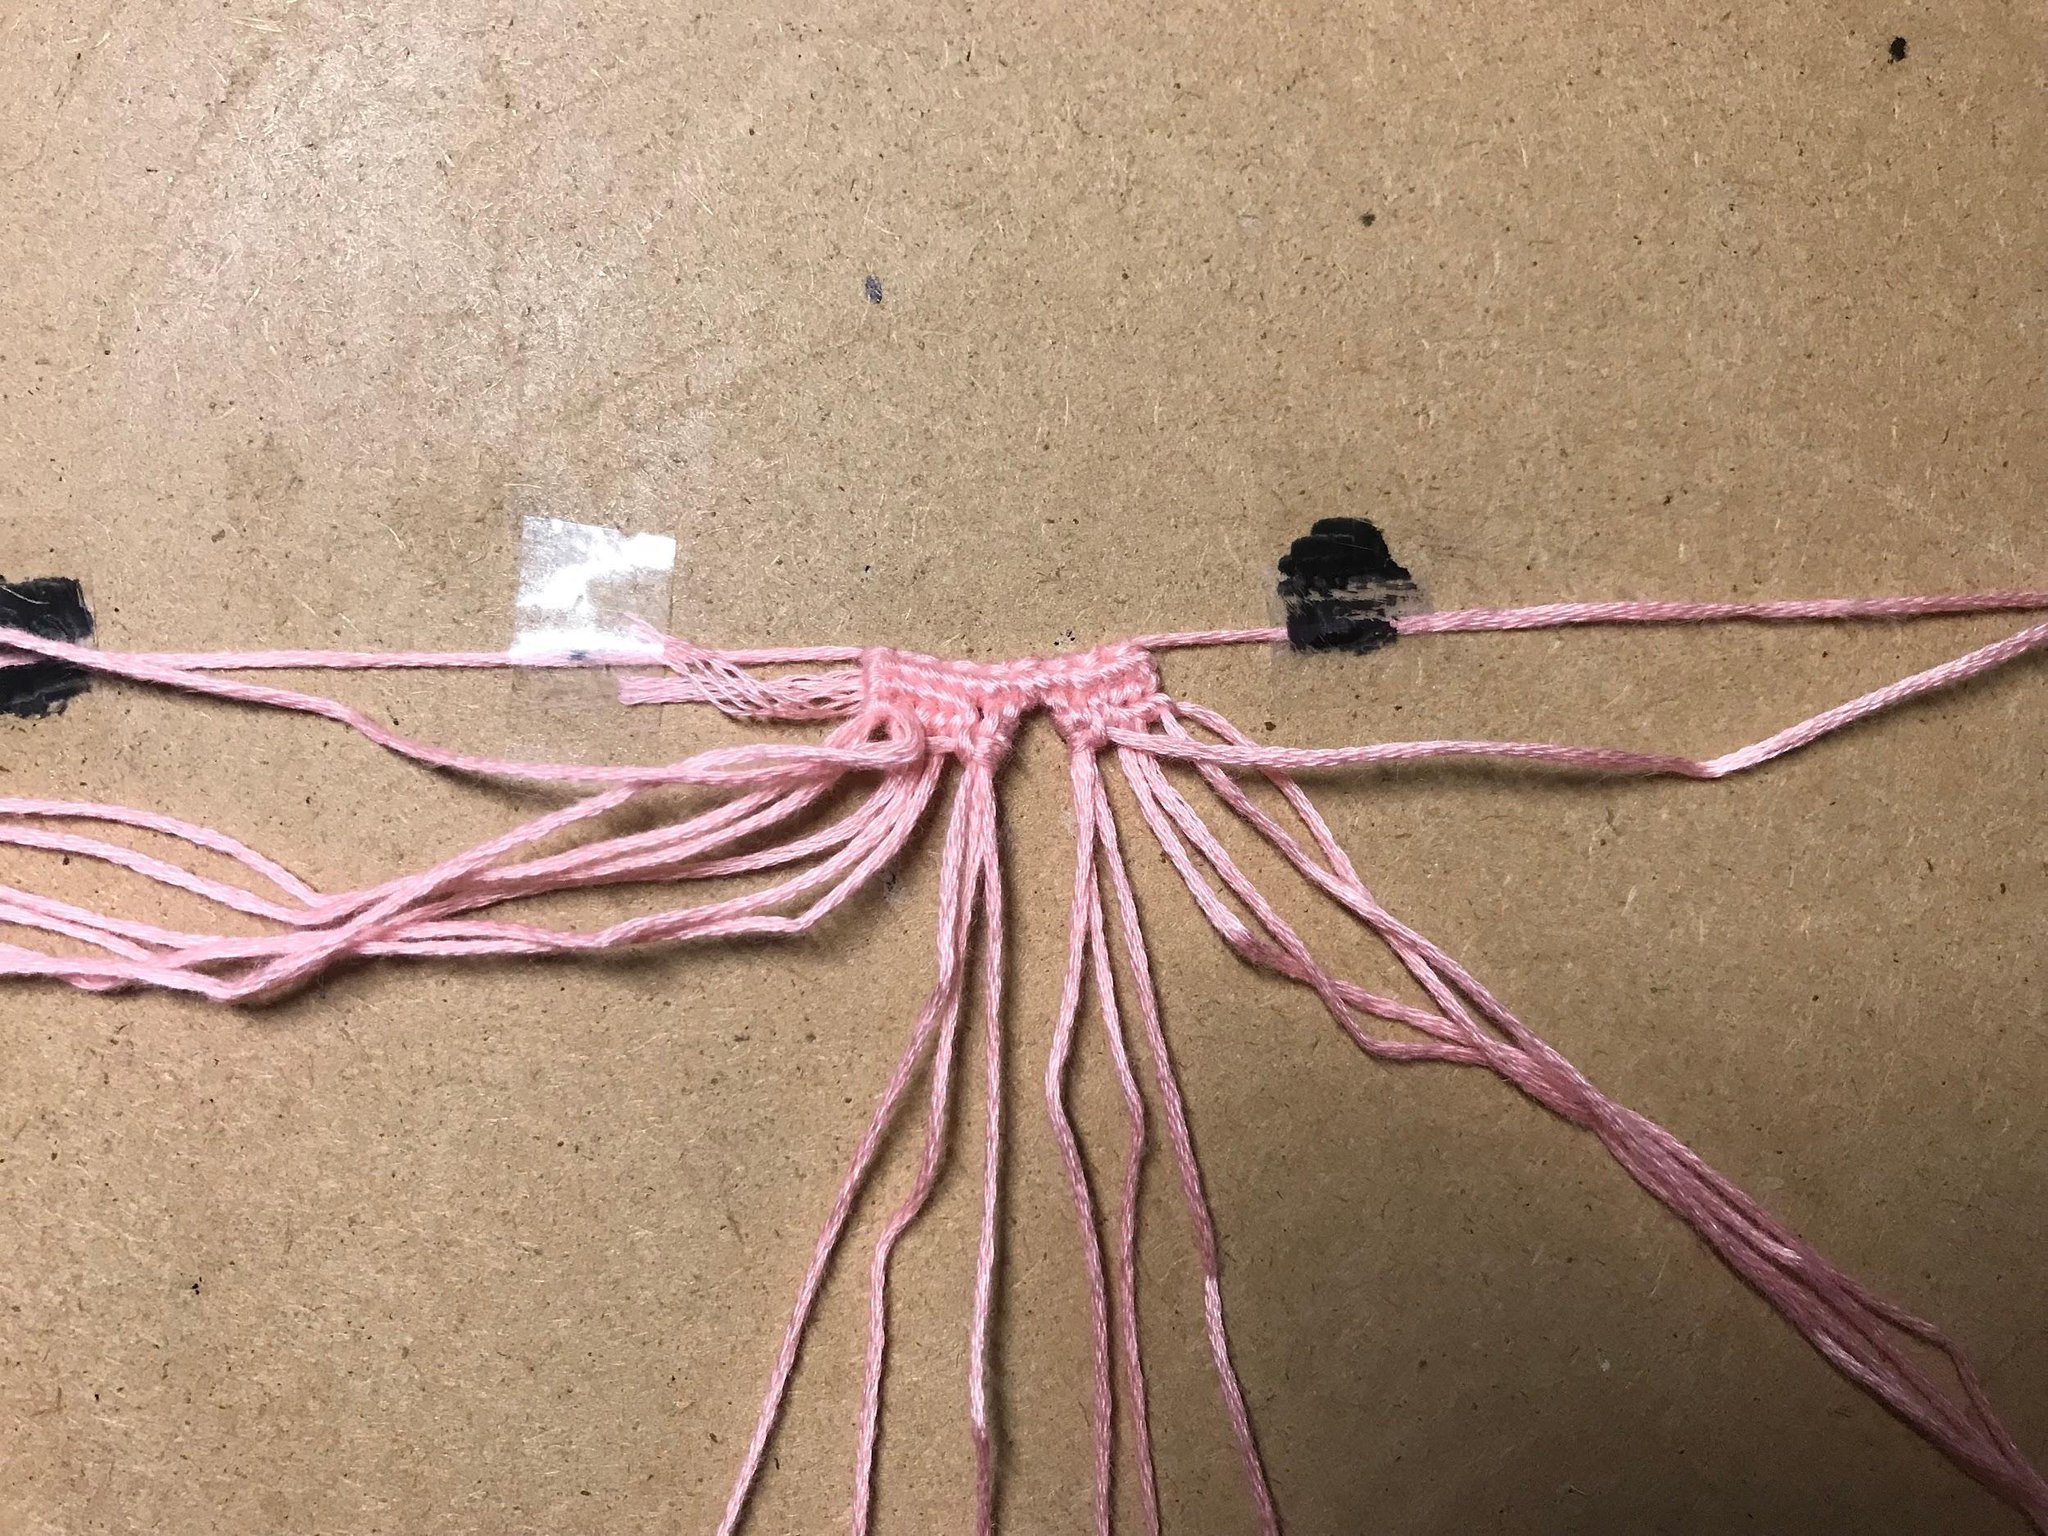
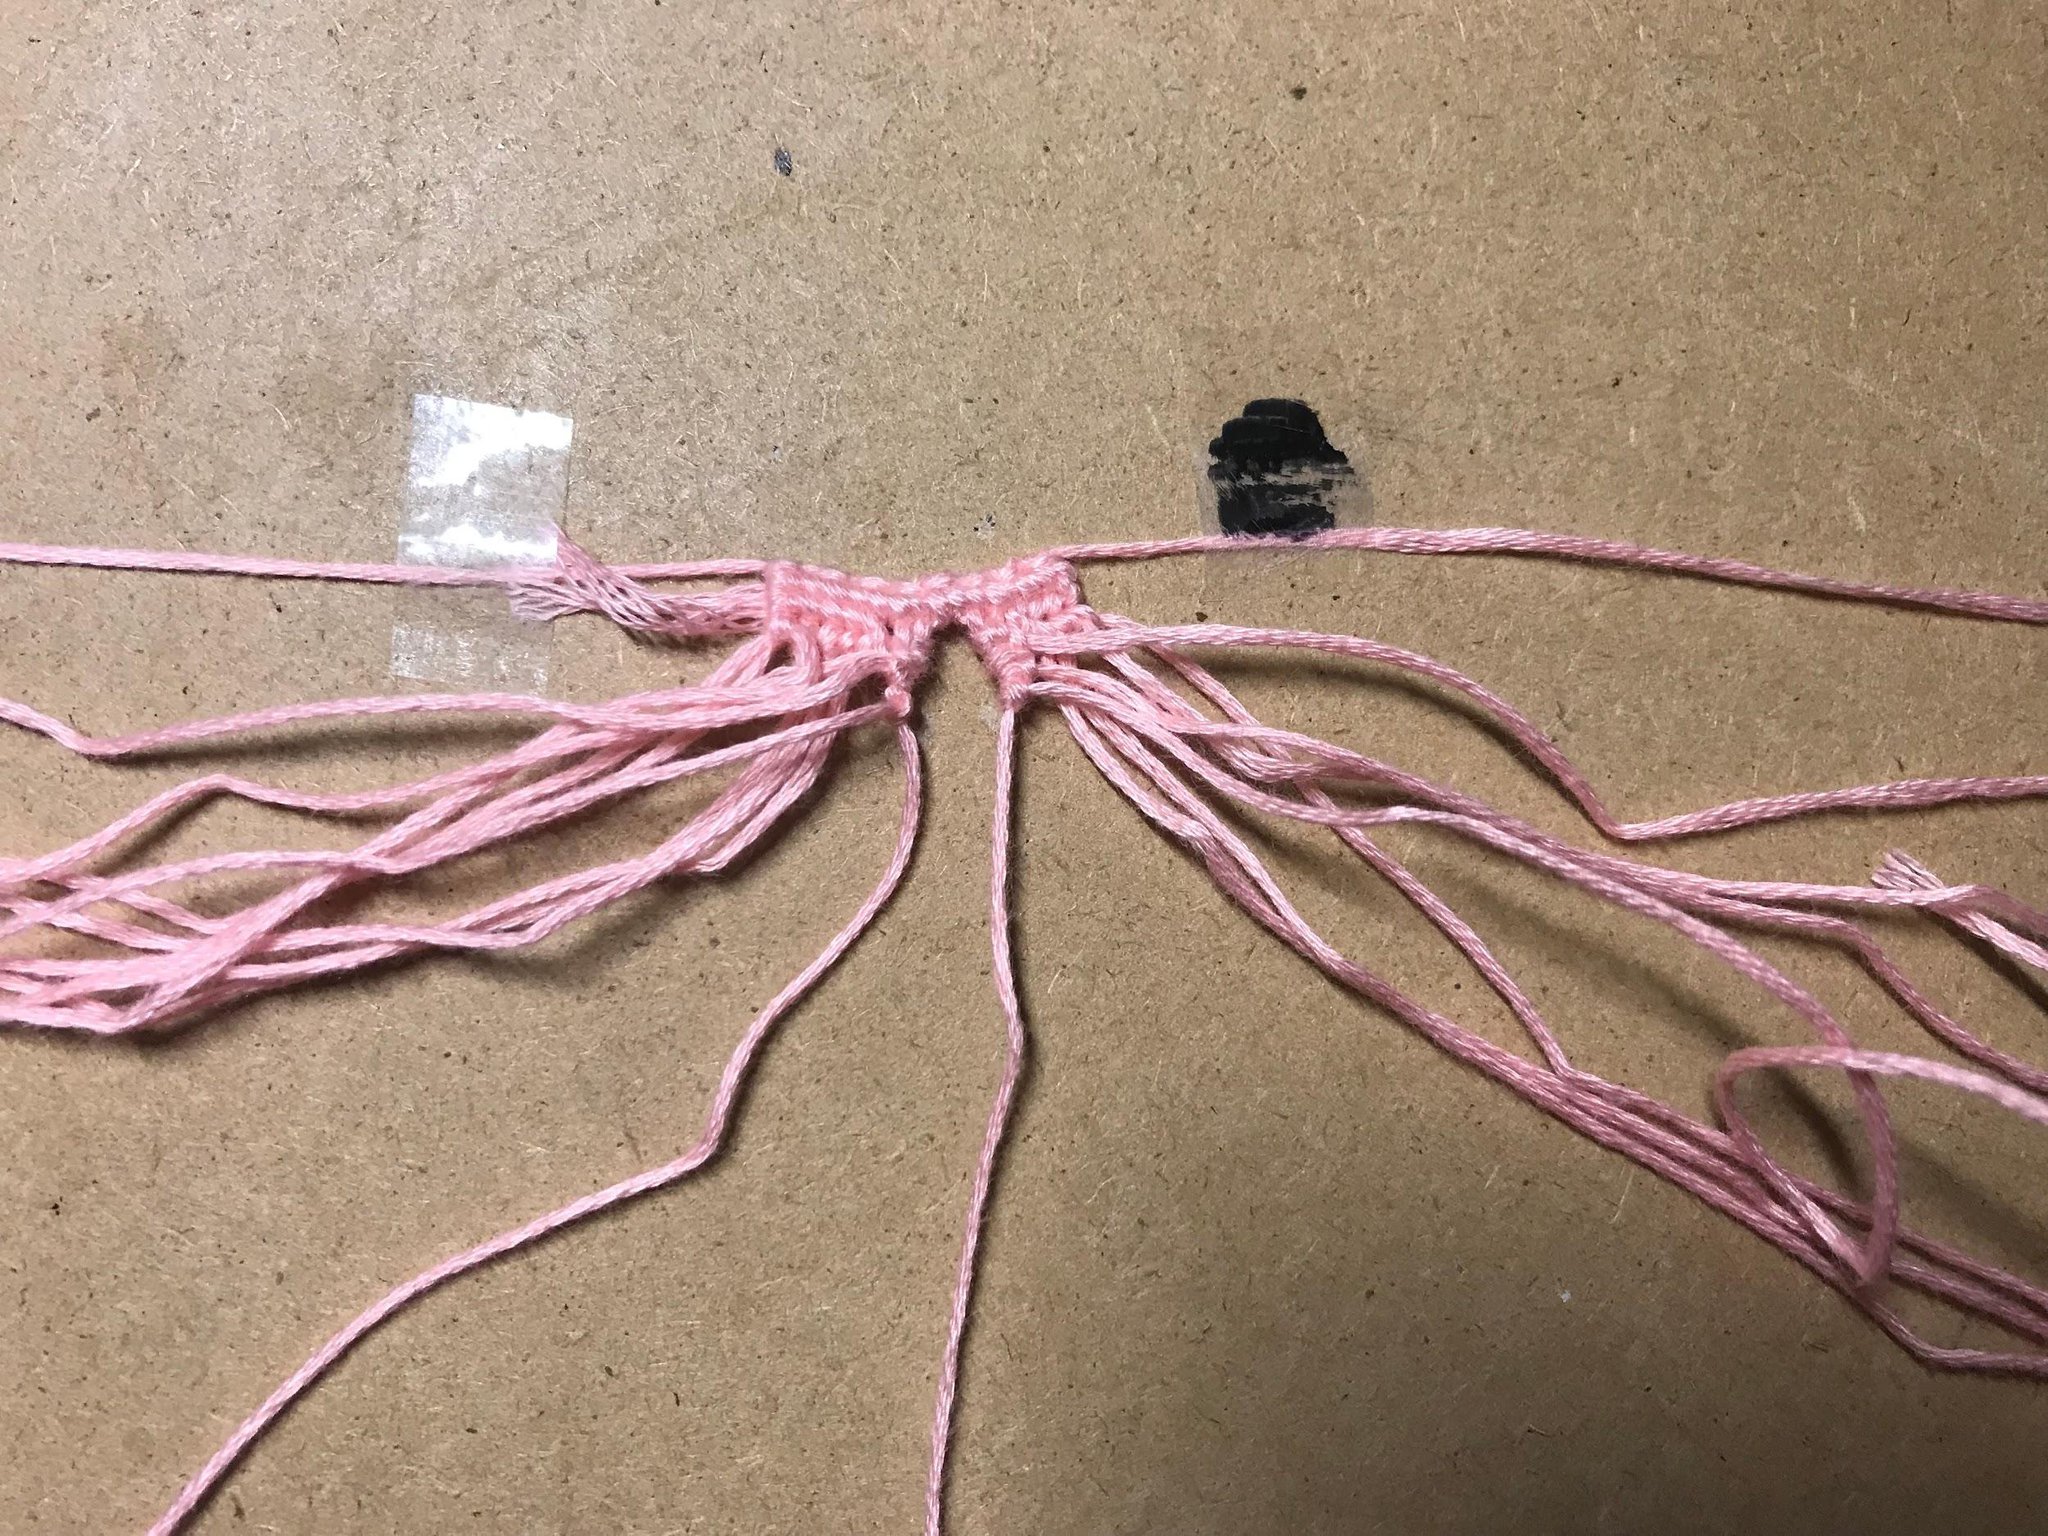
Step 10:
Repeat steps 7-9 on the right side, but instead of doing forward-backward knots, you’re going to be doing backward-forward knots, and instead of backward knots, it’s going to be forward knots. So, forward knot, backward-forward, another backward-forward, and next step.
Step 11:
Remember that base string that we took out from the actual left and right groups? Well, put them back into their own groups. We only need our original 6 now.
Step 12:
The left group of 3, take out any string and do a forward-backward knot onto all the other strings, then set it aside.
Step 13:
With the remaining 2 strings in that group, take either one of them and do a forward-backward knot onto the other. Then set that aside as well.
Step 14:
Repeat on the right side, but with backward-forward knots.

Step 15:
Connect the hole with a forward knot between the 2 remaining base strings in the middle.
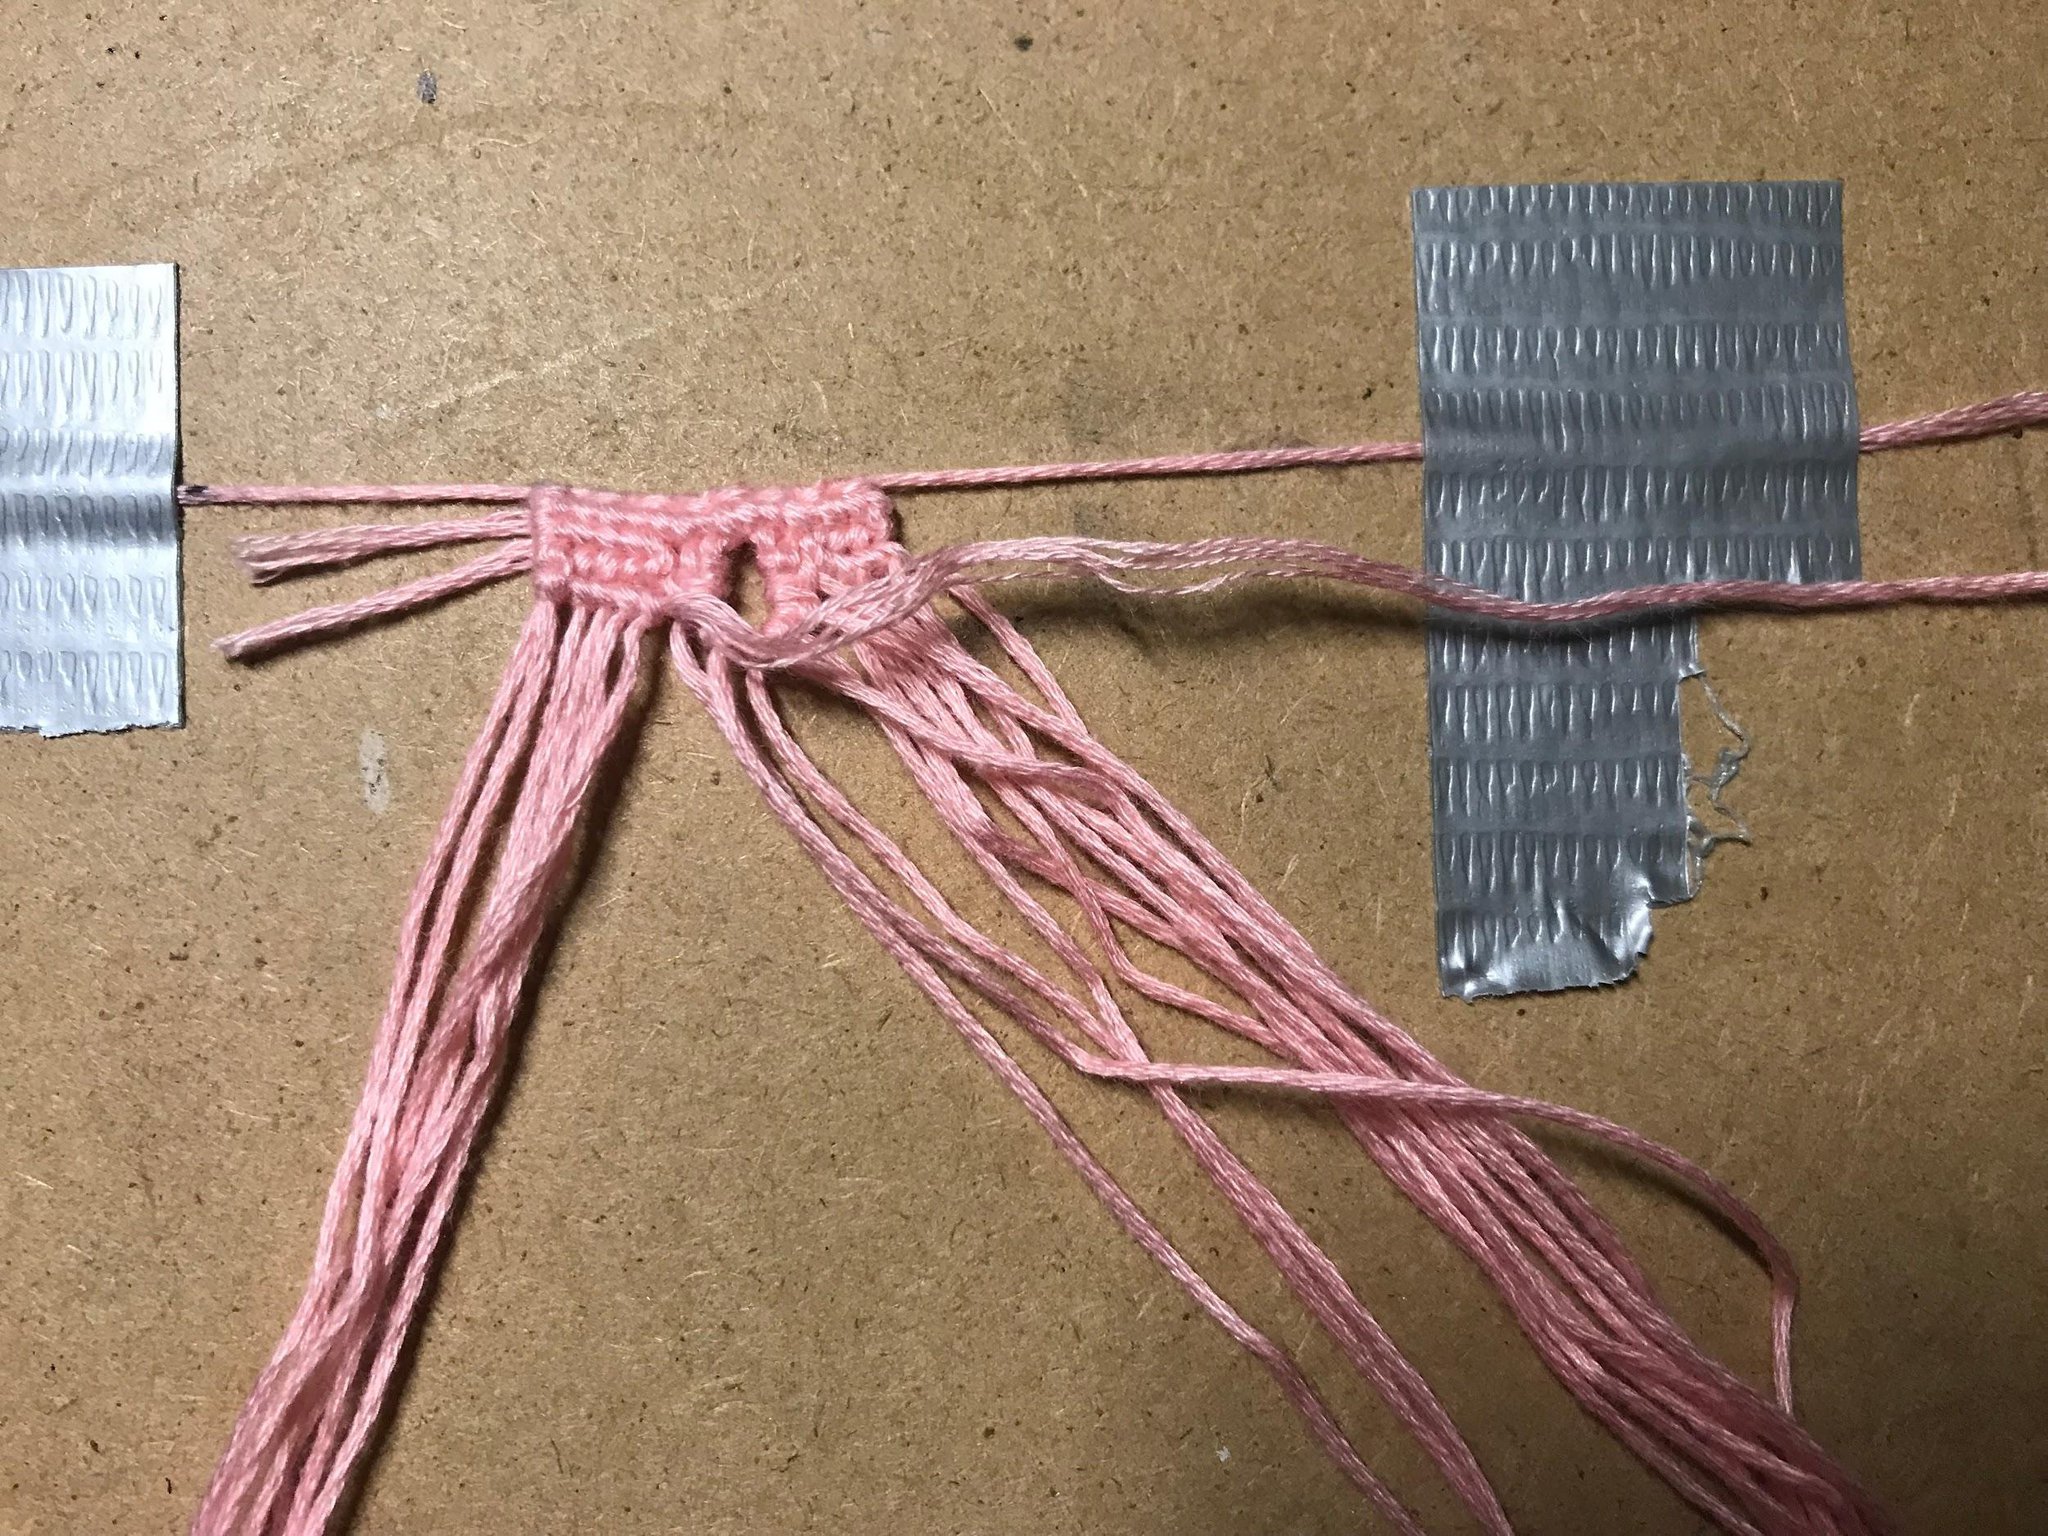
Step 16:
Back to the left side! Using the scrap thread, knot a row until you hit the hole. DO NOT GO PAST THAT HOLE! AND REMEMBER, DO NOT USE STRAIGHT EDGE TECHNIQUE ON THE INSIThis row should be identical to the two rows you made above it.
And yes, I changed my tape. The old ones weren’t sticking anymore.
And yes, I changed my tape. The old ones weren’t sticking anymore.
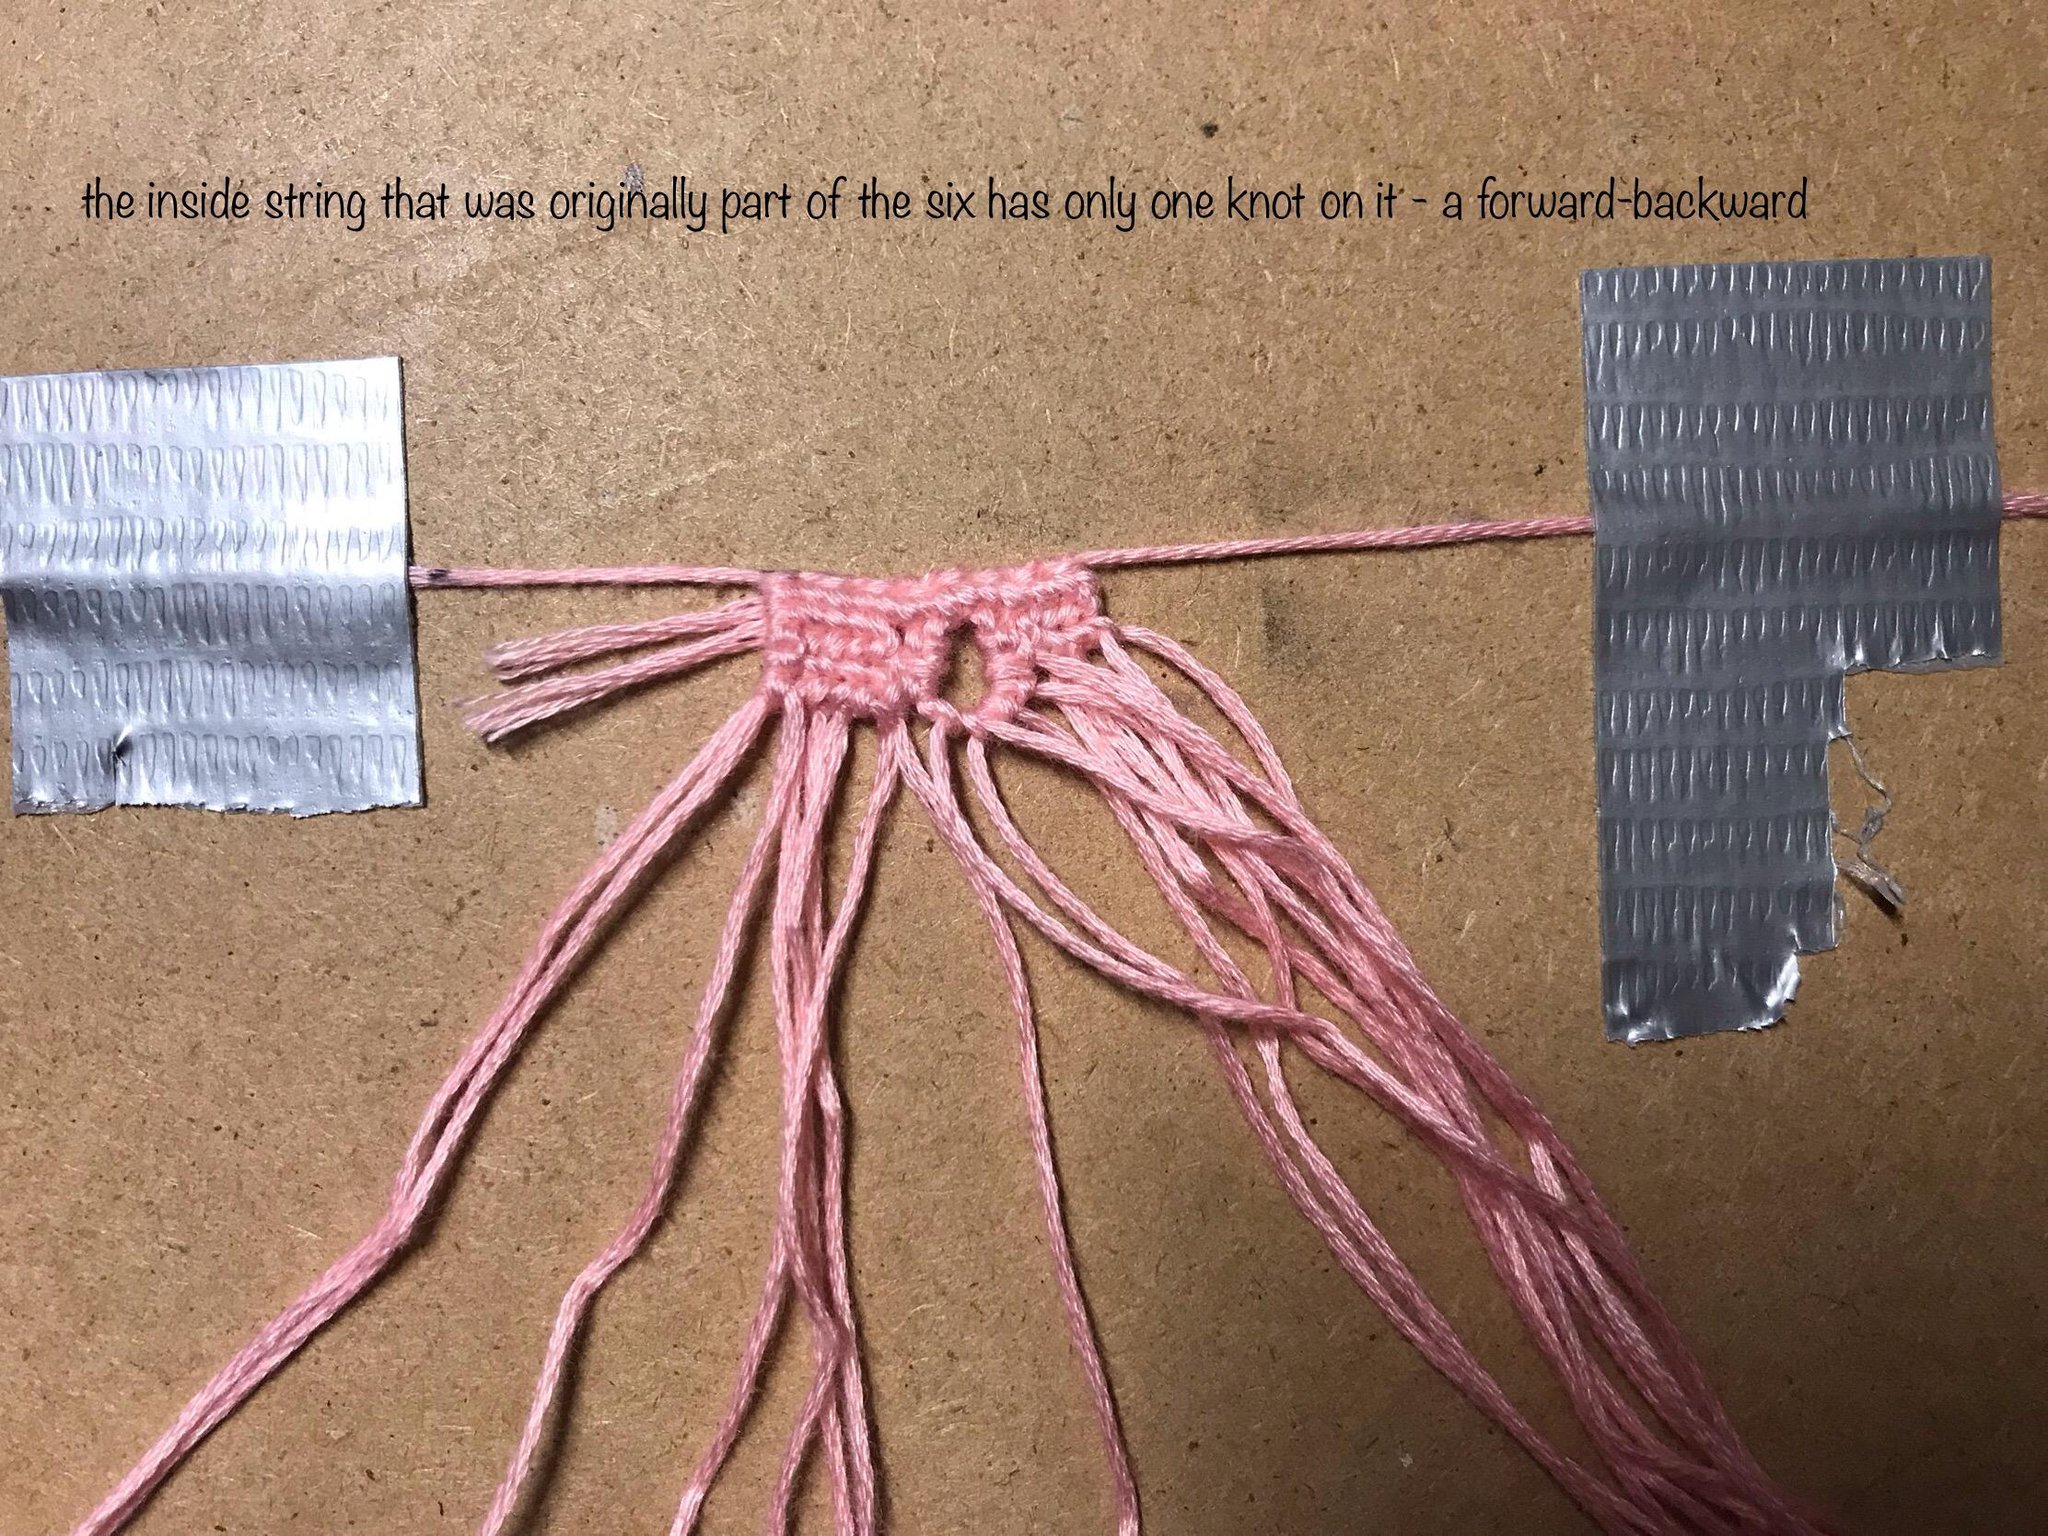
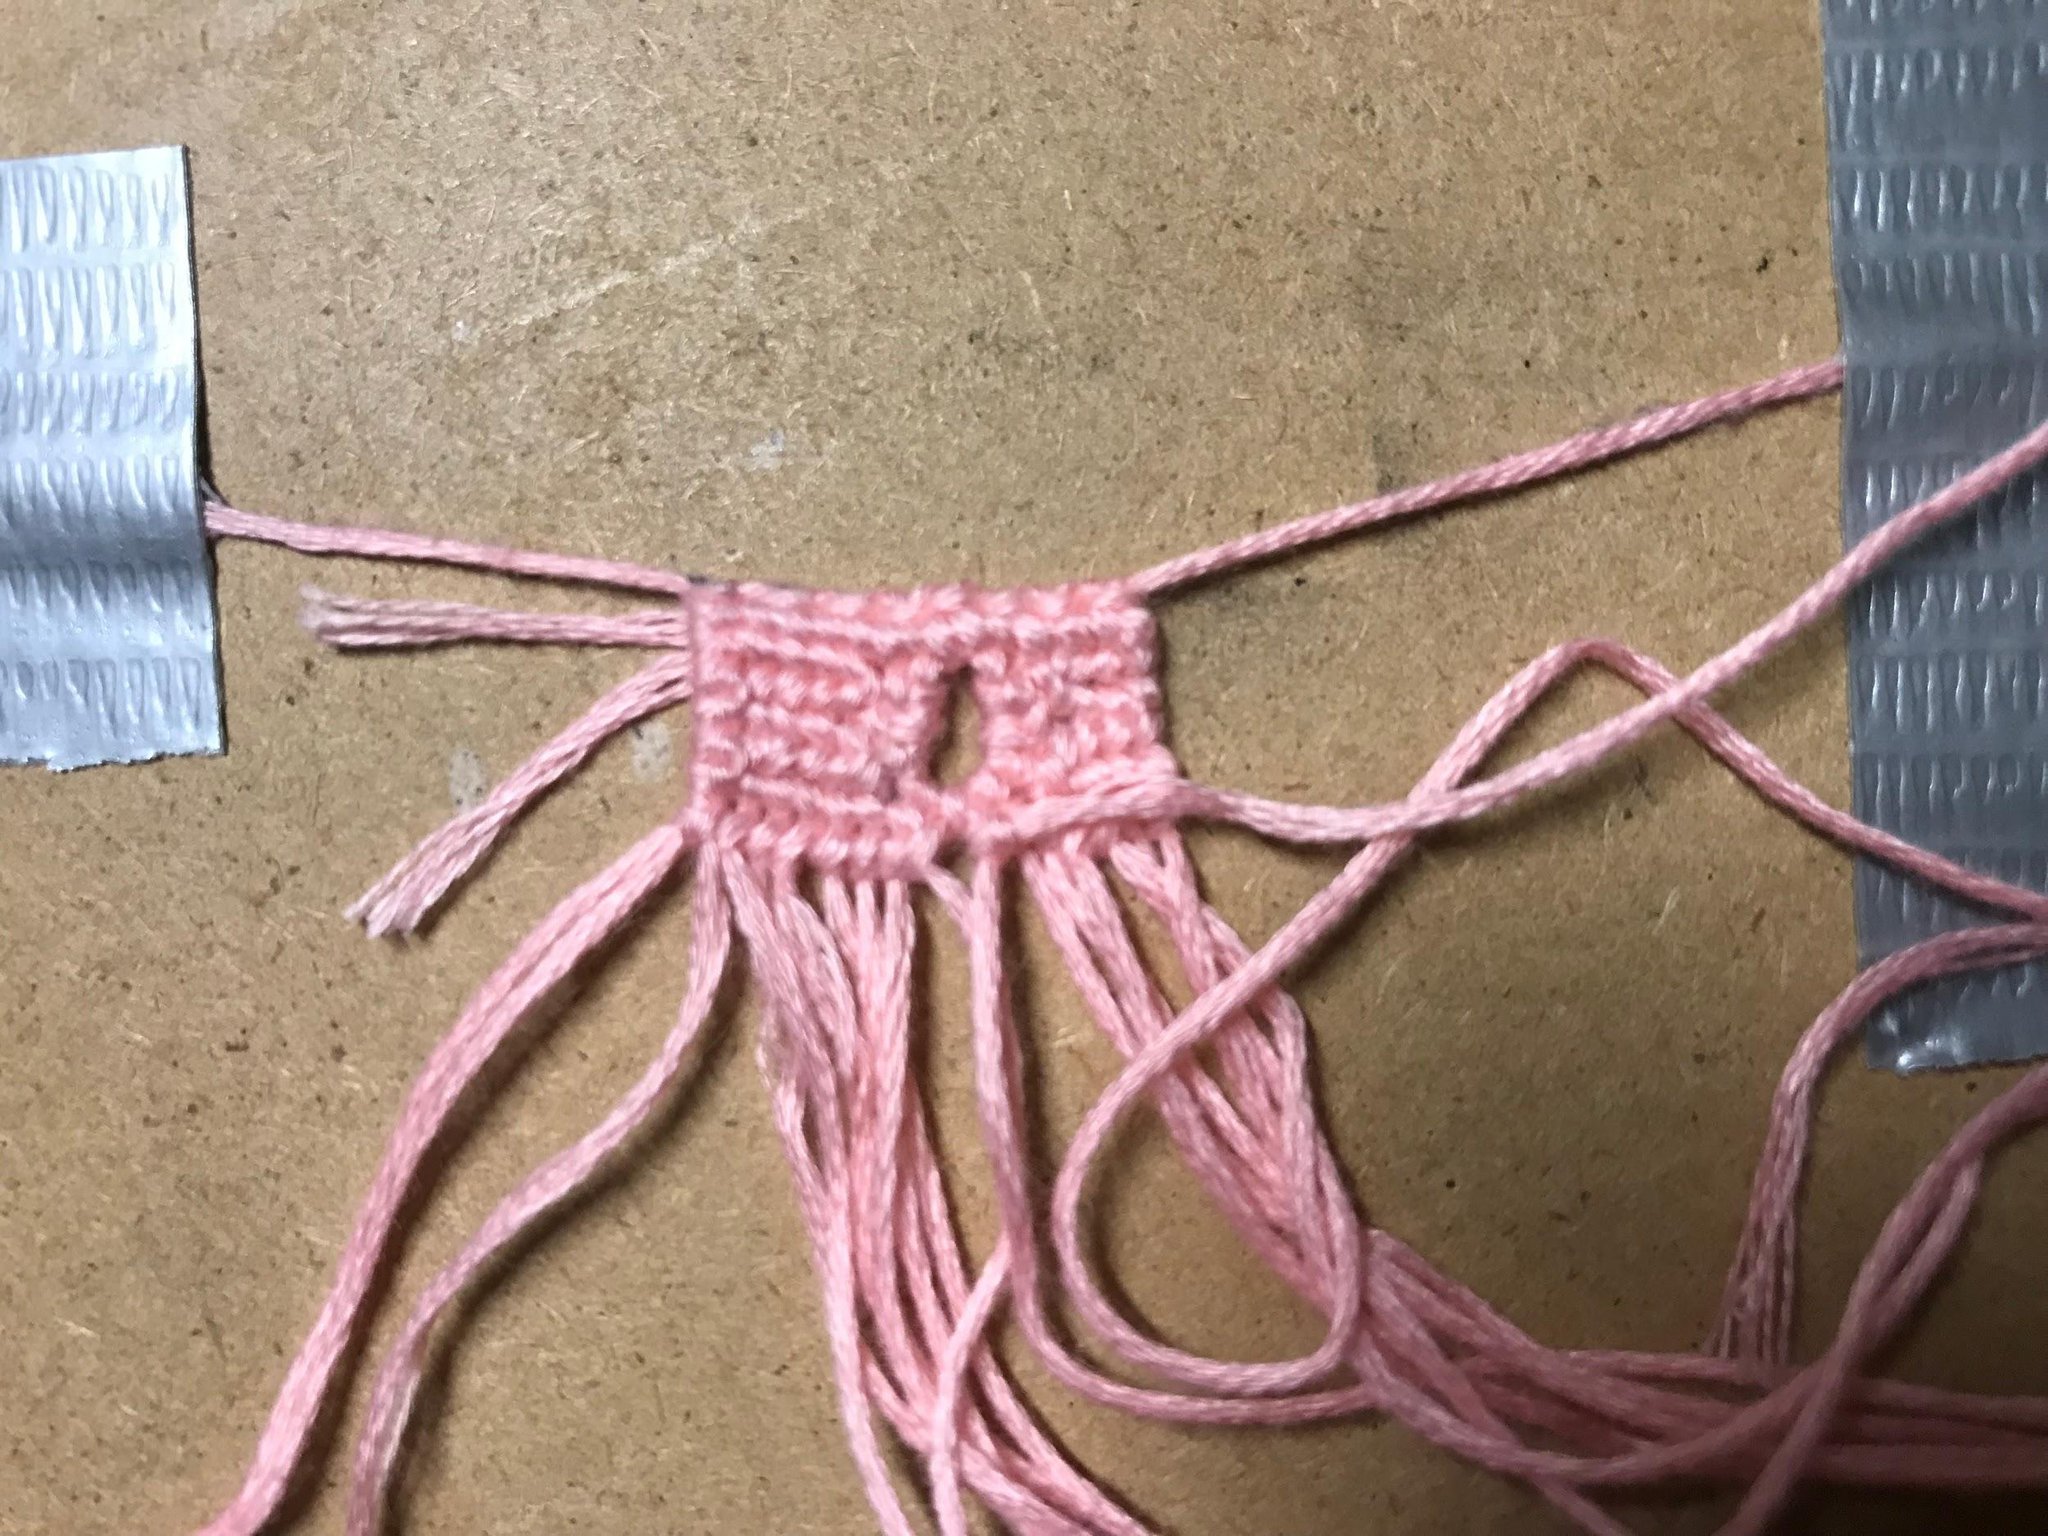
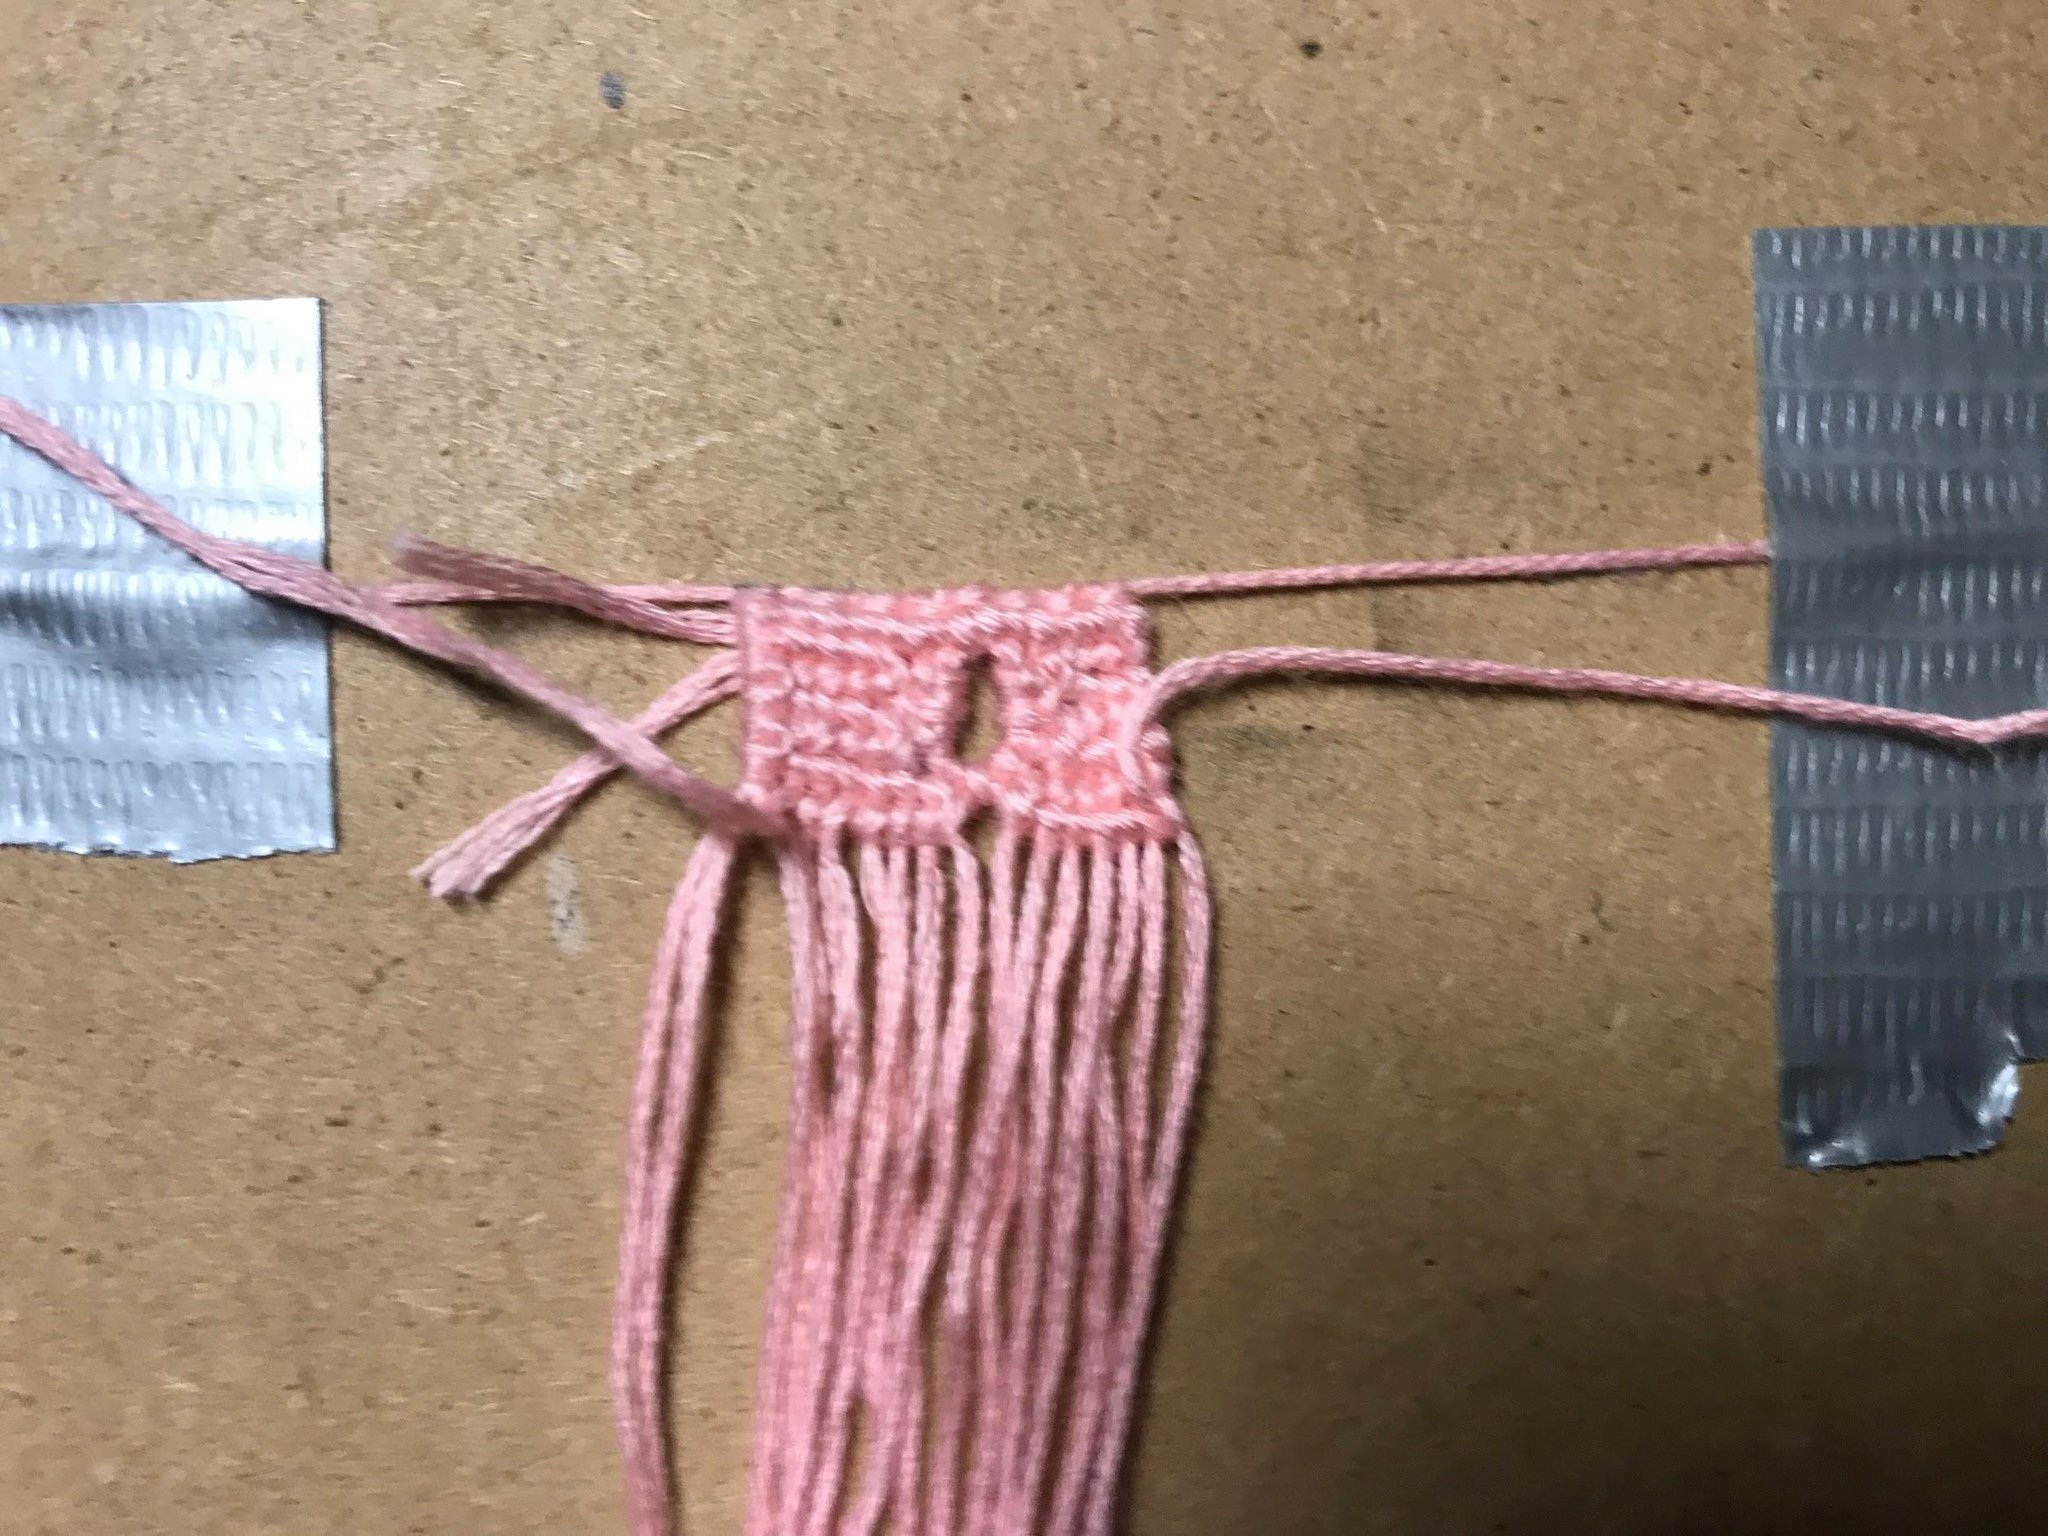
Step 17:
Now that we’ve finished that row that’s going to the right, onto the next row that’s going to the left. Tie a forward-backward knot onto the next string in the row. Remember when I said no straight edge technique on the inside? You can use it but ONLY starting a row from the inside, not ending. So anyway, after the forward-backward knot, keep going to the left and finish the row. That string on the next row should only have one knot on it. It should not have a forward and then a forward-backward knot. Just a forward-backward knot. You’re just going to be zig-zagging back and forth until you reach the bottom of the hole, adding a string every row.
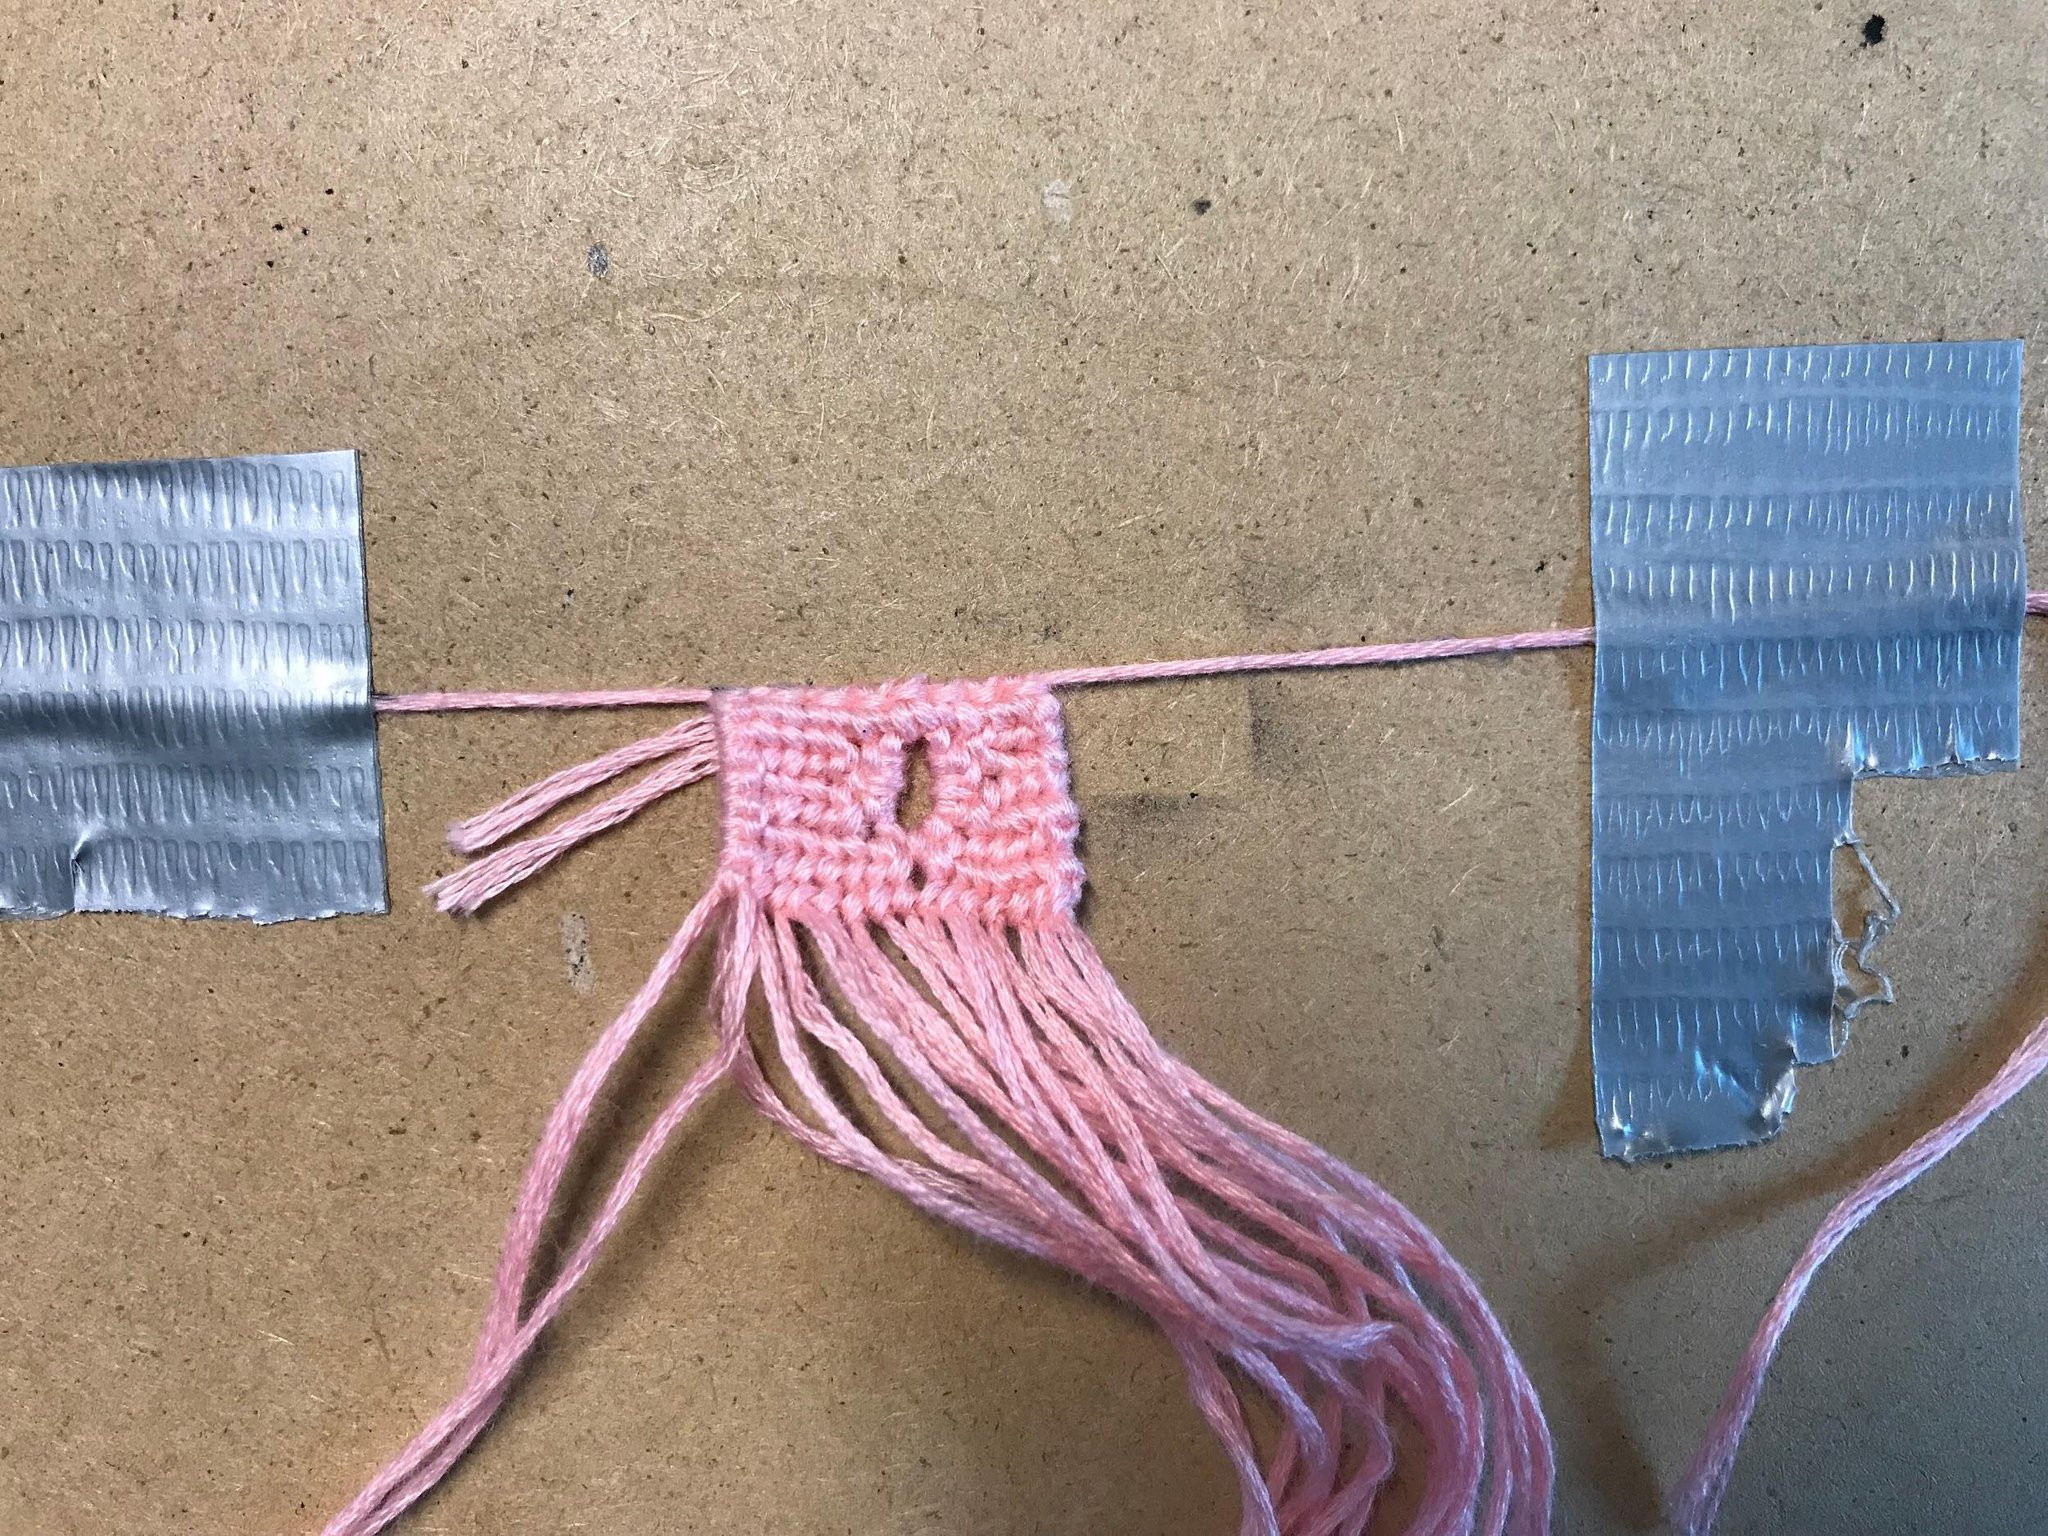
Step 18:
Keep repeating steps 16-17 until you reach the bottom of the hole. (should be 4 rows if you did 6 base strings in the middle)
Step 19:
You can probably guess what’s next. If you guessed repeat on the right side, you’re right! Repeat steps 16-18 on the right side but just flip the knots.
Step 20:
After finishing those steps, you should be left with an almost full row at the bottom, except for a tiny gap in the middle. Ditch the scrap thread background string and go across the full row with the actual background string. It should go back to the left as if you’d just started the pattern. Then you can actually start the pattern from the beginning-after the last two steps.
Step 21:
Trim all the excess thread, including the scrap base thread, but DON’T trim the lark’s head knot’s “dowel” thread.
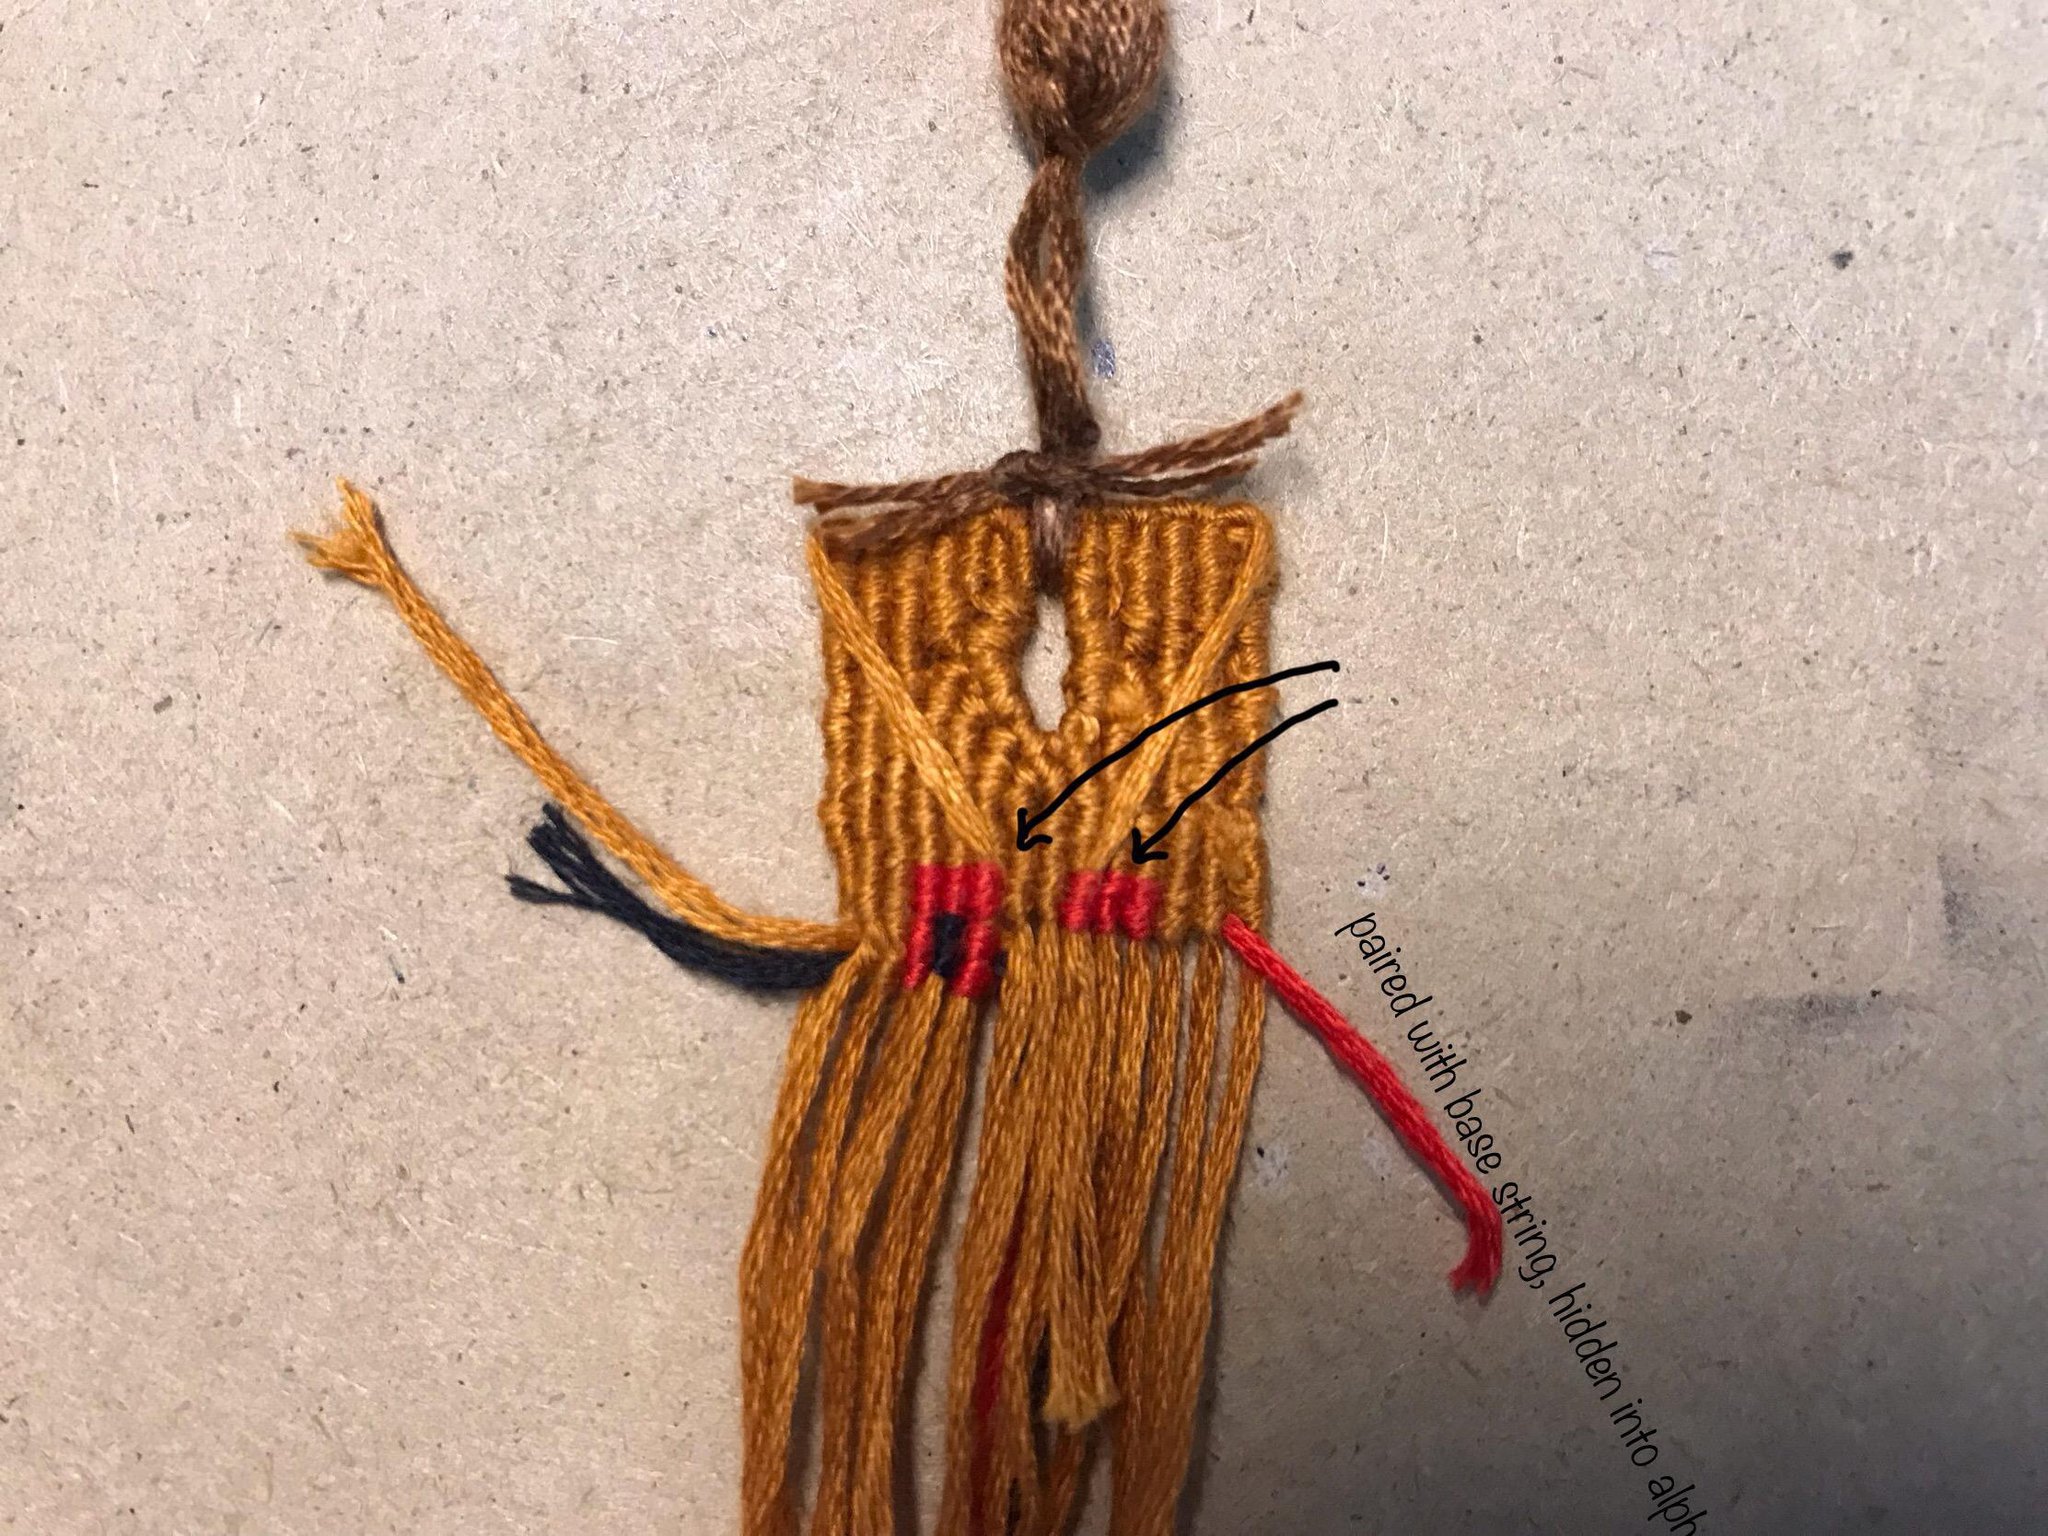
Step 22:
In order to prevent the “dowel” thread from getting loose, pin those diagonally down the back of the bookmark, and pair those each with an actual base string. Knot over each pair as if each pair were one thread. After a couple rows, you can just cut them off. In the picture, I put another bookmark I made (unfinished) to show you what the “dowel” will look like after a couple rows.
To make the tassel:
This part is optional, but it adds a little bit of flourish to the finished bookmark.
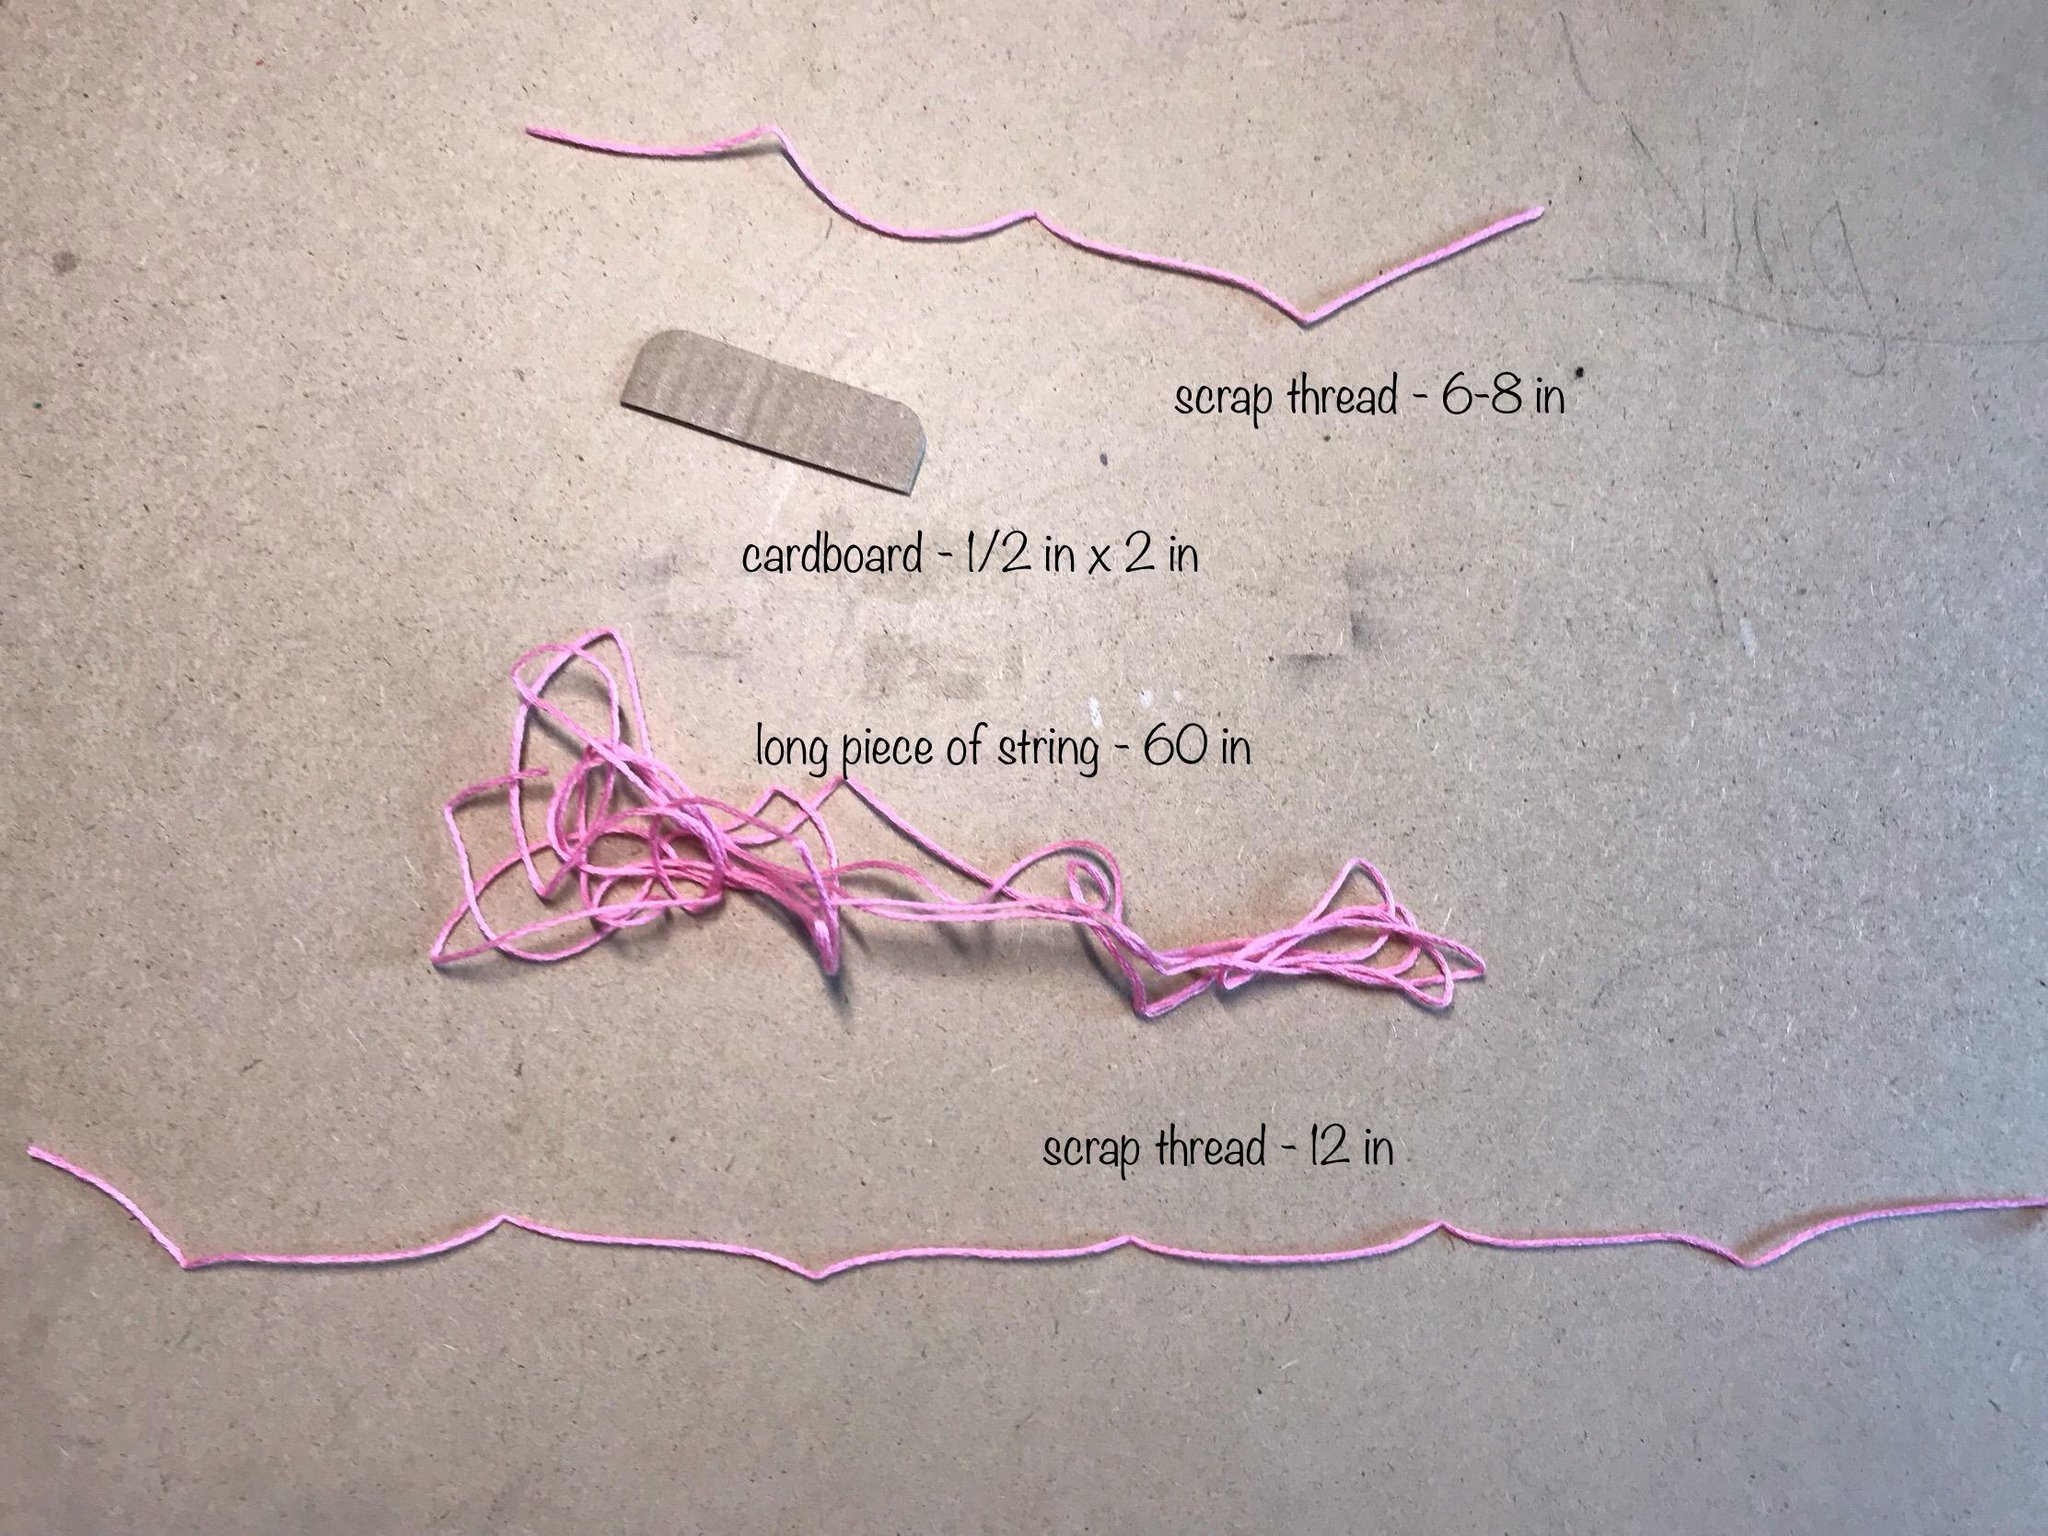
What you’ll need:
- long piece of string (about 60 in/152 cm)
- scissors
- cardboard (about 1⁄2 in x 2 in/1.5 cm x 5 cm)
- scrap thread (one piece about 12 in/30 cm and another piece about 6-8 in/15-20 cm)
- glue/clear nail polish
- your hand
- scissors
- cardboard (about 1⁄2 in x 2 in/1.5 cm x 5 cm)
- scrap thread (one piece about 12 in/30 cm and another piece about 6-8 in/15-20 cm)
- glue/clear nail polish
- your hand
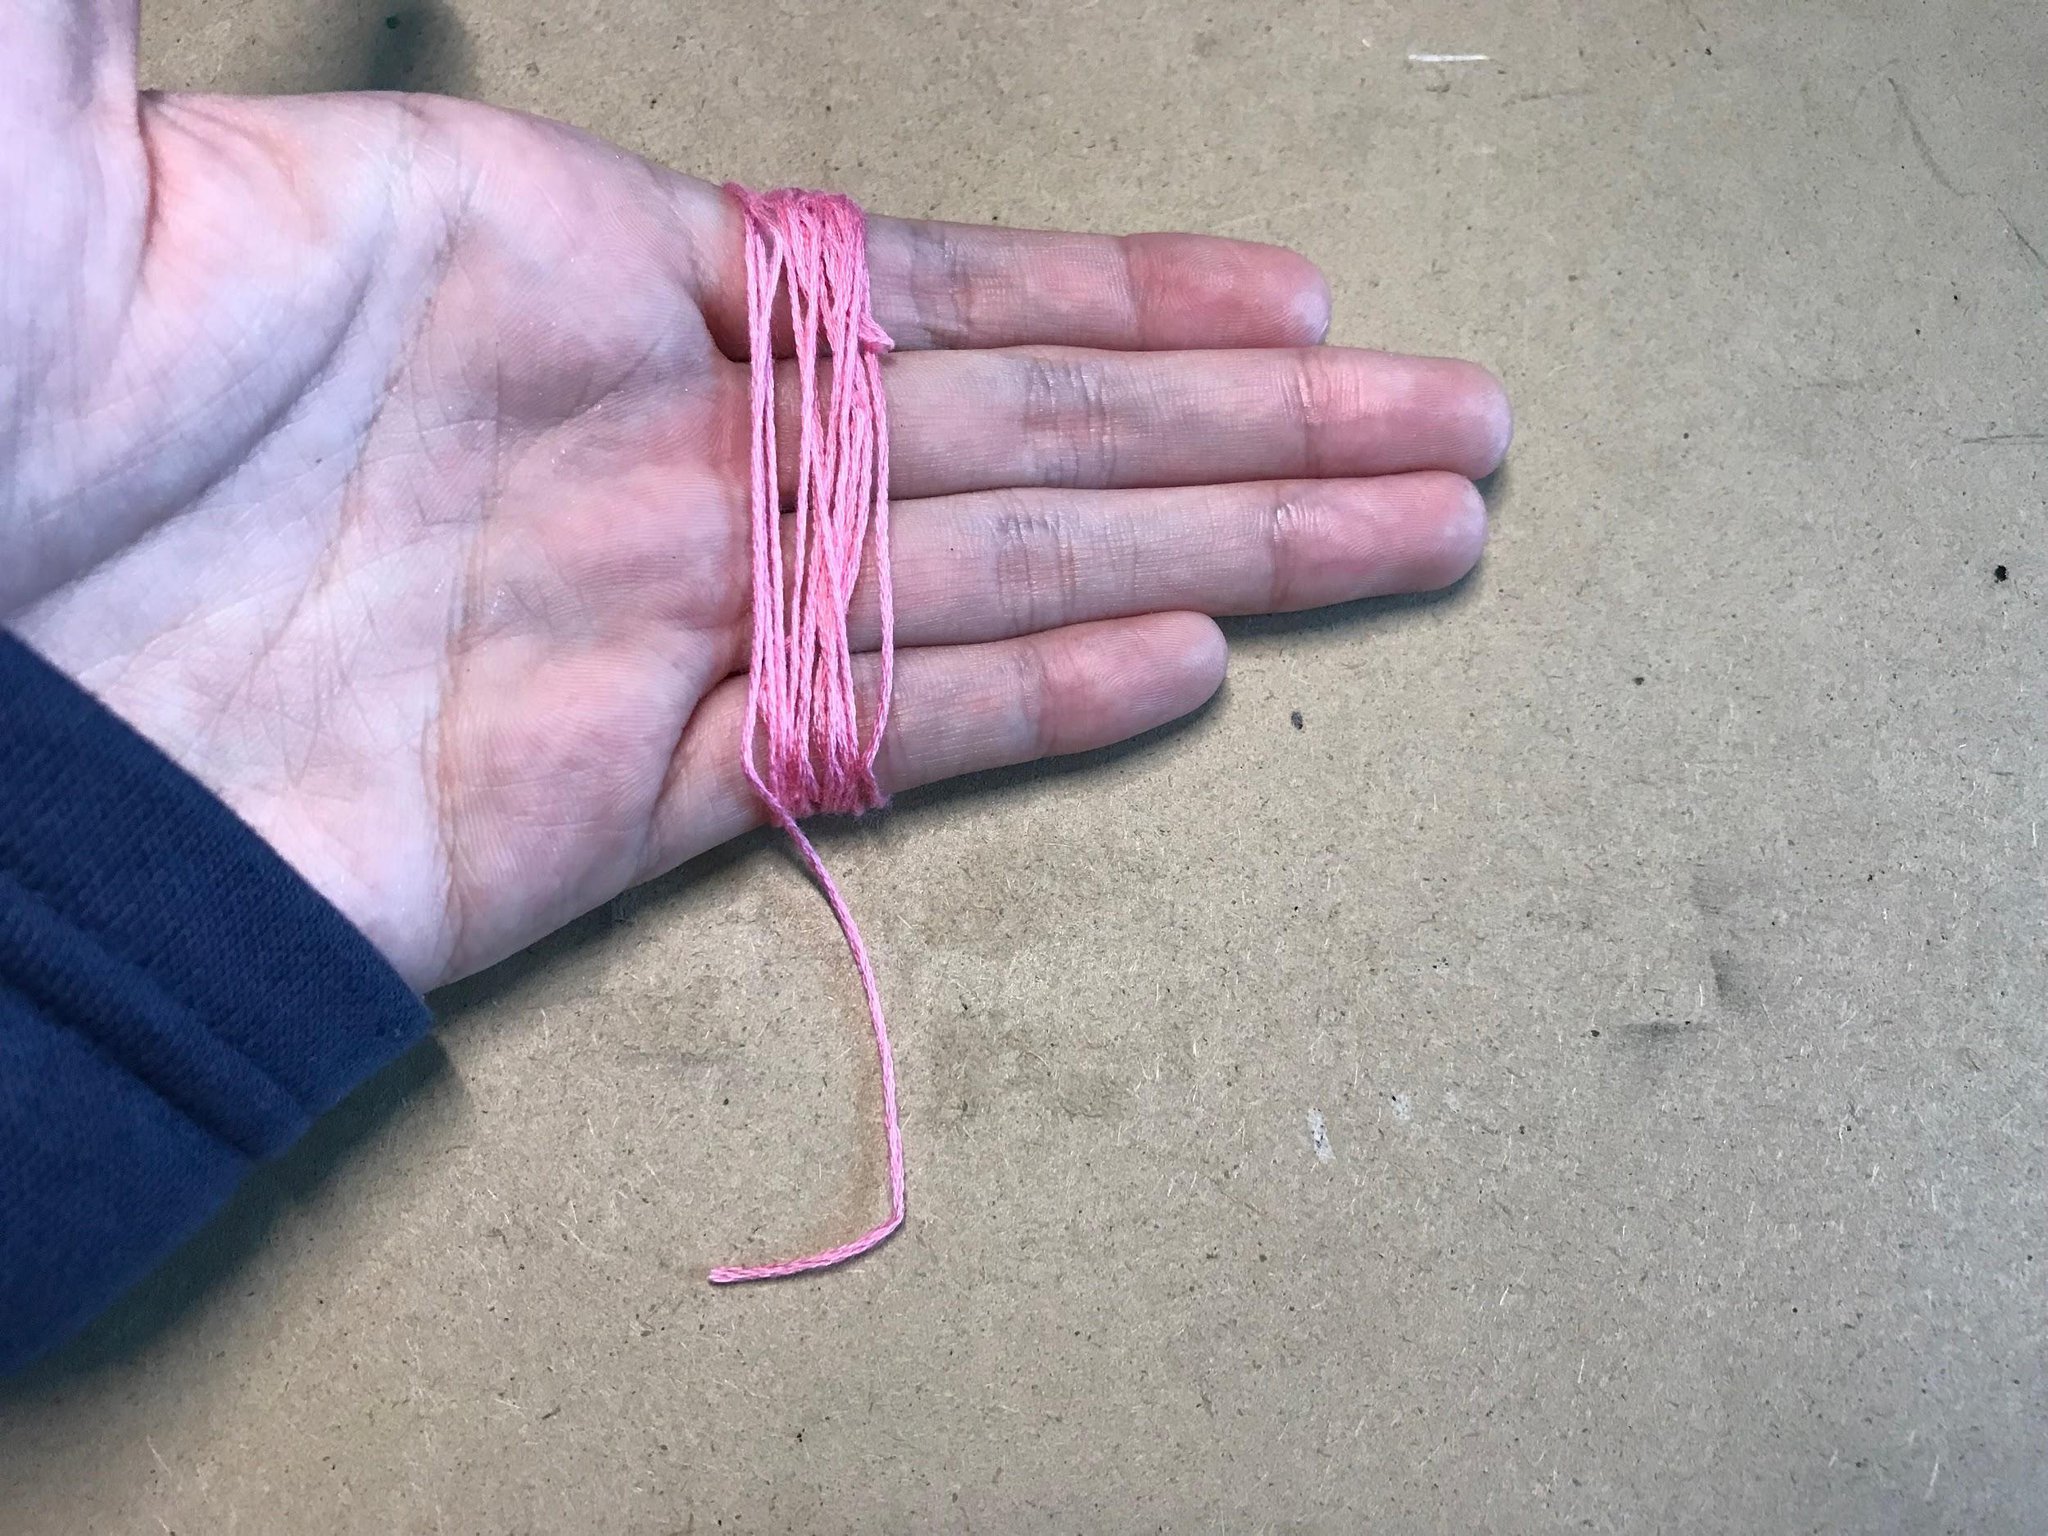
Step 1:
Wrap the long piece of thread around your hand until you run out.
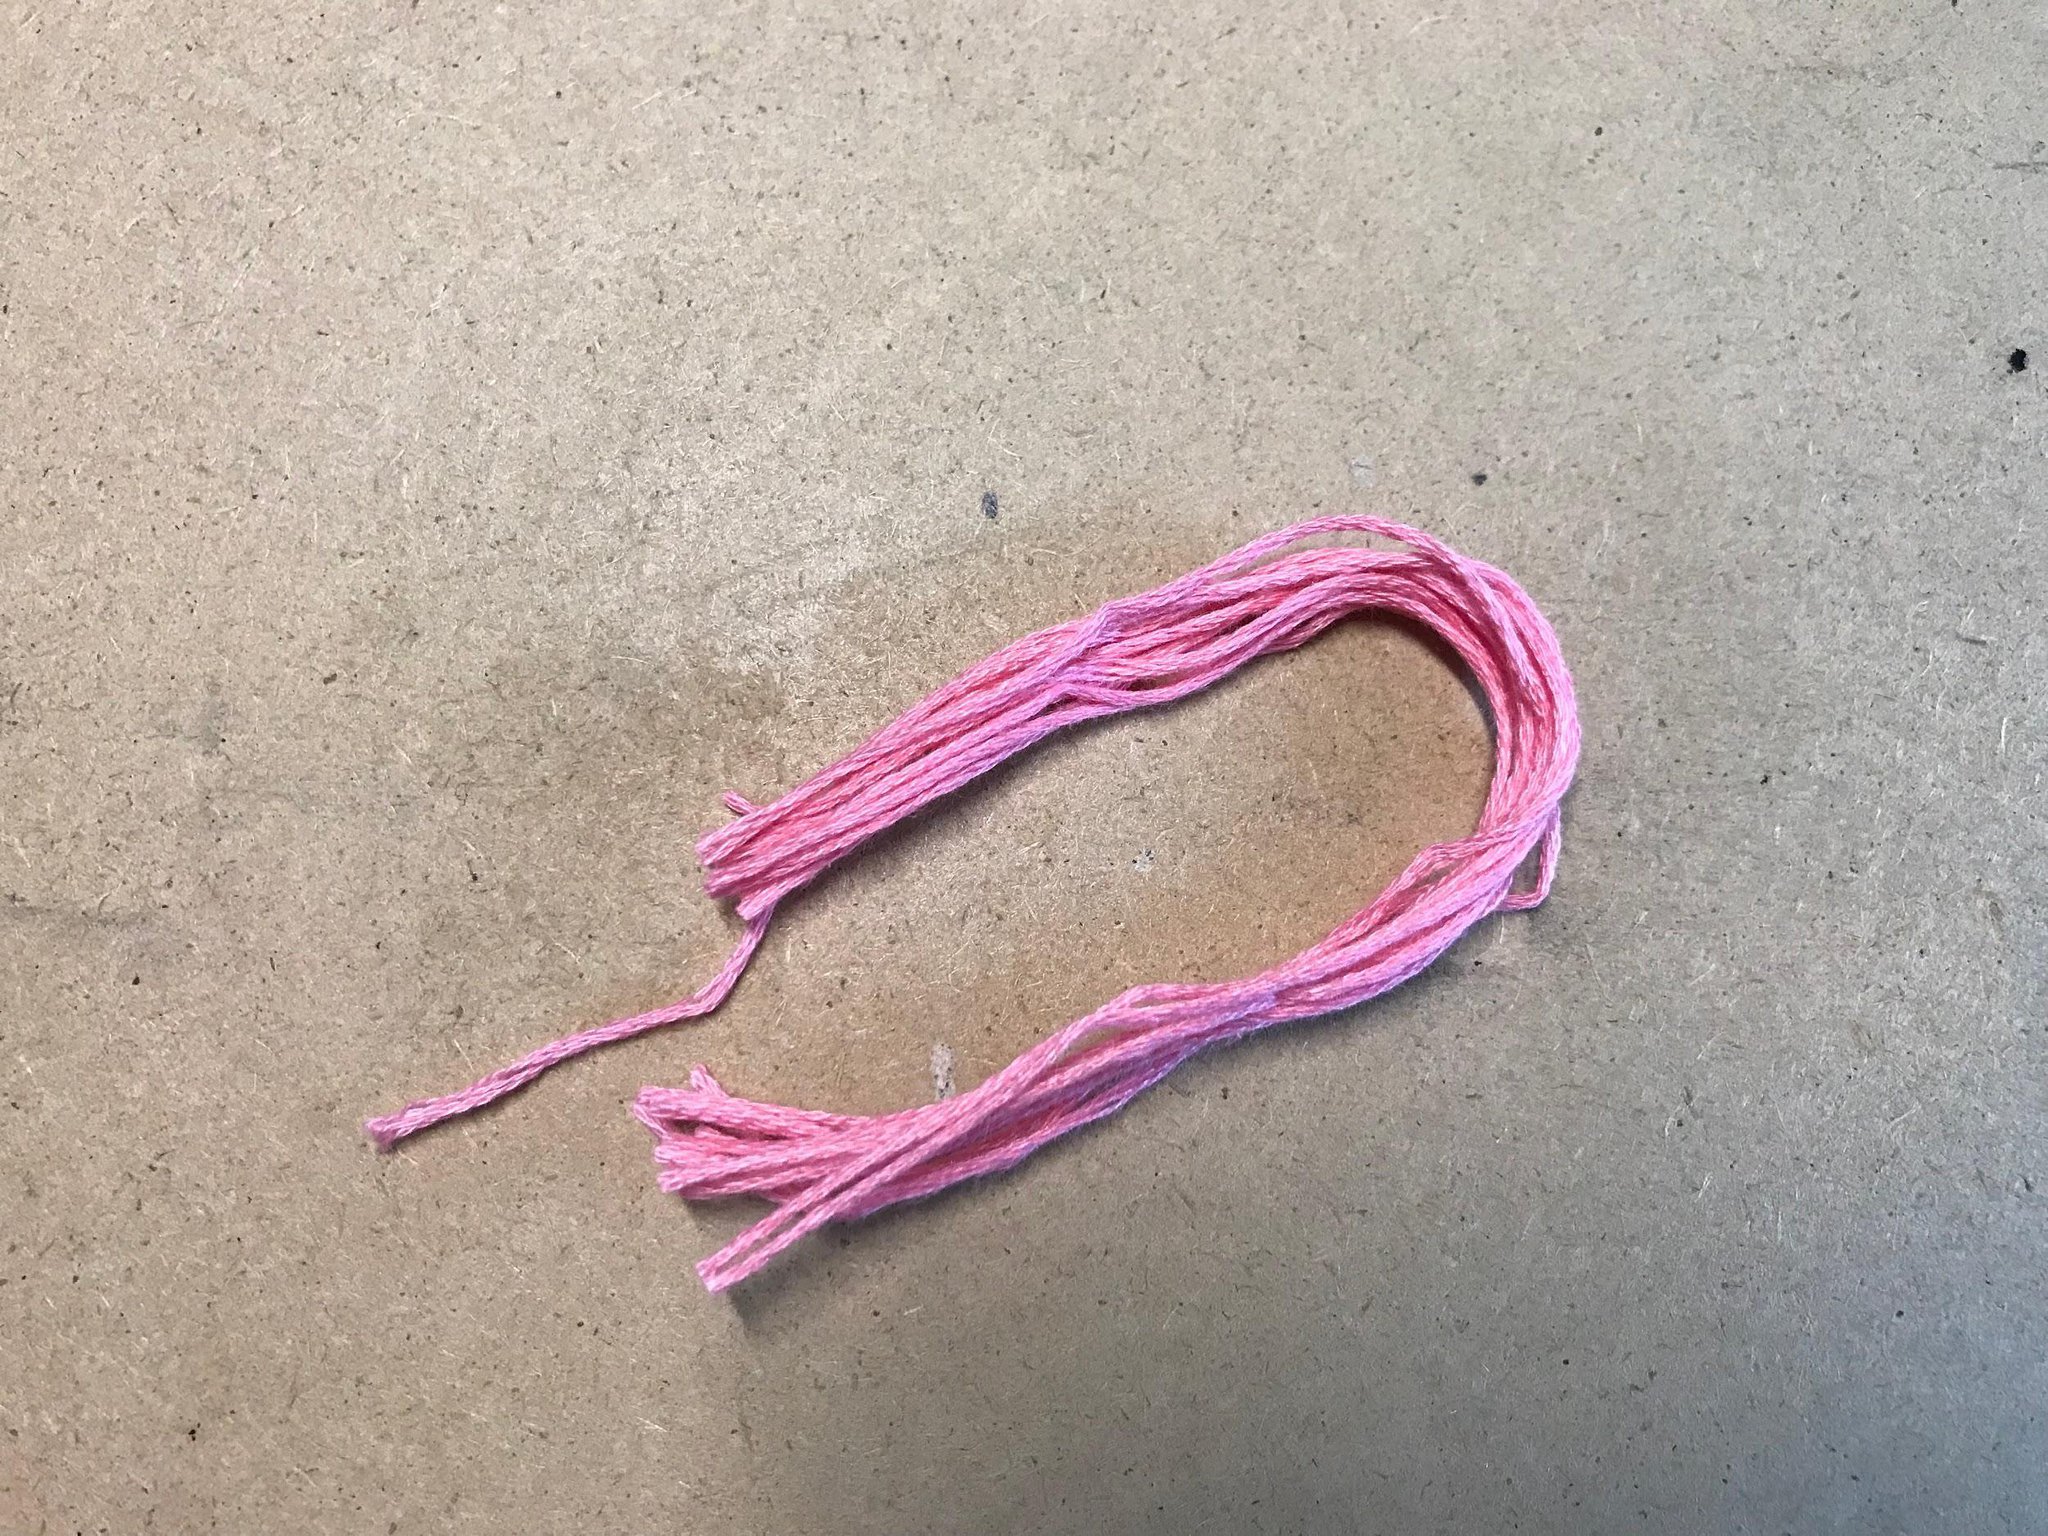
Step 2:
Take out your pinkie finger and cut the thread so that it looks like a bundle of thread folded over. Cut it on the side that your thread ends on.
Step 3:
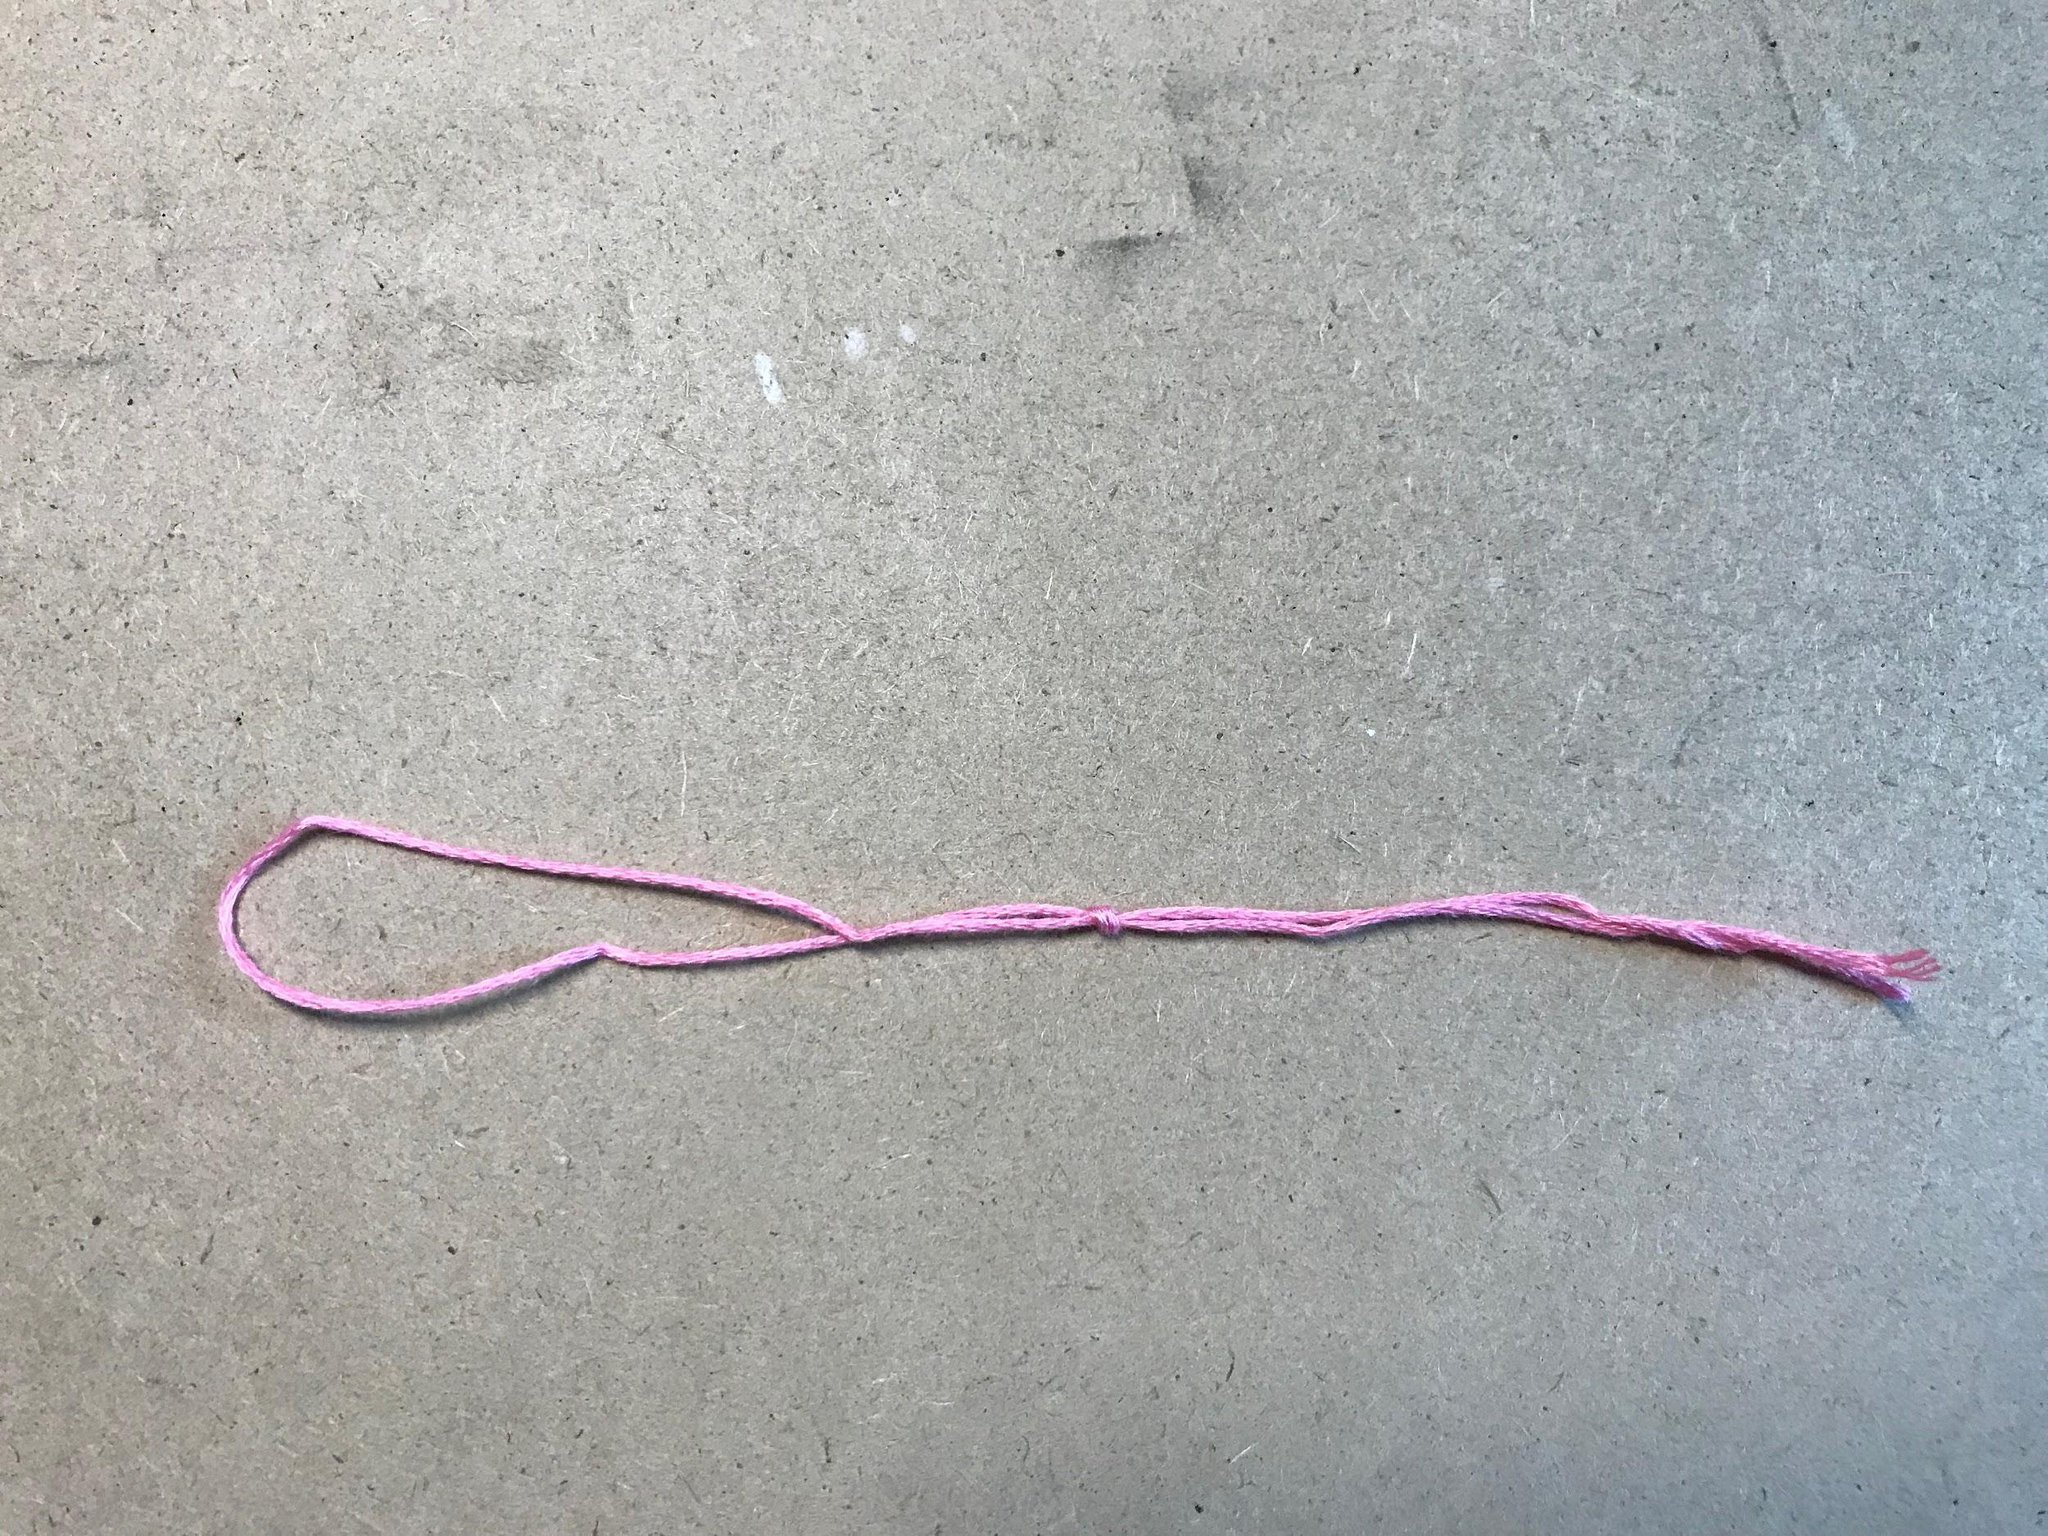
Using the string that’s 12 in (30 cm) long, fold it in half and tie a knot about halfway down after it’s been folded.
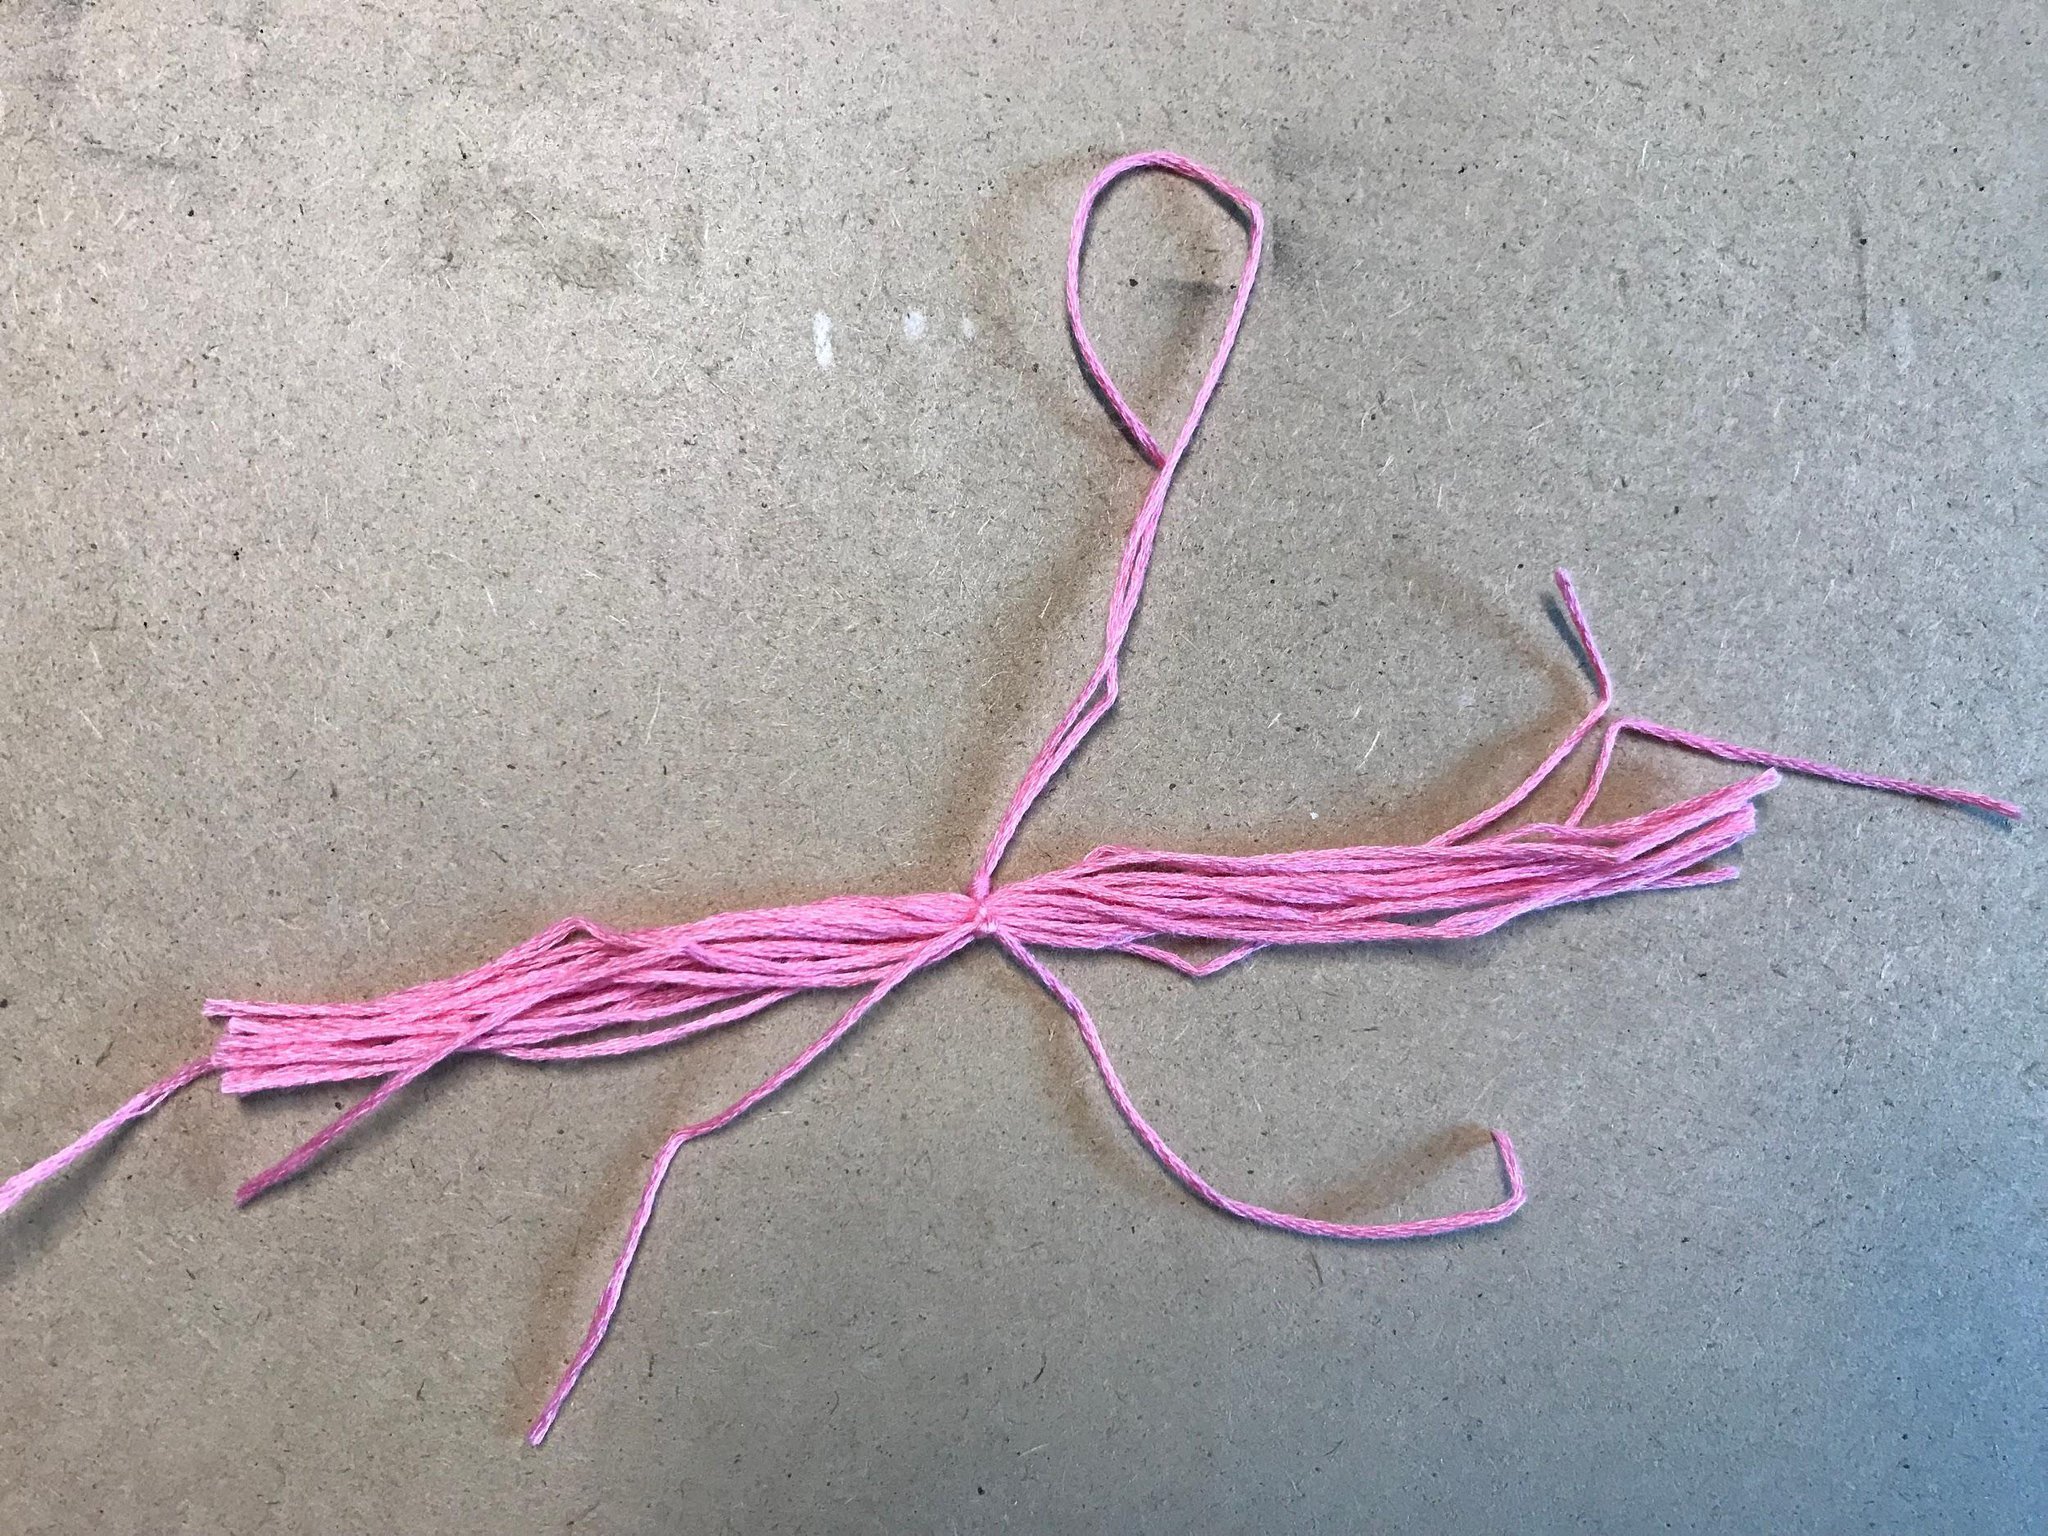
Step 4:
With the raw ends of the knotted thread, tie a knot onto the bundle of thread so that the ends hang down along with the bundle.
Step 5:
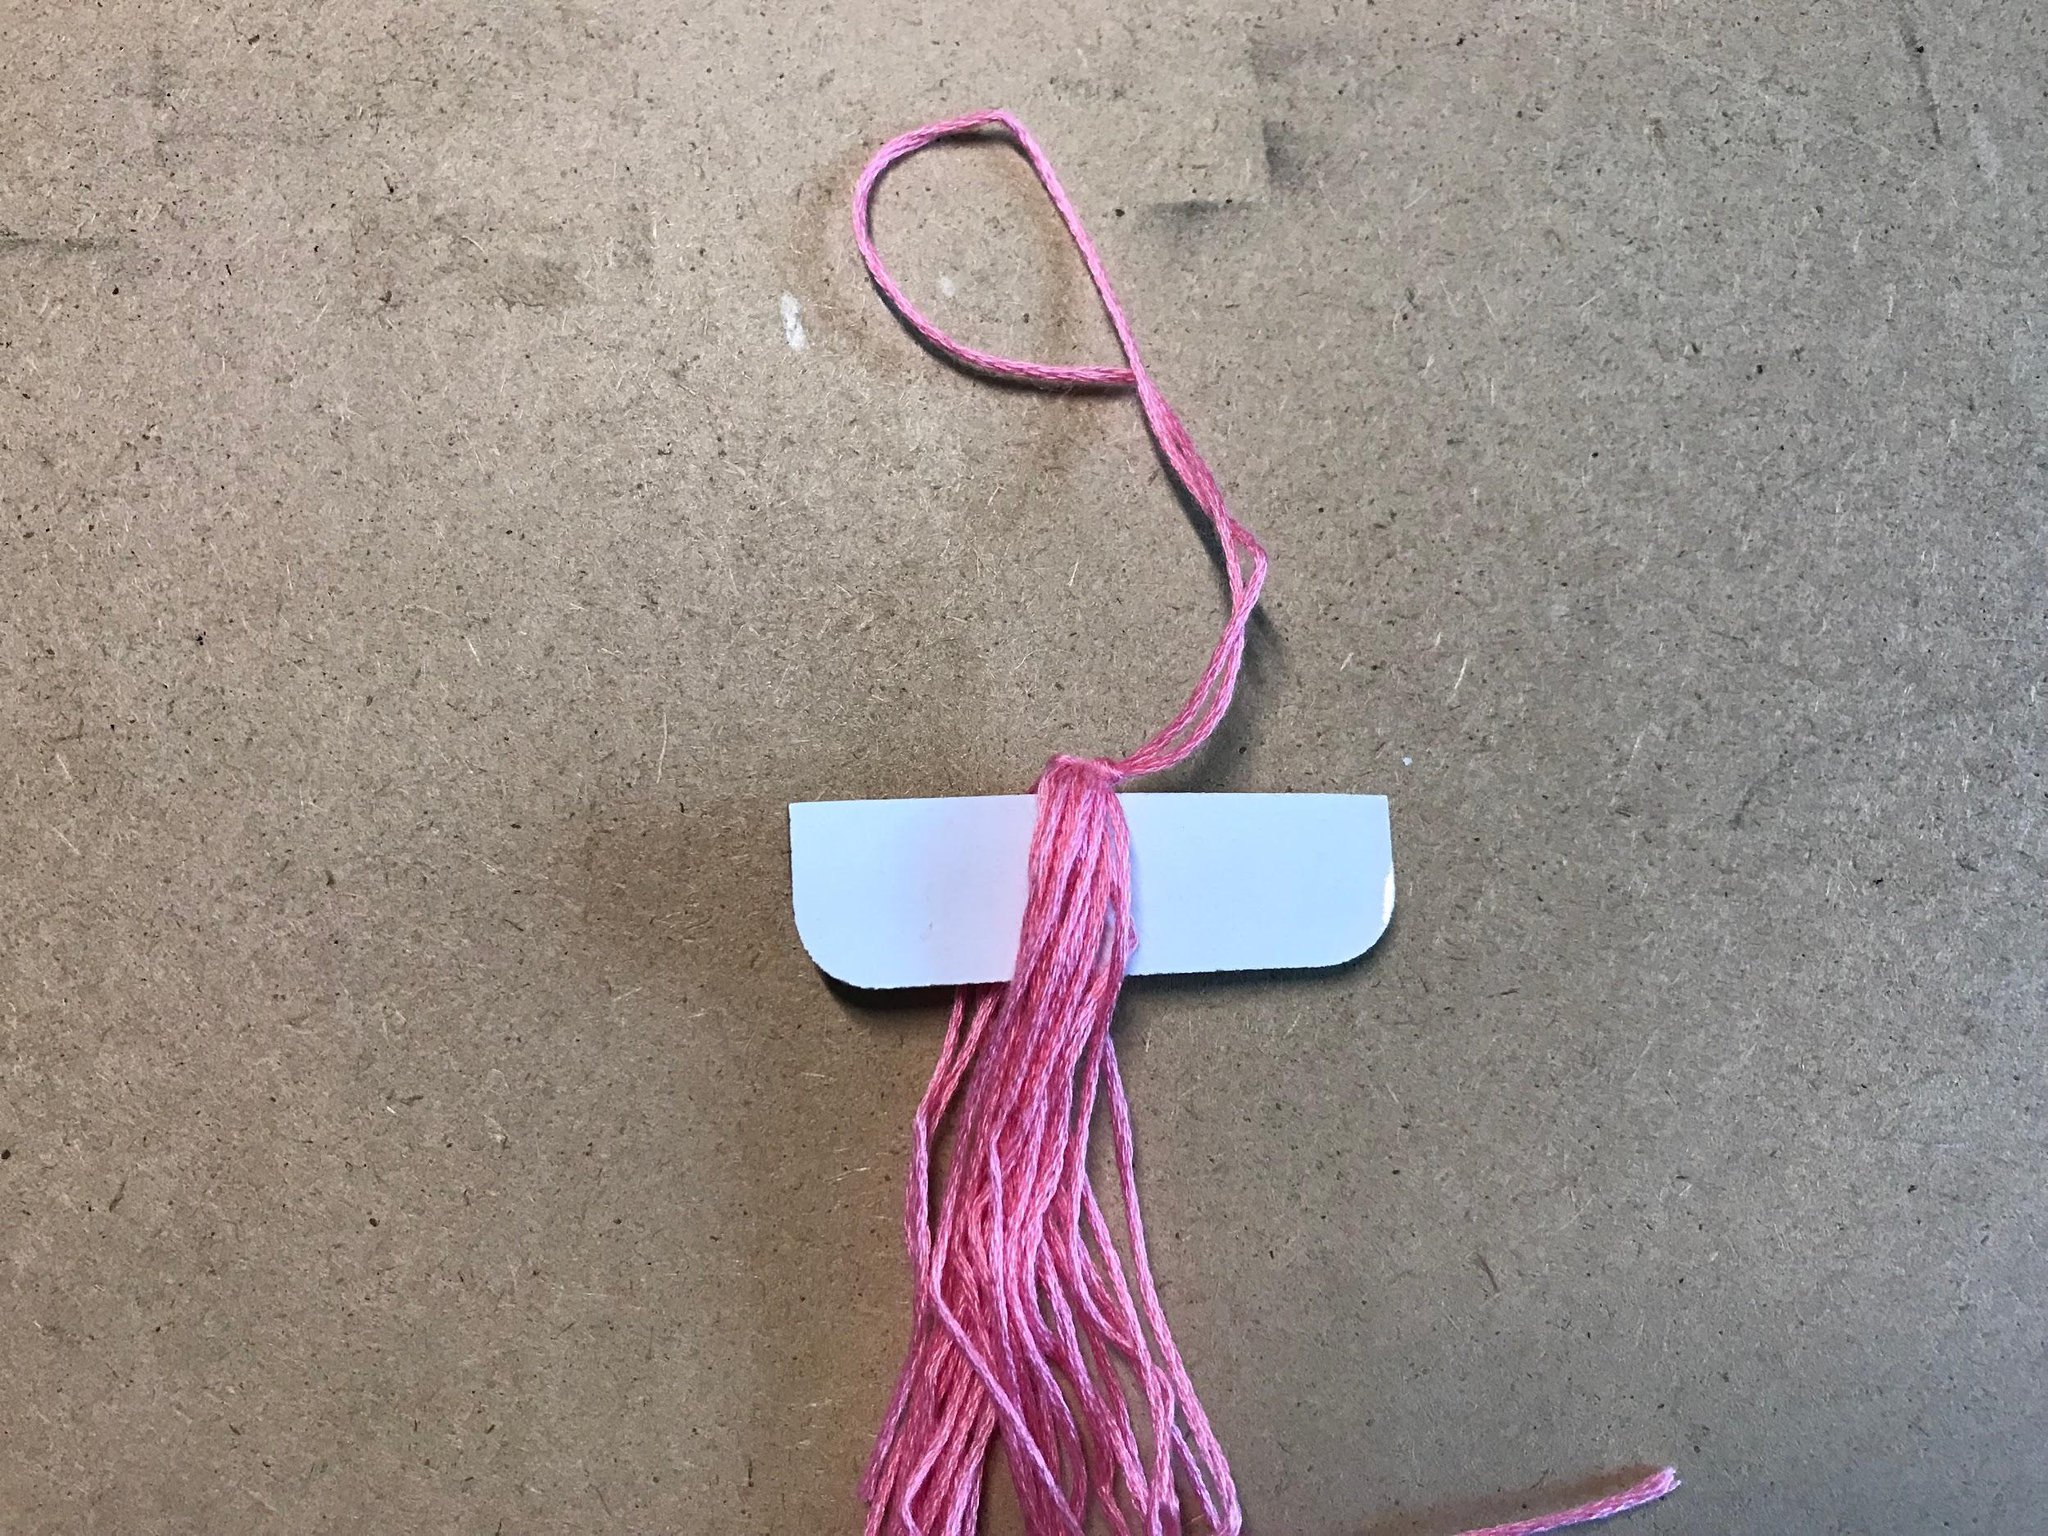
Place the cardboard onto the bundle and fold the bundle over so that the cardboard is sandwiched between the 2 halves of the strings. Make sure the cardboard is pushed as far as it can go into the bundle.
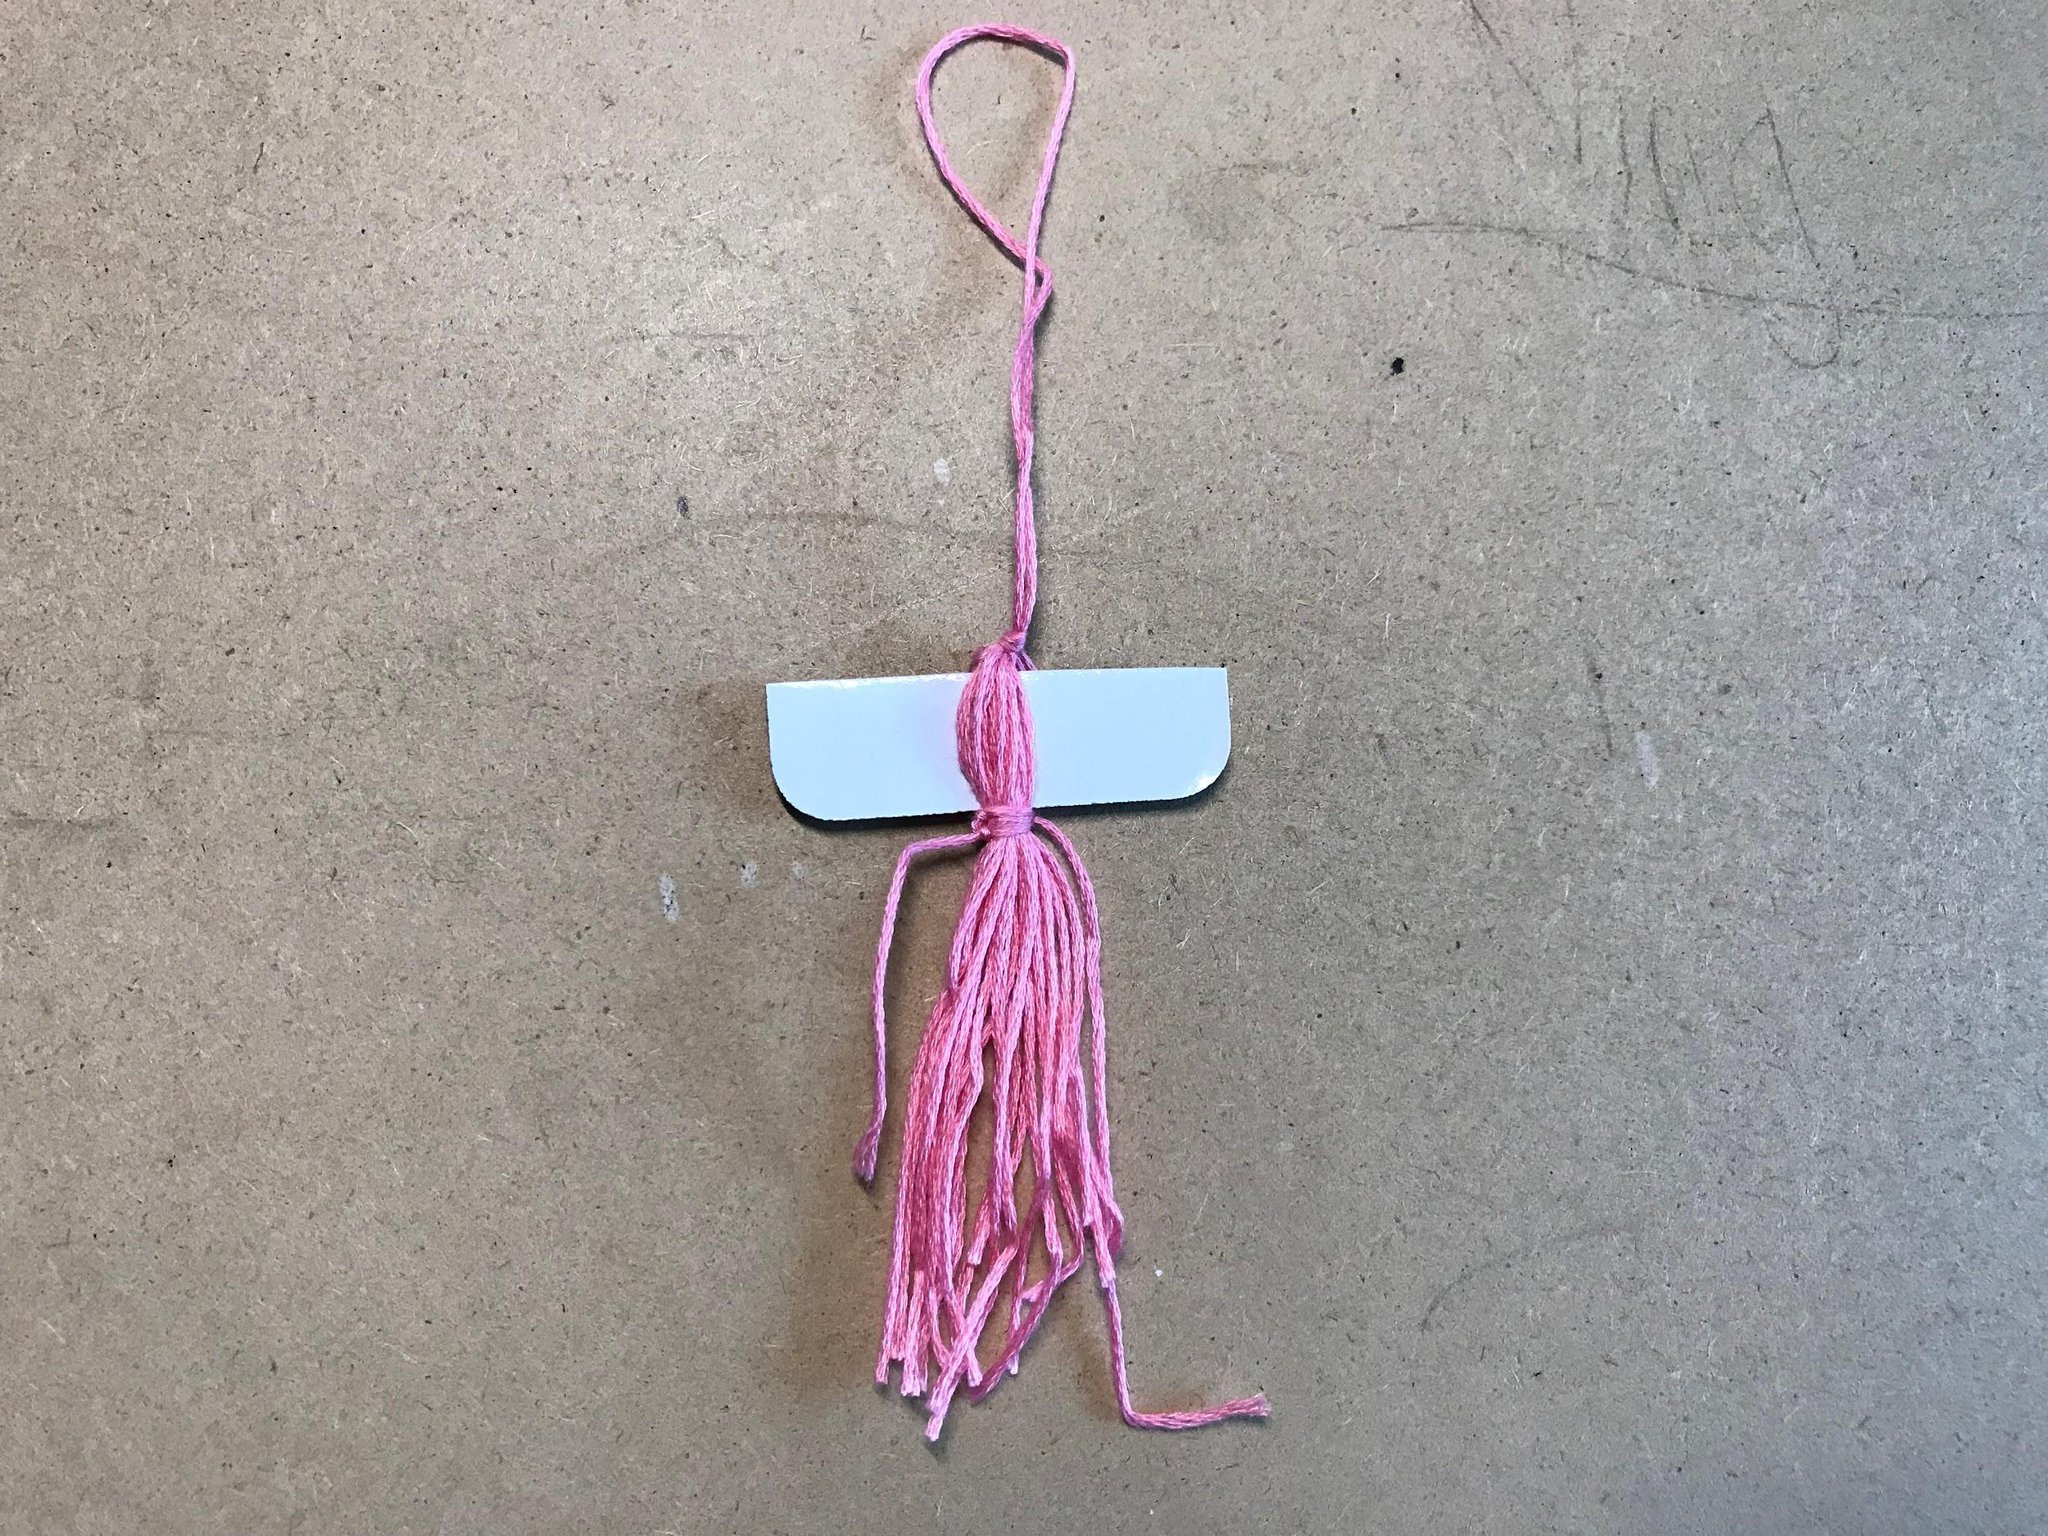
Step 6:
Tie 3-4 square knots with the piece of string that’s 8 in (20 cm) long. The cardboard is there to keep the knots from going too high up on the bundle.
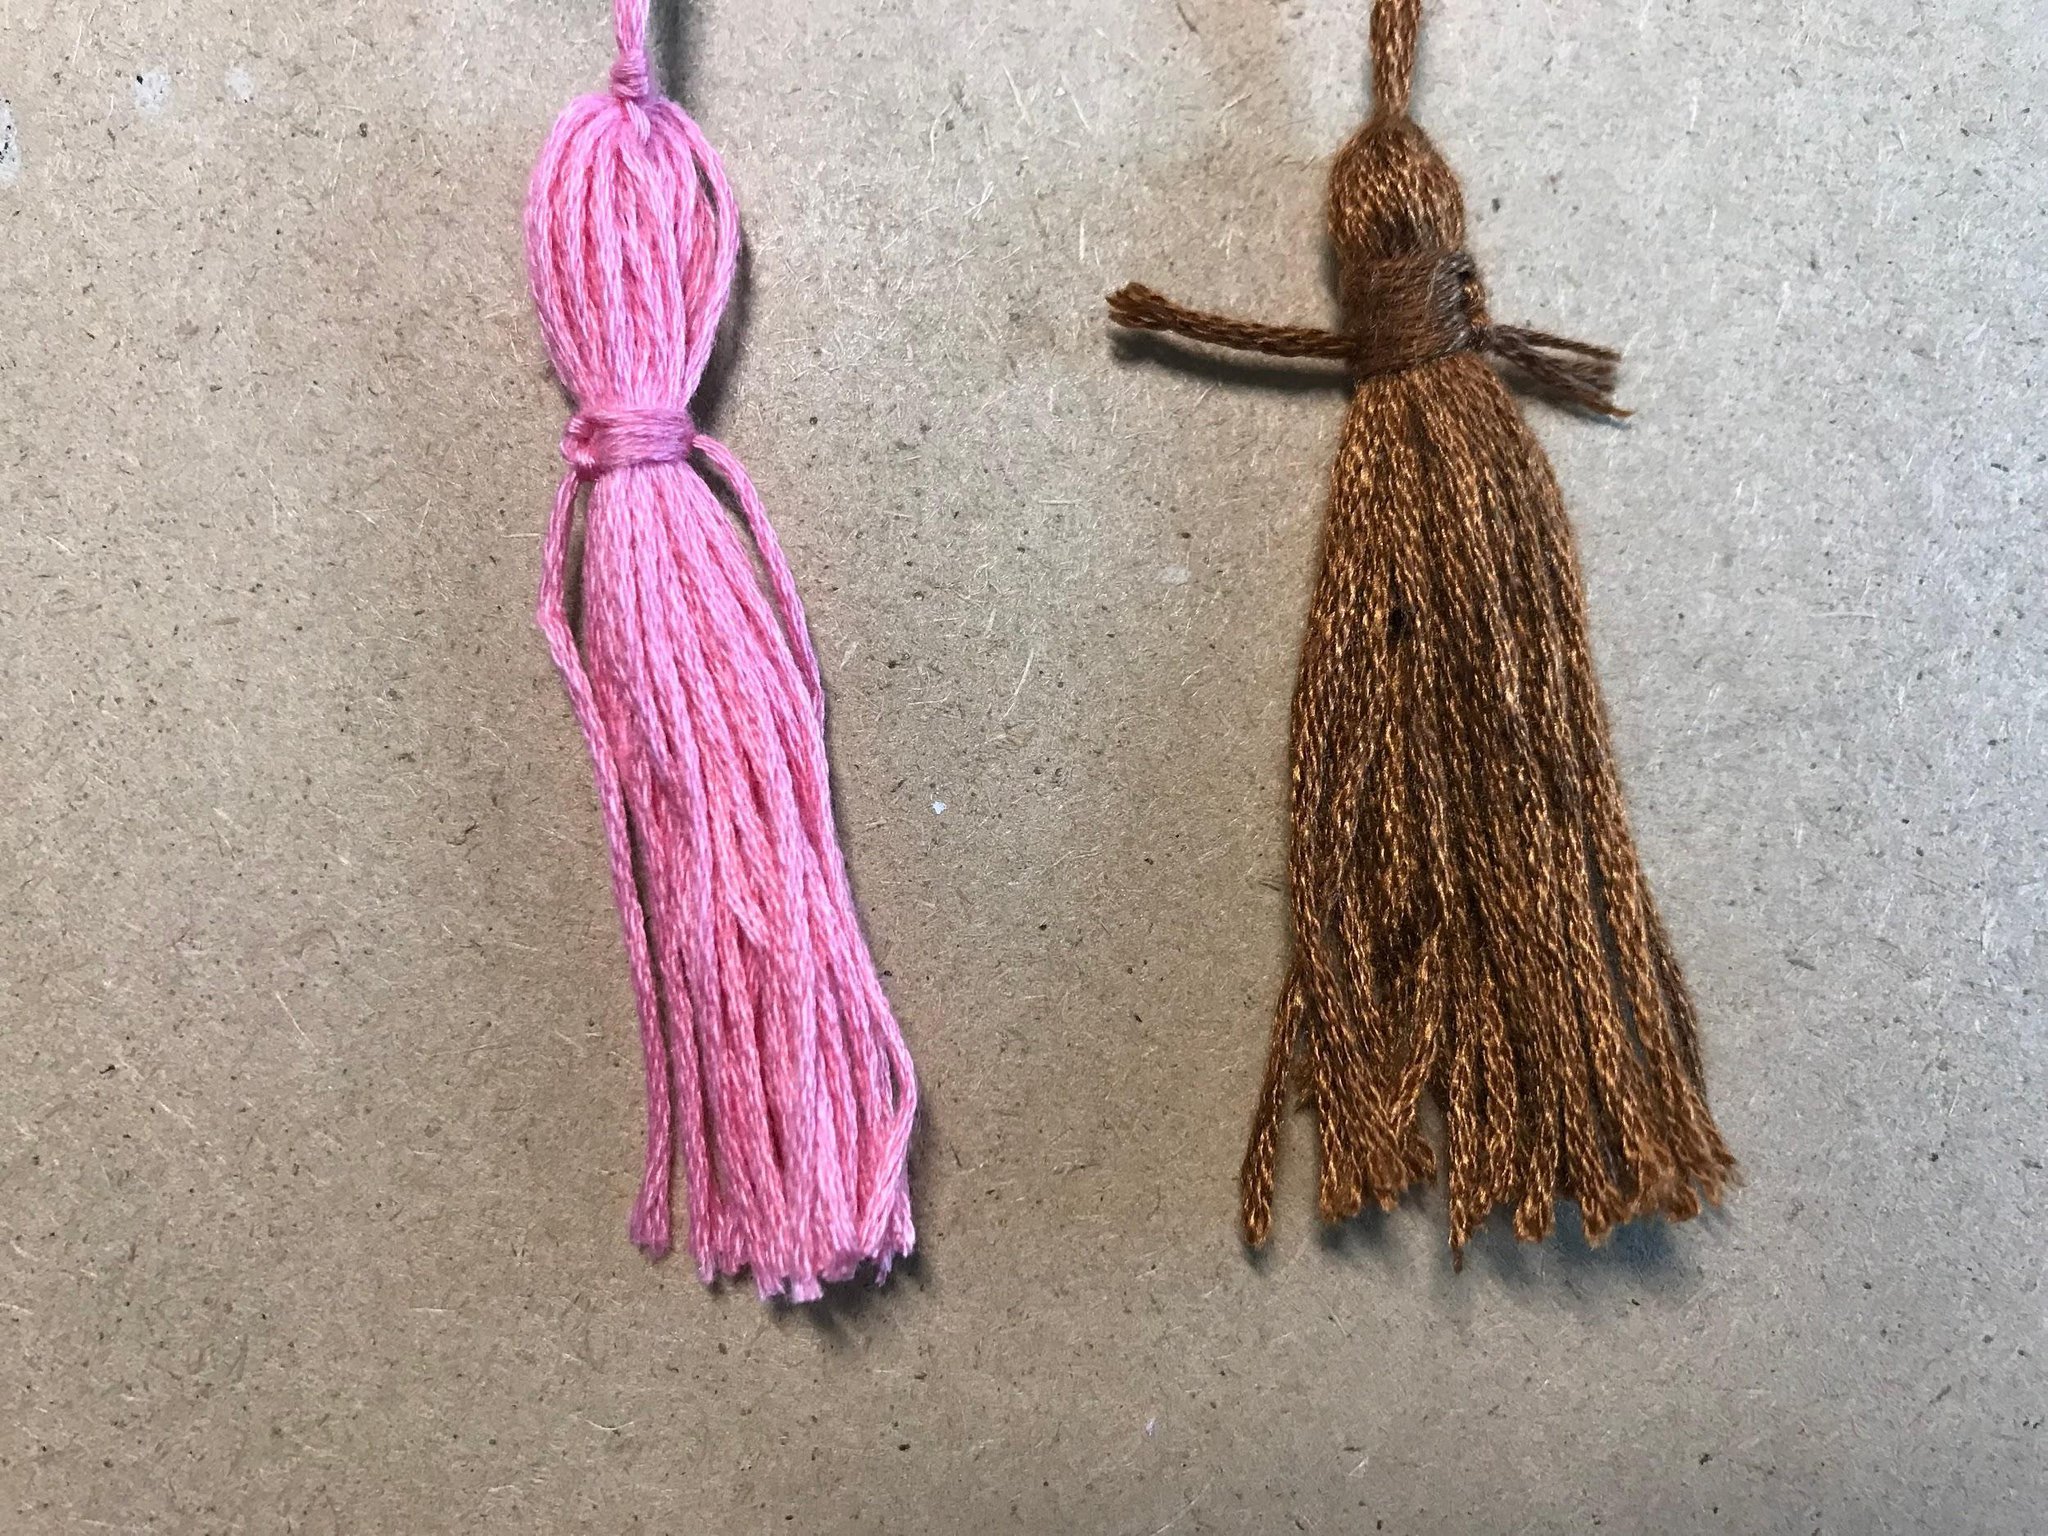
Step 7:
Trim the tassel. The string used to tie the square knots can be used as part of the tassel or trimmed short so that they stick out from the knots. I have two examples-one where i trimmed the square knot string and one where I didn’t.
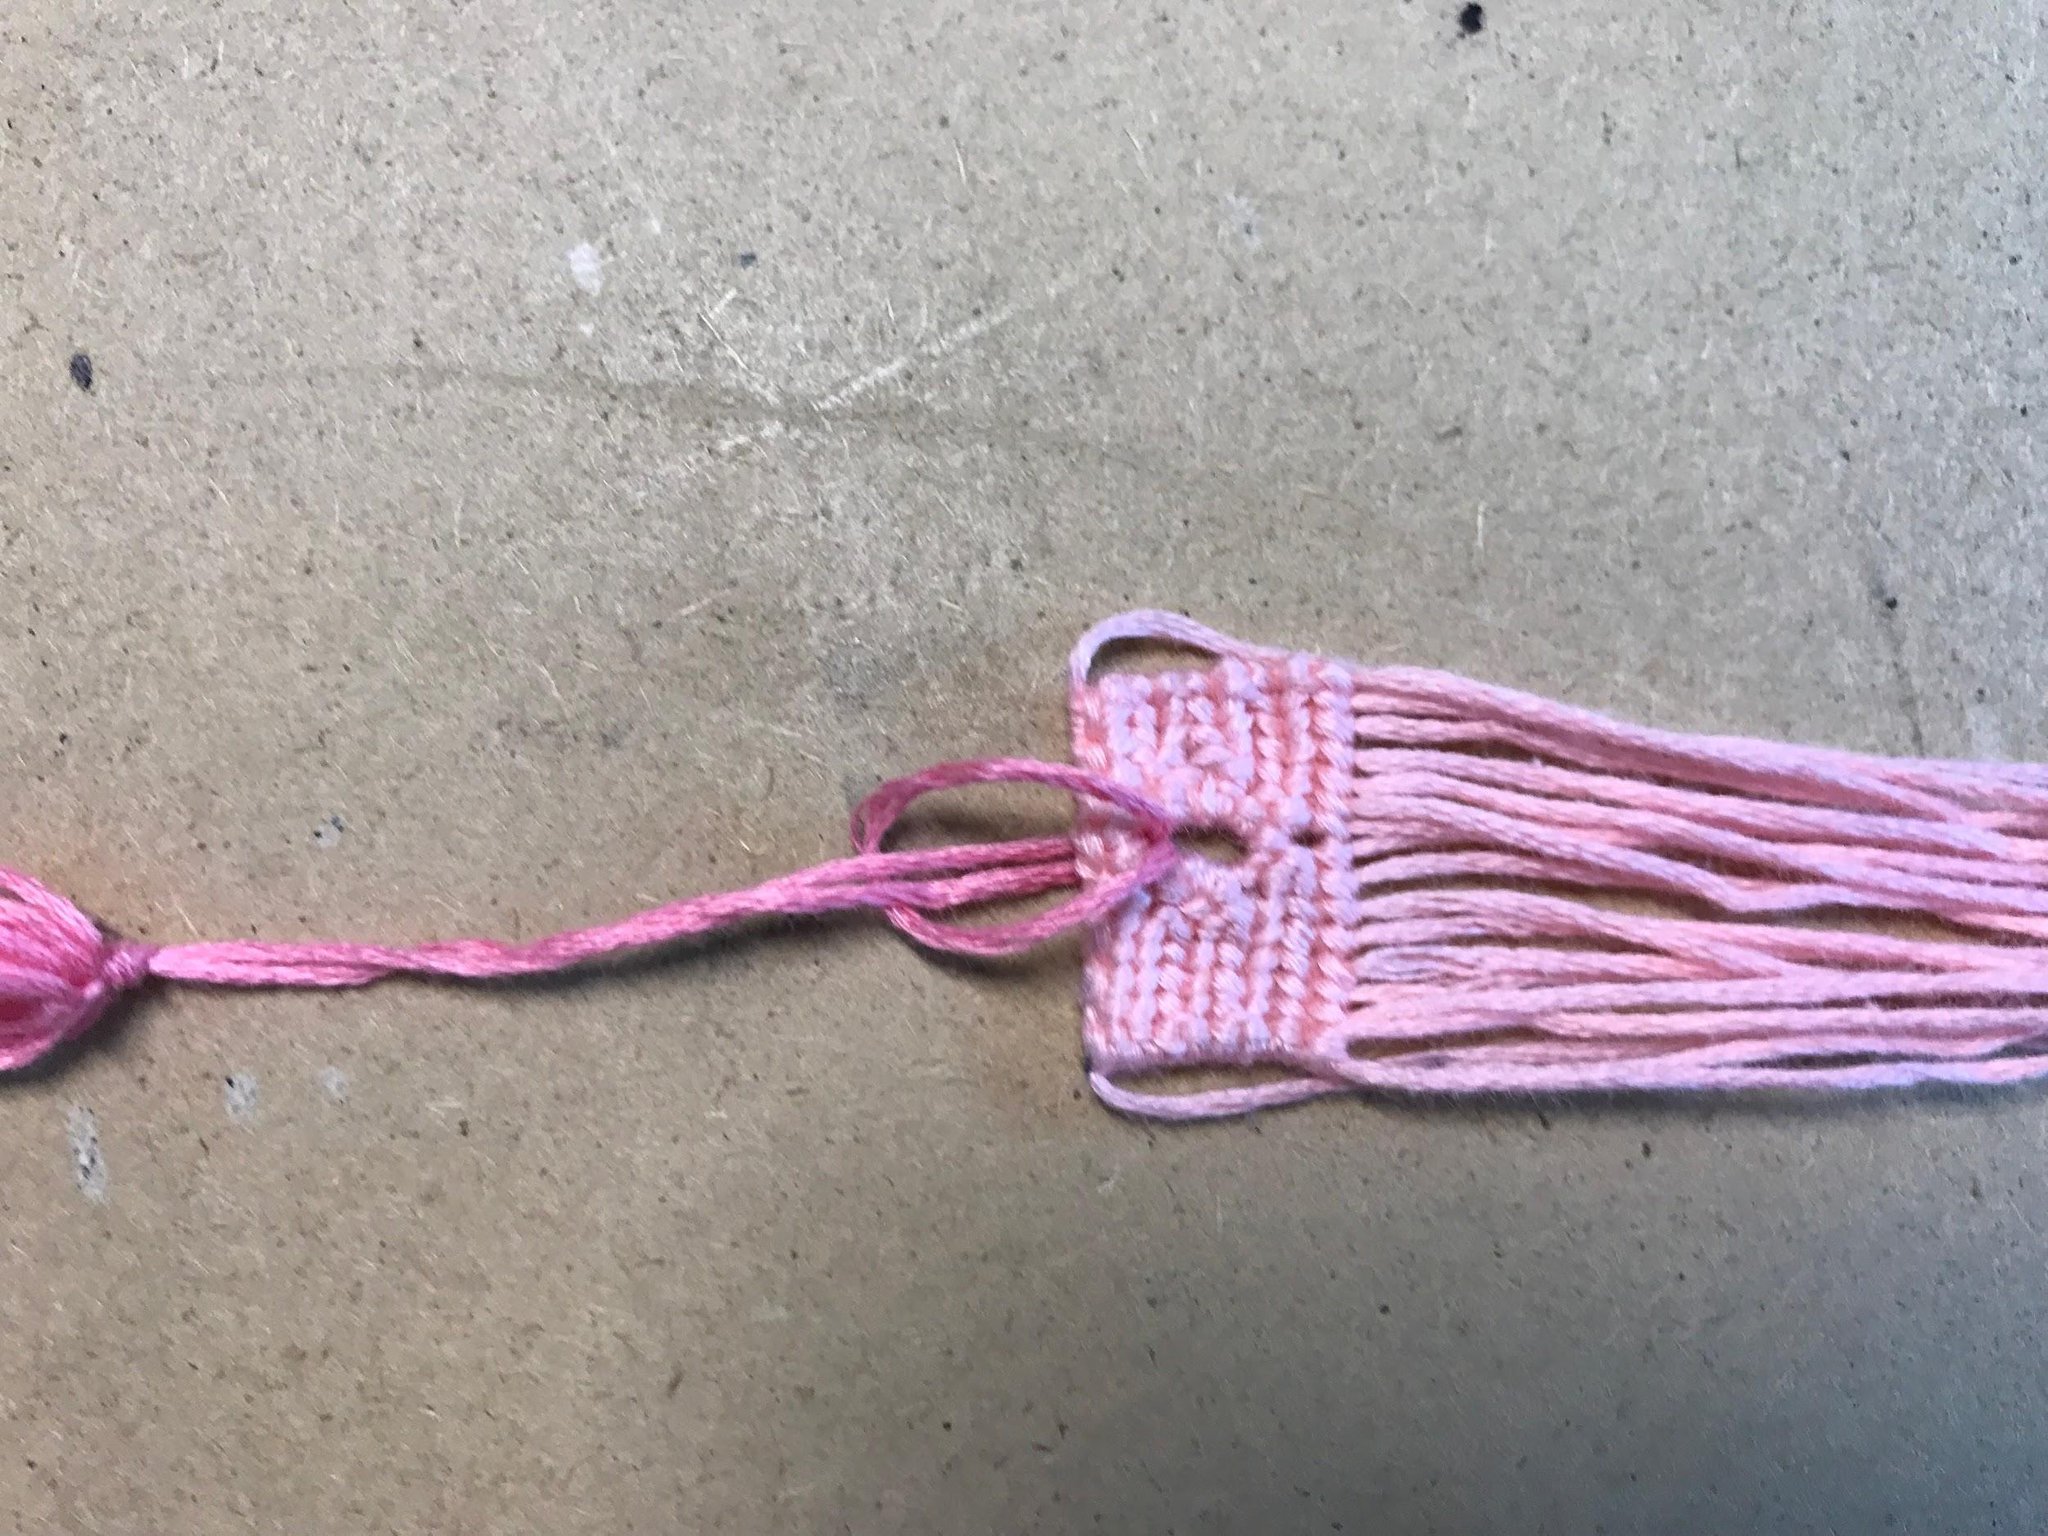
Step 8:
Thread the loop through the hole in your alpha and tie a lark’s head knot by pulling the entire tassel through the loop. Pull it tight.
And voila! 🎉 You’ve got yourself a bookmark with a tassel. Hope you enjoyed this tutorial! If you have any questions, leave a comment or private message me. 🙂 You can also watch @_kinseyb’s tutorial if you’re still confused.
16 Comments