Rate Tutorial
This tutorial will demonstrate how to make a tiny macrame frog. When made with embroidery floss, its body usually ends up being about an inch long. This tutorial refers to pattern #157626 and is especially helpful if you don't have a lot of string, as it only uses 13 strings. Feel free to give it a try!
Materials needed
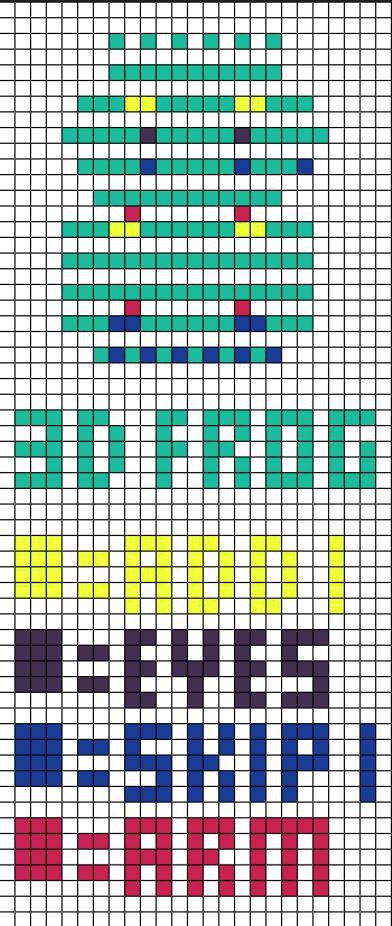
• Pattern #157626
• 1 string 21" long or 53 cm
• 9 strings 14" long or 35 cm
• 3 strings 16" long or 40 cm
• Black seed beads or scrap of black string Sewing needle
• Scissors
• Glue
• 1 string 21" long or 53 cm
• 9 strings 14" long or 35 cm
• 3 strings 16" long or 40 cm
• Black seed beads or scrap of black string Sewing needle
• Scissors
• Glue
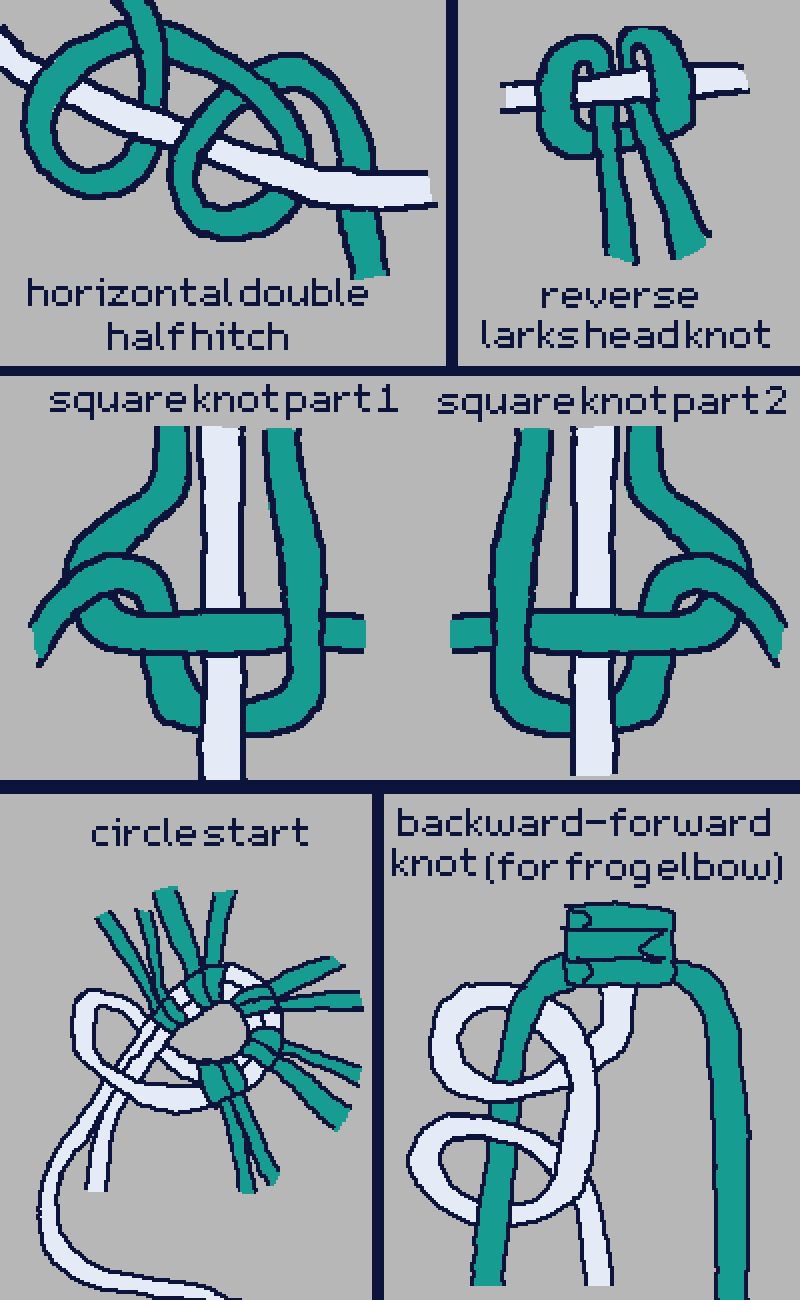
Knots needed for frogs
These are the drawings of the knots you will be using.
Video of Horizontal double half hitch
This is a video of a macrame coaster, but it will help you understand how to start the pattern, how to make horizontal half hitches, and how to add new strings by making reverse larks head knots. Play the video from 2:50.
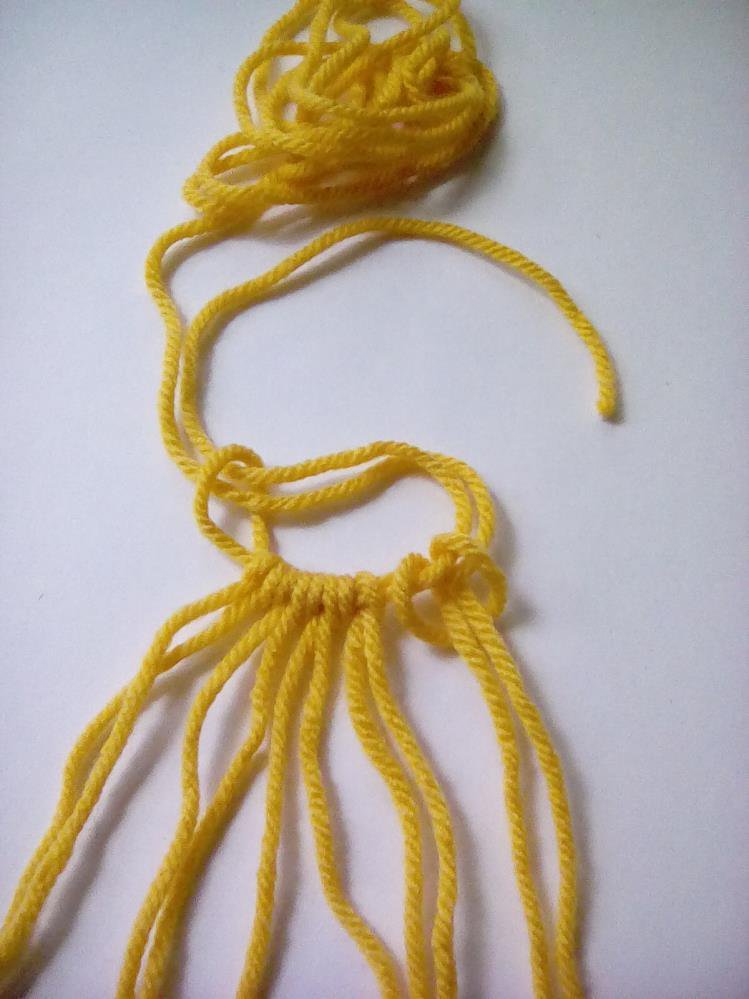
Circle start
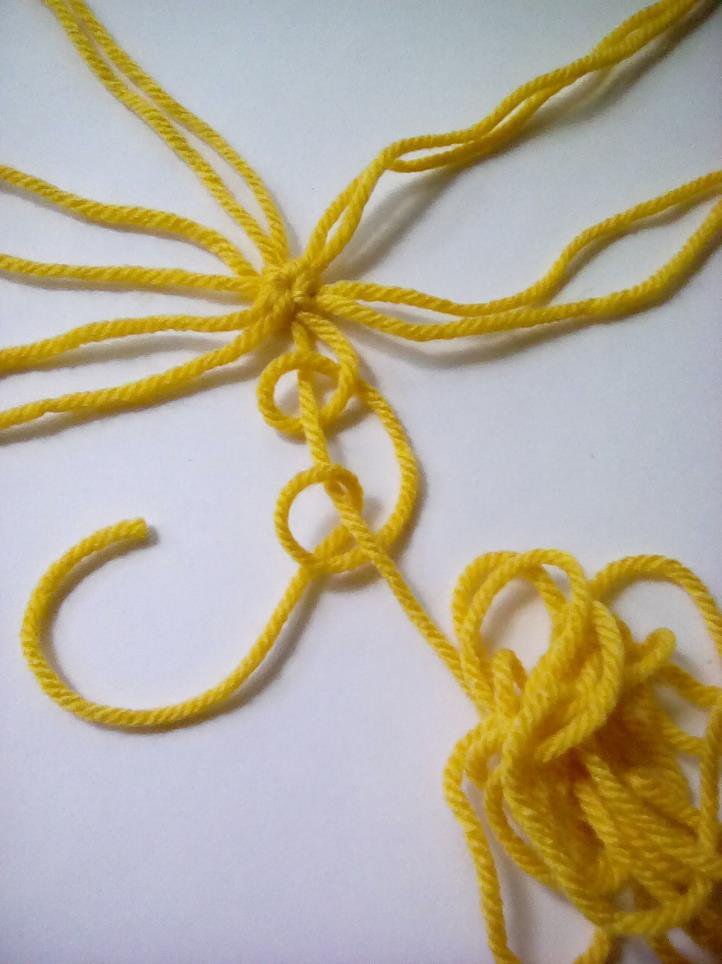
Measure 7" on your longest string and fold it in half at that point. Take 5 of your 14" long strings and attach them one at a time onto this string with larks head knots. Take both ends of the long string and pass them through the loop made from where you folded it. Pull tight to form a circle with 12 strings.
(This is represented in the pattern by the 6 green dots in the first row)
(This is represented in the pattern by the 6 green dots in the first row)
Horizontal double half hitch
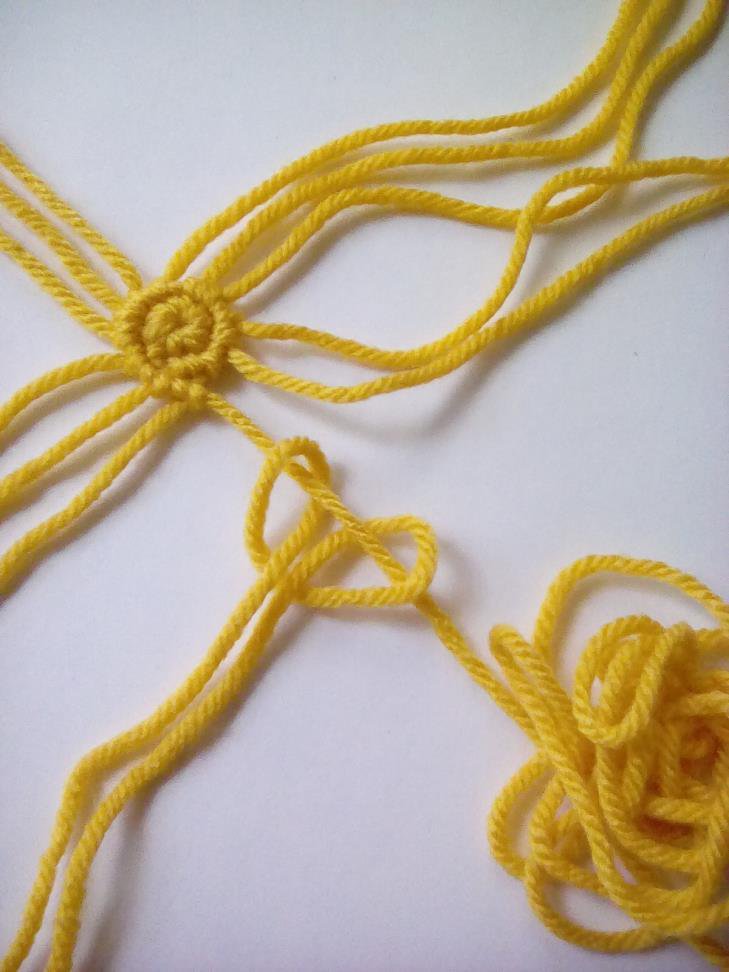
The longest string, or holding string will act as a base string and will be knotted onto in a continuous spiral using horizontal double half hitch. You will not make any knots with this string
It's important to hold this string in the direction you want your knots to go. If you hold it vertically there will be large gaps between your rows. Hold it to the right side as you make and tighten your knots.
To make this knot moving in the direction from left to right or counter-clockwise place the base string ON TOP of the string that you are making the knot with and make a backwards knot. Make a backward 4 shape with the knotting string.take it under the base string, over the base string and through the 4 shape. Do that twice.
(Knot 14)
Adding strings with reverse larkshead knots
Take one of your 14" long strings and fold it in half. Place the loop end under the base string and pull the ends through the loop. Knot the next 5 strings then add another larks head knot with a 14" string.
If your frog starts to form a bowl shape, push on it from underneath so it forms a mountain shape instead.
If you're following along with the pattern you'll notice I added two yellow dots at each place where you add a larks head knot, that's because while this knot is equal to the space of one knot, it adds two extra strings for any following rounds.
(Add 1, knot 5, add 1, knot 8)

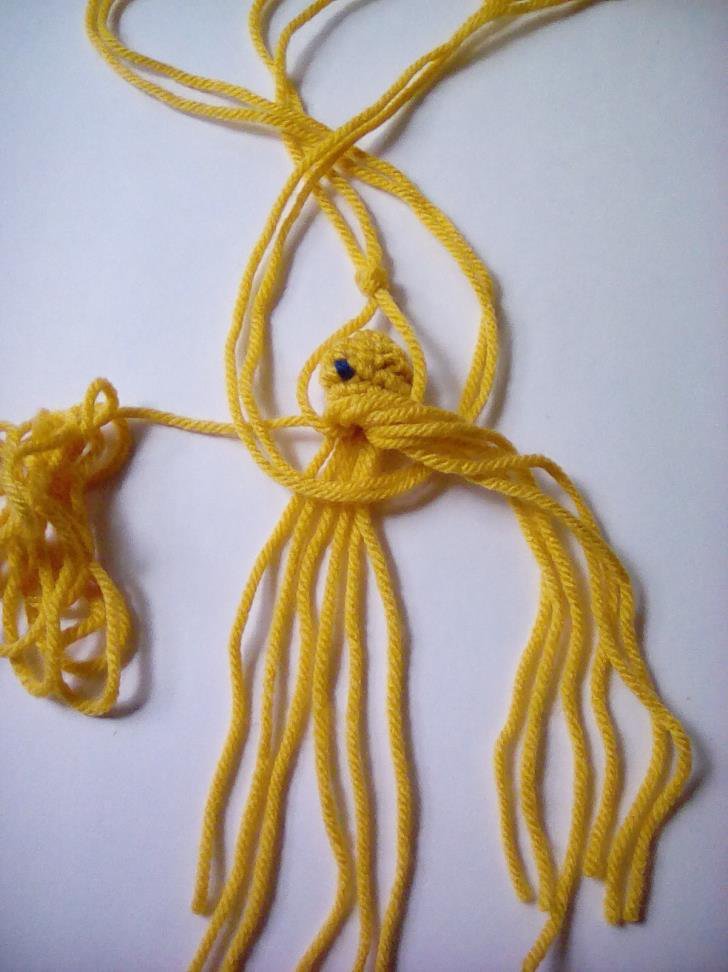
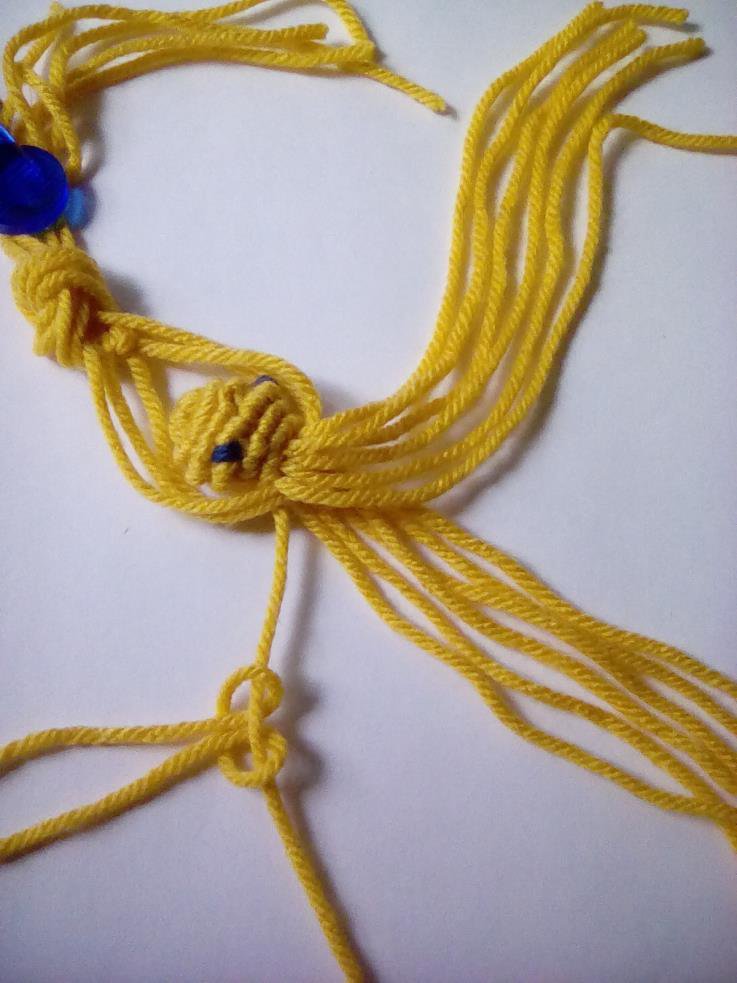
Beaded eyes
To add beaded eyes thread a seed bead onto the long base string.
For non-beaded eyes, take your scrap piece of black thread and tie a horizontal double half hitch onto the base string.
(Eye, knot 5, eye, knot 9)
For non-beaded eyes, take your scrap piece of black thread and tie a horizontal double half hitch onto the base string.
(Eye, knot 5, eye, knot 9)
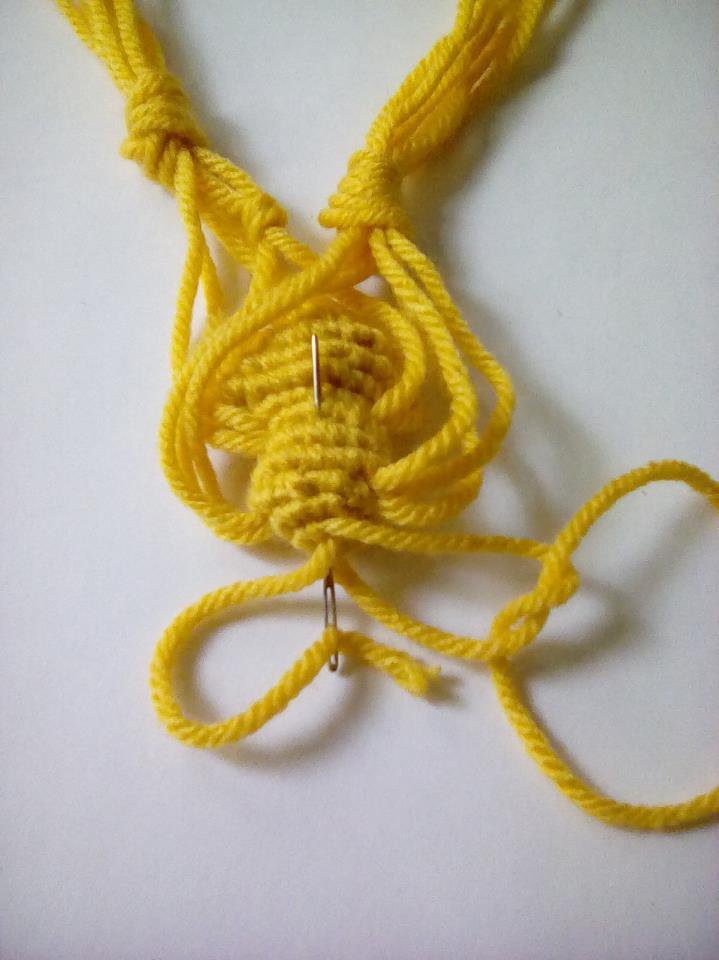
Remove string
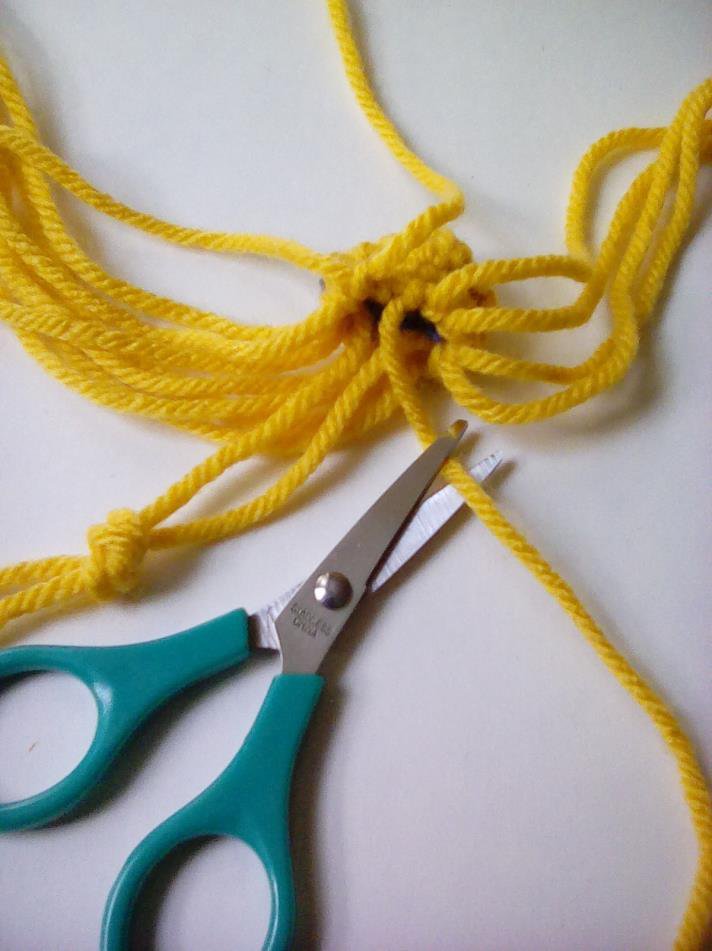
To decrease the number of knots in a round, simply skip making any knots with the specified string and continue with the next string. For the first 2 decreases in round 5, tape these together or tie them in an overhand knot temporarily. These strings will later become the arms.
For the third decrease cut that string 1/2" long and tuck it inside the frog head.
(Skip 1, knot 5, skip 1, knot 3, skip 1, knot 15)
For the third decrease cut that string 1/2" long and tuck it inside the frog head.
(Skip 1, knot 5, skip 1, knot 3, skip 1, knot 15)
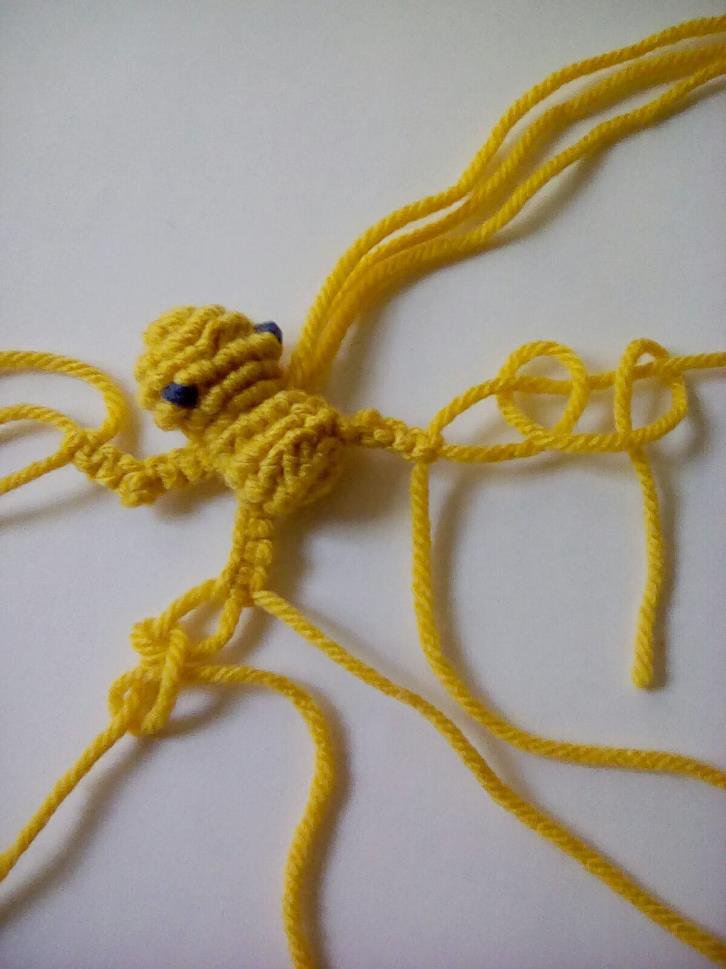
Arm placement
Separate the next 6 strings and place them out of the way. Take your skipped strings from the previous step along with 2 of your 14" long strings and place them so there are 3 strings on each side of the frog between the 6 top and 6 bottom strings. These will be the arms so tie them in a temporary overhand knot to keep them out of the way and so that you don't accidentally knot with them.
Add more strings
Take one of your 16" strings and make a reverse larks head knot onto the base string. Keeping the arms above the head, knot 6 then add another string with larks head knot.
(Add1, knot6,add1,knot38)
(Add1, knot6,add1,knot38)

Second decrease round and back legs
The next 2 strings should be slightly longer for the legs. Separate 6 strings on the top and 6 strings on the bottom of the frog, you should be left with 2 on each side that are slightly longer.
Take the two strings from each side, along with the last 16", string and tie them together in a temporary overhand knot or tape them, these are the legs. Place these, three strings on each side, up between the top 6 and bottom 6 strings.
Make sure the long base string is underneath the strings for the leg. The next knot should trap them in place.
(leg, knot 6, leg, knot 3)

Last decrease round
Place your base string out of the way so you don't cut it. Grab every other string, there should be 6, and cut them so 1/2" remains. Tuck these inside the body of the frog. Continue knotting the remaining 6 strings.
(Knot 6)
(Knot 6)
Sew in the ends
Thread your needle and one at a time, take your string ends inside the hole and out through the belly or chin of the frog. Pull on the string and cut as close as you can. When there are 2 strings left, knot those together and take them inside the frog also.
Arms and legs
For the arms make 3 square knots, With the middle string either backwards-forward or forward-backward knot on the string farthest away from the frog, make 3 more square knots.
For the back legs make 4 square knots, make one backward-forward or forward -backward on the string furthest away from the frog, and make 4 more square knots.
For the back legs make 4 square knots, make one backward-forward or forward -backward on the string furthest away from the frog, and make 4 more square knots.
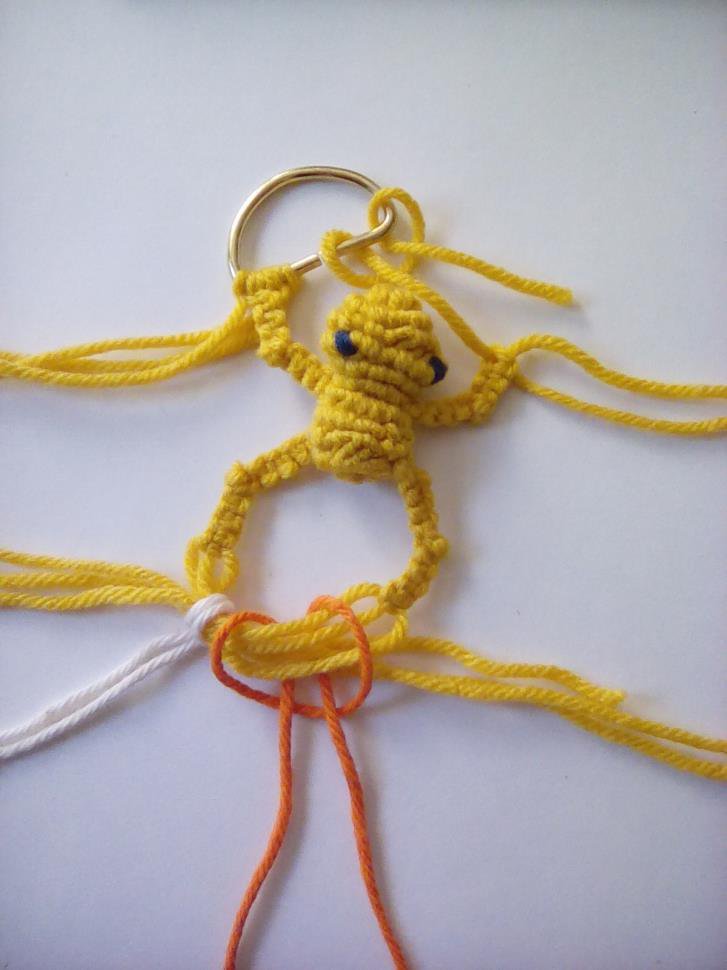
How to attach your frog to things
For keychain
With each individual string on each hand, make larks head knots on a keychain. Flip over to the backside and make a few knots just to make sure it doesn't come apart. Cut strings and add glue to secure. Cut and glue the strings coming out of the back legs.
To attach a bracelet
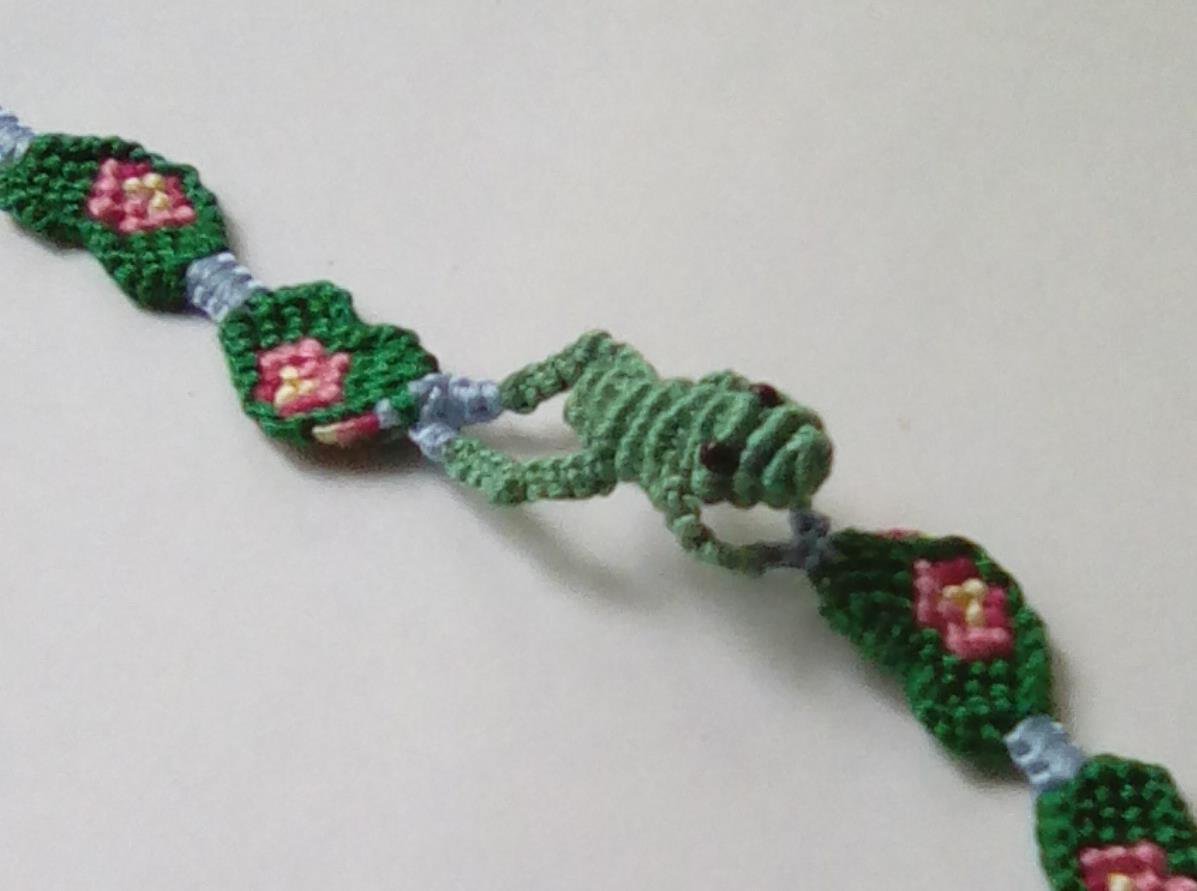
Take the string from the leg on the left side and place them to the right. Take the strings from the right leg and place them to the left so they overlap. Add strings for your bracelet to these 6 strings with larks head knots. After you finish your bracelet turn it over and make several knots with the frog colored strings. Trim and glue the frog colored strings to the back of your bracelet.
With each individual string on each hand, make larks head knots on a keychain. Flip over to the backside and make a few knots just to make sure it doesn't come apart. Cut strings and add glue to secure. Cut and glue the strings coming out of the back legs.
To attach a bracelet
Take the string from the leg on the left side and place them to the right. Take the strings from the right leg and place them to the left so they overlap. Add strings for your bracelet to these 6 strings with larks head knots. After you finish your bracelet turn it over and make several knots with the frog colored strings. Trim and glue the frog colored strings to the back of your bracelet.
How to make larks head with one string
This may be helpful in attaching your frog to a keychain.
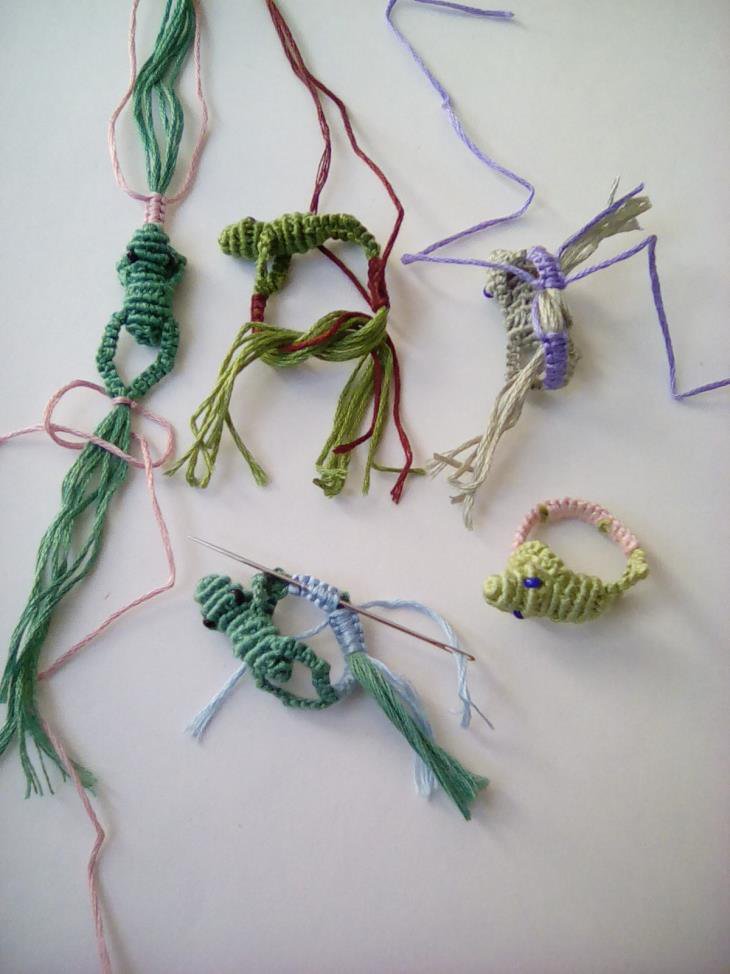
How to make frog rings
Cut 2 strings 18" For a small ring, make around 6 square knots over the 6 frog colored strings coming out from the front arms. Make 6 square knots over the 6 frog colored strings coming out from the back legs.
Hold back 2 of the square knot strings. Gather 6 strings from one side and 6 strings plus 2 square knot colored strings from the other side and tie them together in an overhand knot.
With the 2 square knot colored strings not included in the knot, make a square knot over all 14 strings. Try it on your finger and adjust the size by tugging on both ends of the frog colored strings until it's the size you want. Tightly make at least 6 or as many square knots as it takes to cover the frog colored strings while keeping both ends of the frog colored strings towards the inside of the ring.
Cut all the strings except the ones you've just used to make square knots. Sew the square knot ends on the inside underneath the square knots and
trim the ends.
Name your frog
Congratulations! 🥳 You have now finished this tutorial and hopefully you now have a cute little frog buddy. 🐸 The last step is to give your frog a name!