Rate Tutorial
Tools
- Your almost finished bracelet (This means a bracelet of your choosing only with the pattern portion completed. You will need plenty of string at the top and bottom of the bracelets so you can tie it to the buckle. The buckles will be used to finish your bracelet instead of finishing it with a basic loop, a twisted tie or a triangle end.)
- Buckle
- Scissors
- Nail Polish
- Binder Clip
- Clip Board
- Buckle
- Scissors
- Nail Polish
- Binder Clip
- Clip Board
Guide / Tutorial
FULL VIDEO EXPLANING EVERYTHING IN DETAIL (HIGHLY RECOMMENDED).
Note
The bracelet was started without triangle ends and without a loop. Please have plenty of string at the top.

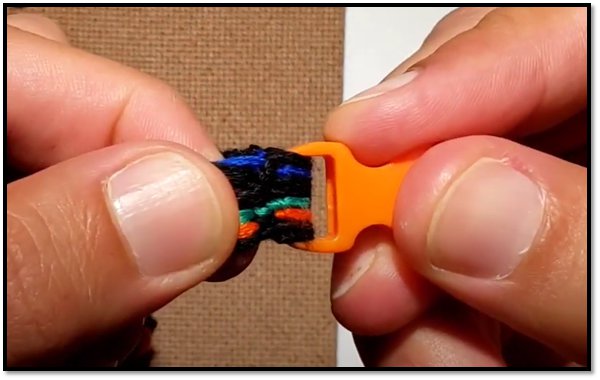
Step 1
Make your bracelet (sample is pattern #11). Leave enough left-over string on both sides. Use a clip to hold your almost finished bracelet against your board. Get your buckle. Have it all setup as shown on the photo.
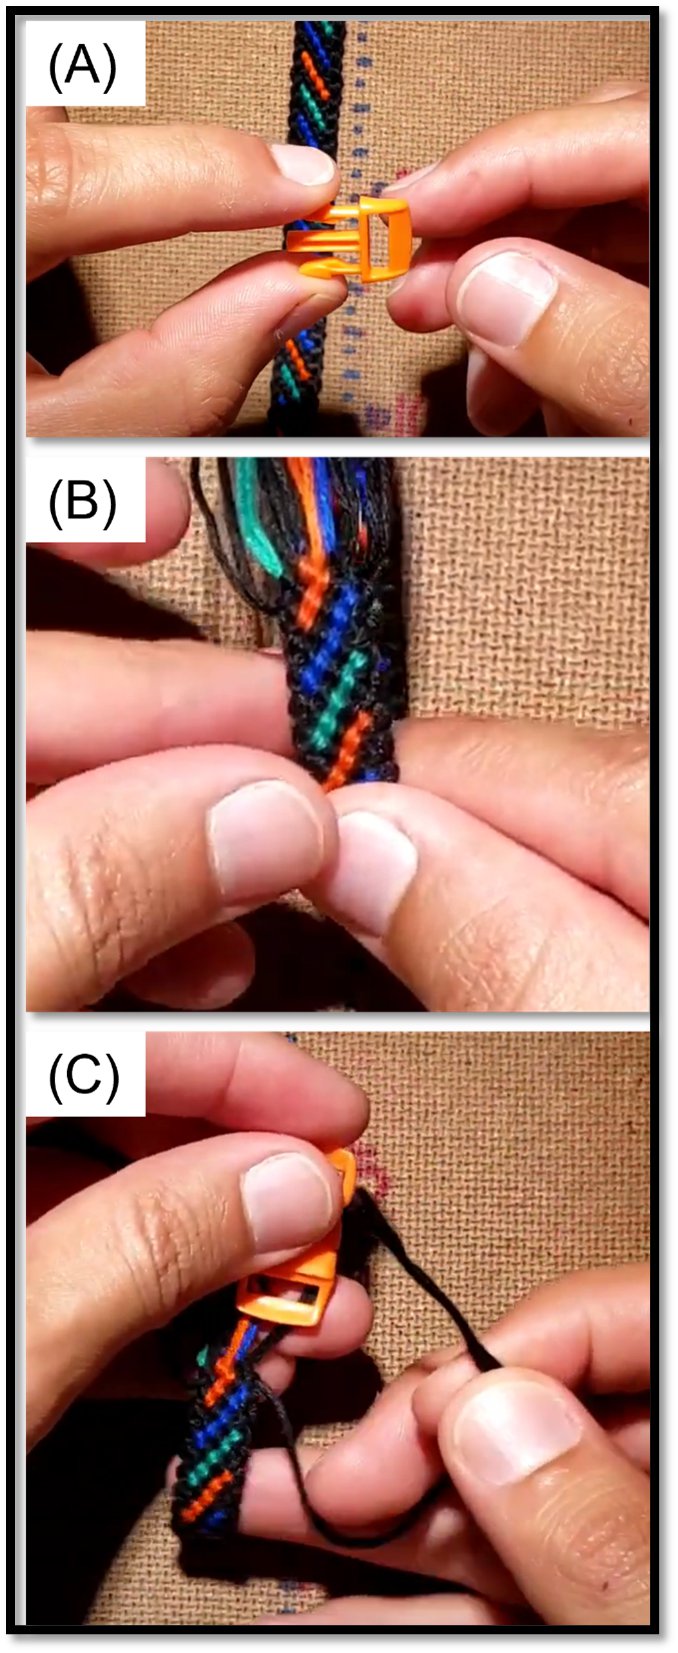
Step 2
Make sure you will first tie the smallest part of the buckle first (A). Fold and Flip bracelet up (B). Tie each of the strings to the smallest part of the buckle. If you are left-handed, start from right to left, if you are right-handed start left to right (C).

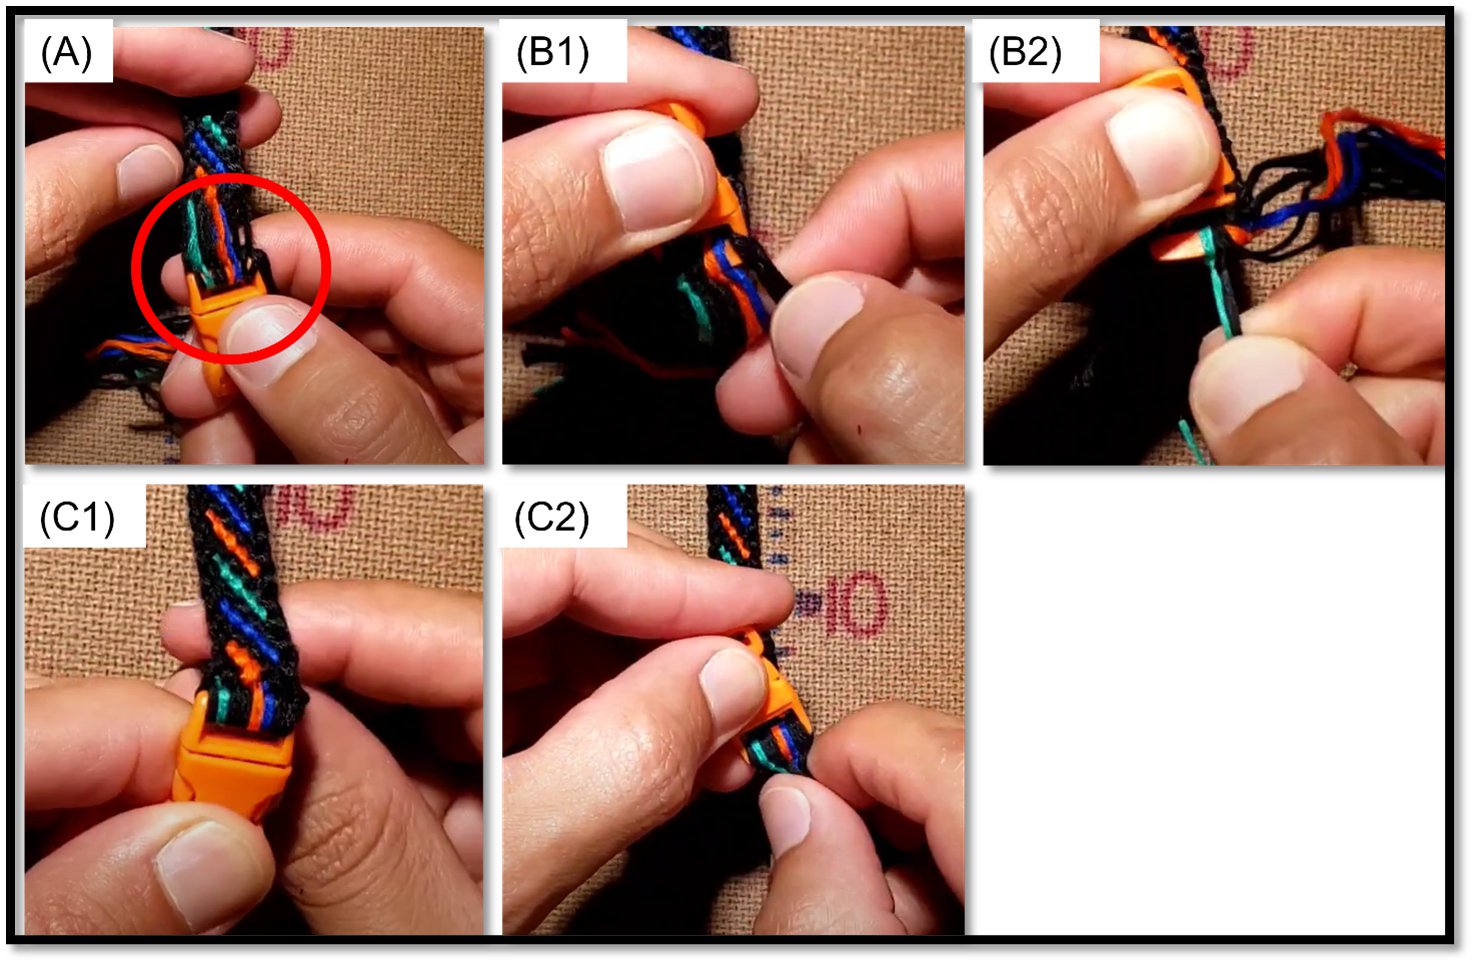
Step 3
For each string do the following. Pass the string inside the opening of the buckle (A). Go around the buckle, go under the string (B). Go over, then go inside (C1 and C2). Pull string down (D). Repeat for all strings until your reach the end, little by little they will start looking like this (E1 and E2). The knot shown below is a backward knot.
Step 4
After you are done with the step above, you will notice there is a gap or lose string between the buckle and the end of the pattern (A). Starting from one end, pick one or two strings and start pulling it, this will shorten the distance between the buckle and the end of the pattern. Repeat for each string, until you pull them all (B1 and B2). If you did it correctly, it will look like this at the end. It is a good idea to grab all the strings and give one last pull just to make sure it is tight and secure (C1 and C2).
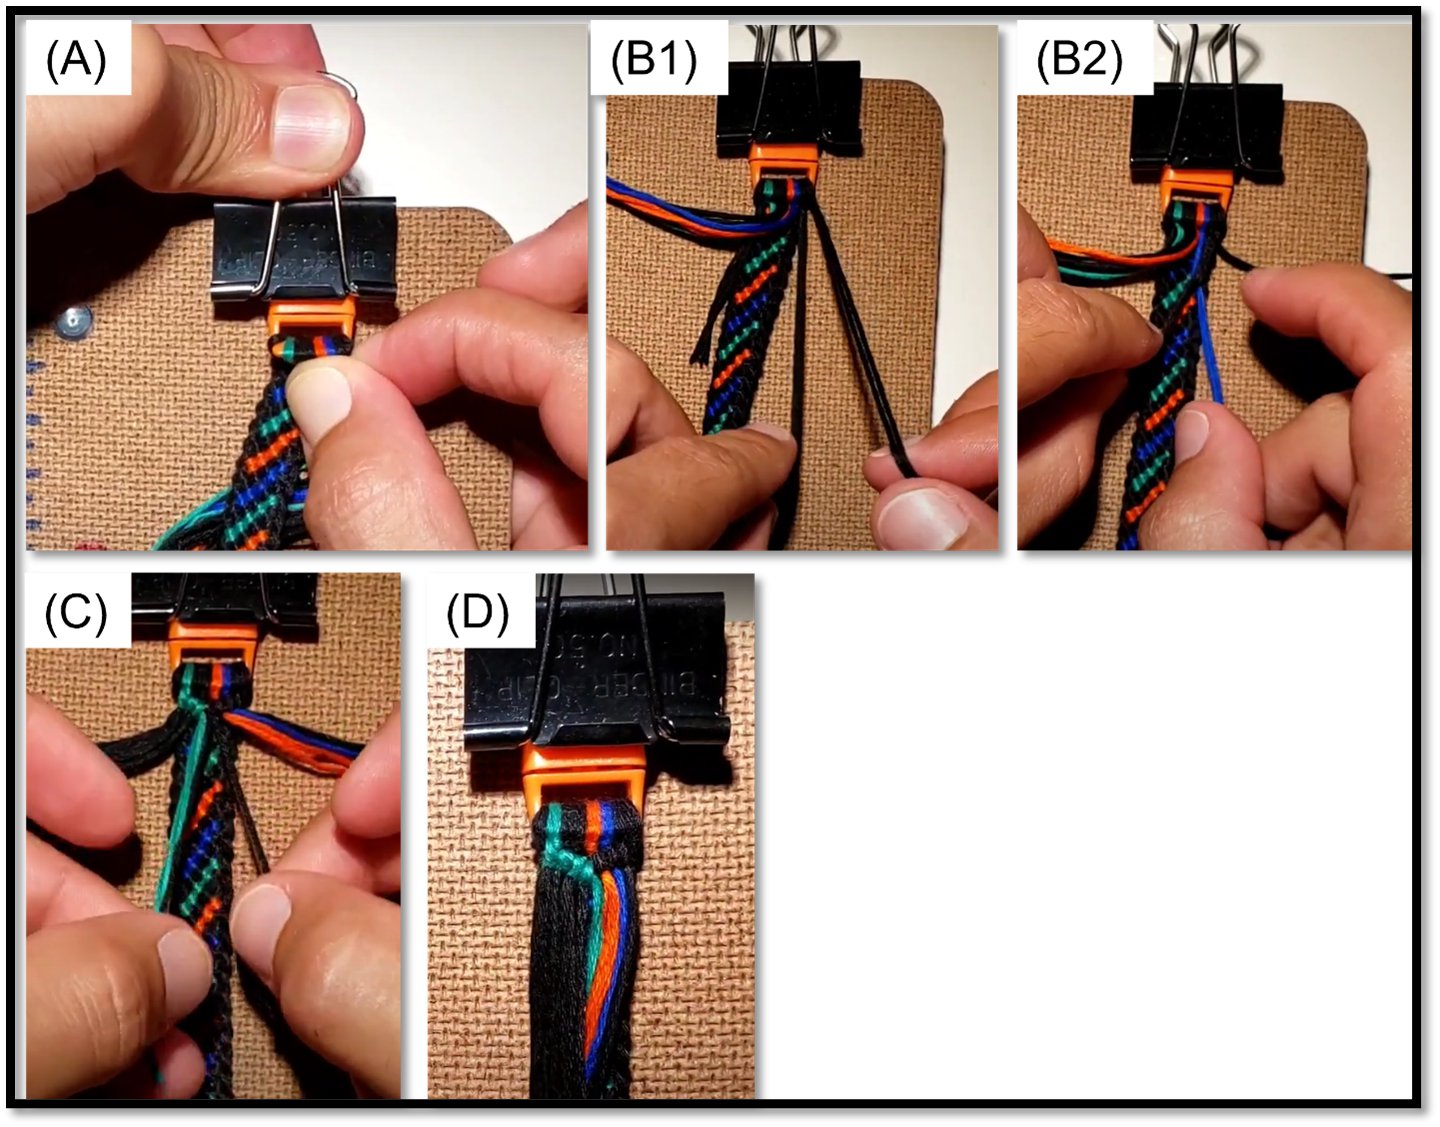
Step 5
Release the bracelet from the Binder Clip, Grab the end of the bracelet you just tied to the buckle and hold it against the clip board with your binder clip (A). Grab the string that is on the corner of the buckle and use it as your main string to tie all the rest of the strings to it, stop at the middle. I am starting from right to left, so tie them together with backward knots, one by one, using the same string from the corner. If you start from left to right, tie the strings using forward knots (B1 and B2). Tie the two main strings together that are now in the middle. Use a forward or backward knot, it doesn’t matter (C). Now one of your ends should look like this (D).
Step 6
Unbuckle the other end of the buckle and repeat STEPS 1 – 5. You should have your other end of your bracelet tied to the buckle.
Step 7
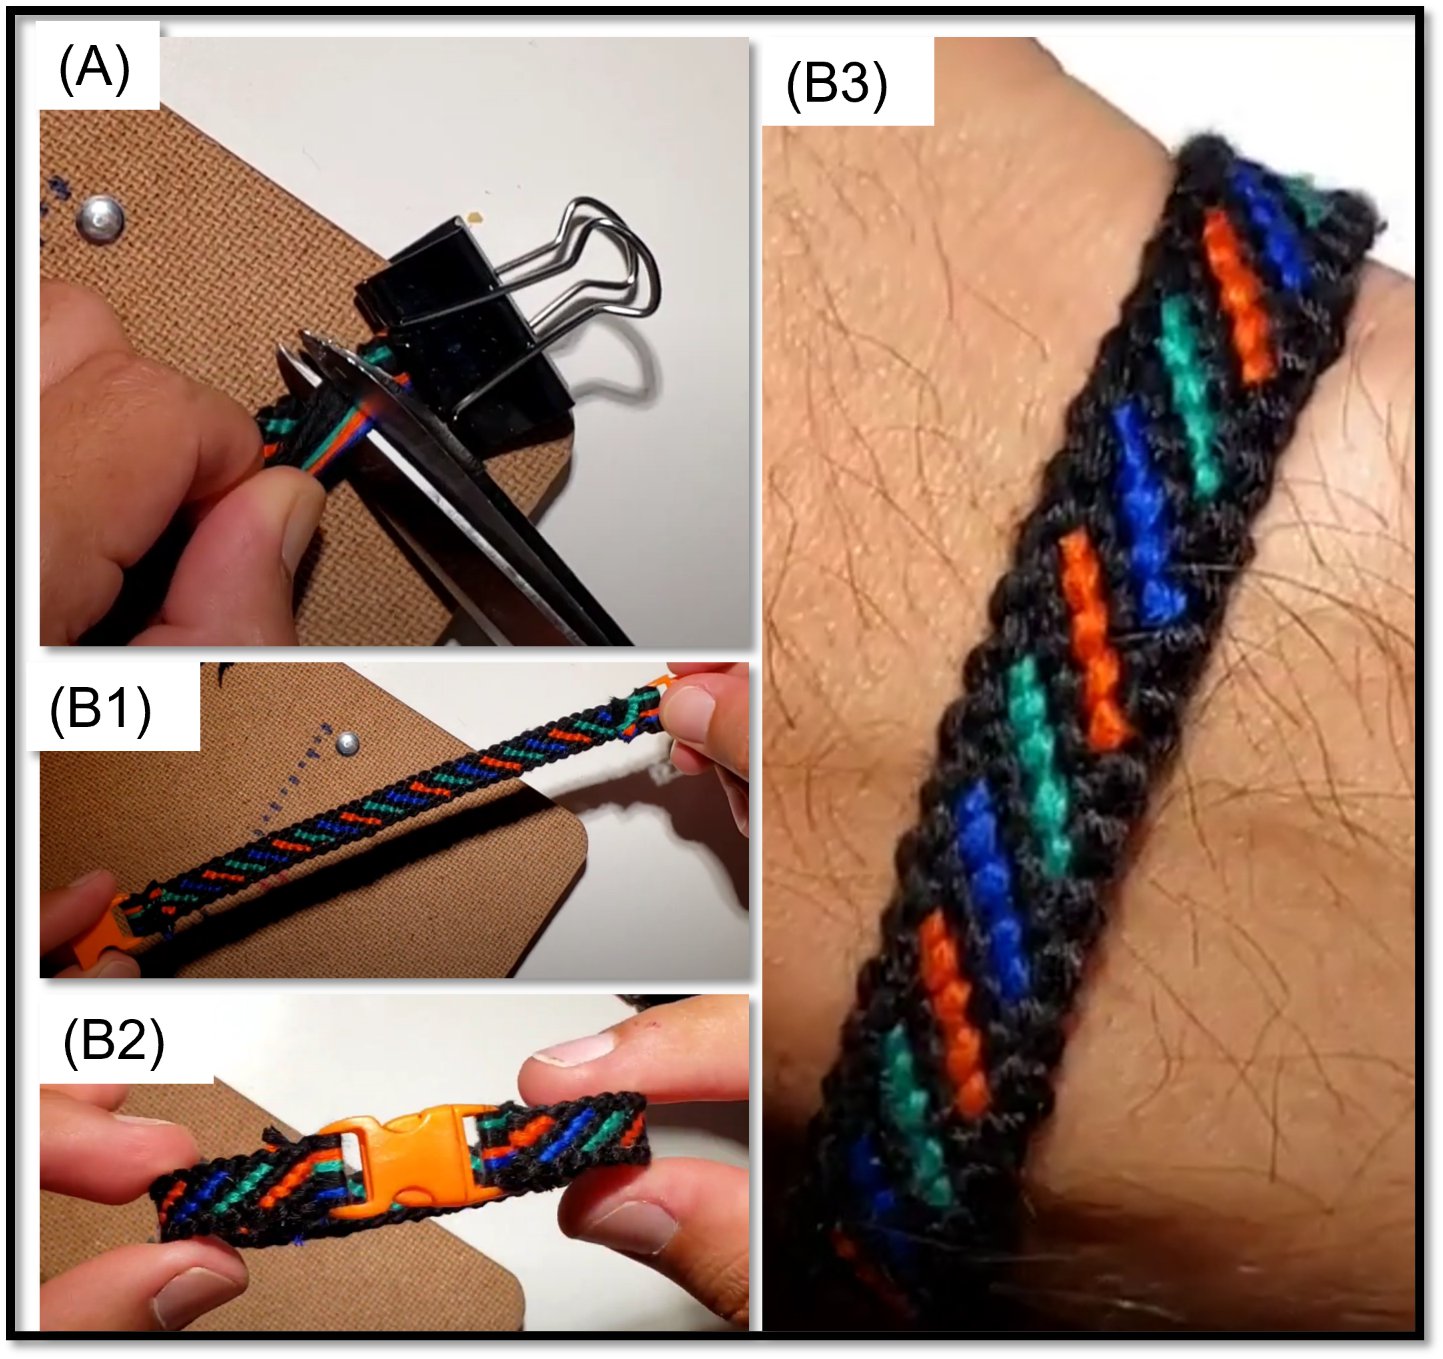
Cut the left-over string for both ends of the bracelet (A). For some of you this is the last step, the buckles are secured to the bracelet, and you are ready to use it (B1, B2 and B3).
Step 8
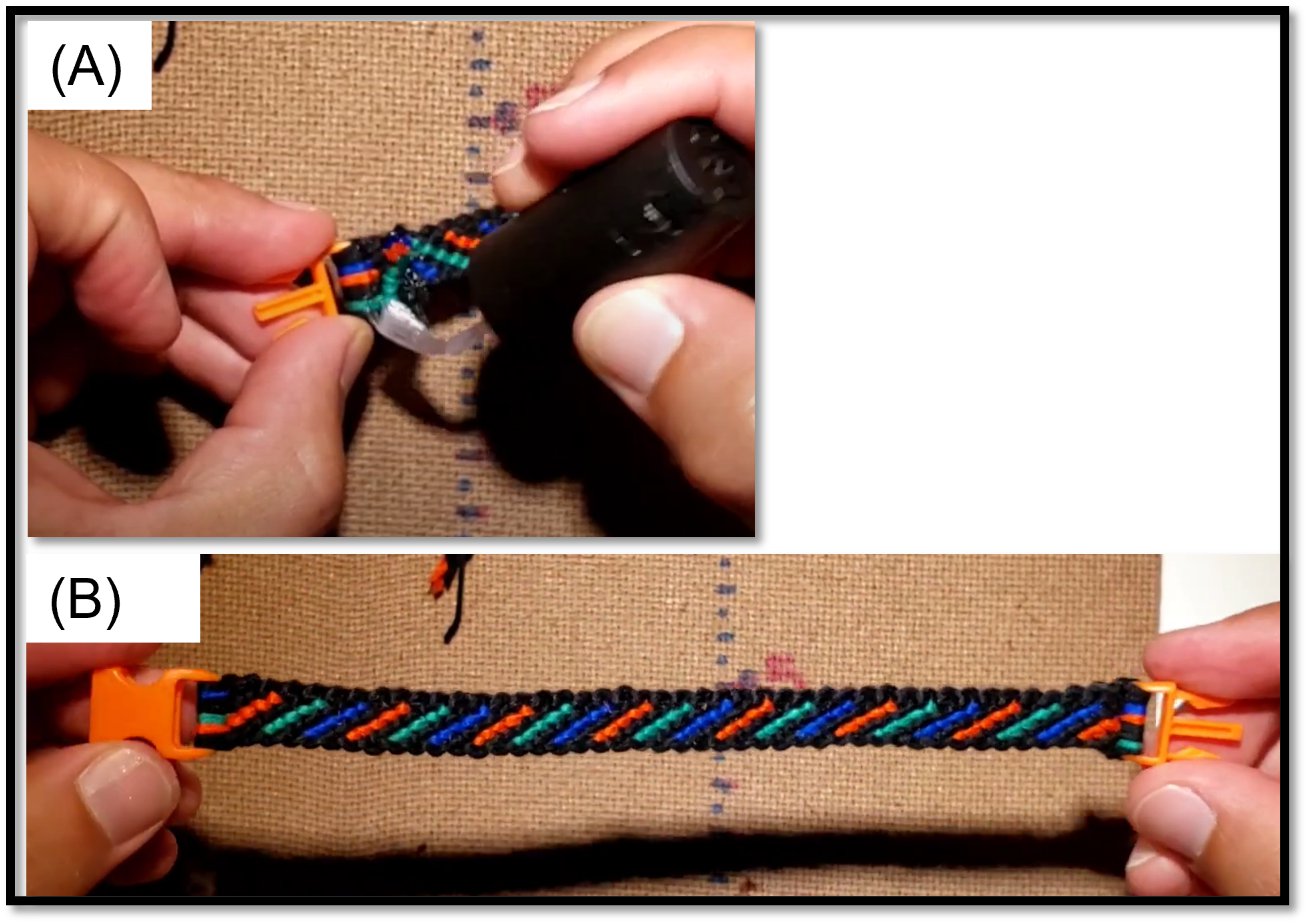
If you want, you can also apply nail polish to each end of your bracelet. This holds the strings together and might lower the chances of a string getting lose (A). Once it is dry, you should be done with your bracelet (B).