Rate Tutorial
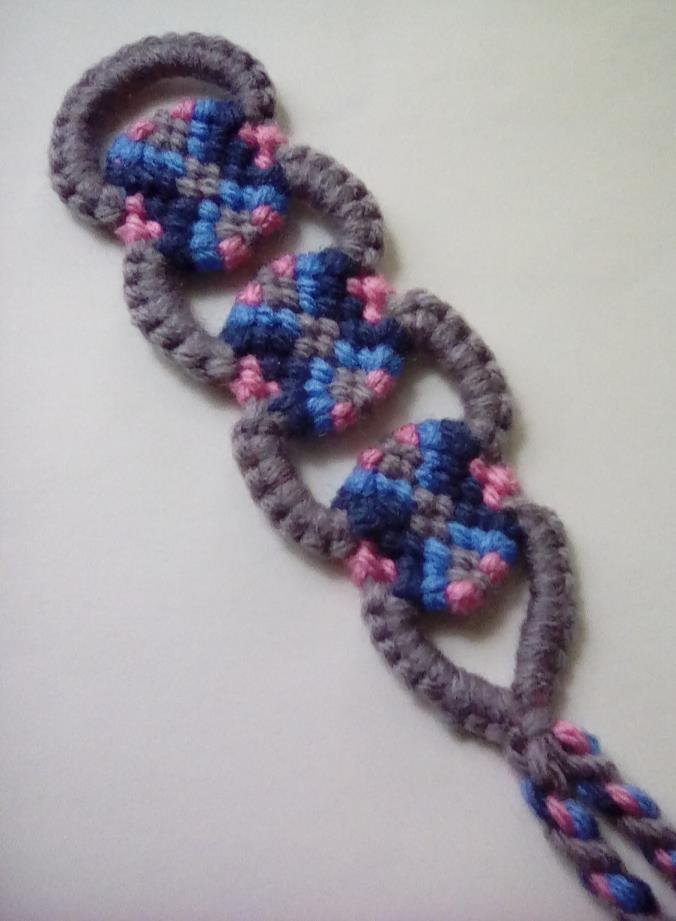
In this tutorial I will show you how to shape by shaping upwards and hiding all the strings in the outside chains. If this is your first shaped pattern, this is not the tutorial you are looking for. You should definitely be familiar with normal shaping before attempting this.
This is a variation of pattern #128493 By @bennobee.
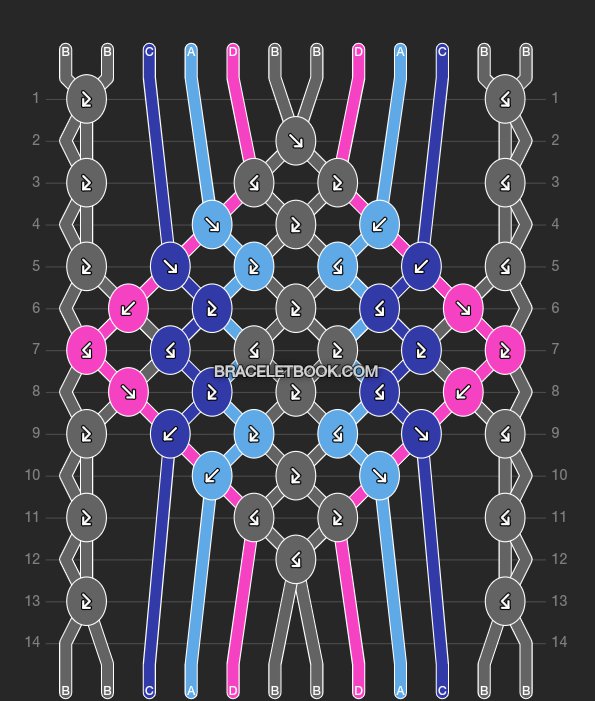
Cut 5 strings.... I don't like to measure things so stretching your arms out and measuring fingertip to fingertip usually works, except you may need a little extra for these types of bracelets. or 64"
Cut the string that makes all the chains and the loop twice as long. or 128"
Feel free to use different colors.
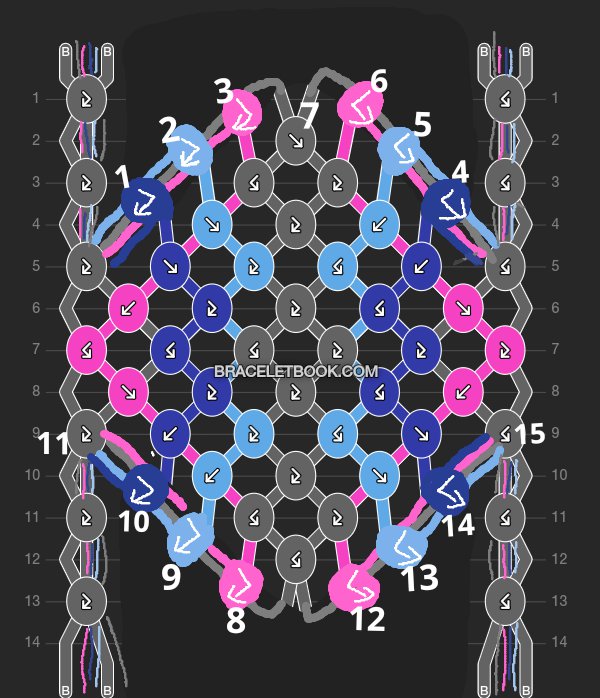
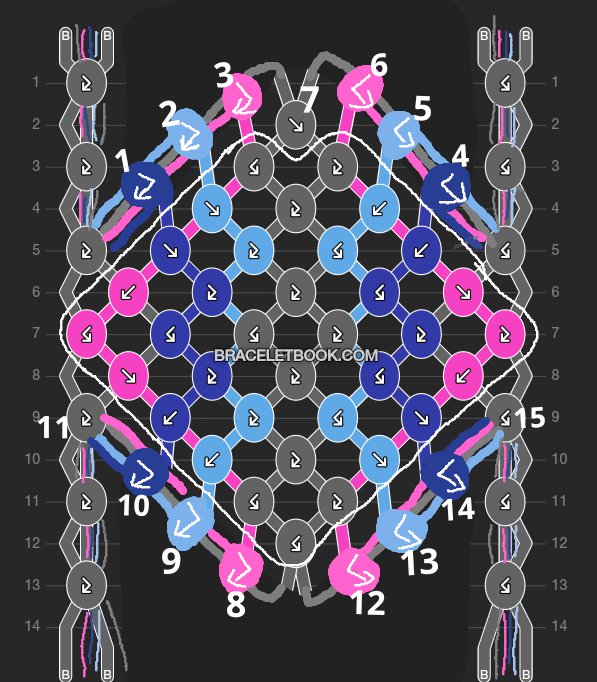
Here is the same pattern with the knots we are going to add and numbers to show the order that you make them.
Notice I used the existing strings coming out the pattern to let me know which color knot to make.
Notice I used the existing strings coming out the pattern to let me know which color knot to make.
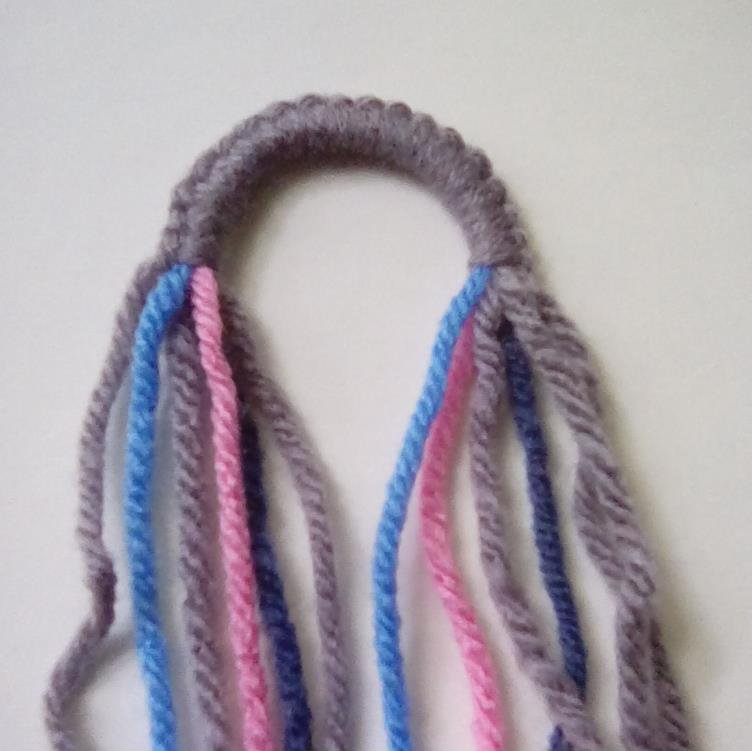
Step 1
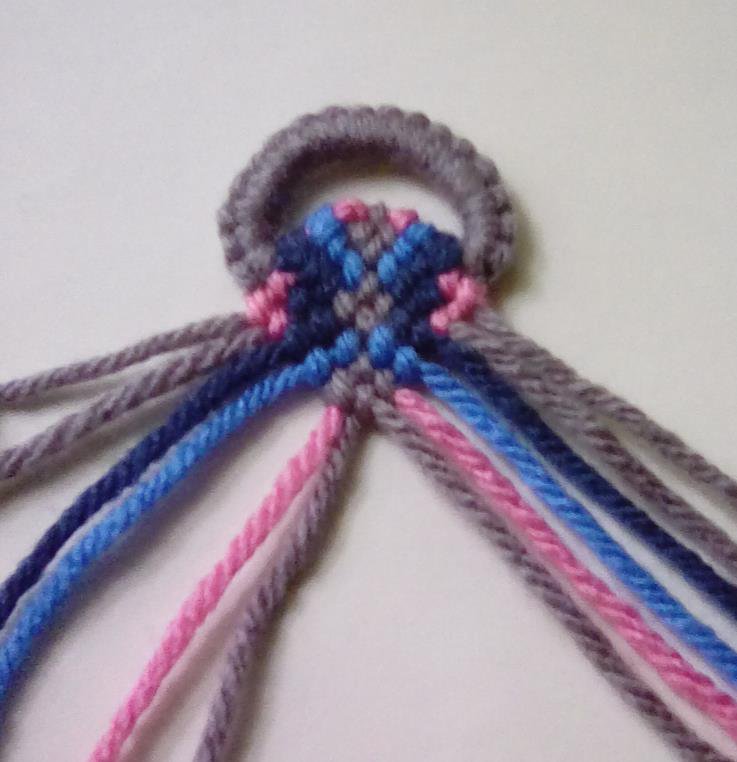
Make a loop with 18 knots.
Now all the strings are inside the loop so we need to spread them out and shape them so they are in the correct position to knot the pattern.
Now all the strings are inside the loop so we need to spread them out and shape them so they are in the correct position to knot the pattern.
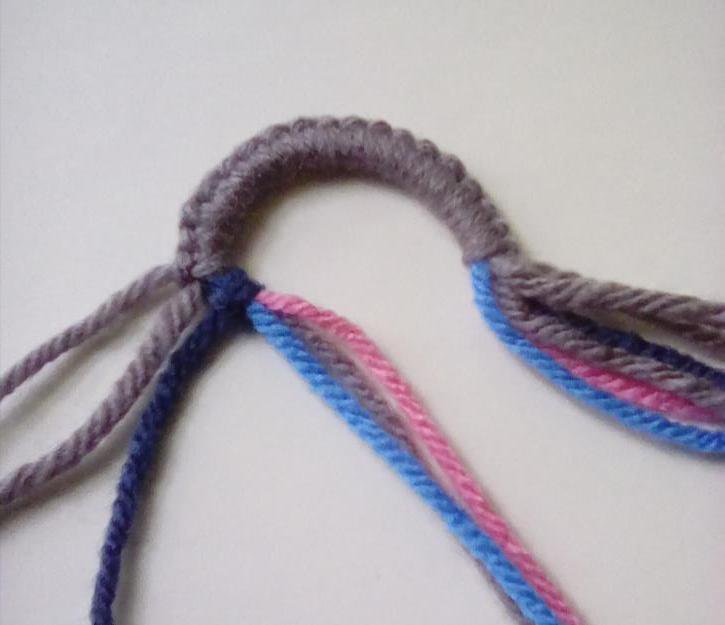
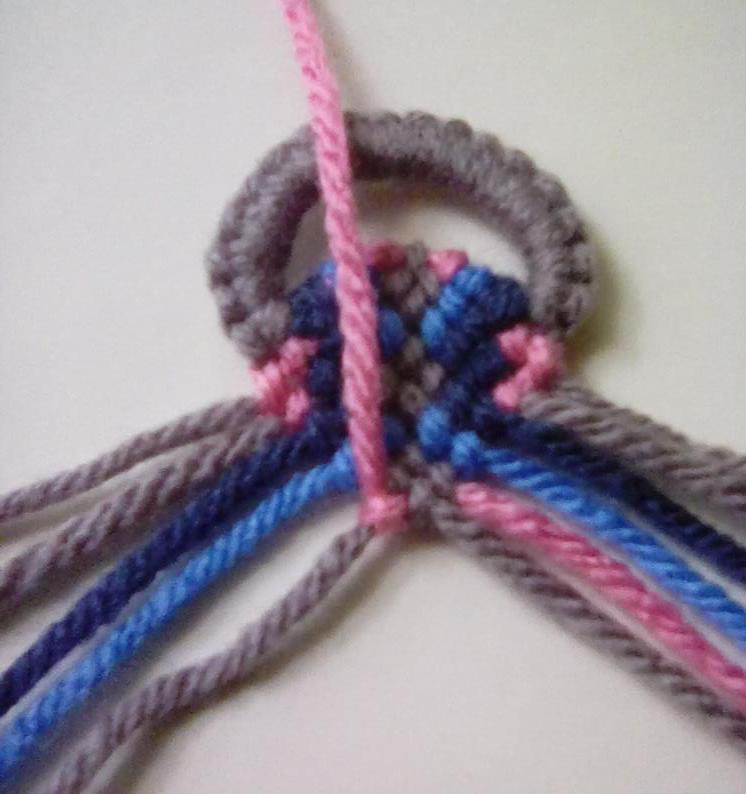
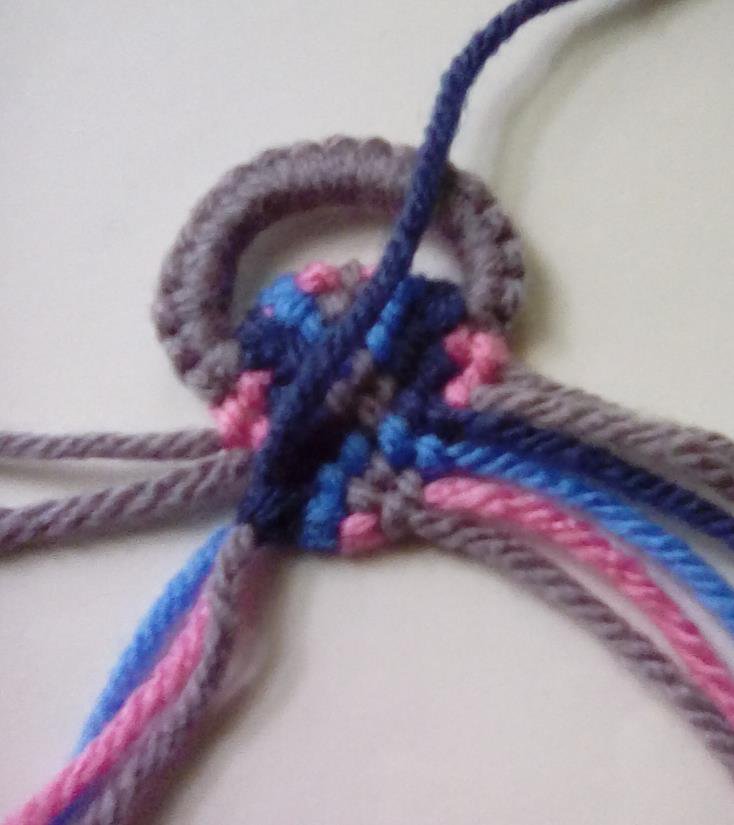
Step 2 - shape the top
On the left side set aside 2 grey strings, one that you used to make the loop and one inside the loop.
( I feel like the chains take up the space of 1 knot so i like to leave 1 string unshaped inside the chains. Feel free to shape that grey string too, just know that if you do it will push your chains up and out more and you will need to add maybe 2 more knots to the chains. )
Make a dark blue forward-backwards knot onto a bundle of 1 grey, 1 light blue, and 1 pink.
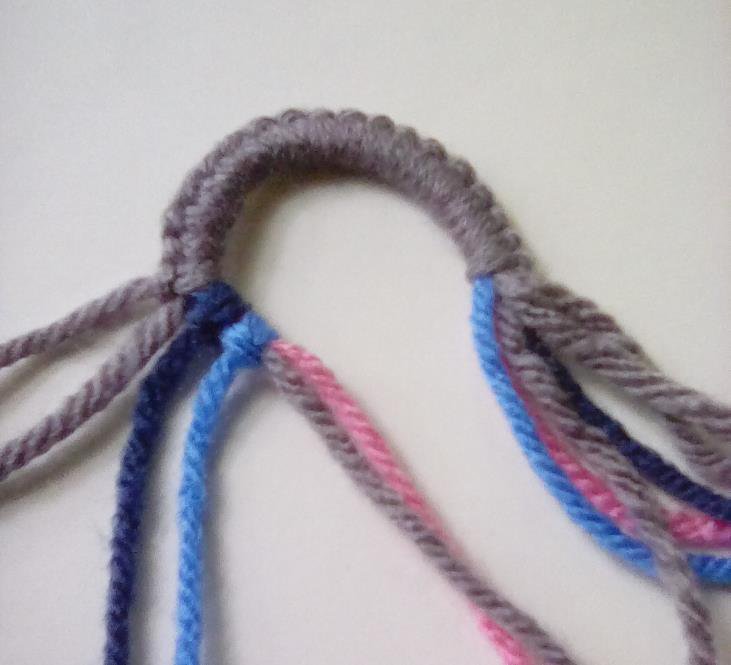
With light blue make a forward-backwards knot onto a bundle of 1 grey and 1 pink.
With pink make a forwards-backwards knot onto grey string.
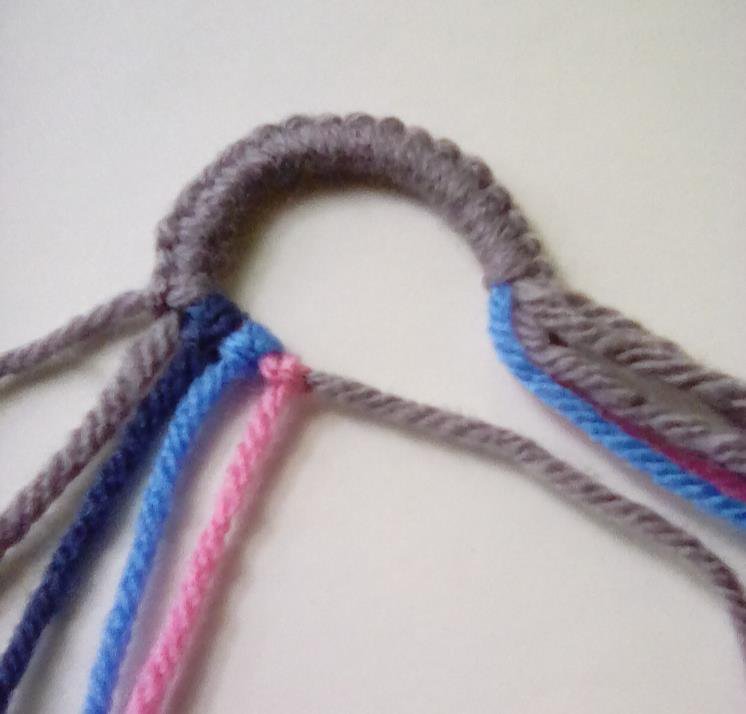
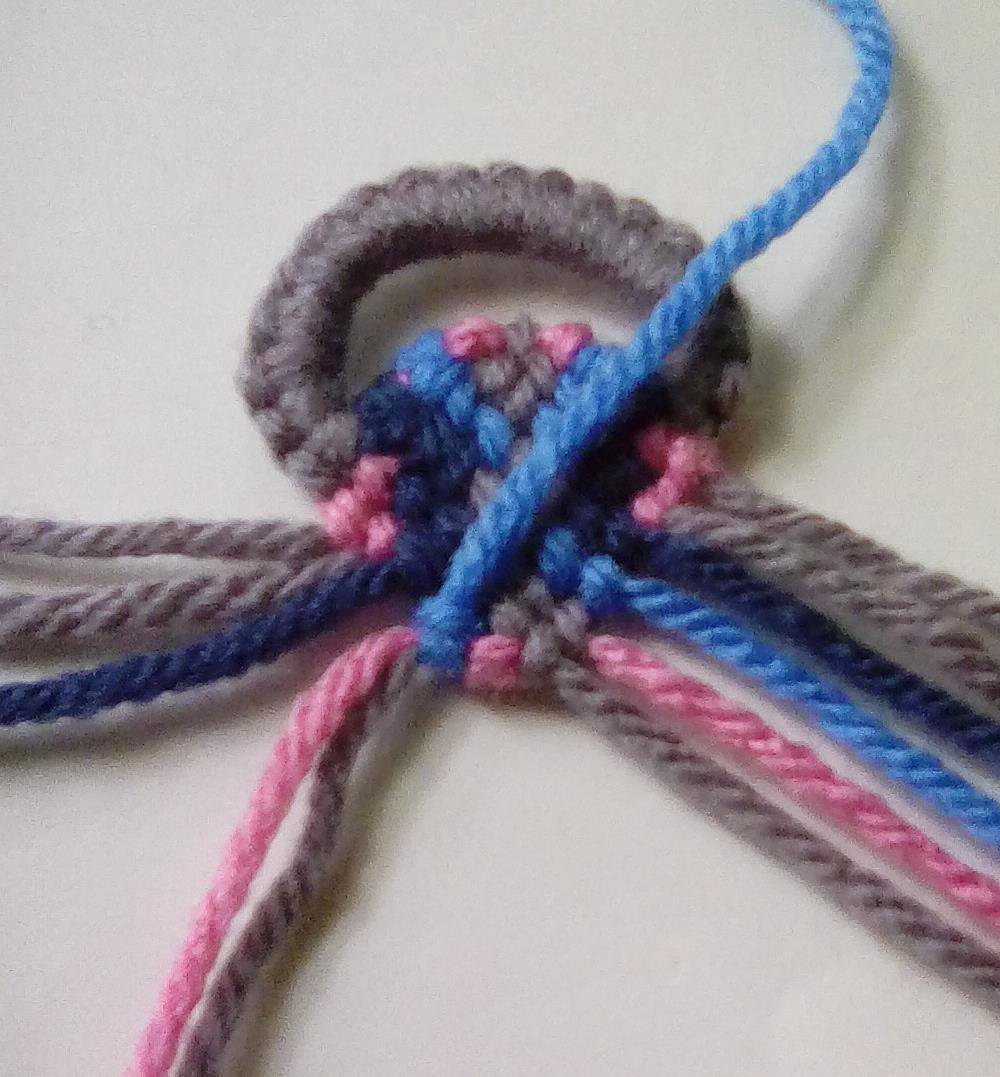
Now shape the right side the same way using backward-forward knots.
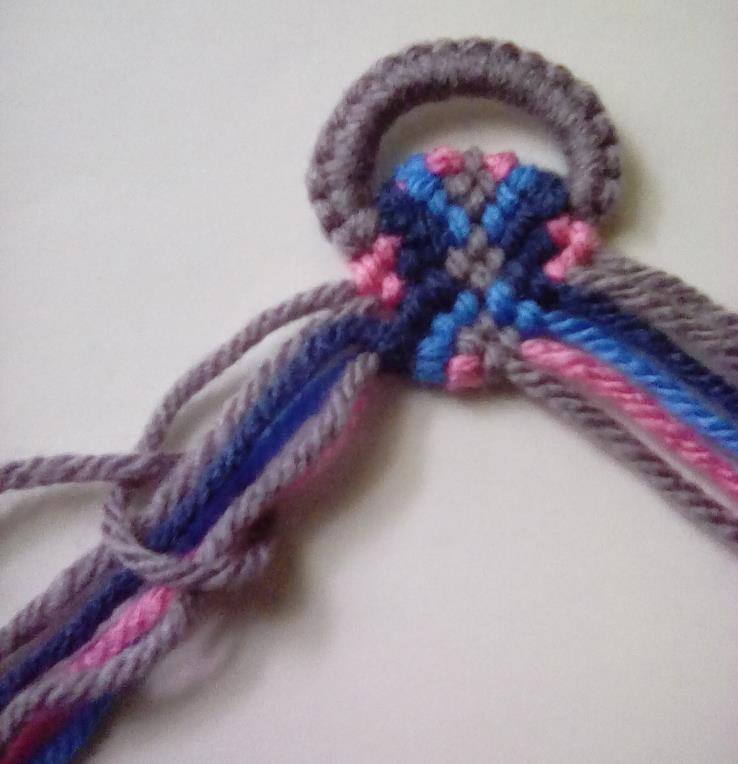
Connect both sides by tying the two grey strings together. This counts as the first knot in the diamond.
Connect both sides by tying the two grey strings together. This counts as the first knot in the diamond.
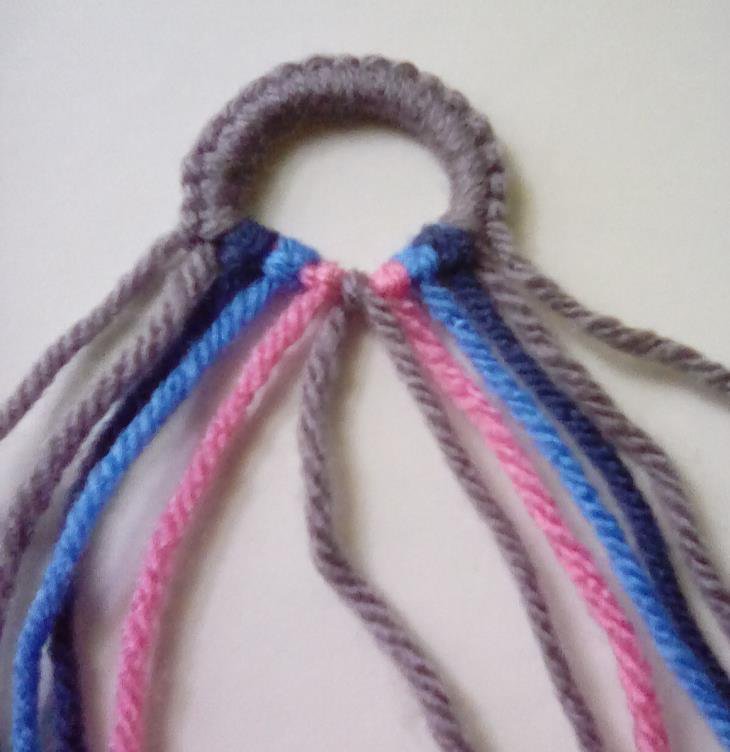
Step 3 - knot the diamond
Now you're ready to make the rest of the knots in the diamond shape. Remember you've already made the first knot at the top of the diamond so continue following the pattern.
As you start to knot, the bracelet tends to curl under so try and keep your knots consistantly tight. It straightens out as you make more knots.
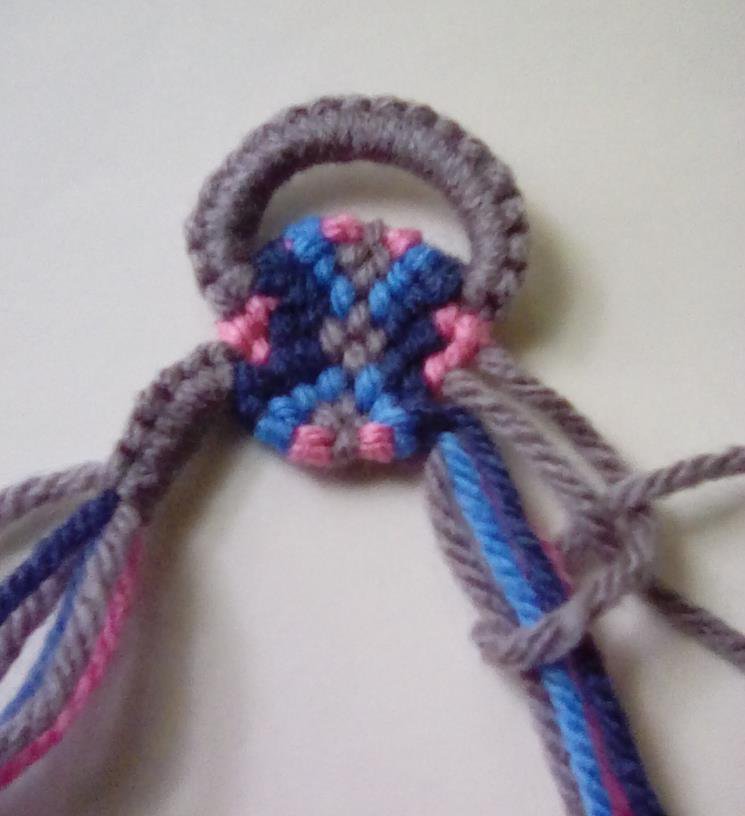
Step 4 - shape the bottom
Shape the bottom left side of the diamond. Make these knots tight and pull the string upwards.
With pink make a forward-backwards knot onto the grey string.
With pink make a forward-backwards knot onto the grey string.
With light blue forward-backwards knot onto the bundle of pink and grey strings.
With dark blue forward-backwards onto bundle of 1 grey 1 pink and 1 light blue.
Bundle all your strings together except the string on the far left. ( Yes I skipped shaping a grey string because that's where the chain goes. If you decided to shape this string at the top you can shape it again here. ).
With the string on the far left forward-backwards knot over all the strings.
Shape the right side the same way, from the center to the outside only using backward-forwards knots.
With the string on the far left forward-backwards knot over all the strings.
Shape the right side the same way, from the center to the outside only using backward-forwards knots.
Step 5 - chains
Make chains of forward-backwards knots on the left, and backwards-forwards knots on the right. I made 7 knots on each side but you can do more knots if you want more space between your diamonds.
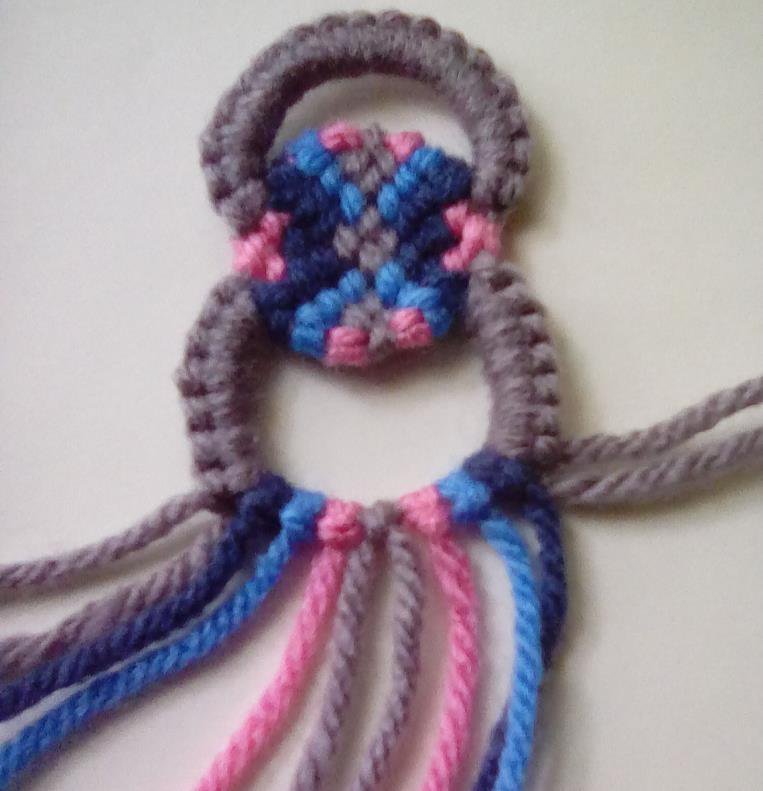
Repeat!
Now you're done and can repeat from step 2 until your bracelet is as long as you like!
I like to end by making chains, then connect both chains with a few knots over all the strings and make ties.
I like to end by making chains, then connect both chains with a few knots over all the strings and make ties.
Other patterns
This technique can be used for other patterns as long as there is enough space to add the extra knots. It will work for just about any diamond shape. It's not necessary to have the chains visible in the pattern.
For larger patterns you will need to add more knots to your loop and chains. How many knots for the chains? You can just add knots until it looks like the halfway point of where you want the chain, then double it. How many knots for the loop? Take the number of strings in the pattern and add at least 6.
For larger patterns you will need to add more knots to your loop and chains. How many knots for the chains? You can just add knots until it looks like the halfway point of where you want the chain, then double it. How many knots for the loop? Take the number of strings in the pattern and add at least 6.
Hope you liked this tutorial. I think it makes a really cool and different kind of shape.
Feel free to ask any questions or message me @goldflower.
Feel free to ask any questions or message me @goldflower.