Rate Tutorial
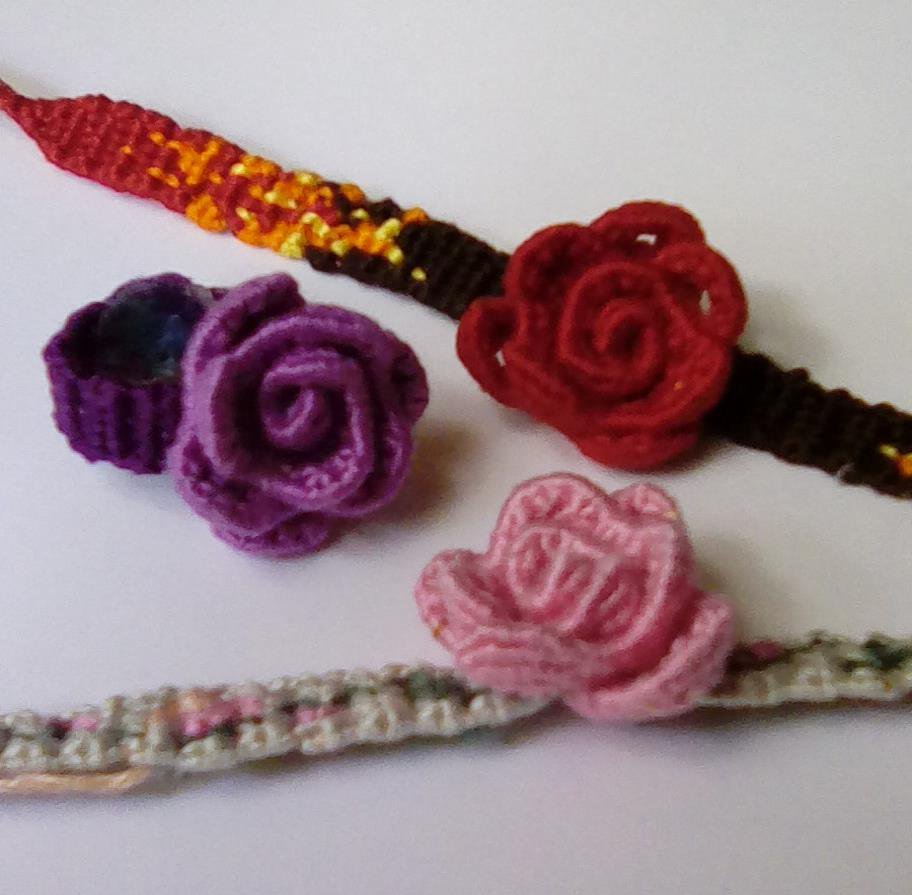
Hi! I'm @goldflower and I'm going to show you how to make a 3-D rose pattern #105435 Its not too difficult but I would recommend this only for advanced bracelet makers. It may be easier if you have made a shaped alpha before. This pattern uses two kinds of shaping. Shaped alpha technique on the right side to form the petals, and skipping knots on the left side to make it curve into a spiral. I also used FB and BF knots on the edges.
Preparing the base strings
You use the same 6 strings to make the rose and bracelet. Some of the base string color may peek through so pick colors that aren't too different. It should be fine as long as you don't try to make a black rose with white base strings. Cut 6 strings approximately 25" or add 9" to however long you usually cut your base strings for alphas with ties at both ends. Fold your strings in half and Measure 4 1/2" back from the center point to find the starting point for the rose. Unfold and tape or secure your base strings.
How to make shaped alphas
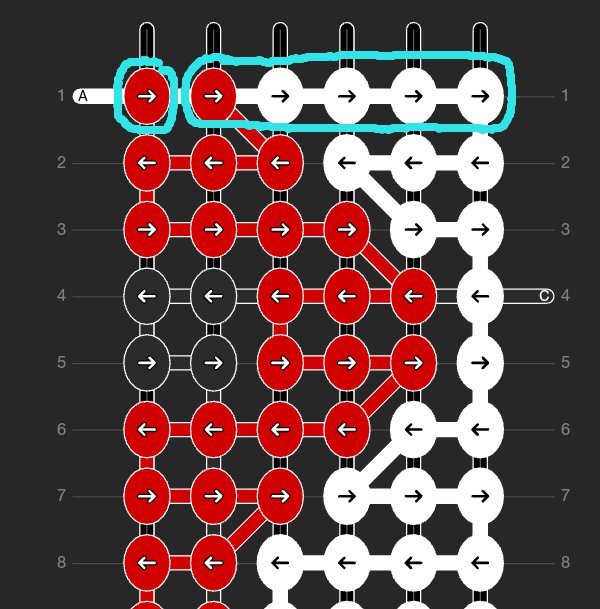
In a shaped alpha you make 1 knot over several base strings to change the width. Look at your pattern, the background should be a different color, in this pattern it's white. You don't want any white knots in your bracelet so on each row you add all the base strings from the white knots that you don't make to the red knot that is next to it. For example in row 1 make 1 F knot on 1 string then make 1 F knot on 5 strings. If you are unsure how many base strings to make the knot on its always the number of background (white) knots in that row +1. Some patterns are shaped on both sides, in that case just count the background knots and have 2 bundles, one on each side (this pattern is only shaped this way on one side).
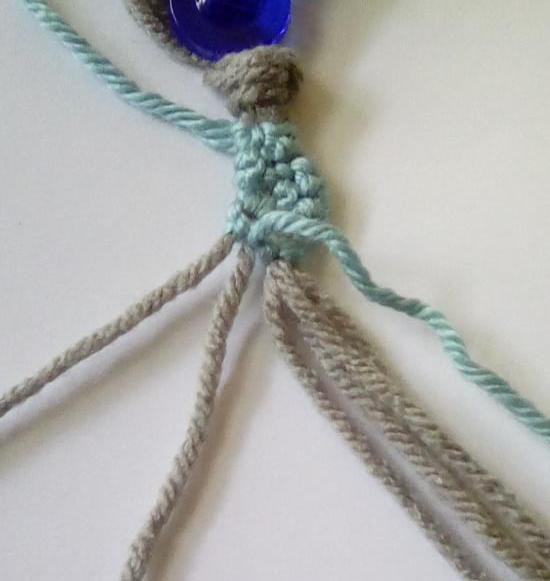
Step 1 row 1
In row 1 there are only 2 knots but 6 base strings so F knot over the first string, now for the last knot in the row take all the extra strings and bundle them together. treat this like one string and FB knot over the whole bundle.
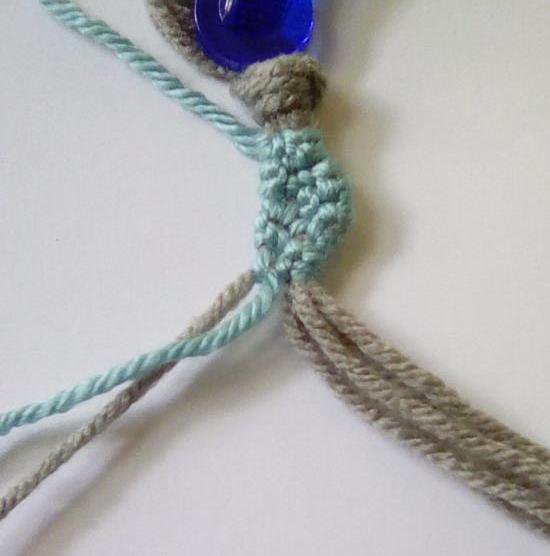
Step 2 row 2
Now row 2 has 3 knots so take one string out of the bundle of 5. FB knot over bundle of 4 strings, B knot over the string you just took out, BF knot over the first string.
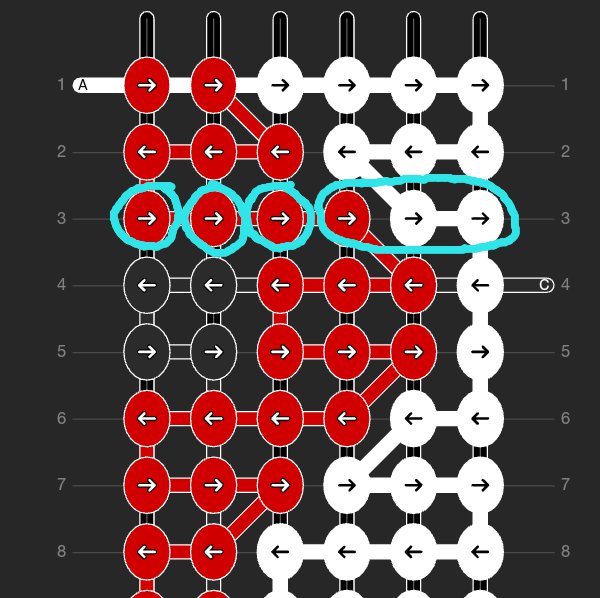
Step 3 row 3
BF knot, F knot, take one string out of the bundle of 4 and F knot over it, FB over the bundle of 3 strings.
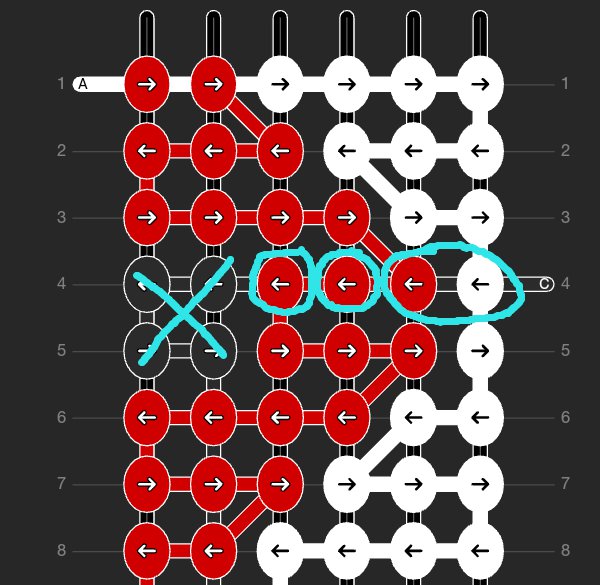
Step 4 row 4 black knots
Now row 4 has black knots but there are no black knots in the pattern so you need to just ignore those and only follow the red knots. Take one string out from the bundle of 3 strings.FB over the bundle of 2, B knot over the string you just took out, BF over the next string. That is the last knot in this row. DO NOT make any knots at all where the black knots are, those strings are left loose.
Step 5 row 5
There should be 2 strings on the left from the last row that you left unfinished. Continue following the red arrows on the pattern F knot, F knot, FB over bundle of 2 strings.
Step 6 row 6
Add a string back to the bundle so it has 3 strings. FB over bundle of 3, B knot, B knot over the next string that you left loose from row 4, BF over the first string, push the last two knots up tightly so there is no gap.
Step 7 row 7
BF knot, F knot, add the next string to the bundle and FB over all 4 strings.
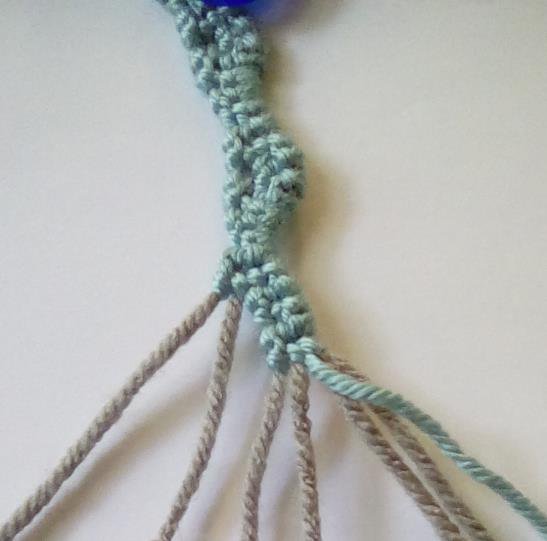
Step 8 row 8
Add one string to the bundle FB over bundle of 5 strings, BF over last string. First petal is finished, repeat the steps to make a total of 3 small petals.
Step 9 medium petal
The medium petal is made the same as the small petal except there are 2 more rows where you skip the black knots.

Step 10
Make sure not to leave a space. Push your knots up to close the gap.
Step 11 large petal
Repeat steps 1-3. Row 58 FB over bundle of 2 strings, B knot, BF knot. DO NOT make black knots, leave those strings loose. Row 59 with 2 strings left loose on the left side F knot, F knot take 1 string out of the bundle of 2 and F knot on it, FB knot.
Step 12
Row 60 FB knot, B knot, BF knot. where the black knots are don't make any knots leave 3 strings loose. Row 61 BF knot, F knot, FB knot.
Step 13
Row 62 FB knot, B knot, B knot, BF knot on the third string that you left loose. Push the knot up to close the gap. Leave the first two strings loose. Row 63 BF knot, F knot, add 1 string to bundle and FB knot over bundle of 2 base strings.

Step 14
Row 64 Add a string to the bundle and FB knot over bundle of 3 strings, B knot, B knot over the second string you left loose, B knot over the first string you left loose. Try to push these last 2 knots up to close the gap. Repeat steps 7-8. Continue following the pattern making a total of 4 large petals.

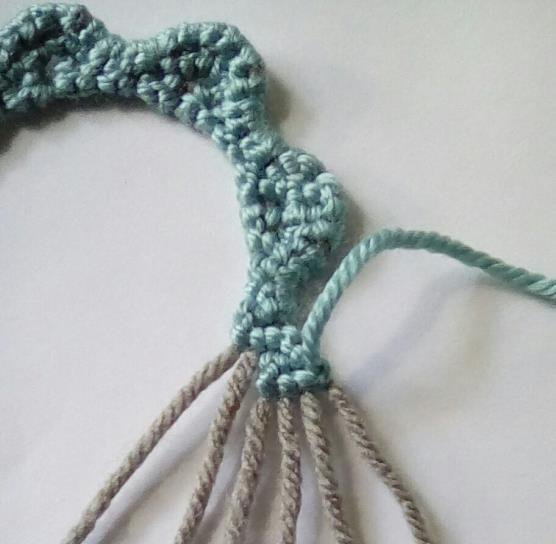
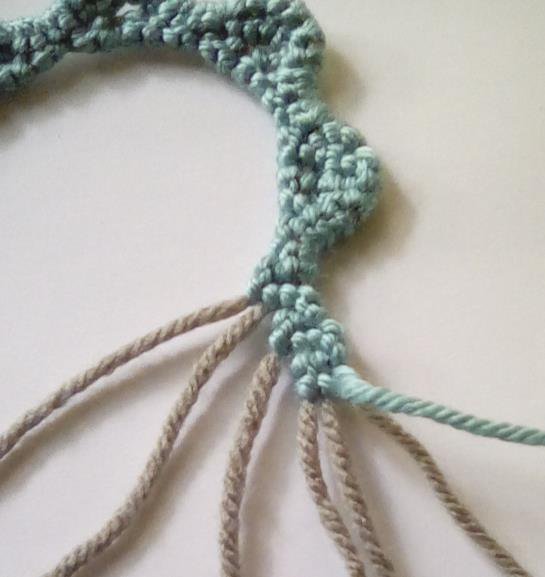
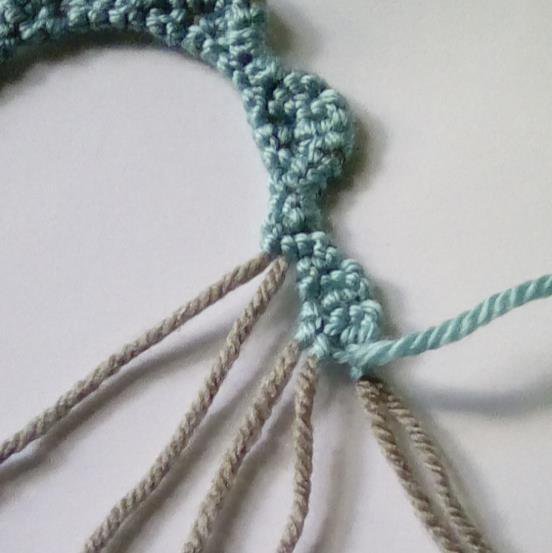
Step 15
BF knot over all the strings 4 times. As you make the medium and large petals the rose should start to form a spiral shape. DO NOT try to keep your bracelet straight.
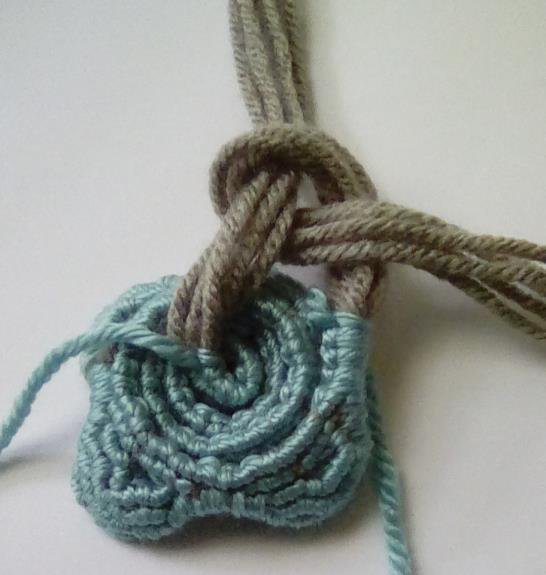
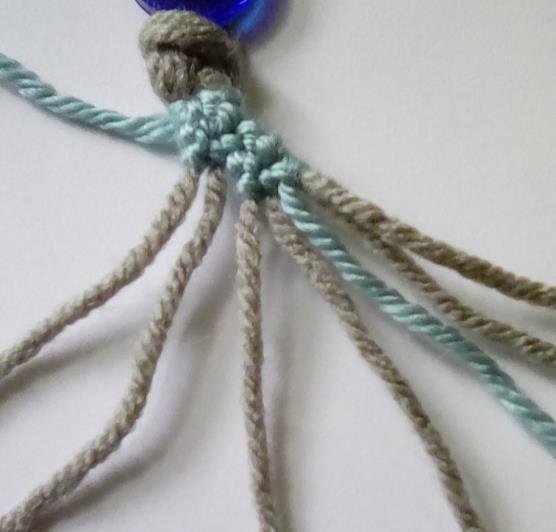
Step 16
Starting with the small petals in the center, tightly roll up your rose lining up the flat edge. Take the base strings from the begining and end and tie one big overhand knot. Don't tie your knot too tight or you may distort your rose. Make sure you like the way it looks before you start the bracelet part.
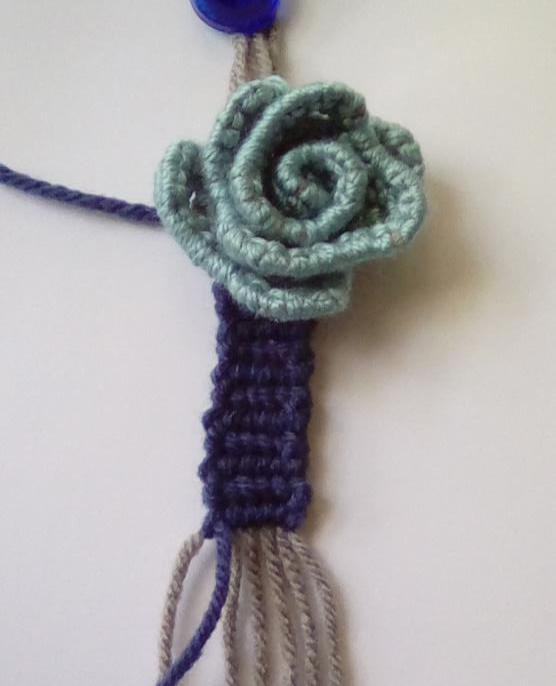
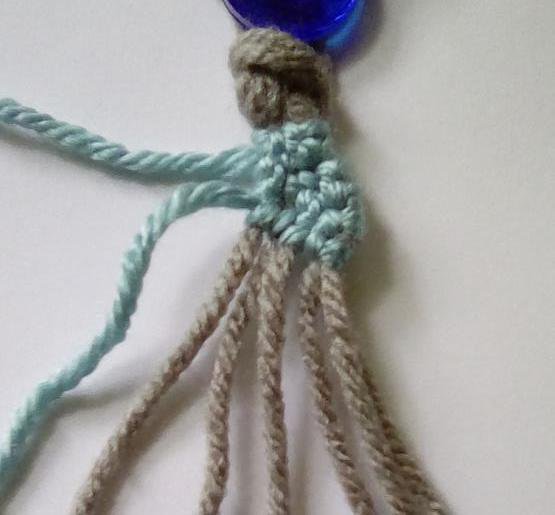
You are now ready to start your bracelet!
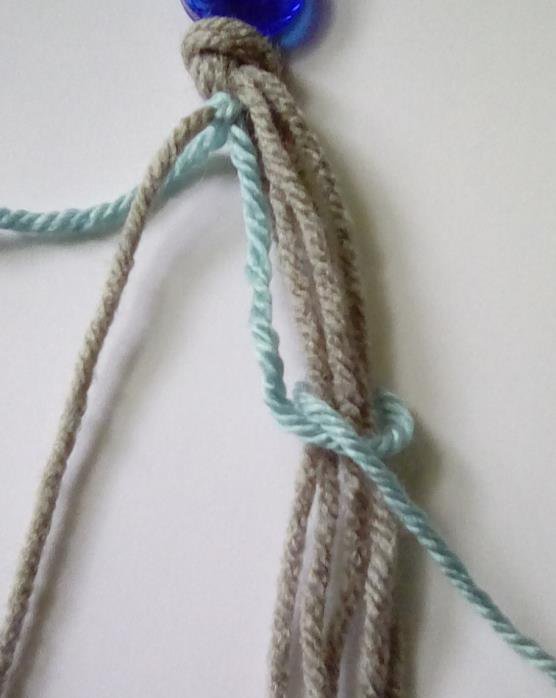
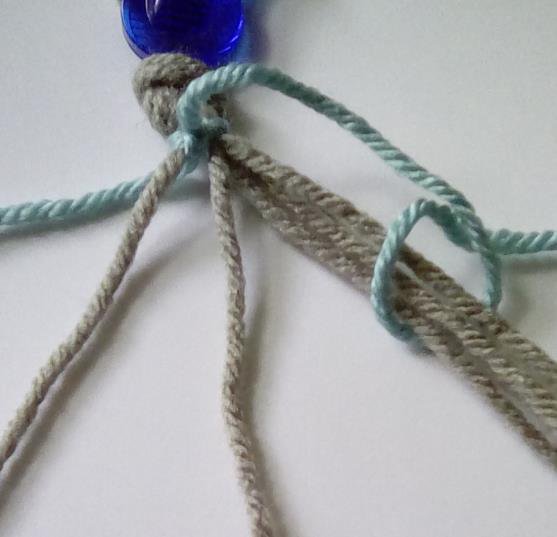
Starting from the rose, make half of your bracelet on the same 6 base strings from your rose that you just used to tie a knot.
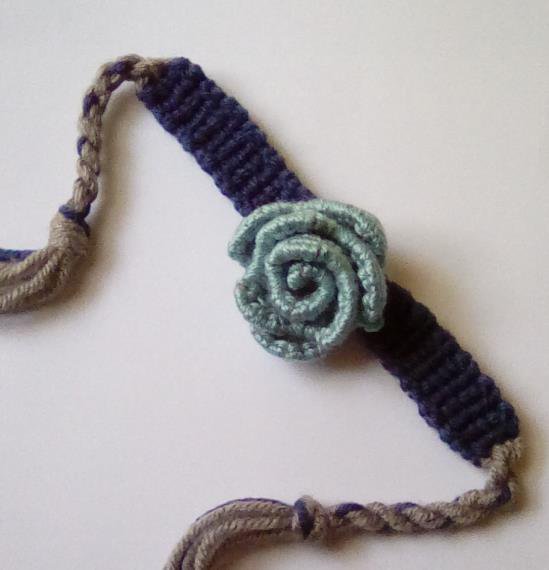
Almost finished!
Make the second half of your bracelet on the other 6 base strings from the knot you tied in step 16, starting from the rose outwards. Finish your ties however you like.
Thank you for reading my tutorial! I hope you liked it and it inspired you to try something new.