Rate Tutorial
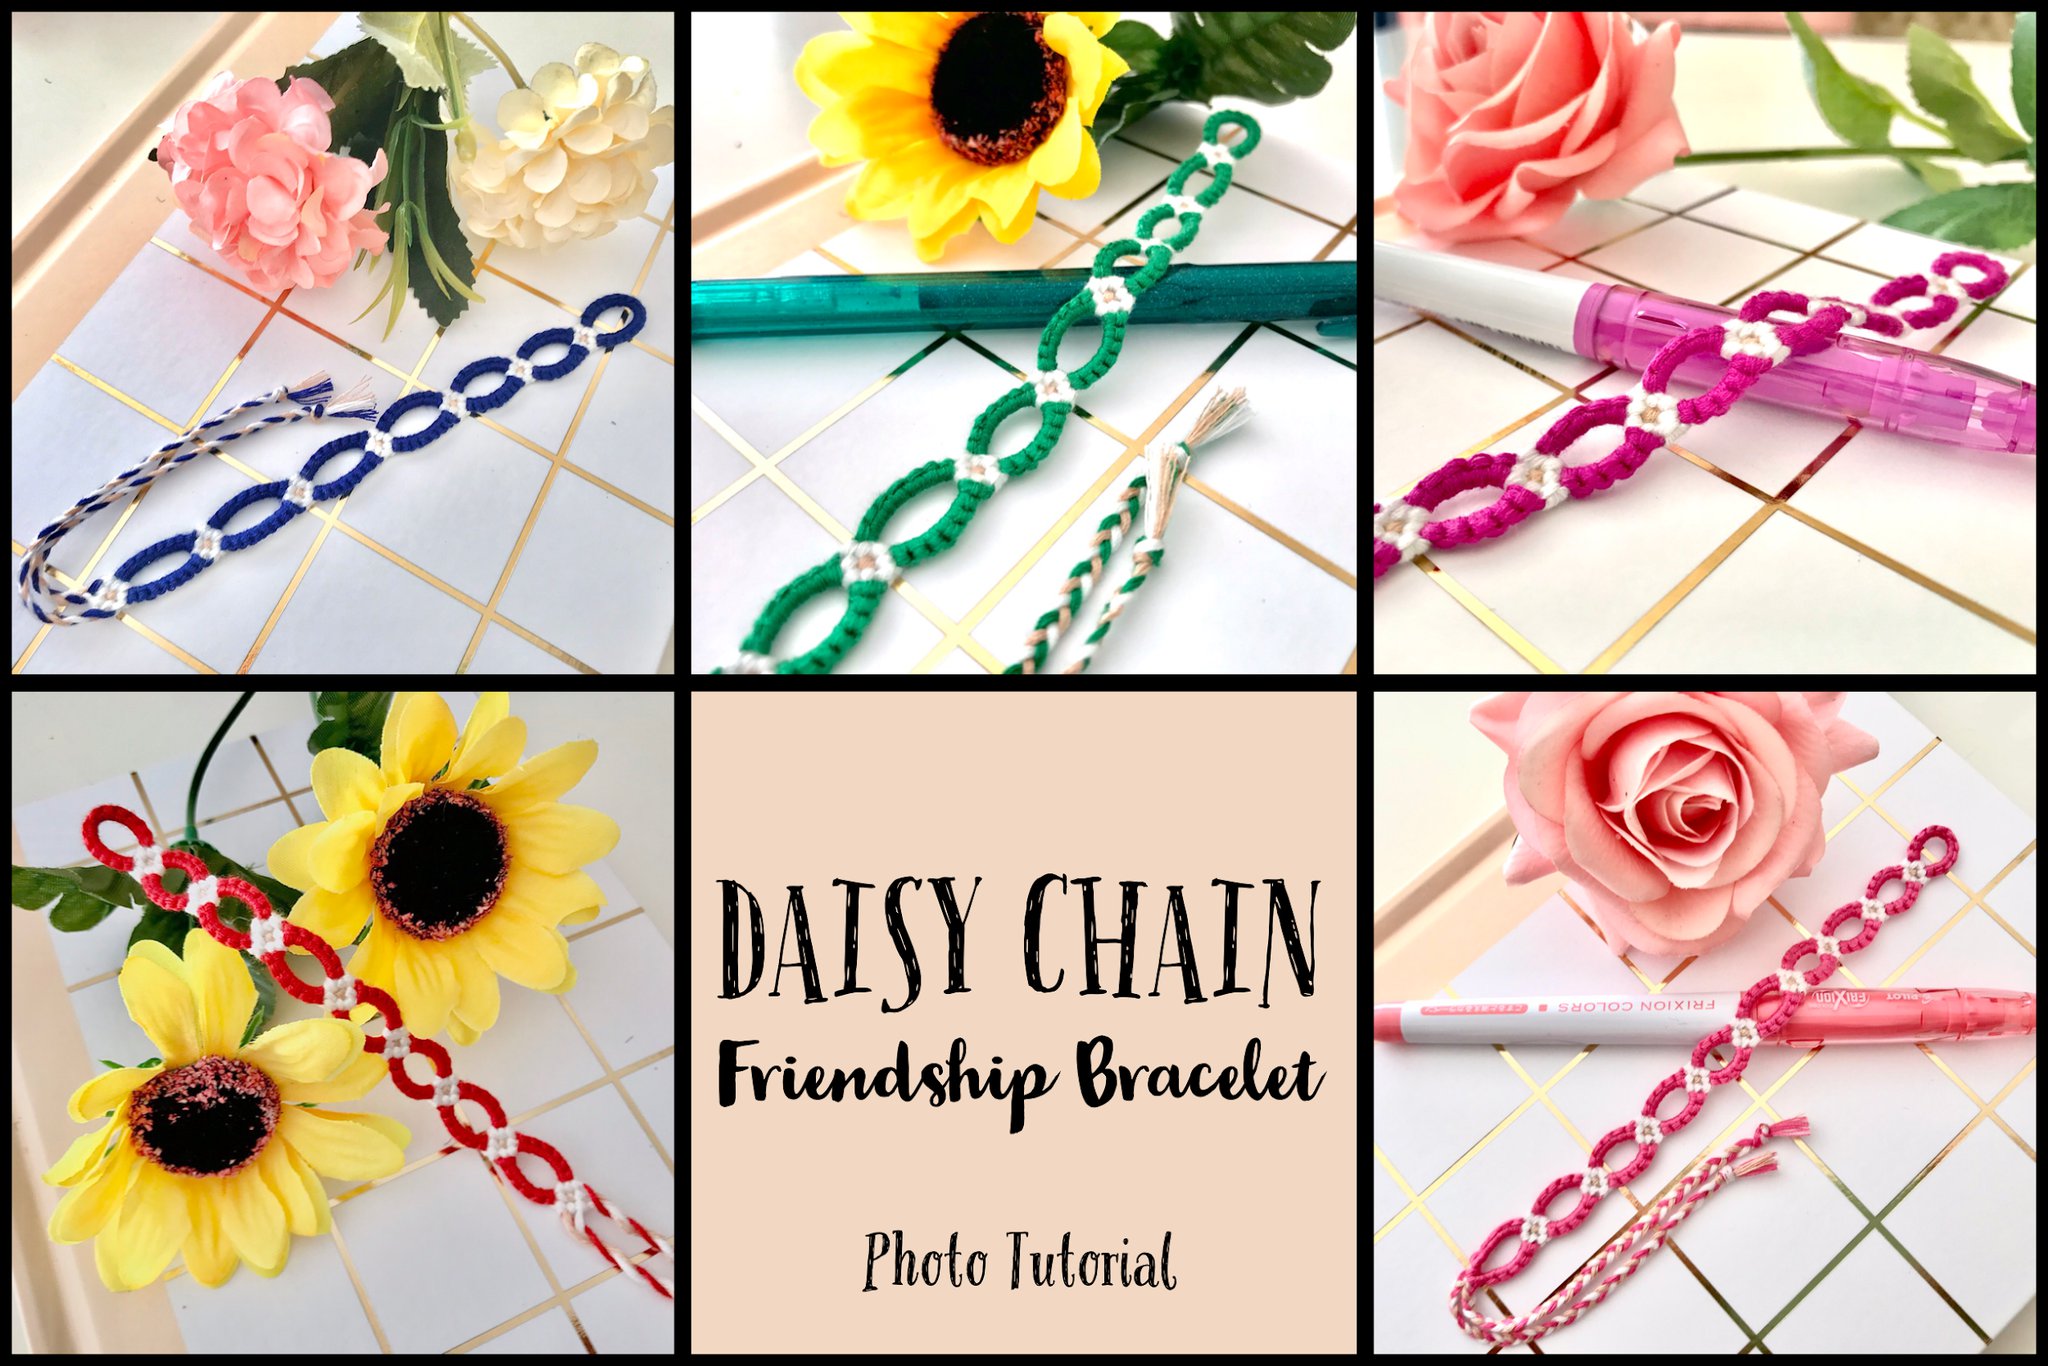
Hello everyone, this is Lisa. Today I’ll be teaching you how to make the Daisy Chain friendship bracelet. Although I don’t recommend this for a complete beginner, it is a very fast and easy bracelet, and takes no time to master. Usually it takes me about an hour to complete. It’s also great for stacking if you wear your bracelets, and looks really nice with almost any other bracelet!
This photo tutorial is divided into sections with a few steps in each. Hopefully it is clear and easy to follow! 🙂
The pattern for this bracelet is #76616. The bracelet doesn’t really follow a pattern but if you’d like to upload photos of your bracelet/s, you can do it there! There are similar ‘chain’ bracelets out there too, if you’re interested. I originally learnt this bracelet from @Racoon on YouTube (Masha Knots) and there are loads of other great tutorials for the daisy chain bracelet too. I don’t know the original creator of the bracelet, but I am crediting @Racoon because I learnt it from her.

Materials
For this bracelet, you will need...
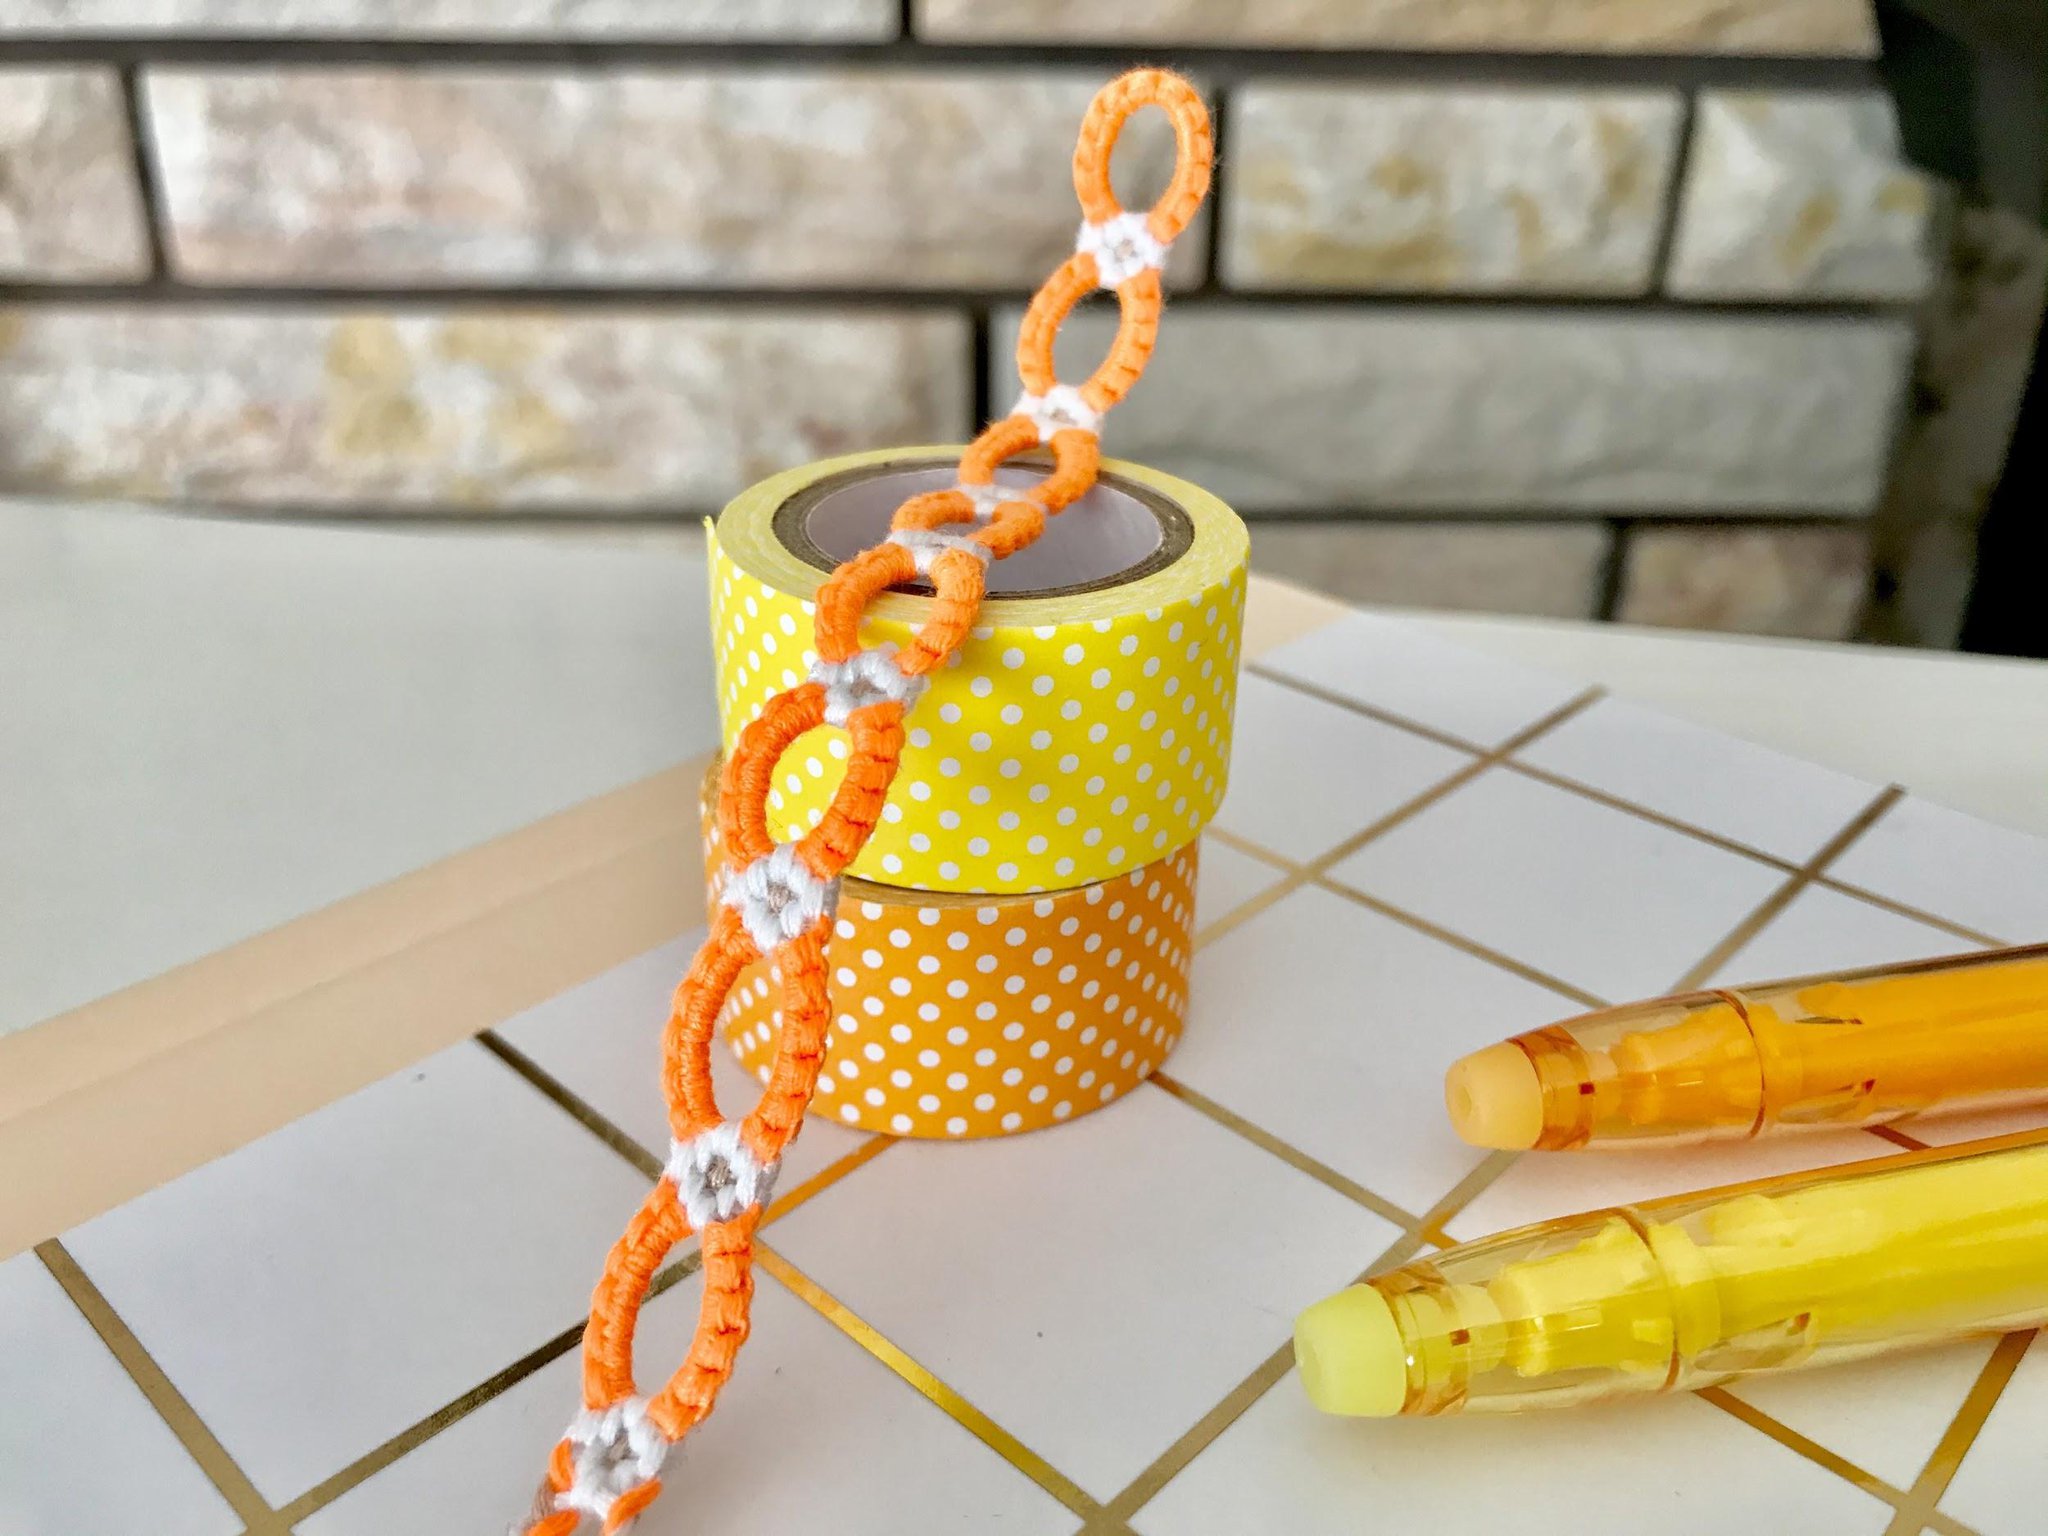
- 3 colours of thread, with varying lengths (I used about 200cm for the orange, 150cm for the white and 80cm for the beige.)
- Scissors
- Something to secure your bracelet with (I’ll be using tape)
- 3 colours of thread, with varying lengths (I used about 200cm for the orange, 150cm for the white and 80cm for the beige.)
- Scissors
- Something to secure your bracelet with (I’ll be using tape)
Requirements
Even though this bracelet is a very fast, easy and memorisable one that you don’t need to refer to a pattern for, there are a few things I expect you already know before going into the tutorial.
- You understand the basic knots and are comfortable with making normal patterns
- Preferably you already know how to make the teardrop/stitched loop, but if you don’t I will go it through briefly
- You understand the basic knots and are comfortable with making normal patterns
- Preferably you already know how to make the teardrop/stitched loop, but if you don’t I will go it through briefly
Starting the bracelet
To start the daisy chain bracelet, you will need to create a normal teardrop loop. After cutting your strings, you should have 3 different colours; for this demonstration I am using a neon orange (the chains), a white (the flower ‘petals’) and a beige (the middle of the flowers). You can use whatever colours you like, but make sure you cut the strings to different lengths. The length of your strings will vary depending on your knotting tension and the length you want for your bracelet. See the image in ‘materials’ for the approximate lengths.
If you already know how to make a teardrop loop, skip this section. You just need to make a normal loop with the orange string.
If you already know how to make a teardrop loop, skip this section. You just need to make a normal loop with the orange string.

1.
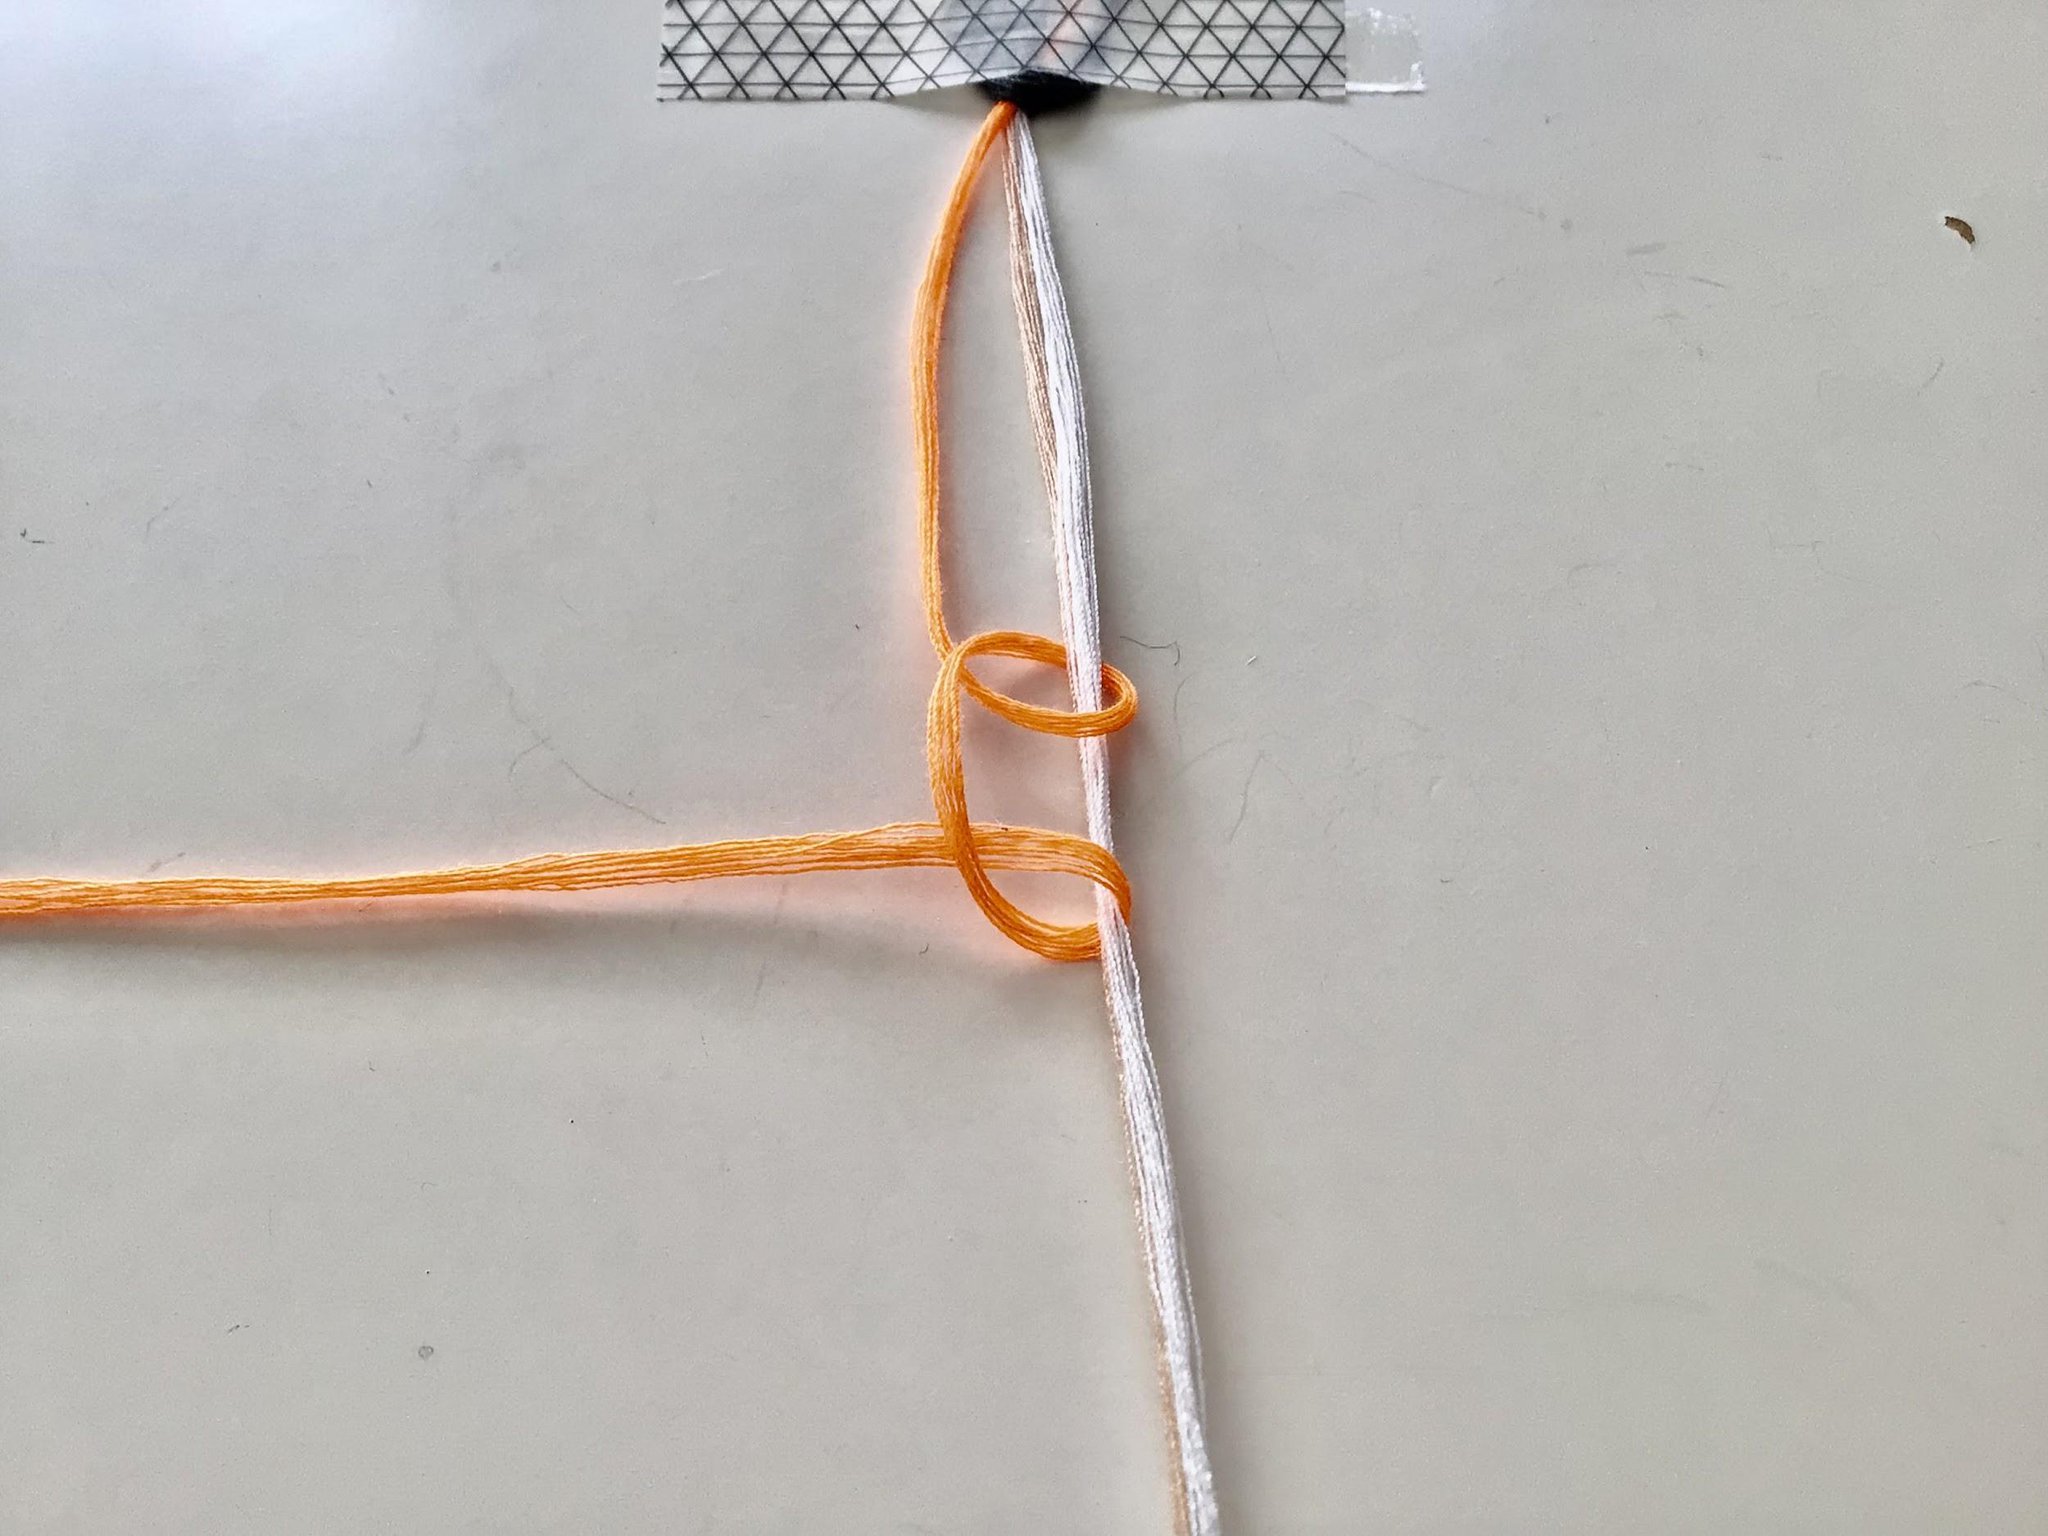
Cut your strings to the length you need. Fold all the strings in half and match the midpoint of each together. Tape your strings down at the midpoint. We are only going to be using the bottom half for now.
2.
Take your orange string (or whatever colour you’re using) and make a forward backward knot onto the white and beige strings together as a bundle.
3.
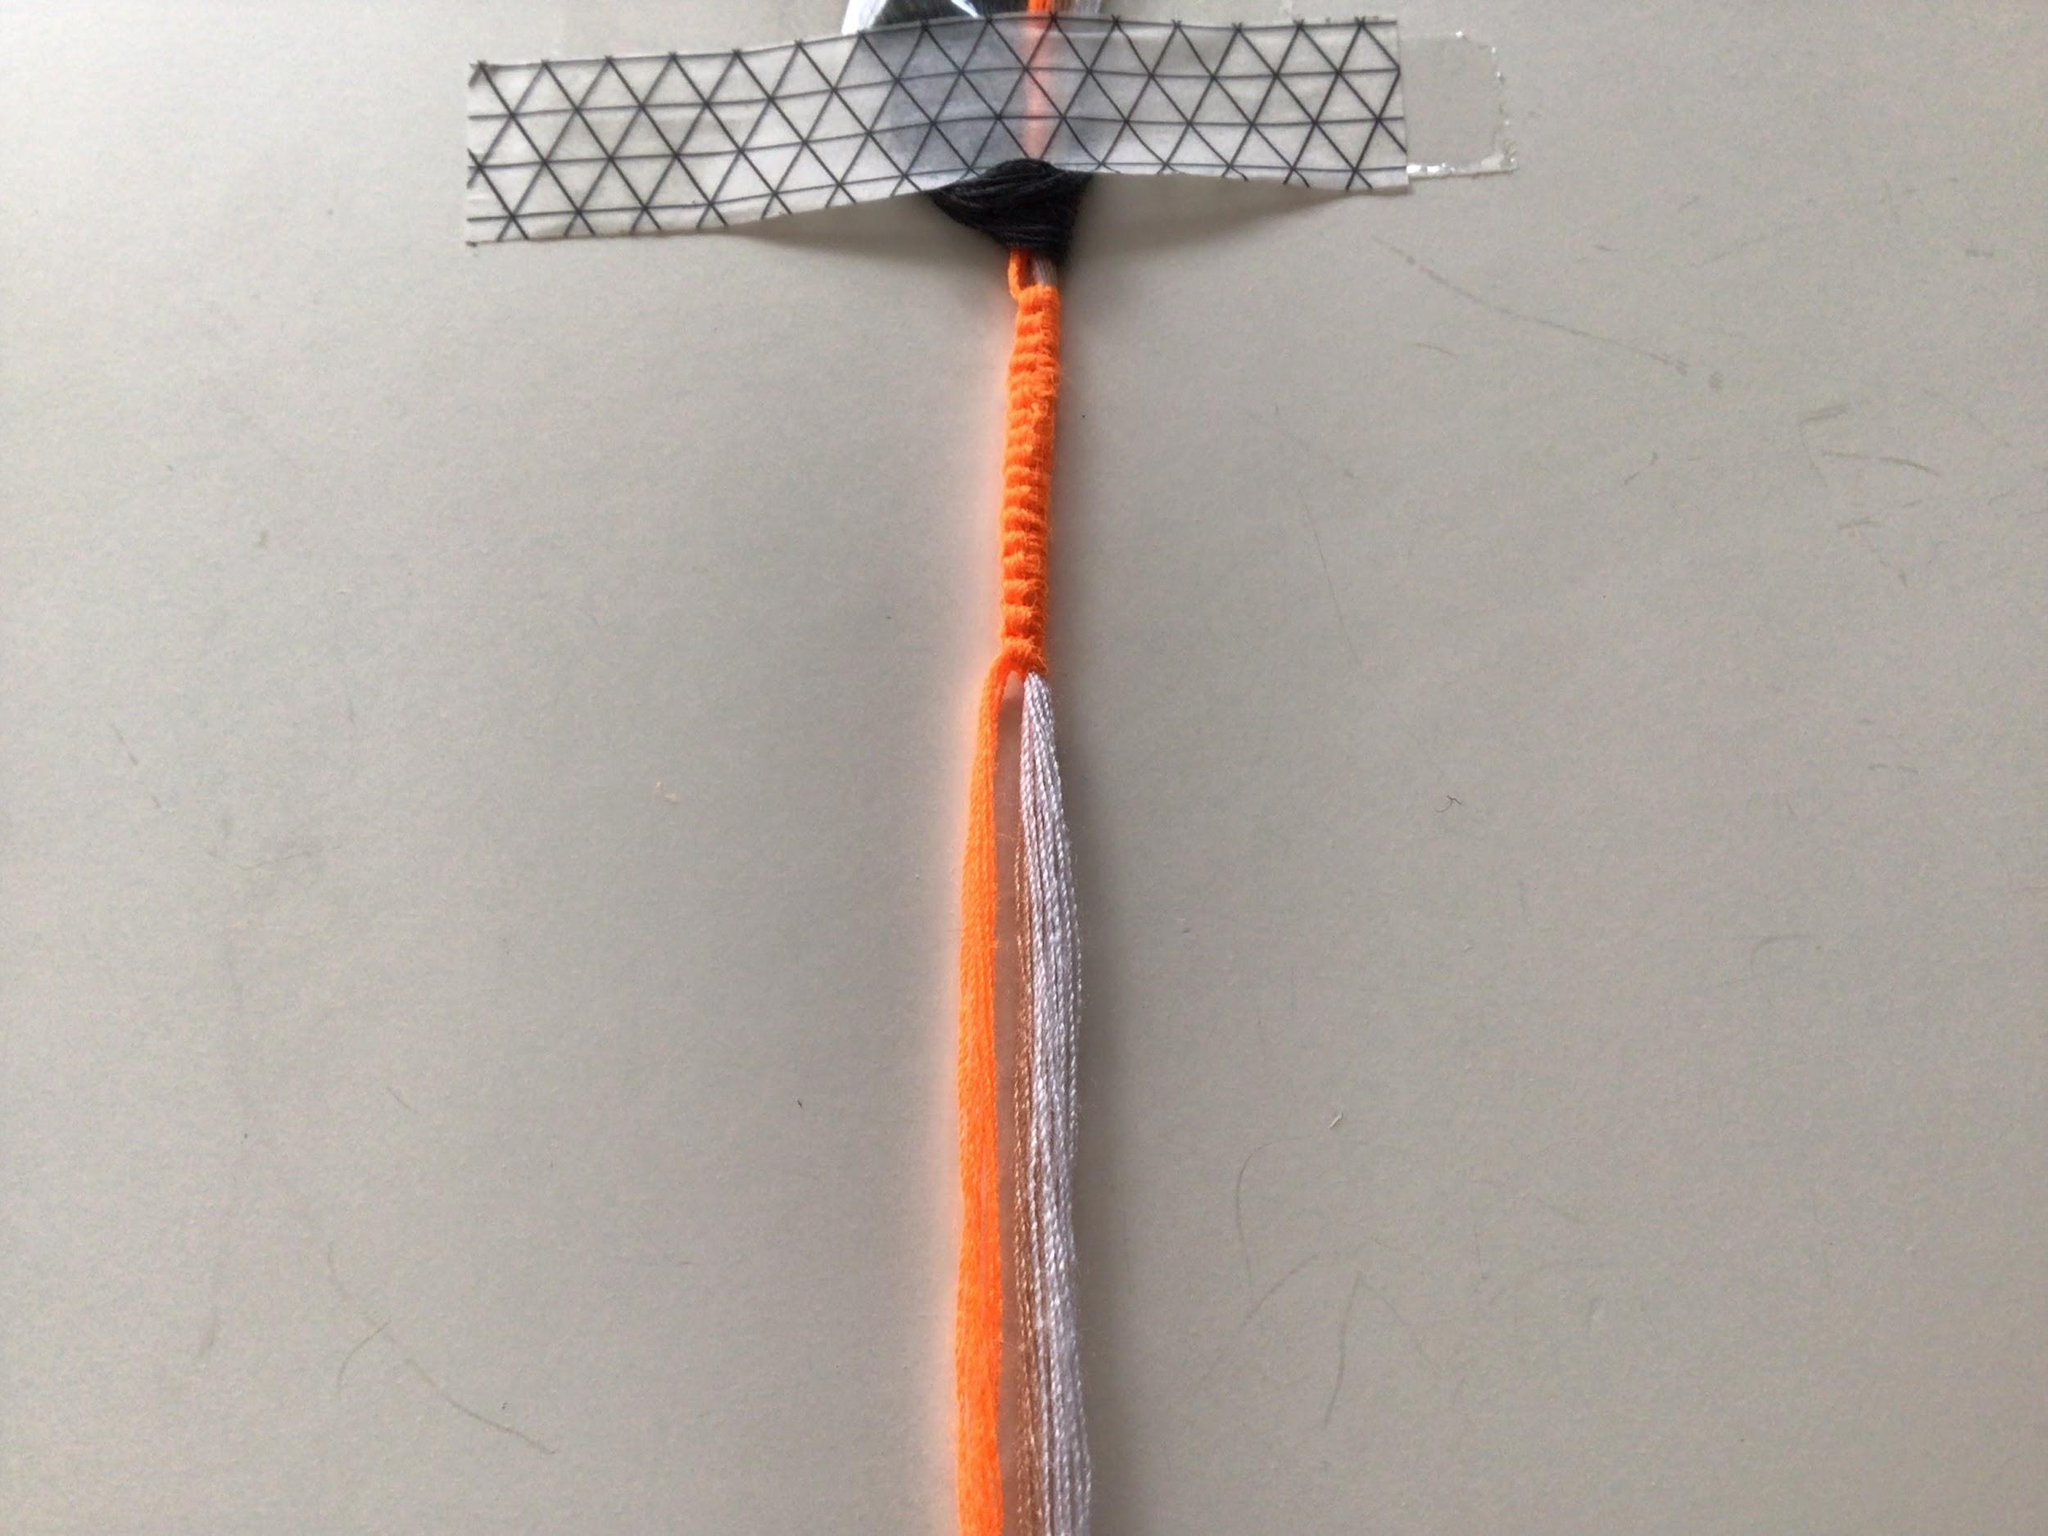
Repeat this step for as many times as you need. I am making 8 knots for each of my chains so I will be repeating step 2 for 17 times (double 8 plus one for the middle). It doesn’t really matter how many knots you do but I suggest doubling the number of knots you want for each chain and adding 1 or 2.
4.
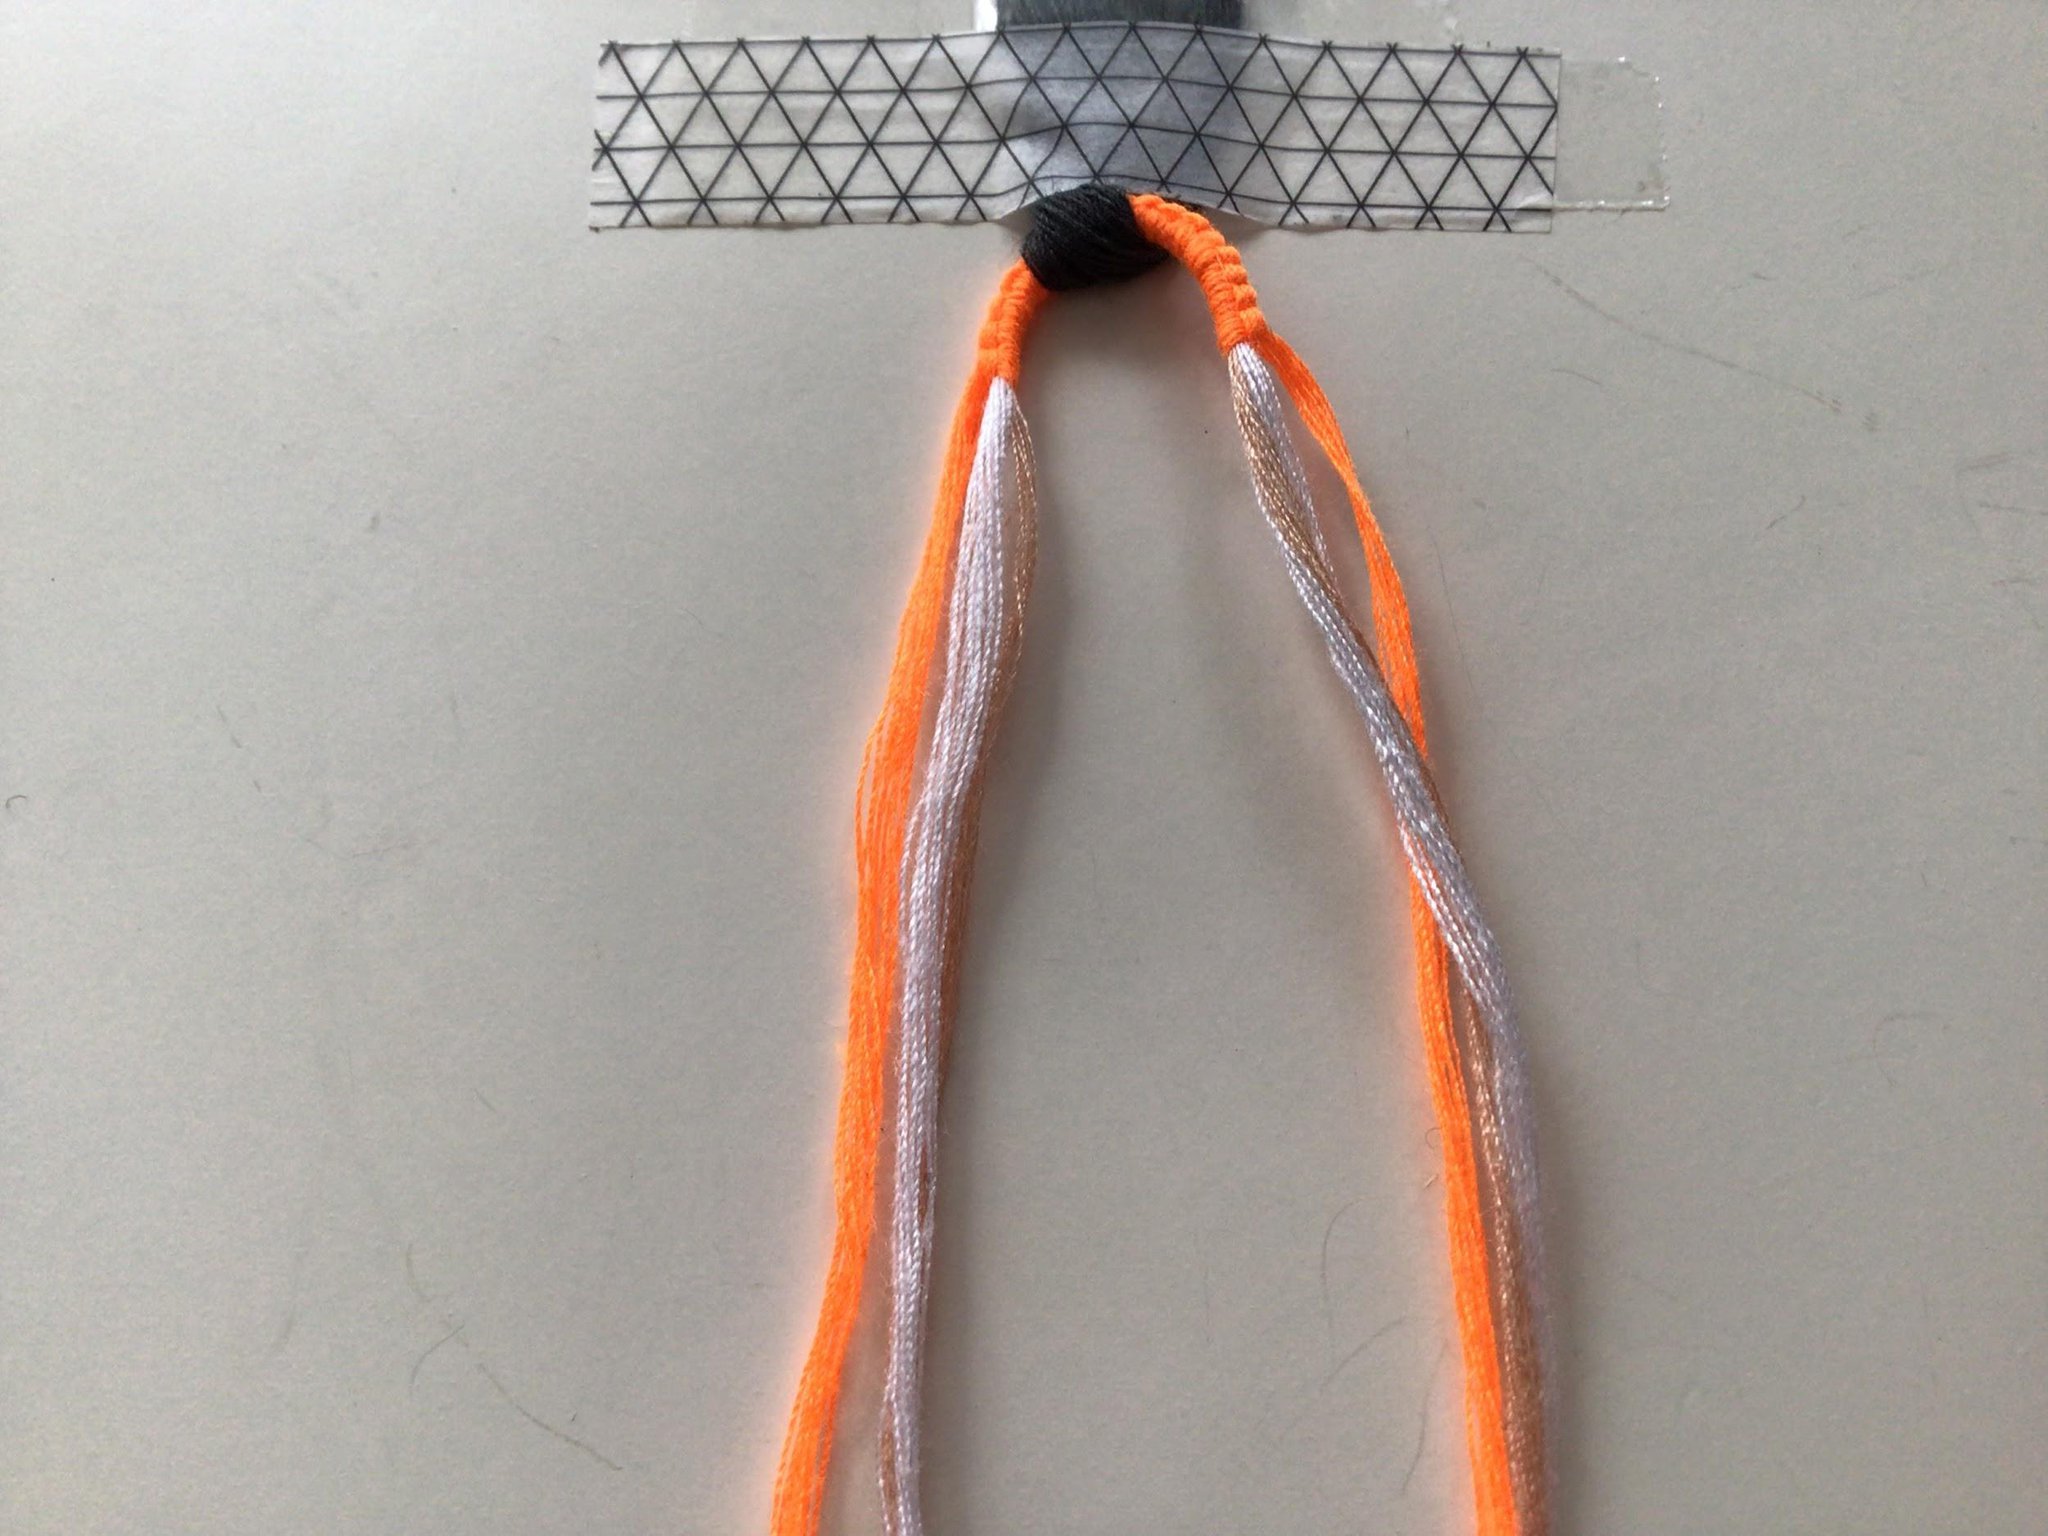
Bring out the other half of your strings and shape your loop into the approximate shape for the starting loop. We’ve finished the starting loop!
The flowers
After creating the beginning loop, we are up to making our first flower.

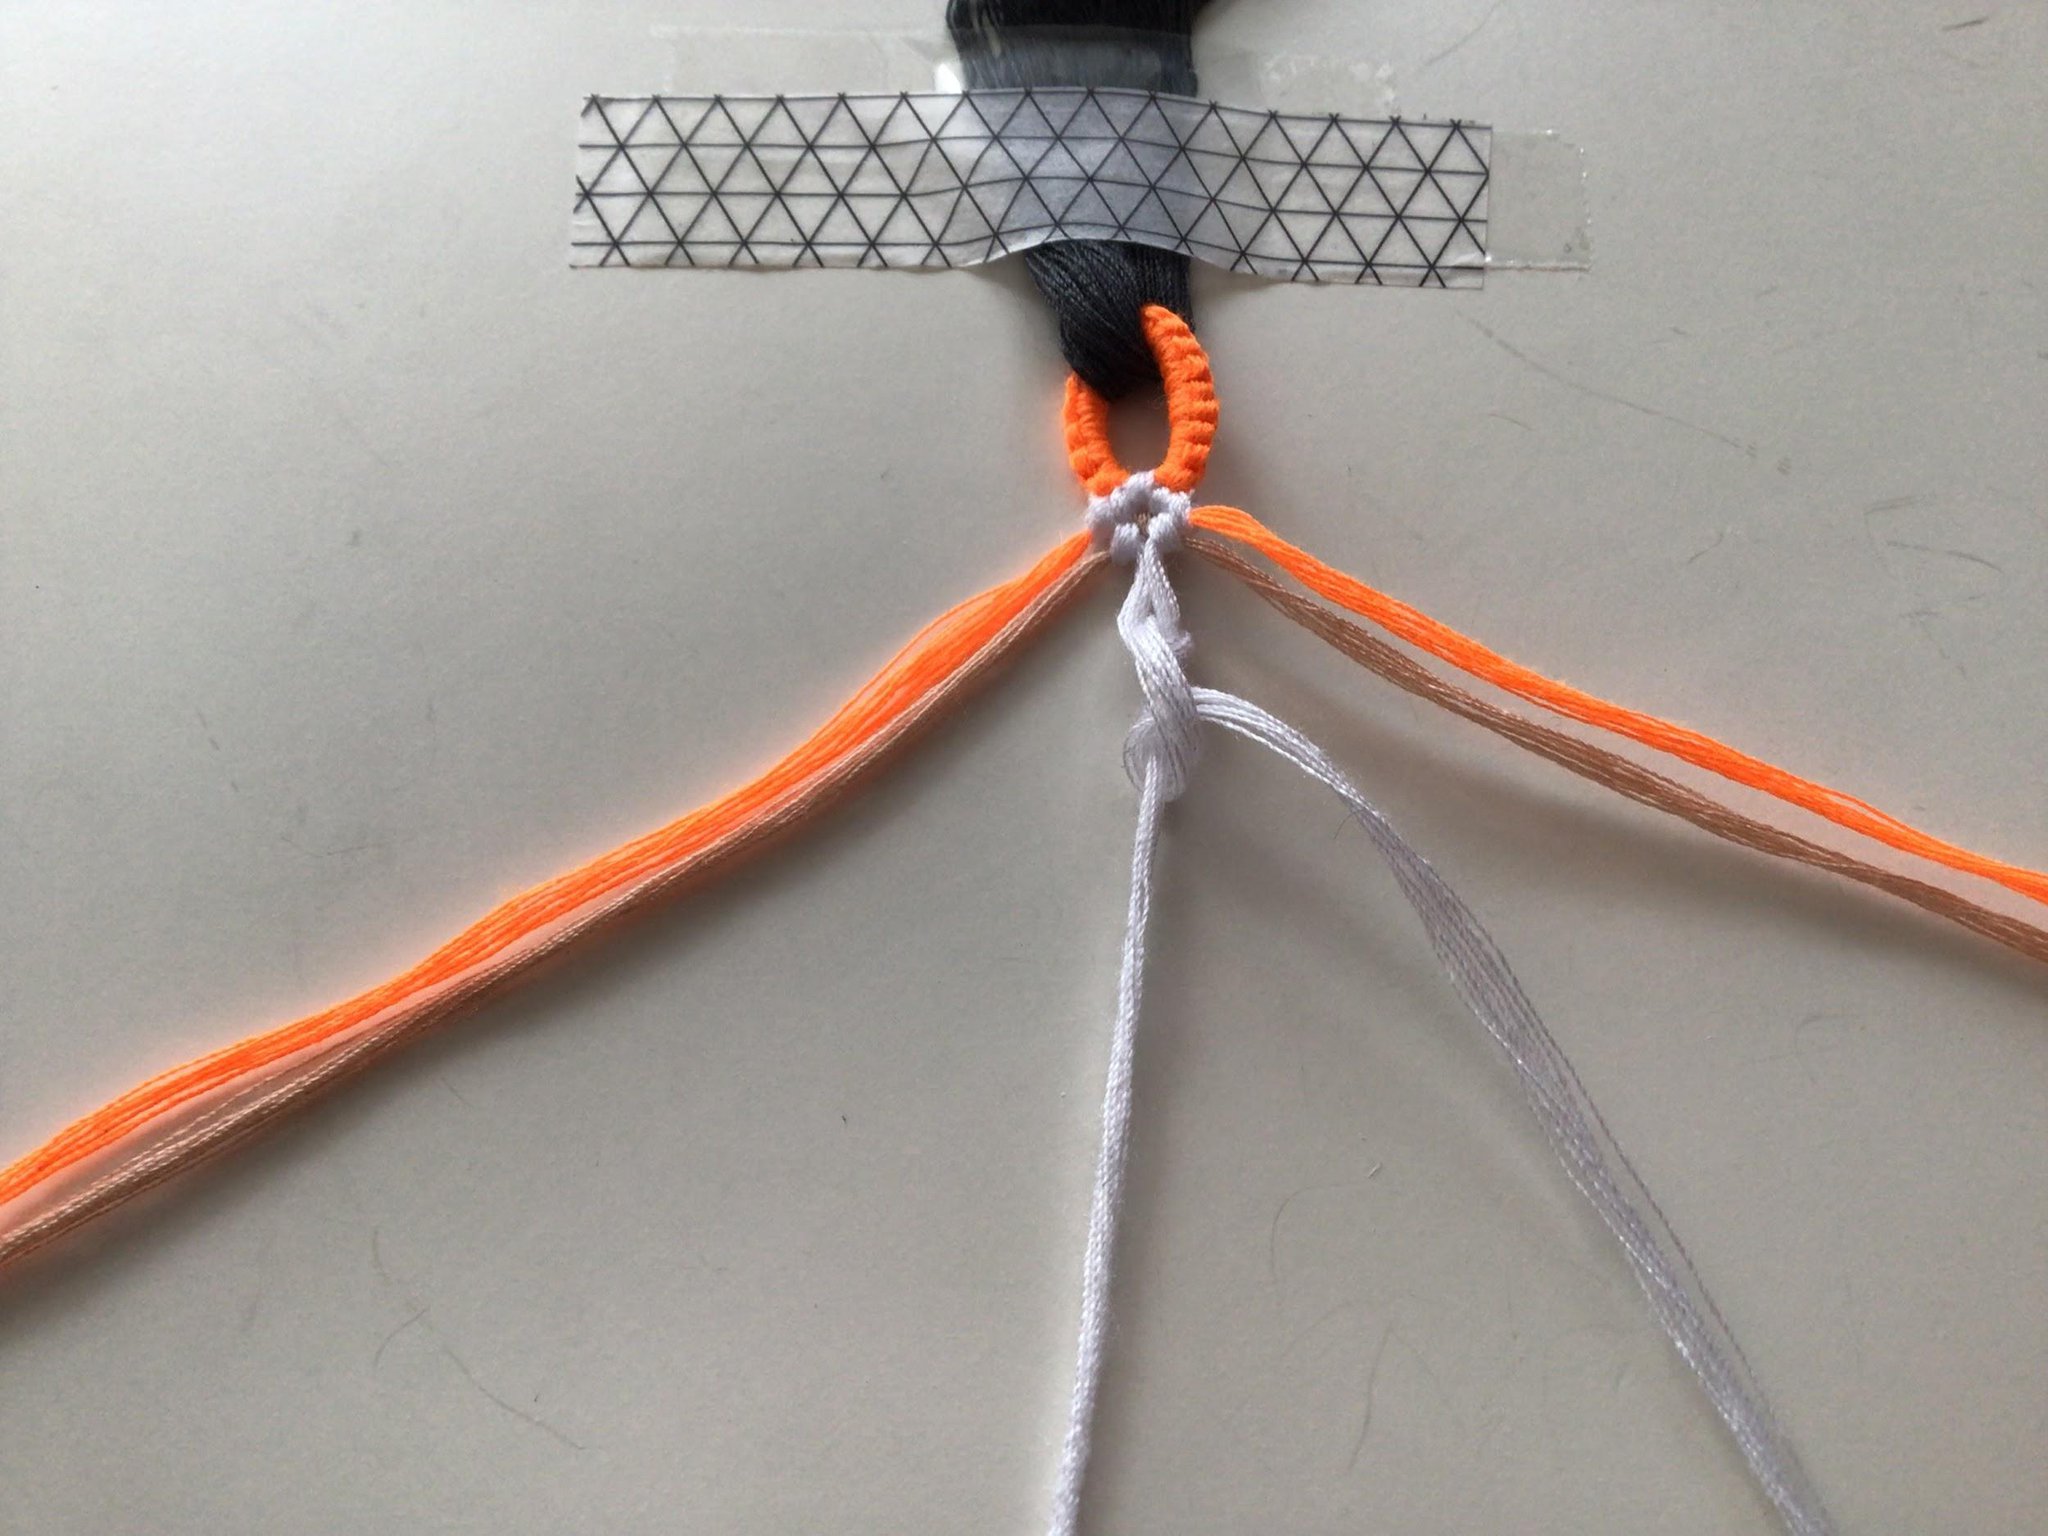
5.
You should now have a non-connected loop secured to your workspace. To connect the loop and start your flower, fish out the white strings on each side. Make a forward knot between them to connect the halves of your loop.
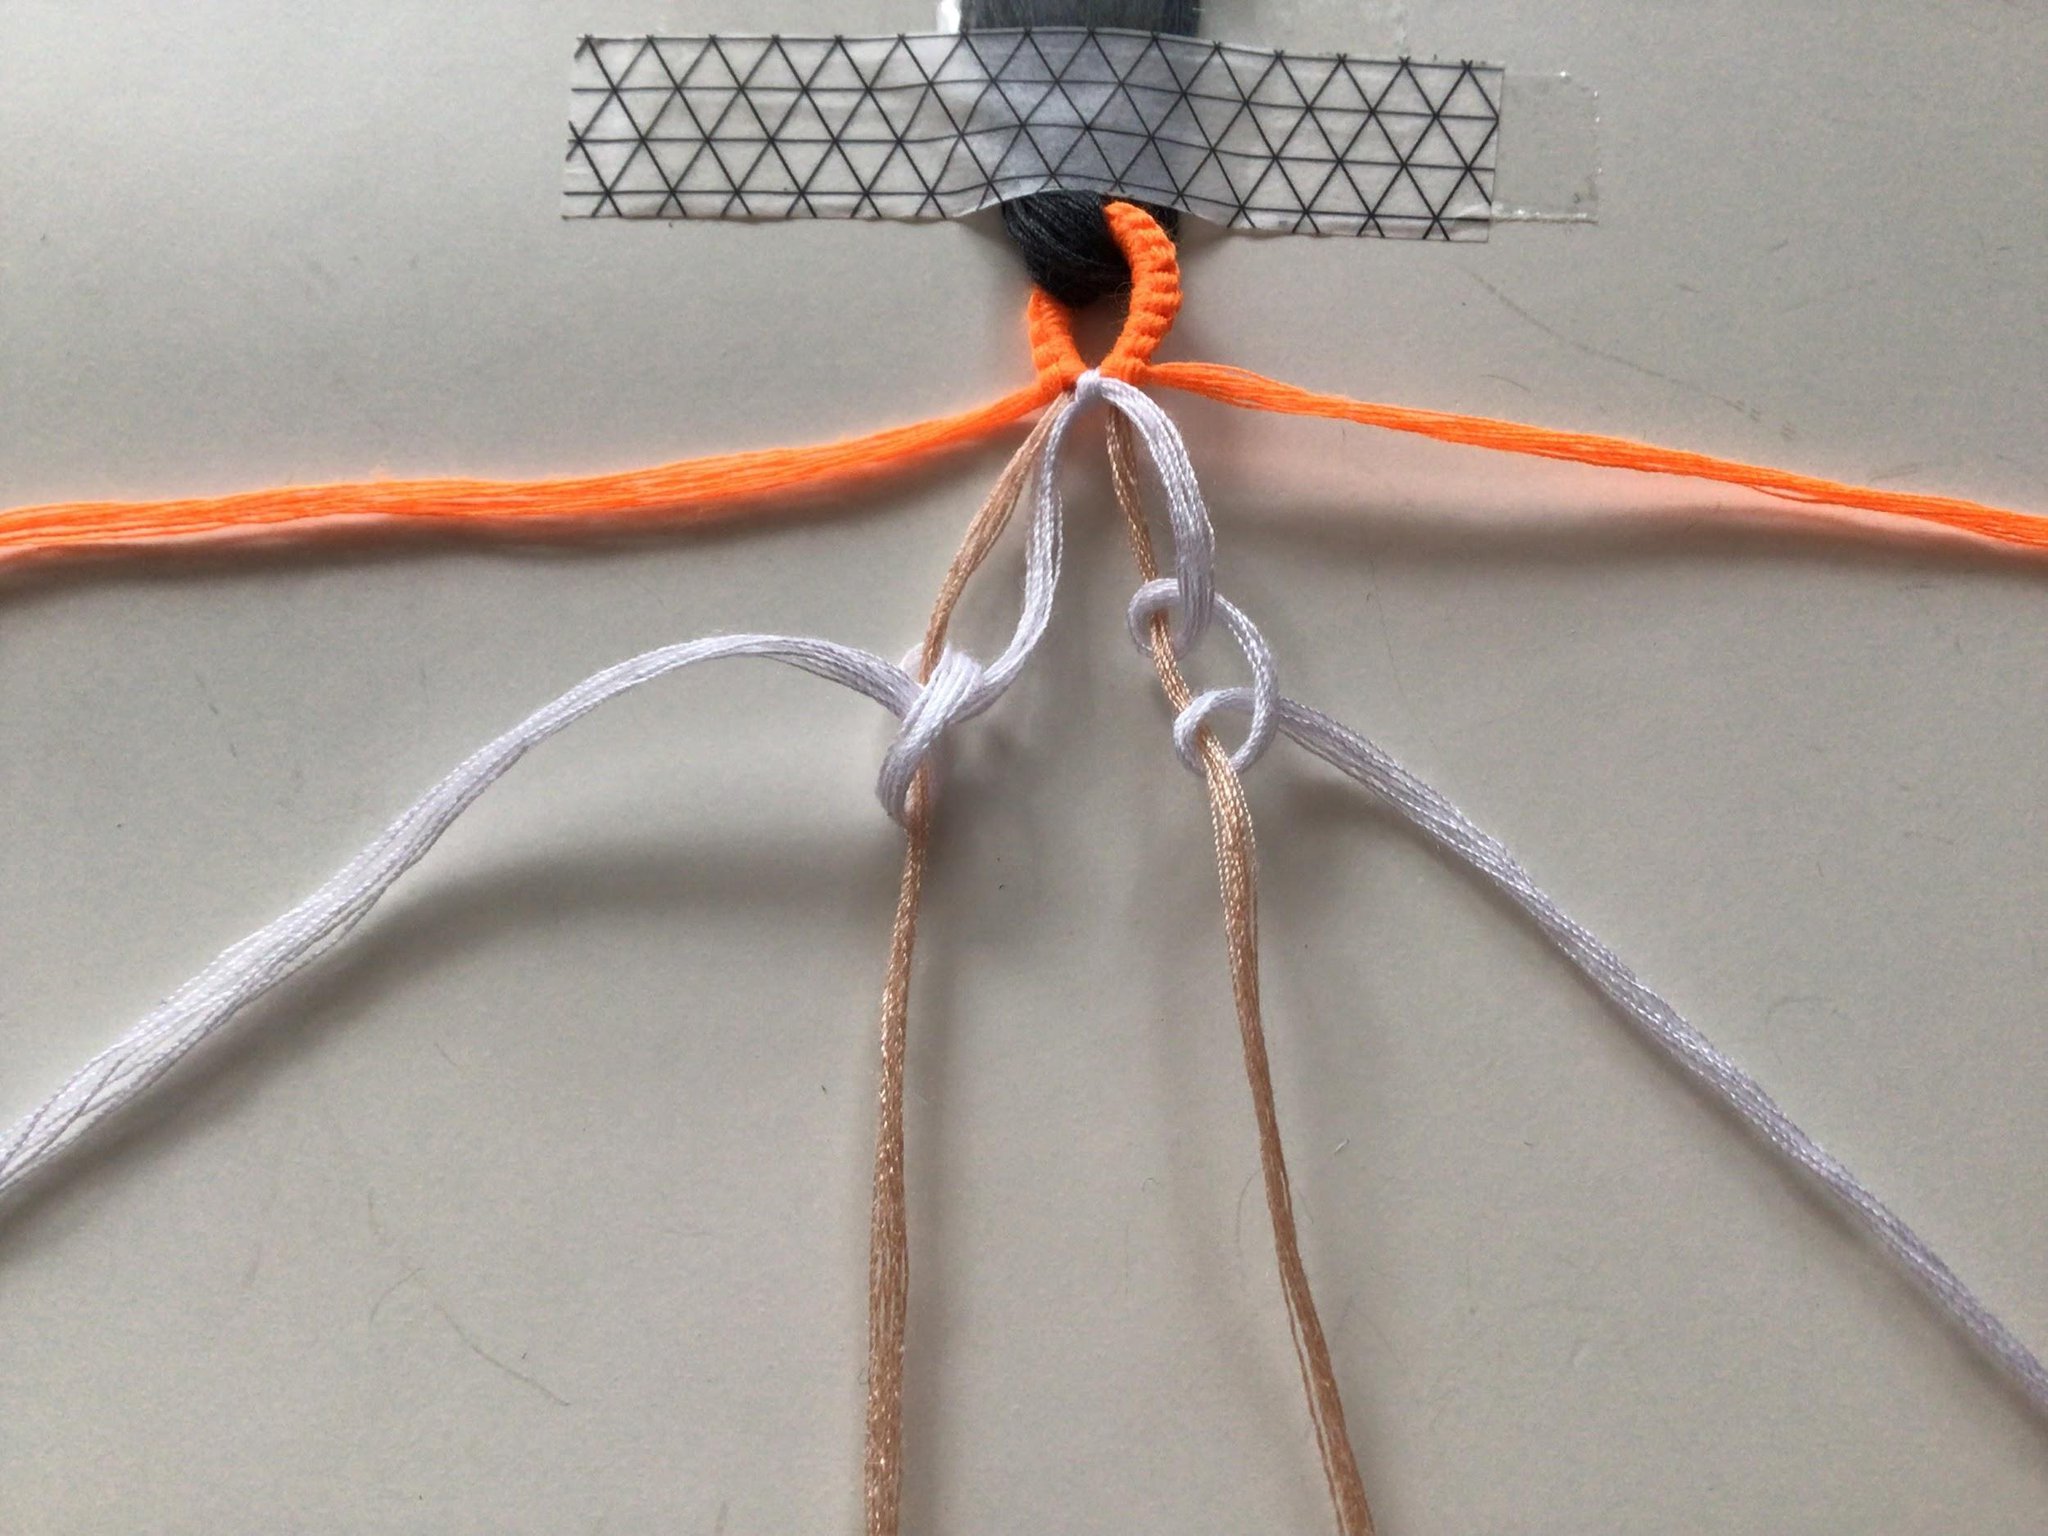
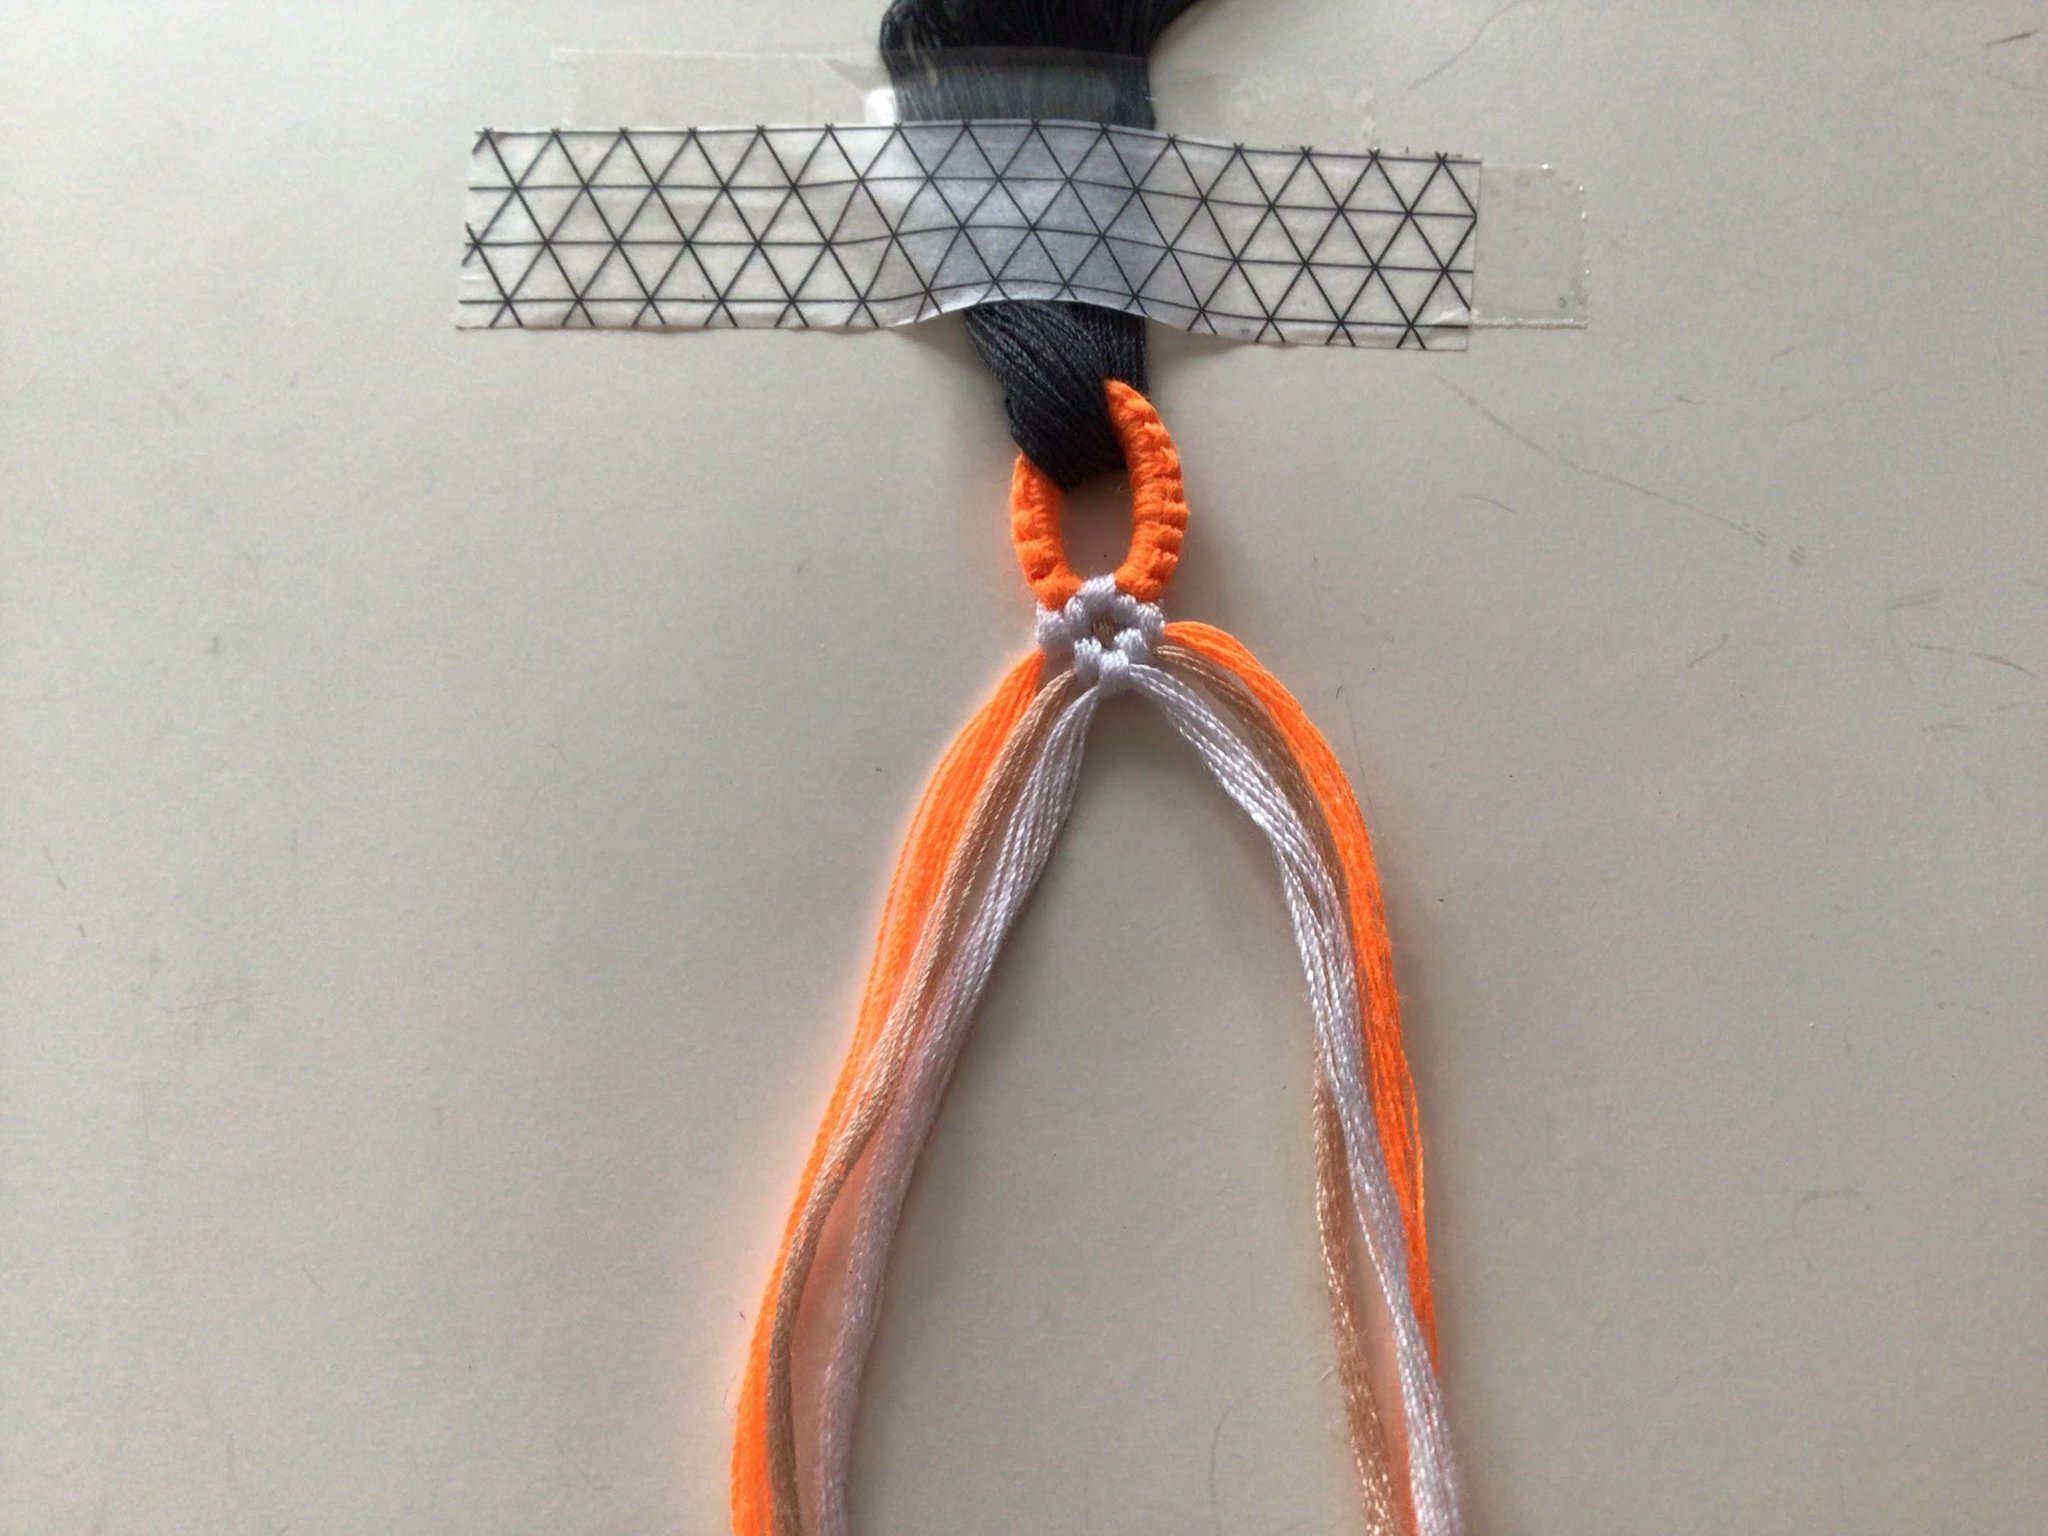
6.
Next, make a backward knot on the left side of your bracelet with the same white strand onto the beige strand. Repeat this on the right side but with a forward knot instead.
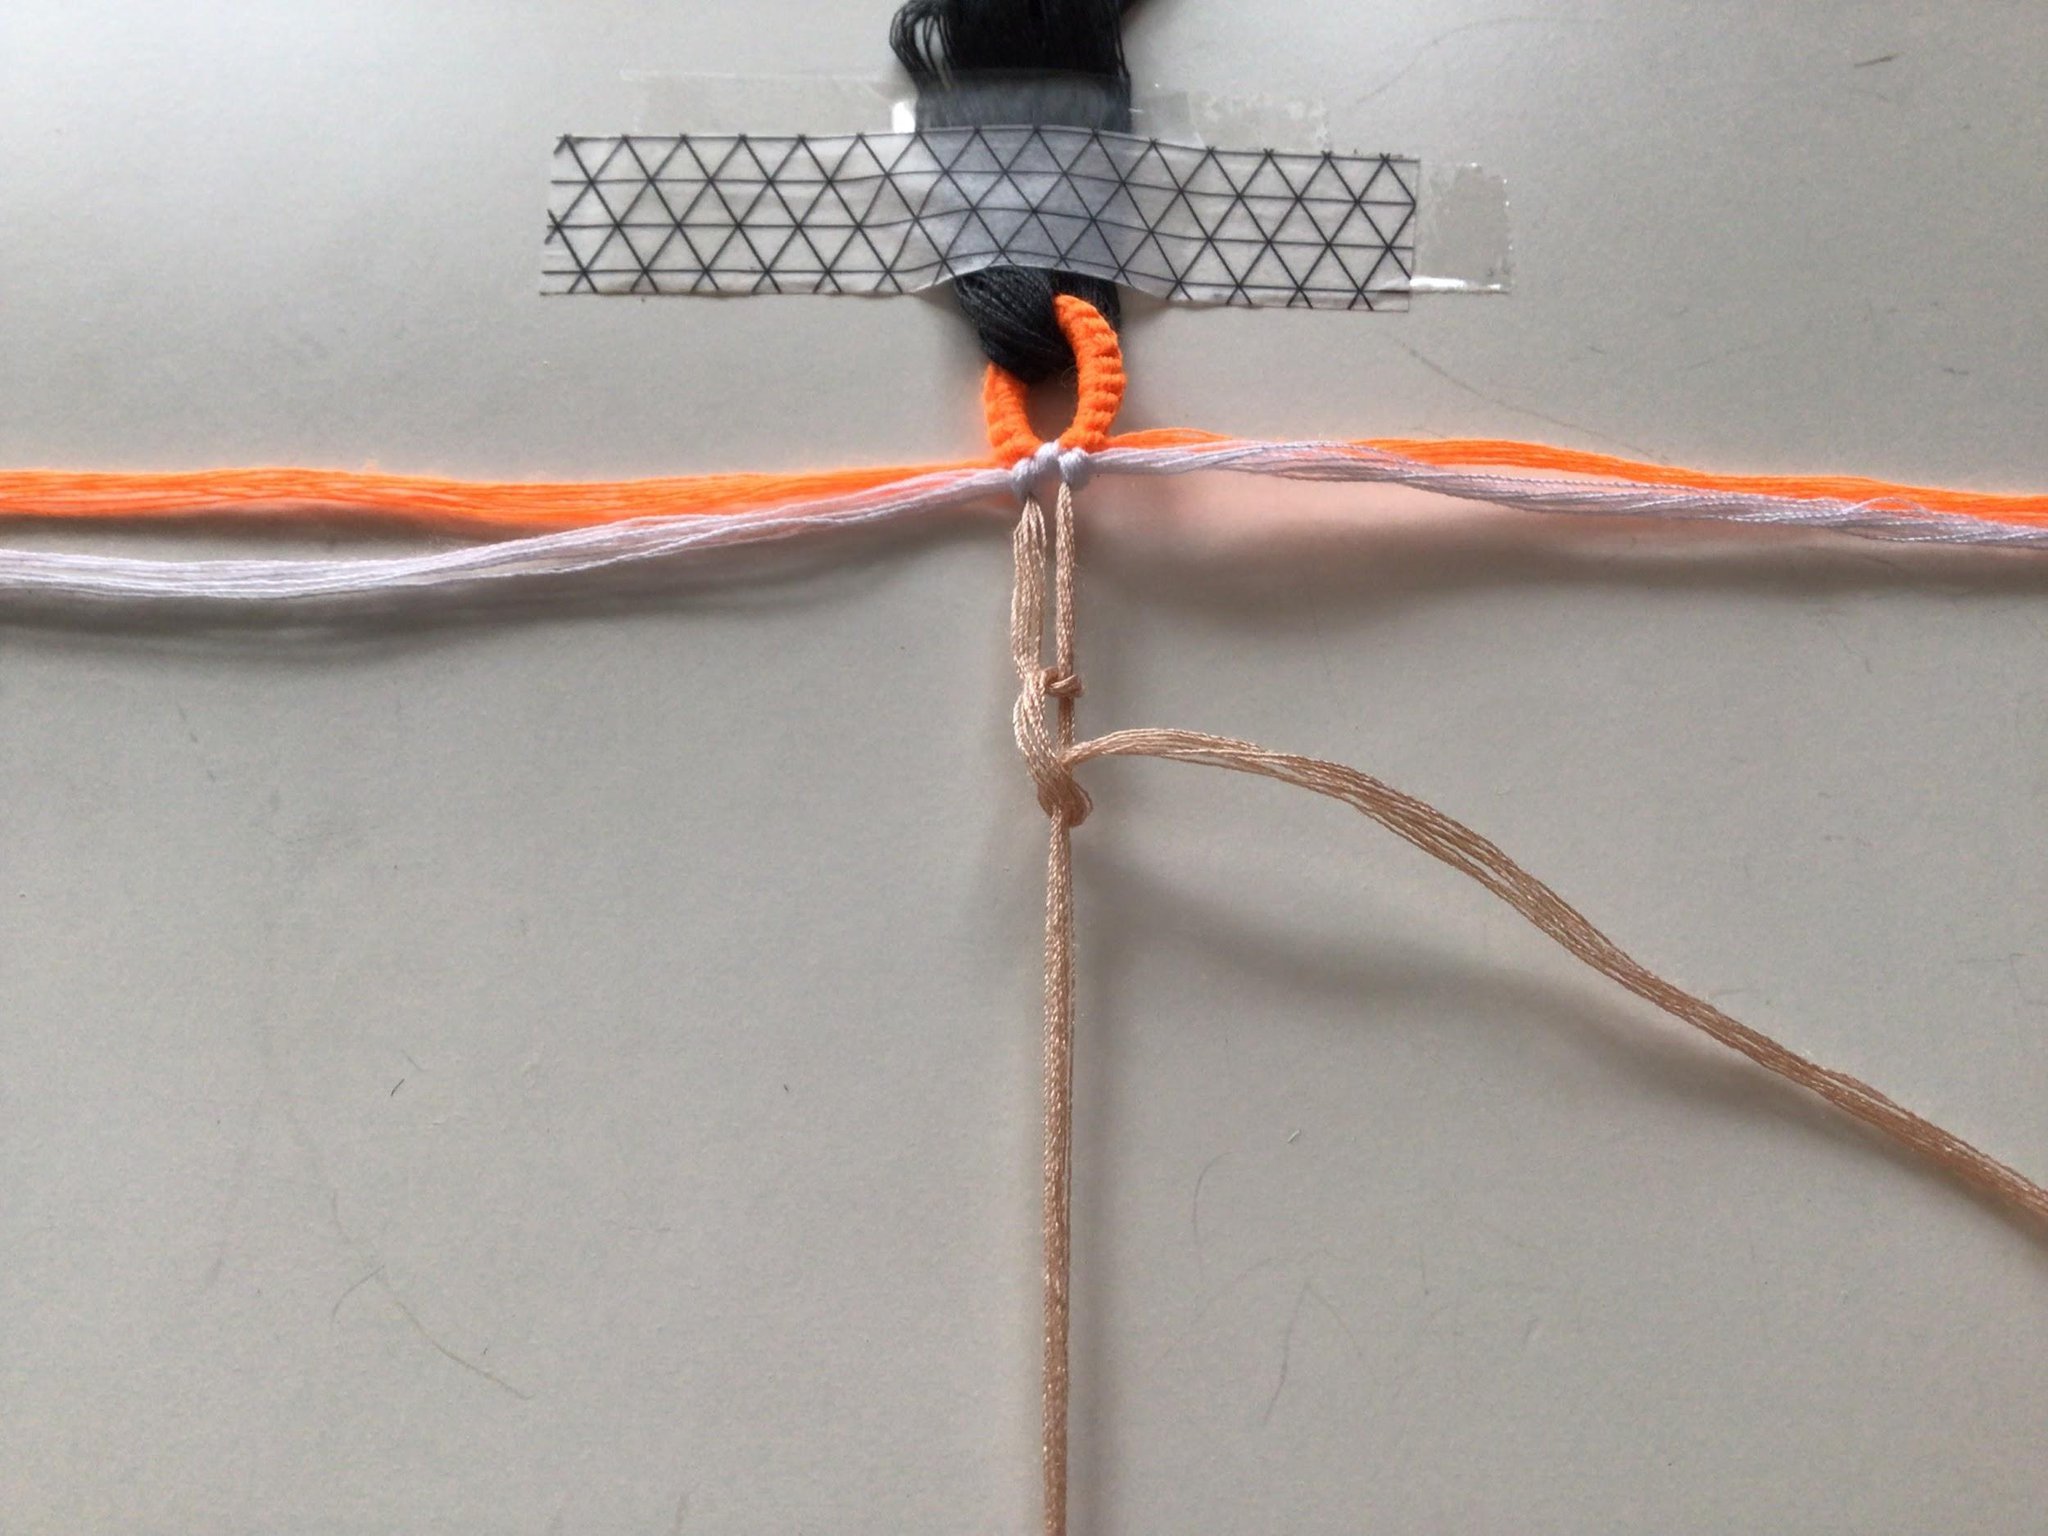
7.
Your two beige strings should now be in the middle. Make a forward knot between them.
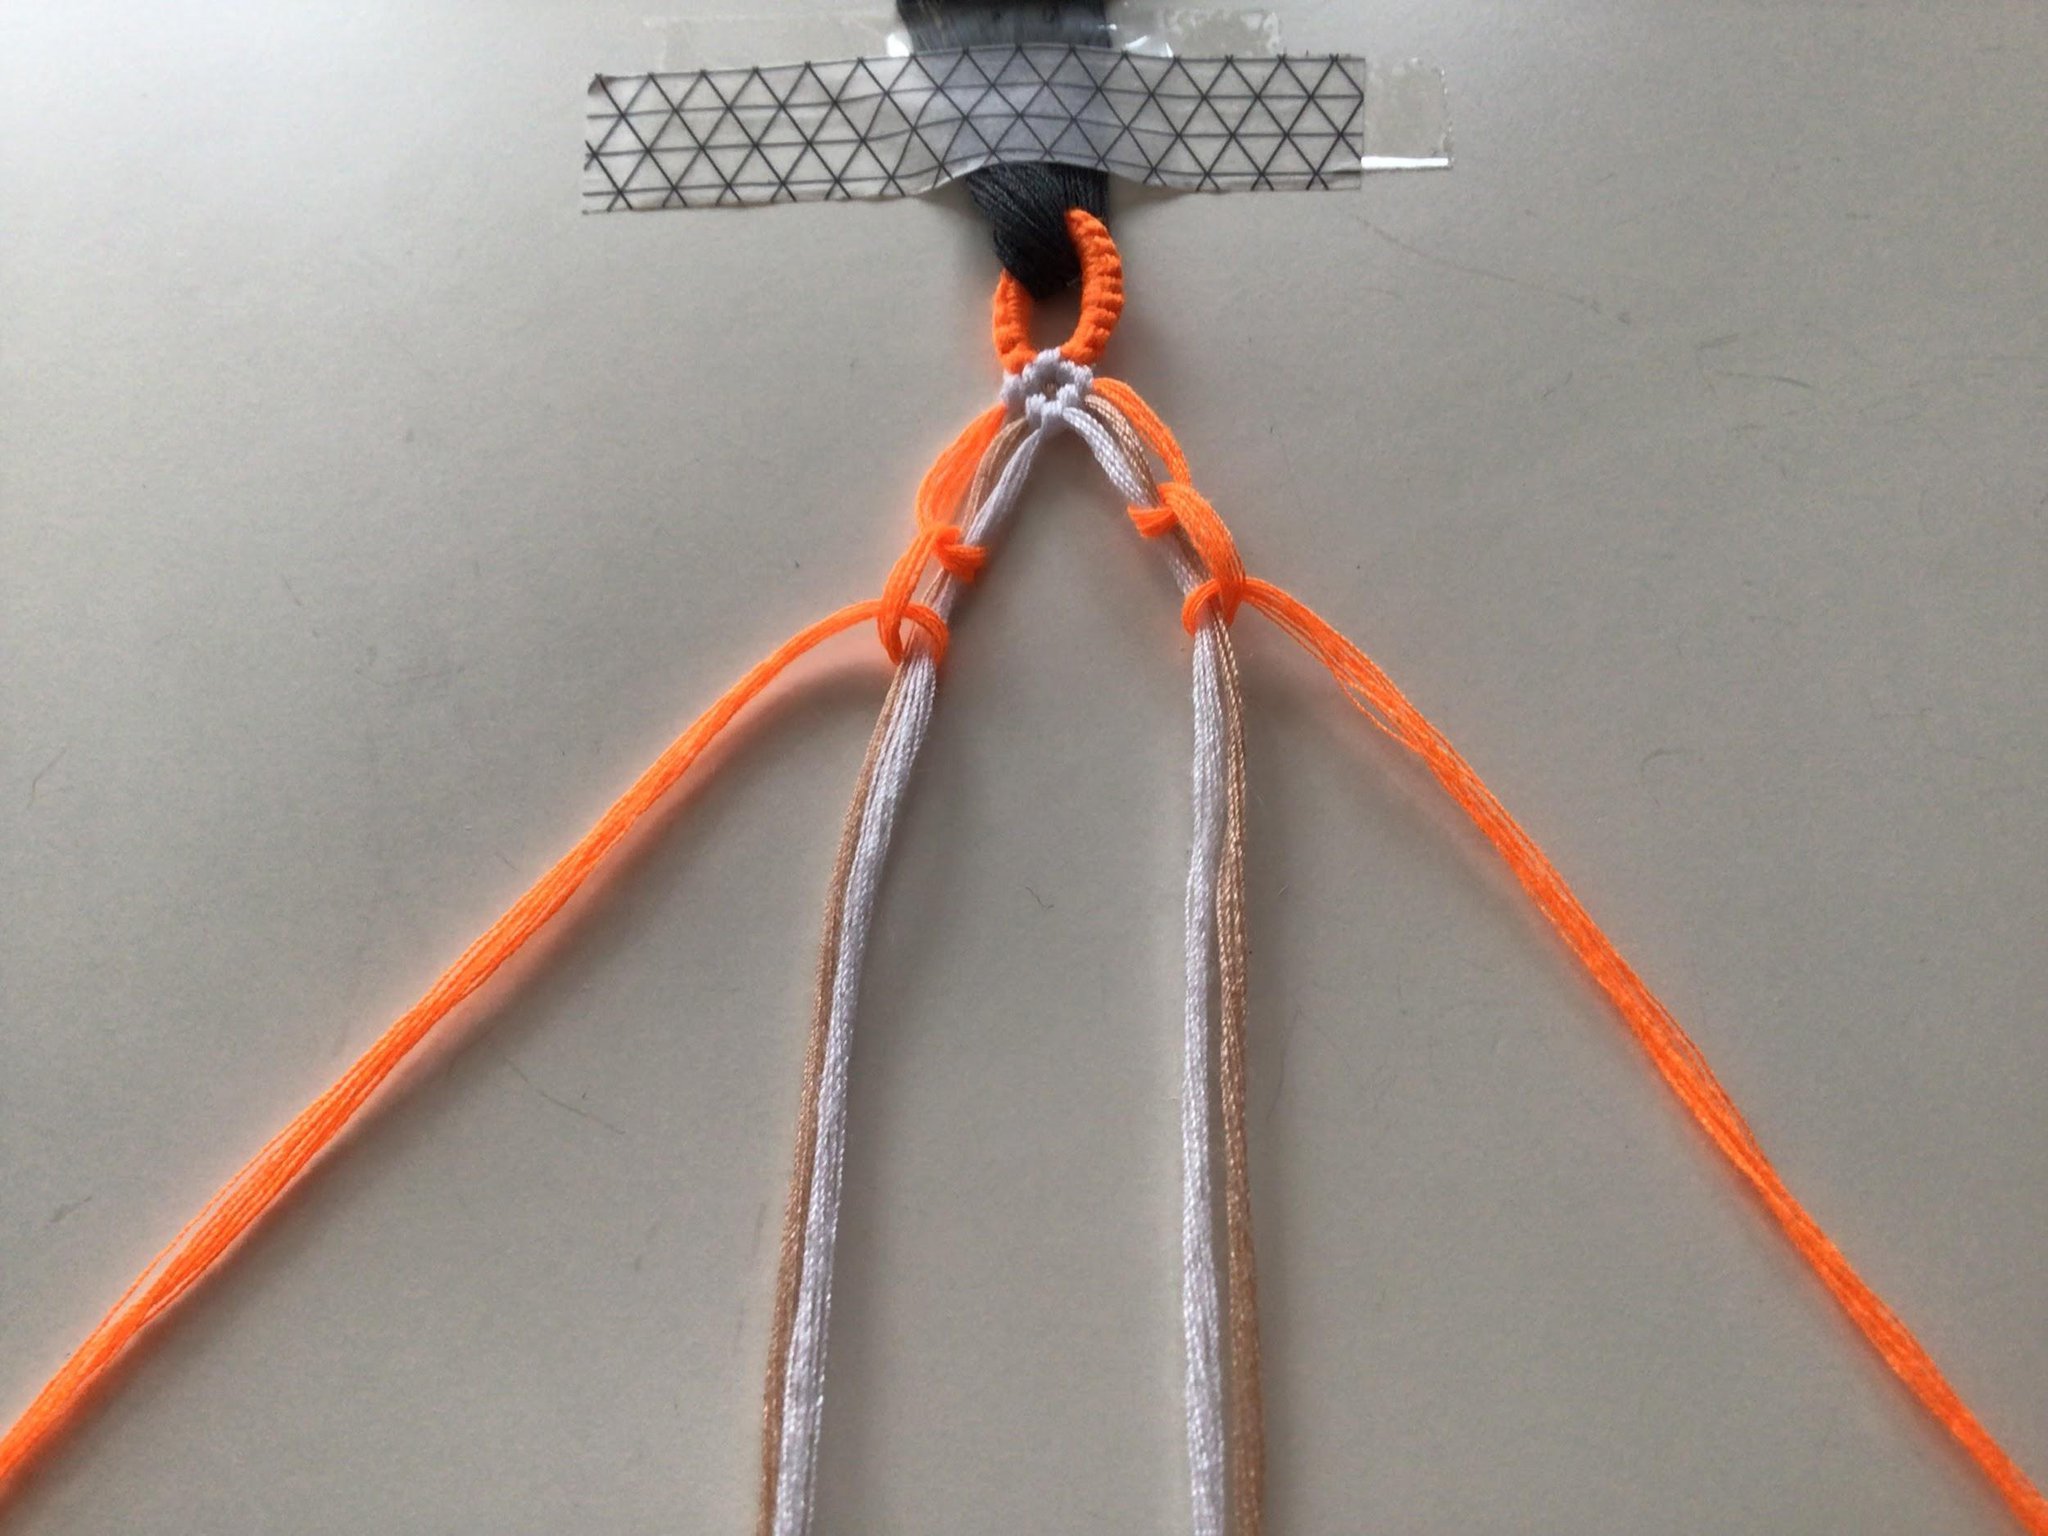
8.
Now make a backward-forward knot with the white string (on the left) onto the orange one. Repeat this on the other side but reversed. (FB knot instead of BF.)
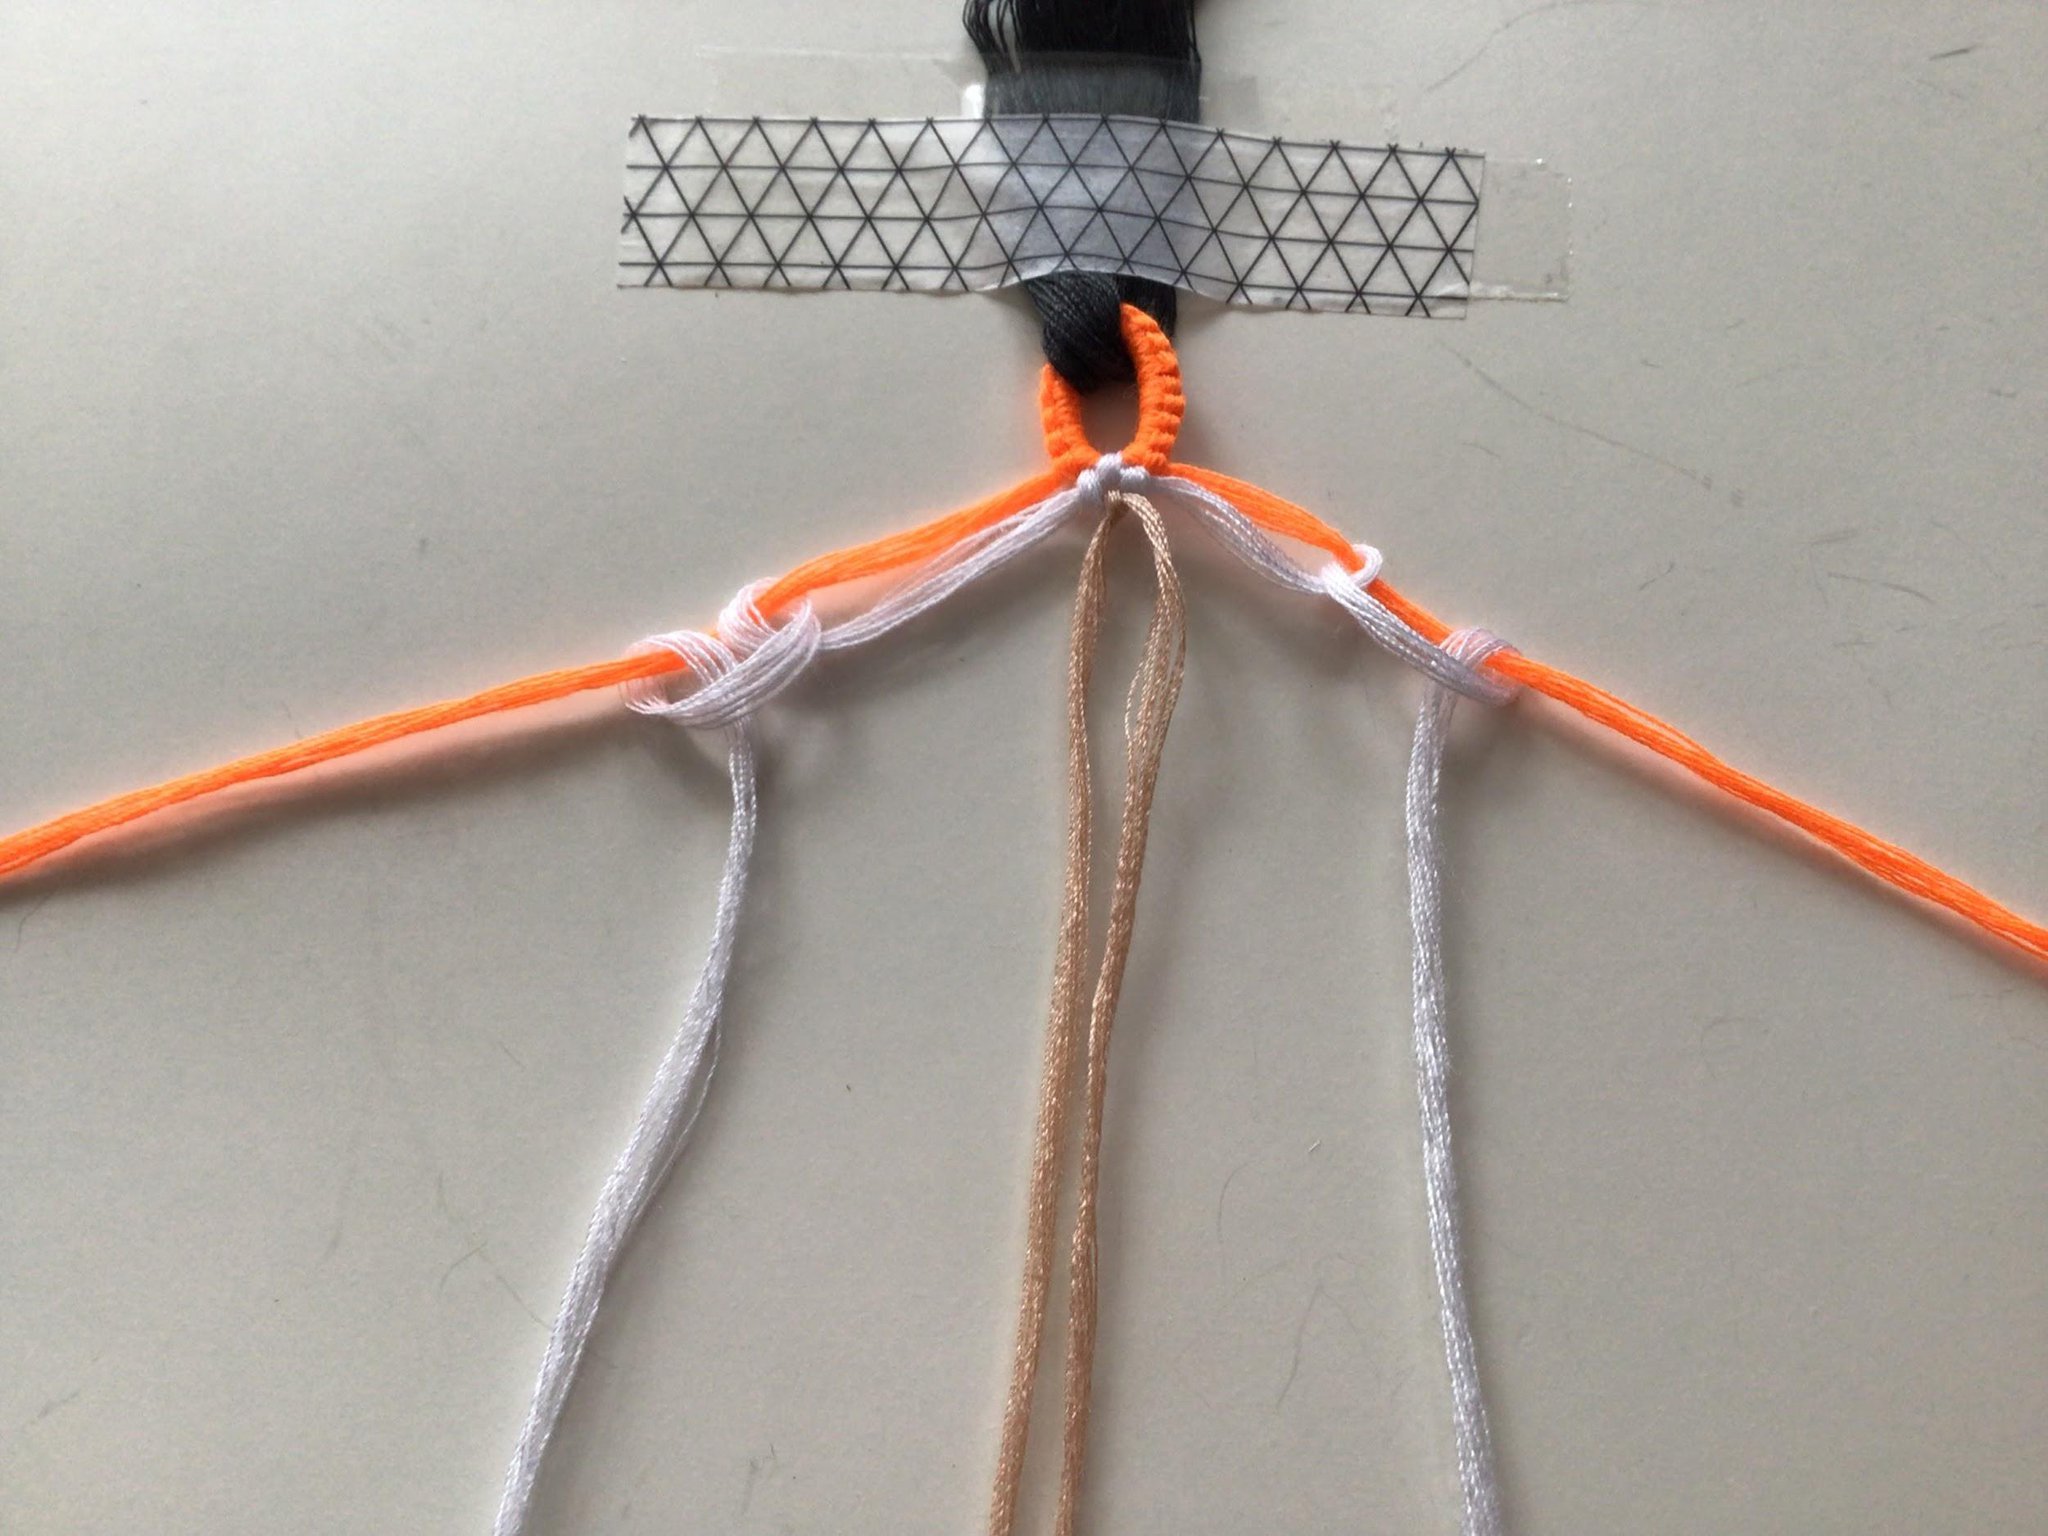
9.
We’re now going to make a mini chevron with the white strings. First make a forward knot with the white (on the left) onto the beige. Do the same on the right side but reversed.
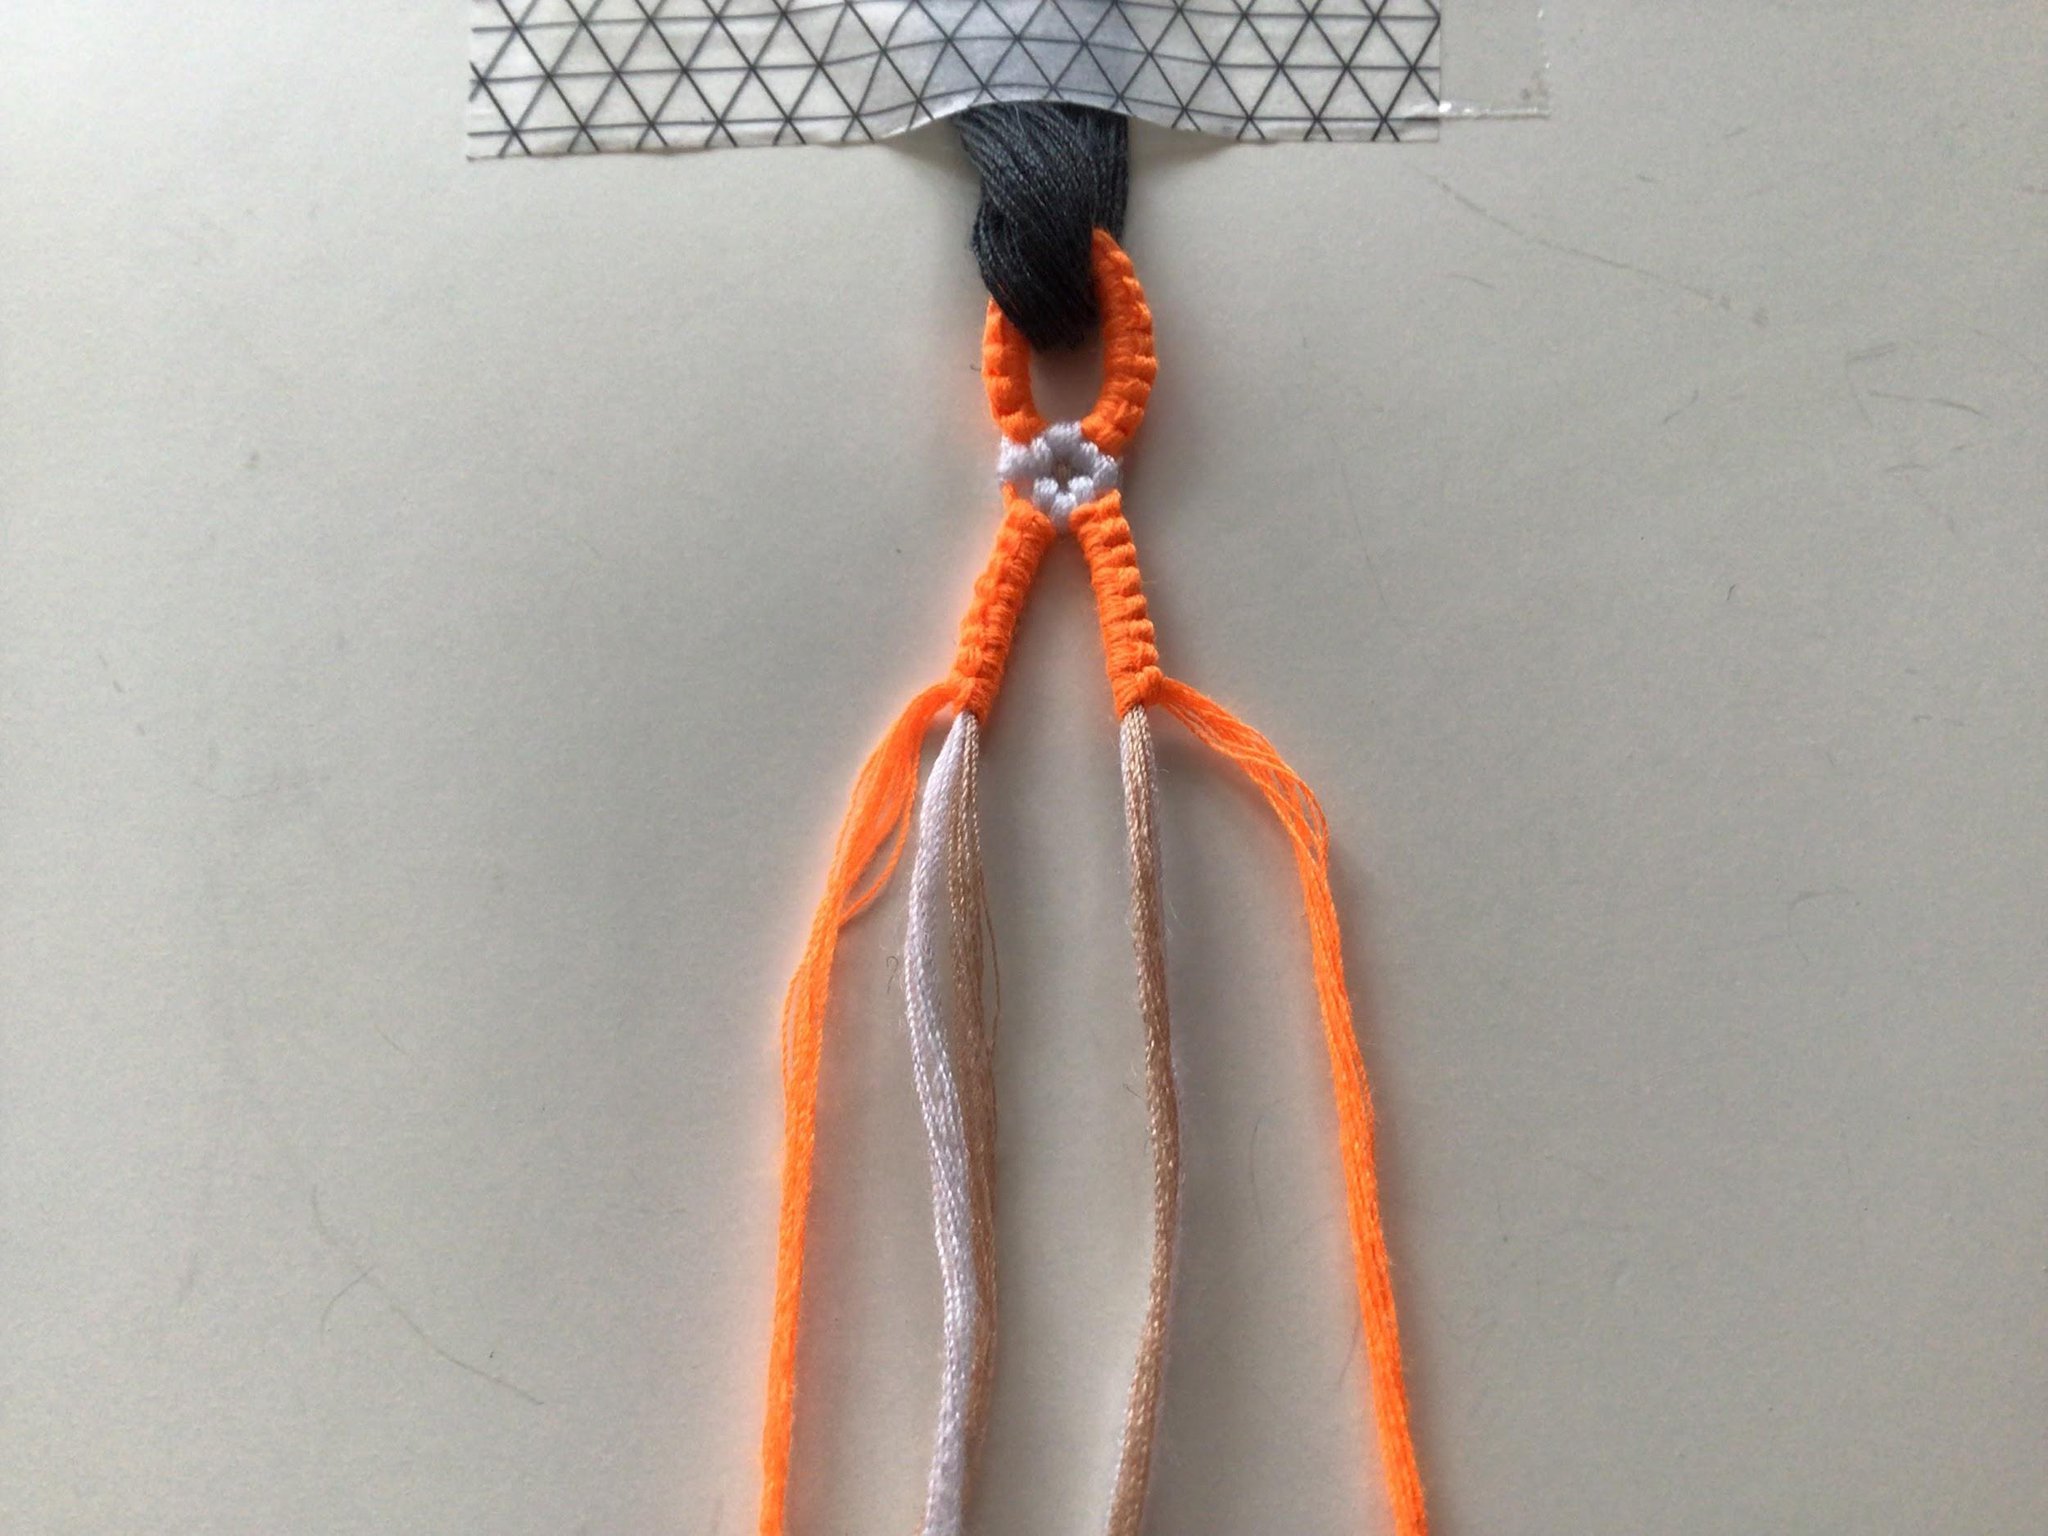
10.
Finish your flower by connecting the two white strings with a forward knot. Your flower is complete! Your string order should now be: orange, beige, white, white, beige, orange.
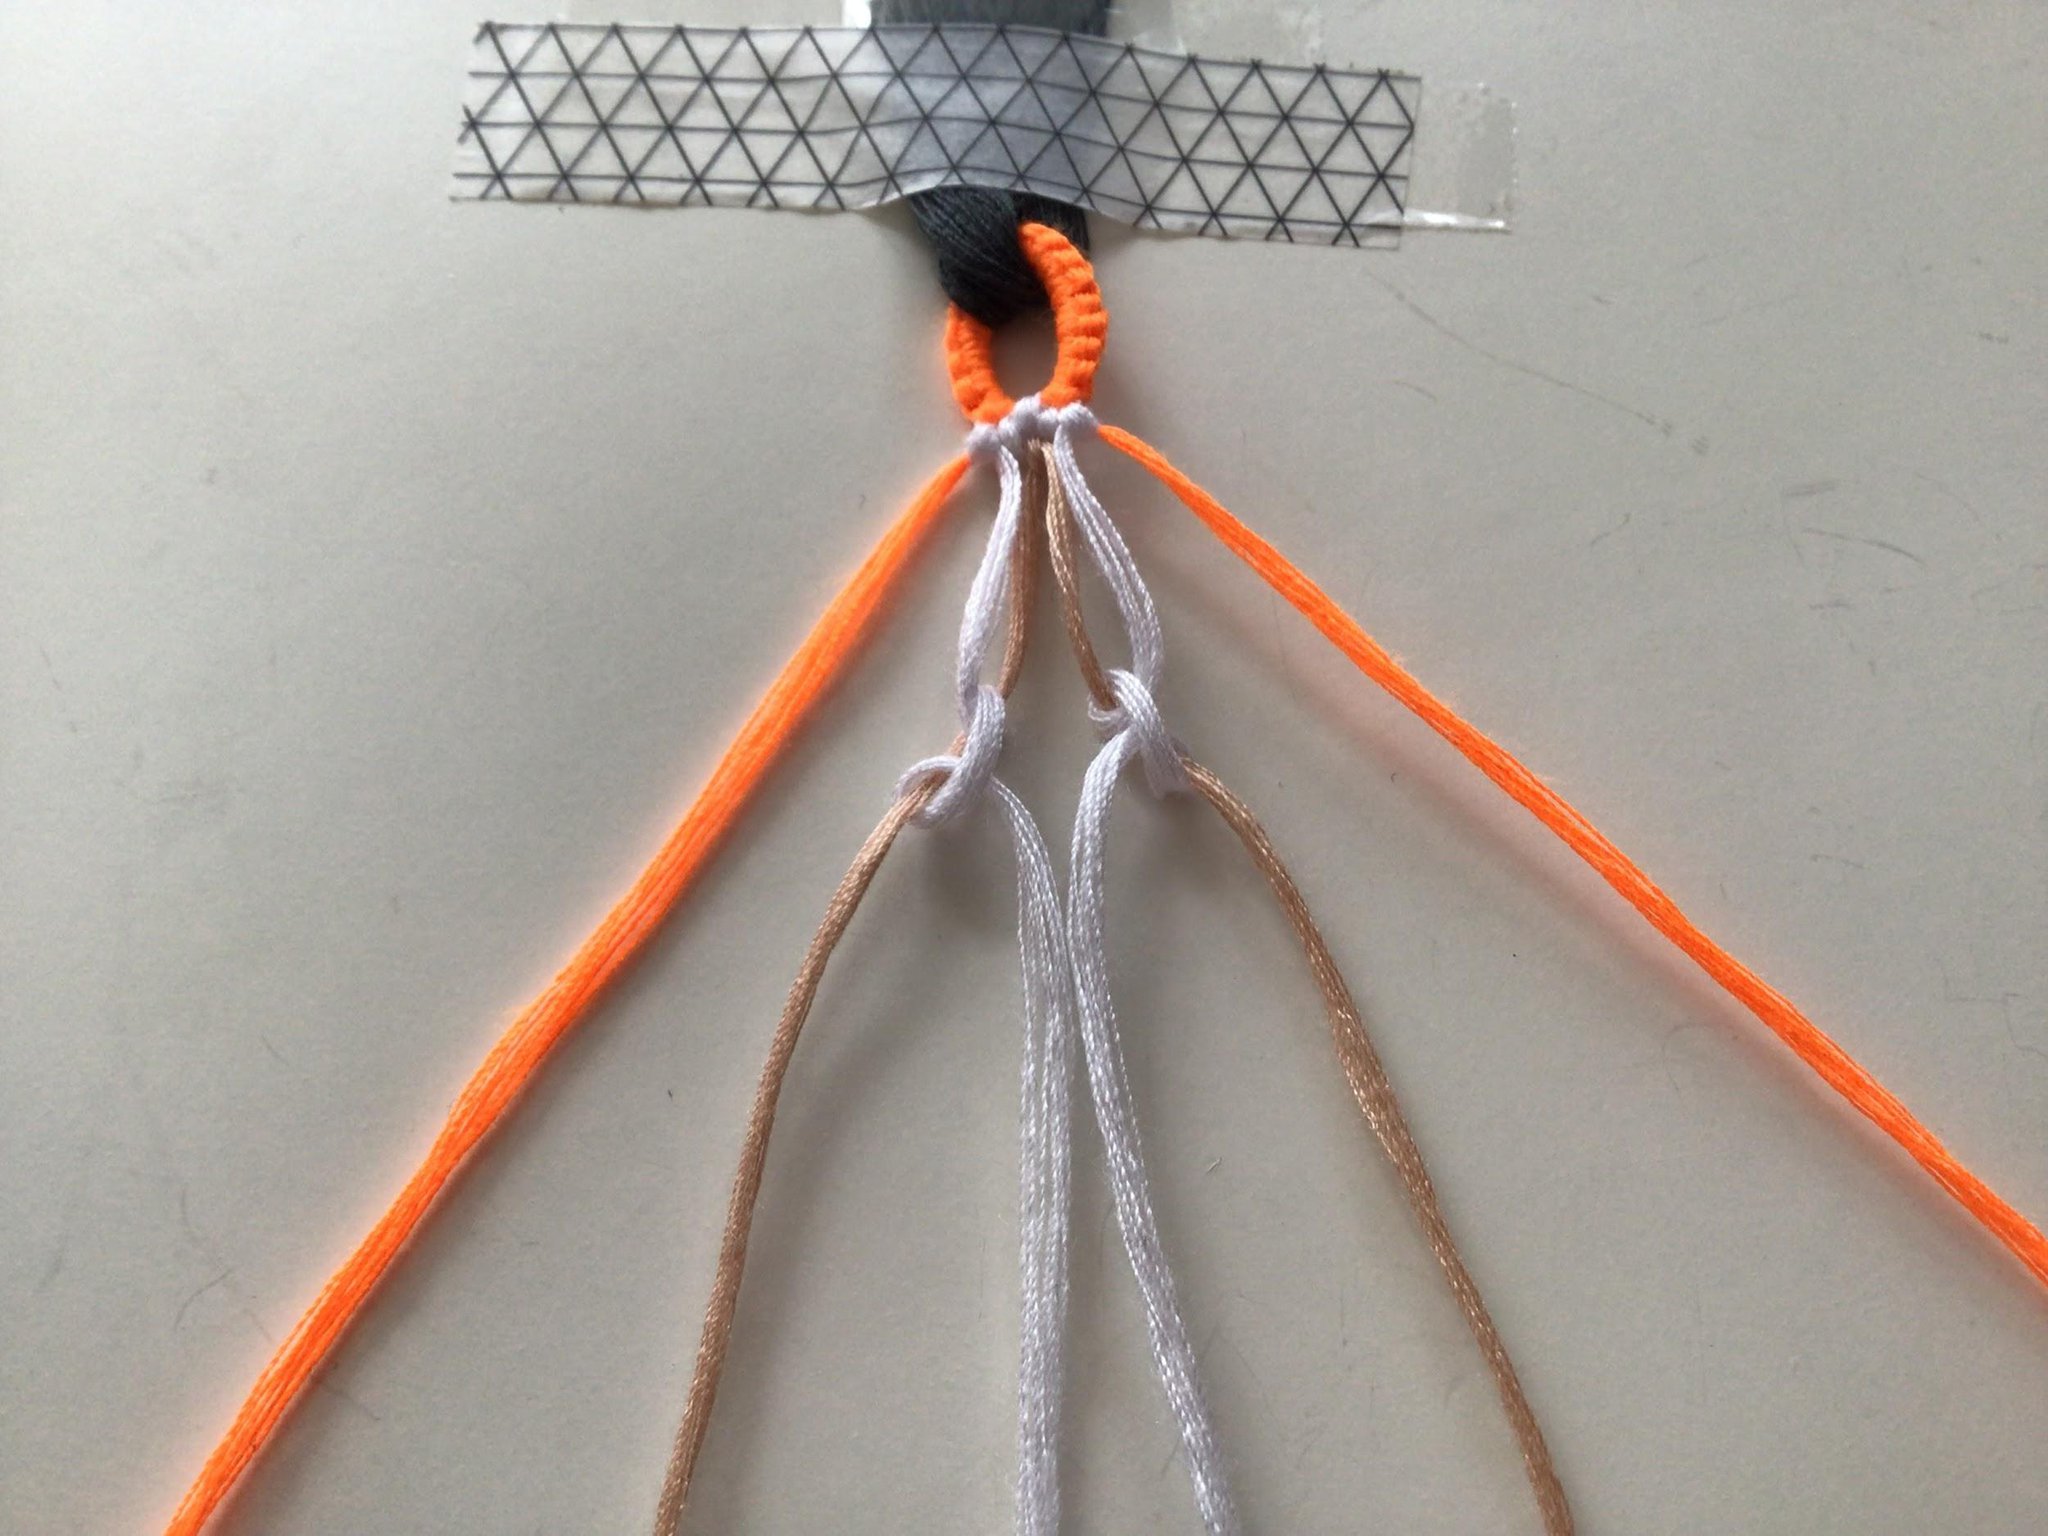
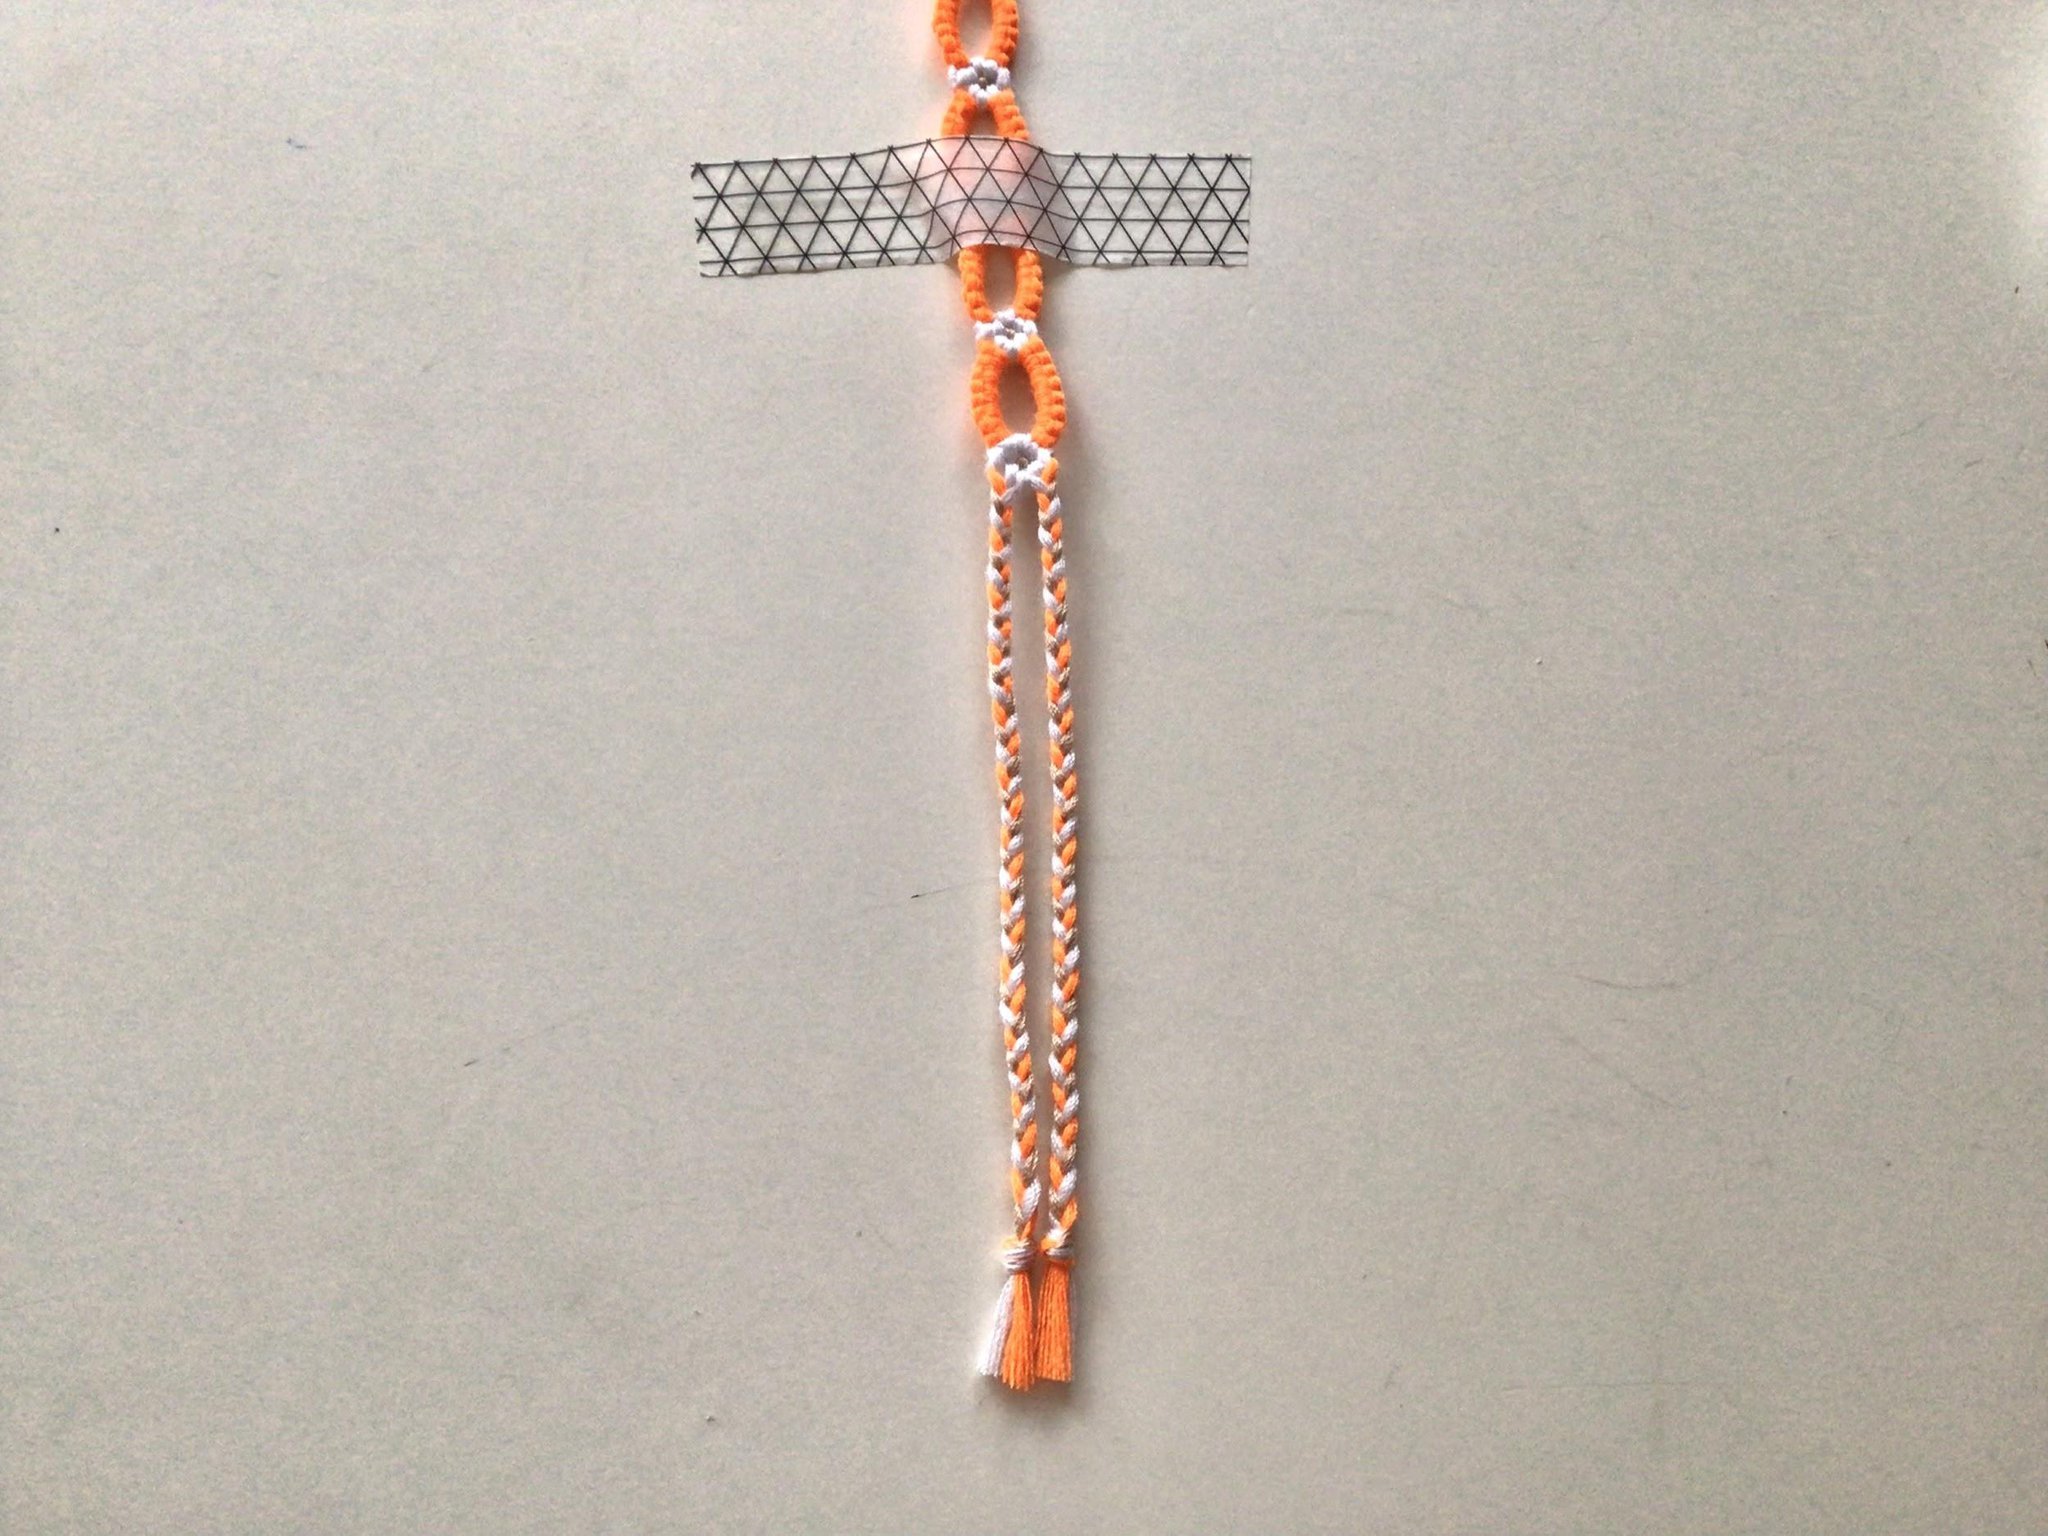
Your bracelet should now look like this.
The middle chains
We are done with our flower, and now we’re moving onto making the chains in the middle.
11.
Separate the strings into two groups, with one string of each colour in each group. Make a forward-backward knot with your orange string onto the entire ‘bundle’ of white and beige (on the left side) and repeat the step reversed on the right.
12.
Keep repeating step 11 for as much as you need. Since I am making 8 knots for each chain, I’ll be doing this 7 more times. That’s all for this part of your bracelet!
Continuing the bracelet
Now you know everything about how to make the daisy chain bracelet (apart from the ending) and it’s time to continue making your bracelet!
13.
Repeat everything from ‘the flowers’ to ‘the middle chains’ sections. Once you have your bracelet at your desired length, keep reading to learn how to end your bracelet!
Ending the bracelet
Our bracelets are almost complete! Lastly I’ll be showing you how to end your daisy chain bracelet. There are multiple ways to end daisy chain bracelets, and I personally prefer to end them with a flower. If you want to end yours with a closed loop, see below. There are two ways that I do it. (I’m ending mine with a flower, so I won’t be demonstrating, sorry.)
14.
To end your bracelet with a closed loop, first make a forward knot instead of a forward-backward knot with the orange string onto the other strings. Do the same on the other side, but of course with a backward knot instead.
15.
Then, make a forward knot between the orange strings. If you want to secure your loop further you can make BF and FB knots respectively with the orange string onto the left and right groups again. Then reconnect the orange strings with another forward knot.
16.
Alternatively, you can make a square knot with the orange threads onto the other threads. This makes your bracelet more secure and I prefer this to the method above, but it’s your choice!
17.
Finally, make the ties of your choice, and trim the ends! I usually braid the ends but you can do anything you like!
This isn’t the same bracelet, but it’s very similar, if you want to see 🙂
And there you go, you’ve got a completed daisy chain bracelet! If you want to see more photos of the finished product, go find photos of pattern #76616. I hope you had fun and I’ll see you next time! If you have questions, feel free to ask me in the comments or send me a message!
- Lisa
- Lisa