Rate Tutorial
This tutorial will show you how to find or create the right patterns to use for Alpha and Normal frilly-edged bracelets, and how to create the frills on Alpha and Normal bracelets.
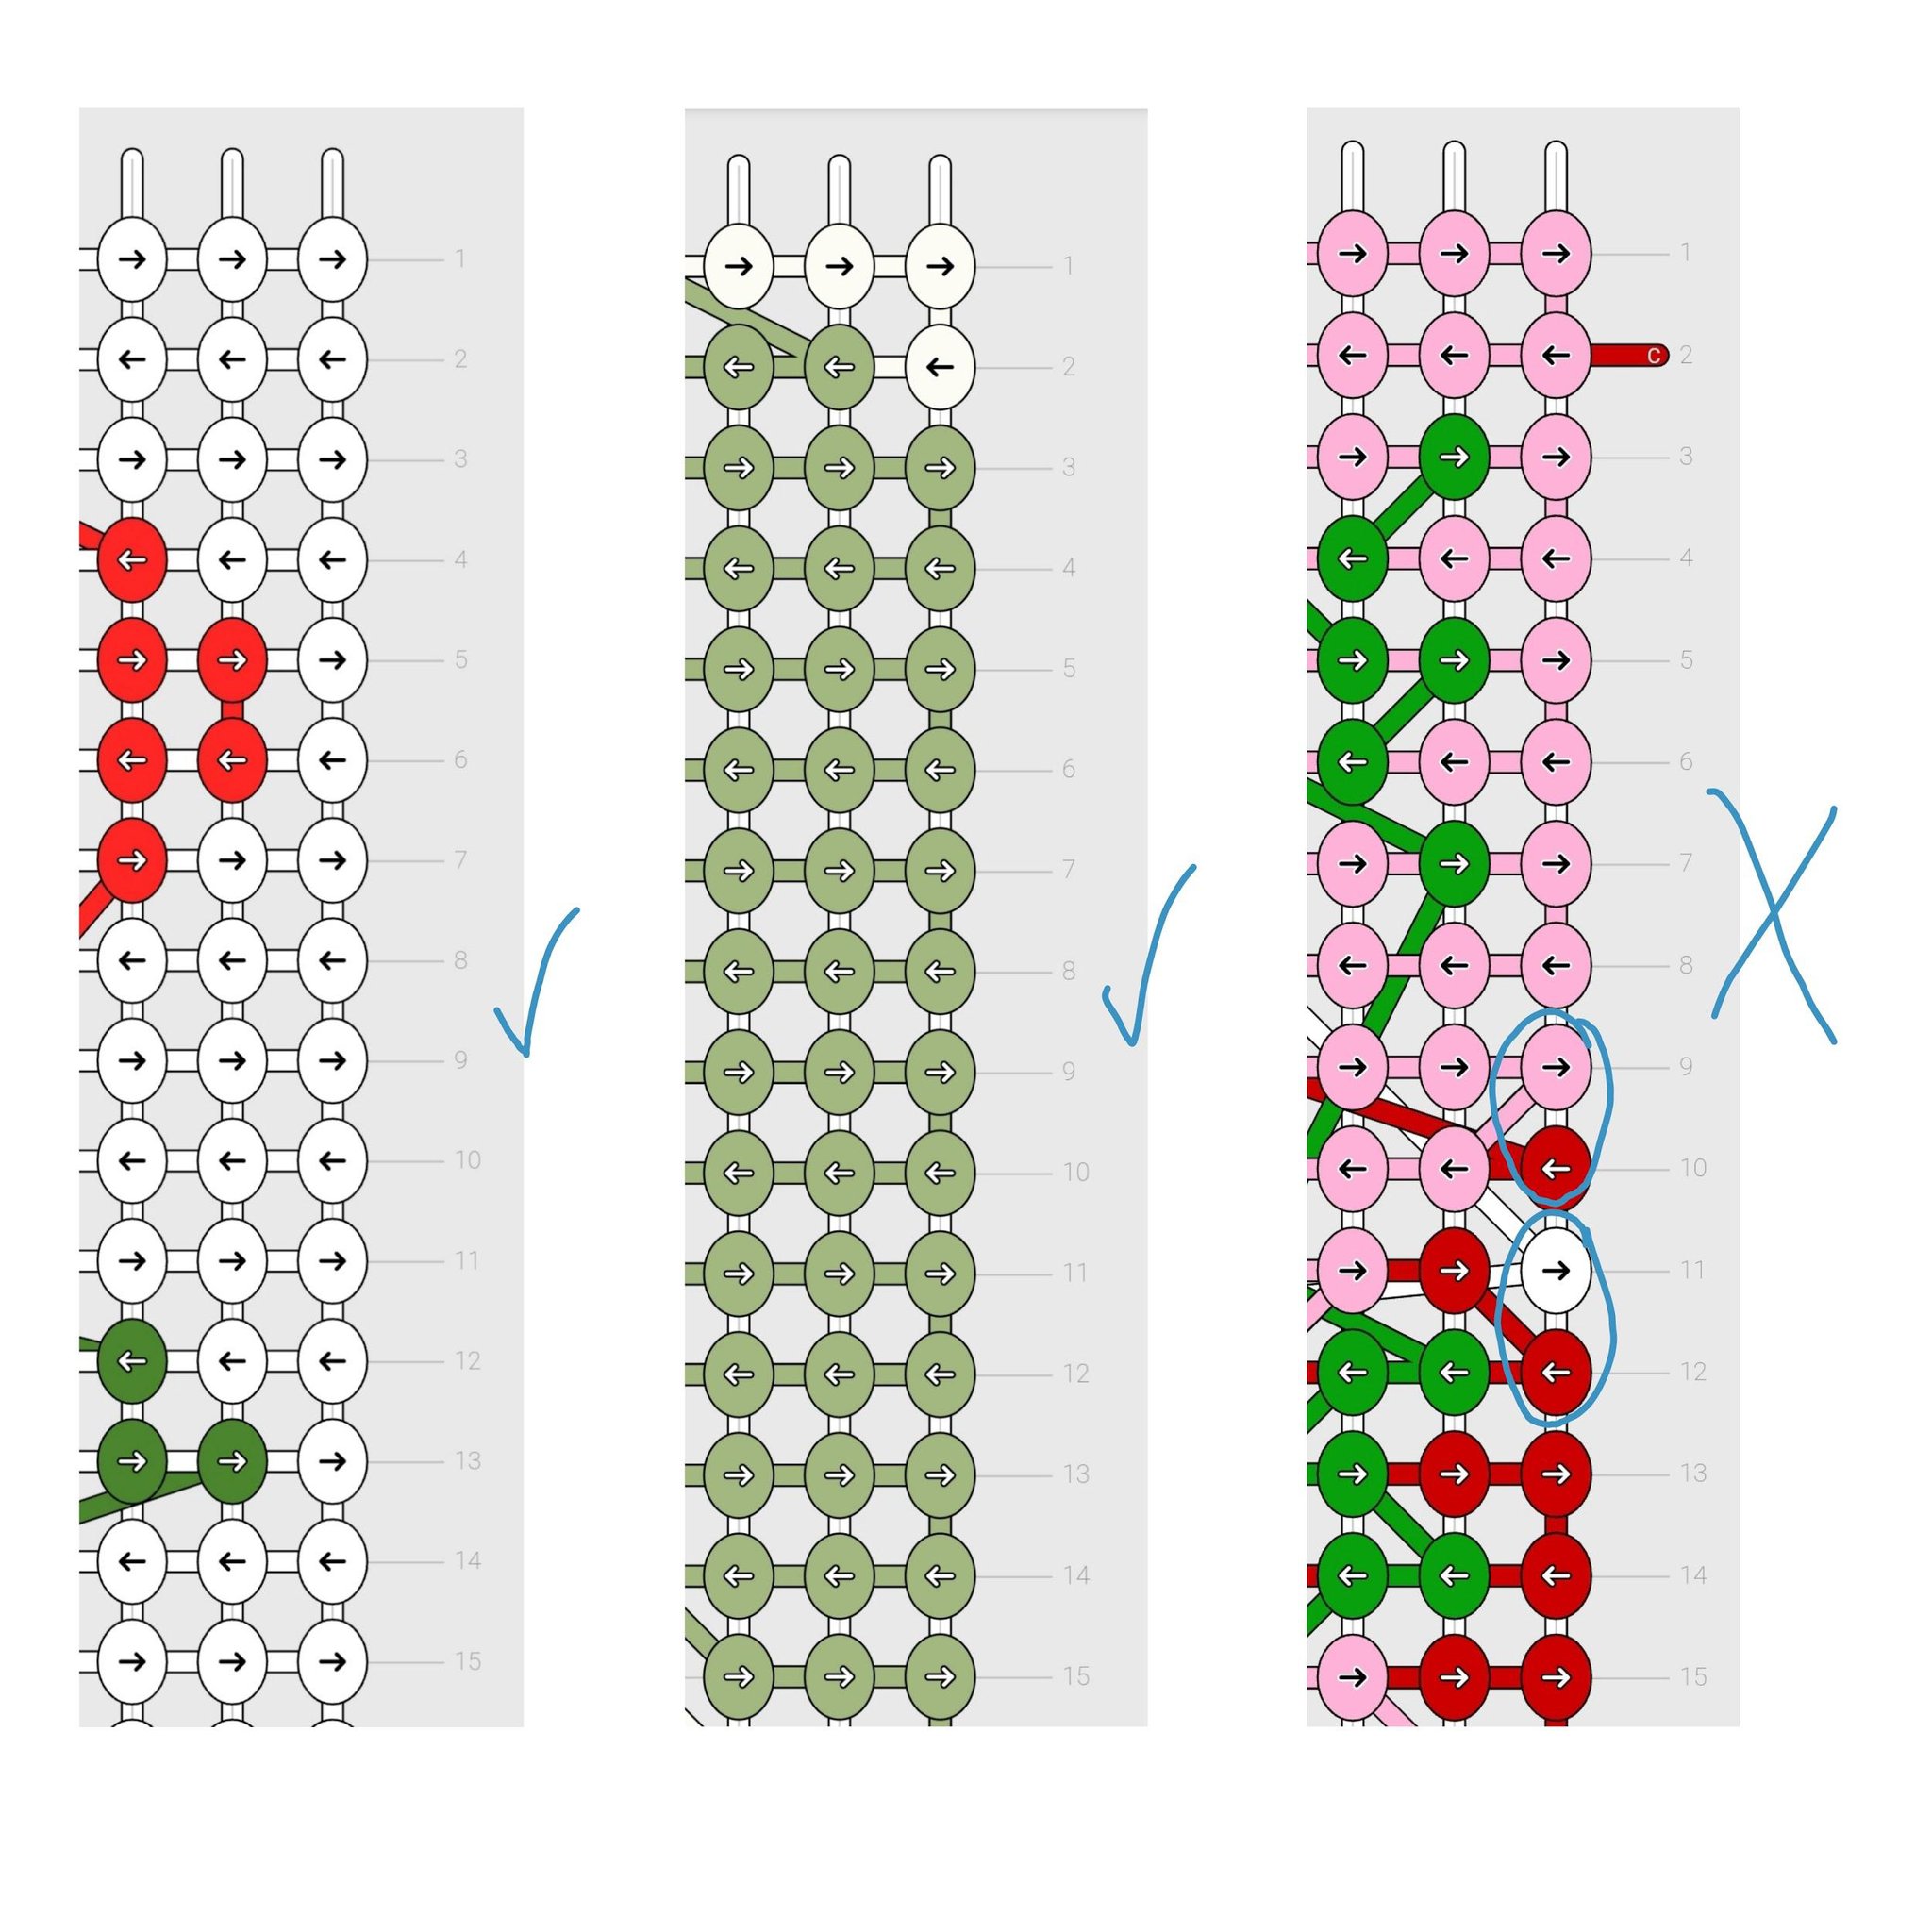
Picking an Appropriate Alpha Pattern
Throughout your pattern, the knot before each loop (a forward knot on the right side of your bracelet, and a backward knot on the left) should be the same color as the knot after each loop (a backward knot on the right side of your bracelet, and a forward knot on the left). The easiest way to achieve this is to choose a pattern with solid-colored borders.
While it’s possible to have more than one color of loop in one bracelet, you need to be very careful to follow the rule above. Check the entire pattern before knotting for any possible violations to the rule.
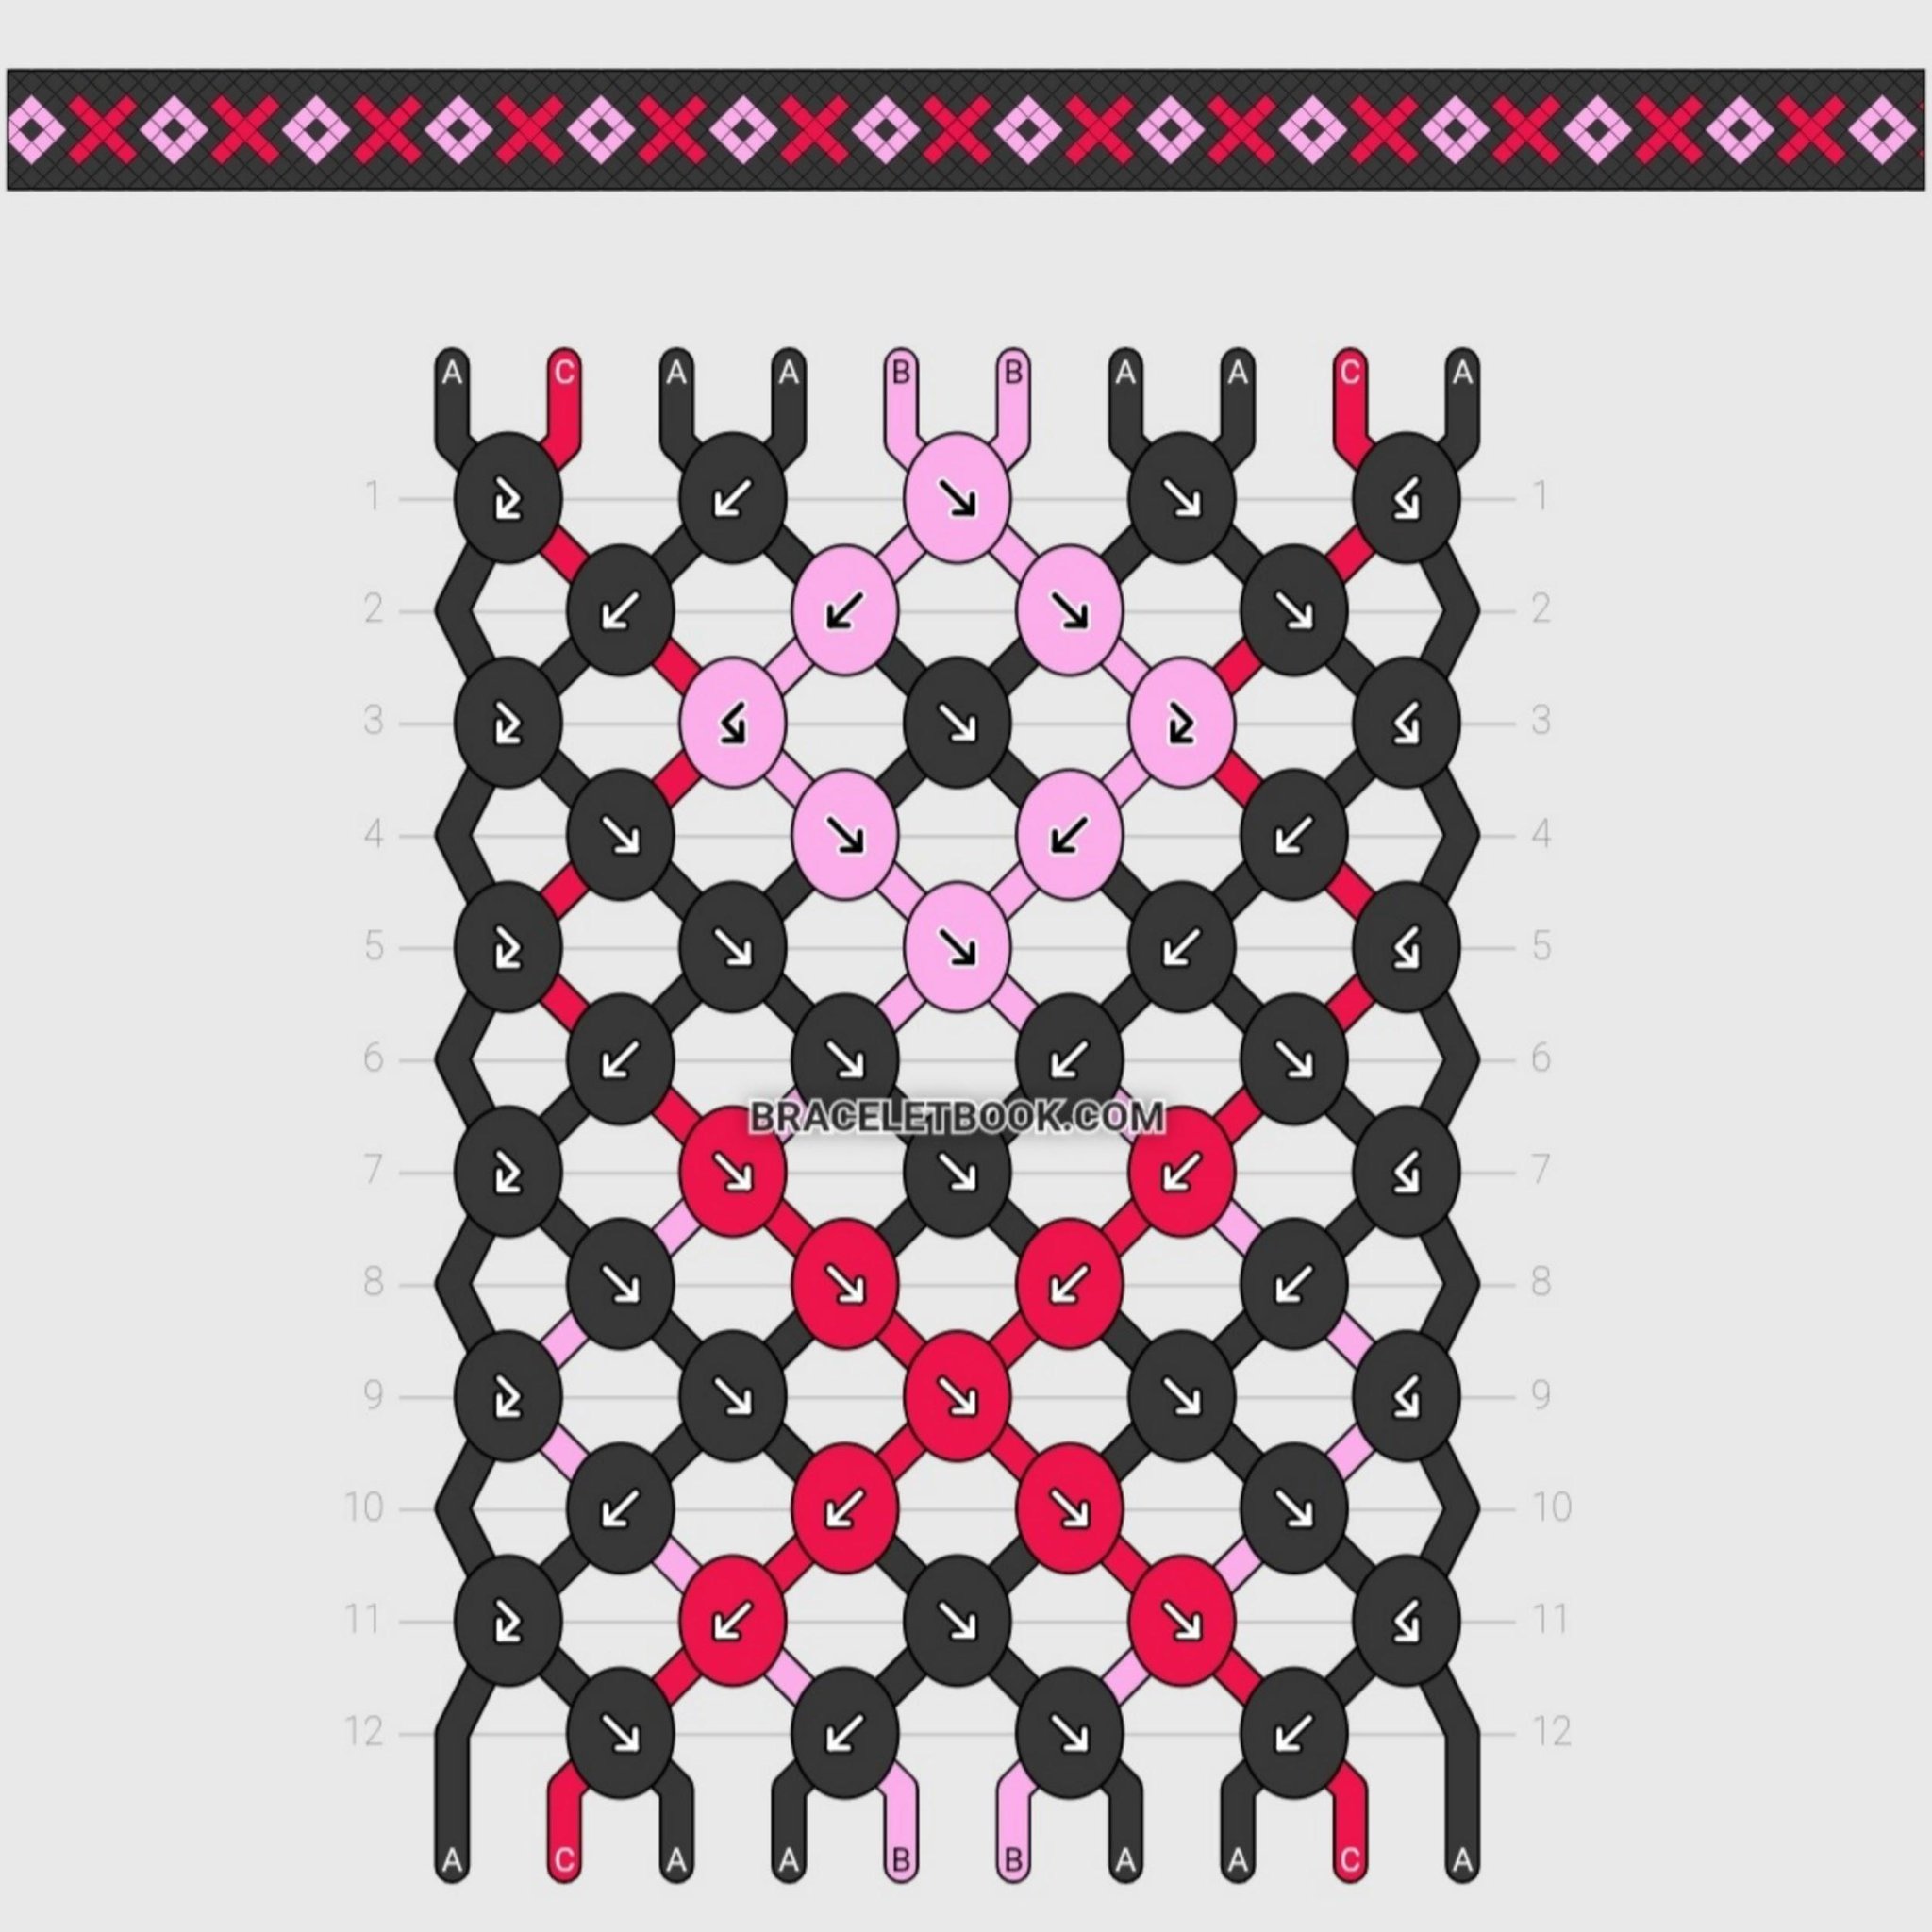
Example patterns shown, from left to right:
#89768
#87658
#45618
While it’s possible to have more than one color of loop in one bracelet, you need to be very careful to follow the rule above. Check the entire pattern before knotting for any possible violations to the rule.
Example patterns shown, from left to right:
#89768
#87658
#45618
Creating the Frills on an Alpha Bracelet
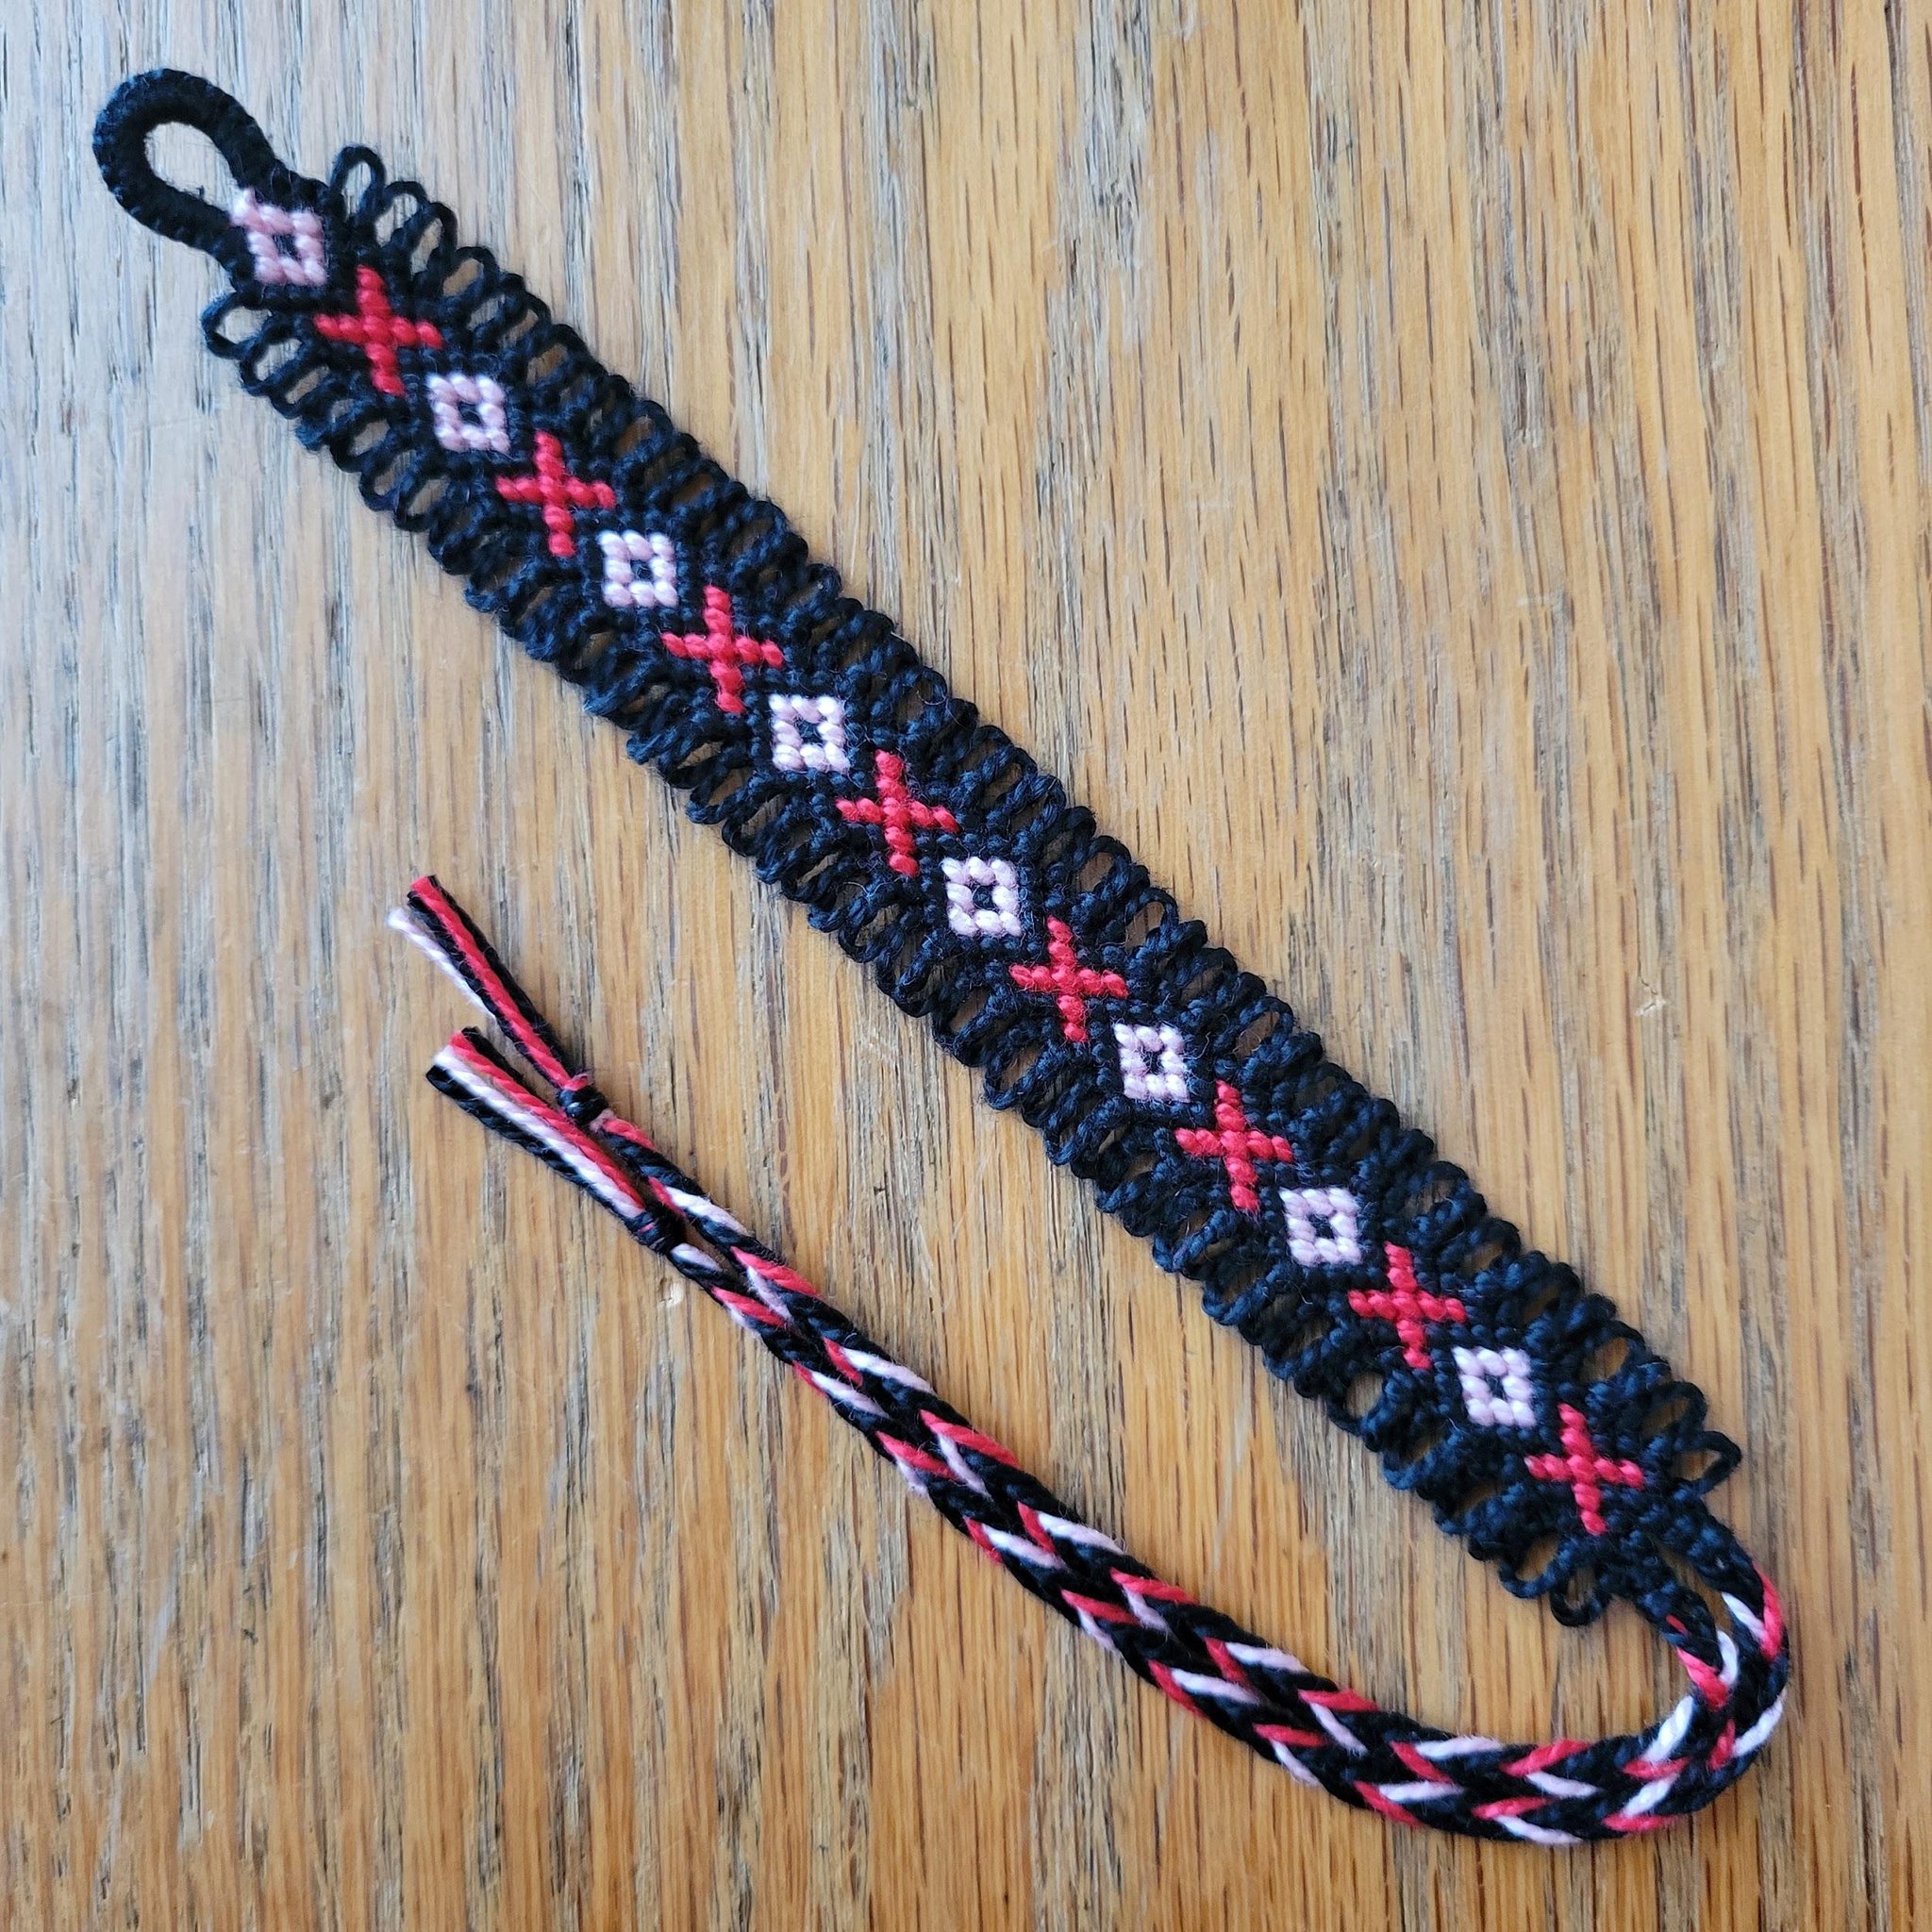
First, choose an appropriate pattern. I will be using pattern #89768.
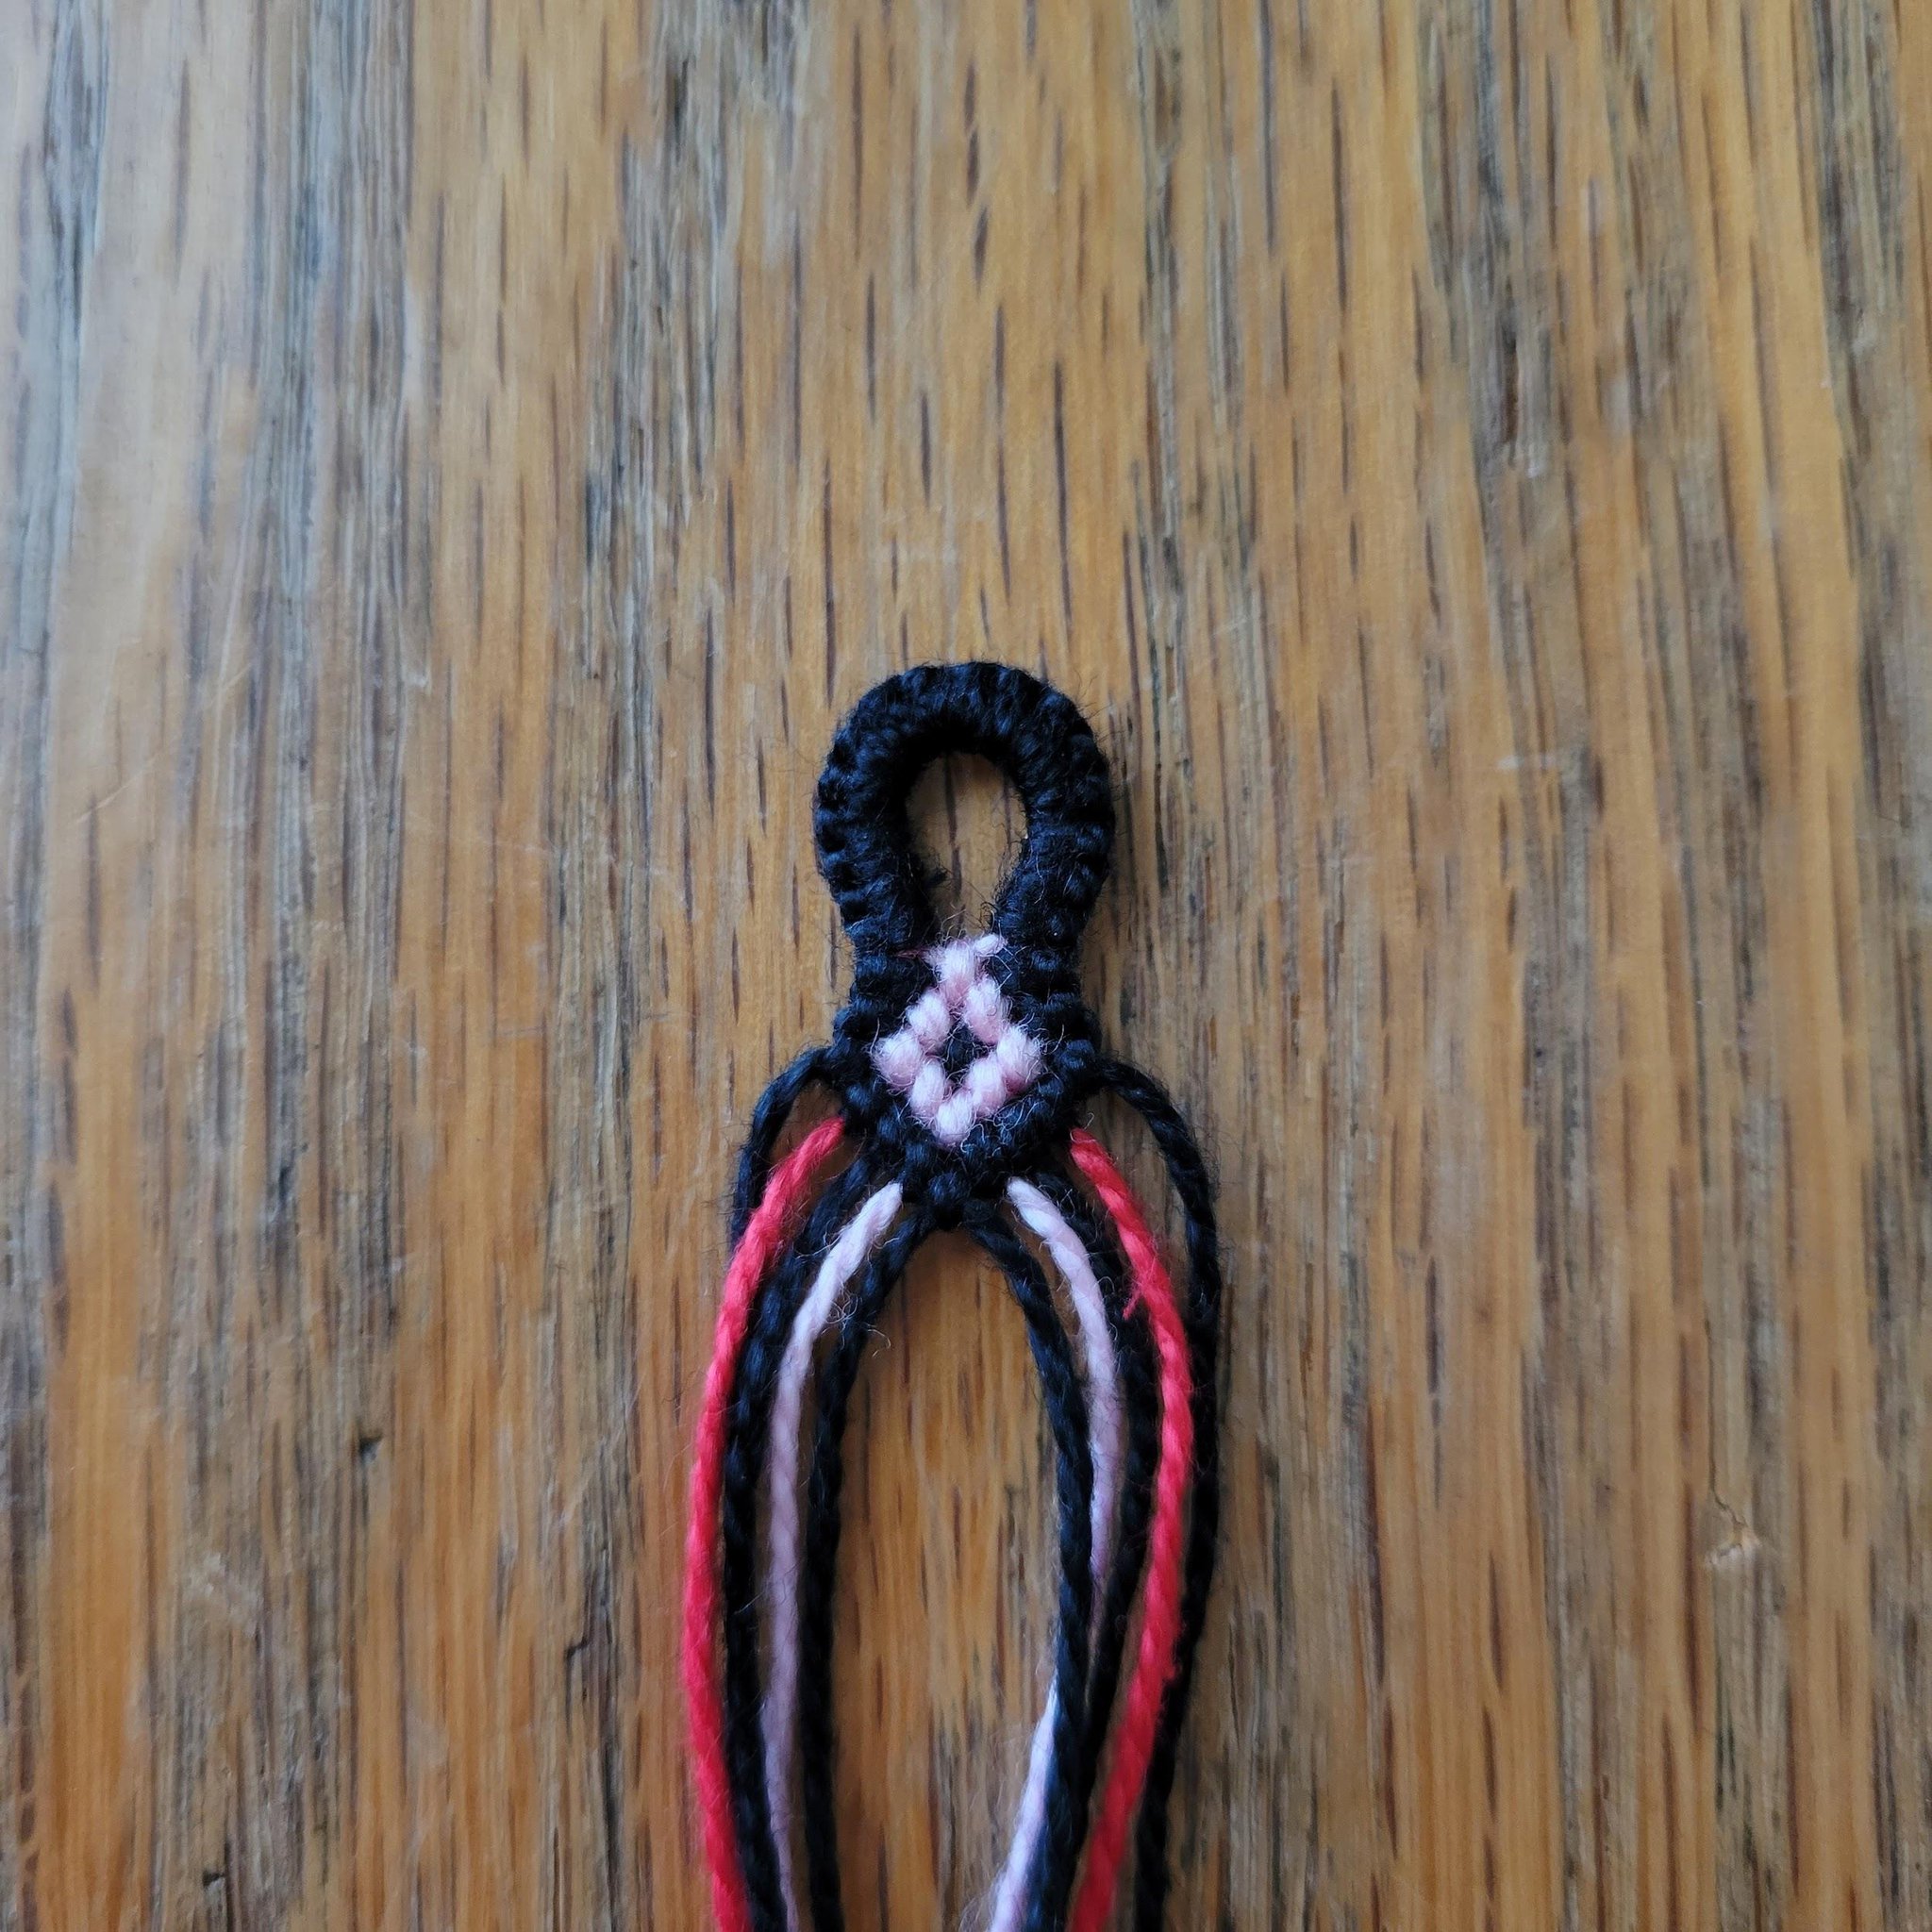
Next, create any starts you would like and knot the first row of your pattern like you normally would. Do not use the straight-edges technique.
Next, create any starts you would like and knot the first row of your pattern like you normally would. Do not use the straight-edges technique.

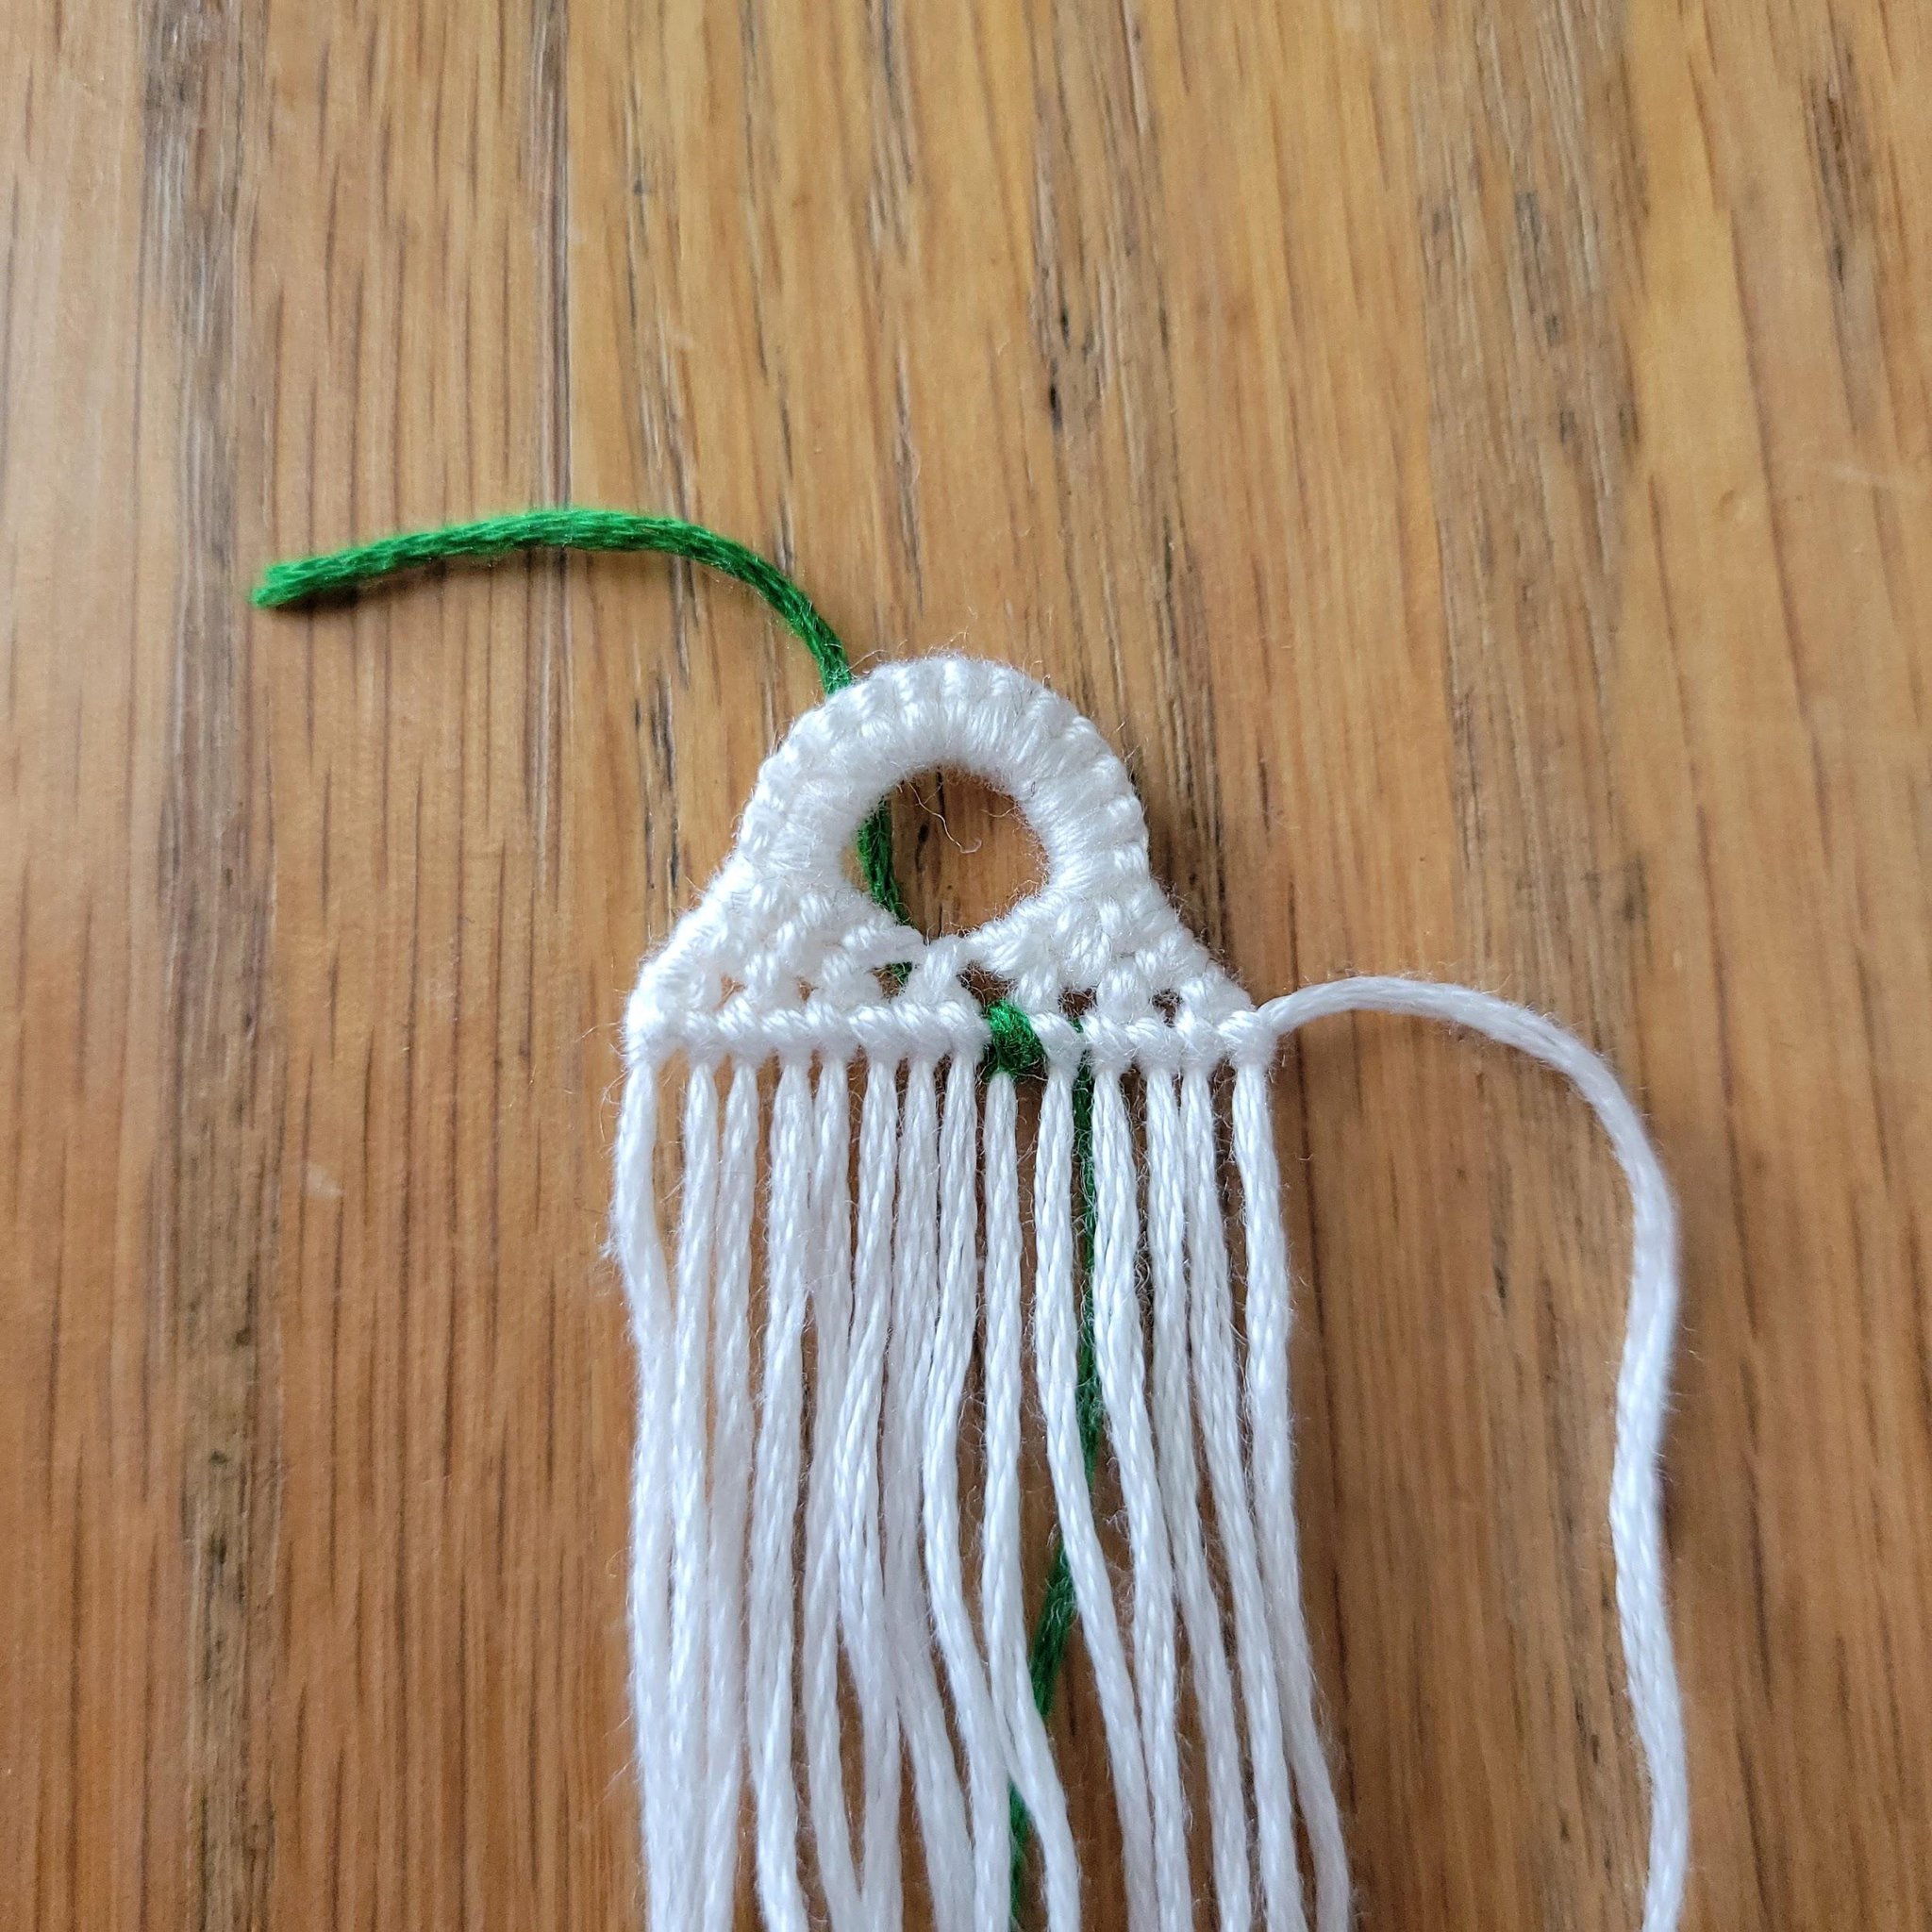
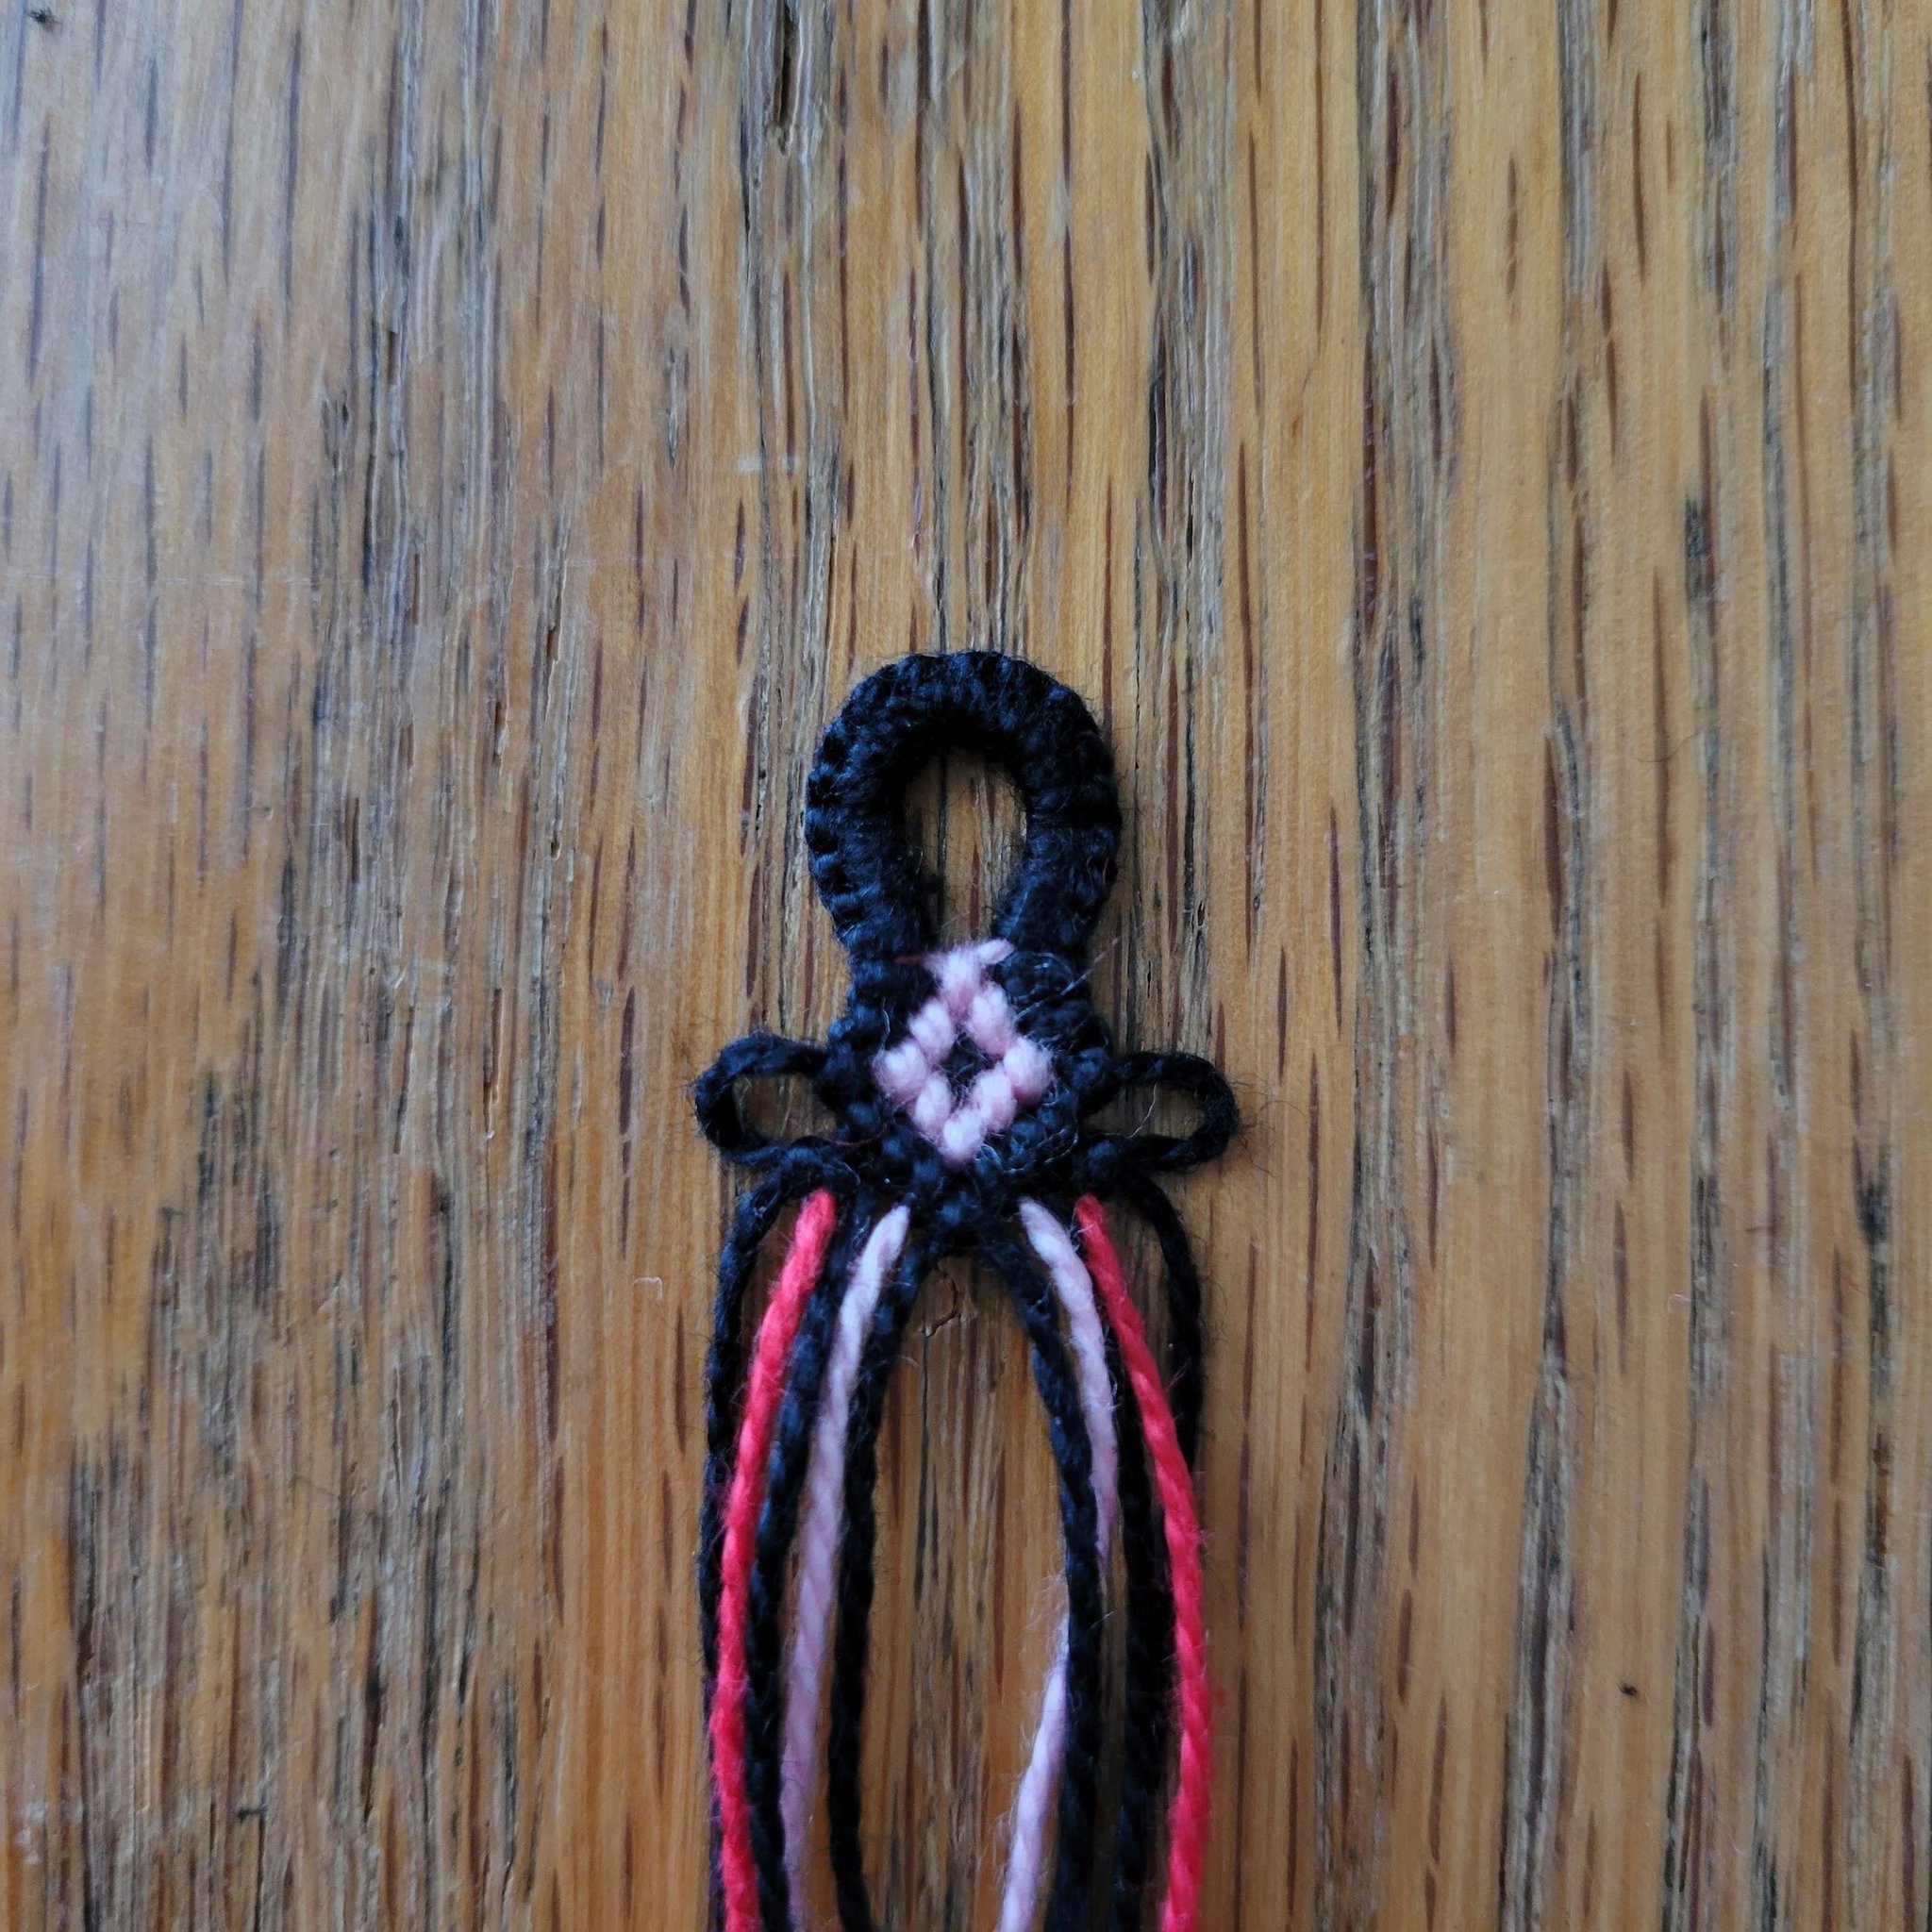
When creating the first knot of the next row, place something in between the last knot of the previous row and the first knot of this new row. Make sure the knot you just made is tight and secure.
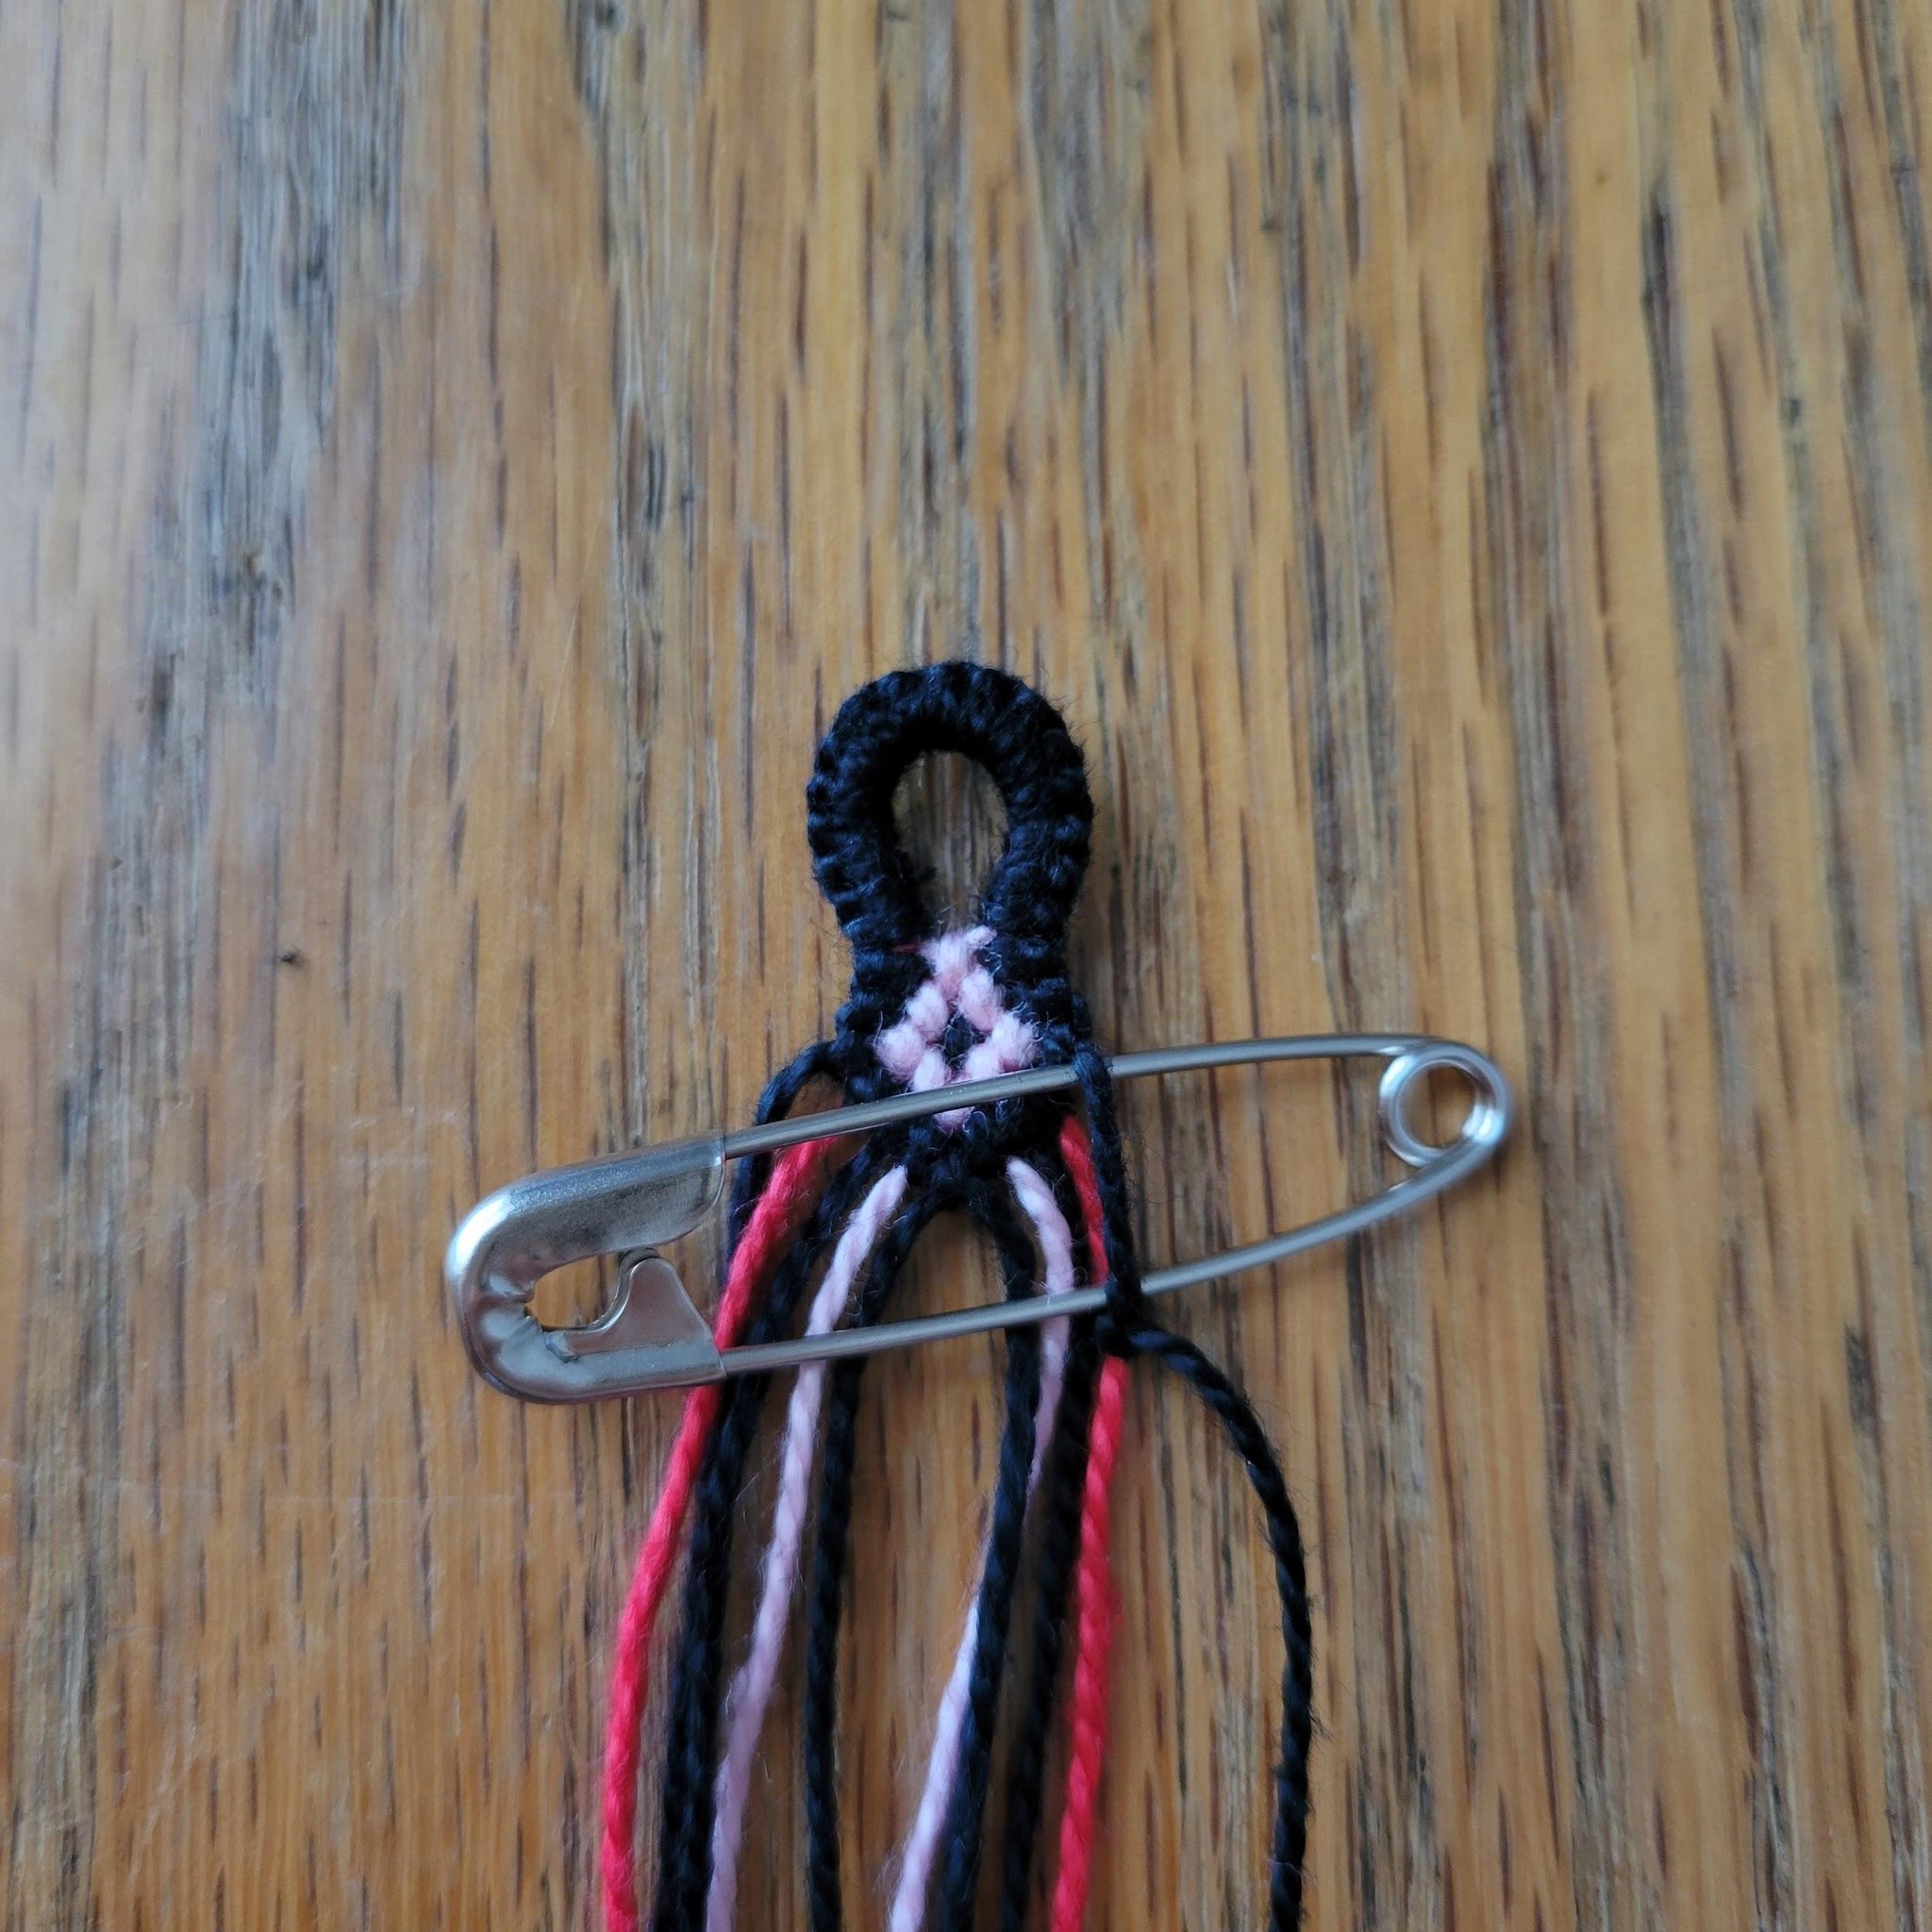
You can use a variety of items to space out your knots and create frills. I recommend using something flat that’s easy to remove from the loop created. Here I’m using a safety pin, but you can use other objects like a piece of thin cardboard, a popsicle stick, a paperclip, etc. The larger the object, the larger the frill loop.
You can use a variety of items to space out your knots and create frills. I recommend using something flat that’s easy to remove from the loop created. Here I’m using a safety pin, but you can use other objects like a piece of thin cardboard, a popsicle stick, a paperclip, etc. The larger the object, the larger the frill loop.
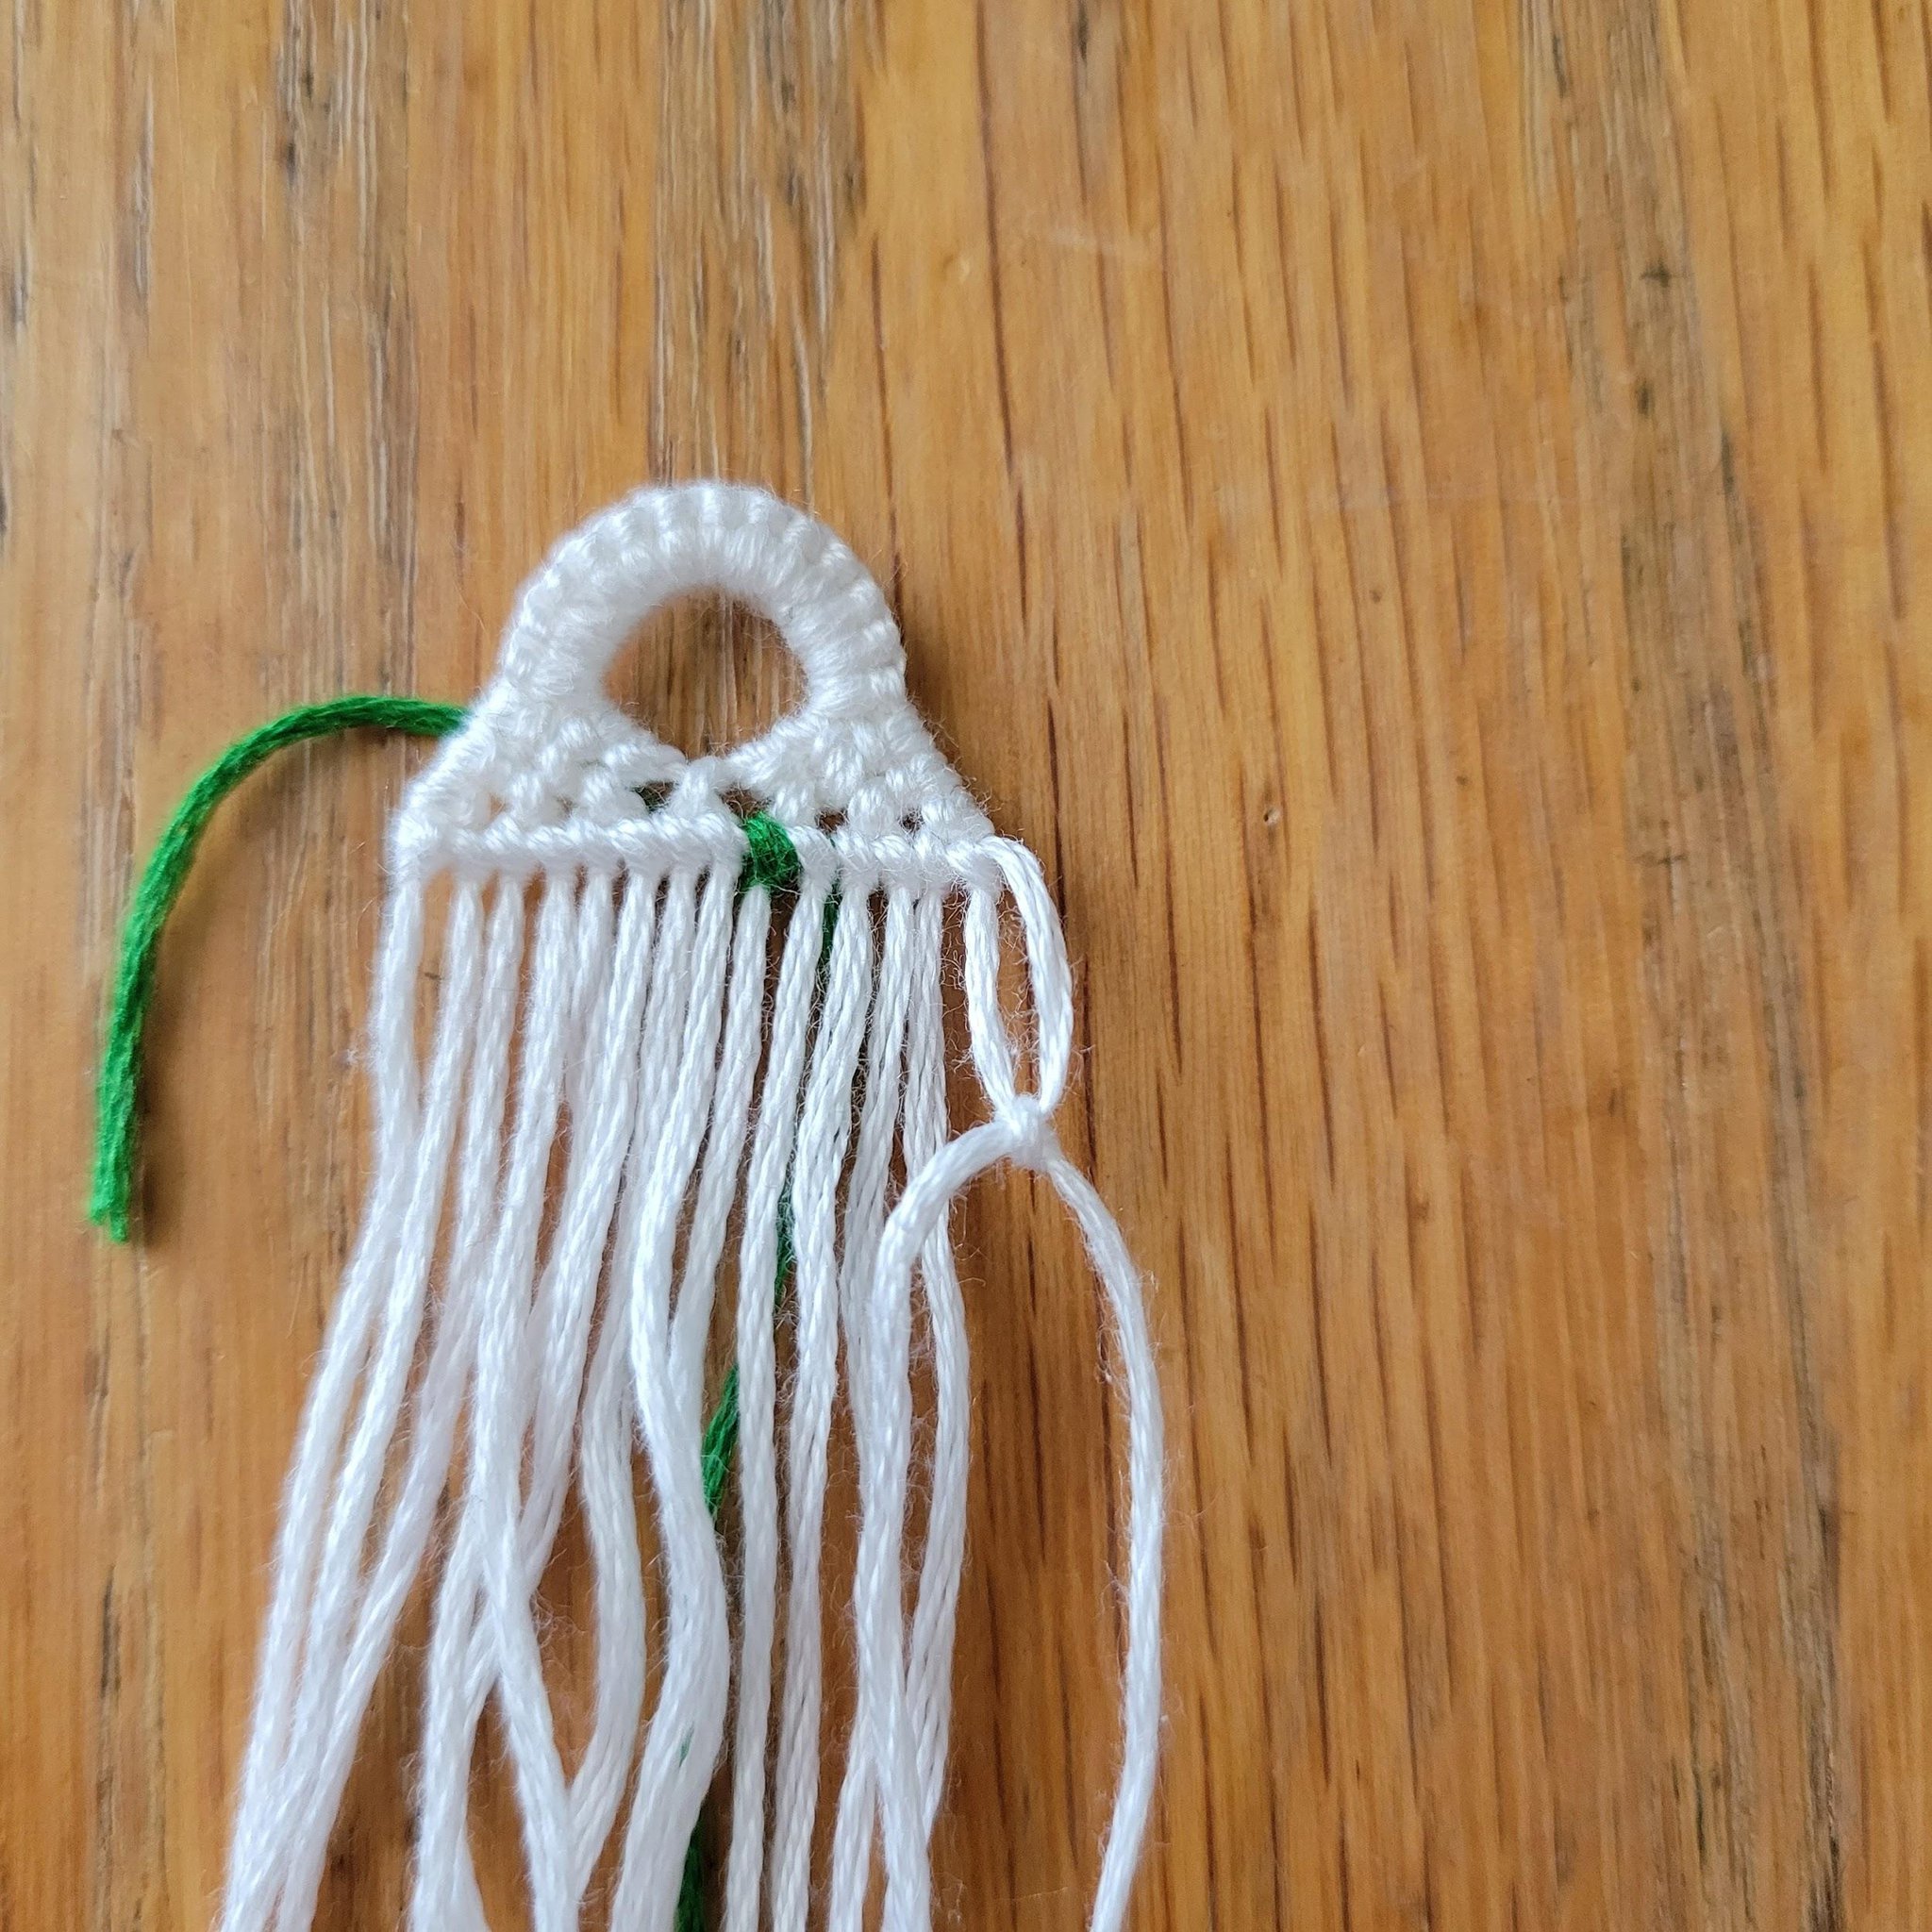
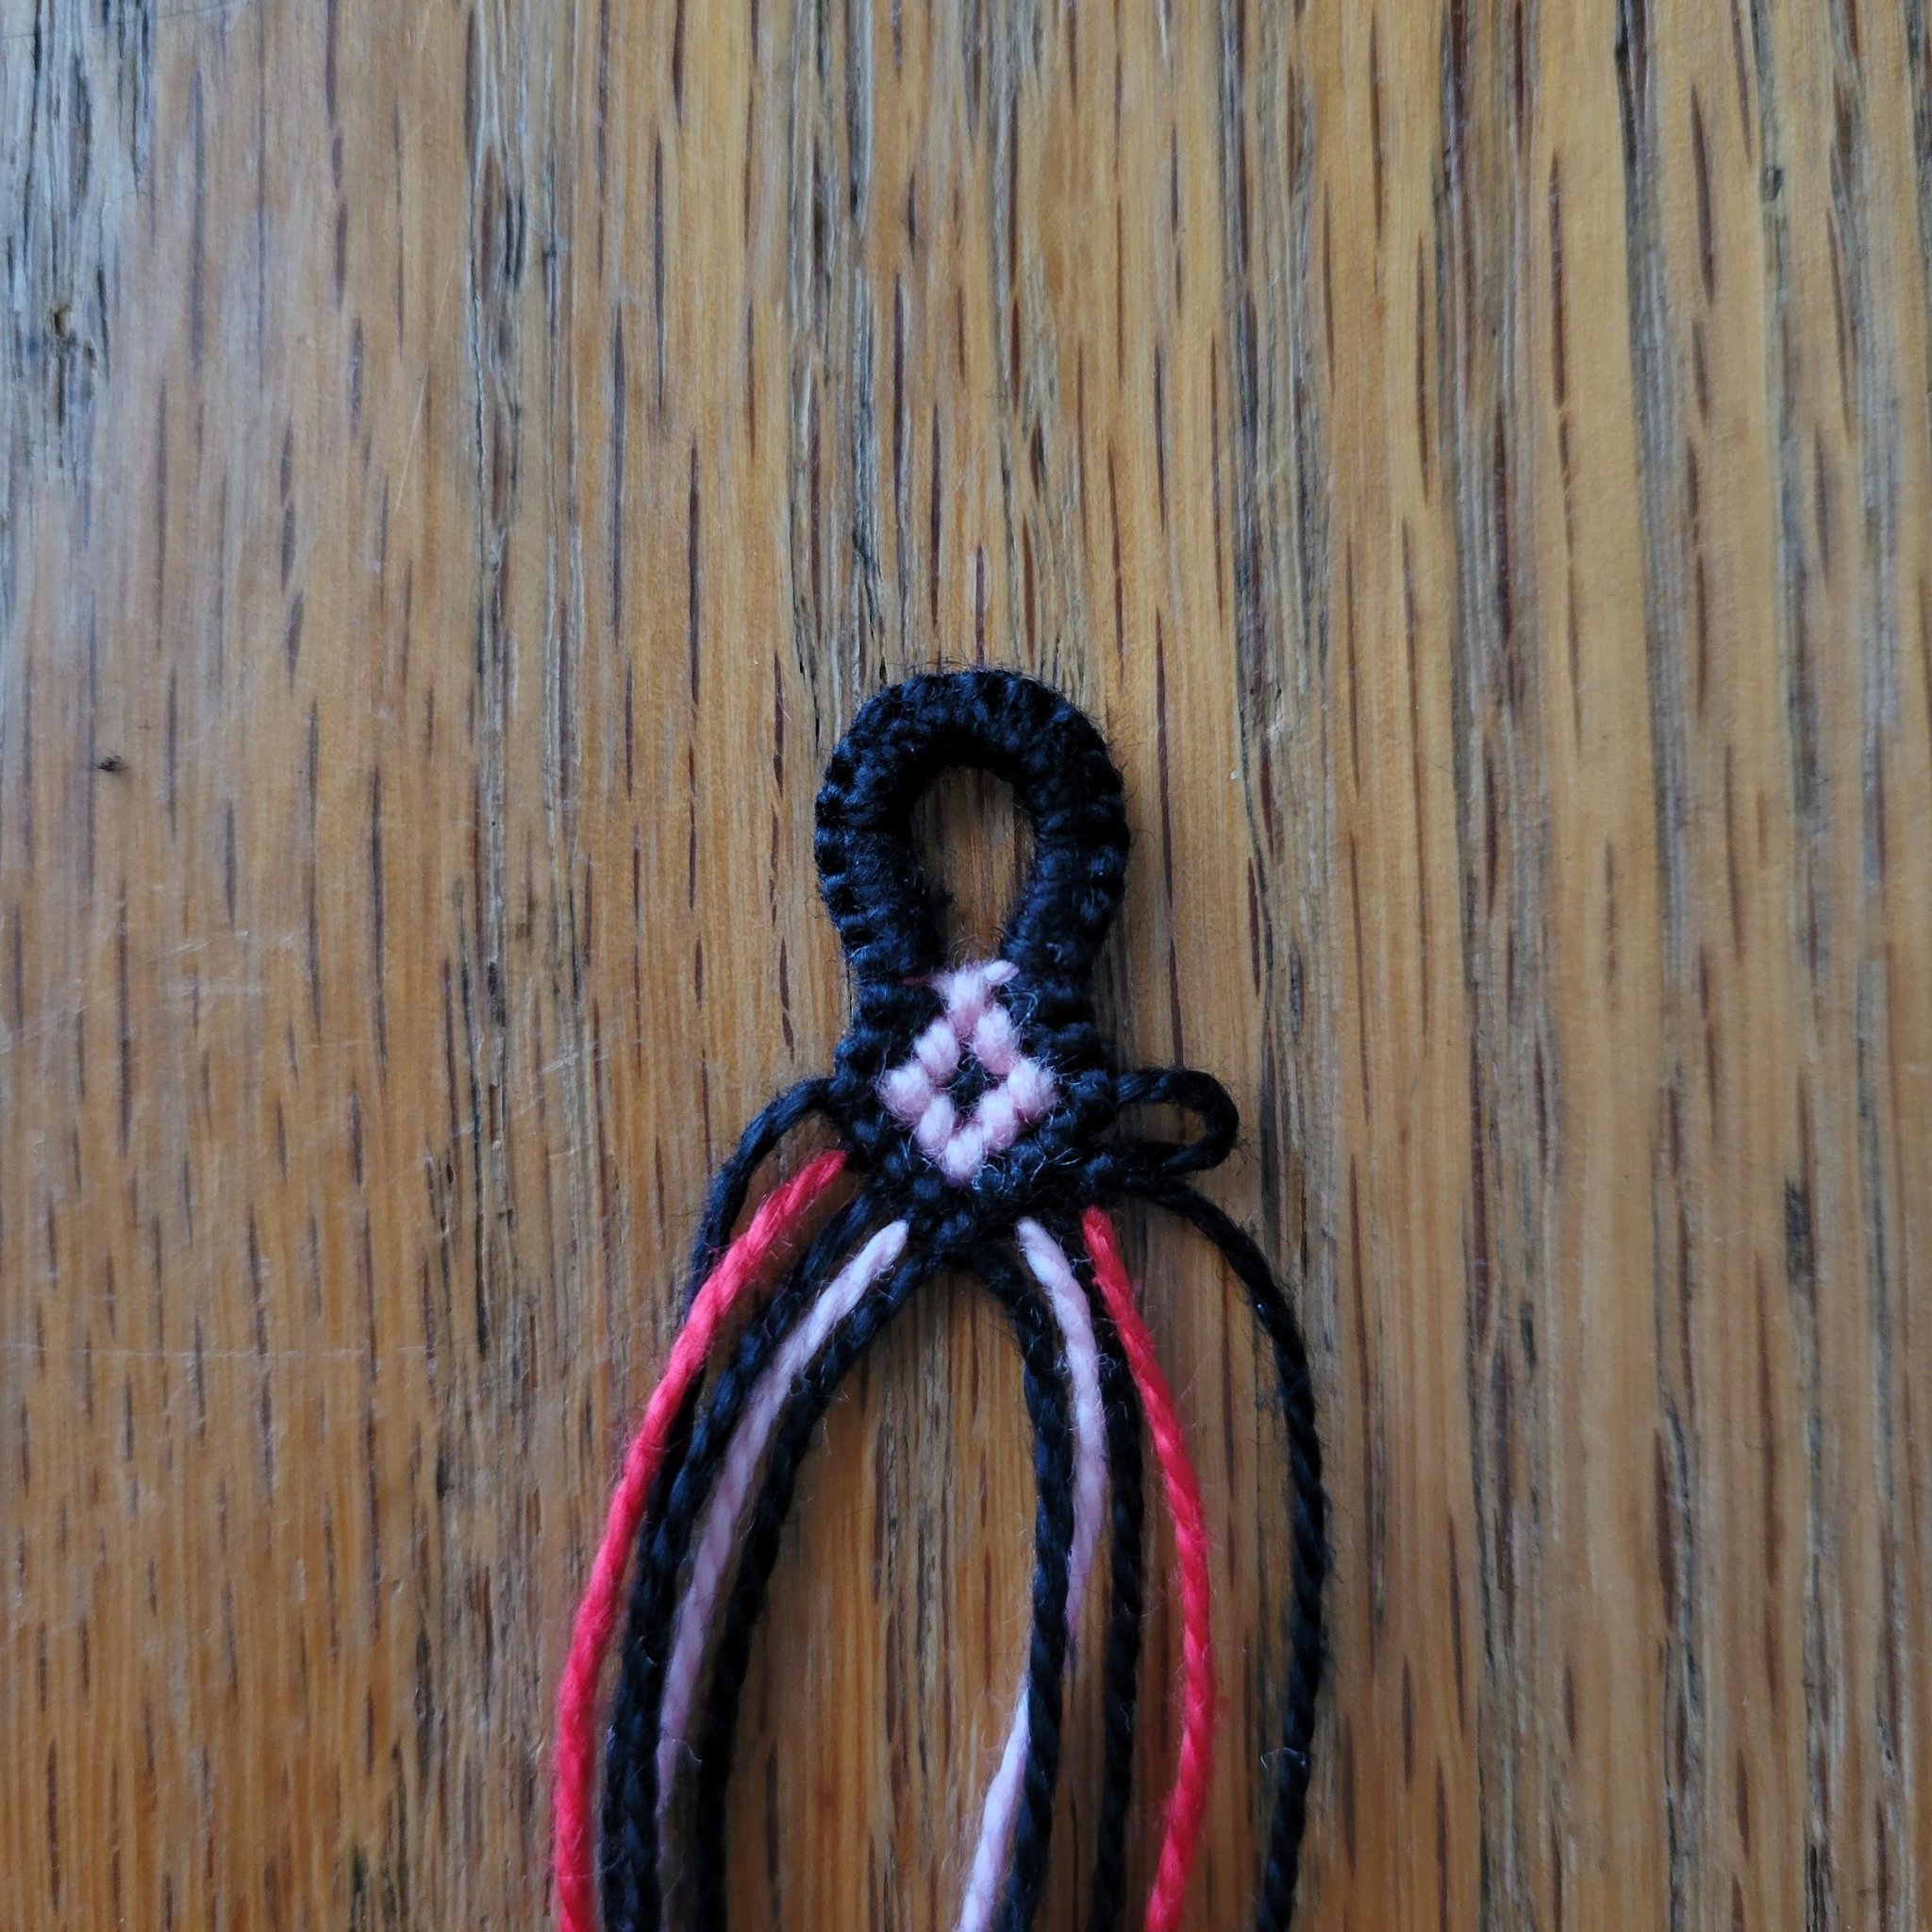
Remove the object. Do not tighten or loosen any of your knots.

Use your fingernail to slide the new knot up, snug against the previous row. Again, do not tighten or loosen any of your knots.

Finish the row normally, and repeat the same steps on the other side to create another frill.
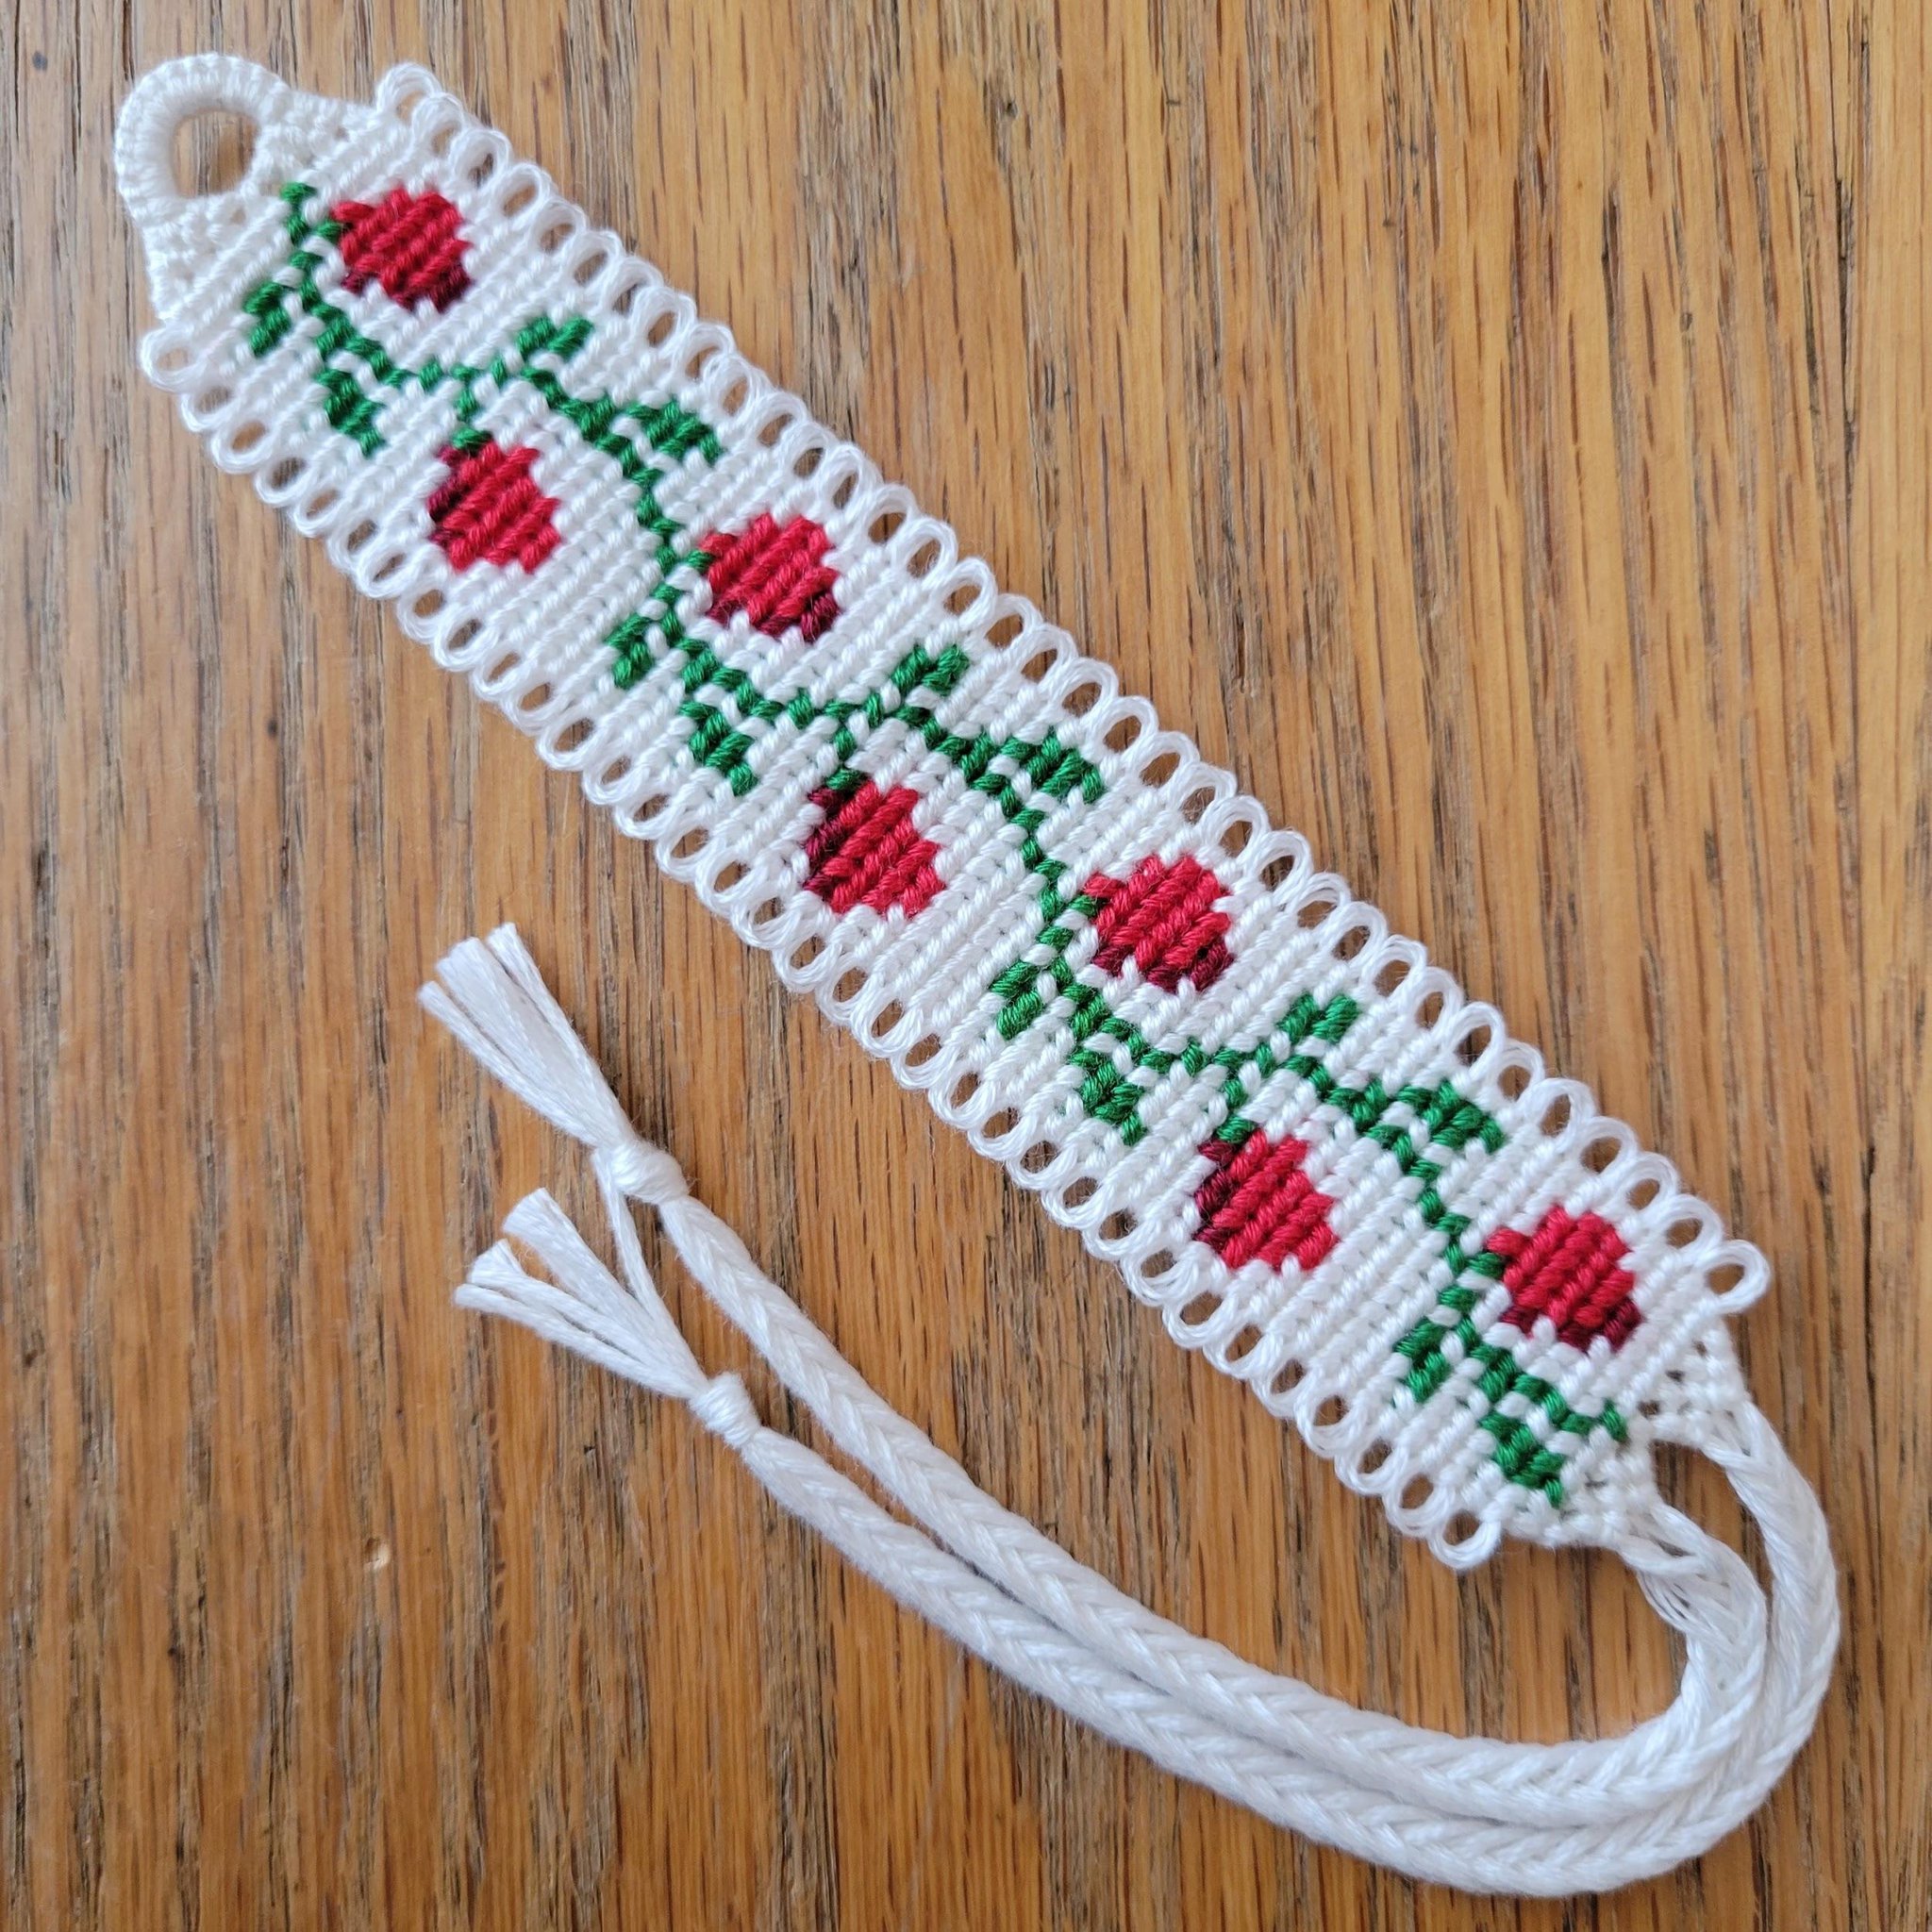
Repeat these steps until your bracelet is finished.
If you’re using triangle ends or any similar method, don’t make a frill after the last row of your bracelet.
If you’re using triangle ends or any similar method, don’t make a frill after the last row of your bracelet.
Picking an Appropriate Normal Pattern
To add frills to the edges of a Normal pattern, you need to choose a pattern with only backward-forward knots on the right edge, and only forward-backward knots on the left edge.
Example pattern shown is #17262, with added borders.
Example pattern shown is #17262, with added borders.
If a pattern you want to use doesn’t have these features, you can add two border threads to achieve this effect. This video shows how to easily do this.
Creating the Frills on a Normal Bracelet
First, choose an appropriate pattern. I will be using the example pattern I showed previously.
Next, create whatever starts you would like. Knot up until right before you make your second pair of border knots.
Next, create whatever starts you would like. Knot up until right before you make your second pair of border knots.
When creating the new border knot, place something in between the last border knot and this one. Make sure the knot you just made is tight and secure.
You can use a variety of items to space out your knots and create frills. I recommend using something flat that’s easy to remove from the loop created. Here I’m using a safety pin, but you can use other objects like a piece of thin cardboard, a popsicle stick, a paperclip, etc. The larger the object, the larger the frill loop.
You can use a variety of items to space out your knots and create frills. I recommend using something flat that’s easy to remove from the loop created. Here I’m using a safety pin, but you can use other objects like a piece of thin cardboard, a popsicle stick, a paperclip, etc. The larger the object, the larger the frill loop.
Remove the object. Do not tighten or loosen any of your knots.
Use your fingernail to slide the new knot up as far as you can. Again, do not tighten or loosen any of your knots.
Use your fingernail to slide the new knot up as far as you can. Again, do not tighten or loosen any of your knots.
Repeat the same steps on the other side. With every new edge knot you create, repeat the same steps to create a frill.
Repeat these steps until your bracelet is finished.