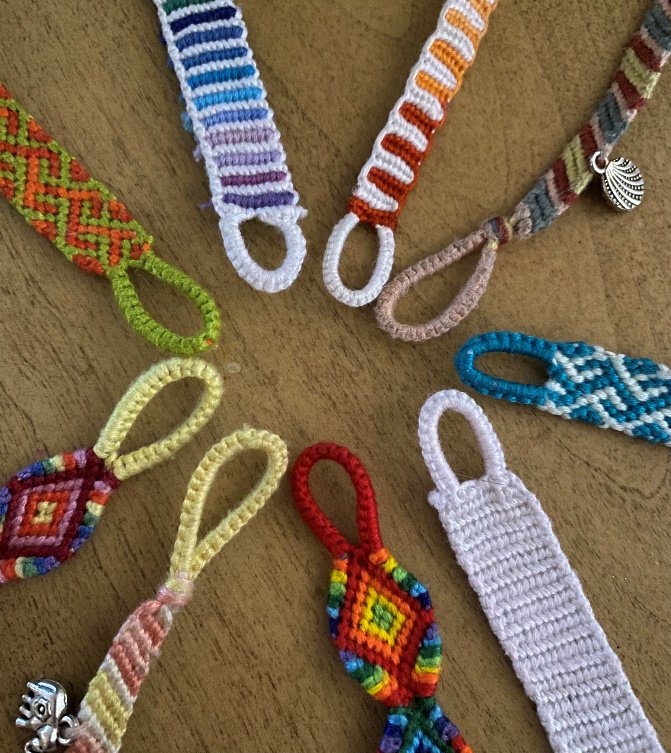
Rate Tutorial
Hey everybody! In this tutorial I’ll be showing you how to create a stitched loop. This tutorial will cover both alpha and normal patterns, and I’ll be showing you normal patterns first. All you’ll need is tape, thread, and scissors. For the normal pattern I used #47520 and for the alpha pattern I used #16559. Enjoy!
Stitched loop for normal patterns
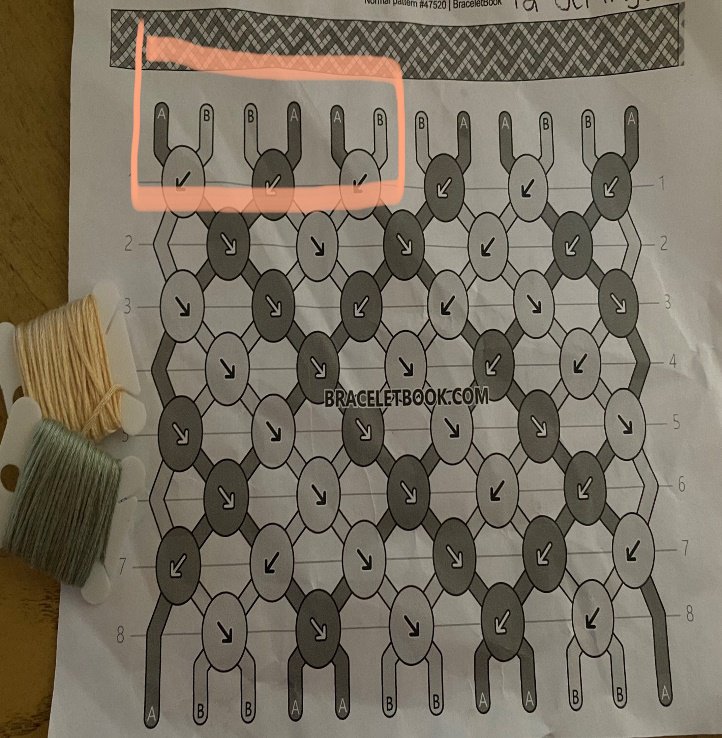
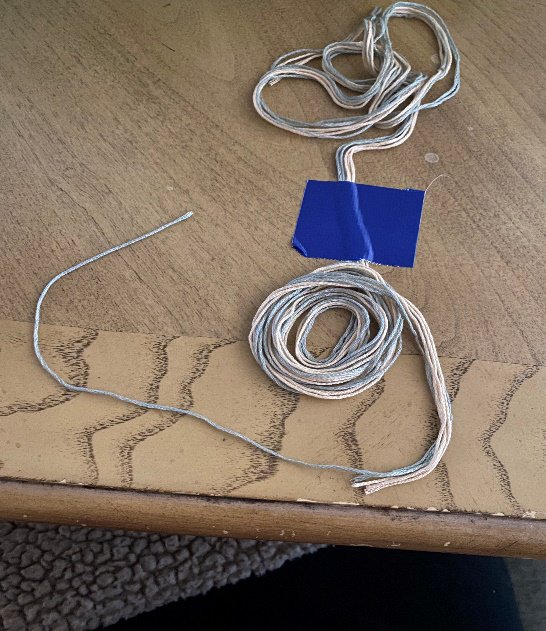
When we look at normal patterns at the very top, it shows us how many strings we need, as well as the order they need to be in. In my pattern, we have ABBAABBAABBA. Let’s only focus on the left, since we know the strings are mirrored and there’s an equal number of strings for each color on both side. It says there are three color A and three color B. So, to cut the correct number of strings, we will cut very long strings and fold them in half. We need six A total and six B total, so we will cut three strings of color A that are a wingspan’s length and three strings of color B that are a wingspan’s length, adding 6 inches to only ONE thread which will be your loop color. We cut it longer than the rest because this is the one we’ll be knotting with.
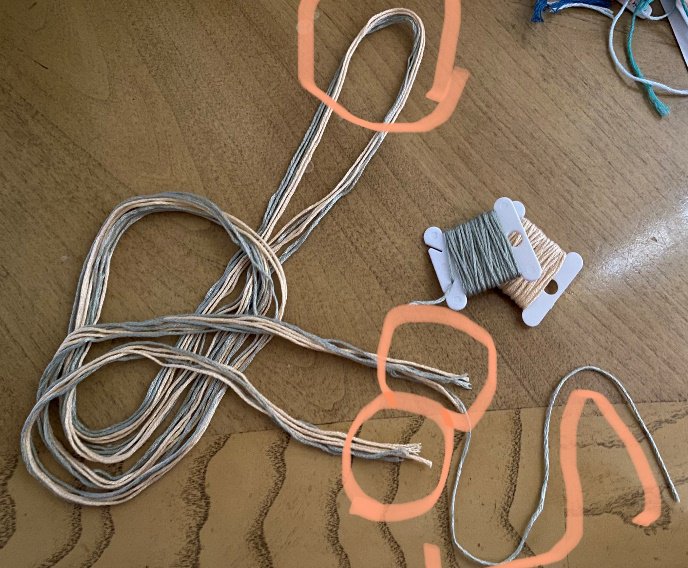
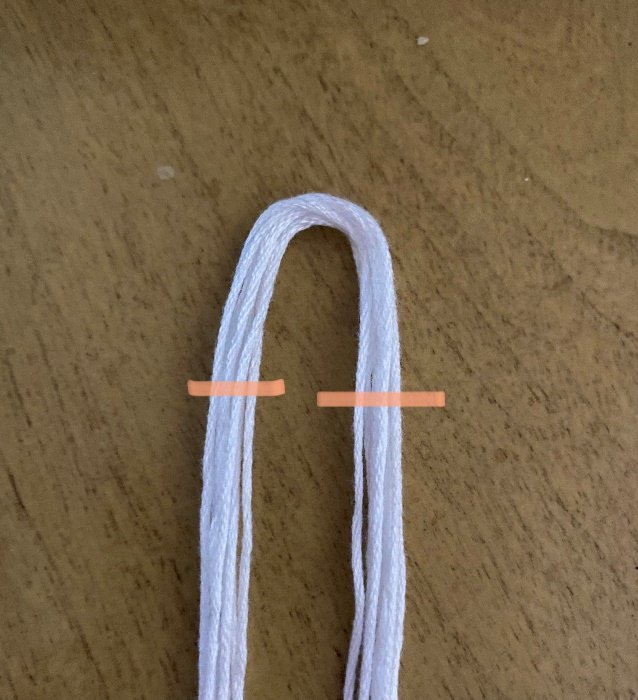
Once you have your strings cut, you need to fold them in half so there’s a fold at the top and the ends meet at the bottom. Notice how the longer string is positioned at the bottom.
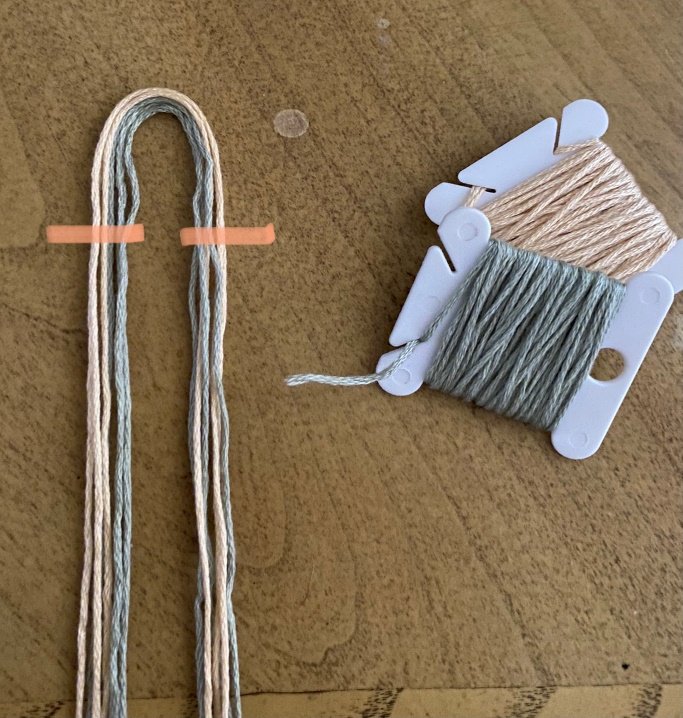
We want our loop to start and end on the pink lines I have indicated. So, if your longer string is on the left, apply your tape under the right line. If your longer string is on the right, apply your tape under the left line.
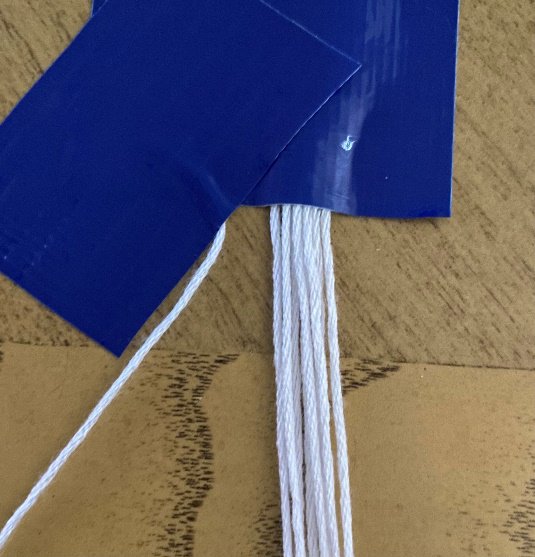
Once you have your tape on, you need to tape it down as shown in the photo.
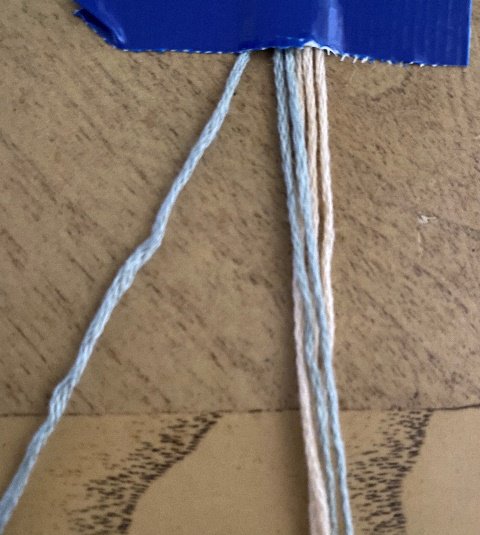
Separate your long string. This is the string you’ll be knotting with. Since I chose gray, my loop will be gray. If I chose pink, my loop would be pink.
Do forward-backward knots with this string over the whole bundle of the other threads.
Do forward-backward knots with this string over the whole bundle of the other threads.
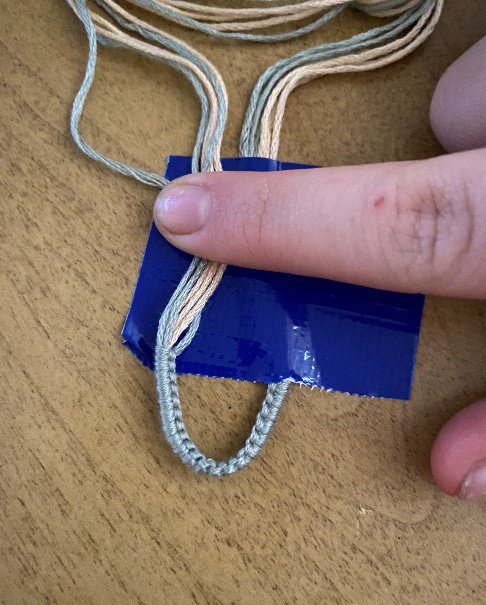
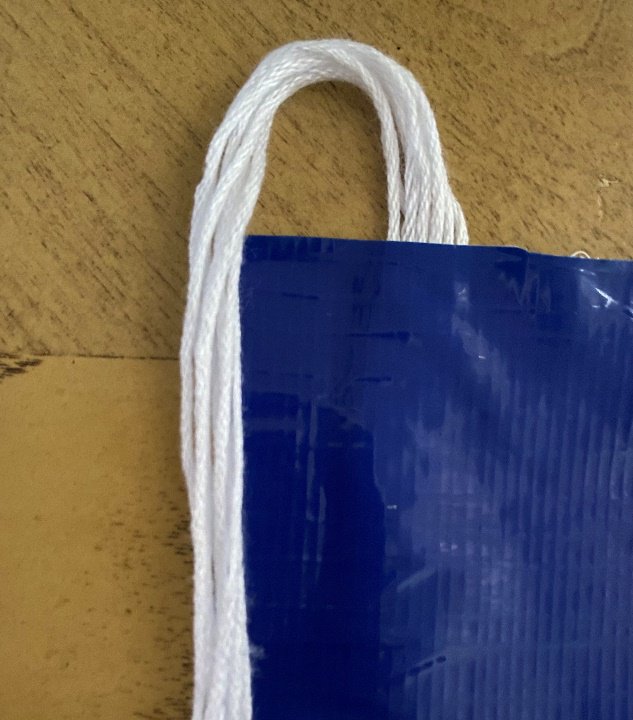
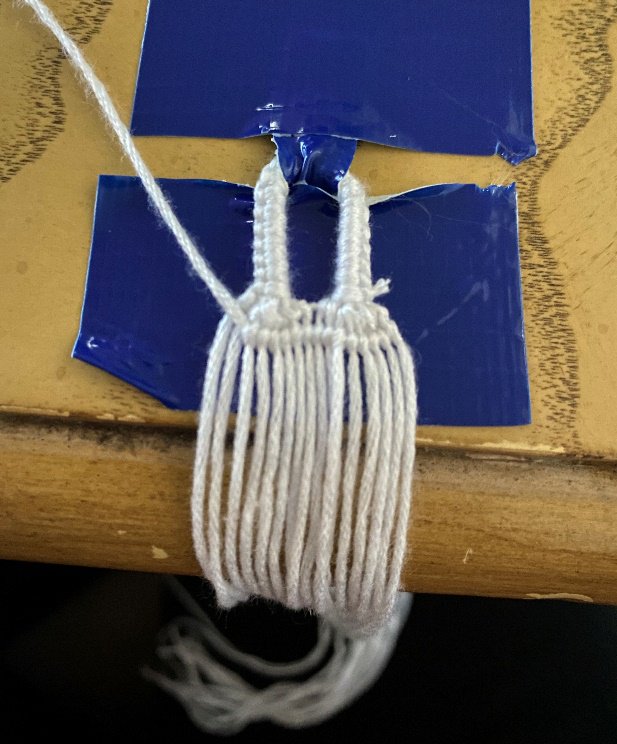
You need to continue doing your forward-backward knots until you can fold the loop in half to be long enough. When I fold mine in half, as shown in the photo, it is long enough. A good way to measure if it’s long enough is by seeing if a button can if through it. If a button could, move on to the next step. If not, keep going!

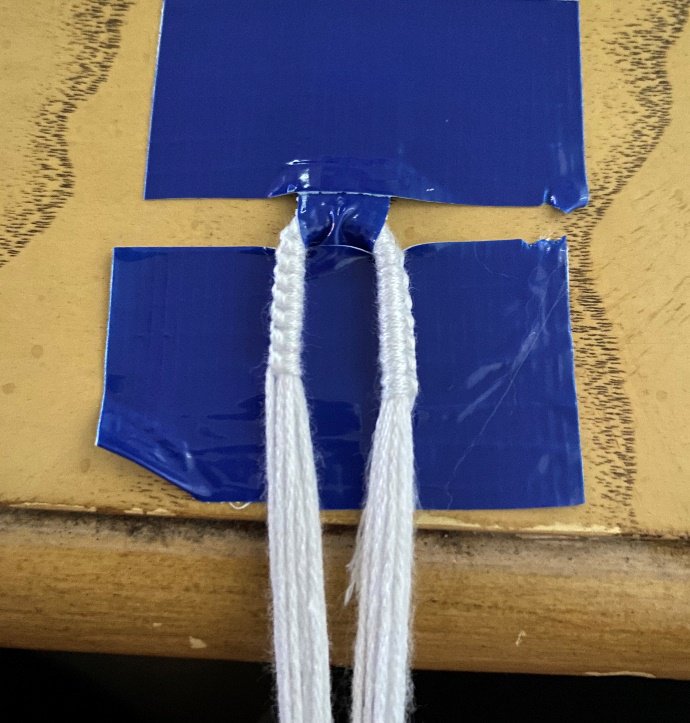
Now you can tape the loop down. I recommend taping it down as shown in the photo. Put your strings in the order shown in the pattern. I chose gray for color A and pink for color B.
The color order is ABBAABBAABBA, so I did gray, pink, pink, gray, gray, pink, pink, gray, gray, pink, pink, gray.
Now, all you need to do is knot the pattern to your desired length.
The color order is ABBAABBAABBA, so I did gray, pink, pink, gray, gray, pink, pink, gray, gray, pink, pink, gray.
Now, all you need to do is knot the pattern to your desired length.
Stitched loop for alpha patterns
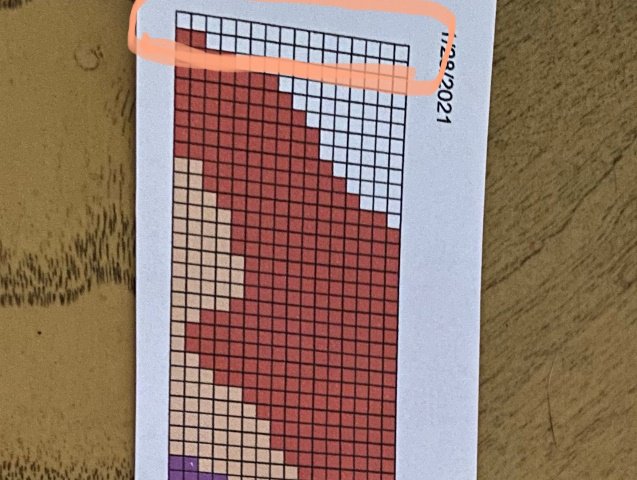
At the top of this alpha pattern, there is 16 knots in the first row, meaning there are 16 base strings. So, we will cut 8 base strings since we are folding them in half. All your base strings should be the same length.
16 ÷ 2 = 8
16 ÷ 2 = 8
We want our loop to start and end on the pink lines I have indicated. So, apply tape under one of the lines.
Once you have applied your tape, it should look like this.
Now, position your tape so it looks like this and tape down a long string. You’ll be knotting with this string, and it’s also going to be your leading string.
Do forward-backward knots with this string over the whole bundle of the other threads.
Do forward-backward knots with this string over the whole bundle of the other threads.
You need to continue doing your forward-backward knots until you can fold the loop in half to be long enough. When I fold mine in half, as shown in the photo, it is long enough. A good way to measure if it’s long enough is by seeing if a button can if through it. If a button could, move on to the next step. If not, keep going!
Tape the loop down. I recommend taping it down as shown in the photo.
Tape the loop down. I recommend taping it down as shown in the photo.

Once you have it taped down, use the same string you use to make your loop and use it to knot over the base strings. This will be your first row.
Now continue knotting the pattern regularly!

Thanks for reading this tutorial! I hope this was helpful. If you have any questions or need any clarity, feel free to ask!
As always, stay safe and happy knotting! 💛
As always, stay safe and happy knotting! 💛