Rate Tutorial
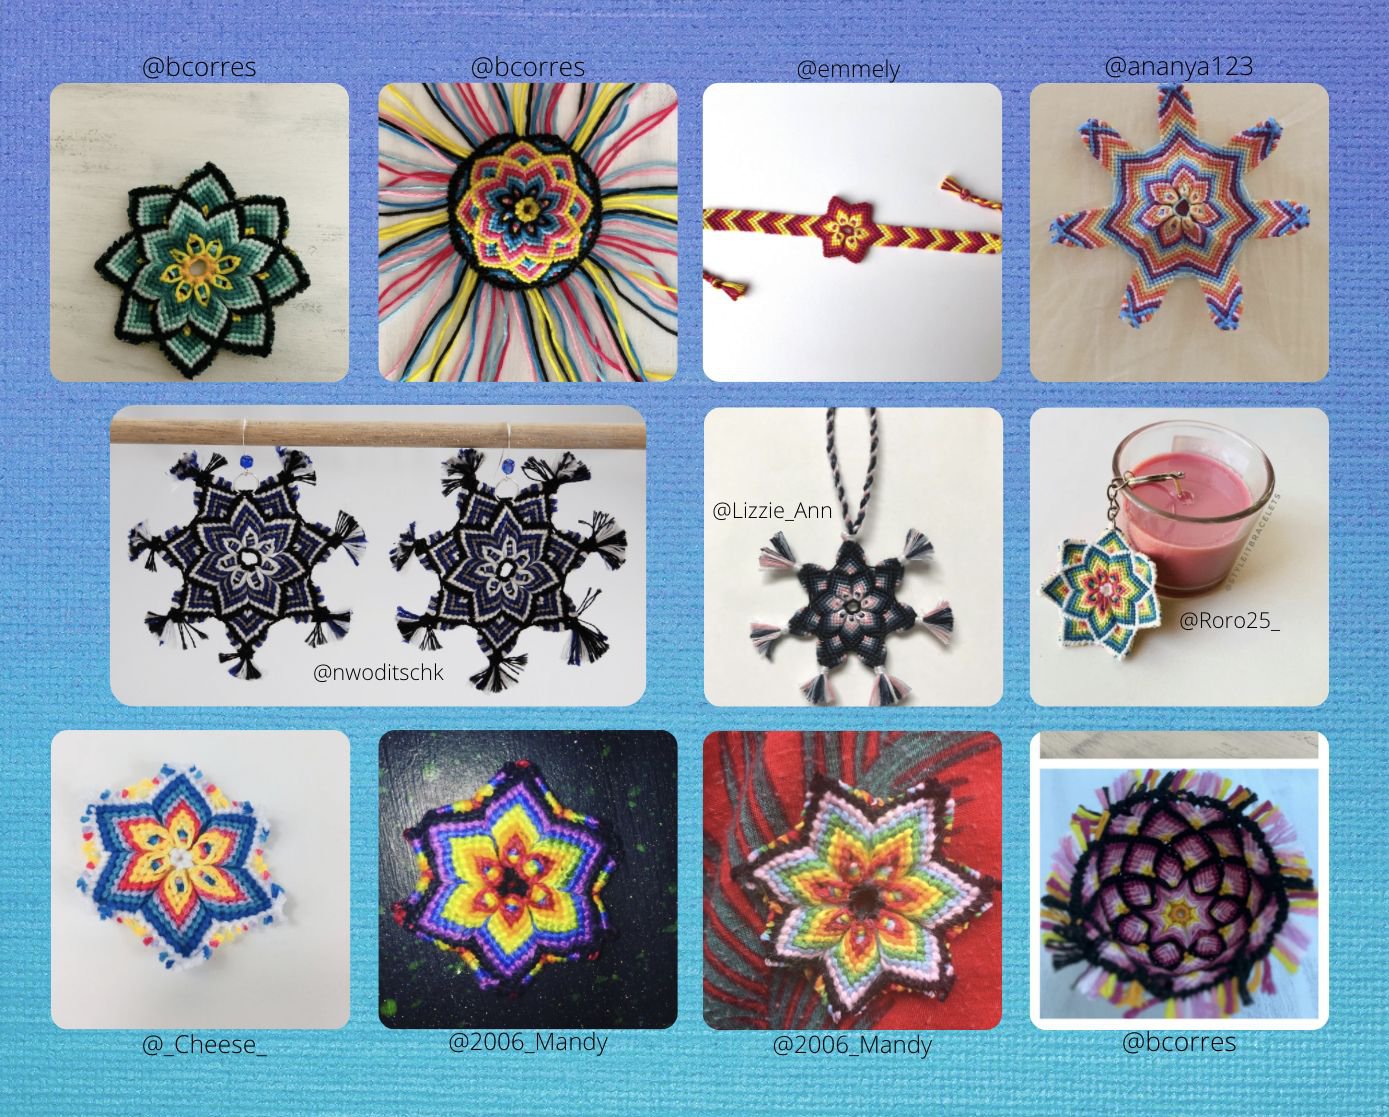
A mandala flower is the name for the knotted flower. It uses a chevron pattern structure however It will most likely be too hard for a beginner to make so if you haven’t made a chevron before I would recommend making a few first before attempting a mandala flower. You can experiment by making earrings, keychains, ornaments, bracelets etc. The mandala flower can be posted to pattern #2 or #70 and you can also look through photos posted to those patterns for ideas to inspire your mandala flower.
Materials needed
- scissors
- tape
- thread
- glue / clear nail polish
- tape
- thread
- glue / clear nail polish
Step 1
Cut one string around 50cm long and tape it down to your workspace. Keep in mind you might need more/less thread depending on how much of the flower you make and this thread color will outline the flower.
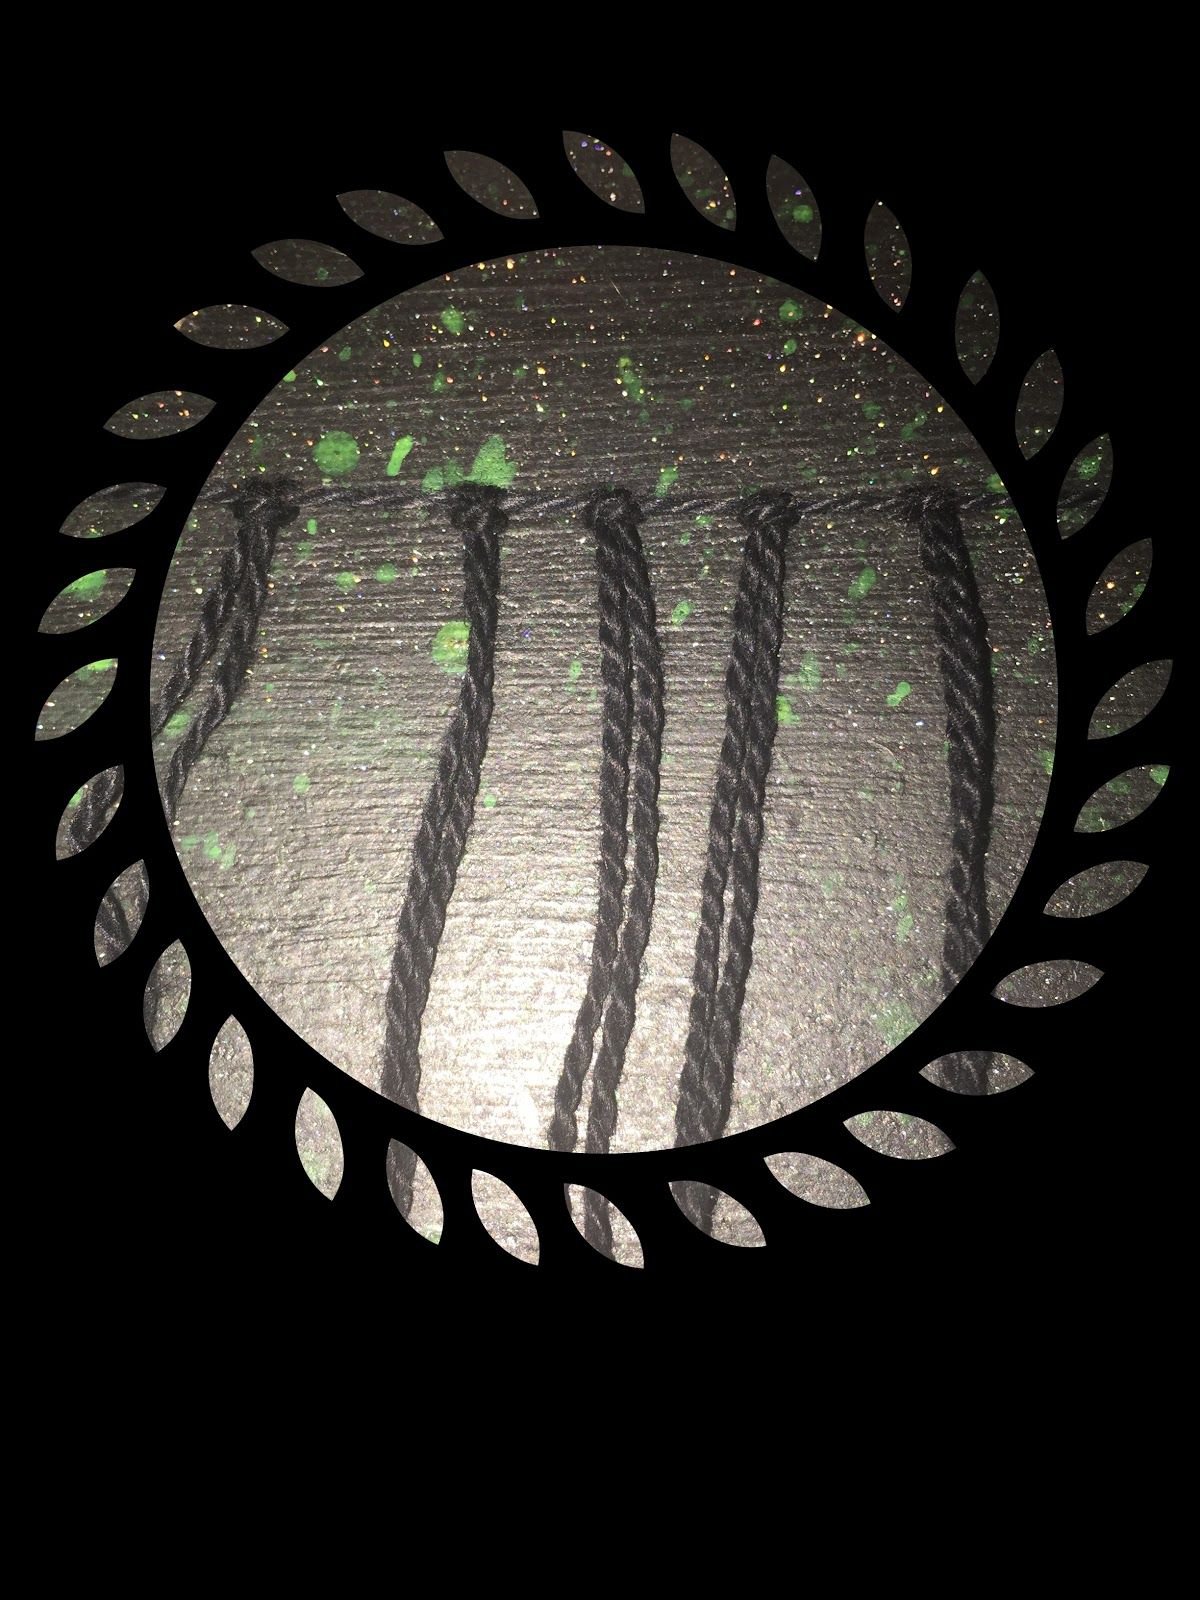
Step 2
Cut 5 strings (in the same color as above). These strings will be folded in half and you will need to use the lark's head knot to attach them to the string taped down. (To learn the lark's head knot watch the 30 second video linked below). Each of these threads will become a base string for the petal colors to be attached to.
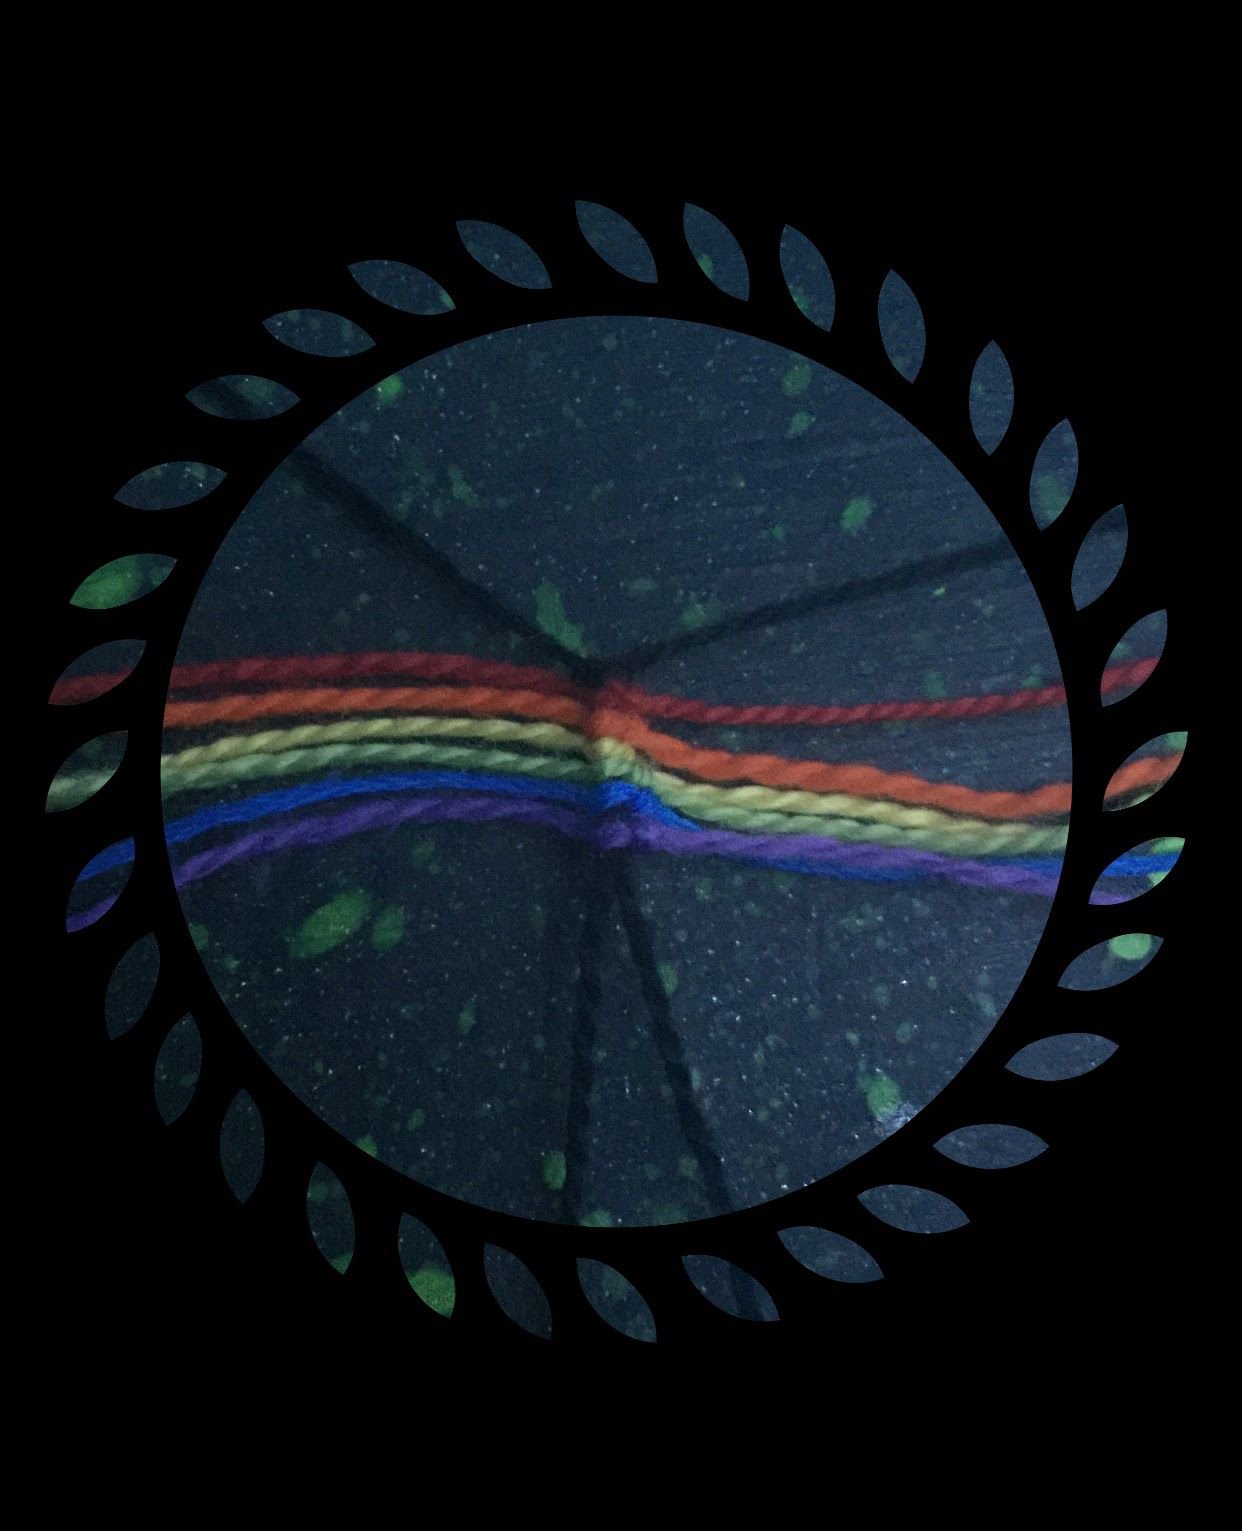
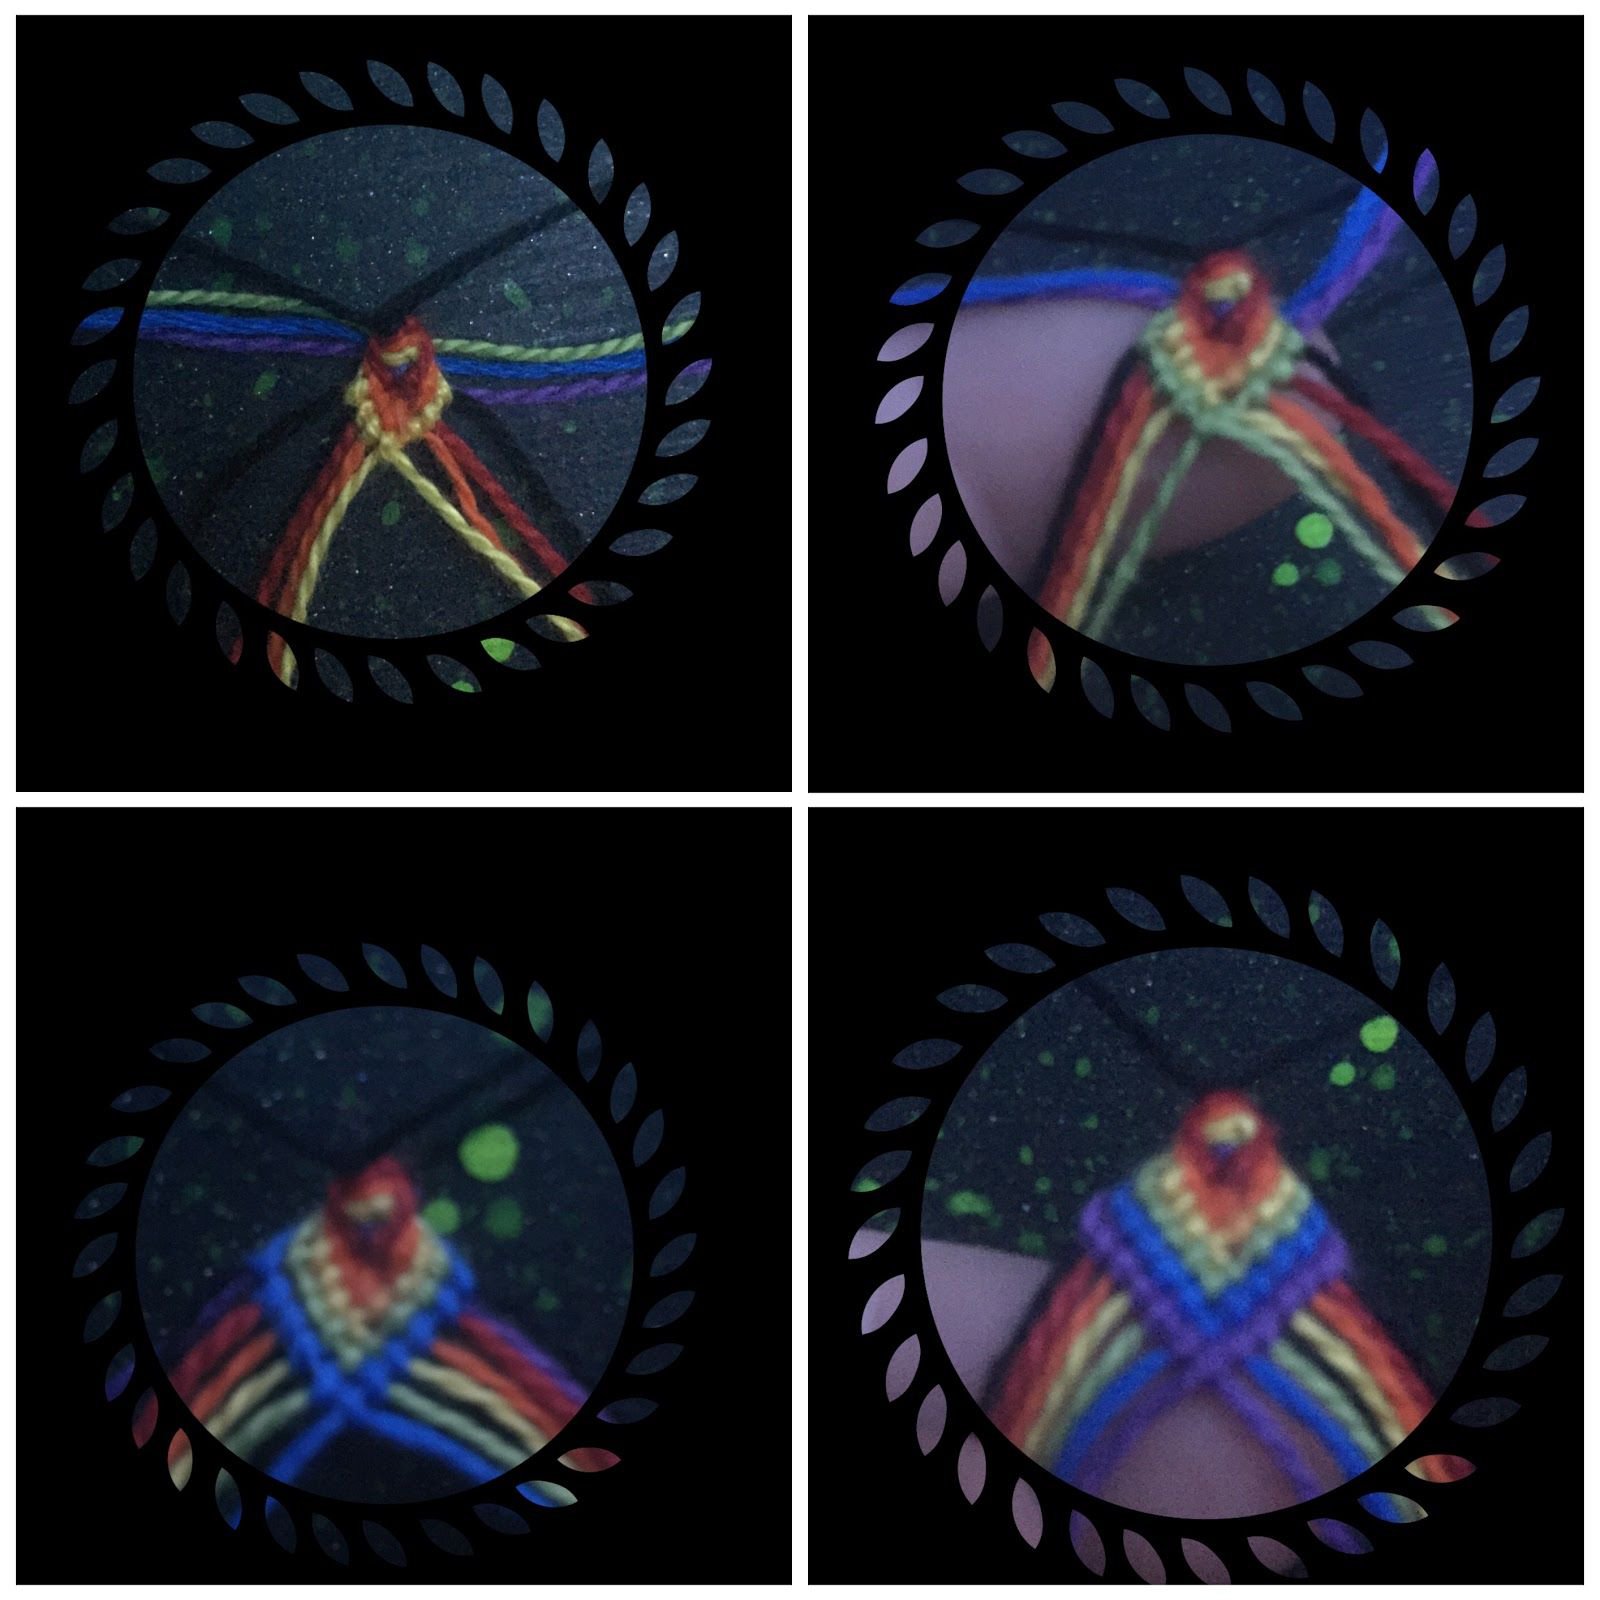
Step 3
Now we can start the first petal! You will need 6 strings per petal which we will attach to each of the base strings from step 2. Using half of a square knot (tutorial linked below) attach your first 6 strings to one of the base strings in the order you want them to be in the petals. I am making a rainbow flower so I ordered mine from red to purple, you can use as little as one to 6 colors for each petal.
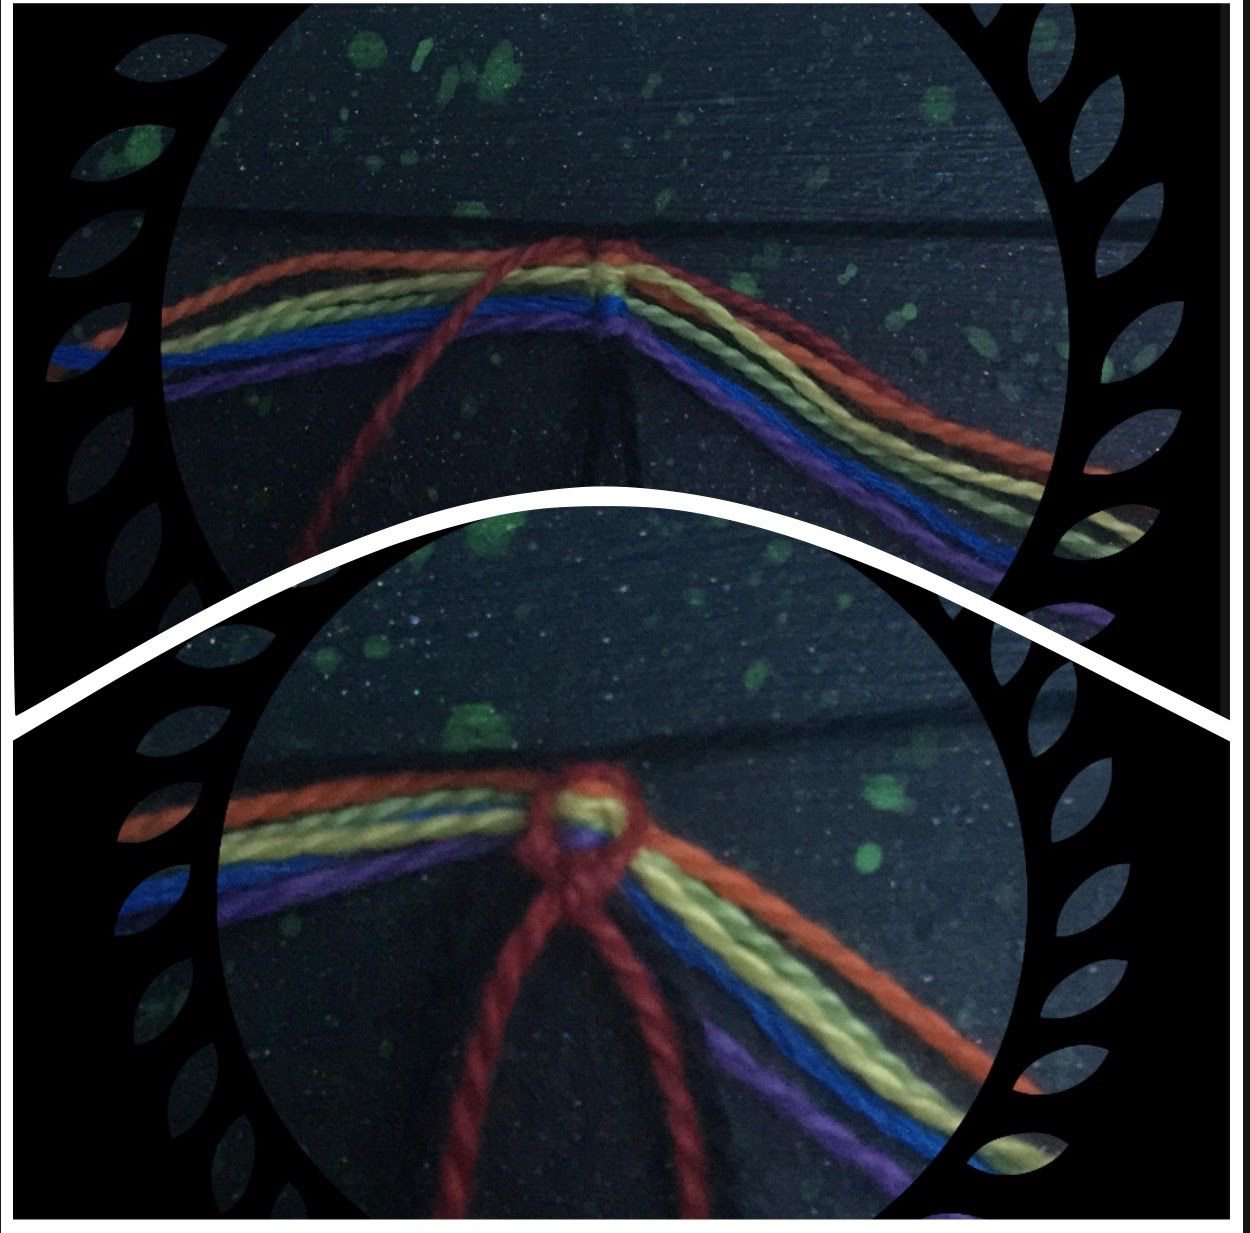
Step 4
On the left side of the first petal, take the first string you attached (for me it is red) and bring it over all the other strings towards you. The base string will now become 2 base strings. We will do a forward knot on the left base string and then a backward knot onto the right base string, make a knot to connect the two strings. We will now have done the first row of the flower with there only being 3 knots so far.
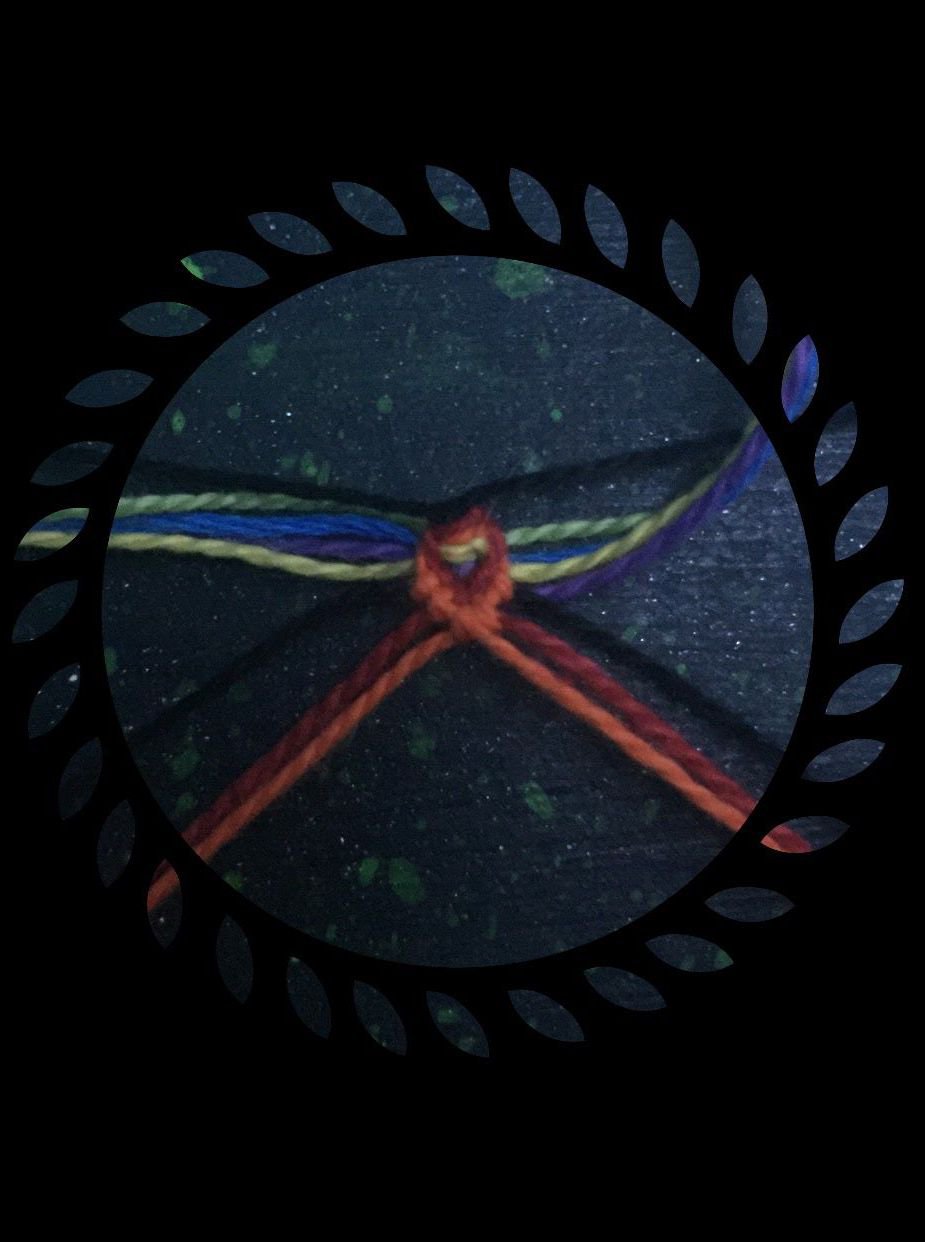
Step 5
From now on the petal repeats step 4. We will take the first string (furthest away from you) on the left and bring it over all the other strings, up until the base string which is when we will make a forward knot. Then we will make a forward knot onto the string from the last row. Again we will do the same on the right but with backward knots bringing the furthest string on the right over the rest up until the base string when we will make a backward knot, another backward knot on the string from the last row and then make a knot to connect the 2 string. You can see we increased the chevron by 1 knot on each side.
Step 6
Now you will take the next color and repeat step 5 but with the next color and then the next until the first petal is done. Each new row will add one knot to each side and when you are done there should be one of the base strings on each side of the petal. If any of the above confuses you the video linked below visually shows you this process.
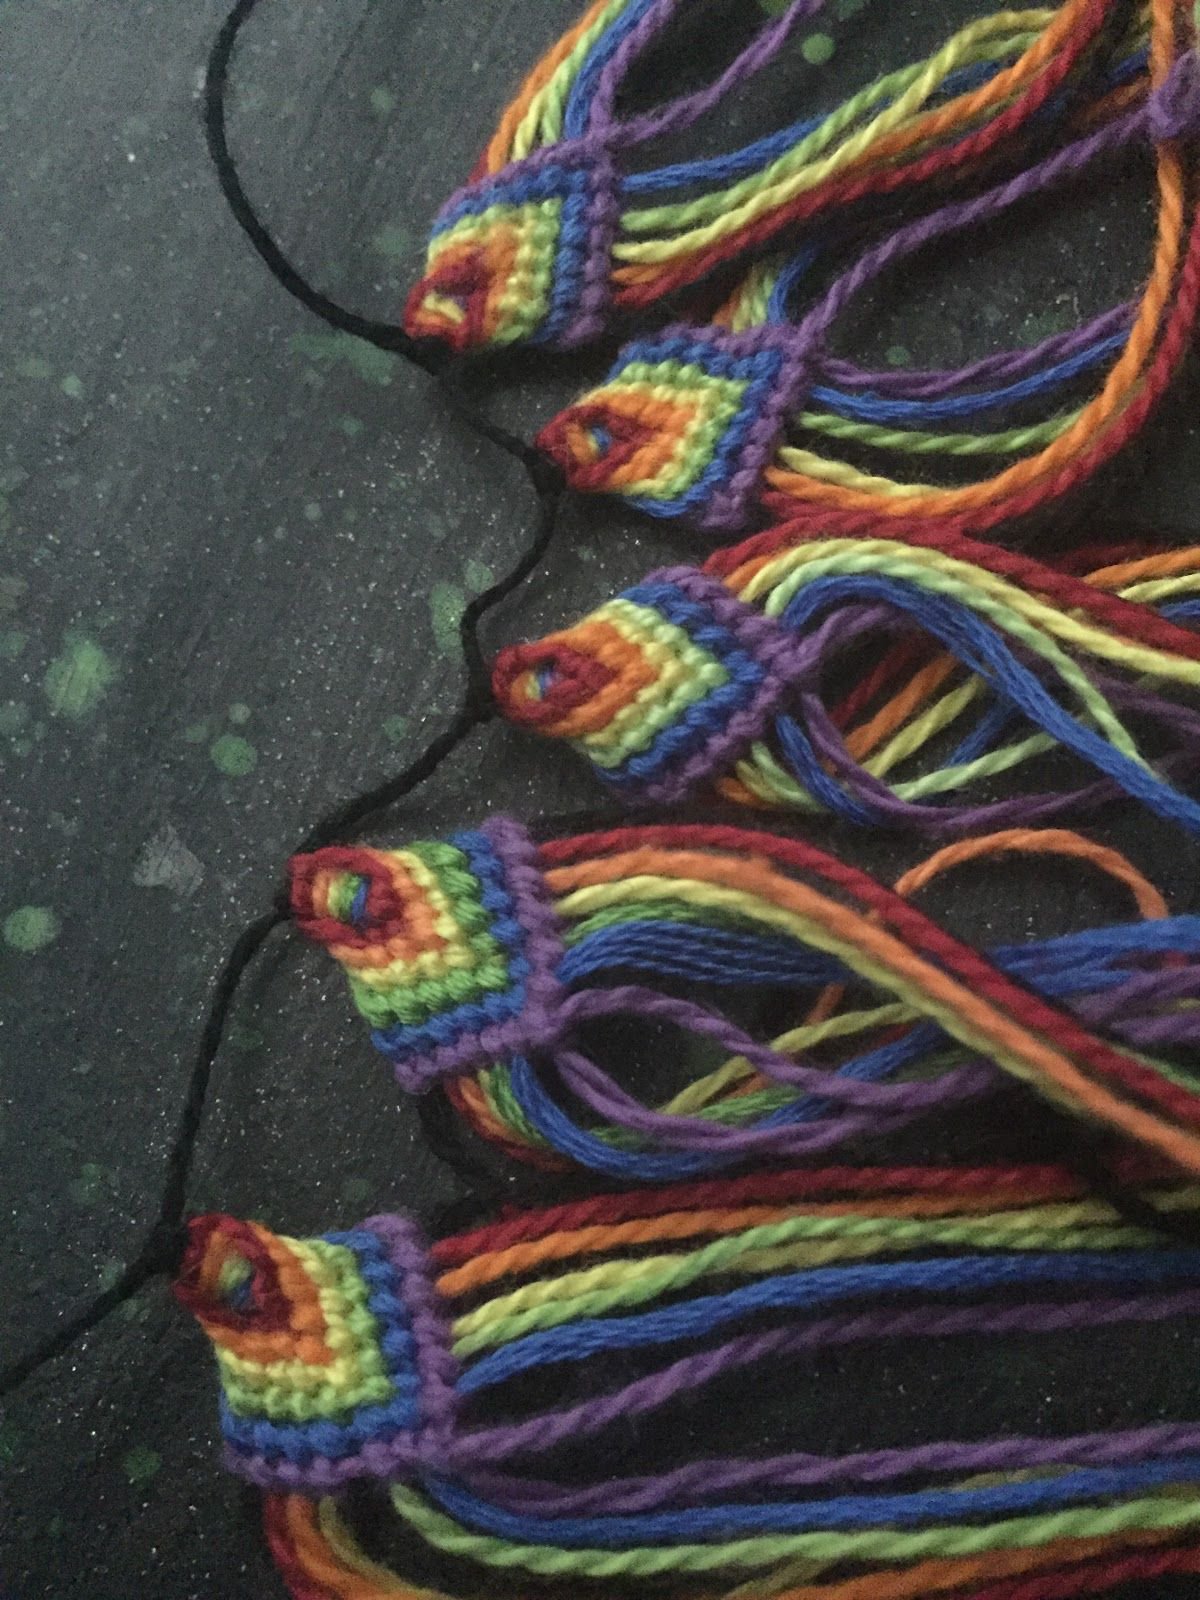
Step 7
When you are done the first petal we have to repeat steps 3-6 to make the other 4 petals. Eventually after the first 1-3 petals this process should become super easy and you will hopefully have this process memorized.
Step 8
When you have 5 completed petals push them as close together as possible, they may pile on to each other. Now we have to tape off the tape that we used to hold down the first string and the two ends of that string will become the base strings for the final/6th petal. Make sure the flower is facing the right direction when you make this final petal. Repeat steps 3-6 and be careful as the flower is not fully connected which means this step can be pretty difficult sometimes with the petals moving around.
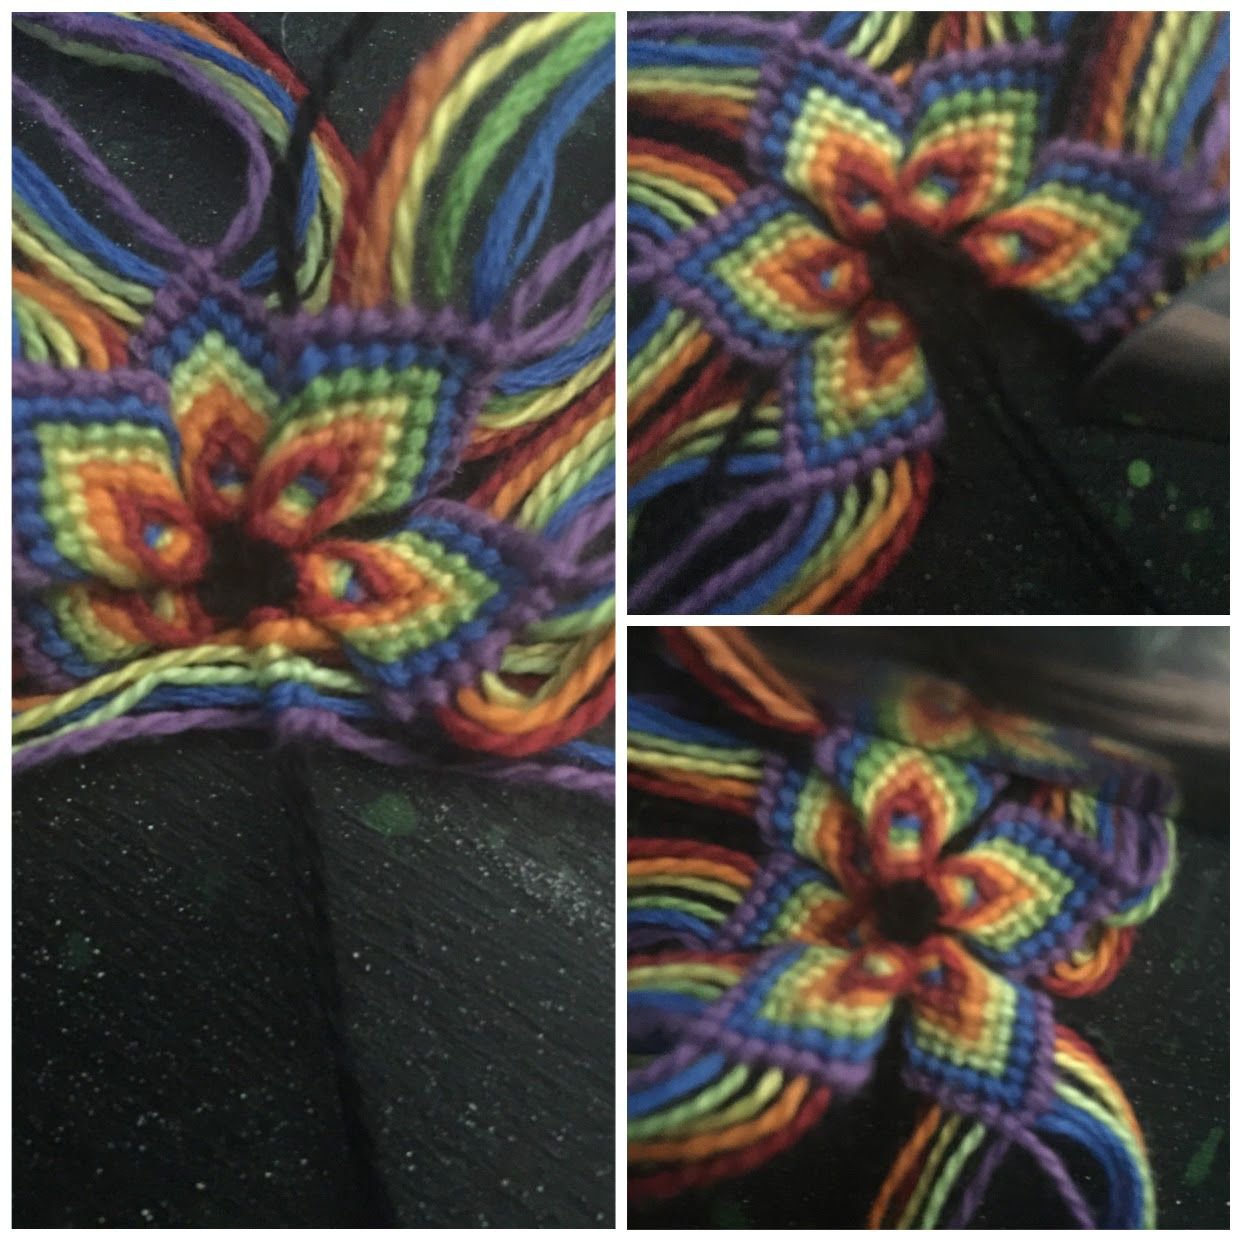
Step 9
Now we need to connect all of the petals of our flower together. This will form a border. On the outermost edge of each petal should be one of your beginning base strings, the one we tied all of our colors onto. For me, it is the black strings. First, let's connect these two petals. Taking the two innermost strings from two side by side petals which is black for me, tie a forward-backward knot with the string on the left. Next, take the string on the right, and make forward knots on each of the strings on the right side. Do the same on the left, with backward knots. Repeat these steps on all of your petals, until you have a border all the way around your flower. To finish, tie the two black (or whatever colour you used as the base string for the earlier steps) strings in the tip of each petal together using one of the four friendship bracelet knots.
Step 10
We are now done with the flower, unless you plan on continuing it by making an increasing chevron in between each of the petals. There are many ways to end your flower and in the photos on the left you can see some examples; like doing a shaped end on each petal with tassels, cutting off the leftover strings completely and securing it with clear nailpolish, flat ends, etc.
Step 11
Once you are completely done with your flower I would recommend applying a glue or clear nailpolish to the back to keep the petals together and flatten it out however you do not need to do this. You can also add felt to the back if you wish.
Adiks tutorial
Larks head knot tutorial
Square Knot
Friendship Bracelet Knots Tutorial