Rate Tutorial
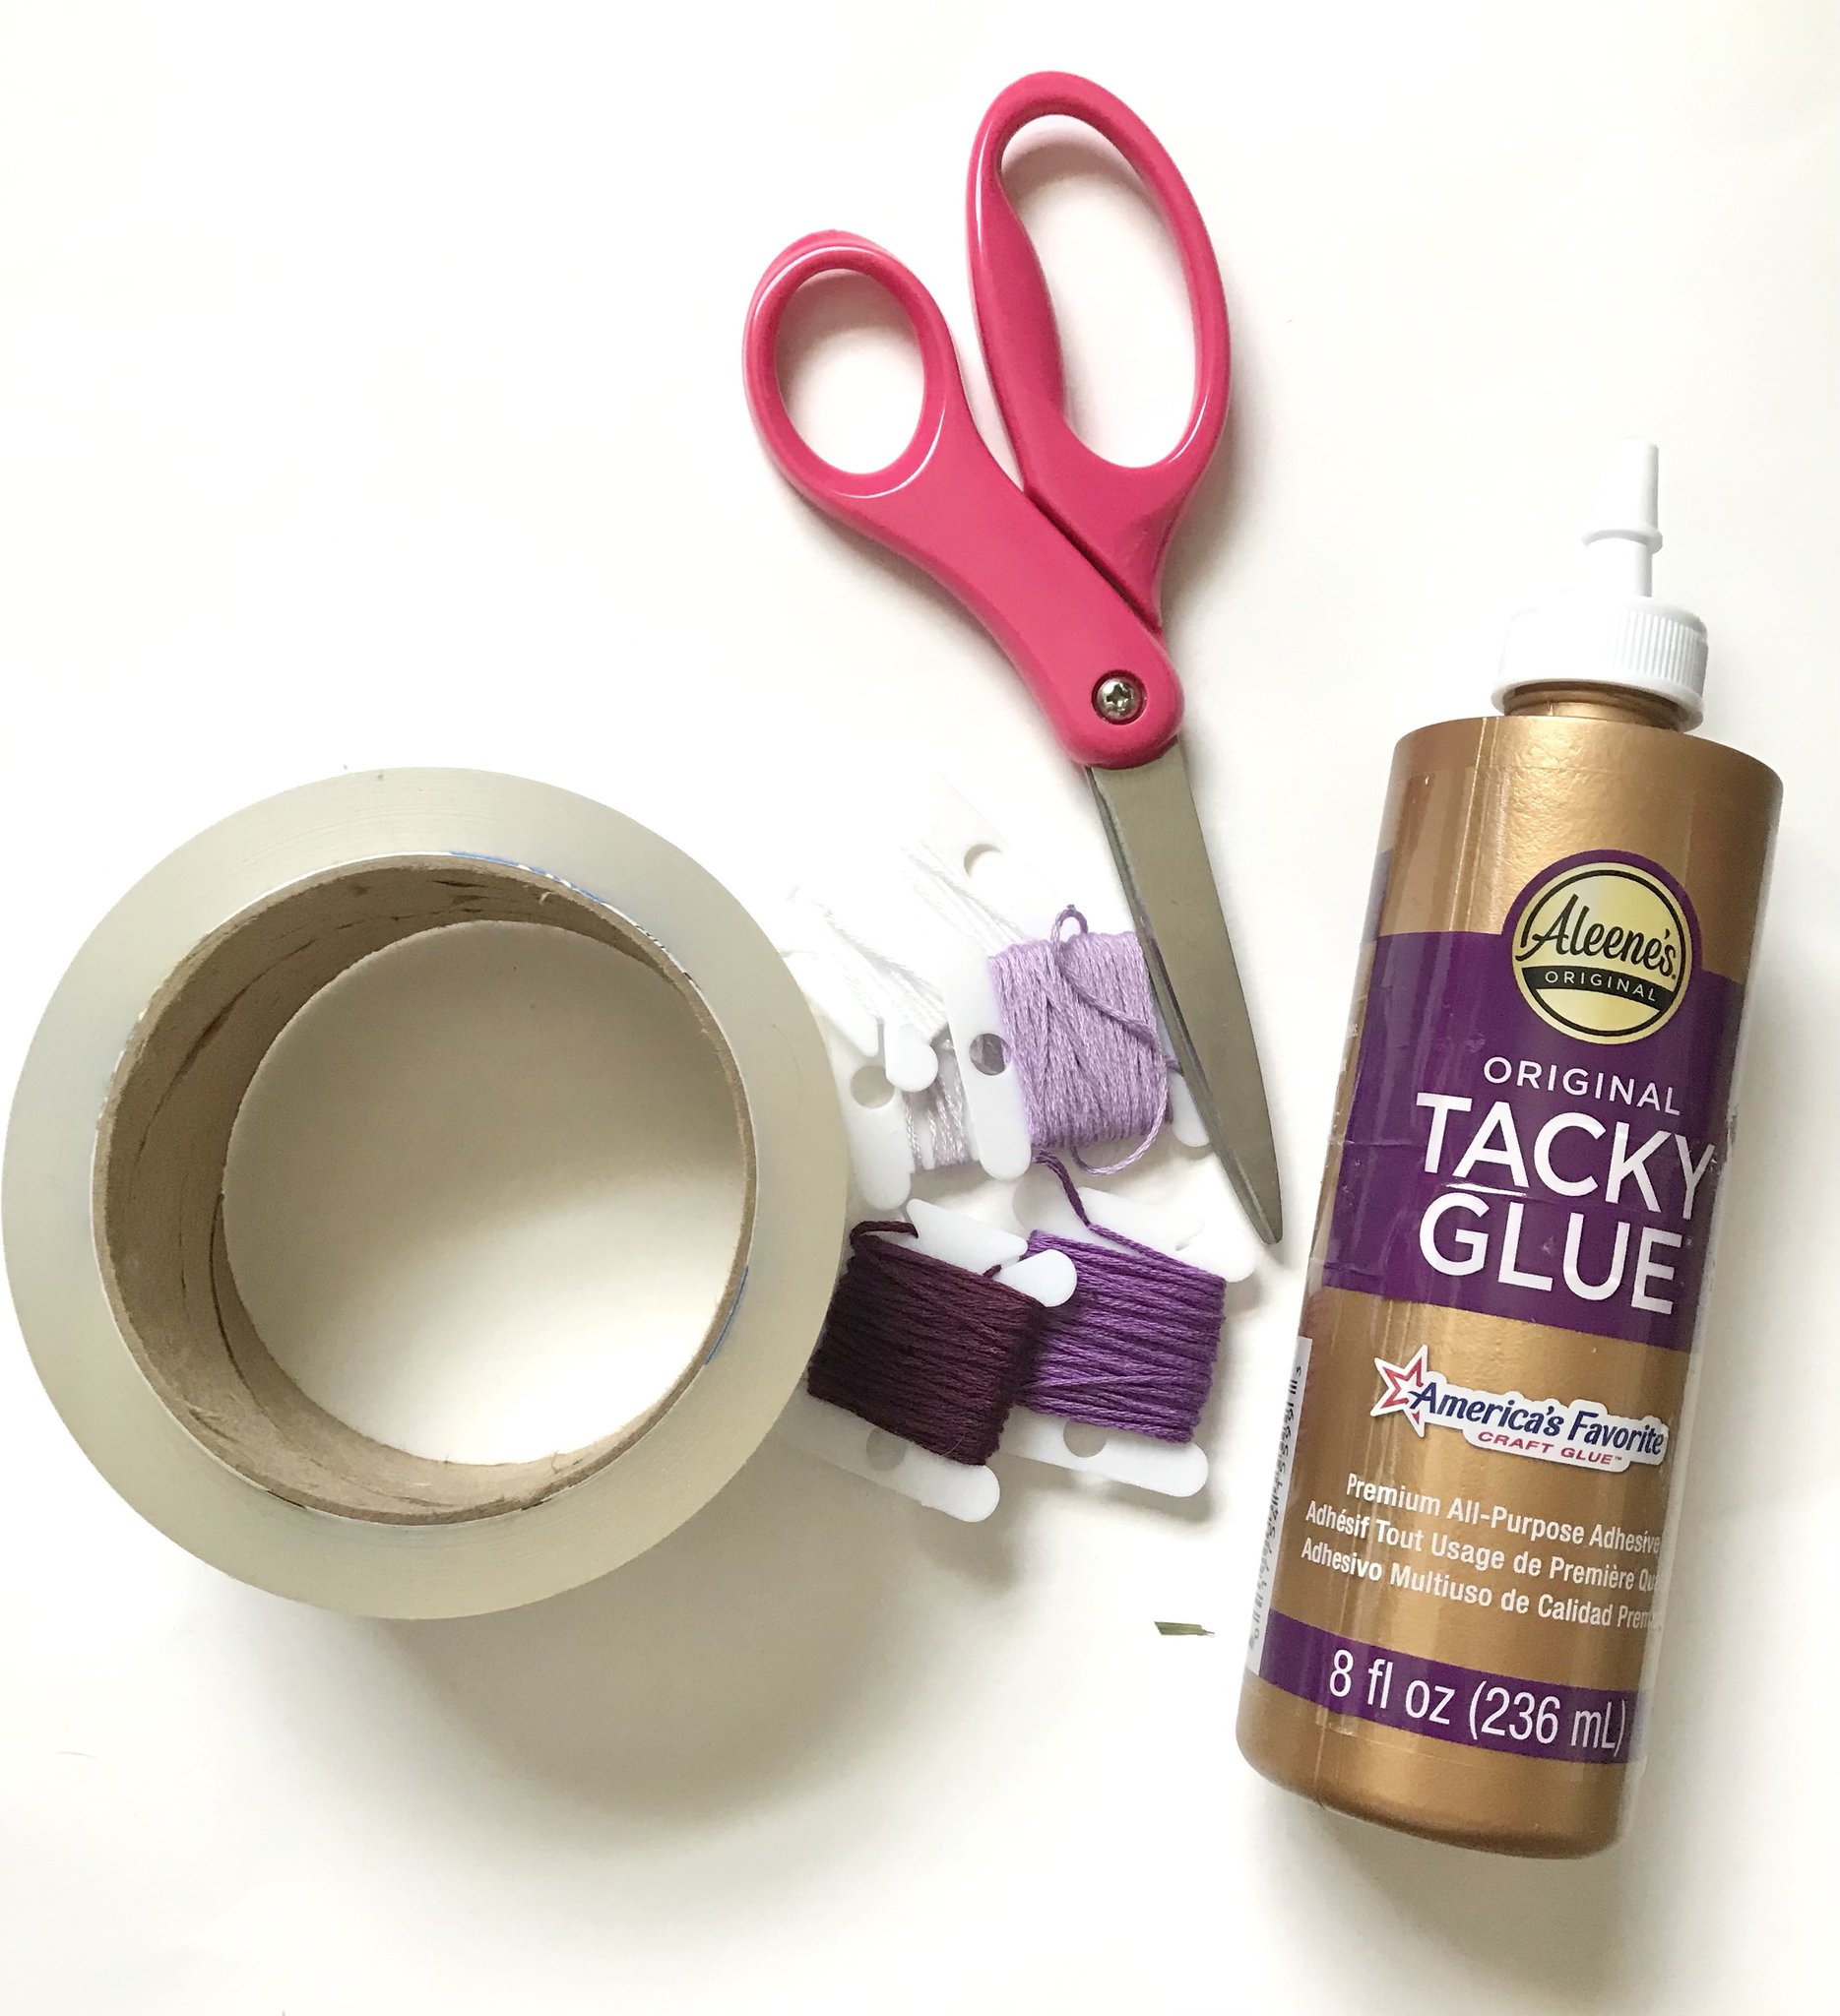
What You will need
- Scissors
- String
- Glue
- Tape
- String
- Glue
- Tape
Step 1
Choose a normal pattern. I choose #65948. You can pick any pattern, but I recommend picking a pattern that will match your alpha color scheme/theme.
Step 2
Once you’ve picked your pattern cut your strings. I cut mine about a wingspans length, but depending on your pattern, you cut your strings to whatever length you’d like. Knot them together leaving extra string for your ties.
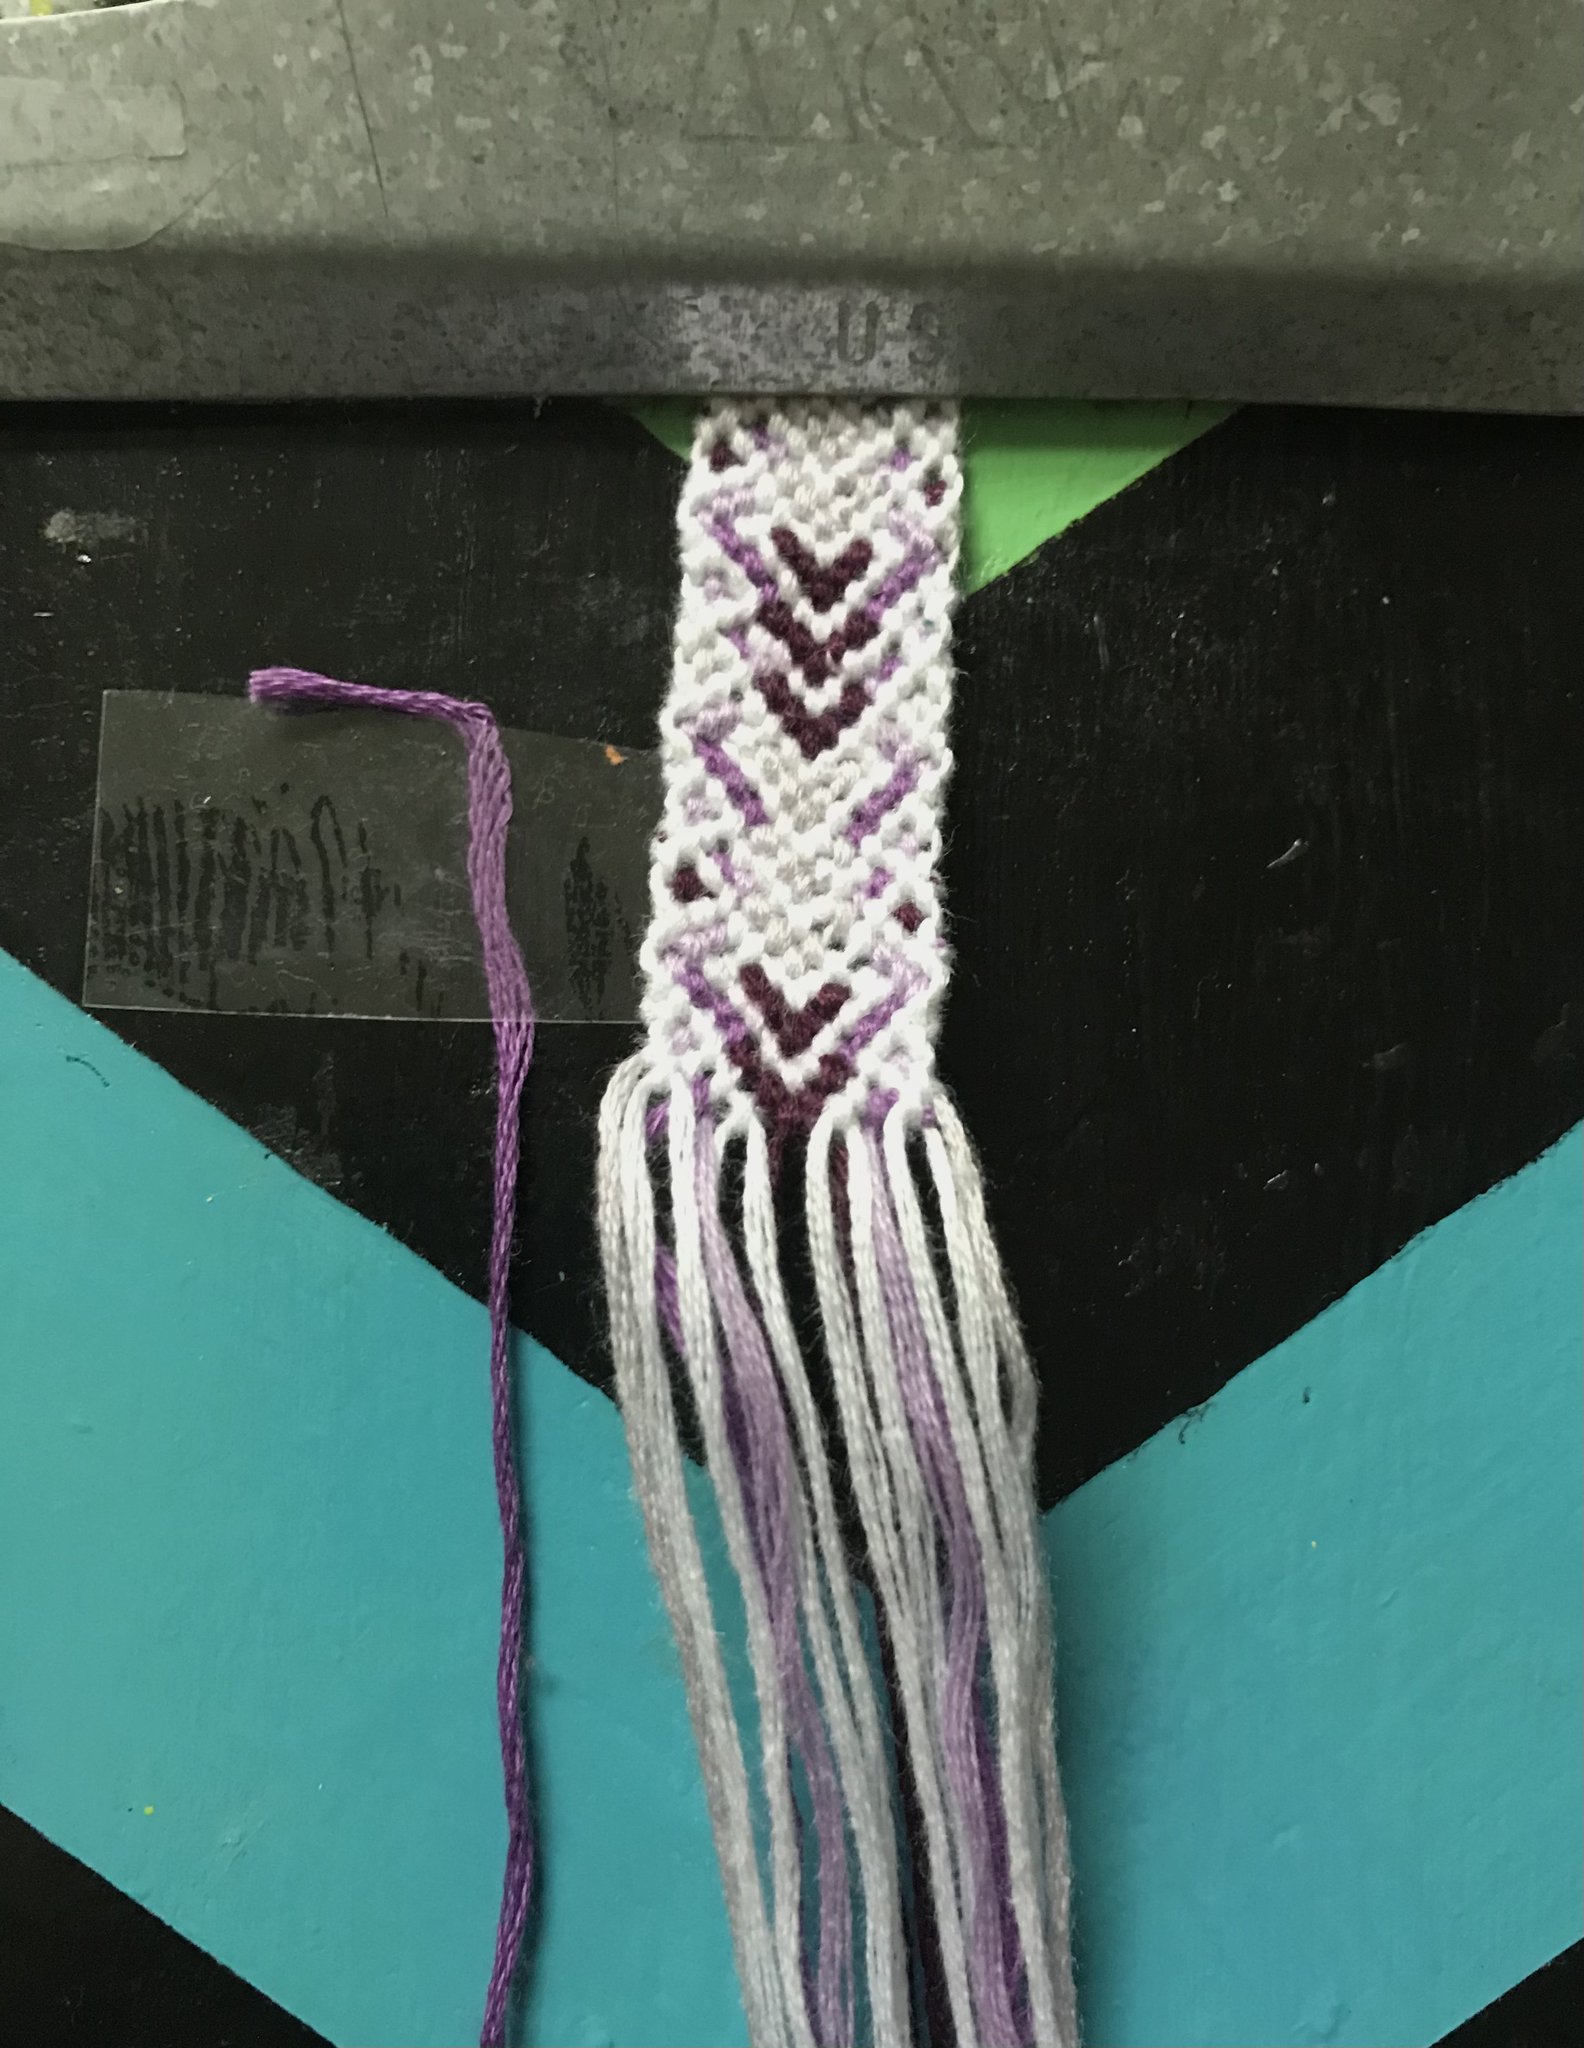
Step 3
Start knotting your bracelet. Stop knotting when you are about halfway through. Make sure that you ended flatly. If you were segment knotting make sure that you ended on a row. If you were knotting row-by-row your are fine.

Step 4
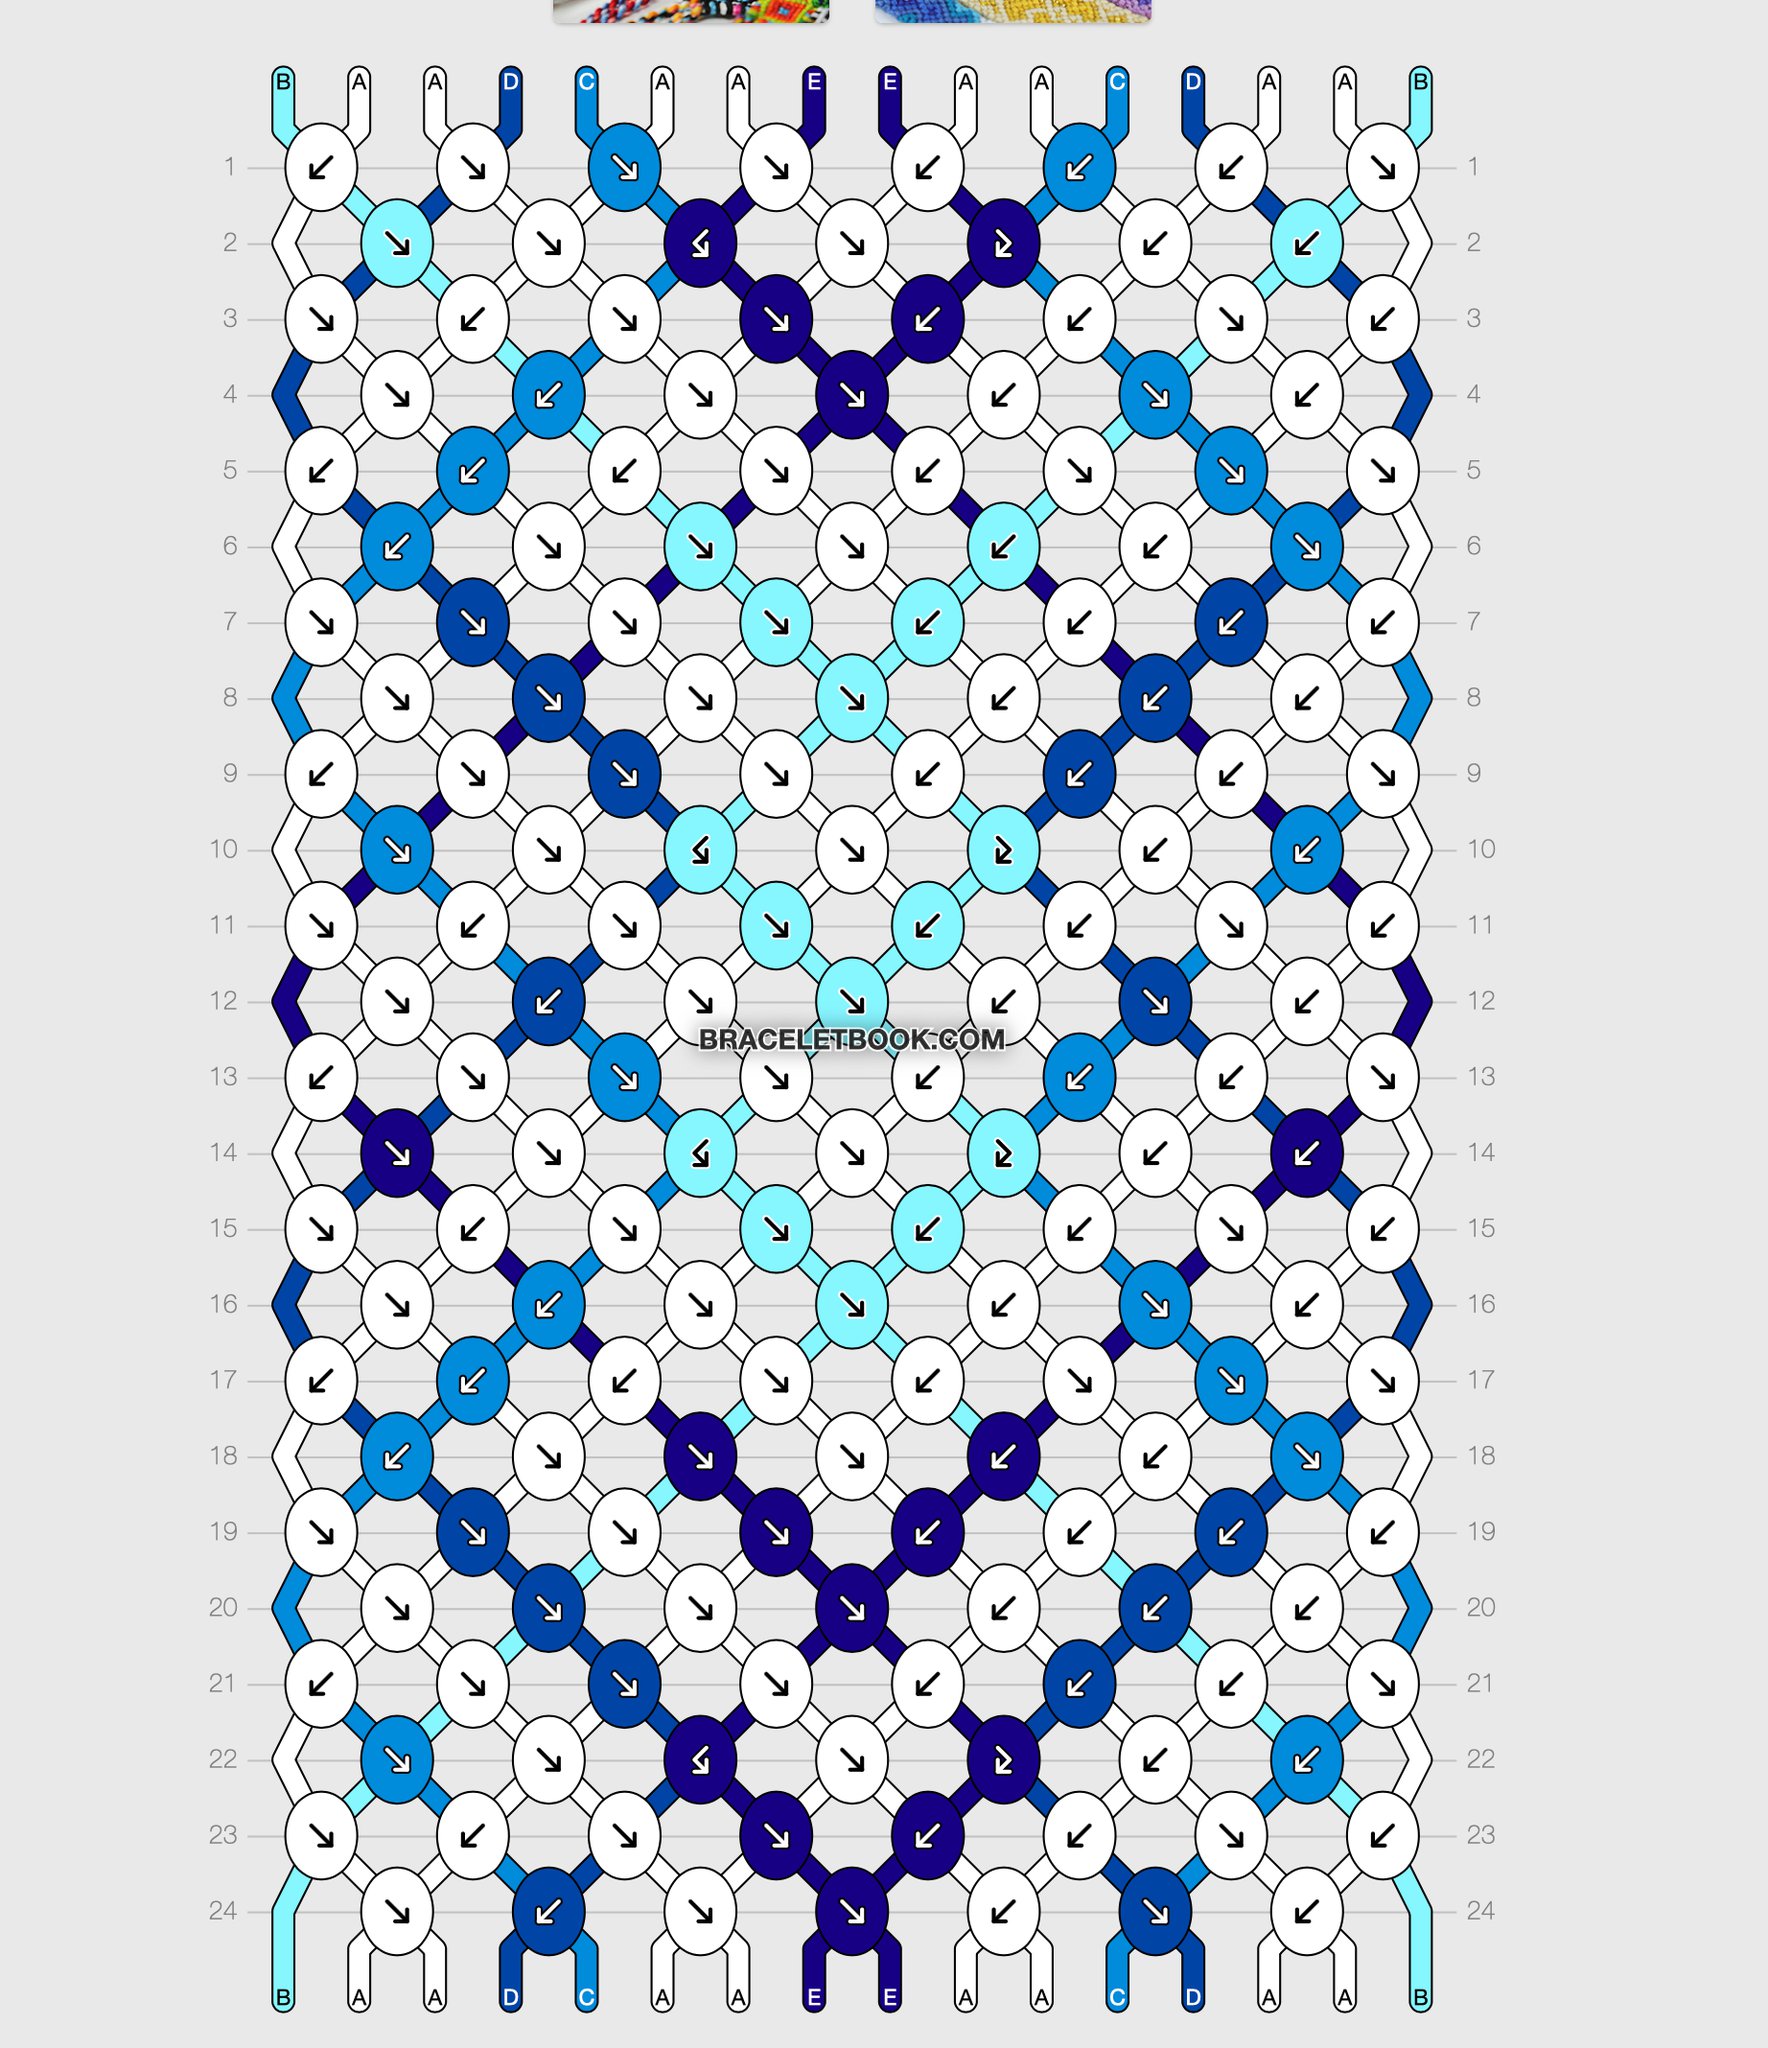
Pick an alpha pattern. I choose to do one of the flowers in pattern #35792. When picking your pattern, pick a pattern with the same amount of base strings as number of strings in your normal bracelet.
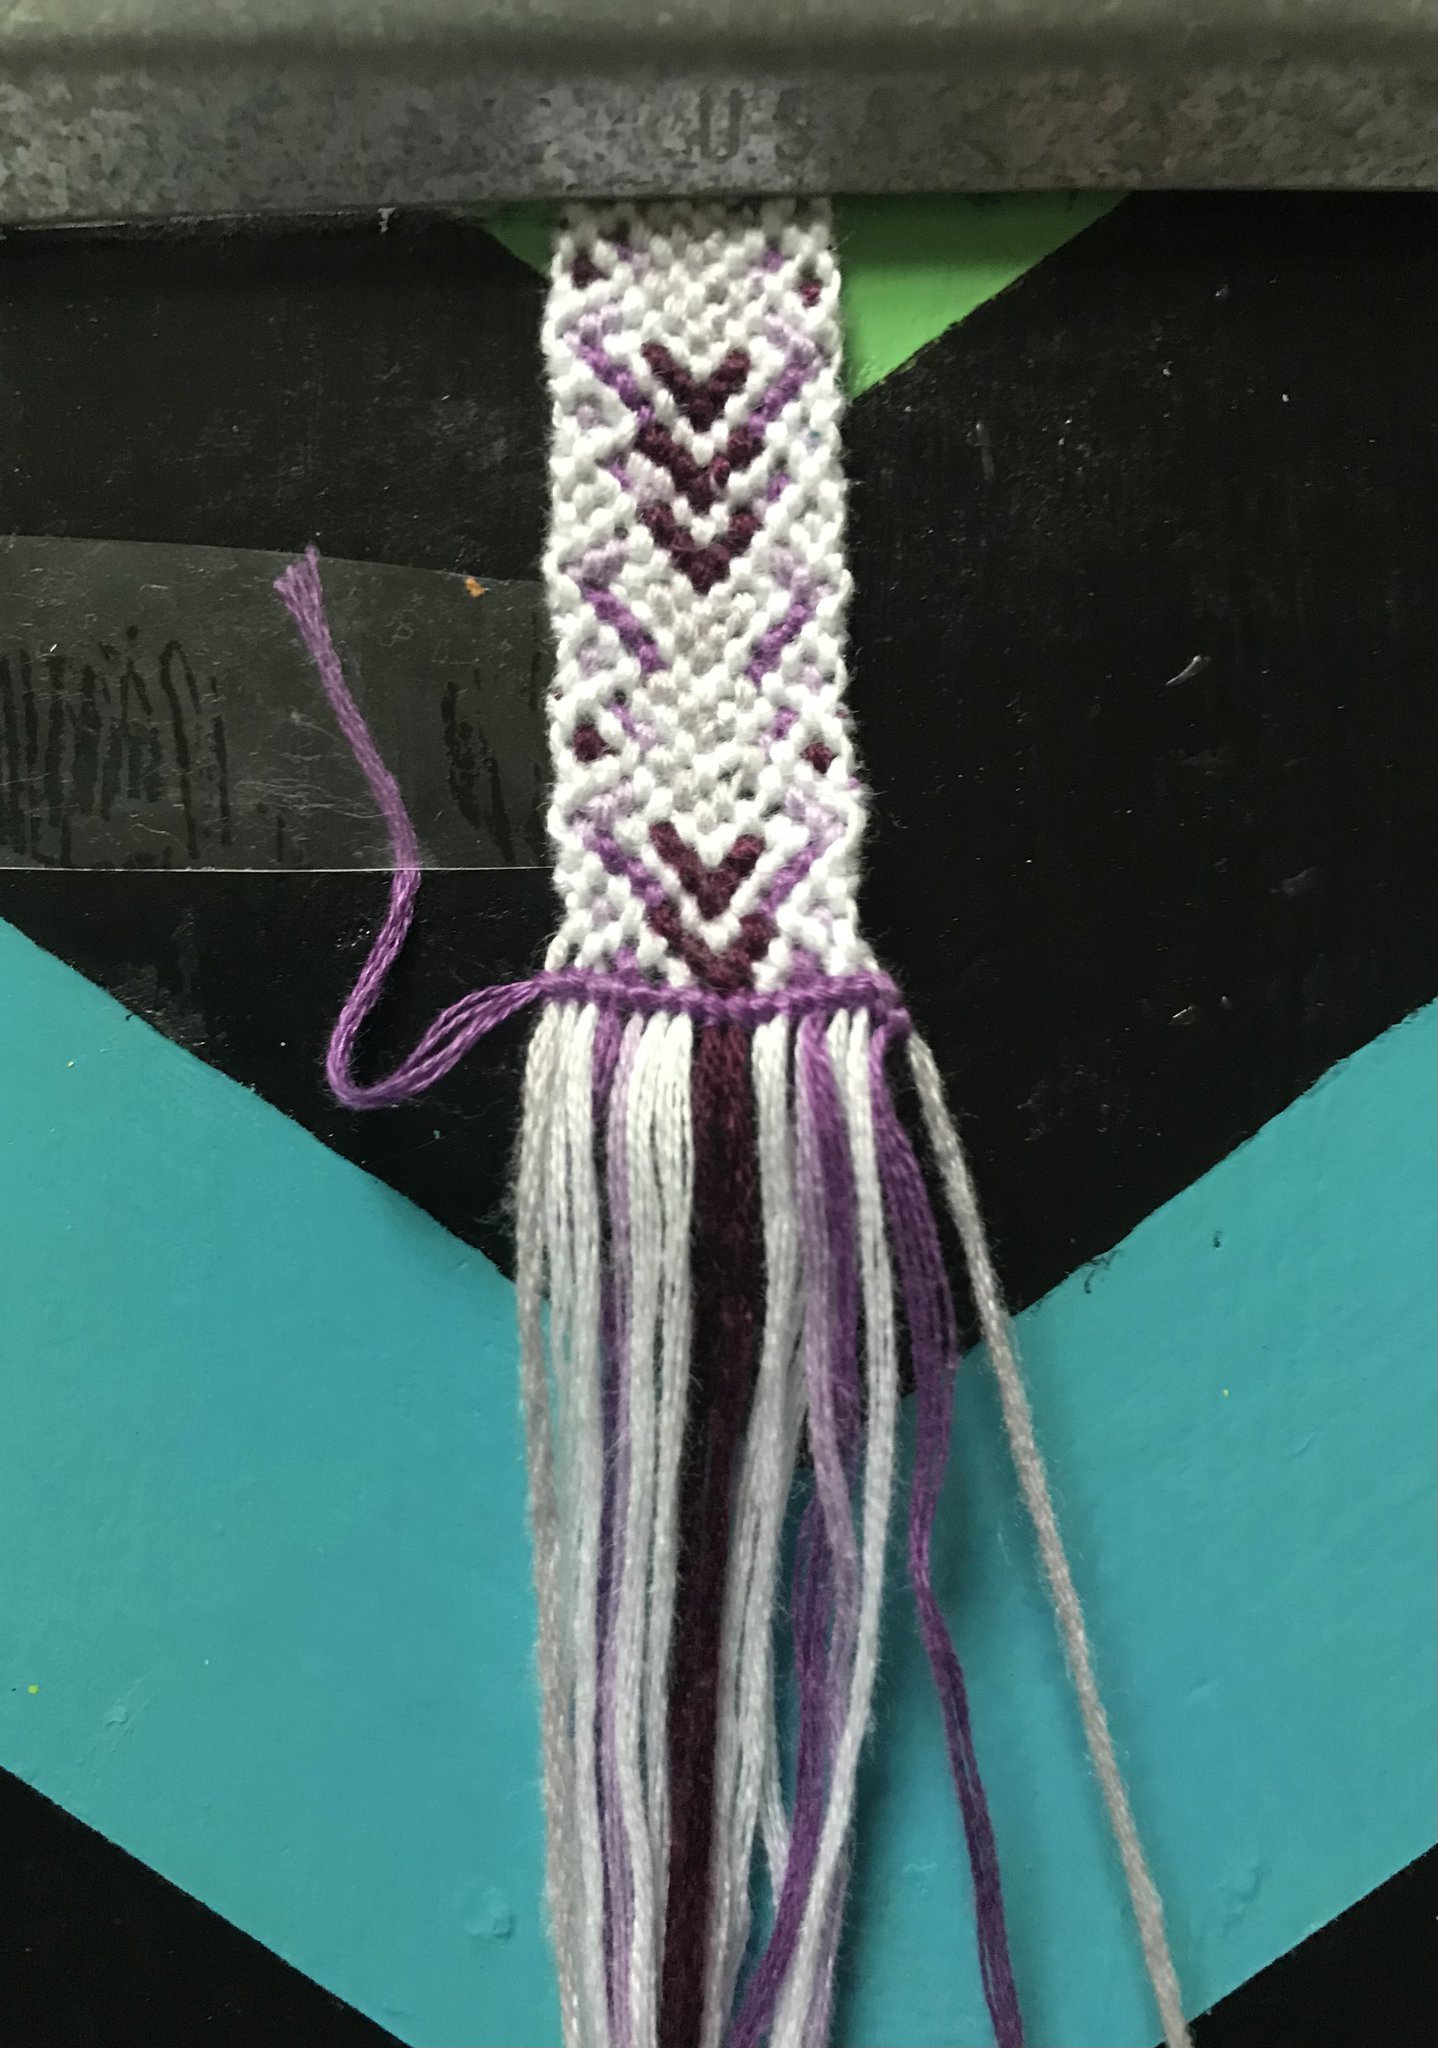
Step 5
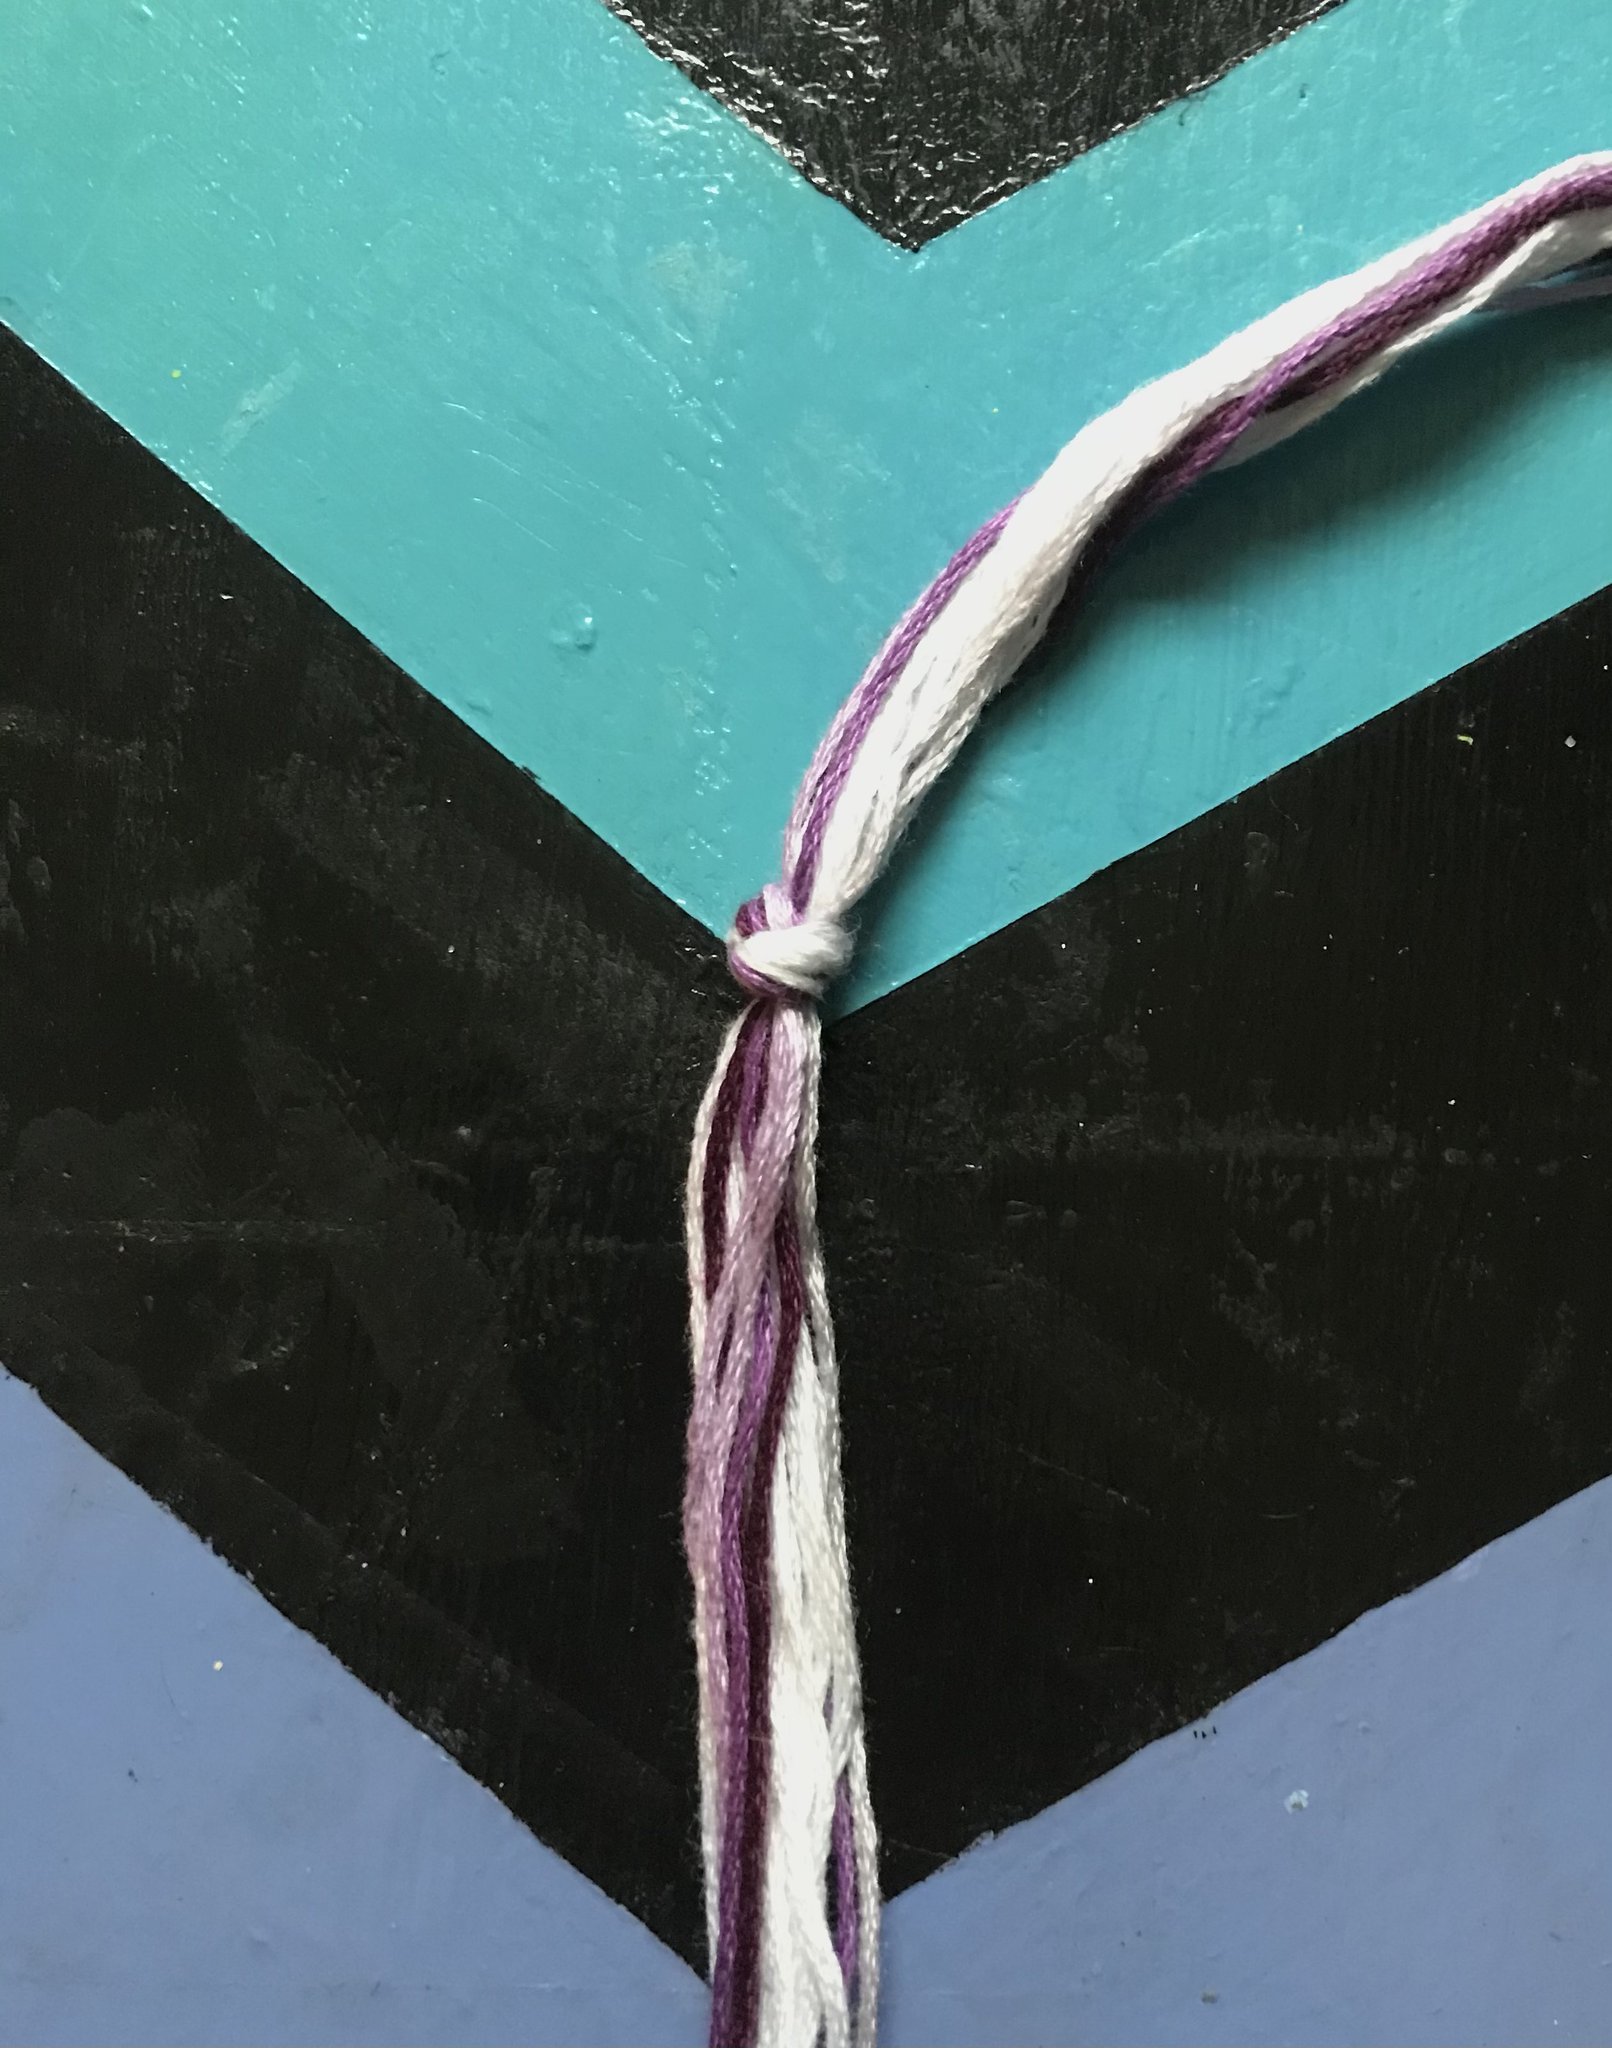
Tape your leading string for your alpha to the left.
Step 6
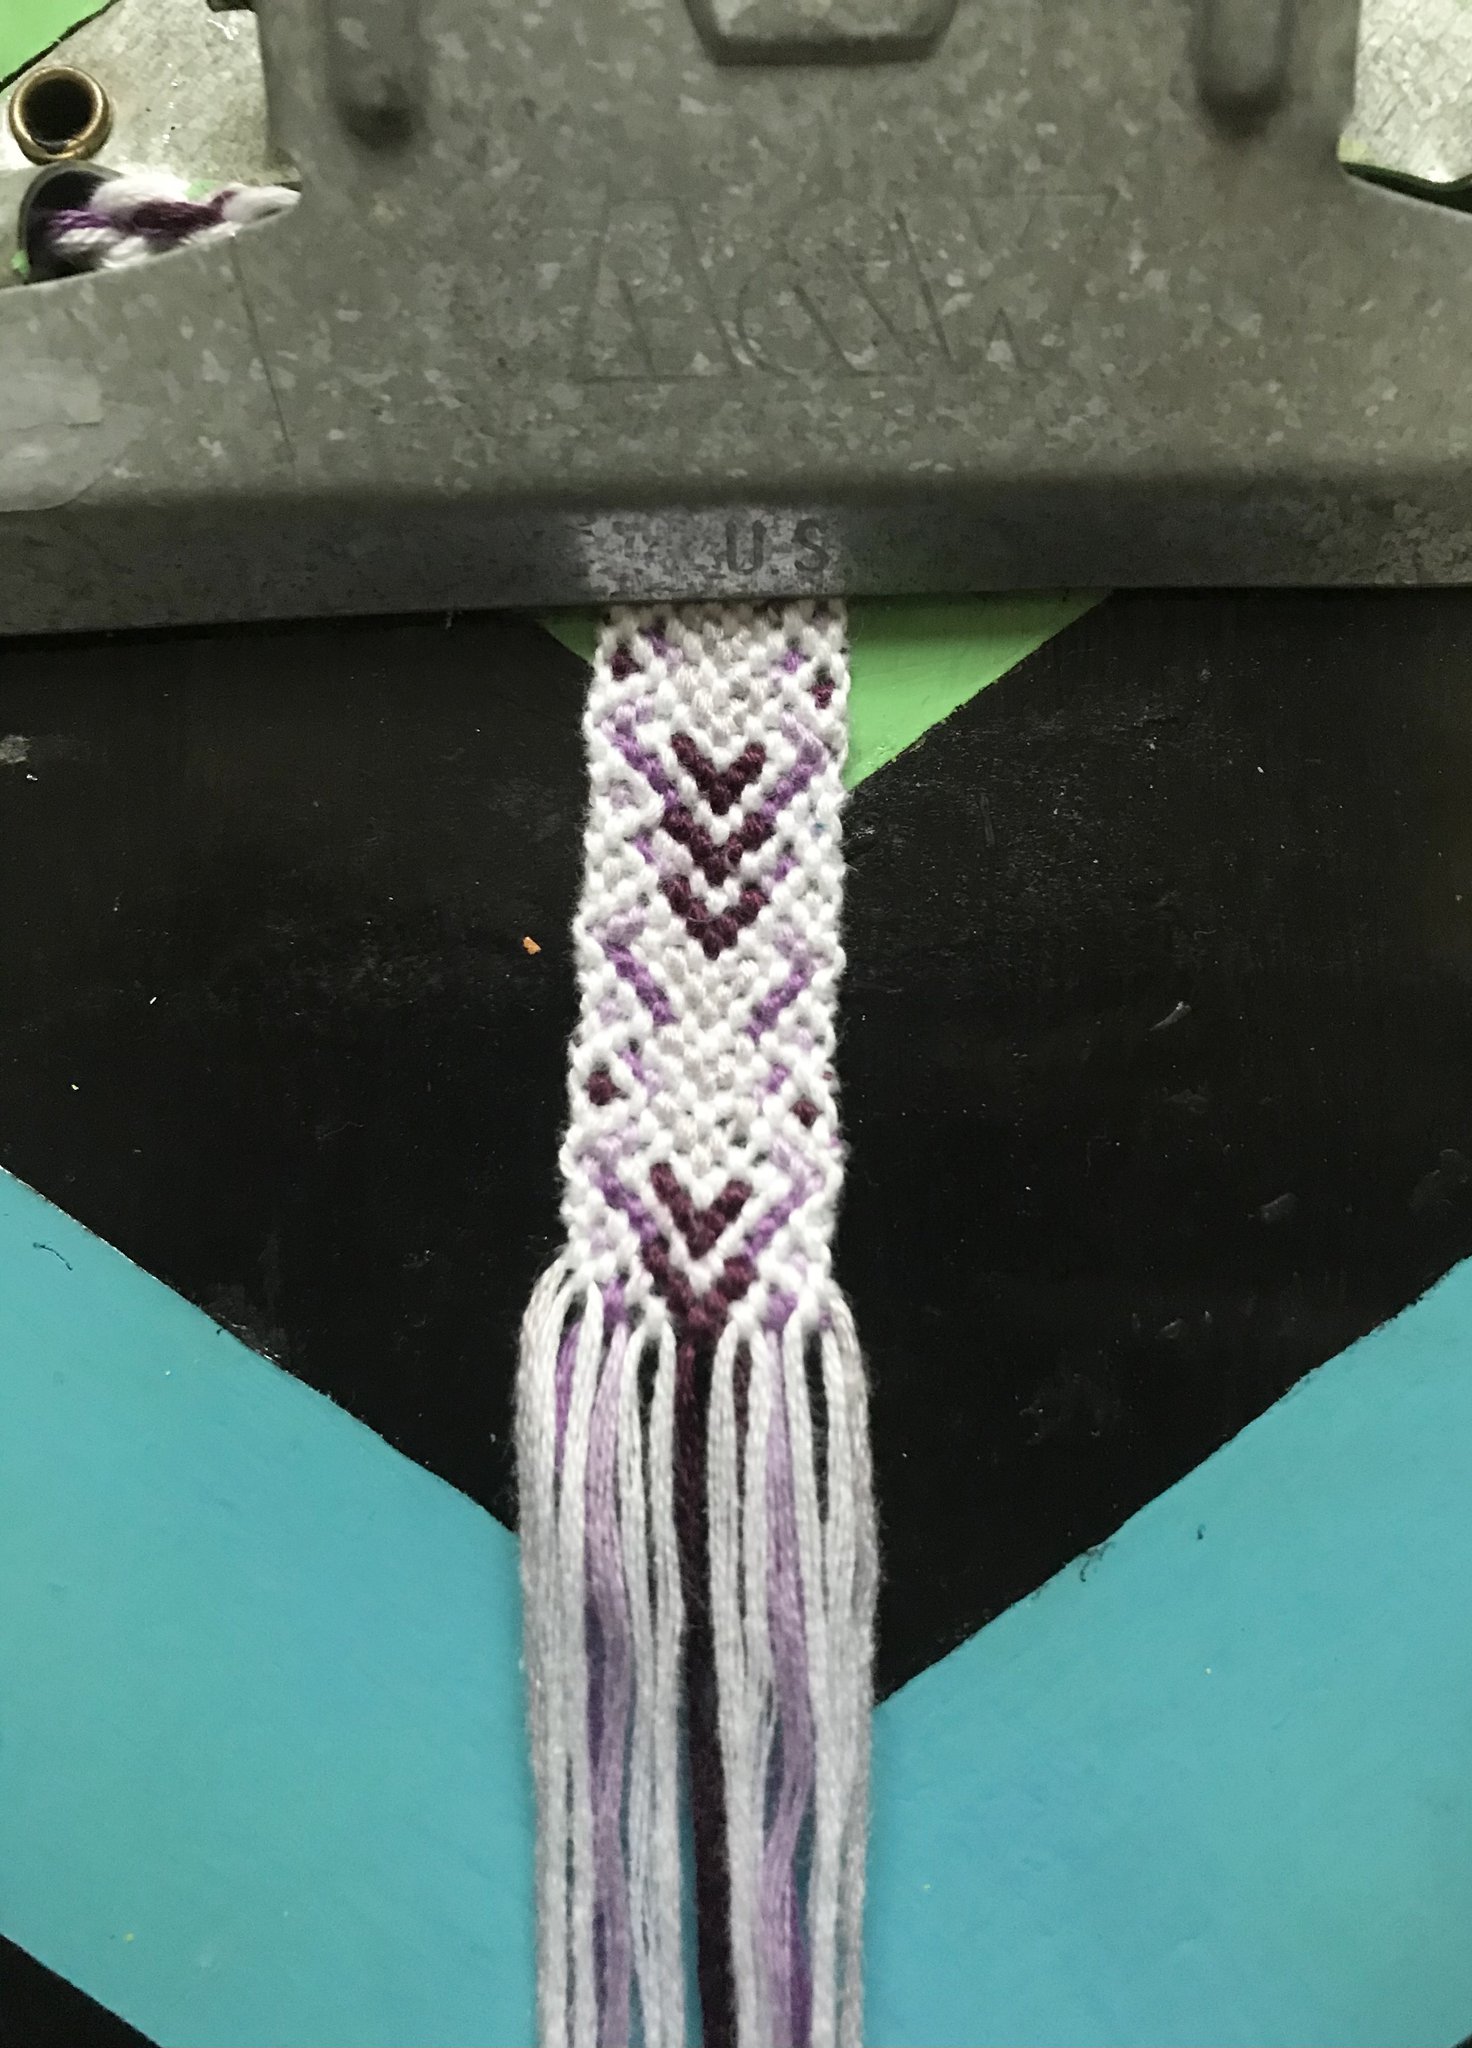
Start knotting on your strings. The strings from your normal part will now become the base strings for your alpha. Continue knotting until you have finished your alpha.
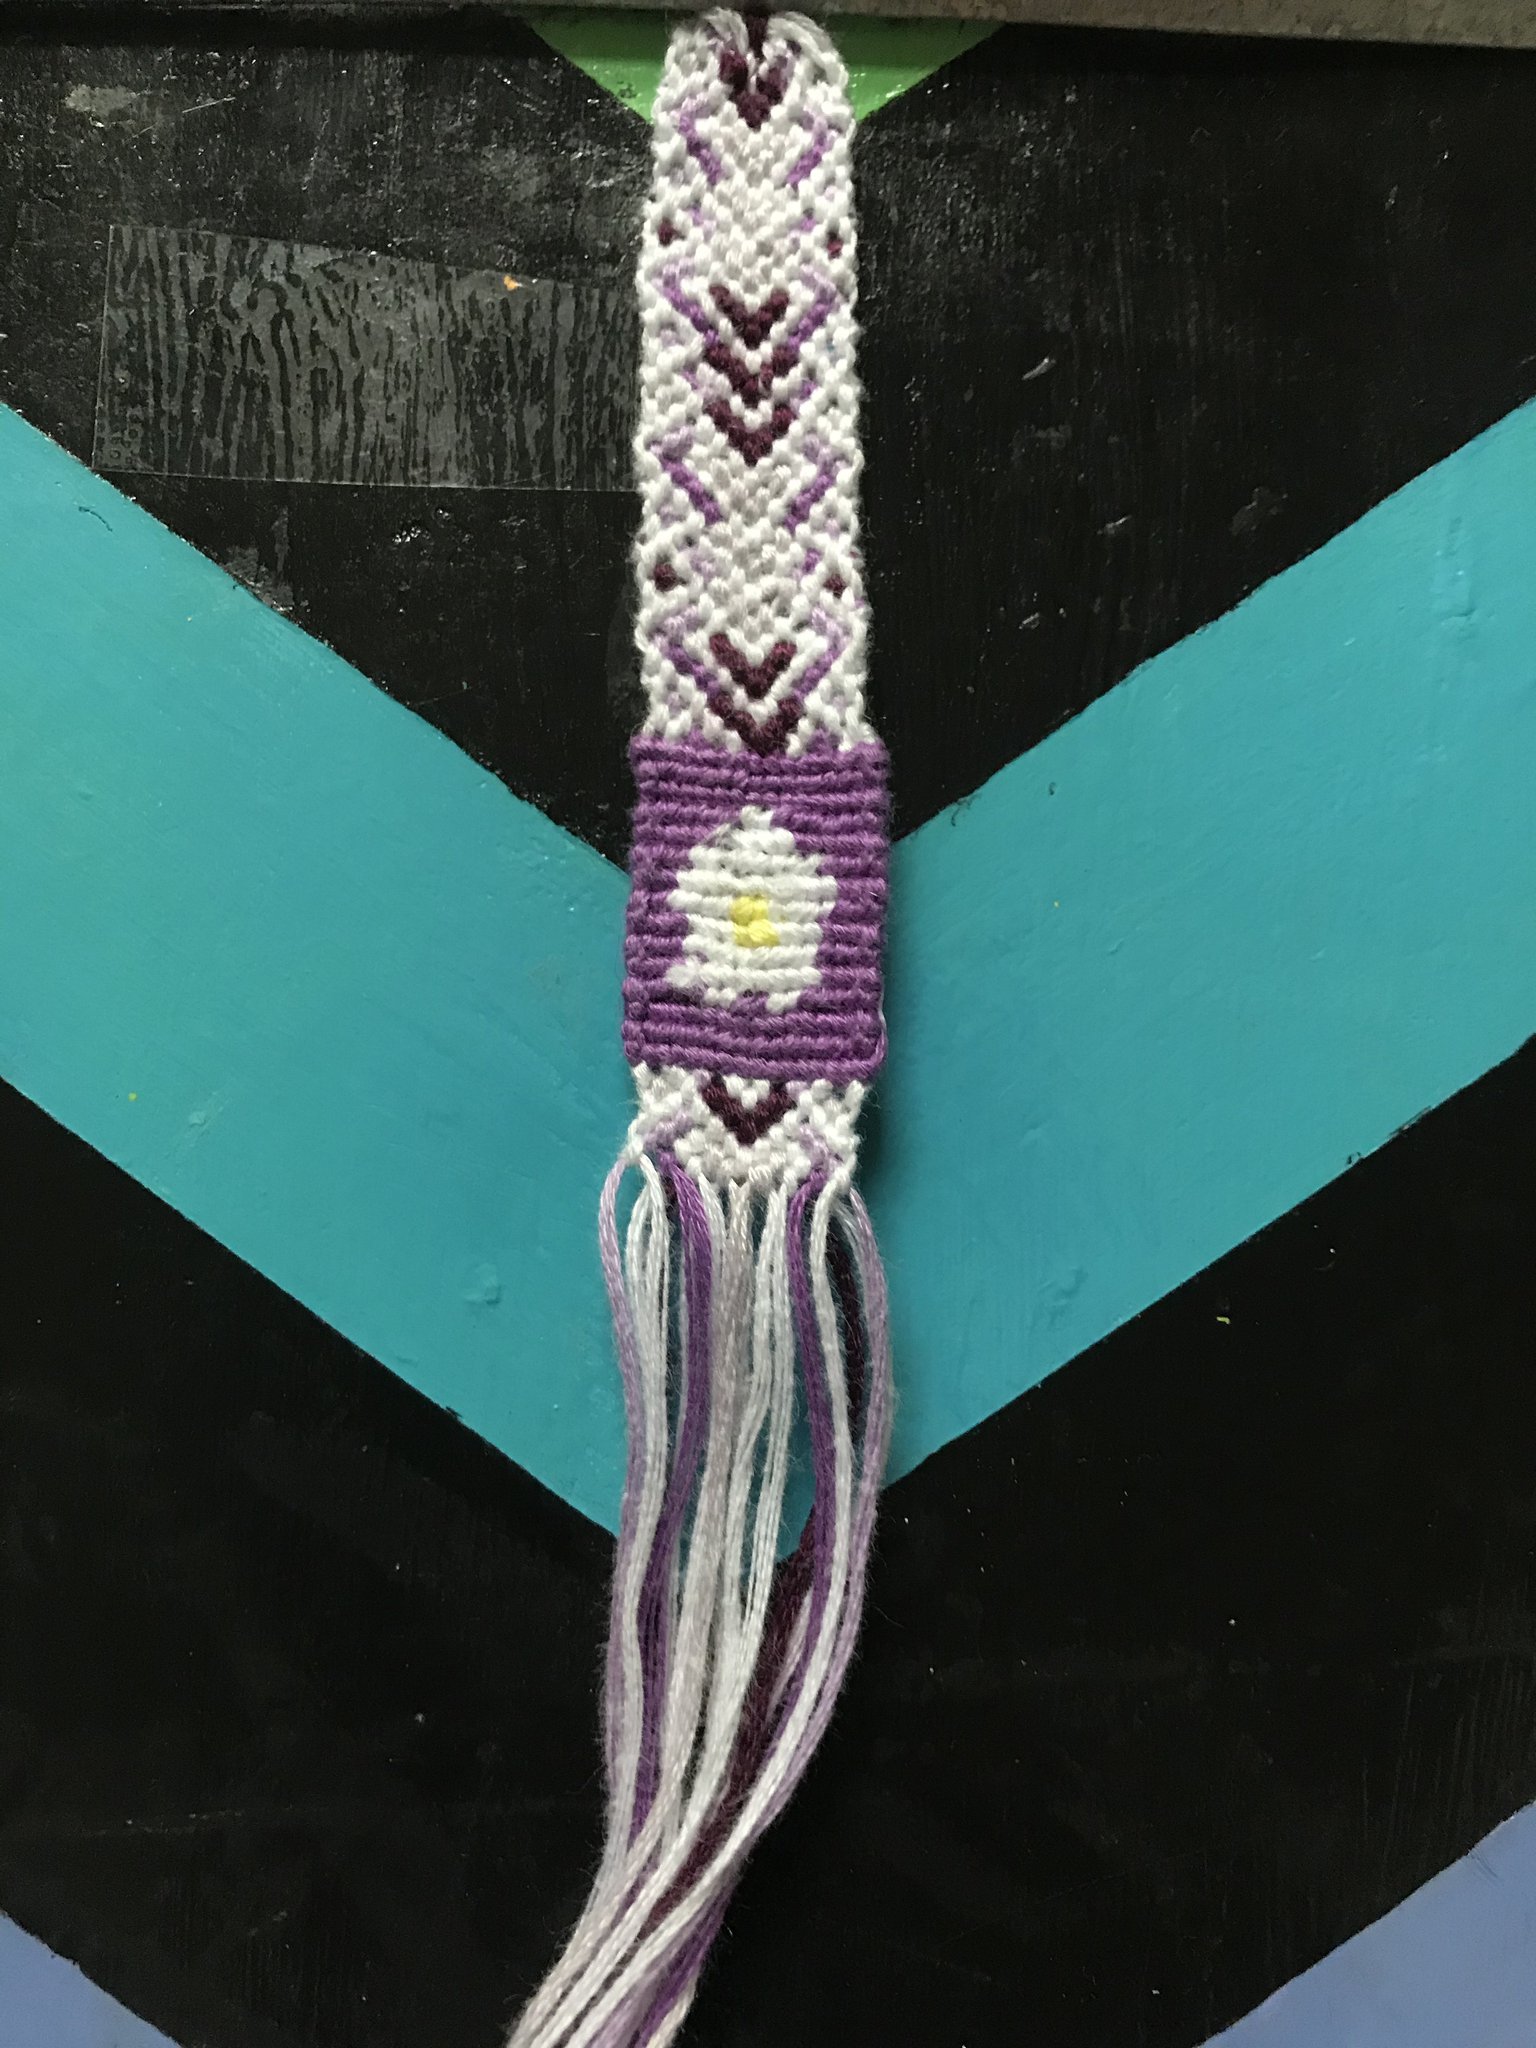
Step 7
Once you have finished your alpha cut off the extra strings from your alpha. Then start knotting the normal part again. Once you have finished, finish off your bracelet. (add ties, make it adjustable, etc.) If you would like you can glue the back of the alpha part to secure it.
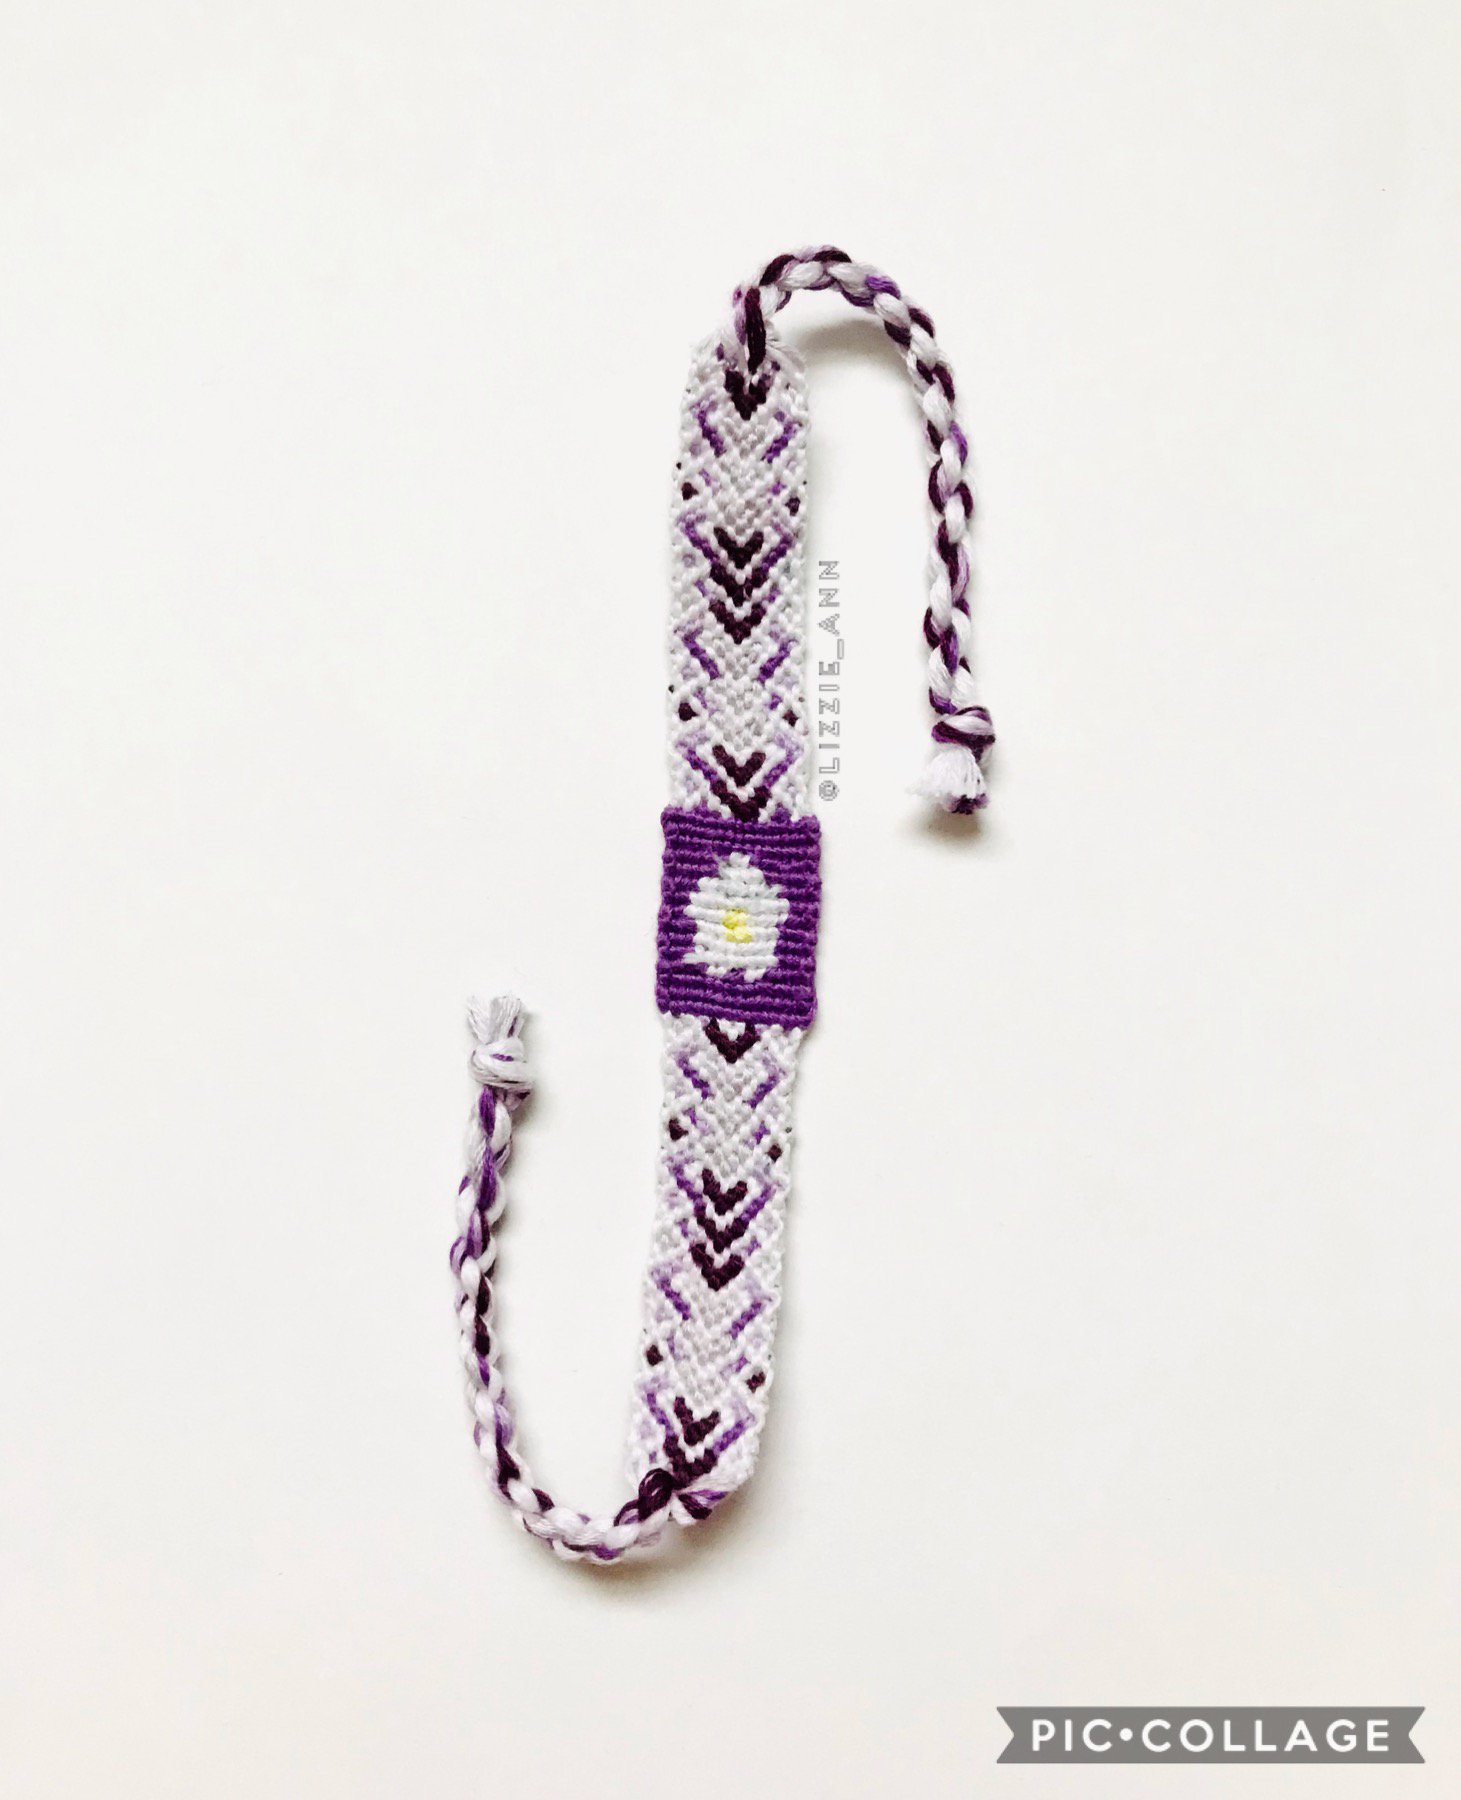
You Finished!
Congratulations, you finished your bracelet! I hope your bracelet turned out how you hoped. As always, thanks for reading this tutorial and if you have any questions, feel free to comment them below or message me. Have a wonderful day! ❤️
Knotting Dangerously || Ep. 3 by Megan Morris
This video by @Margaron showcases the Alpha-Normal Technique if you prefer videos, or still don’t quite understand.