Rate Tutorial
As I always wanted to invent something new and tried around a little bit, I found out how to make alpha pattern as patches for your jeans jacket or even to hang the Christmas tree with little self-made alphas.
You need to know how to make alphas in general. I’m make my alpha with the upside-down method, but it doesn’t matter at all if you do upside-down or the normal technique.
Let’s get started!
You need to know how to make alphas in general. I’m make my alpha with the upside-down method, but it doesn’t matter at all if you do upside-down or the normal technique.
Let’s get started!
Search for a pattern
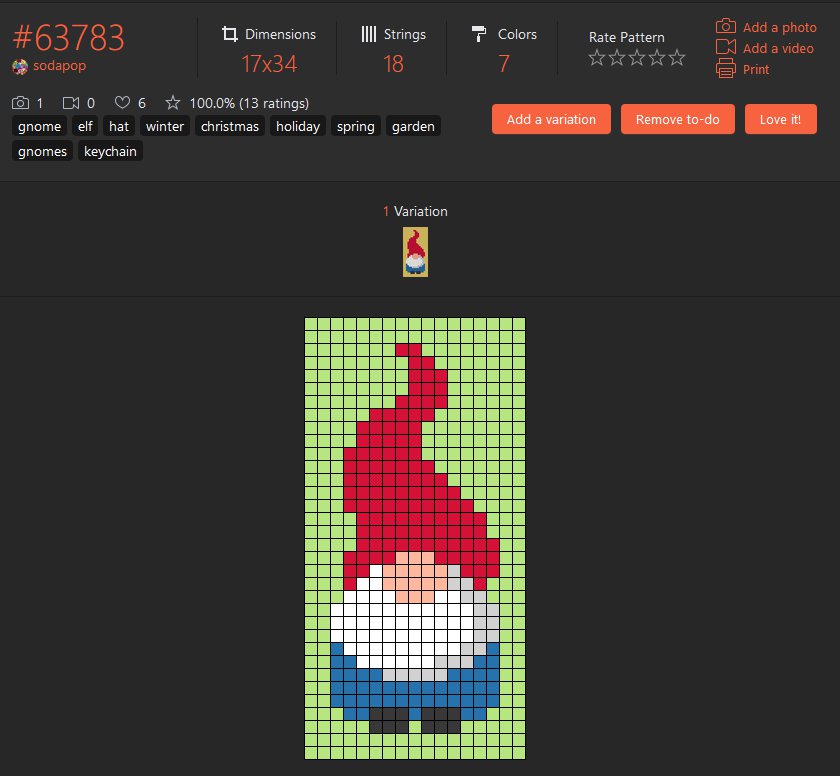
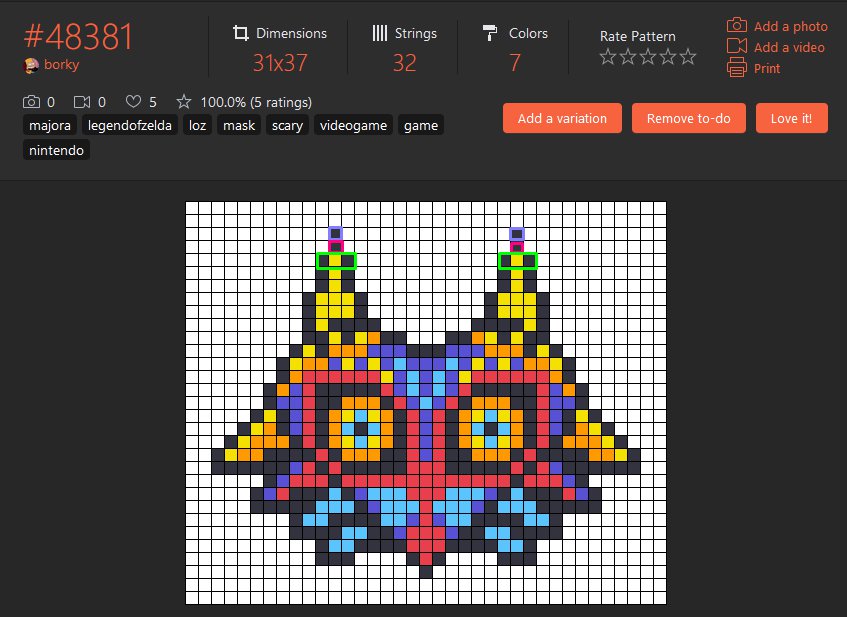
First, find your pattern you want to make. If you’re trying this technique for the first time, I recommend choosing a small pattern. Like something with the maximum of 20 strings in width and with less different colors.
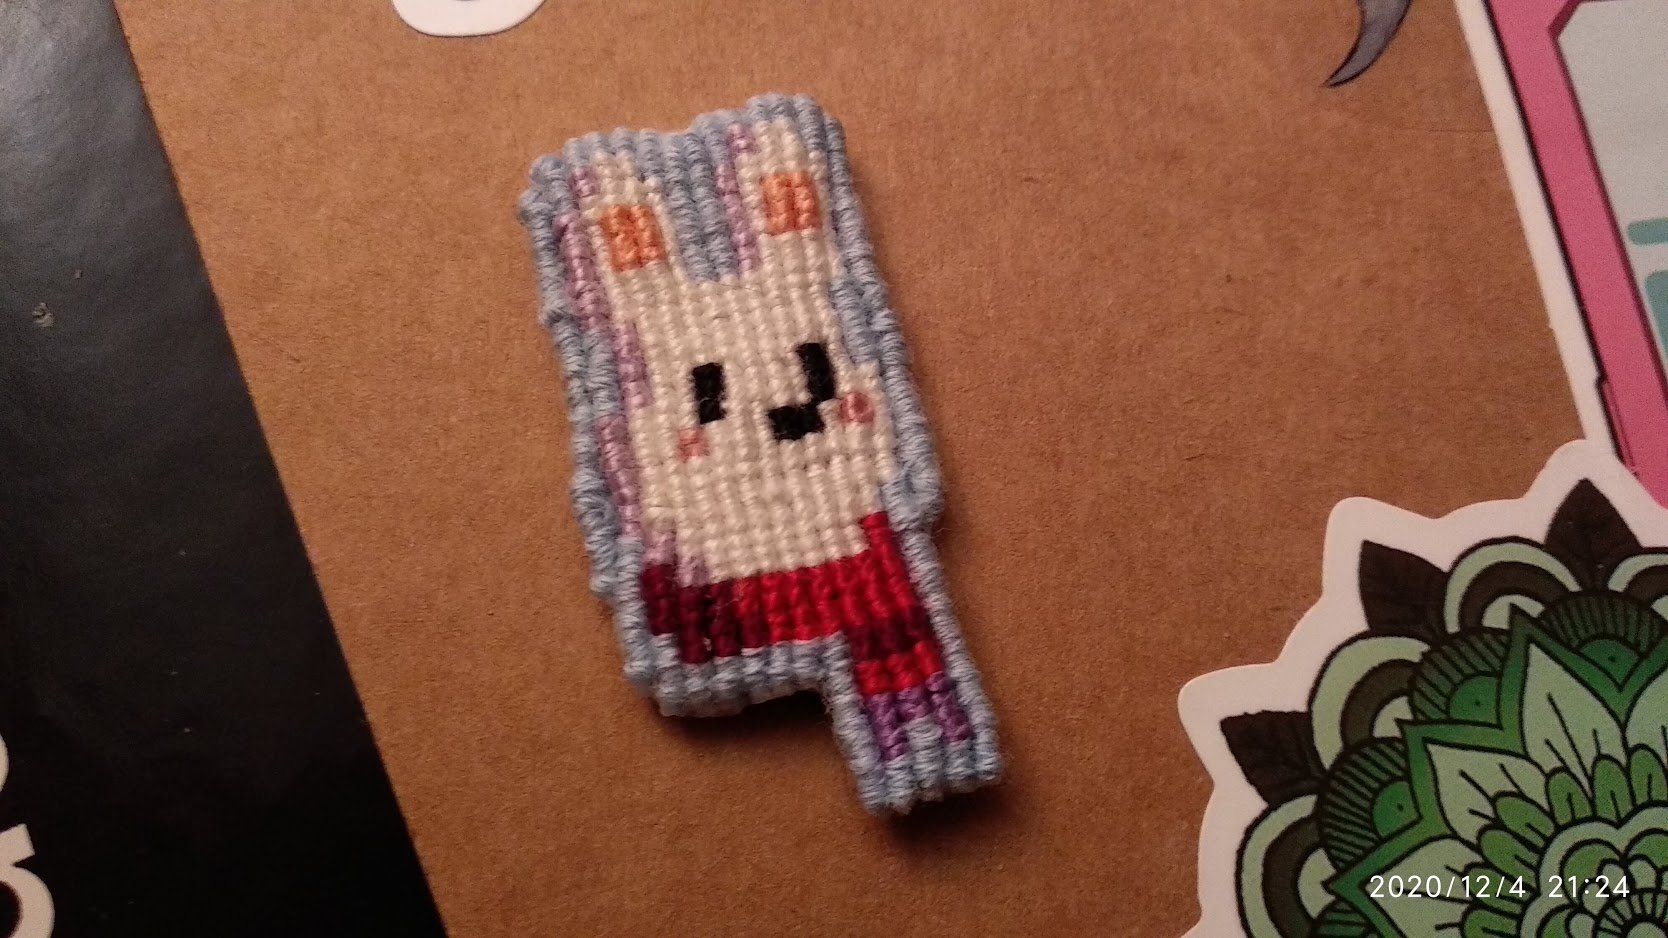
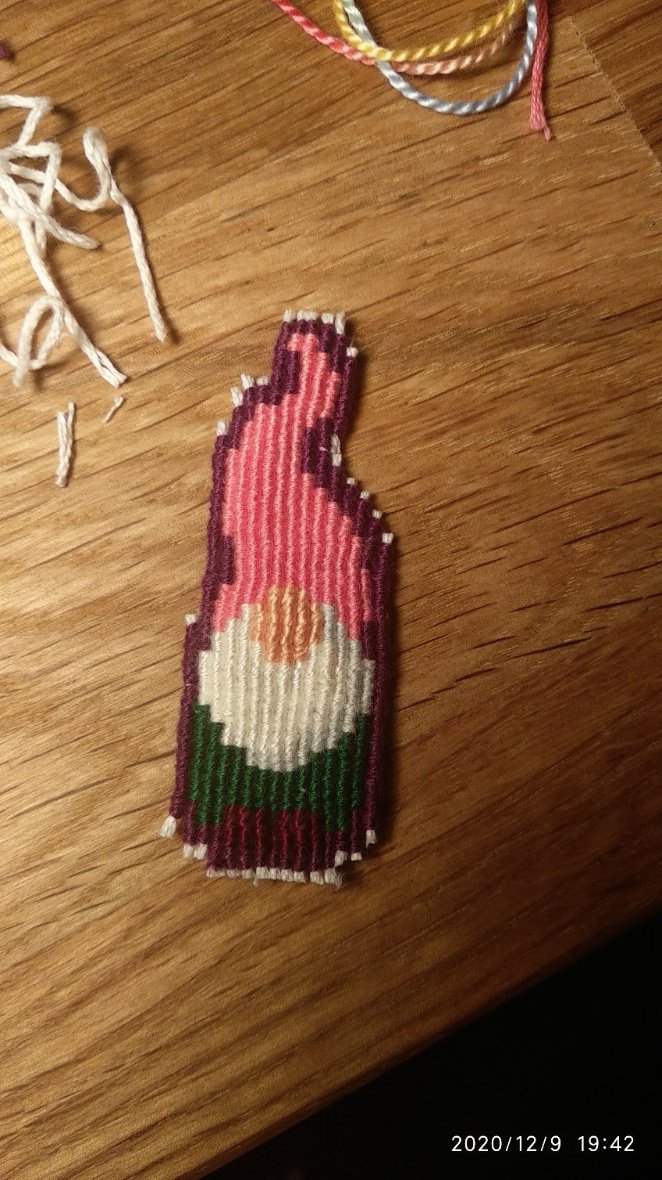
For this tutorial I choose pattern #63783 from sodapop. My first patch was #61461. You can find a photo on my profile.
For this tutorial I choose pattern #63783 from sodapop. My first patch was #61461. You can find a photo on my profile.
Take a screenshot
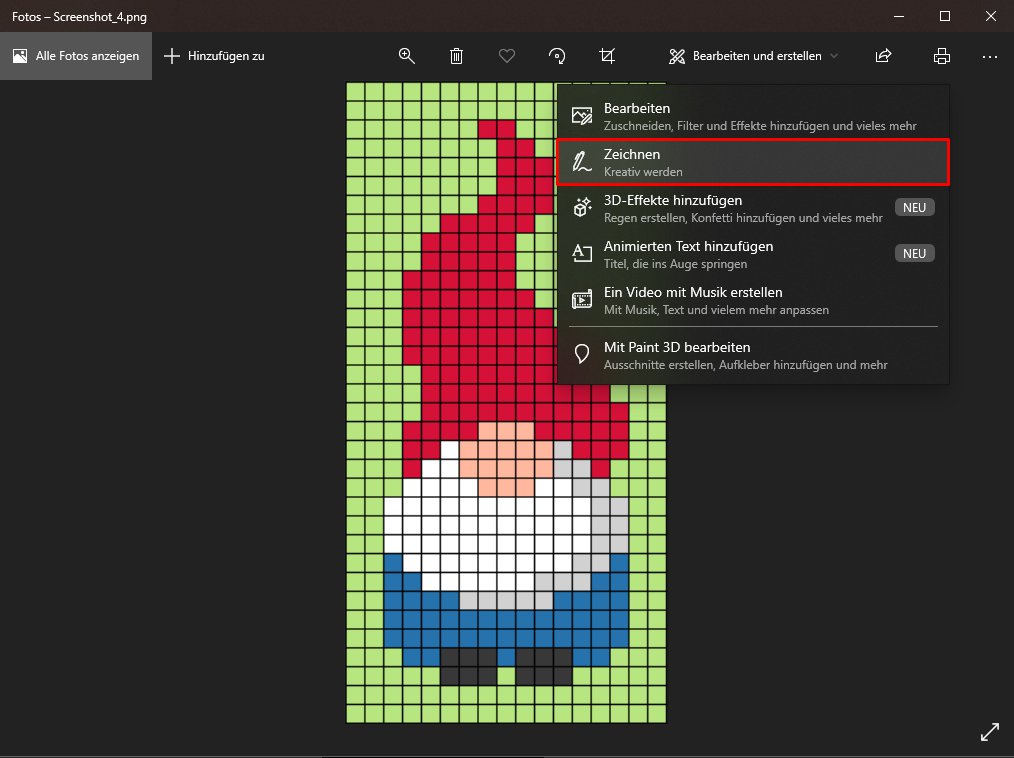
When you find your pattern of choice, take a screenshot of the pixel art. We need to draw on the pattern. I know on Windows you can take a screenshot with Snipping Tool and draw on the screenshot. I save the screenshot and use the standard photos viewer on Windows 10. I, sadly, can’t give any recommendations for Mac devices. There are also web browsers where you can color things. Or print the pattern and draw with a pencil on it. Get creative, there is no wrong way.
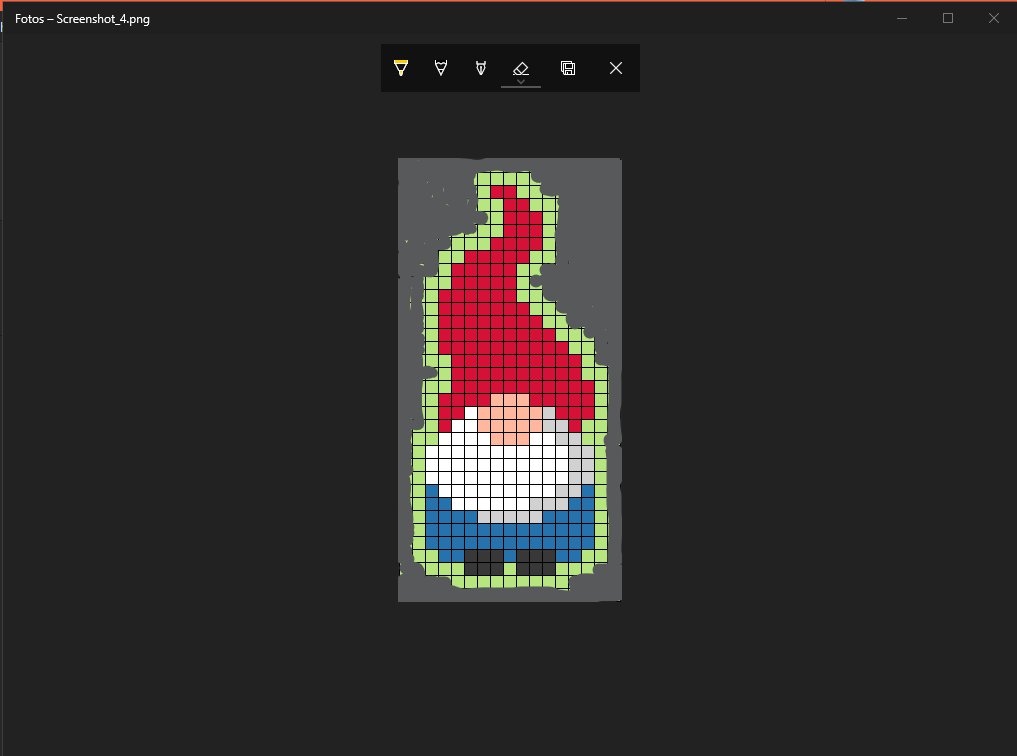
Draw over unneeded knots
When your digital pencil is ready to use, color over all of the knots that you are going to be ignoring. I have colored them gray here. I am choosing to keep a border that is one pixel in width around the whole pattern as shown here in light green.
Coloring the knots that you are ignoring doesn't have to be perfect, as long as you have a clear idea of which knots you will be tying.
Coloring the knots that you are ignoring doesn't have to be perfect, as long as you have a clear idea of which knots you will be tying.
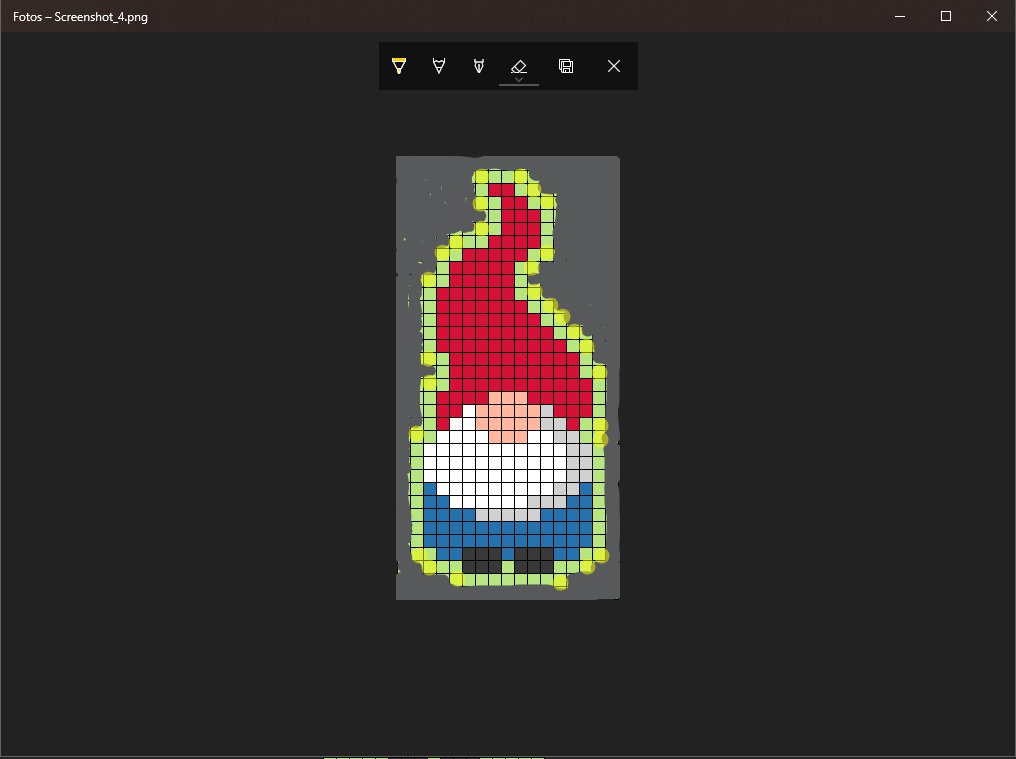
Don’t forget the diagonal knots
I want to mention, to leave the background knot diagonal at an edge knot, so it will look nice and neat. I colored it in light yellow. No need to color it on your pattern as well, it’s only for explanation.
Who much base strings do I need?
Now we are ready to get our yarn and start to knot.
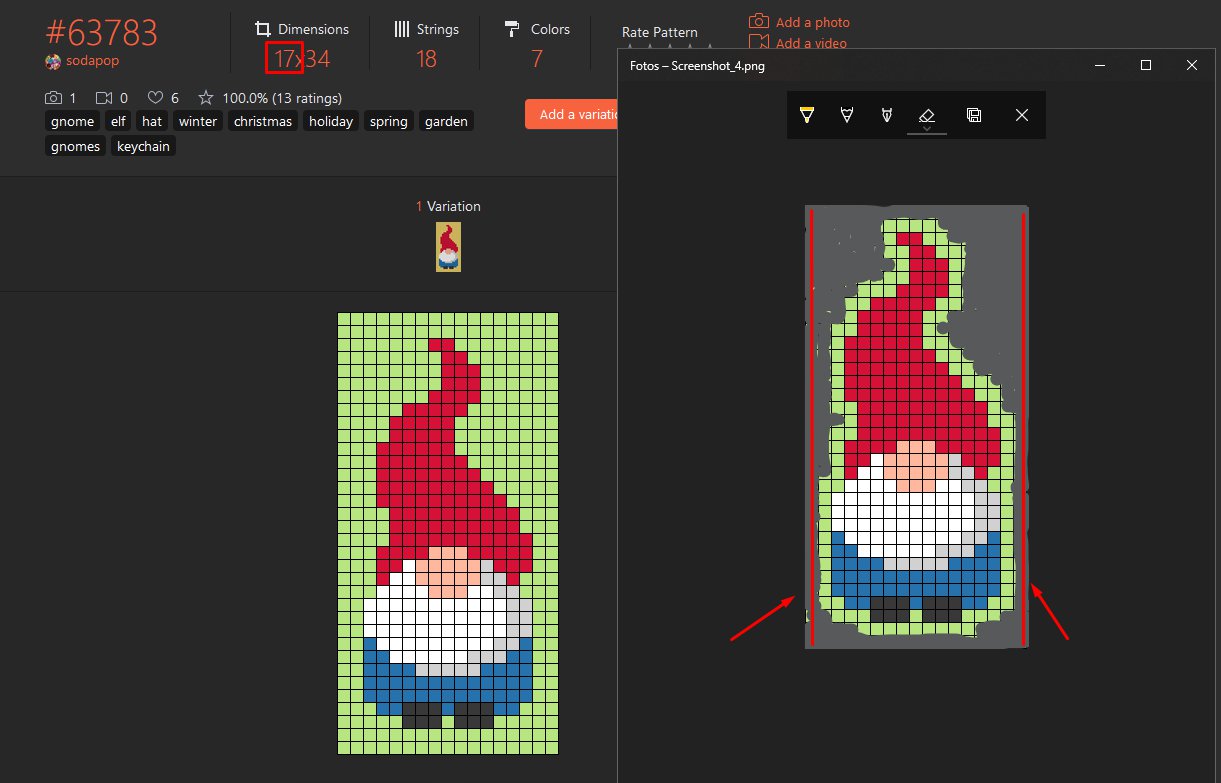
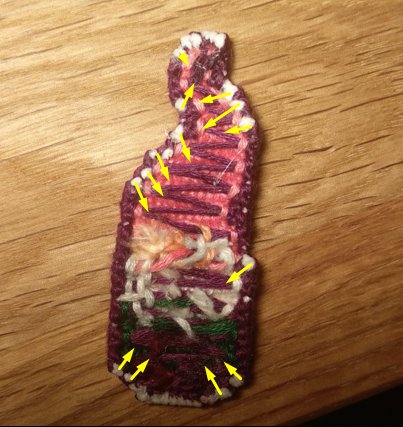
My pattern has a width of 17 strings. As you can see in the picture, I colored only 2 strings (marked in red with arrows) completely, as there is nothing to knot on, so I’ll leave them out.
I need 15 base strings.
My calculation:
(whole) 17 strings
(colored fully) 2 strings
17-2 = 15 strings in total

Where to start my first knot?
Prepare your base strings and colored strings you need for the pattern. There is no need to make a triangle start if you want to make a patch. If you want to make a keychain or something like that, please be creative.
The first row is the trickiest, but when the first row is done, you don’t need to worry about counting at the others.
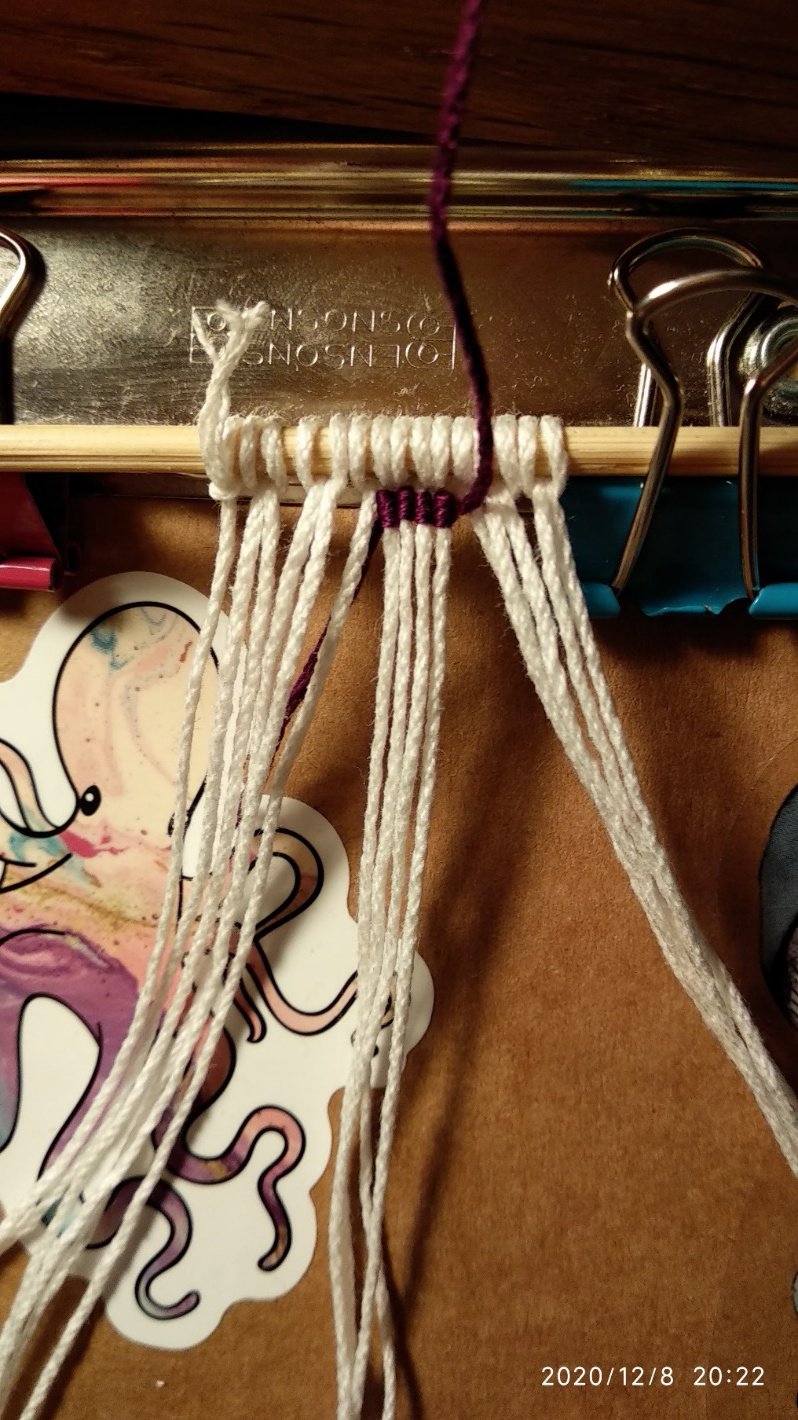
My first row will be a row with 4 background color knots. I marked the first knot (on my screenshot and the real pattern on braceletbook) with the dark purple arrow. Now we need to count the knots on the left before our first knot which are under the red colored line. The knot with the green X must be ignored, because we didn’t even prepare a base string for this line.
The first row is the trickiest, but when the first row is done, you don’t need to worry about counting at the others.
My first row will be a row with 4 background color knots. I marked the first knot (on my screenshot and the real pattern on braceletbook) with the dark purple arrow. Now we need to count the knots on the left before our first knot which are under the red colored line. The knot with the green X must be ignored, because we didn’t even prepare a base string for this line.
Your first row
Make the straight edge alpha technique to get the result you want. THE BEGINNER’S GUIDE TO ALPHAS youtube video from Alex’s Innovations will help you out here.
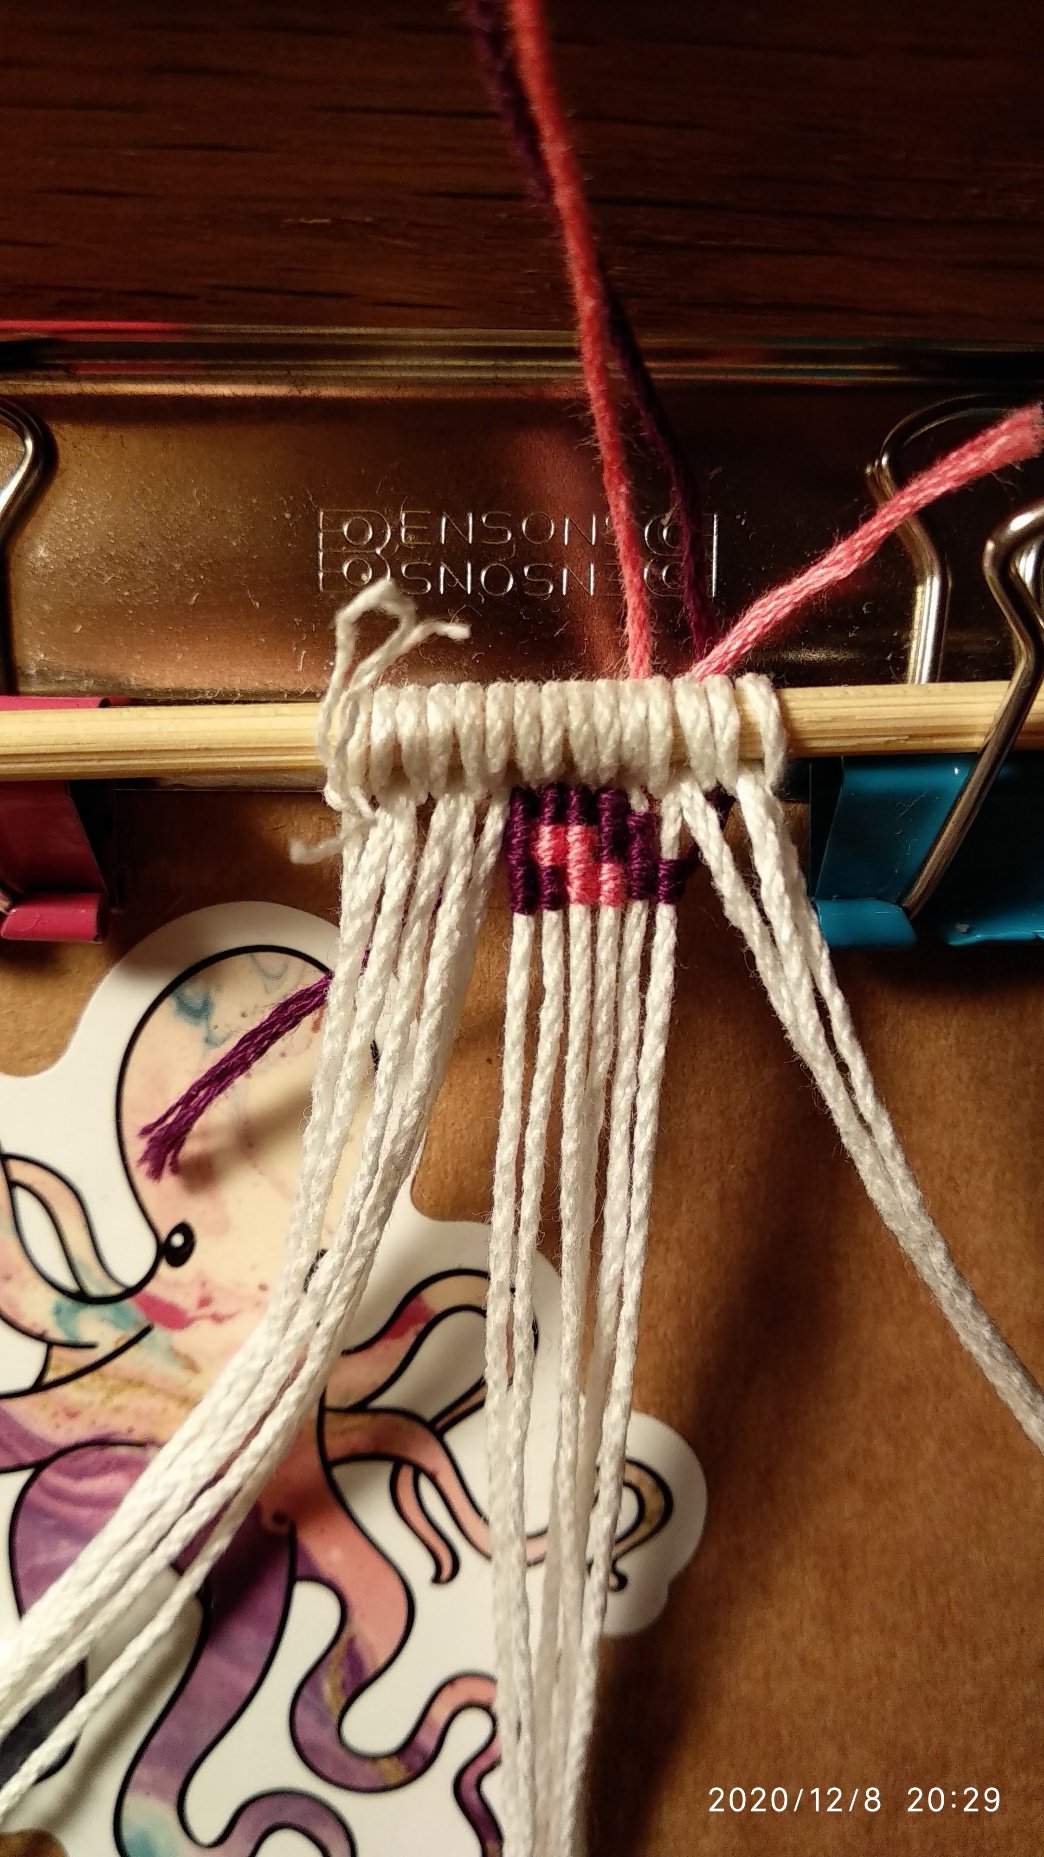
I need to ignore the first 5 strings on the left and make my first knot on the sixth. And as someone might noticed, I miscounted myself, but this is beneficial for demonstration purpose on a later point at this tutorial.
I need to ignore the first 5 strings on the left and make my first knot on the sixth. And as someone might noticed, I miscounted myself, but this is beneficial for demonstration purpose on a later point at this tutorial.
The start of the second row
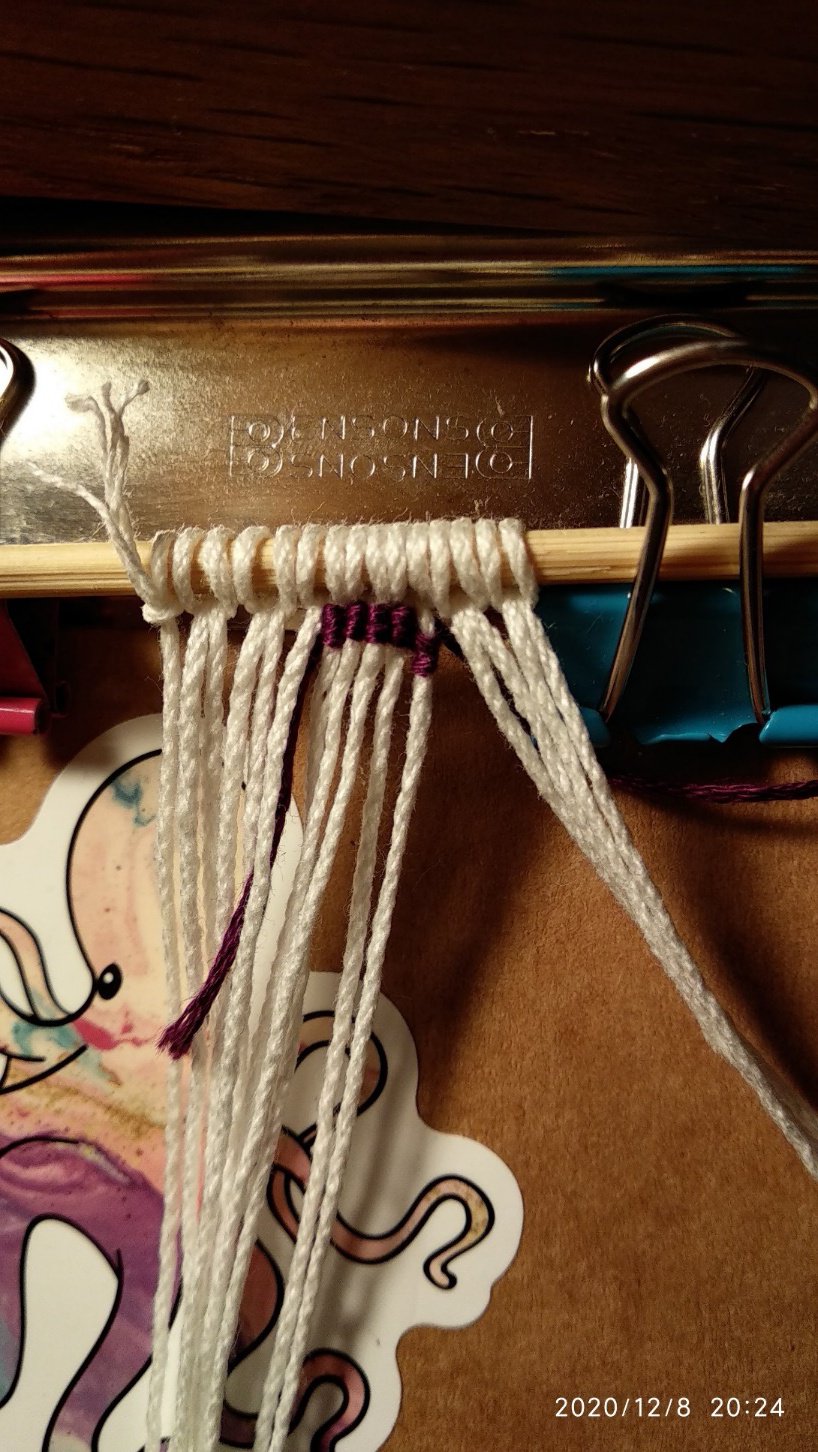
The next row starts with a knot on the base string after my last knot from the first row.
Try to make it as closely to the last knot as possible. The new knot could slide a little bit too far up, but you can put it in place with your fingers, once made.
You need to knot row by row, even when there are base strings between the knots you need to ignore. Let’s show another example pattern to demonstrate this.
Another pattern, to show row-by-row
Knot row by row means exactly what it sounds.
As shown on this example, you need to knot the lavender colored framed knots. The next row will be the pink framed knots. The next row the green framed knots. Even if you need to ignore lots of base strings between these knots, make it row by row.
You can have separate leading strings on both sides, until your knots come together and will give a straight line again, if you want to. It is recommended for pattern with wide spaces between the knots, so you don’t waste a lot of leading strings.
Back to knotting the little gnome
Now, knot ahead. You can see within a few rows how the border and patch is formed.
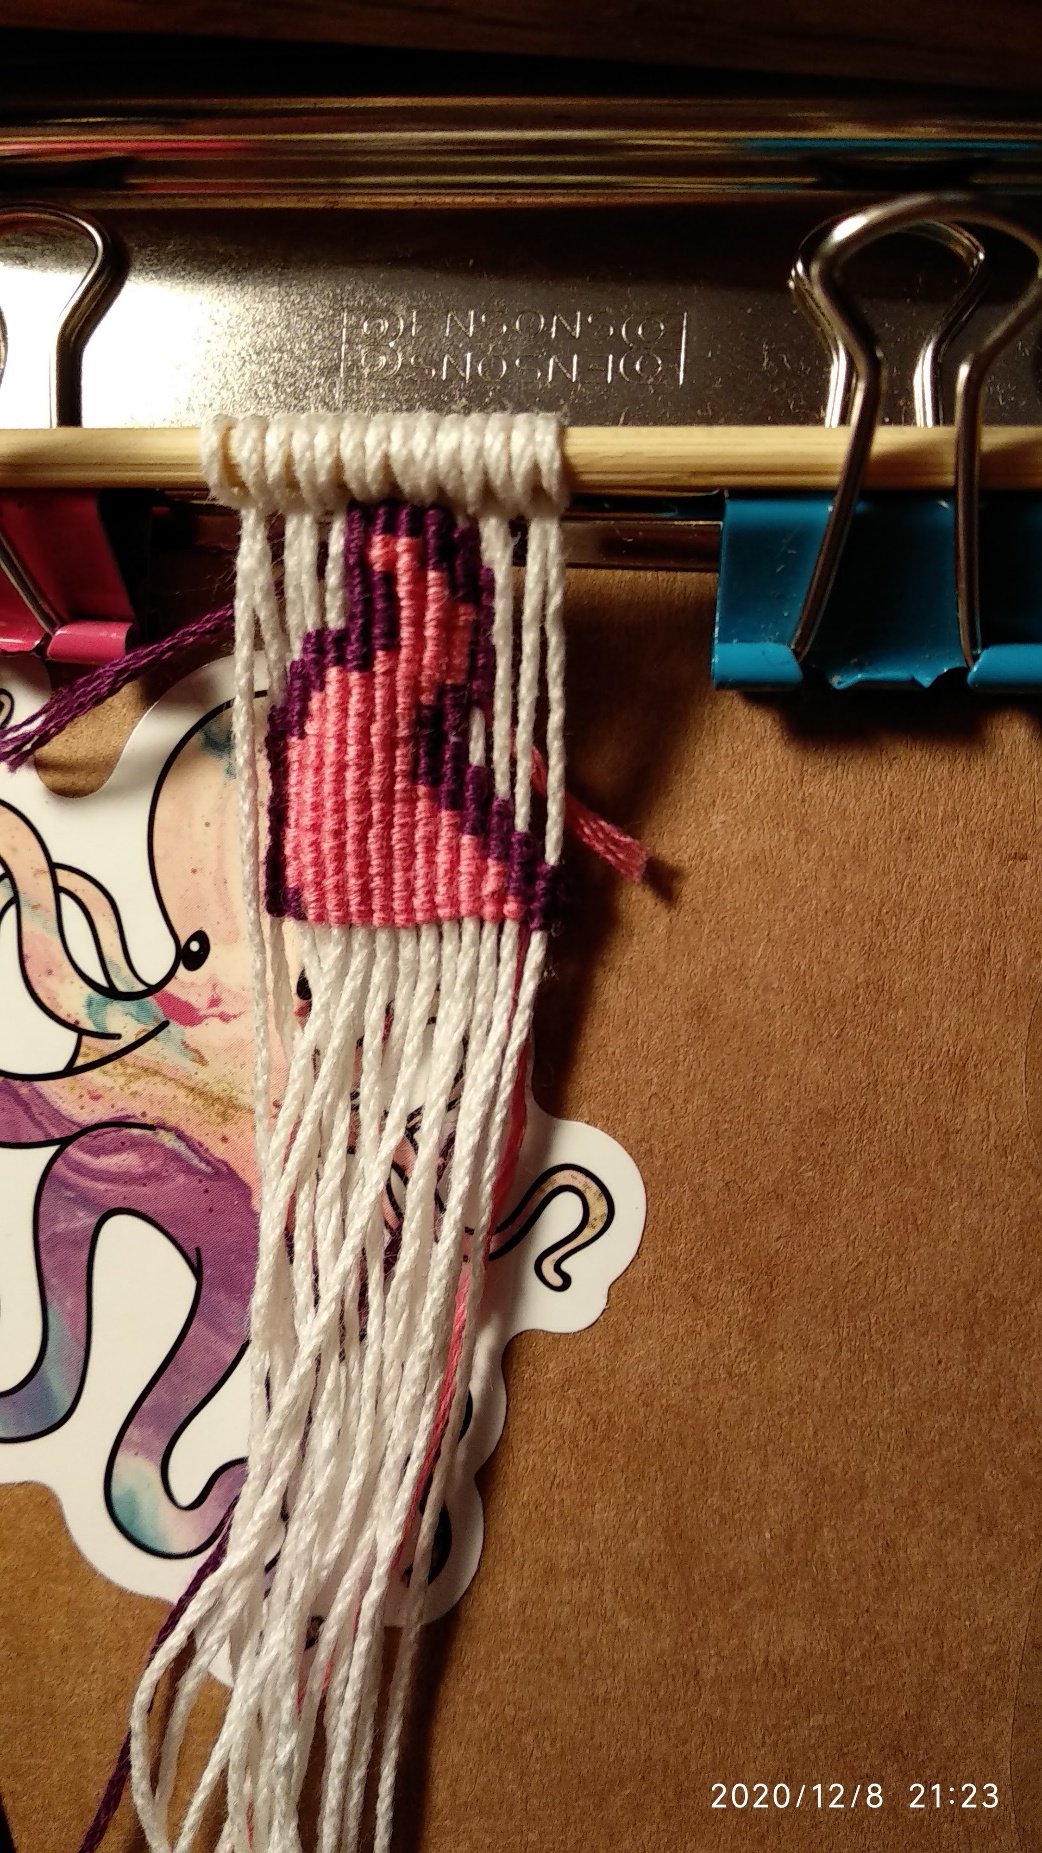
What to do when there is some base string missing?
You miscounted on the first row (as I did) or you forgot one or more base string? No problem, I got you!
Simply add a string or more and continue knotting.
Simply add a string or more and continue knotting.
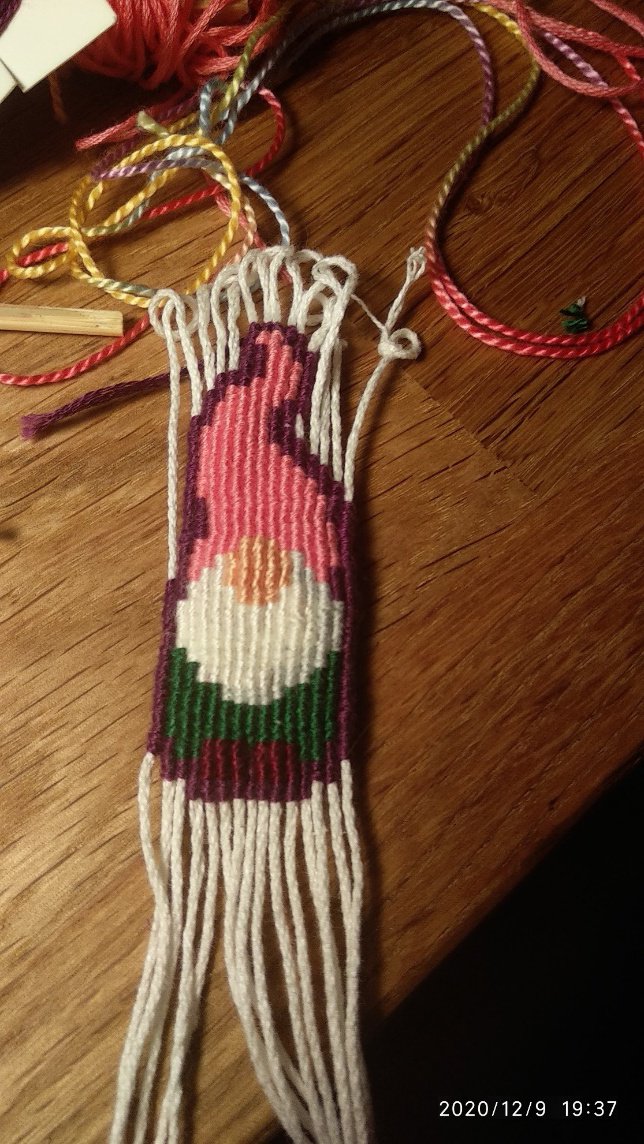
Almost done!
When you’re finished knotting, you are only two steps ahead of your patch.
Cut the remaining base strings
Cut the base strings, leave about 3-5mm, measured from the knot. If you cut them too short, it will be harder to secure them on the back.
On my picture I nearly cut them too short.
On my picture I nearly cut them too short.

Secure them on the back
Put glue or nail polish on the base string leavings and tuck them to the back. Repeat that with all leavings.
Try to secure them on the back, so there is no base string seen on the front.
Try to secure them on the back, so there is no base string seen on the front.
A look at the back
Try to tuck the strings on the edges diagonal to the inside of the patch and not downwards/upwards as shown on the point before.
To have a more beautiful back, you can sew/glue some piece of fabric or felt on the patch.
Or you can make a double keychain as well, please be creative again.
To have a more beautiful back, you can sew/glue some piece of fabric or felt on the patch.
Or you can make a double keychain as well, please be creative again.
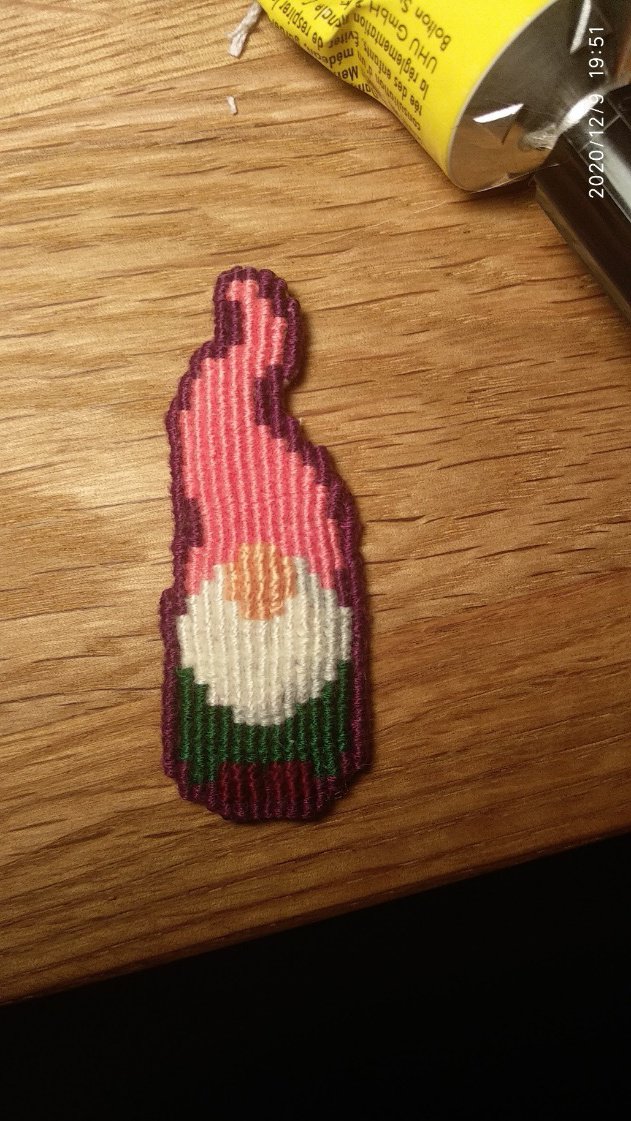
Yay! We are finished!
Congratulations! Now you’re finished. Have fun with your patch and I hope you had fun with this tutorial too.
I would love if you mention me in the comments on the pattern you posted your photo of your patch.
See ya!
I would love if you mention me in the comments on the pattern you posted your photo of your patch.
See ya!