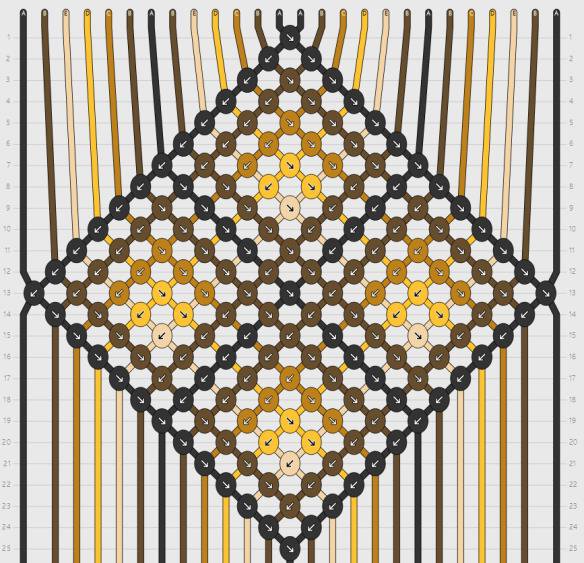
Rate Tutorial
Hi everyone! I’m @Samanada, and I’m going to show you how I make earrings! I would say this is an intermediate skill level project. This is a similar tutorial to “Making earrings from a shaped bracelet” by @Chica2020 . I learned how to do this on my own (I’m not trying to copy!) and I read through their tutorial to make sure they were different. I also included a section on how to make sure the earrings stay in a consistent shape.

You will need
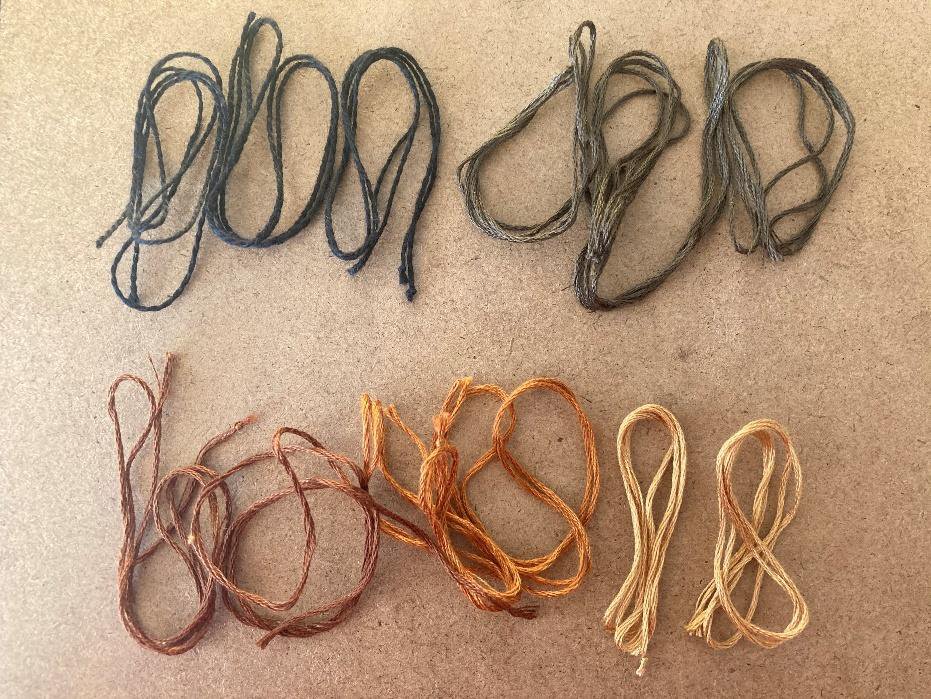
Scissors, thread (I used DMC 310, 3021, 801, 433, and 3828), shepherd’s hook or fish hook earrings, jump rings (I used 7mm—you may want one or two extra, especially if it is your first time, as they are easy to open and hard to get back to their original shape!), earring backs (optional), two sets of pliers (not pictured).
Step 1: cut your strings
I usually cut mine to about 40 cm (16 in), but that can be varied depending on how much string you like to knot with. I wouldn’t go shorter than that for string A, but strings D and E could probably be cut much shorter.
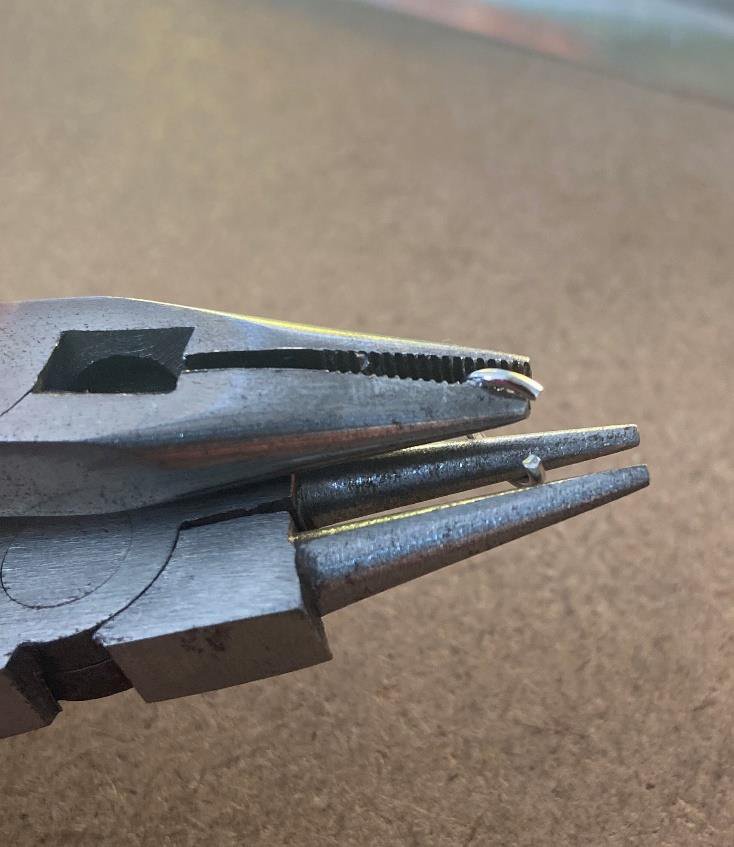
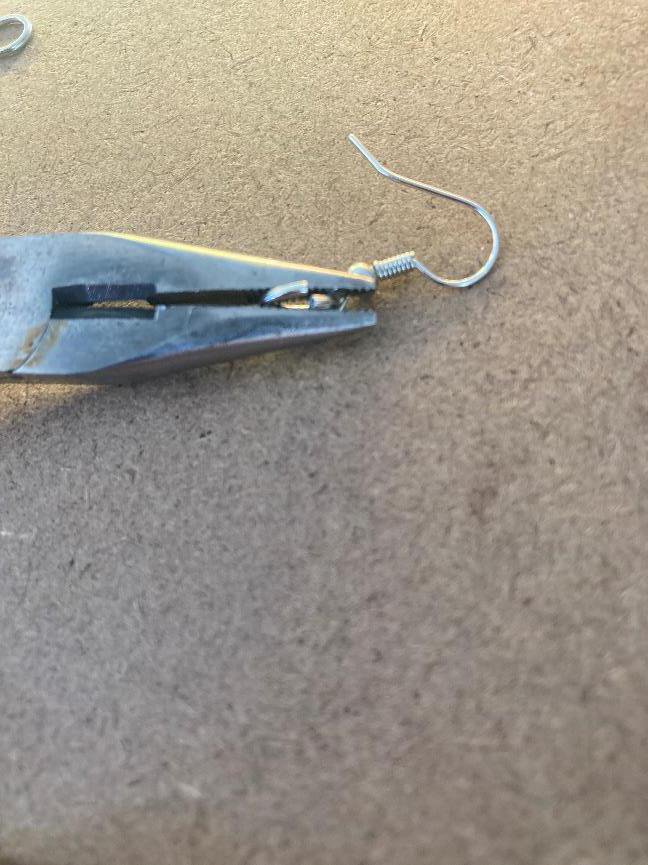
Step 2: open the jump ring
Using the two sets of pliers (I used one set of embroidery pliers and one set of needle nose pliers), grip both sides of the jump ring opening. Slowly twist them apart, being sure not to break the ring or stretch it too far. In the attached photo, I opened mine a bit too far; you really only need it slightly wider than the ring on the bottom of the earrings.
Step 3
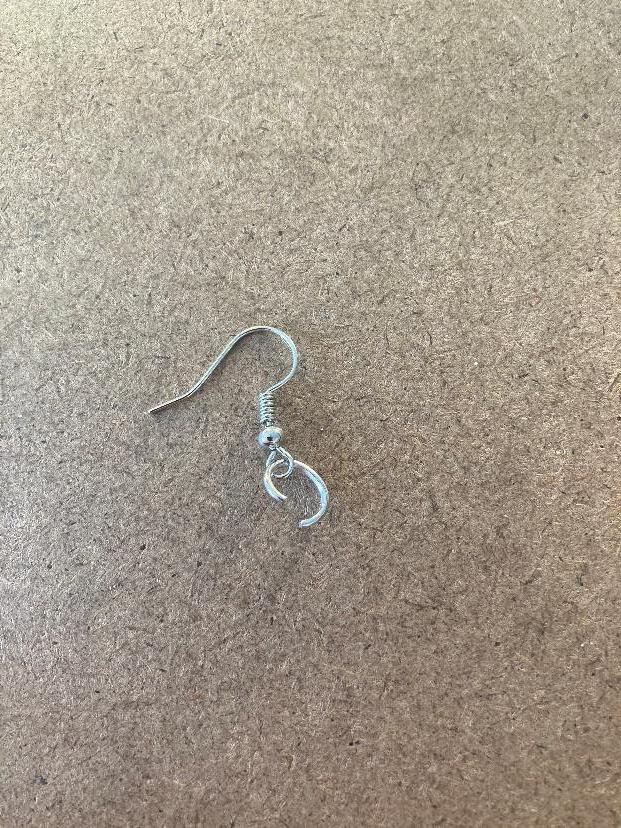
Slip the jump ring through the ring at the bottom of the earring.
Sep 4: close the jump ring
I used the needle nose pliers to pinch the ring closed, but you can also bend it the same way you opened it.
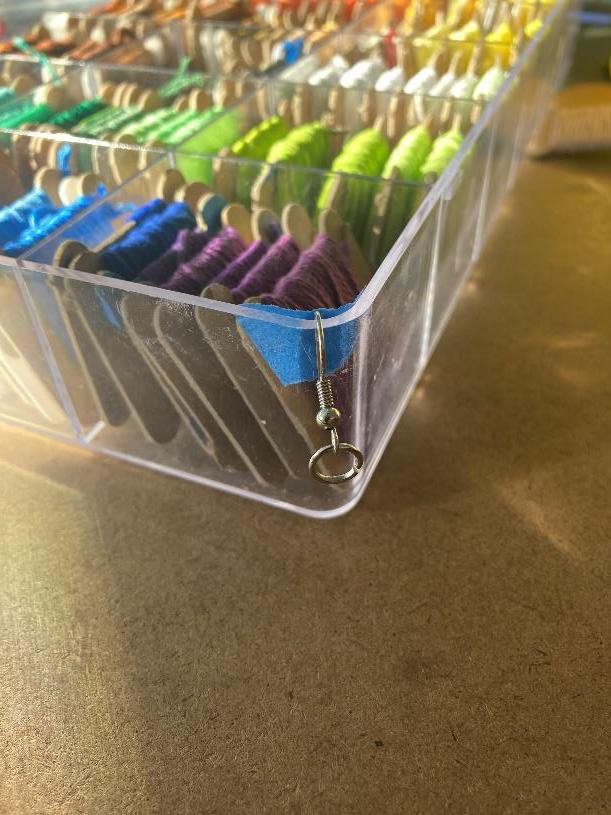
Step 5: secure the earring
I like to tape my earrings to the inside of my thread case. I wouldn’t recommend using a clipboard, because you will be working at an angle, and your knots might not turn out the way you want them to.
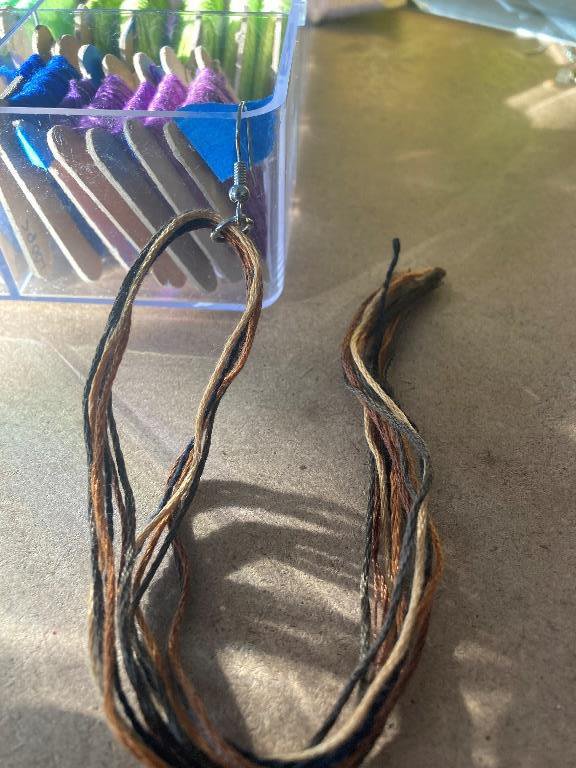
Step 6: separate your strings
For this example, I will show you how to work with a pattern where it doesn’t split perfectly (13 strings on each side). Take one each of strings A, C, D, E, and two of B. Fold them over the left side of the jump ring.
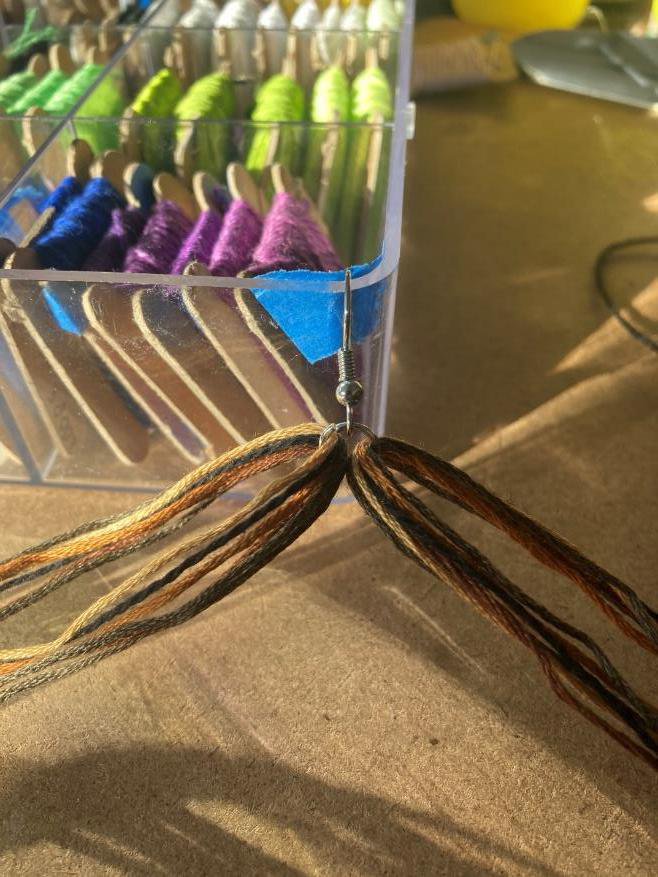
Step 7: attach the other half of the strings
Take the other half of the strings (there should be one A string remaining—leave it off to the side, we’ll need it later) and do the same thing you did in step six but mirrored: flip the strings over the right side of the jump ring.
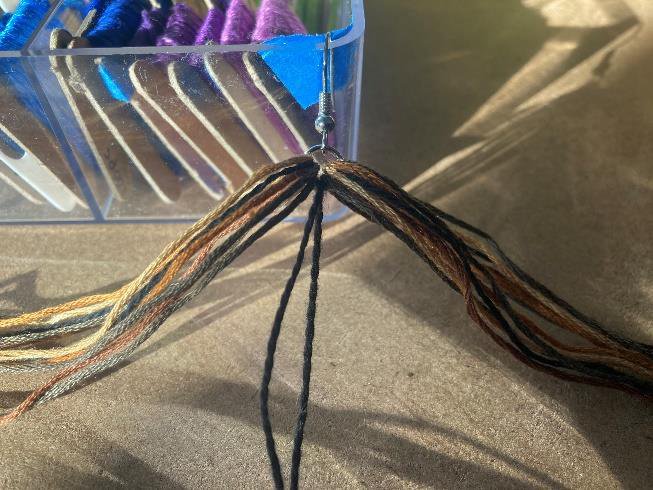
Step 8: add the last string
Take the A string you set aside earlier. Flip it through the middle of the jump ring, in between the two groups of threads, with one side of it leaning towards the left and one to the right. Make sure to keep both halves of this string an even length.
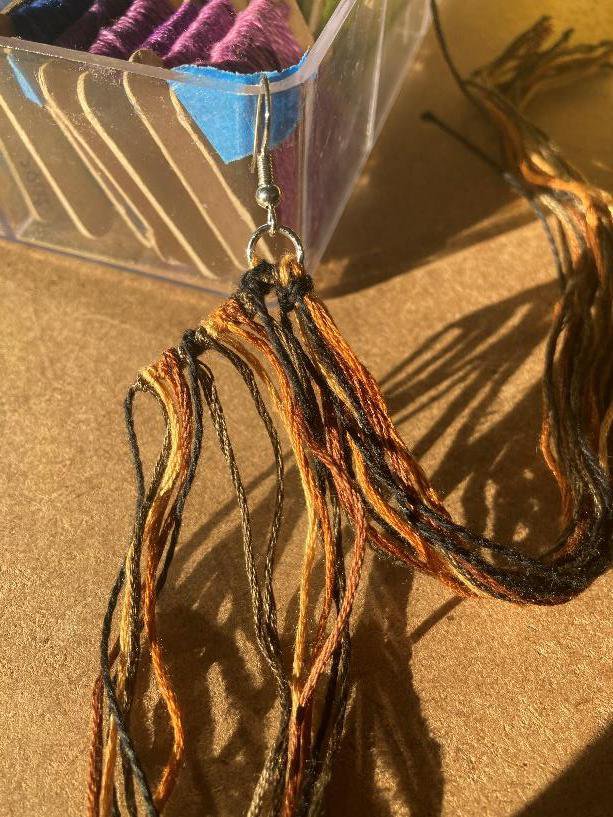
Step 9: tie your first knots
Take the left side of that centre string and tie a backward-forward knot onto the left group of strings. Do the same on the right but mirrored—tie a forward-backward knot instead. Continue each side as you would a triangle start, dropping your colours in this order: ABCDEBABCDEBA, on both sides, making it symmetrical.
Step 10: segment knotting
Tie the centre two strings together, then tie them down in an outwards chevron, with backwards knots on the left and forwards on the right. Do the same with the next row, making sure to pay attention to the forwards knots on the left string and the backwards knots on the right.
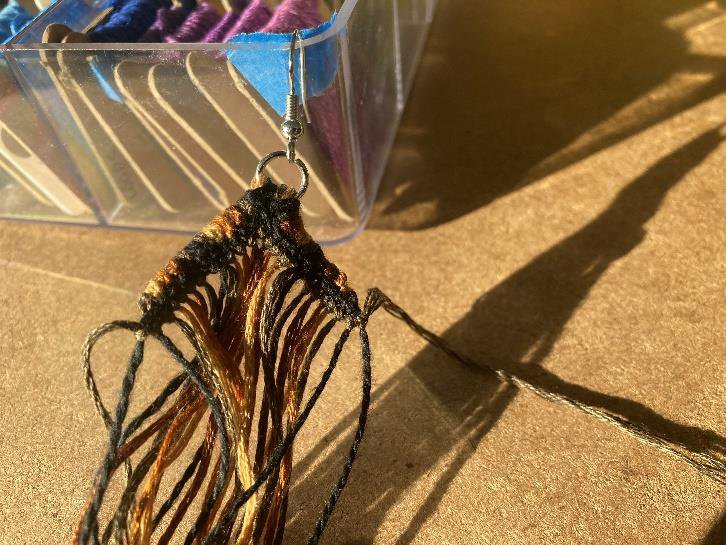
Step 11: steps to keep your earring even
Continue segment knotting your pattern in an OUTWARDS direction. This is crucial, as it will keep the ending from becoming unbalanced. In this photo here, you can see the difference between the left earring and the right (sorry for the bad lighting!). I segment knotted the left earring in an outwards direction. For the one on the right, I tried knotting it in an inwards direction, and it changed the shape of my triangle ends, as well as the rest of the earring. The triangle ends look bunched up because I did them all at once and didn’t leave enough room to even them out.

Step 12: continuing the pattern
Keep knotting your earring, making sure to stay in an outwards chevron. When you get to the bottom edge, use the triangle ends technique to gather the strings.
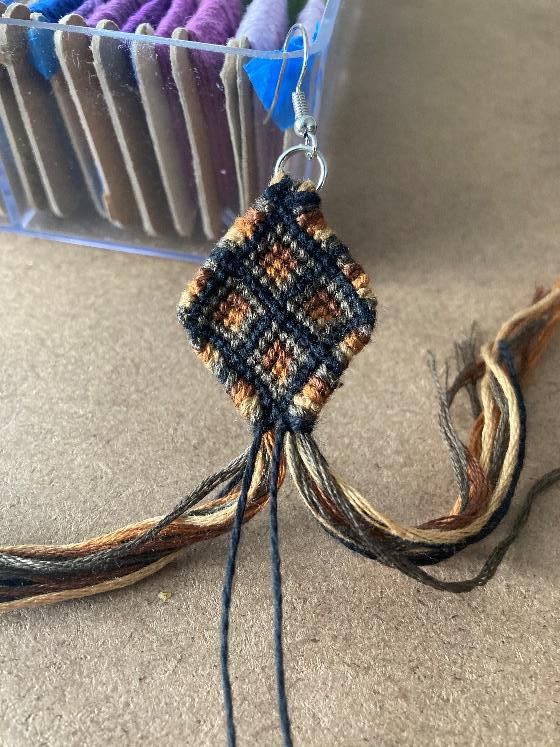
Step 13: ending the earring
Once you are finished segment knotting and the triangle ends, take two strings (it doesn’t have to be the two you did the last knot with!) and tie them in a square knot at the back, pushing the looped thread up to the last knots. The next step explains the square knot if you’ve never done one or simply want a refresher.
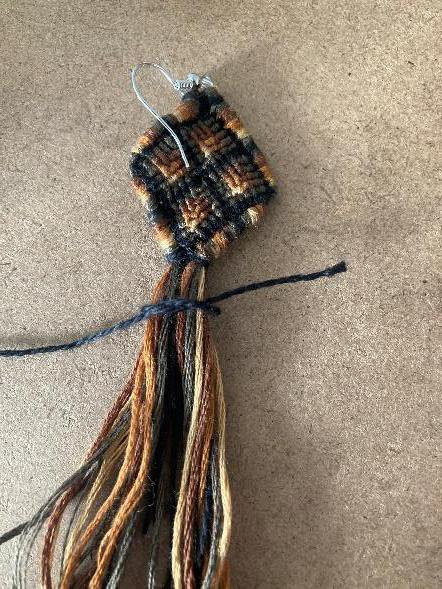
Step 14: the square knot
Once you have the two strings selected, flip your earring over. Loop one over the other, like in a basic knot, and pull tightly to both sides. Do that once more, pushing the knot up to the end of the earring.
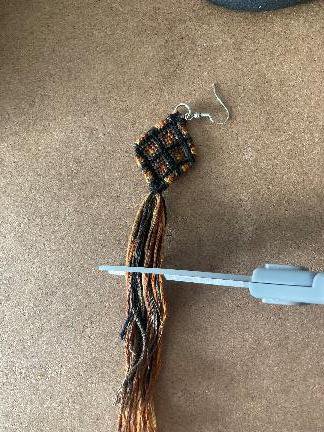
Step 15: the tassel
Decide how long you want your tassel to be (I’d recommend slightly shorter than the length of the earring). Using a pair of scissors, cut the tassel to your desired length.

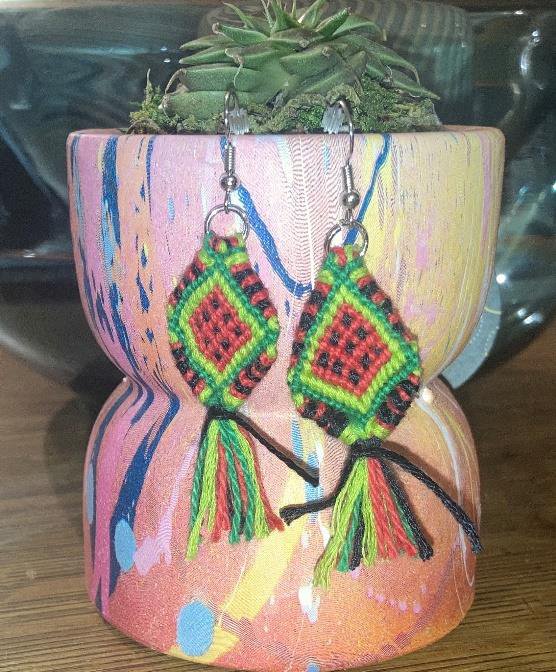
The finished product!
This is what my finished earring looked like! In hindsight, I probably should’ve chosen a lighter colour combo, but it wasn’t bad! If you want a smoother look, you can iron your project (check what material your string is, first! Polyester and metallic strings might melt, and silk might burn. Cotton should be good at just about any heat, but I find smoothing knotted projects doesn’t take much). You can also use a hair straightener, but again, check the temperatures.