Rate Tutorial
Supplies
- Seed Beads
- Bead Loom
- Nylon String (or a 0.5mm or smaller size string)
- Beading Needles or Wide Eyed Needles
- Scissors
- Glue
- Bead Loom
- Nylon String (or a 0.5mm or smaller size string)
- Beading Needles or Wide Eyed Needles
- Scissors
- Glue
Extra Information
~Diagram
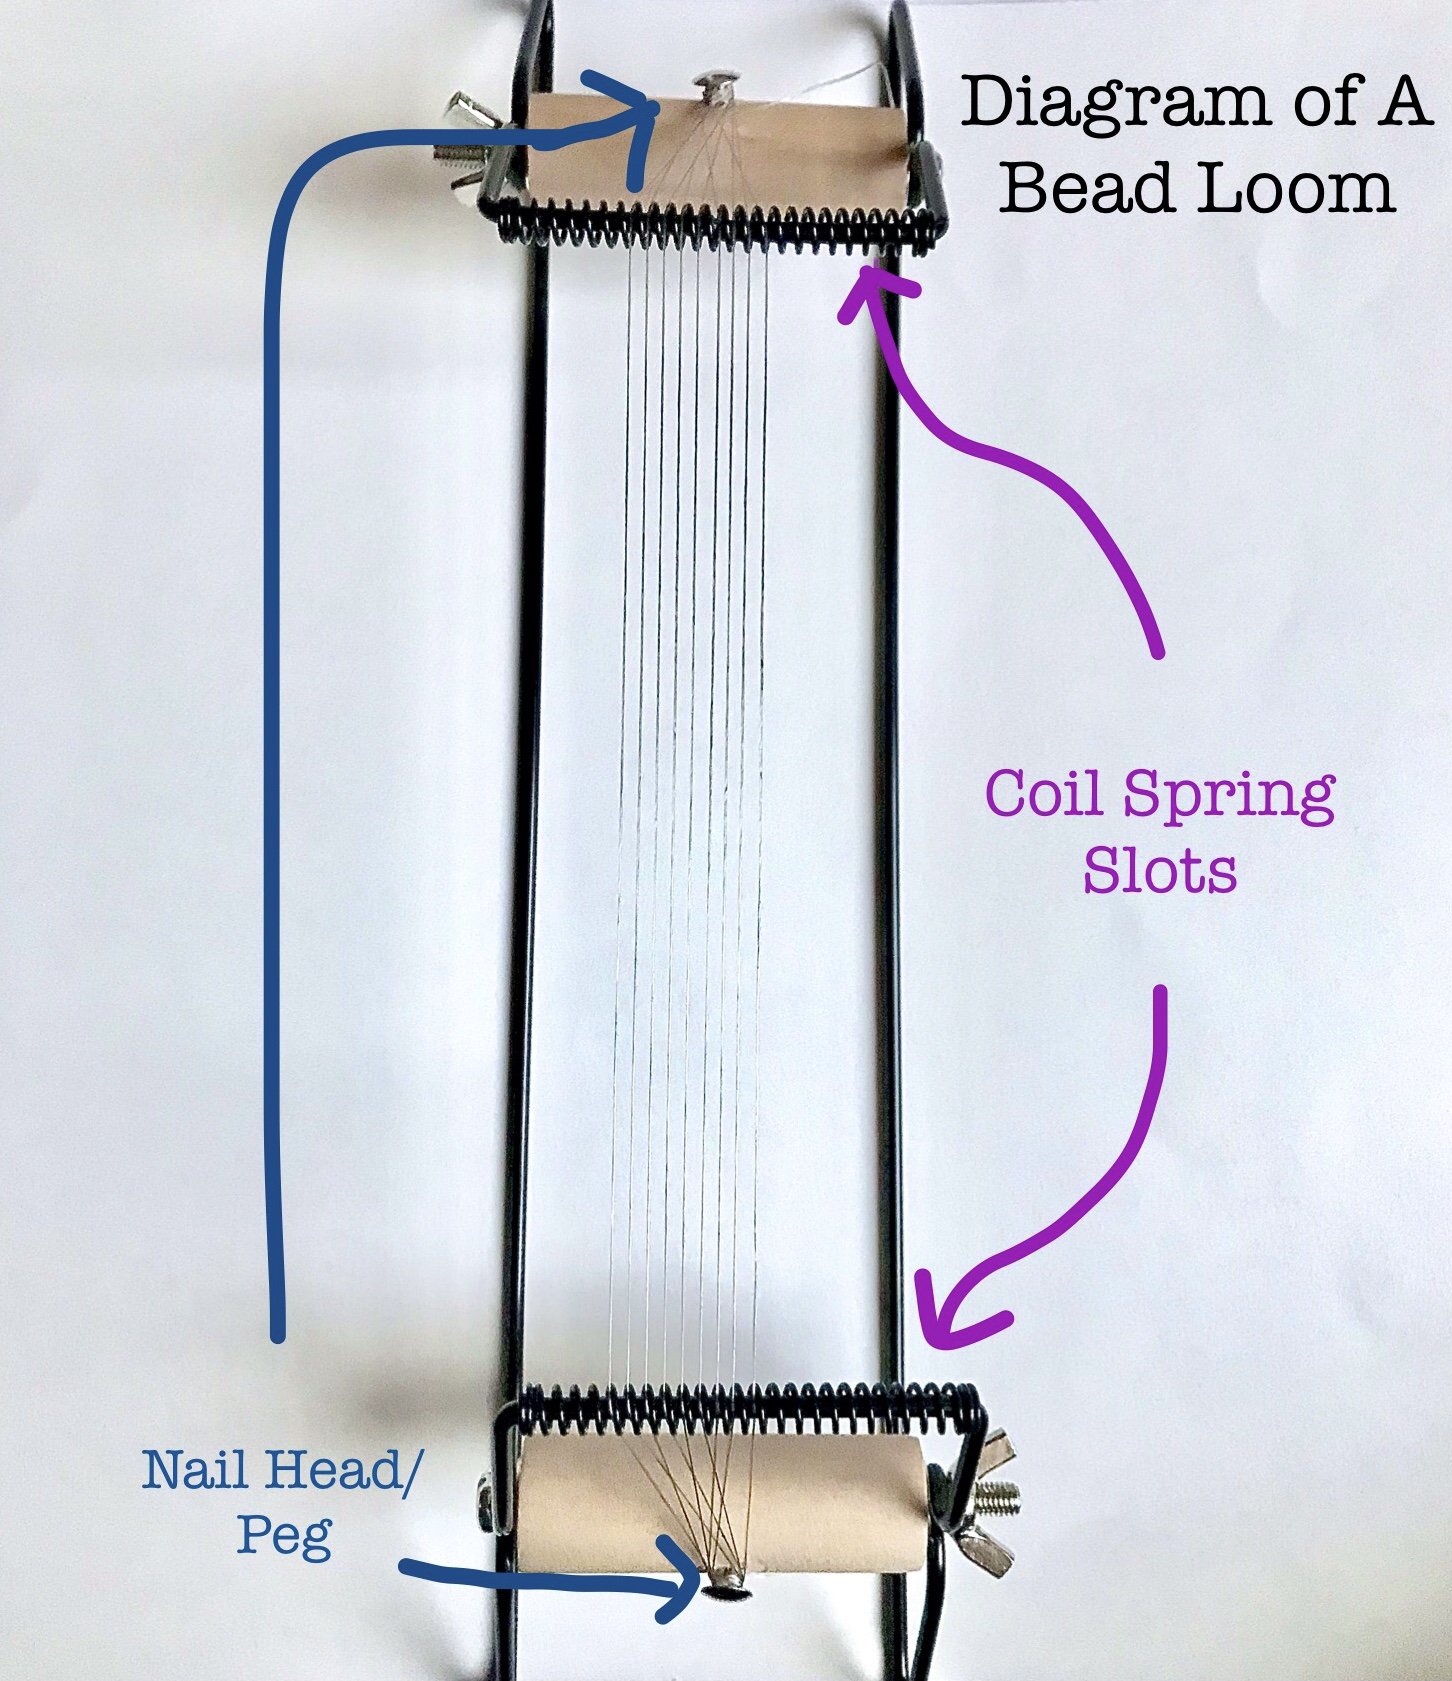
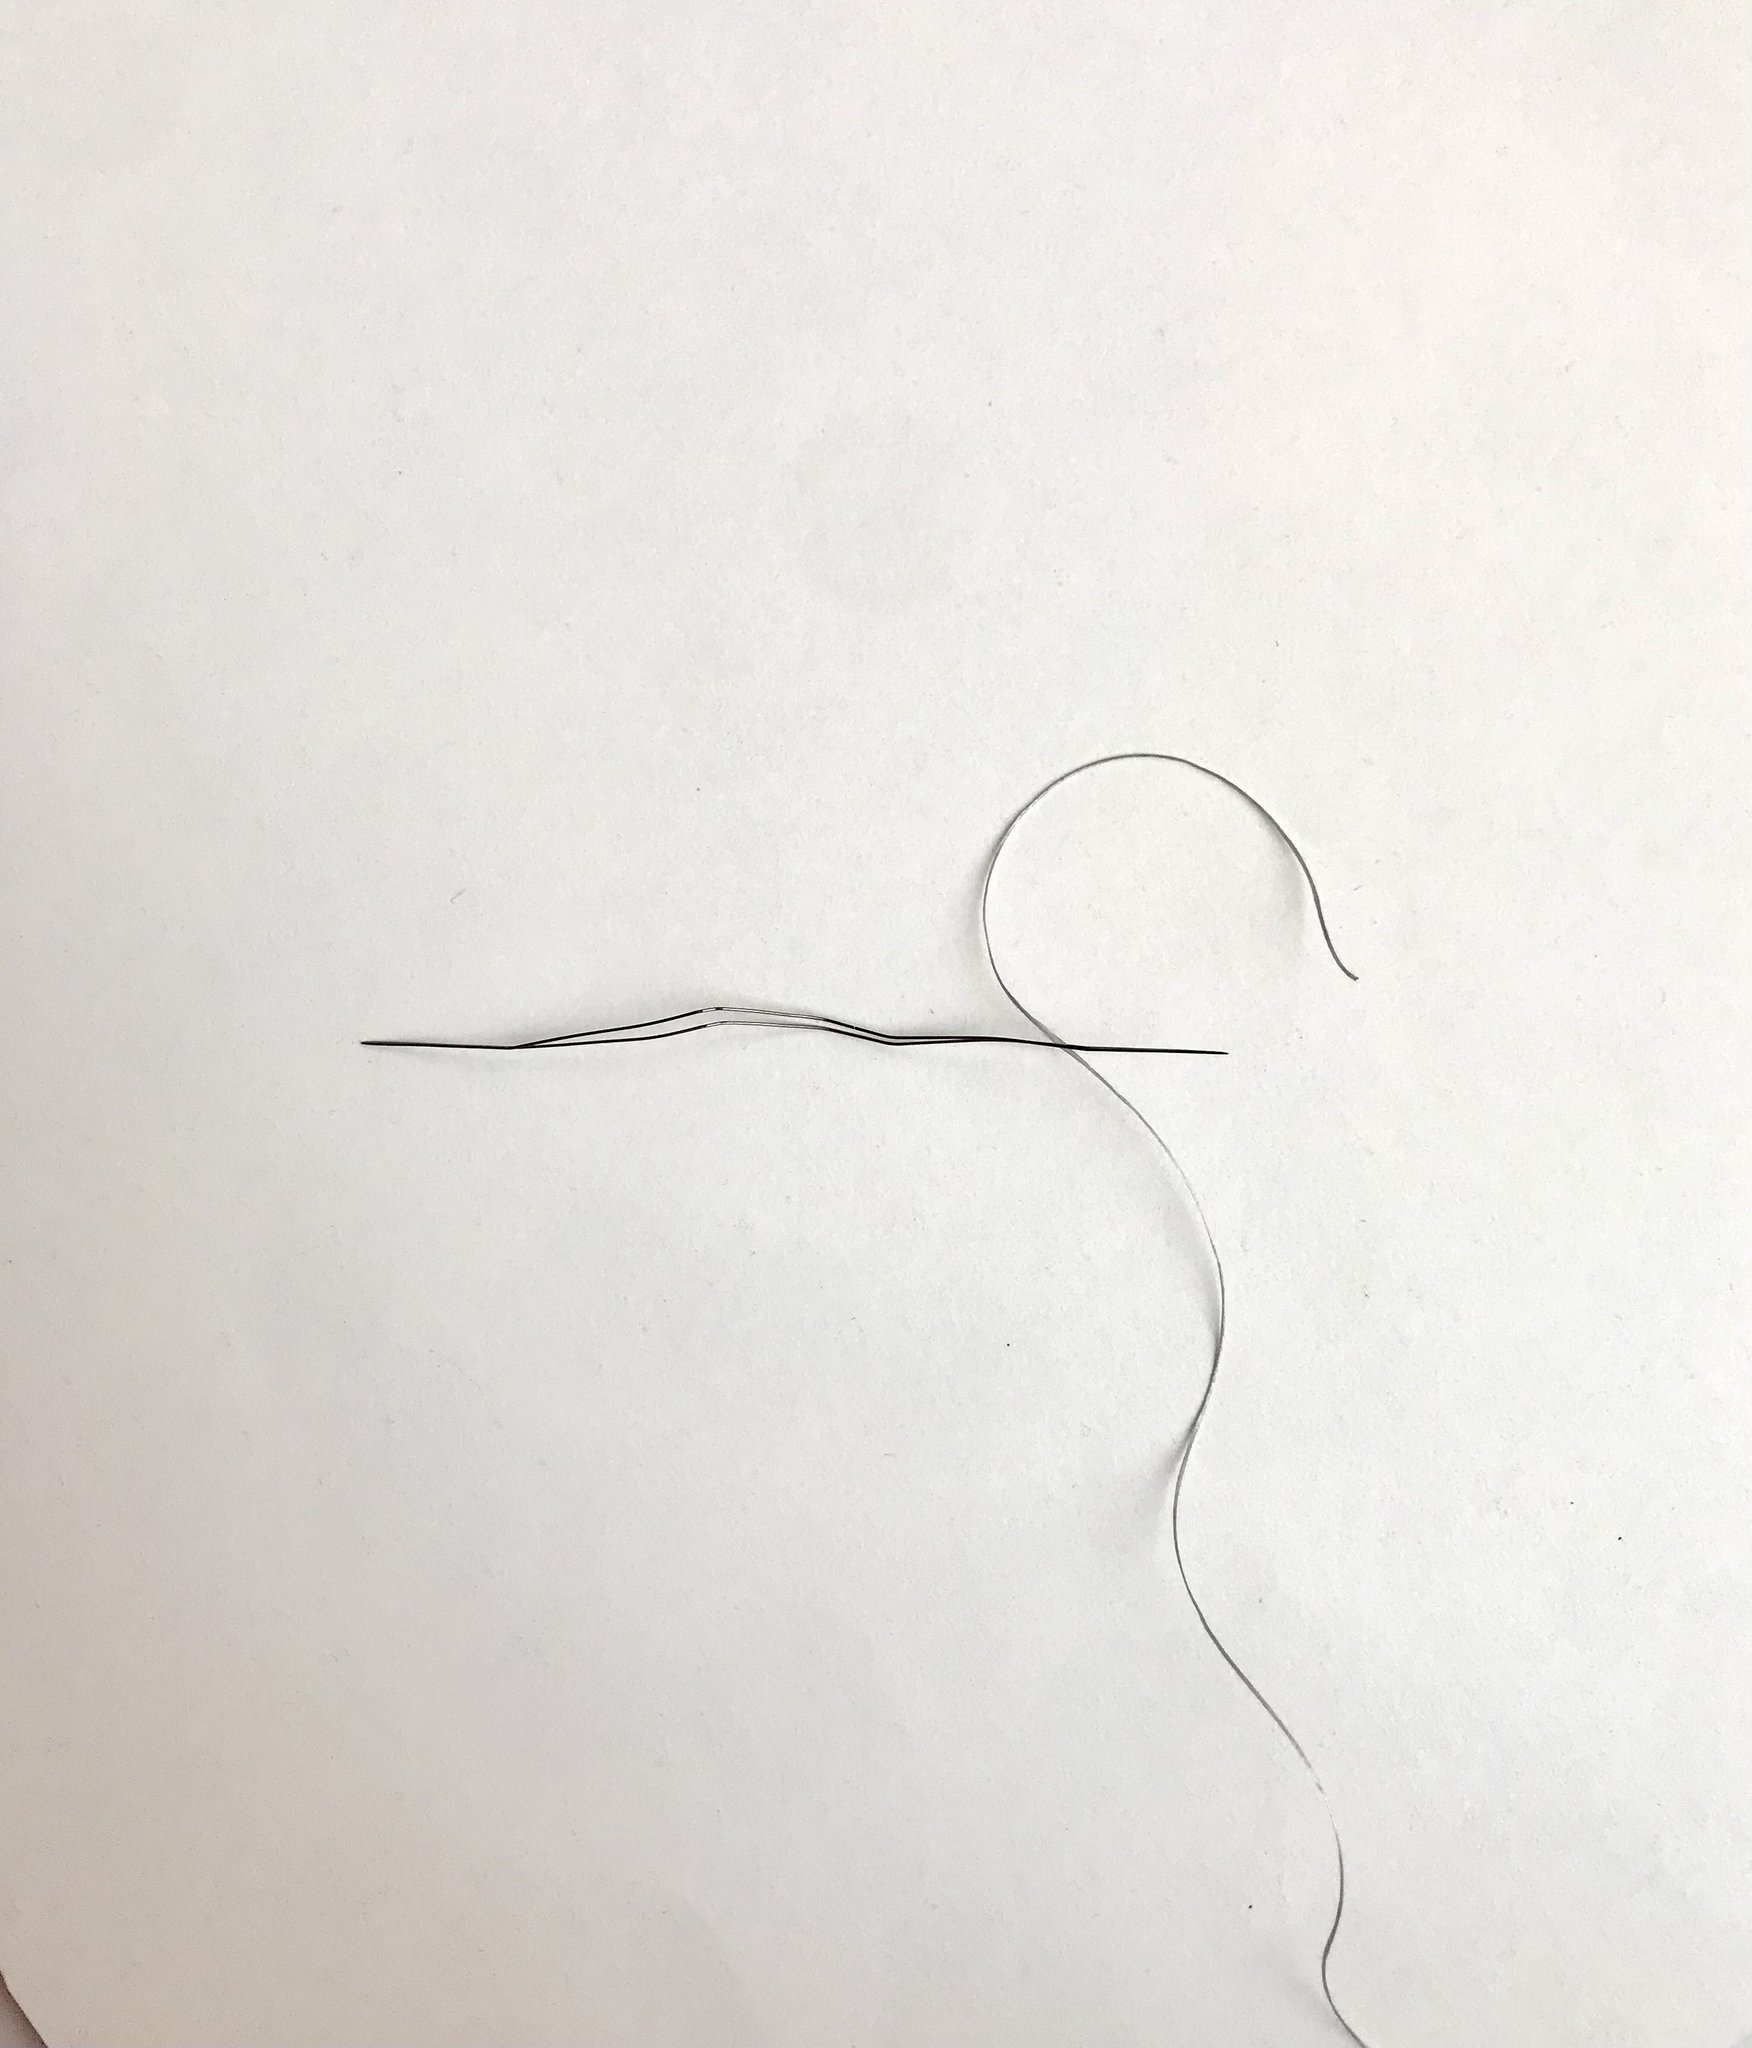
Some of the words I use can be confusing so I created a digram for the bead loom. (See Photo)
~Where to find supplies
You can find most of the supplies I use at a local craft store as well as Amazon. For looms there are many options, so I would look around to find your favorite, but mine is the Beadsmith Bead Loom. If you were to get that loom it comes with string, beads, and needles. I got extra supplies not aware it came with supplies and I would say that the seed beads and string it comes with aren’t the best quality but still useable. You can still use the supplies it comes with and getting additional supplies isn’t necessary.
Step 1
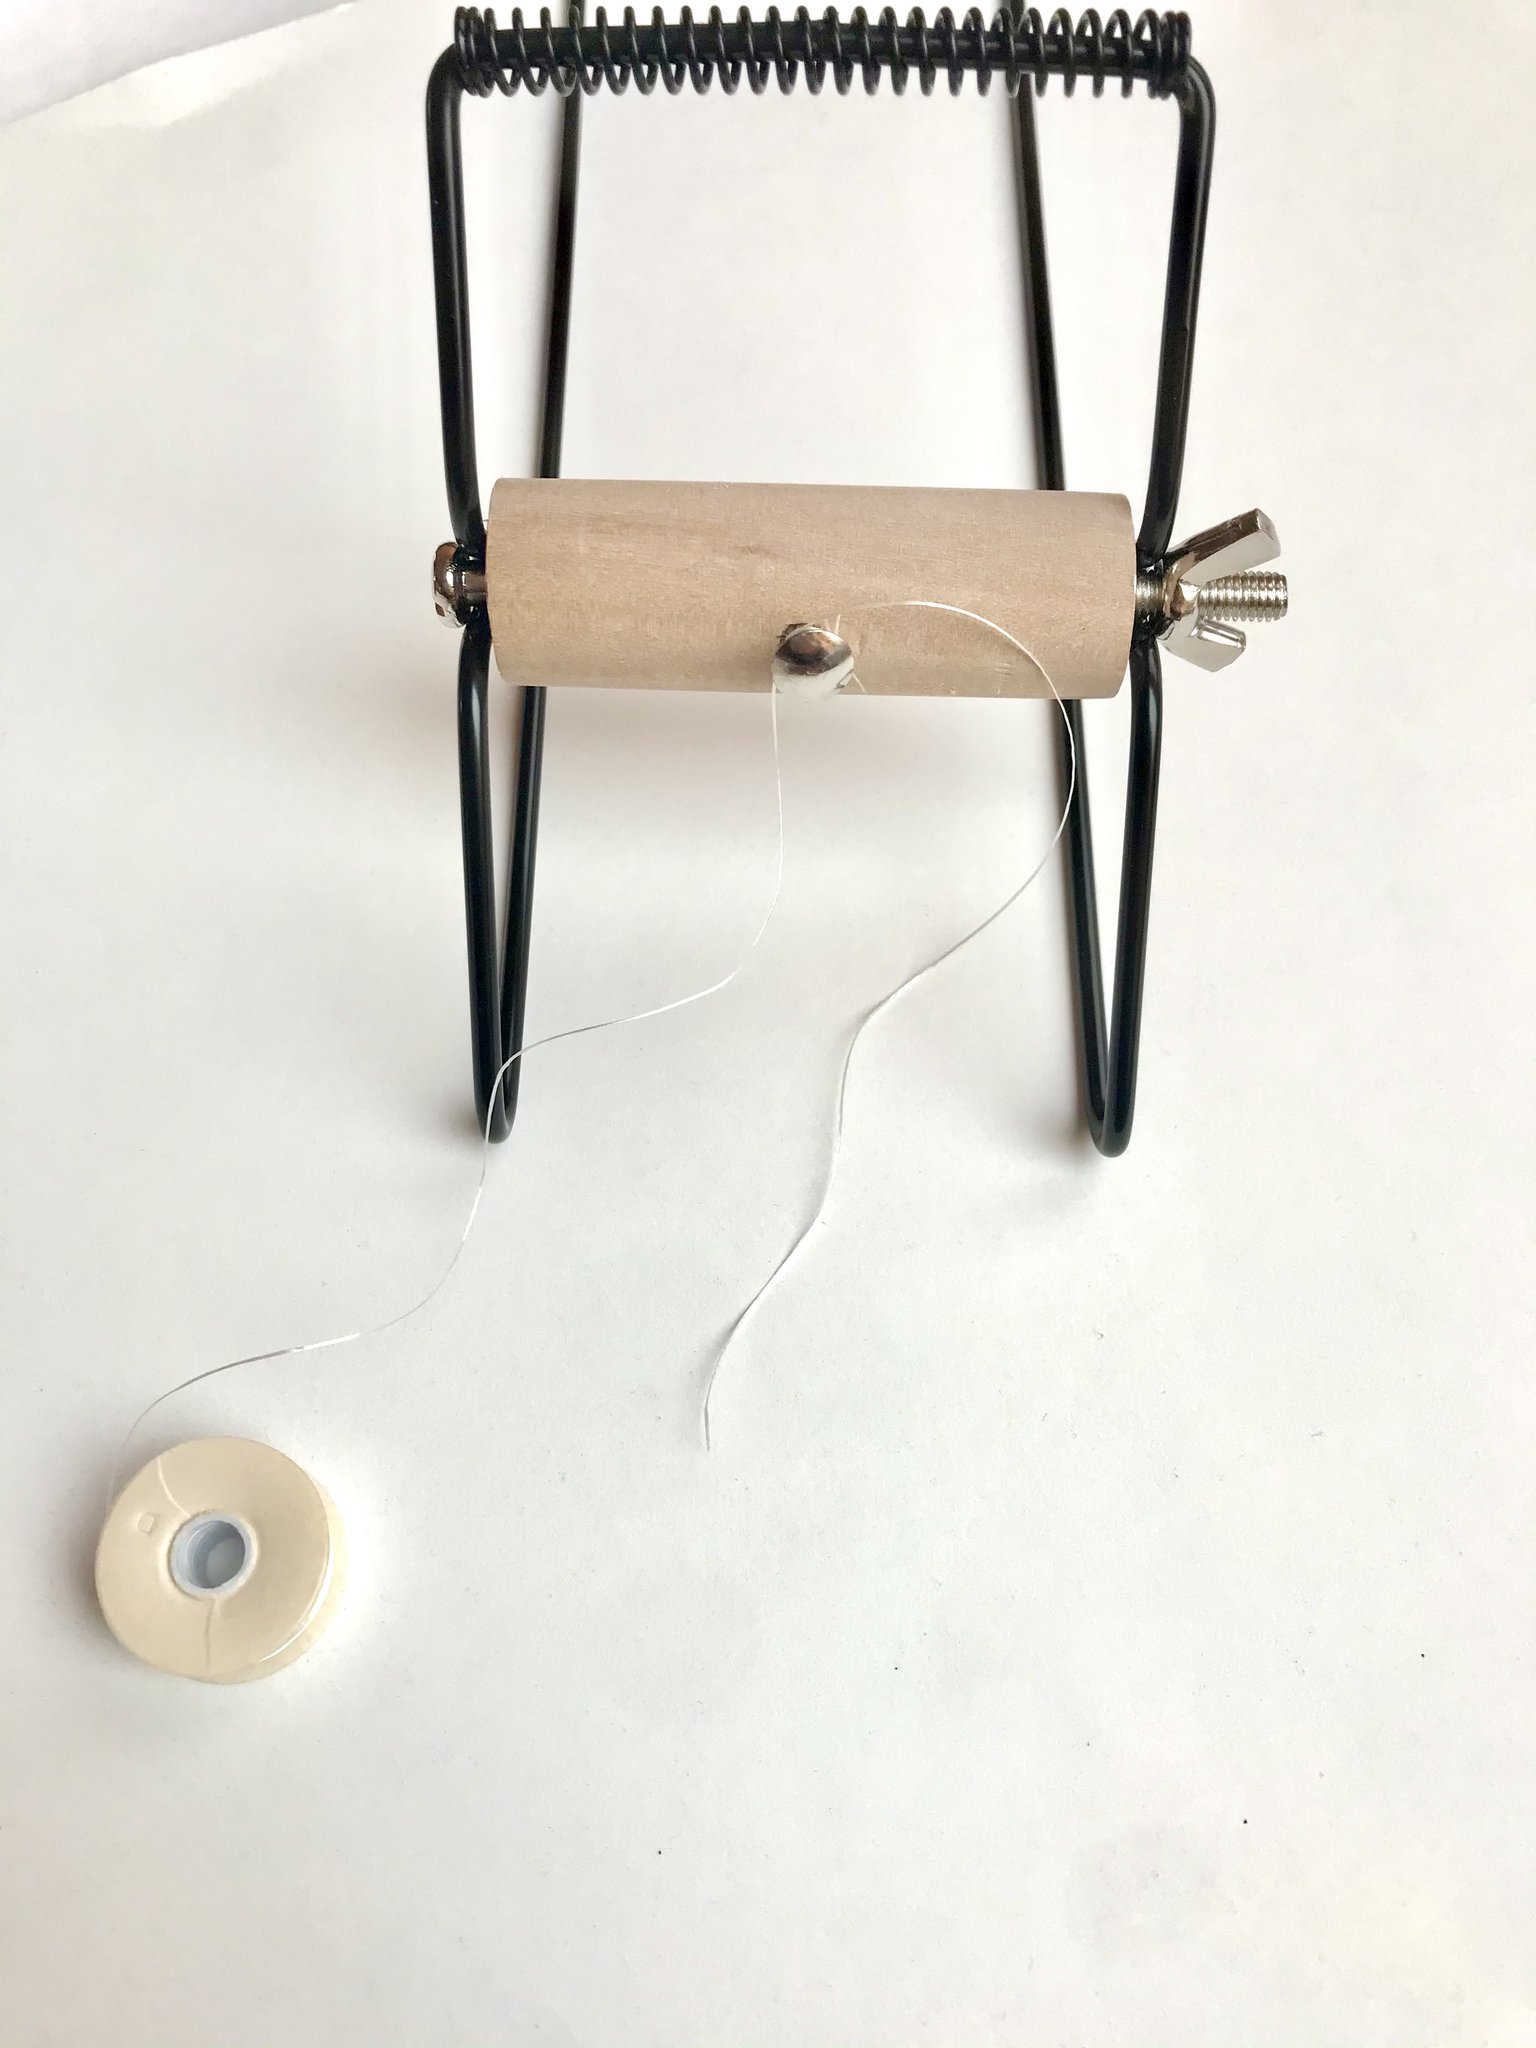
Using your nylon string, tie a knot on the peg on one of the sides.
Step 2
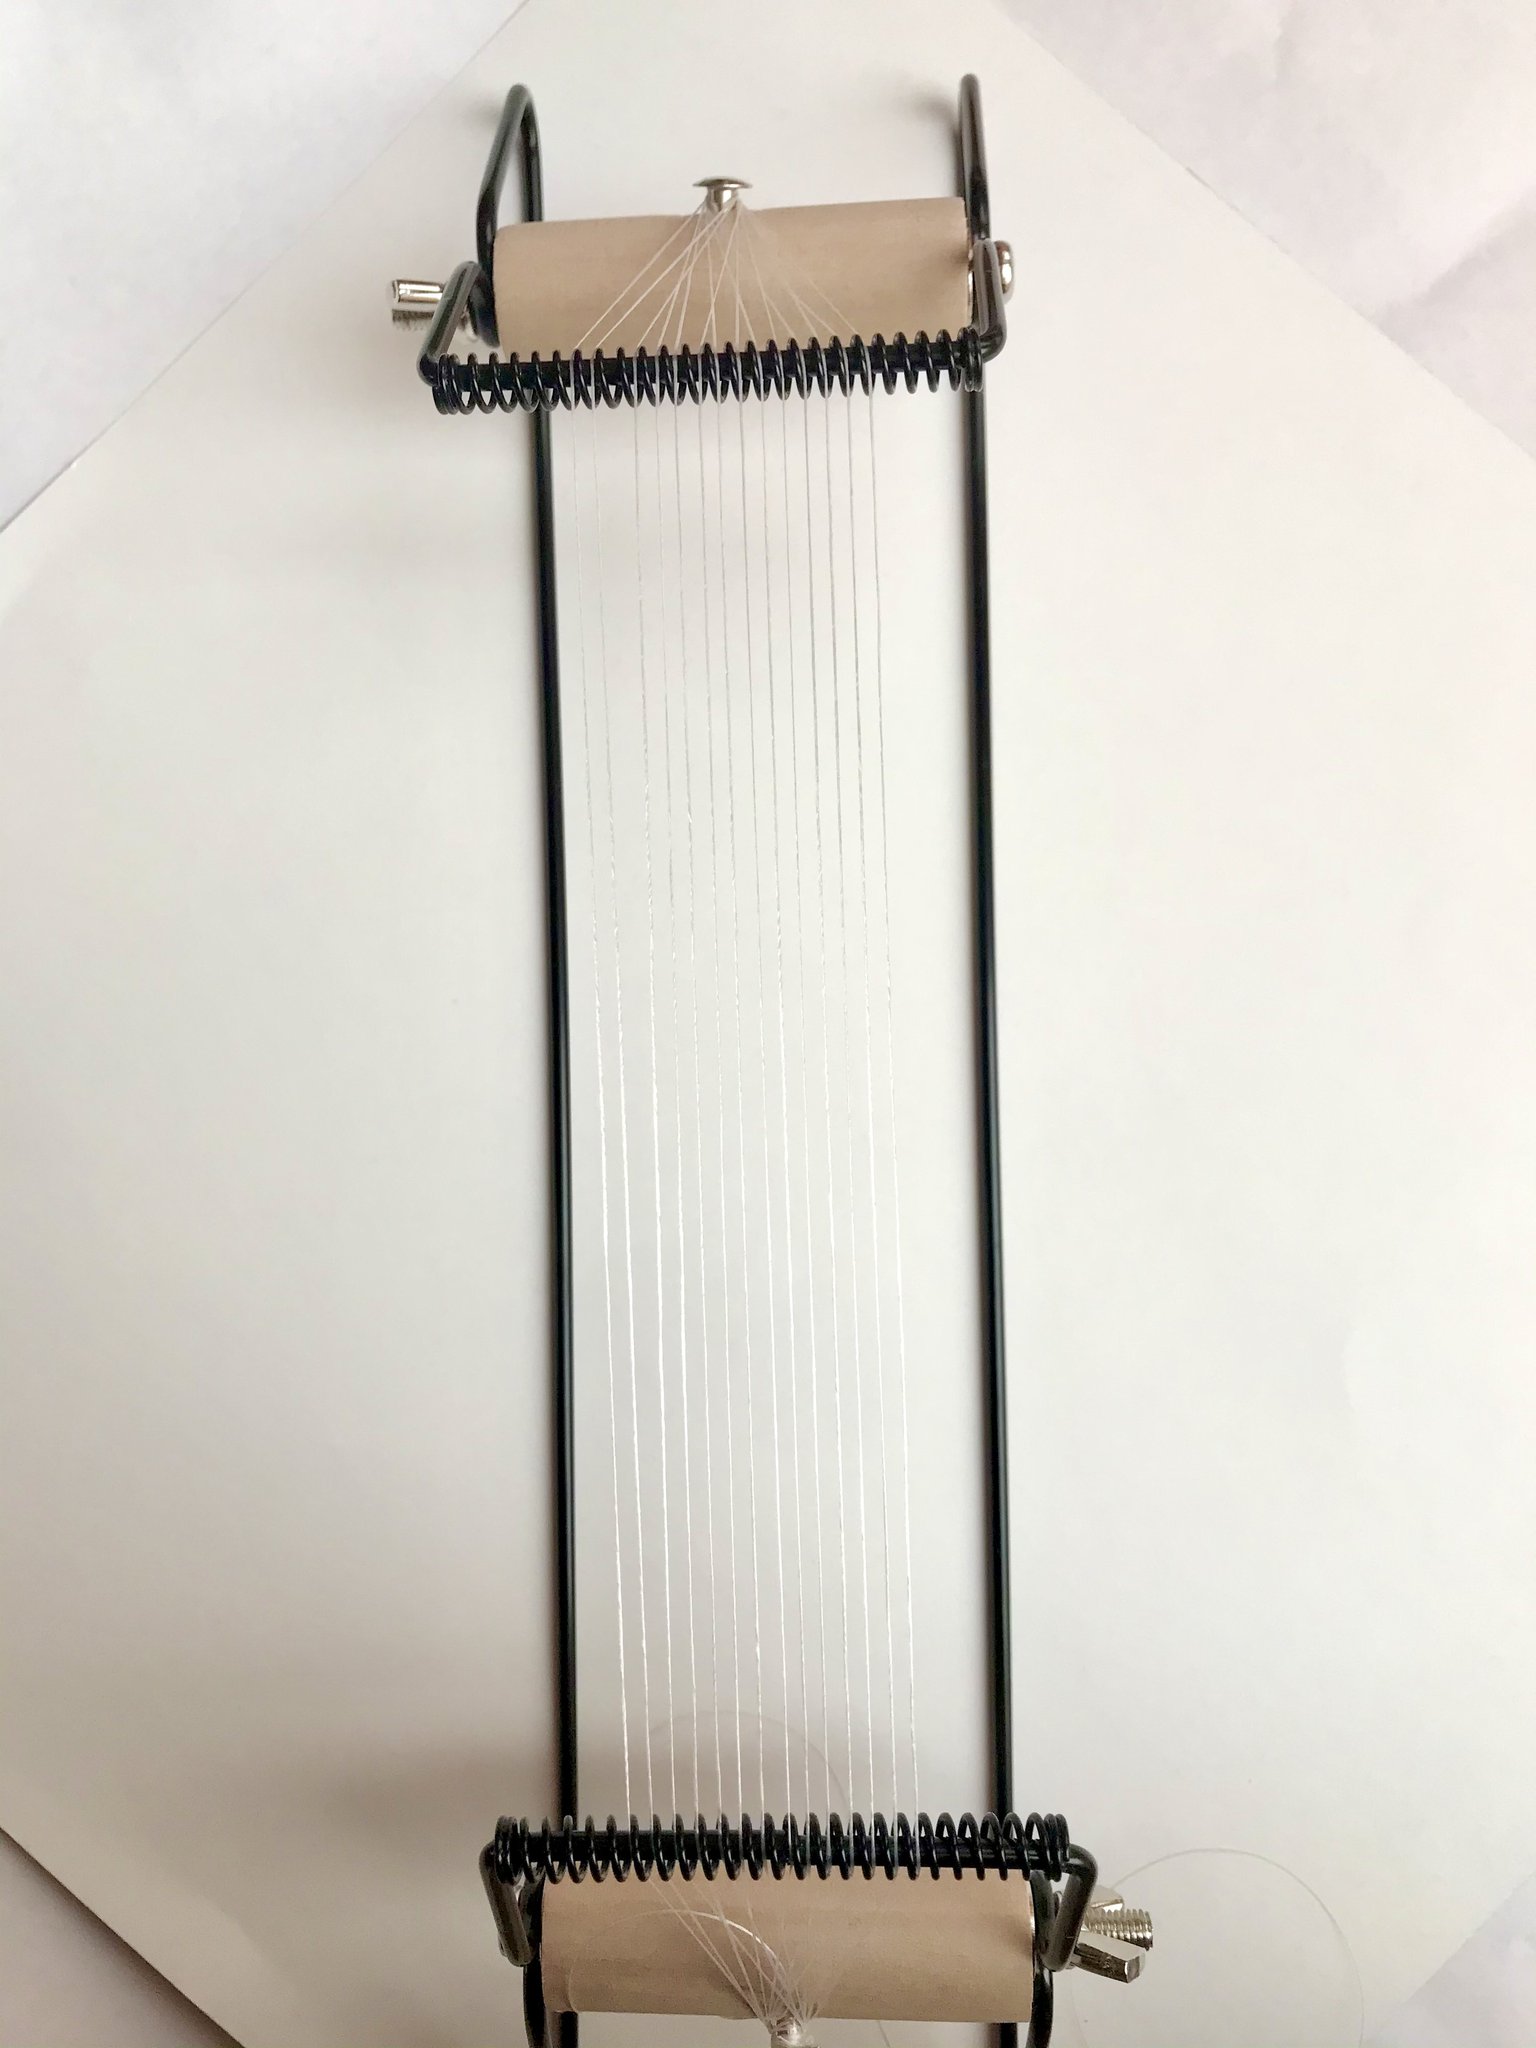
Place each string inside of a single slot of the coil spring, and then again in each corresponding slot on the opposite side. Continue the process until you have enough base strings. You should have on more base string than the number of base strings you would normally have. For example, the pattern I'm using (#25140) consists of 12 base strings so I will have 13 base strings on the bead loom.
Step 3
Cut a piece of string the length of your wingspan. If you're making a keychain you can cut it to about half your wingspan. Thread it through your needle leaving a 1-2 inch (2.5-5 cm) tail.
Step 4
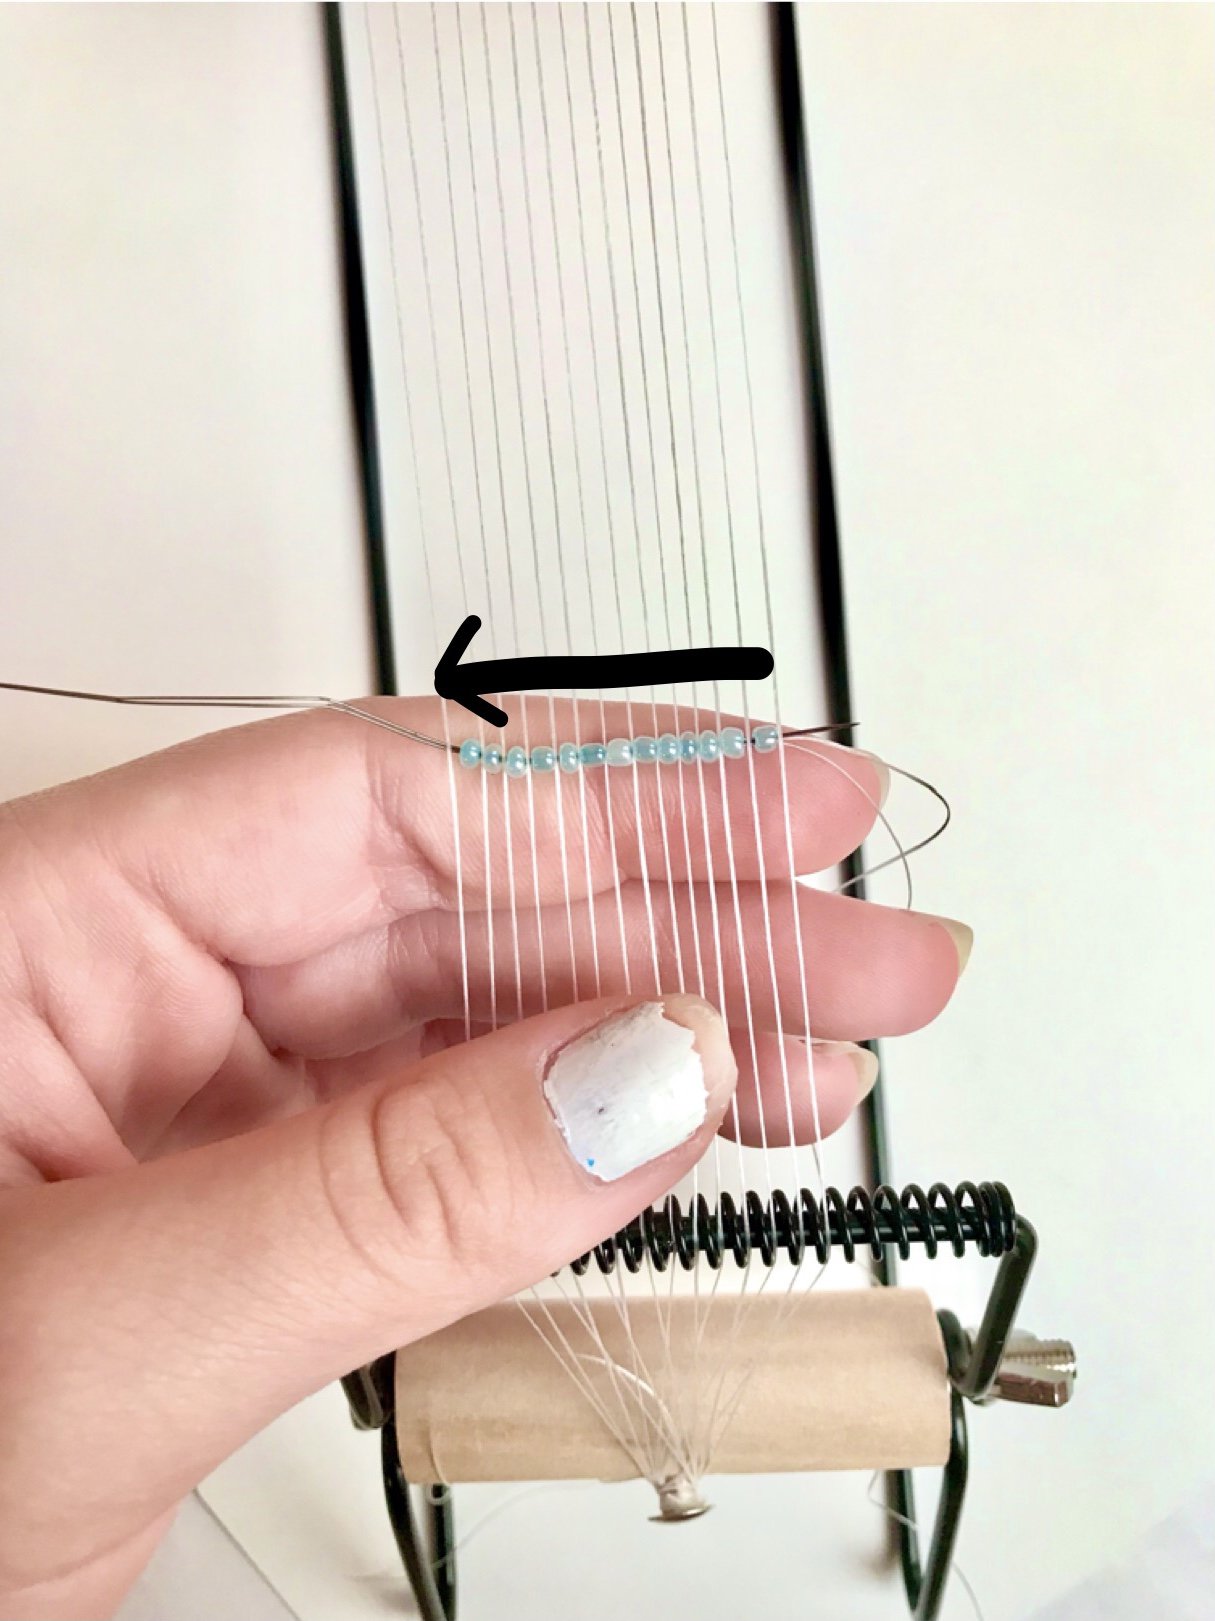
Place your beads on your needle. You don’t have to add an extra bead like you added an extra base string. Put your needle under the strings, and push them up with your finger. There should be one string between each string (see picture). Holding the beads with your finger, pull the needle through. Pull the string through, until there is a small tail. DO NOT stop holding the beads, otherwise they will fall.
Step 5
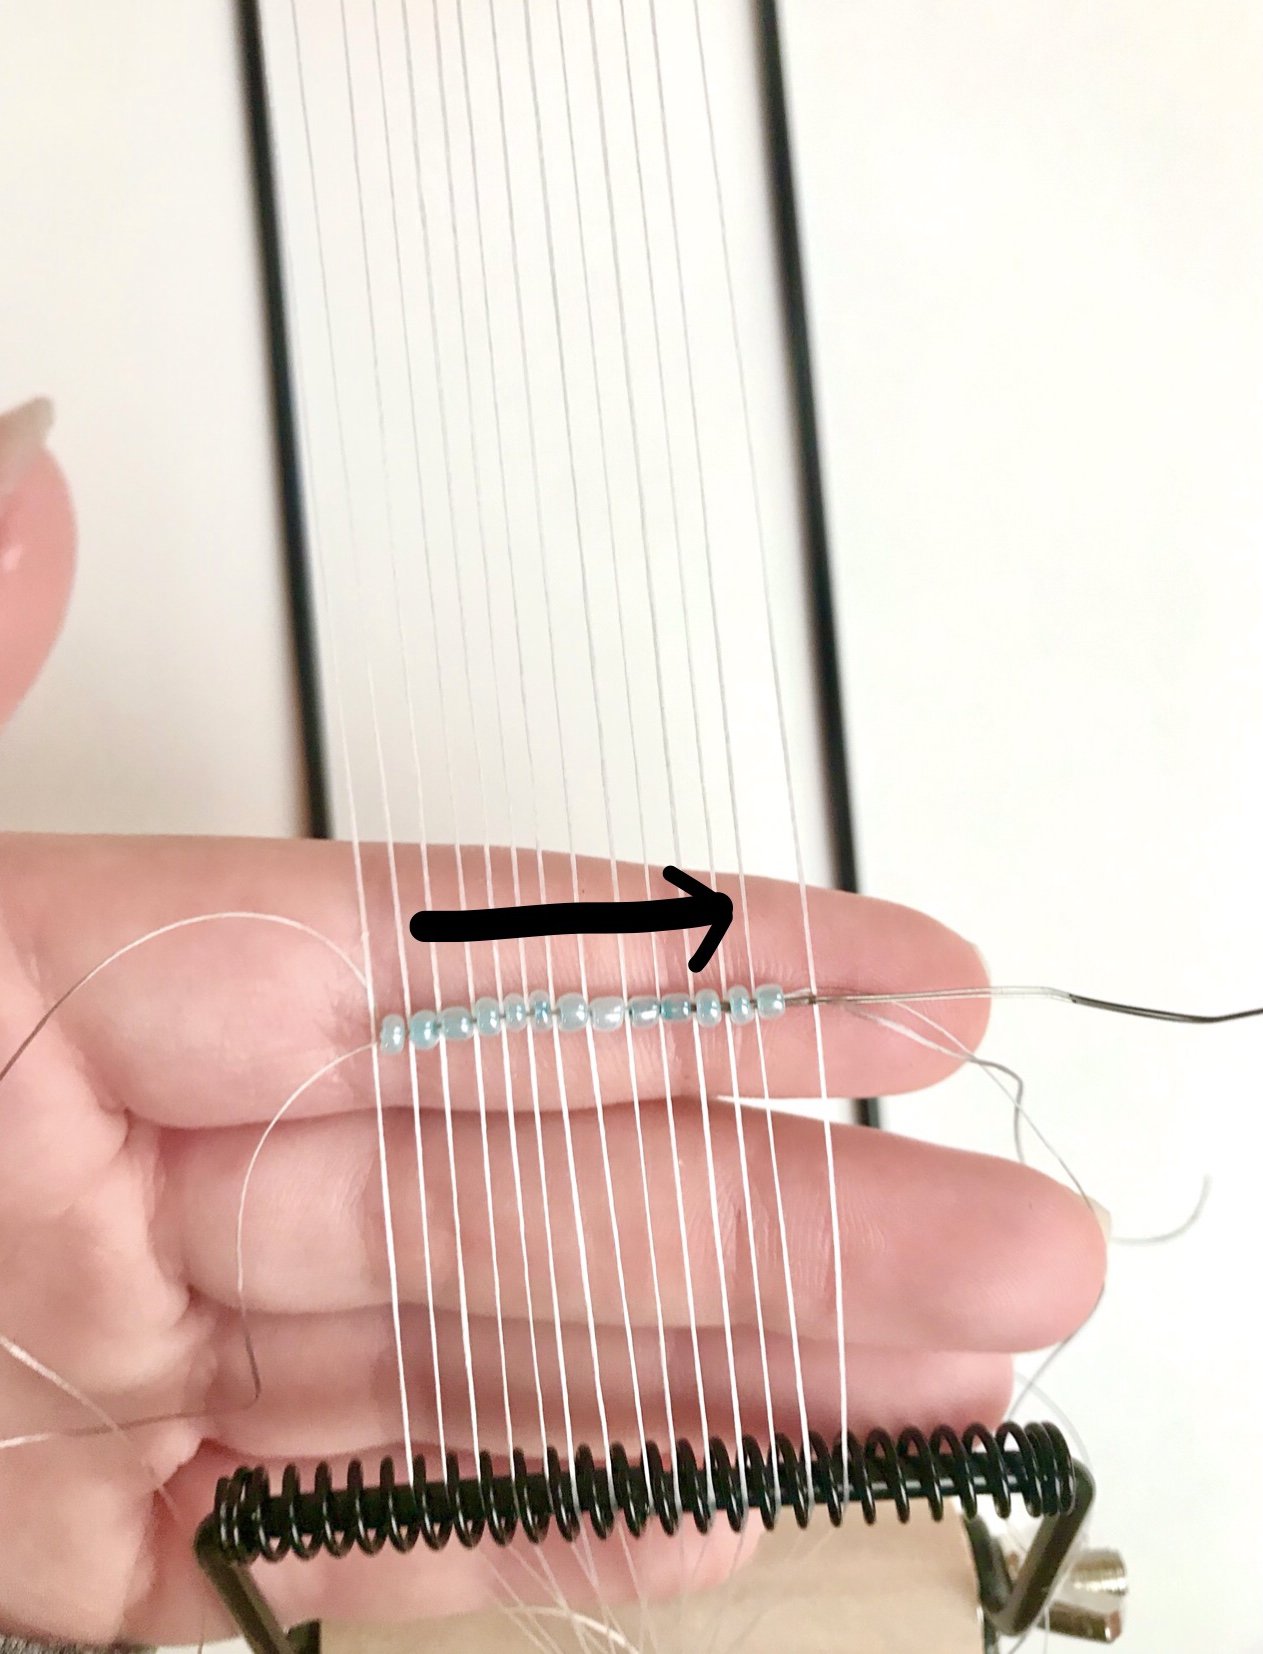
Still holding the beads with your finger, put the needle back through the beads and pull. (See picture) Then you can let go of the beads. If the beads fall, you didn’t correctly thread the beads. To correctly thread the beads, you want to make sure the needle is above the base strings the second time, since your first string was under the base strings. This “sandwiches” the beads so they don’t fall.
Step 6
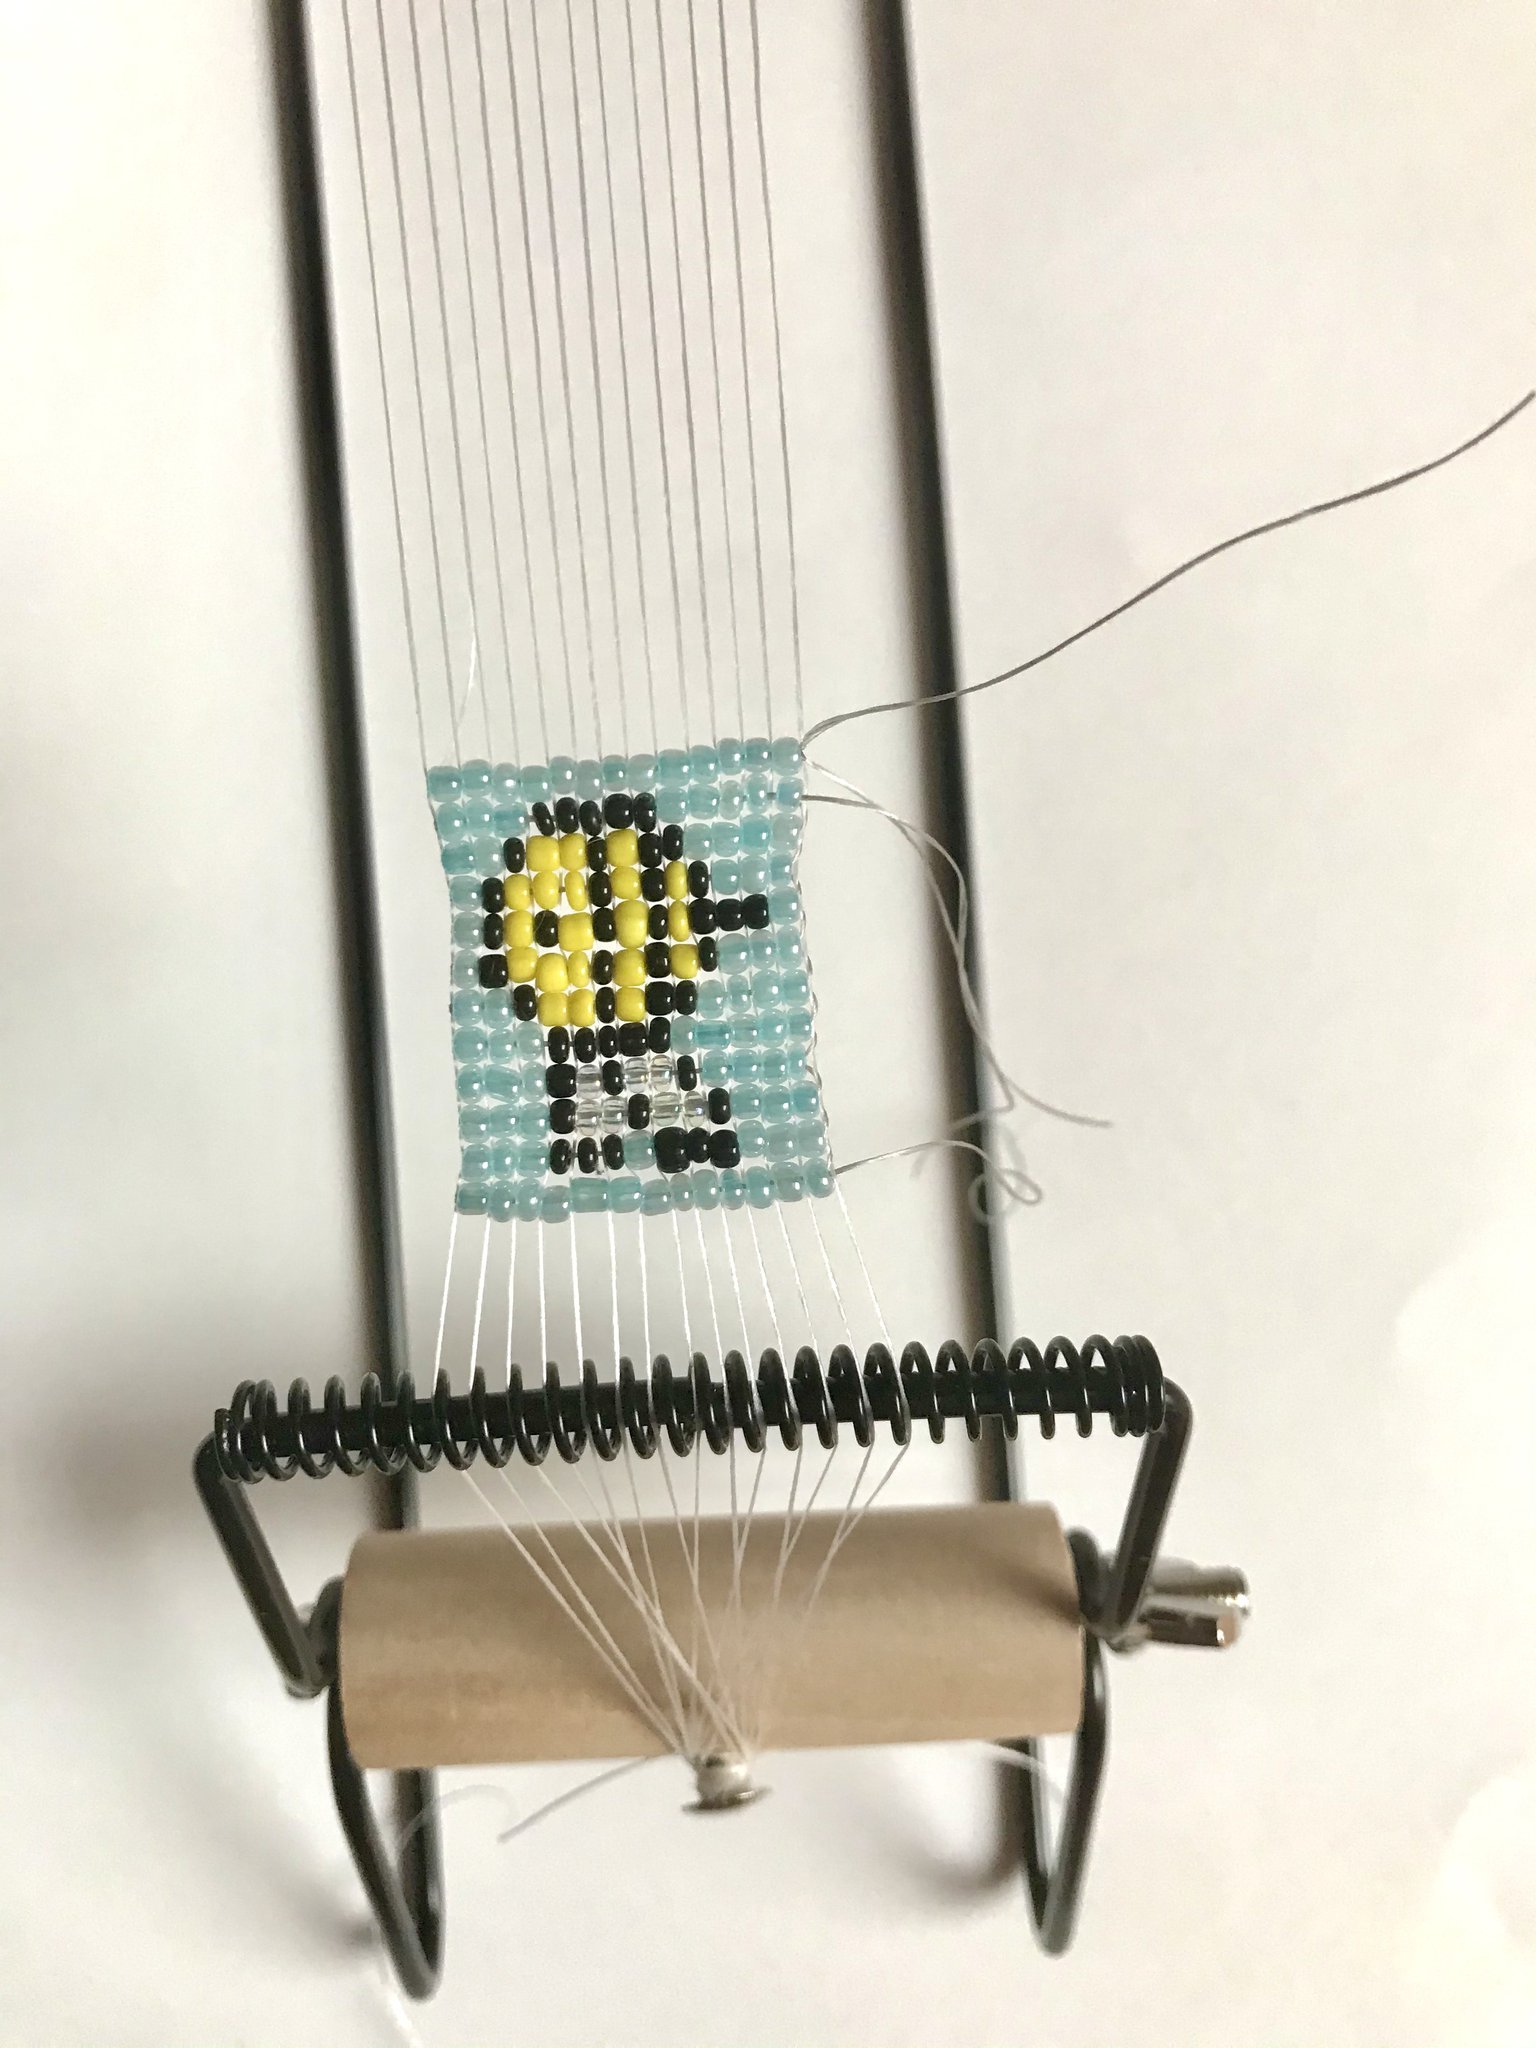
Repeat Step 4 and 5 for each row of your pattern. With your extra strings sticking out, just weave them back in to secure them. If you run out of string while making your keychain or bracelet, you use the same technique as if you were just starting. Cut a new piece of string and thread your needle (Step 3) Then continue to add your remains rows. (Step 4 and 5)
Step 7
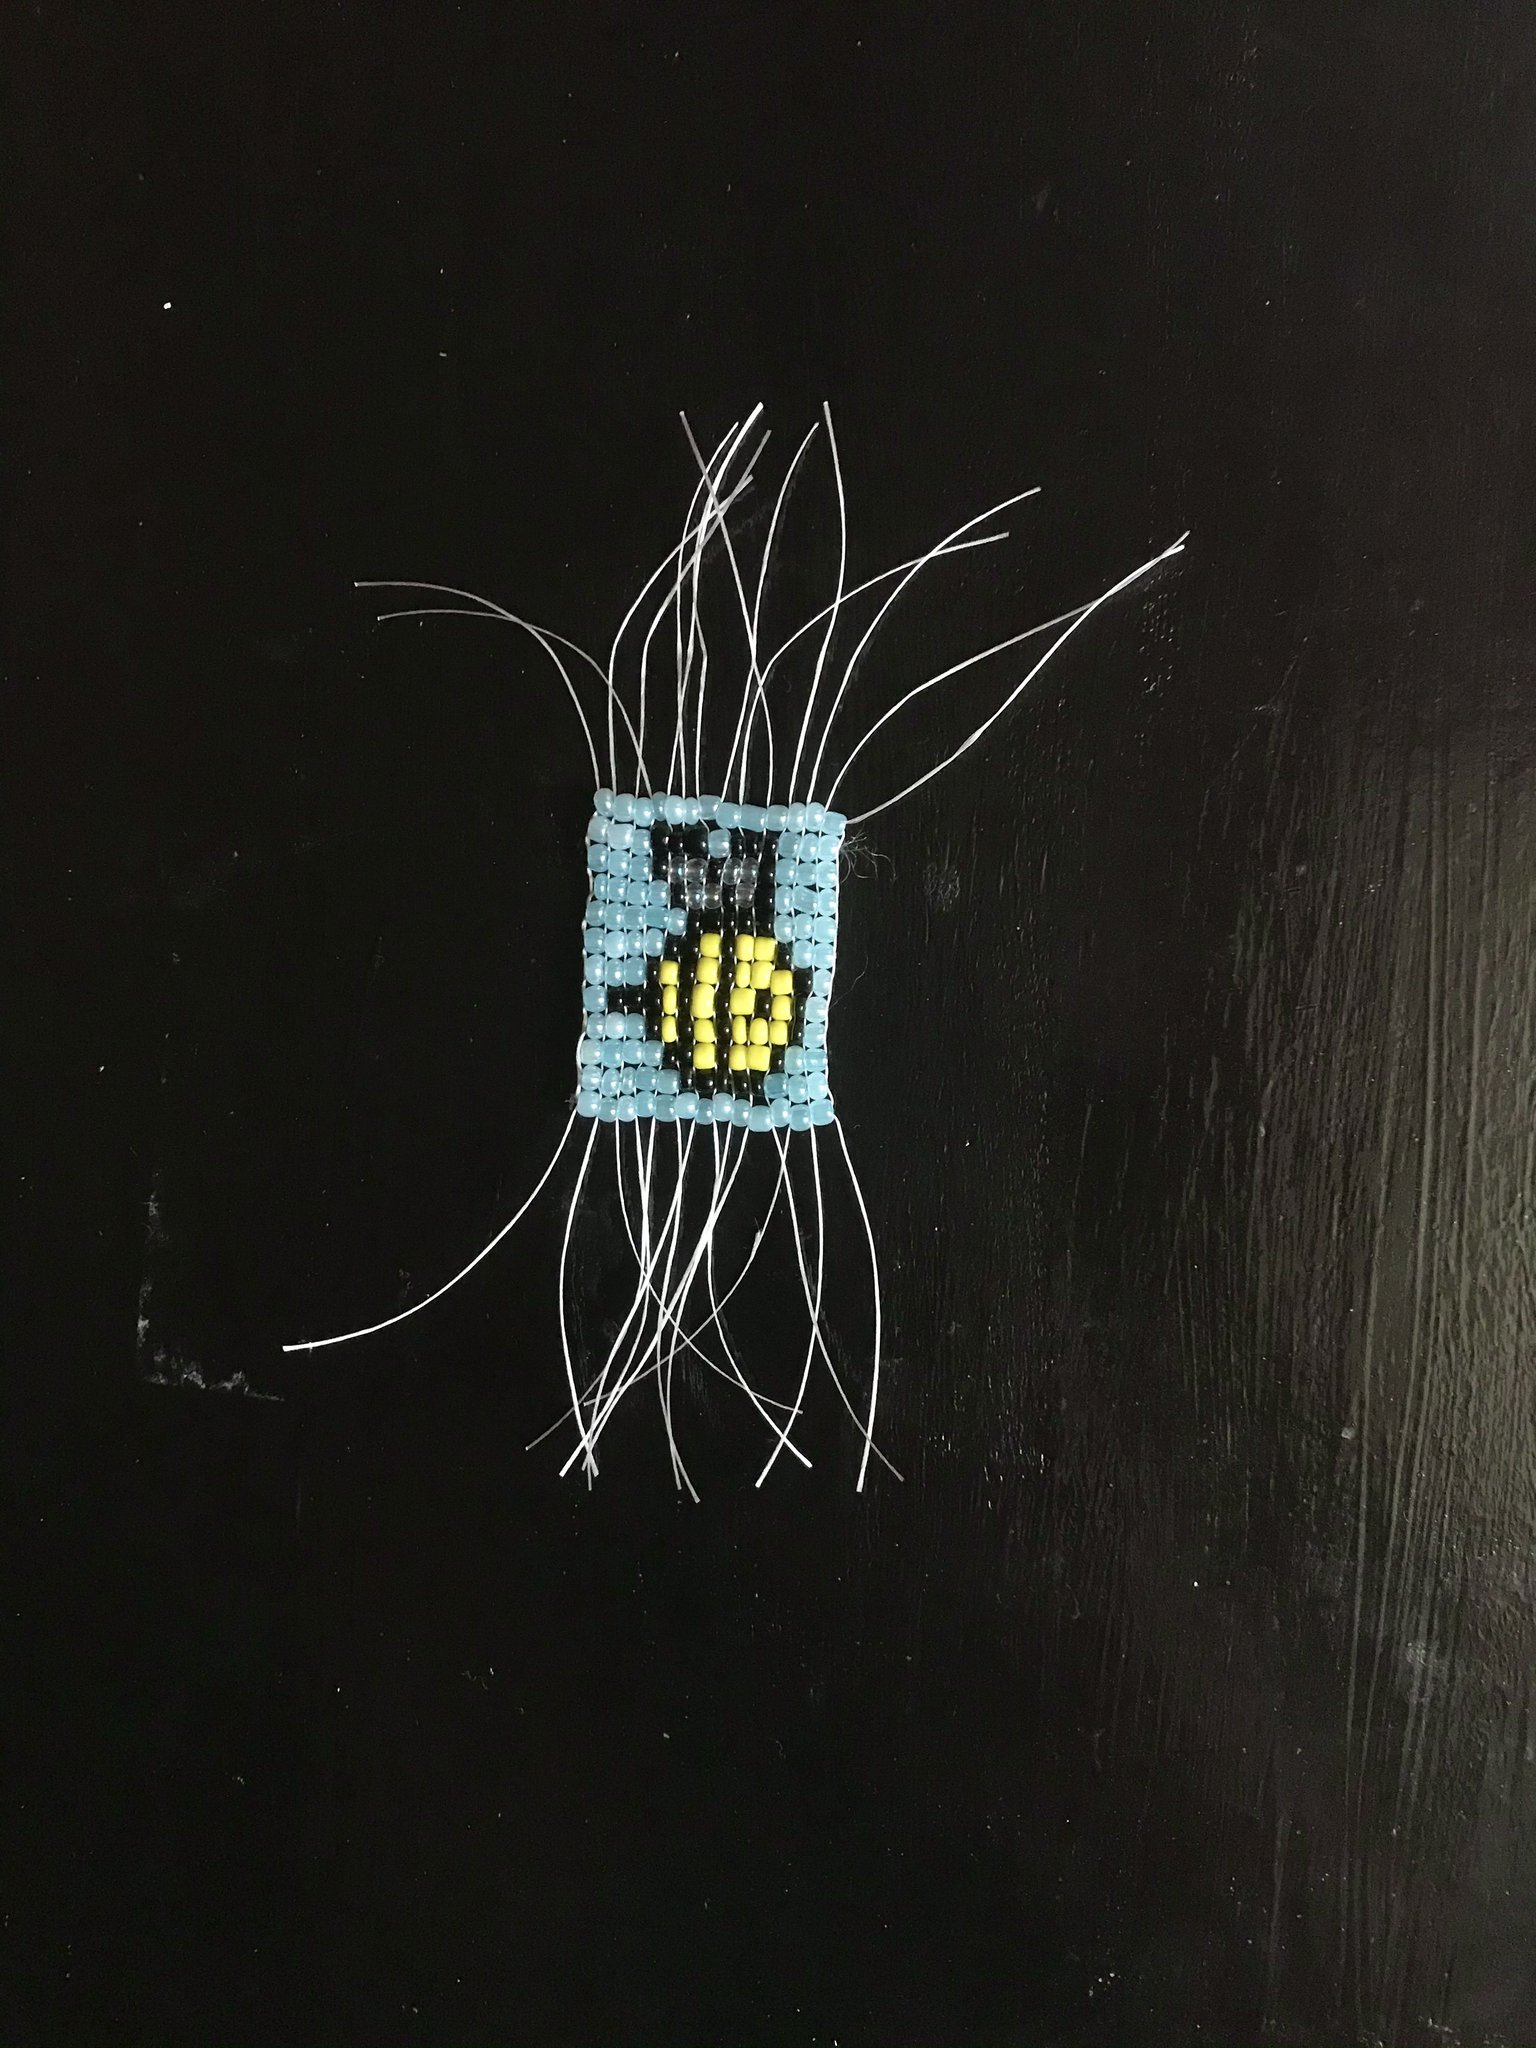
Cut your project of the loom. Put glue on the front to secure it and let it dry. After it has dried, Cut the strings off.
Step 8 (optional)
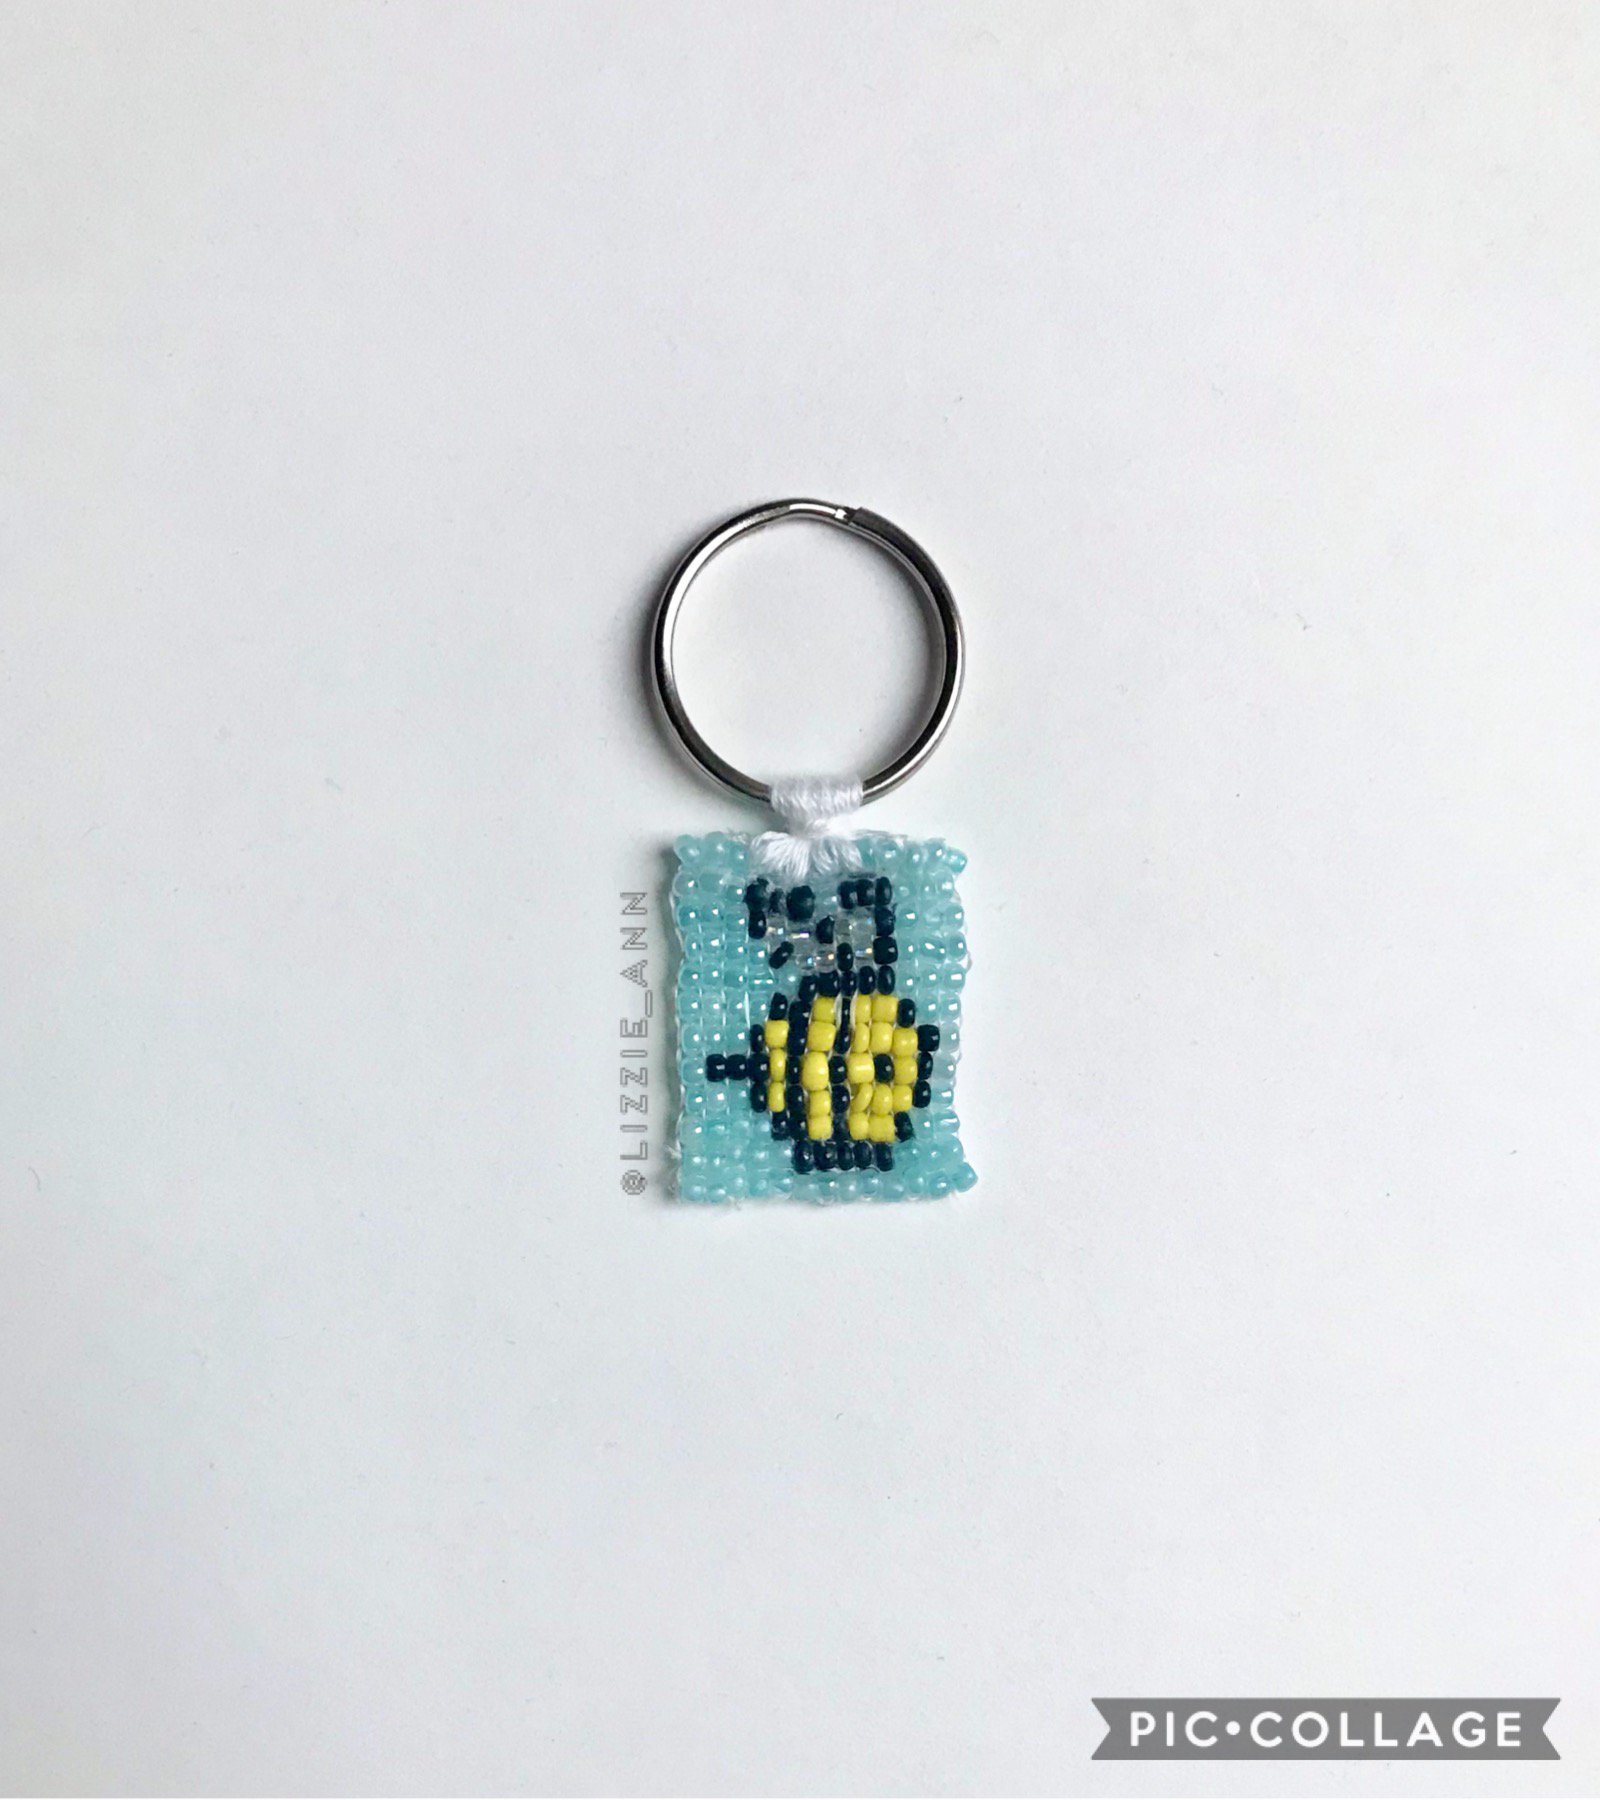
Add strings to make a bracelet or connect it to a keyring.

YOUR FINISHED!!!
You finished! If you have any questions feel free to message me or comment below any questions you have! Thank you for reading my tutorial and have a wonderful day! ❤️
How to Use a Bead Loom
This will help if you like watching videos rather than reading tutorials.
How to Finish Off Traditional Loom Work
How to add more strings and weave back in your extra strings.