Rate Tutorial

This tutorial will teach you how to make a keychain with rounded edges, which is especially useful for Alpha patterns that are normally too large for a keychain ring. This tutorial will show you how to annotate your pattern for use as a rounded keychain, make a rounded keychain with an even number of base threads, and make a rounded keychain with an odd number of base threads.
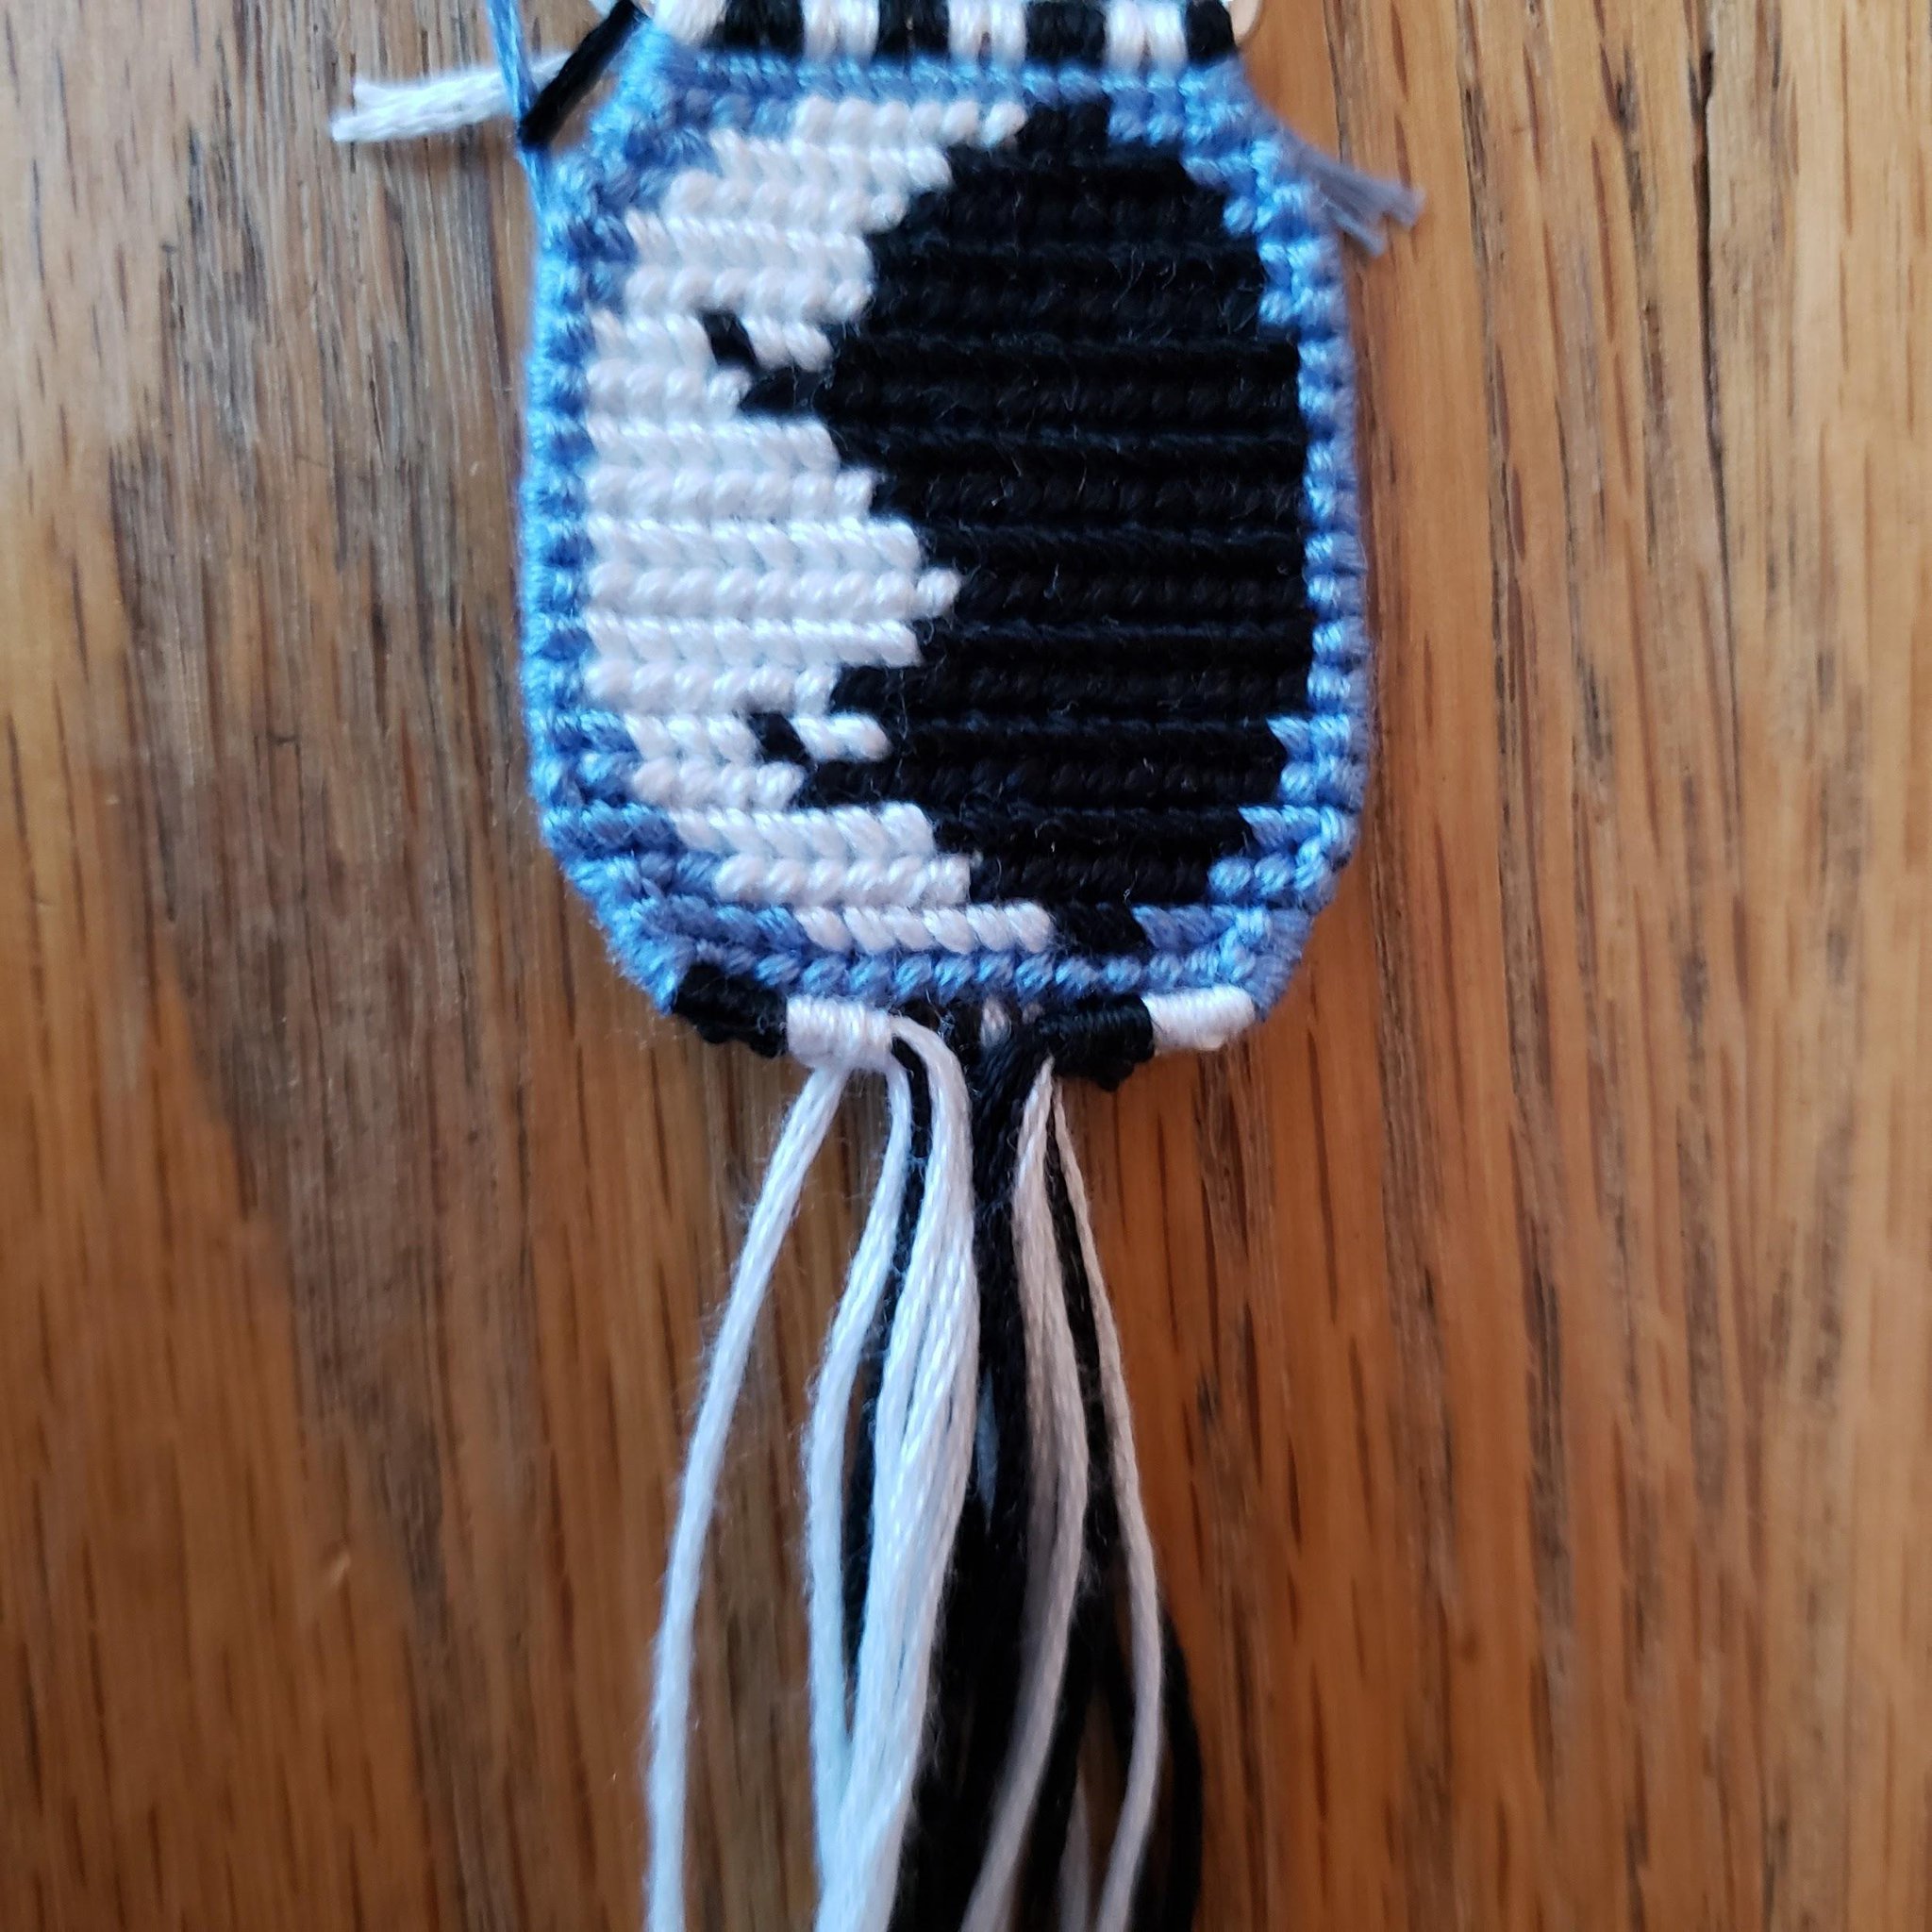
If you are curious, I used pattern #38321 for the left keychain, and pattern #63870 for the right keychain.
If you are curious, I used pattern #38321 for the left keychain, and pattern #63870 for the right keychain.
Annotating Your Pattern
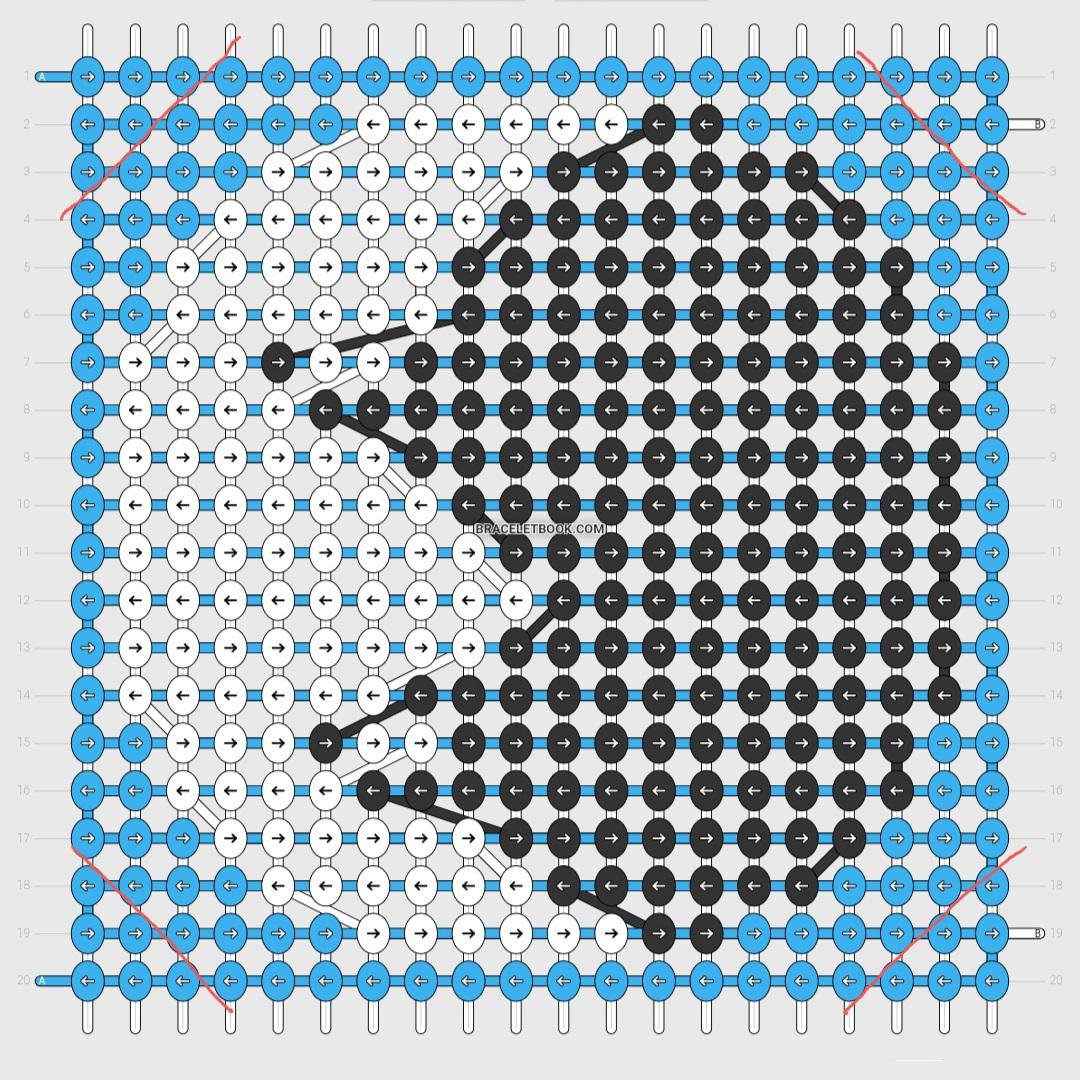
Before you begin your keychain, it helps to annotate the pattern you use so you do not get confused. On my keychain rings, I know I can comfortably fit 14 knots in the first row. This means I should not make the first or last 3 knots in the first row of the pattern, since my first row would normally have 20 knots. I draw 2 diagonal lines in the upper corners of my pattern, excluding the knots beyond them. In the lower corners of my pattern, I do the same. This should make your resulting pattern look like a hexagon.
Even Number of Base Threads
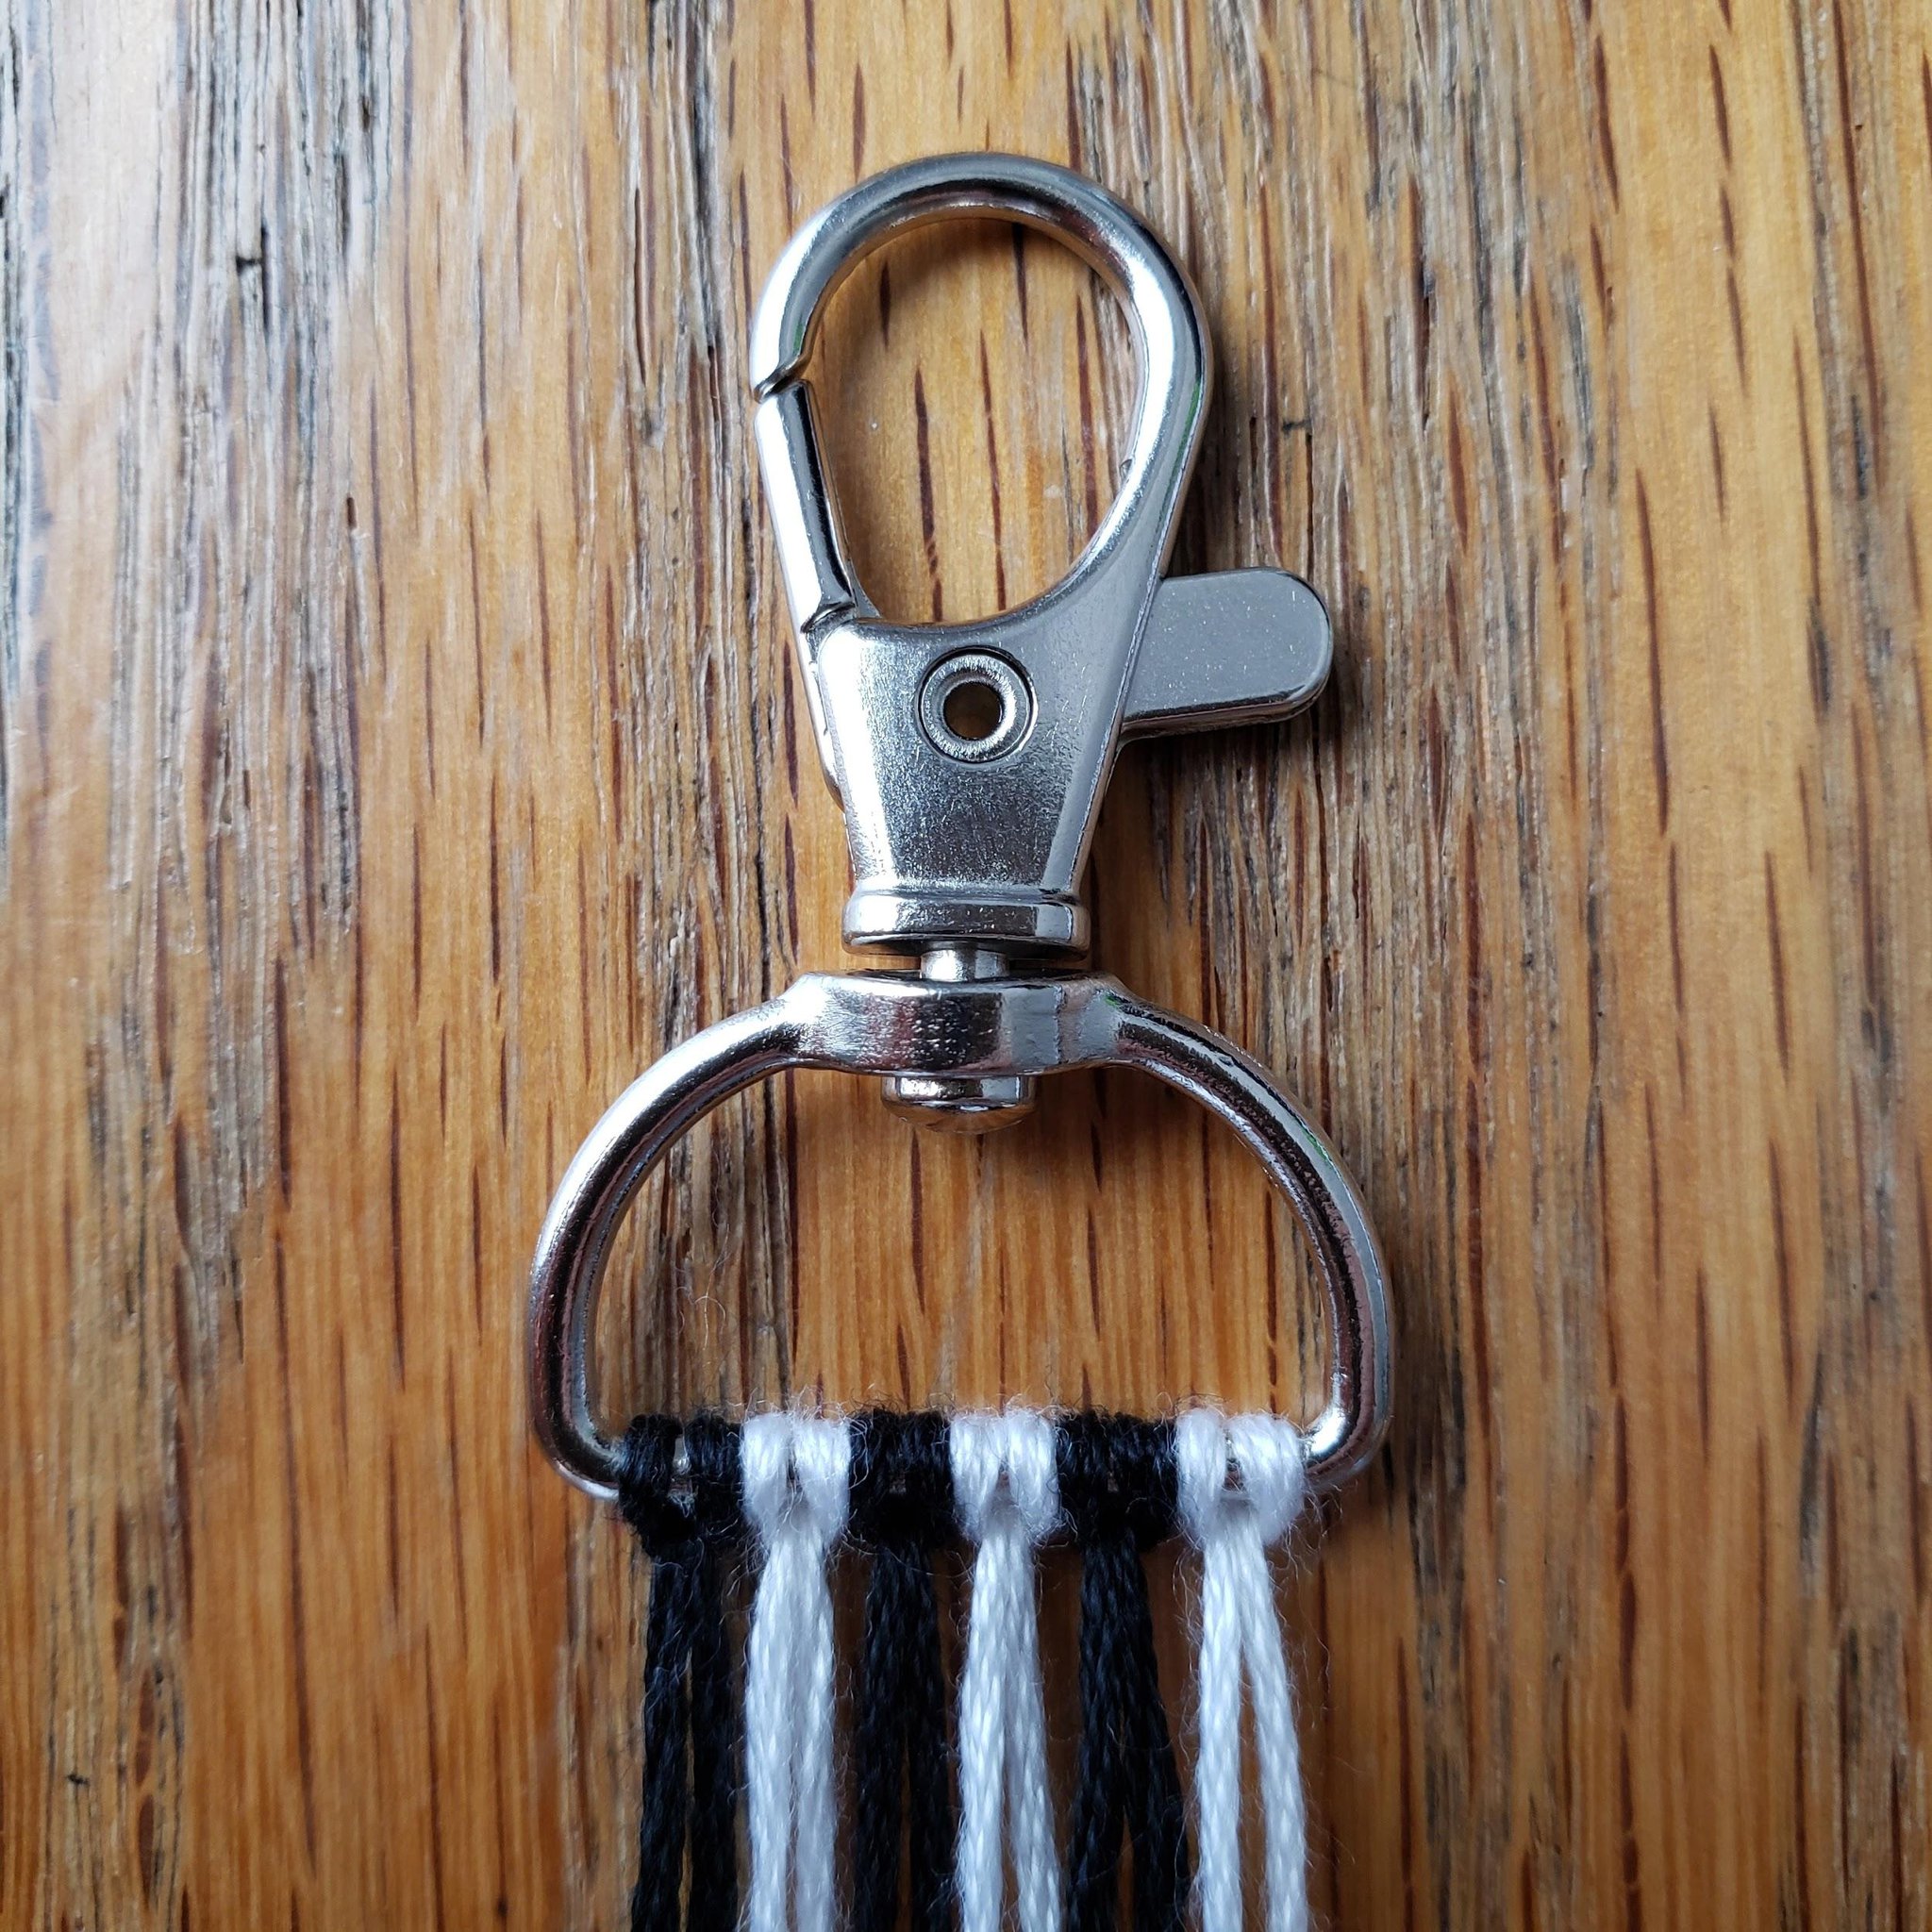
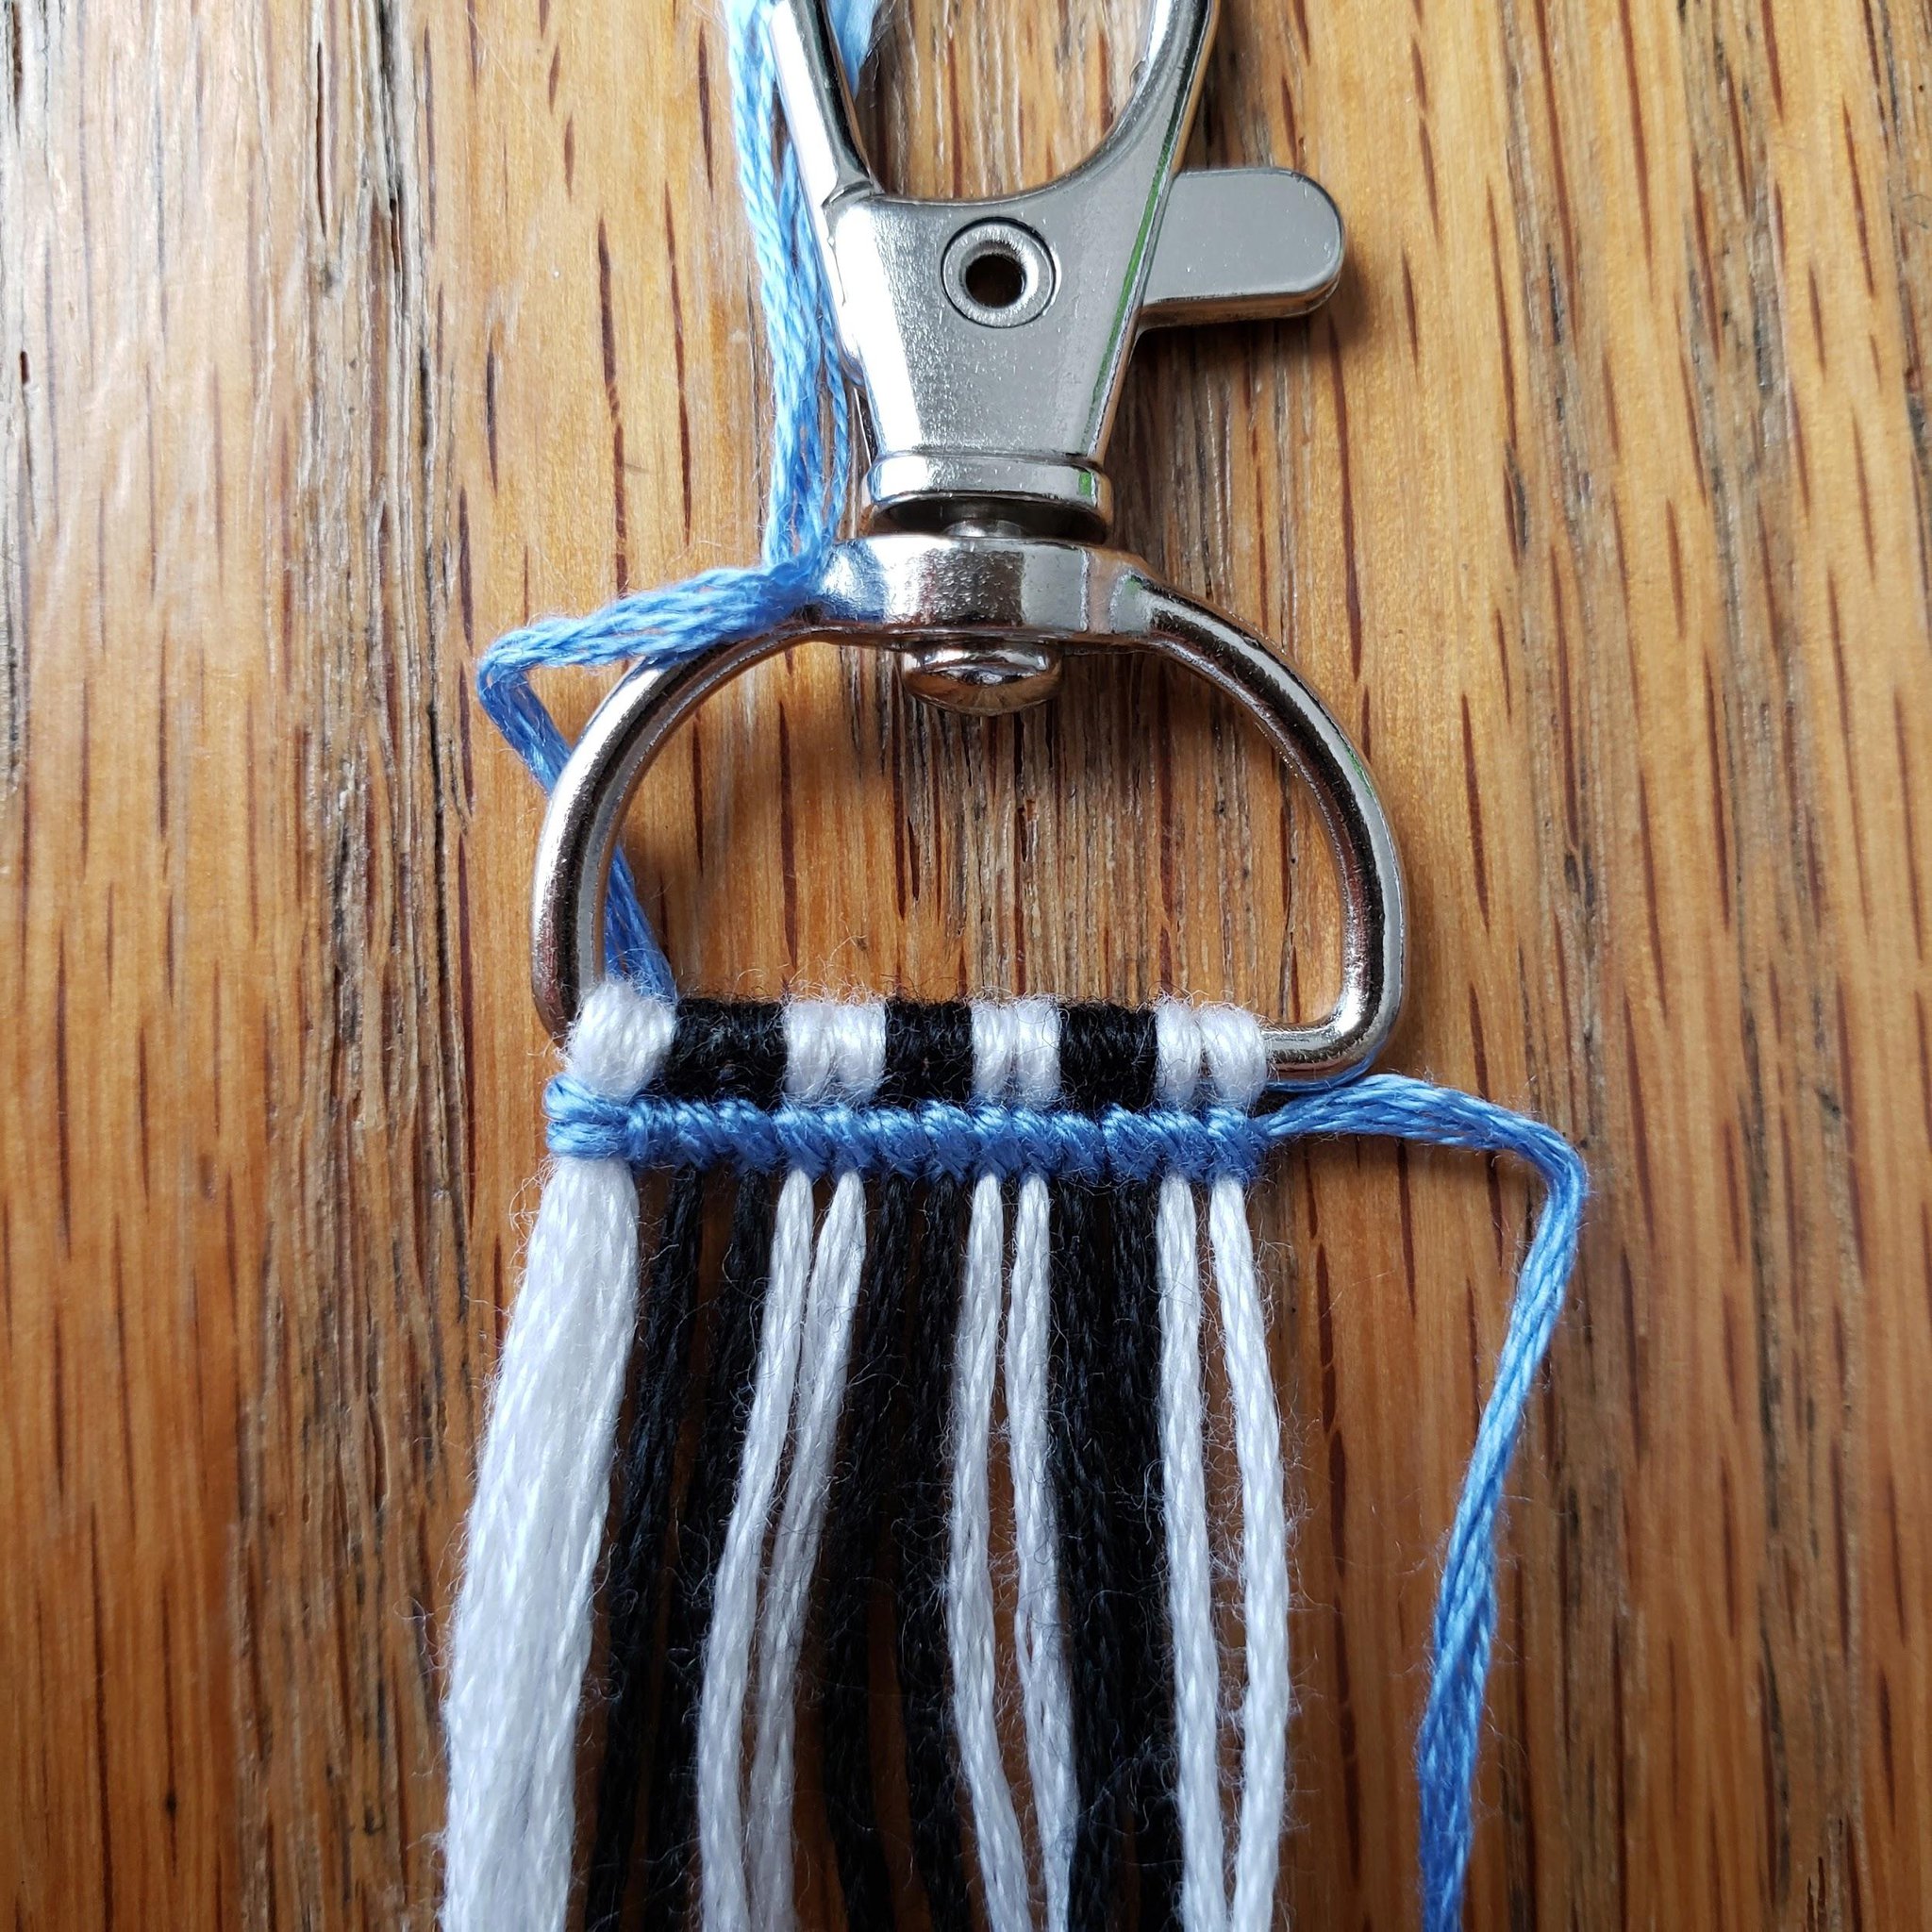
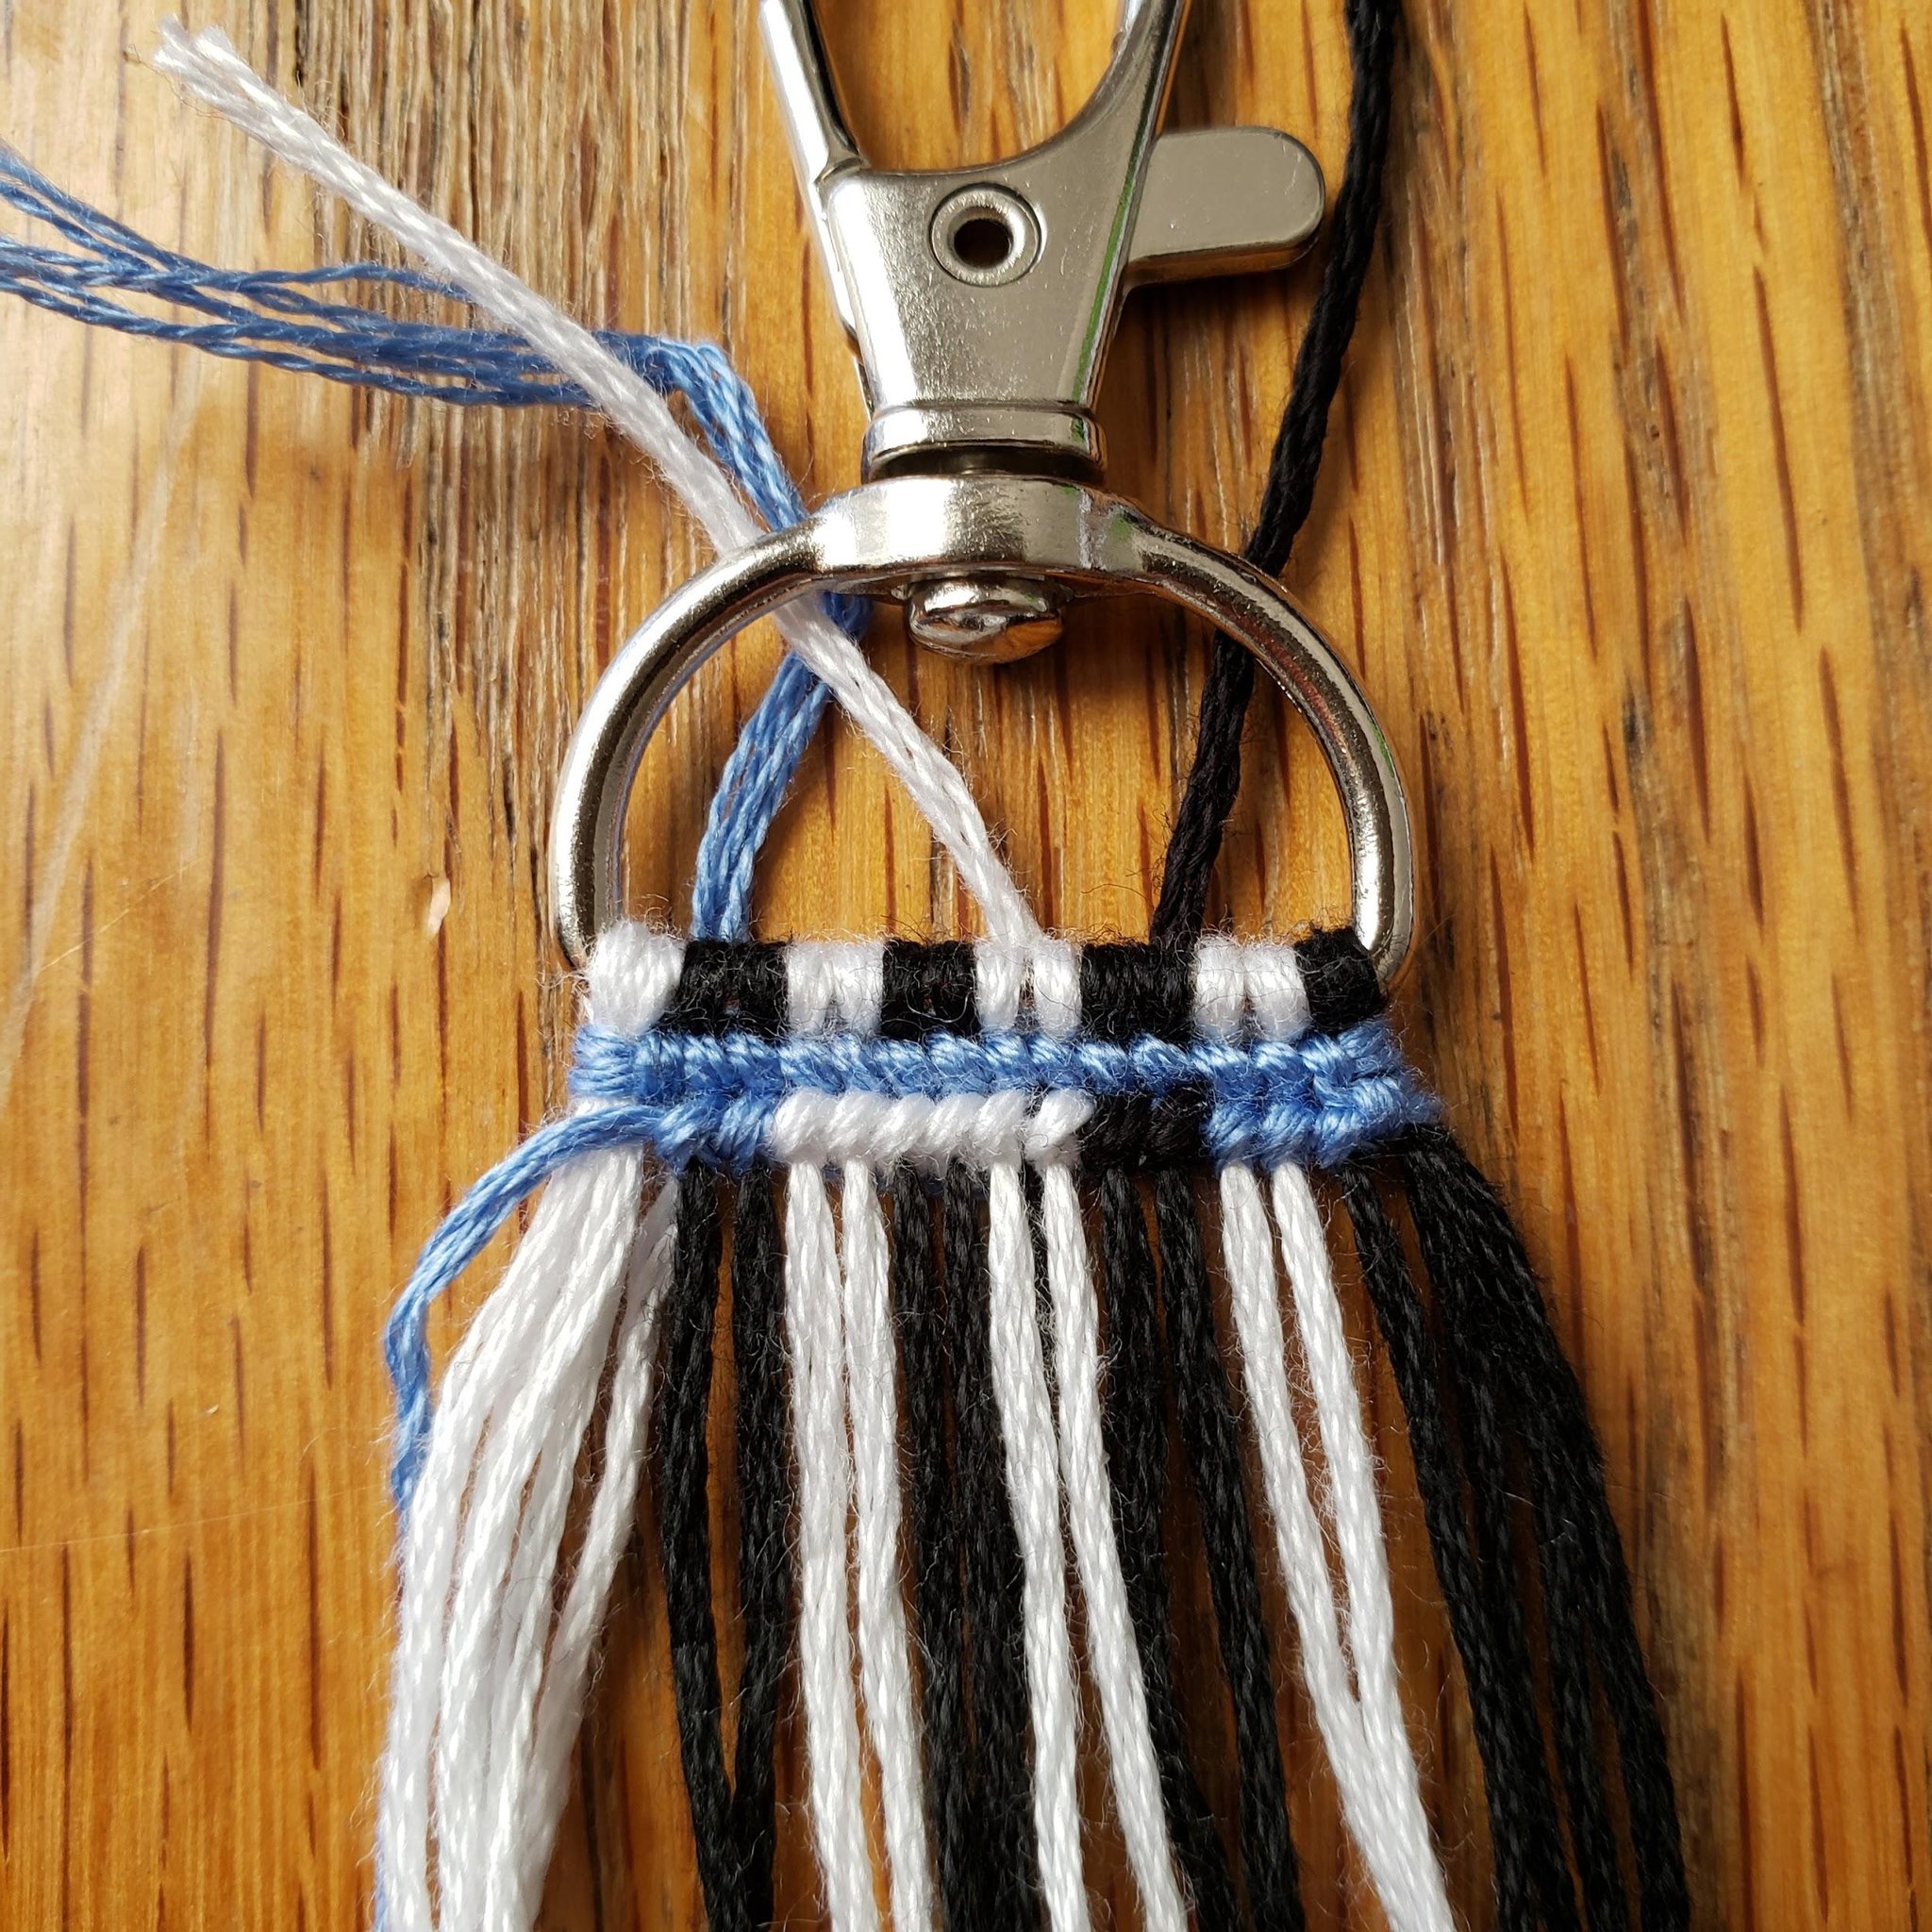
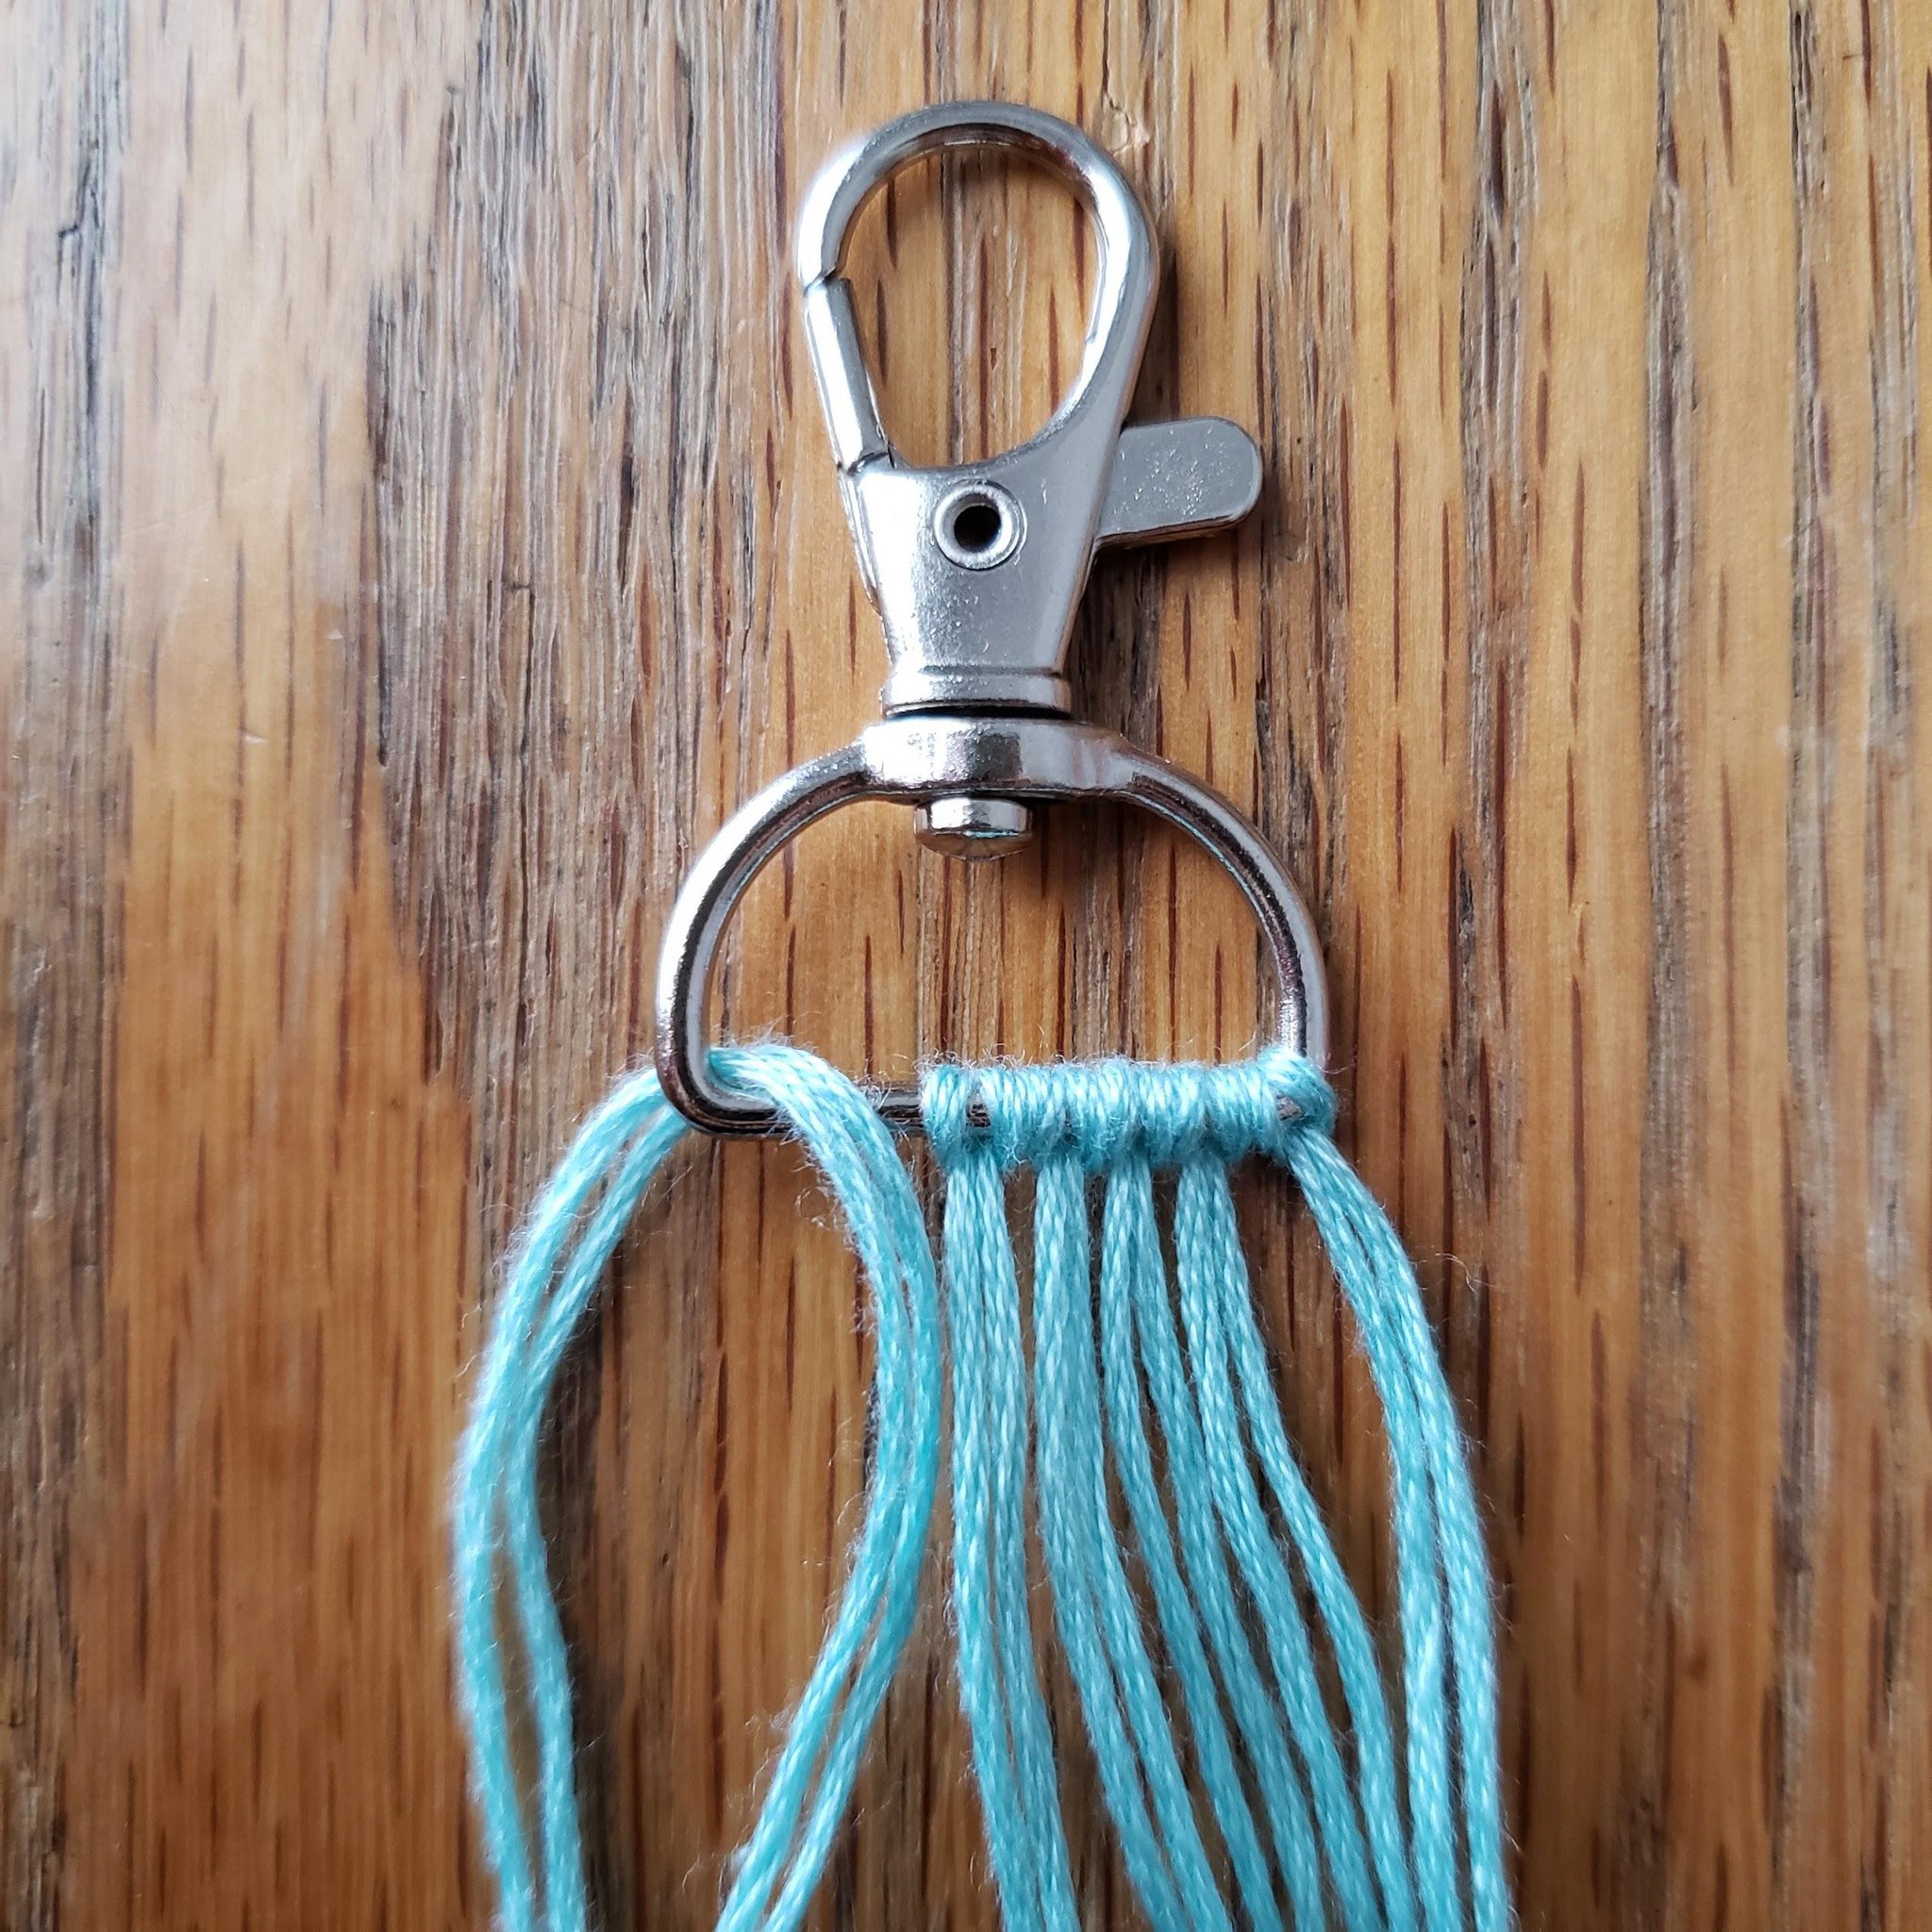
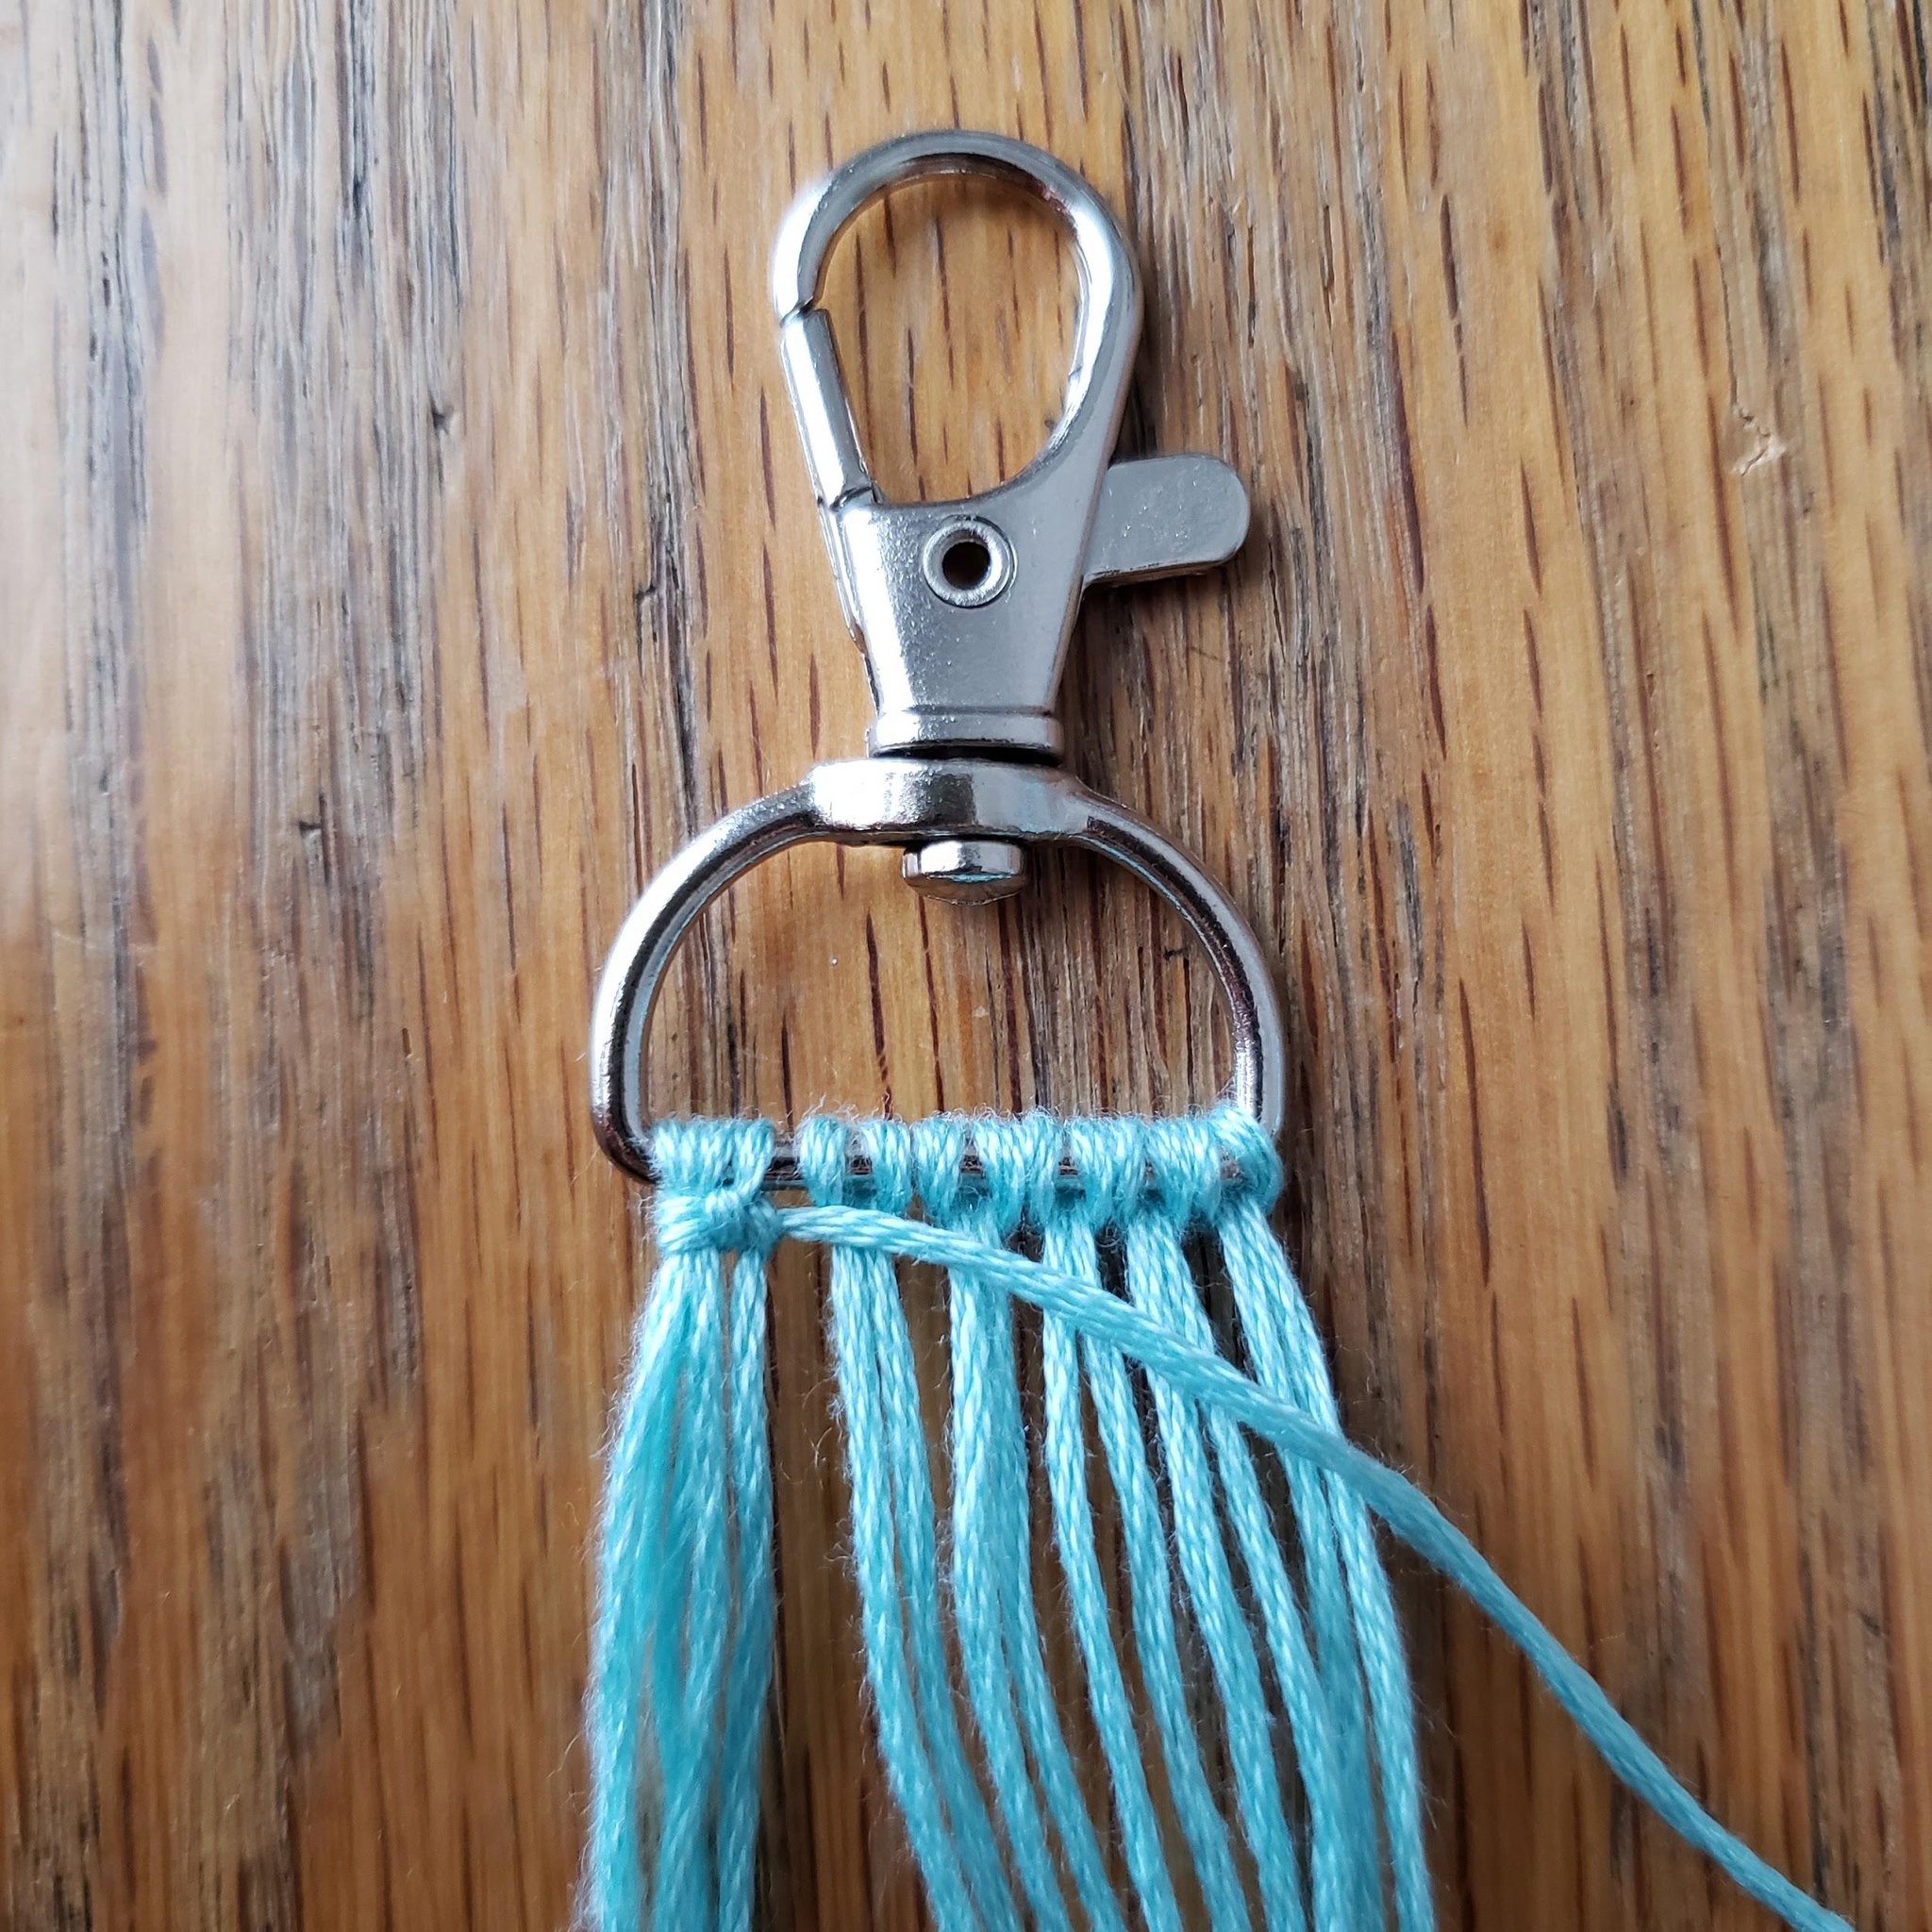
Start the keychain how you would normally, tying lark’s head knots with your base threads onto your keychain ring. For this keychain, the amount of lark’s head knots I make is 2 less than the max amount I can fit on this ring. This leaves room for the 4 “loop-over” threads I will be adding later on.
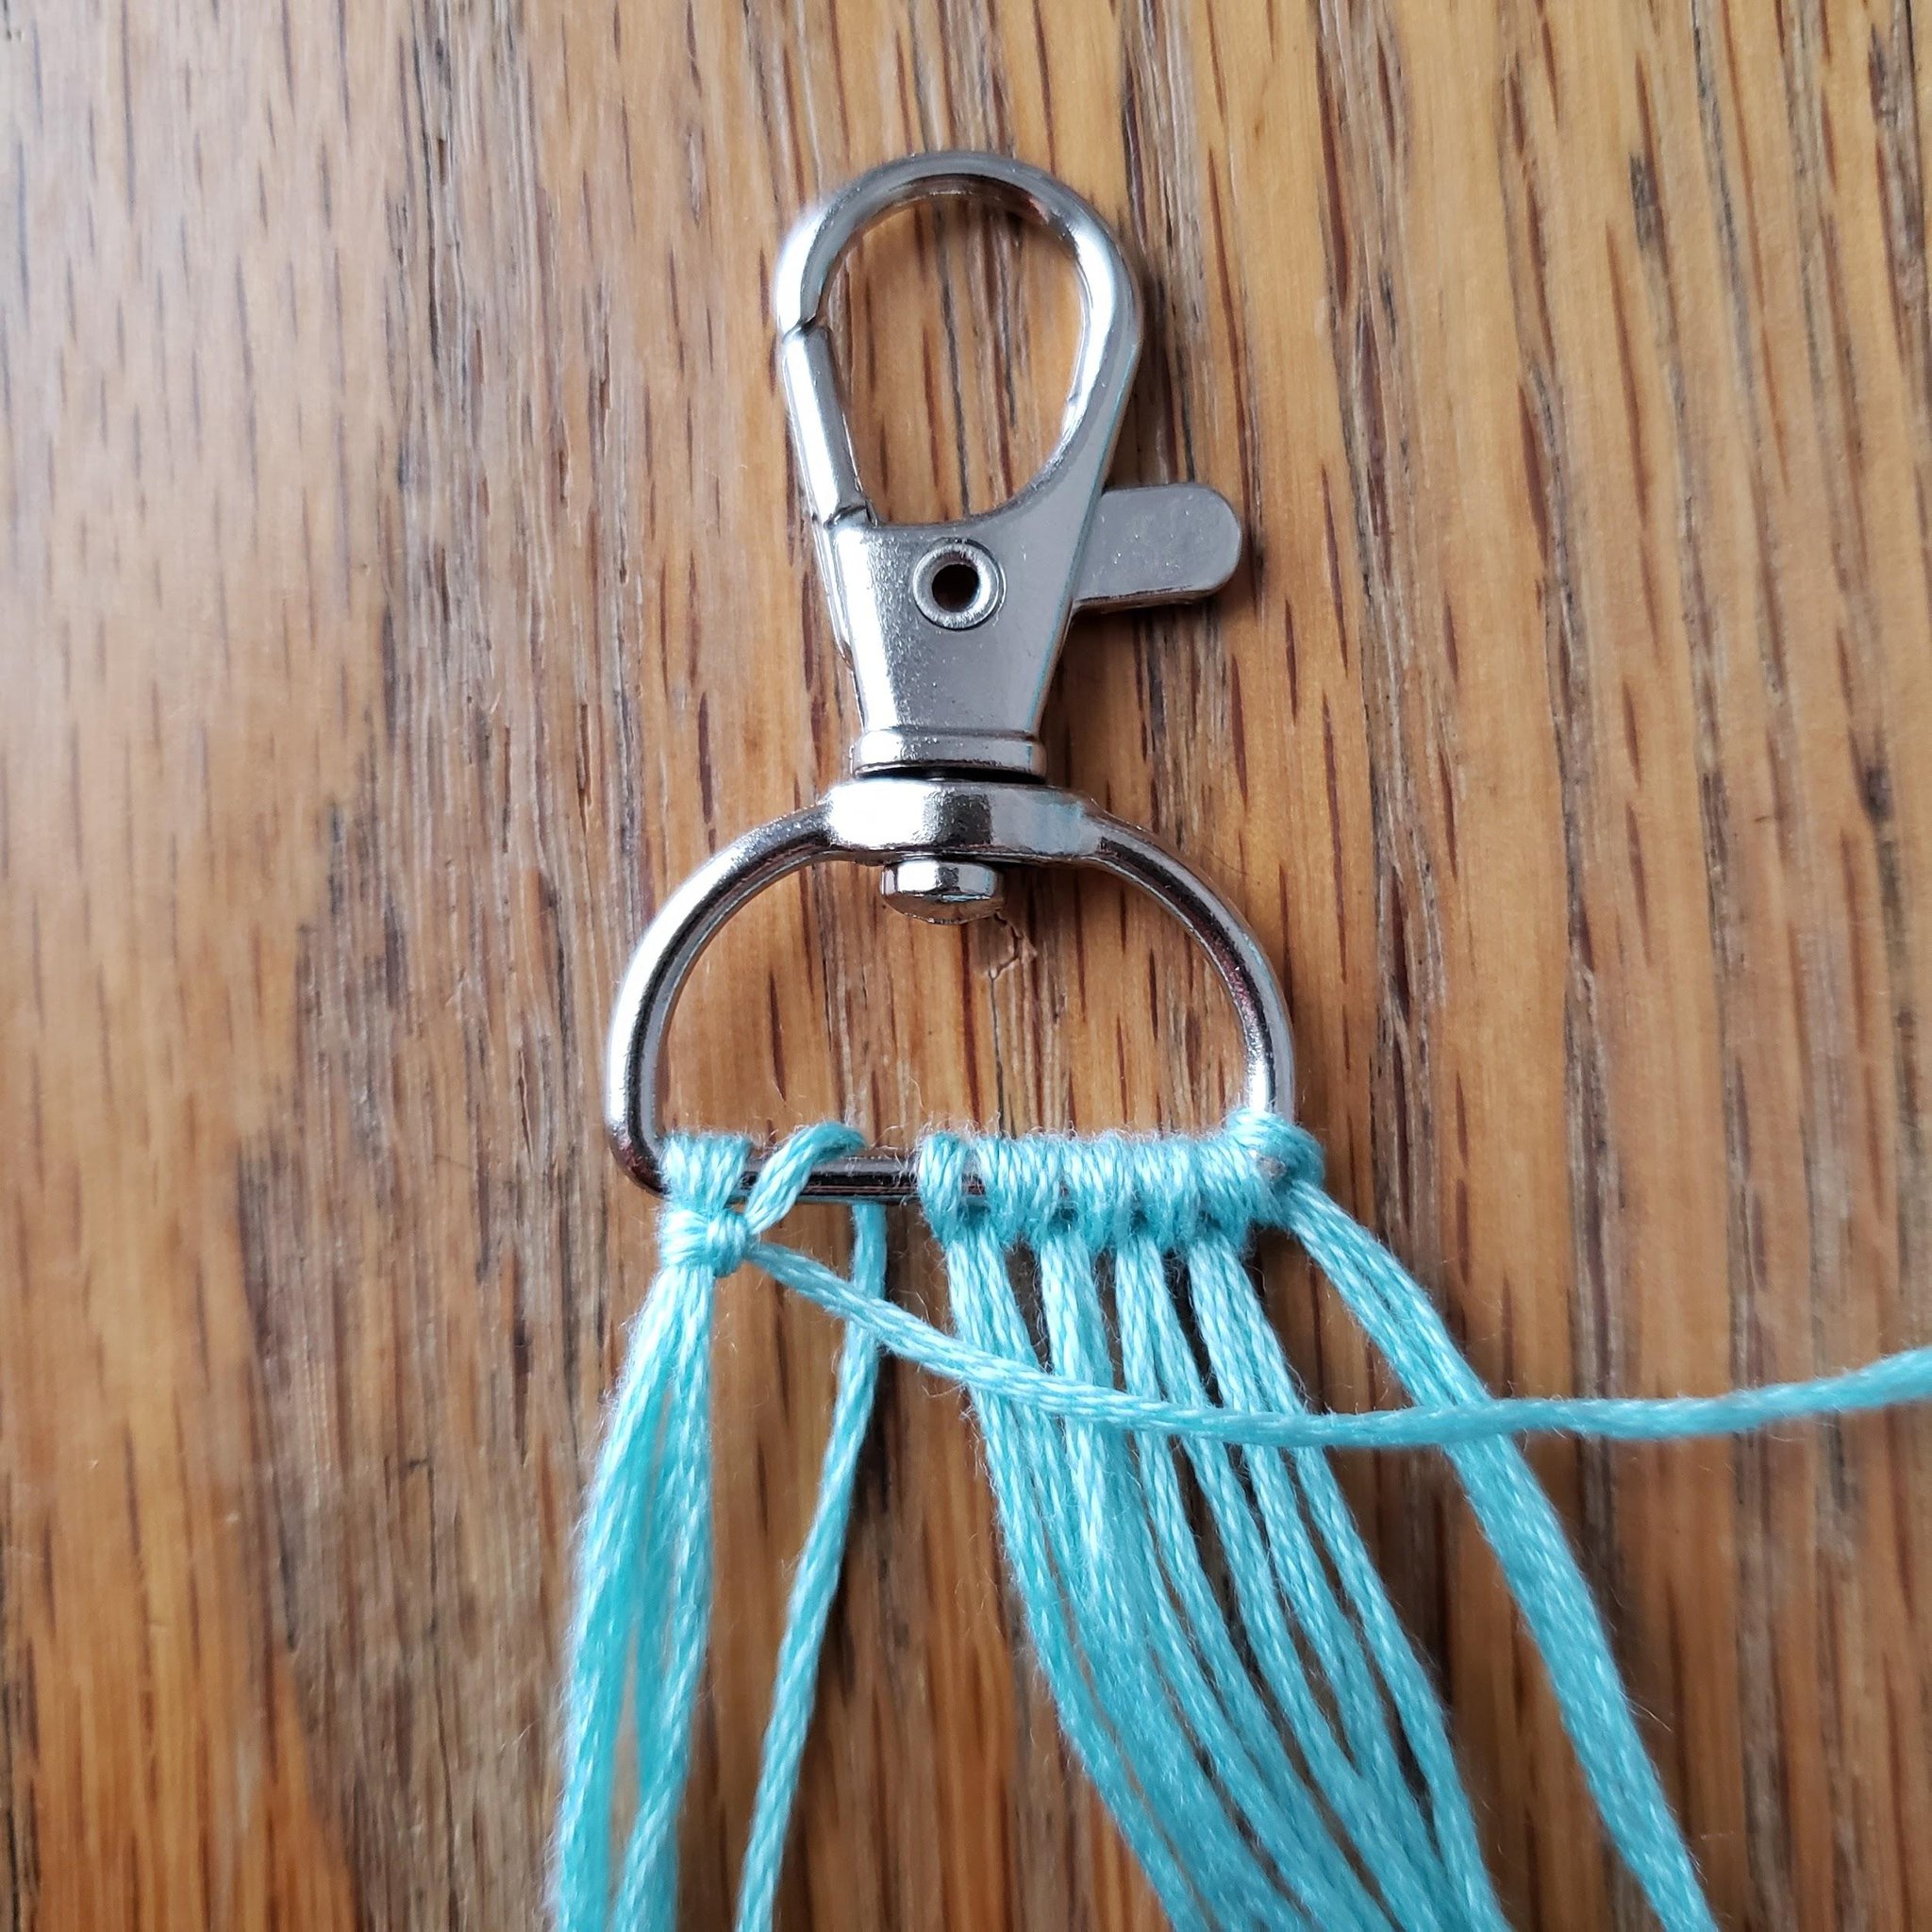
Add your leftmost loop-over thread(s). Do this by threading a base thread through the ring and folding the thread in half. For this keychain, I have 2 leftmost loop-over threads.
Tie your first knot over all your leftmost loop-over threads. For this keychain, I am tying my first knot onto 2 loop-over threads, which create 4 base threads.
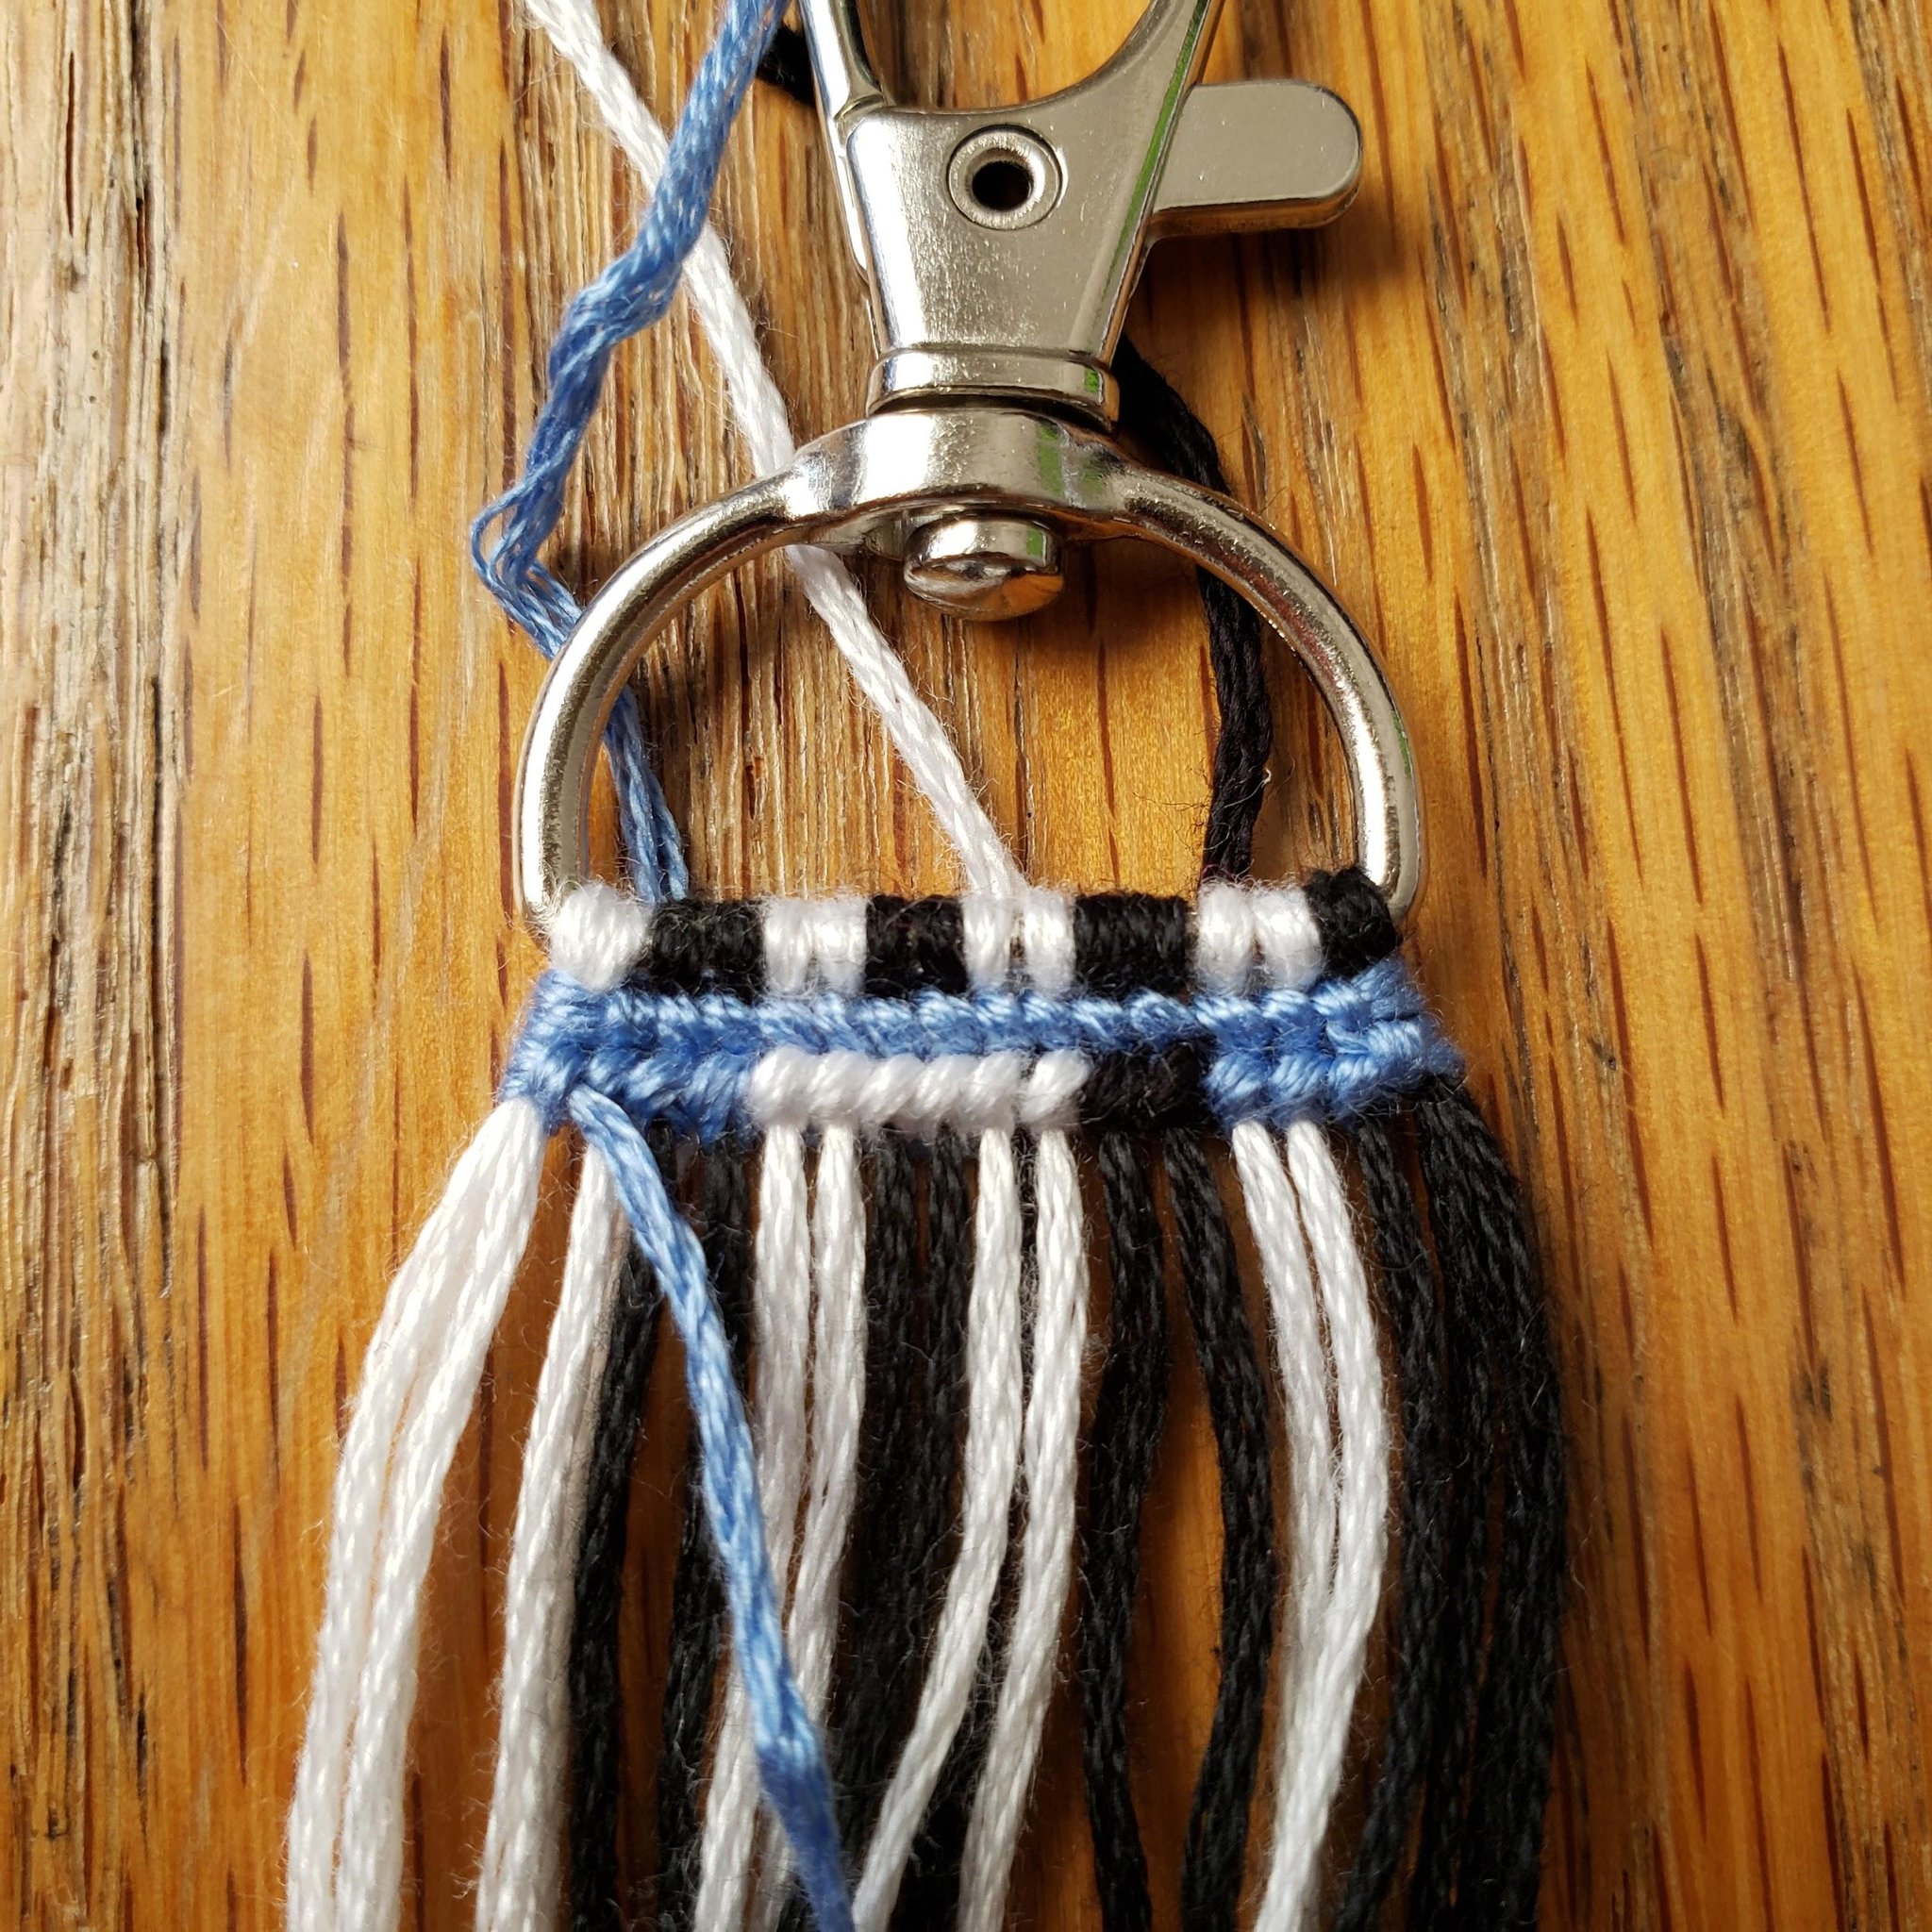
Knot onto the remaining base threads just how you would for a regular keychain. You should only have 1 more knot to make to finish this row. For my pattern, my first row should have 14 knots. At this point, I have made 13 knots.
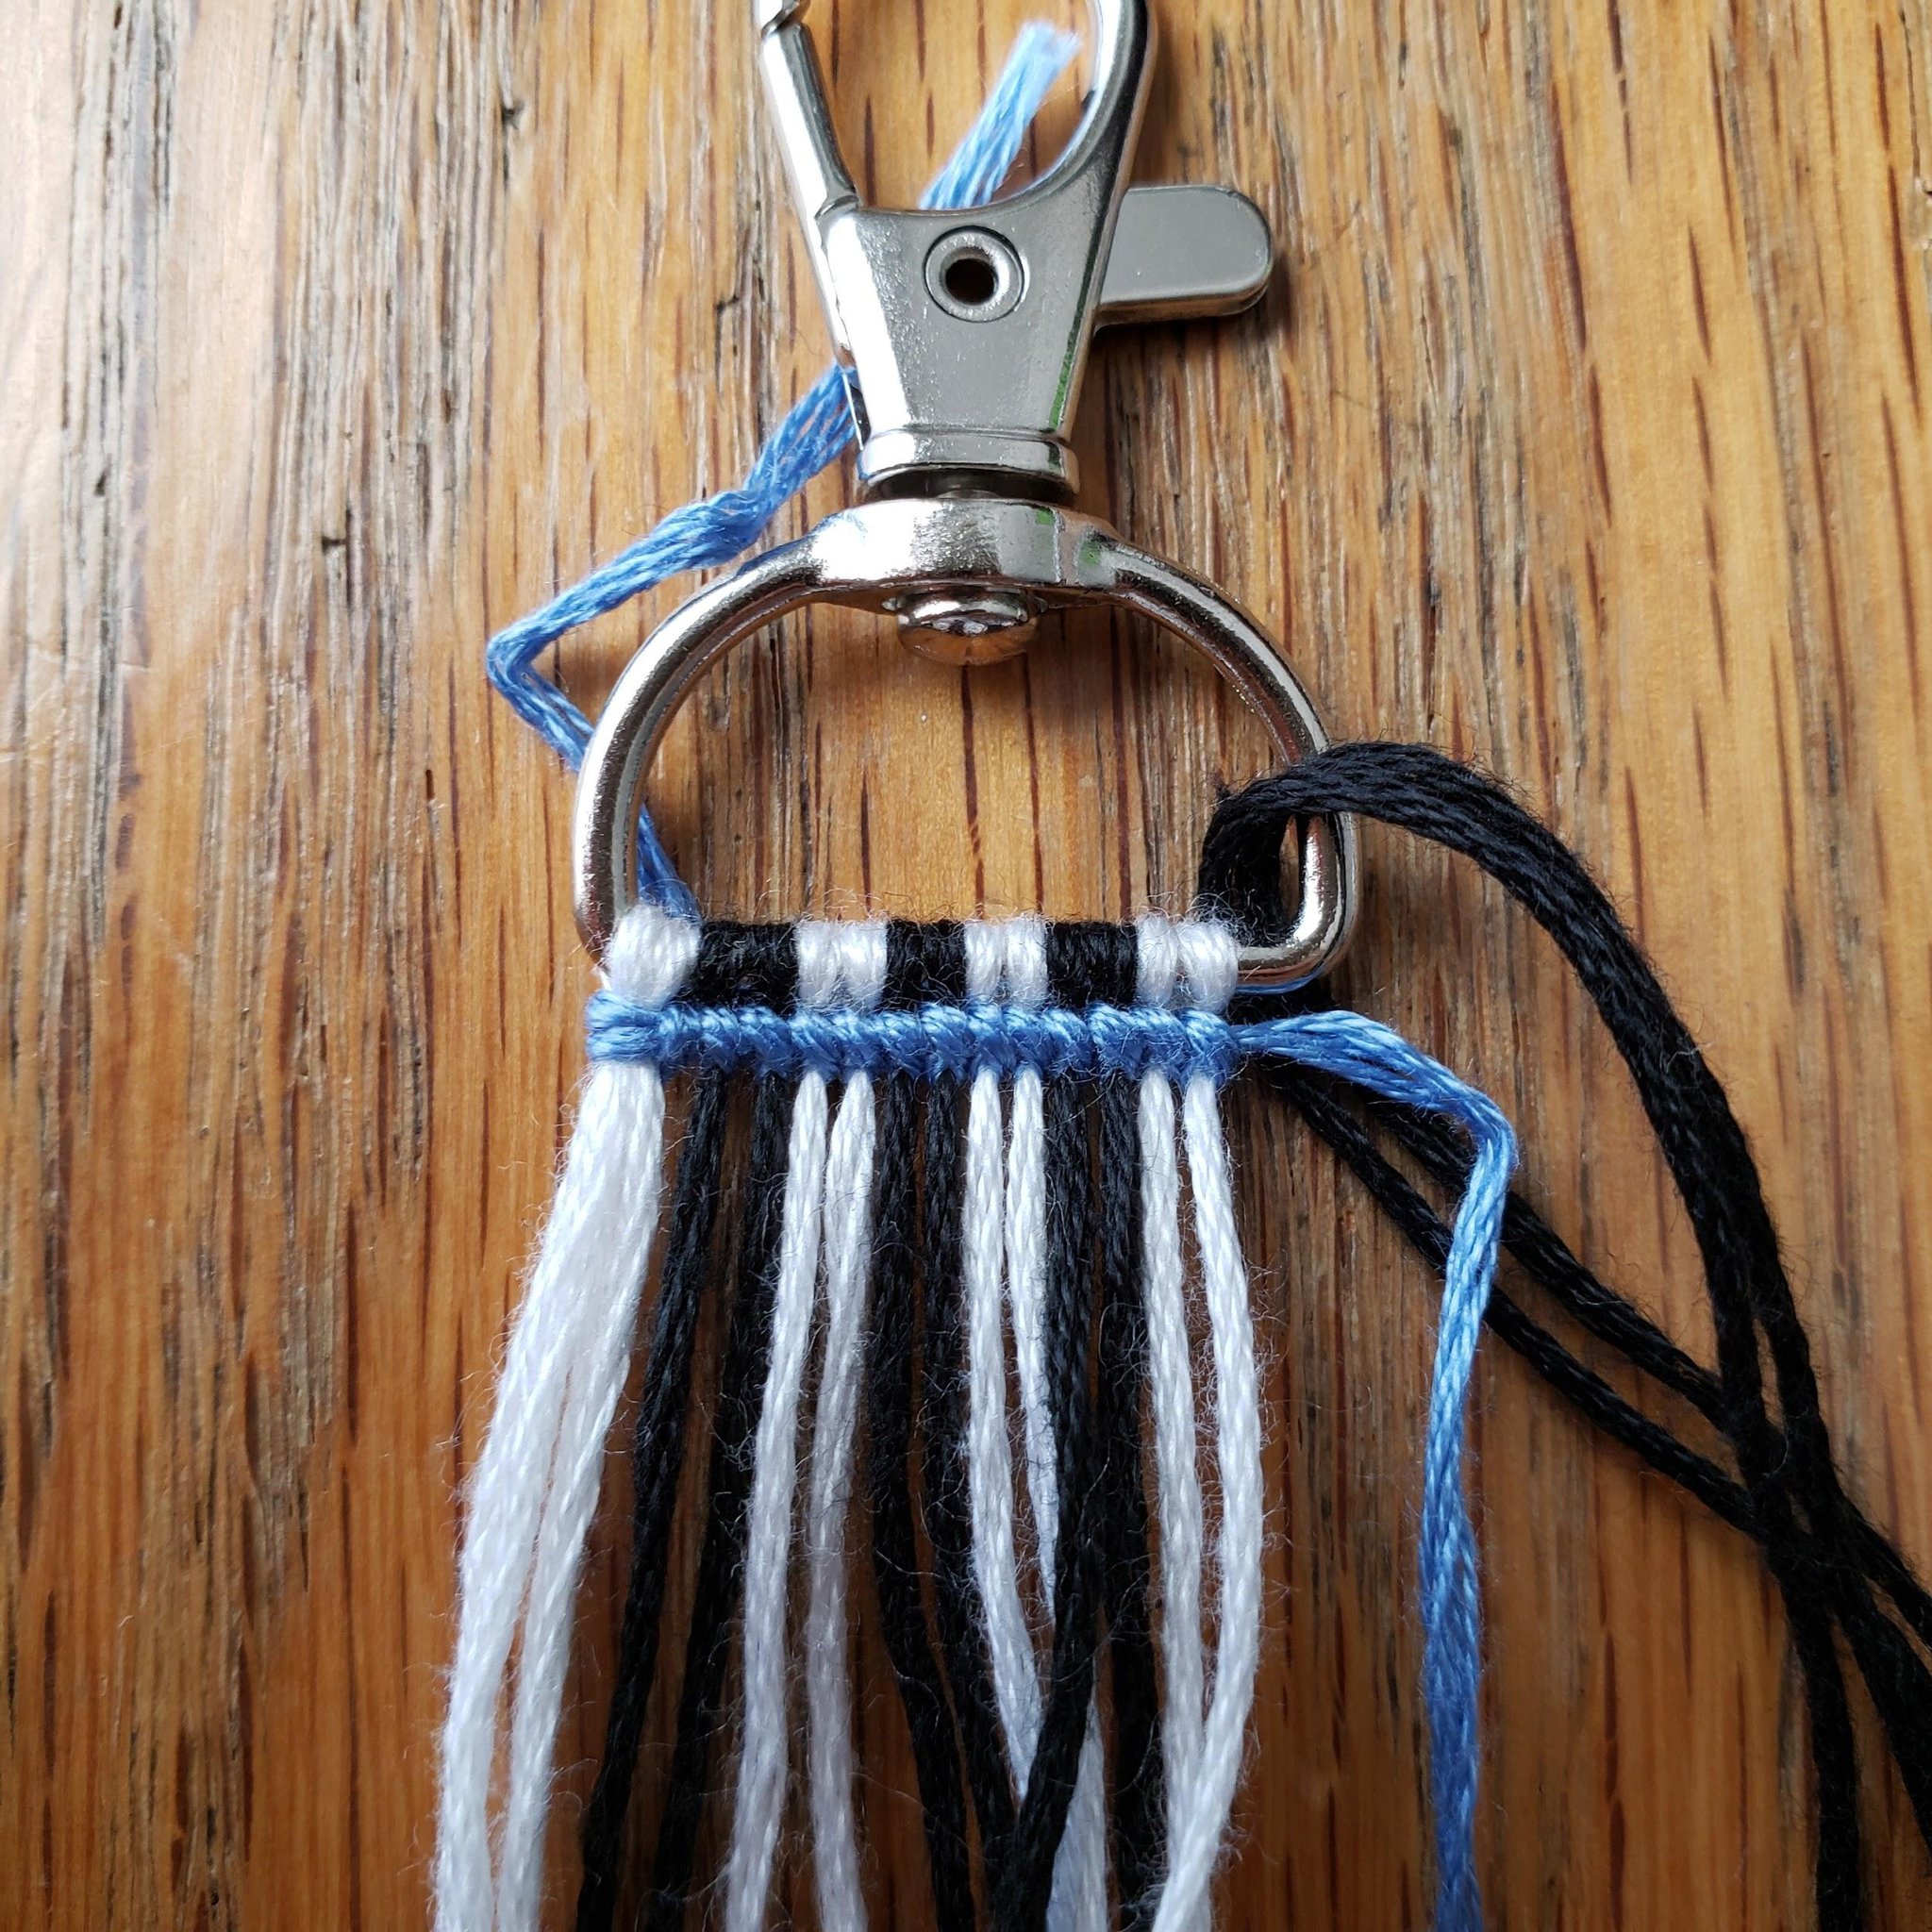
Add your rightmost loop-over thread(s) the same way you added your leftmost loop-over thread(s). On this keychain, I will be adding 2 rightmost loop-over threads.
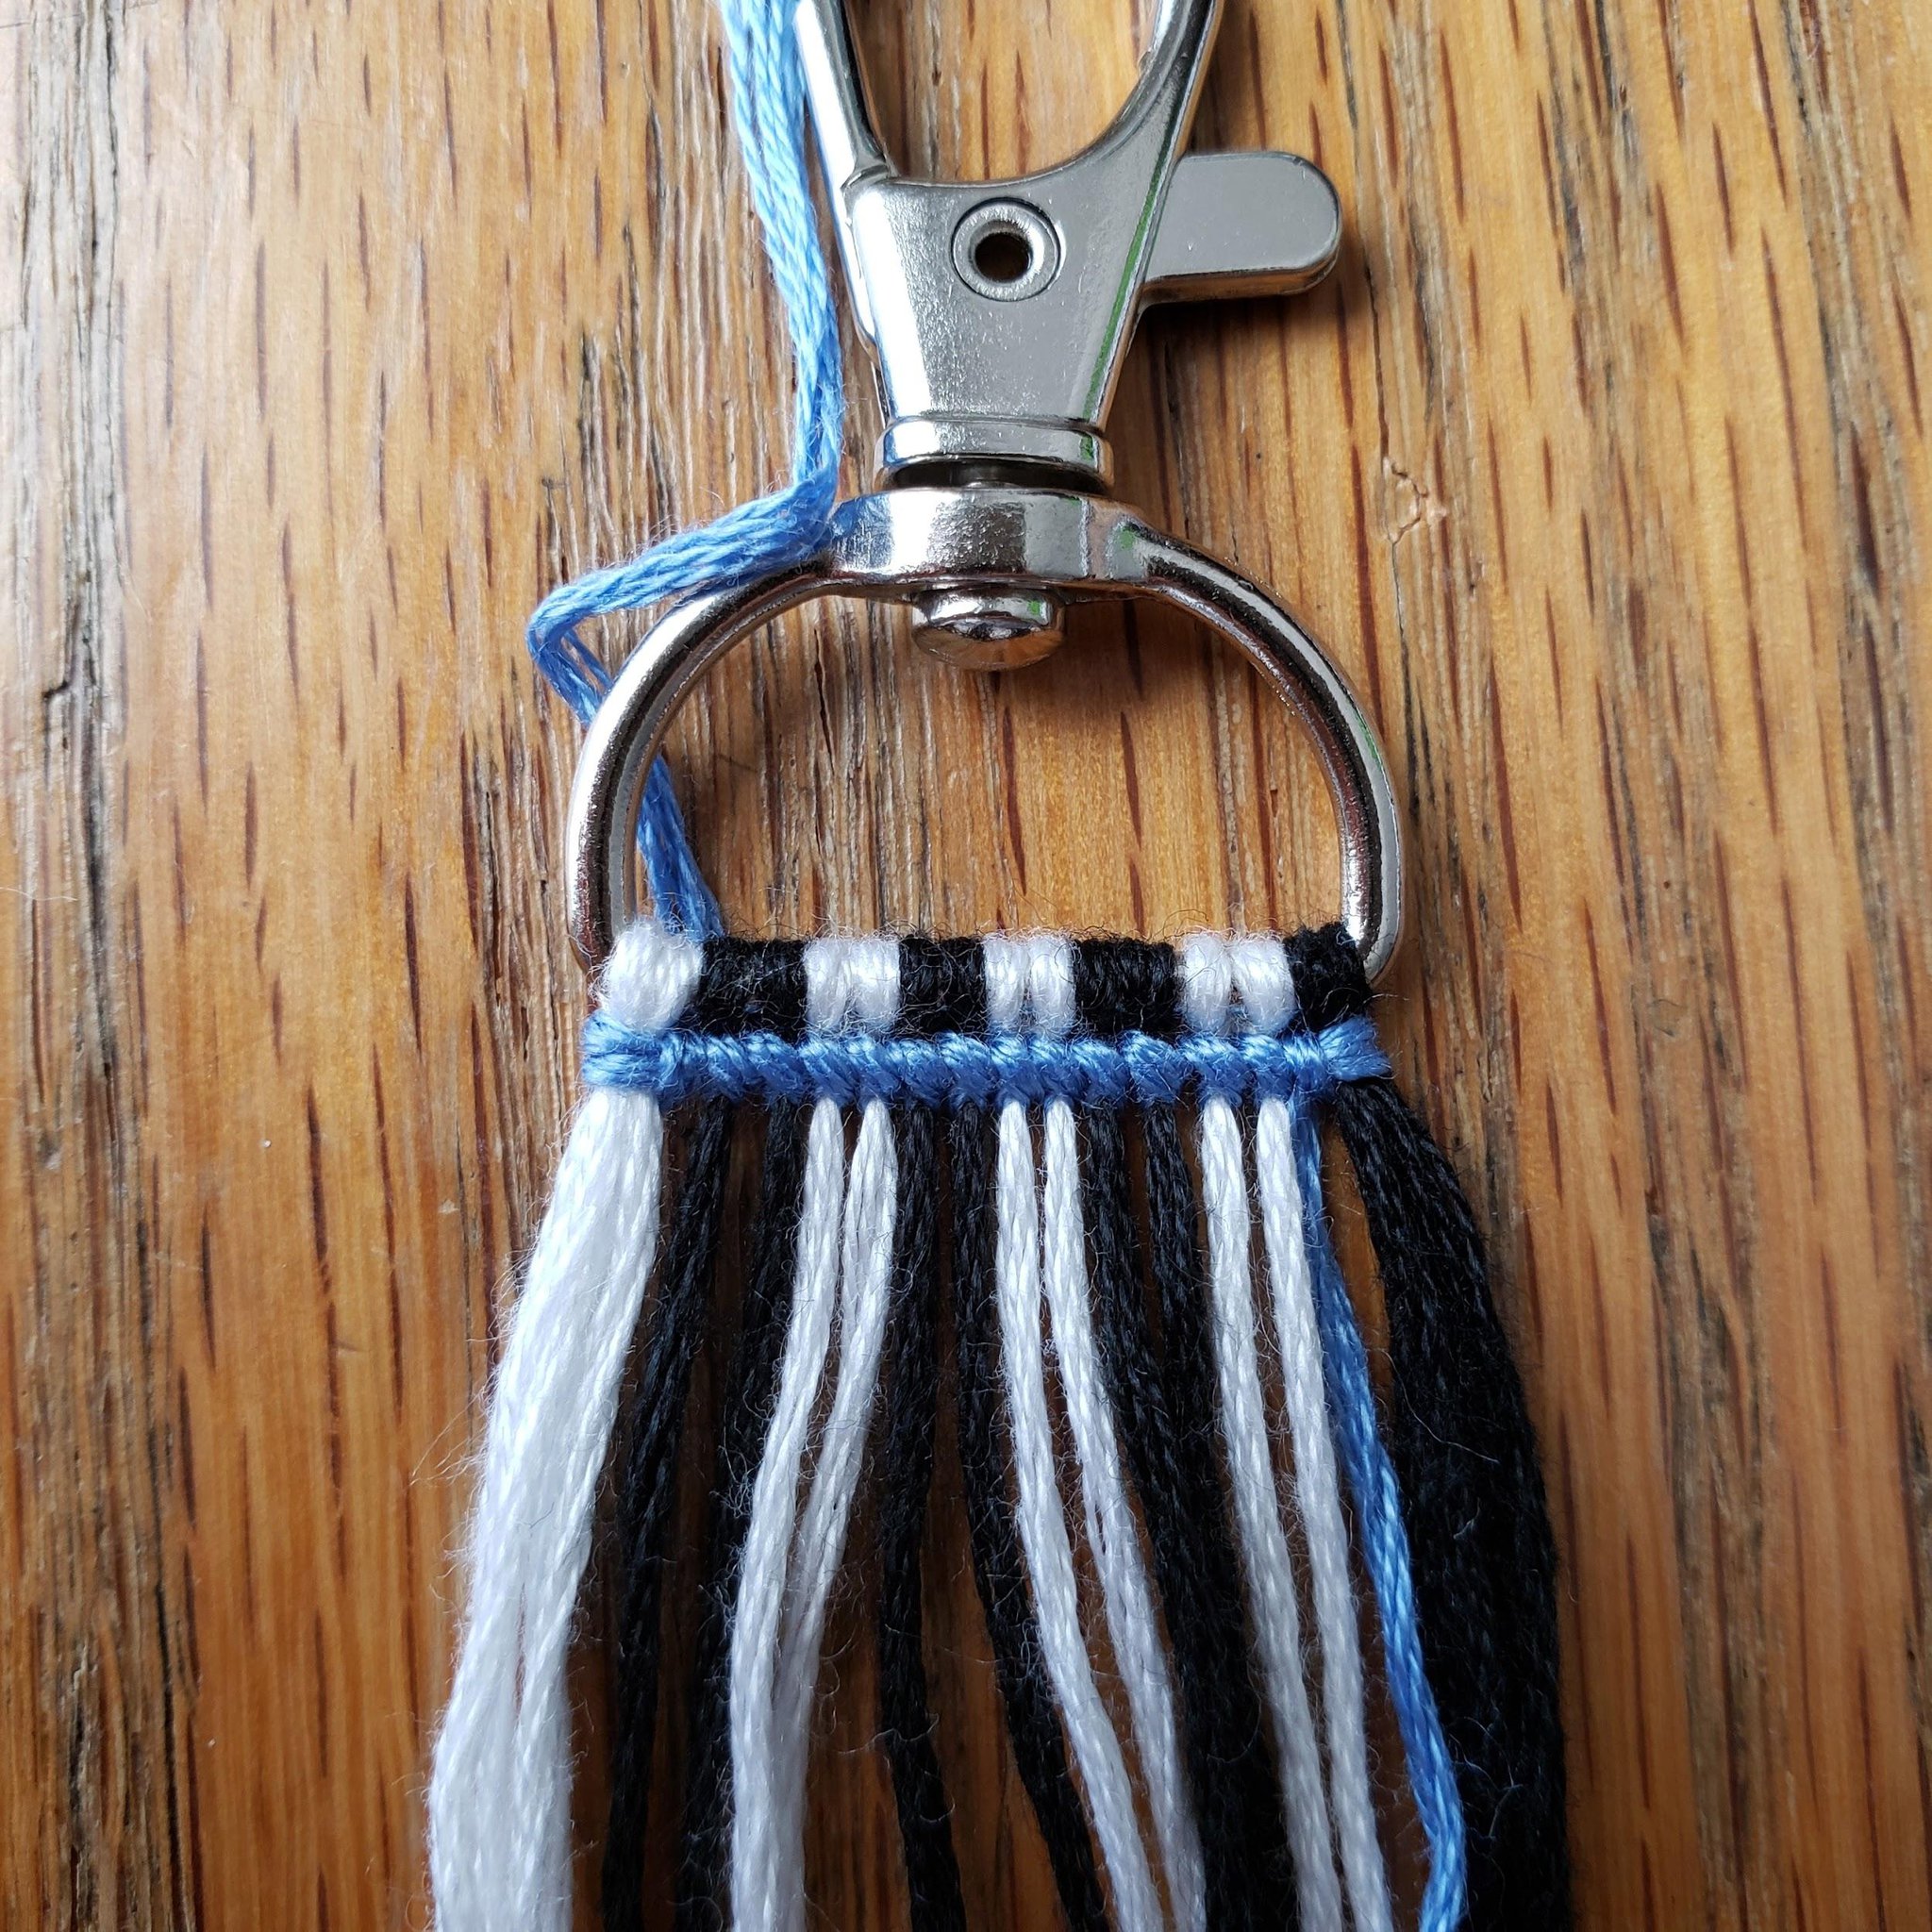
Make 1 knot onto all 4 of the base threads created by your 2 rightmost loop-over threads. This should be the last knot of your first row. In my keychain, I have just finished the 14th knot of my first row.
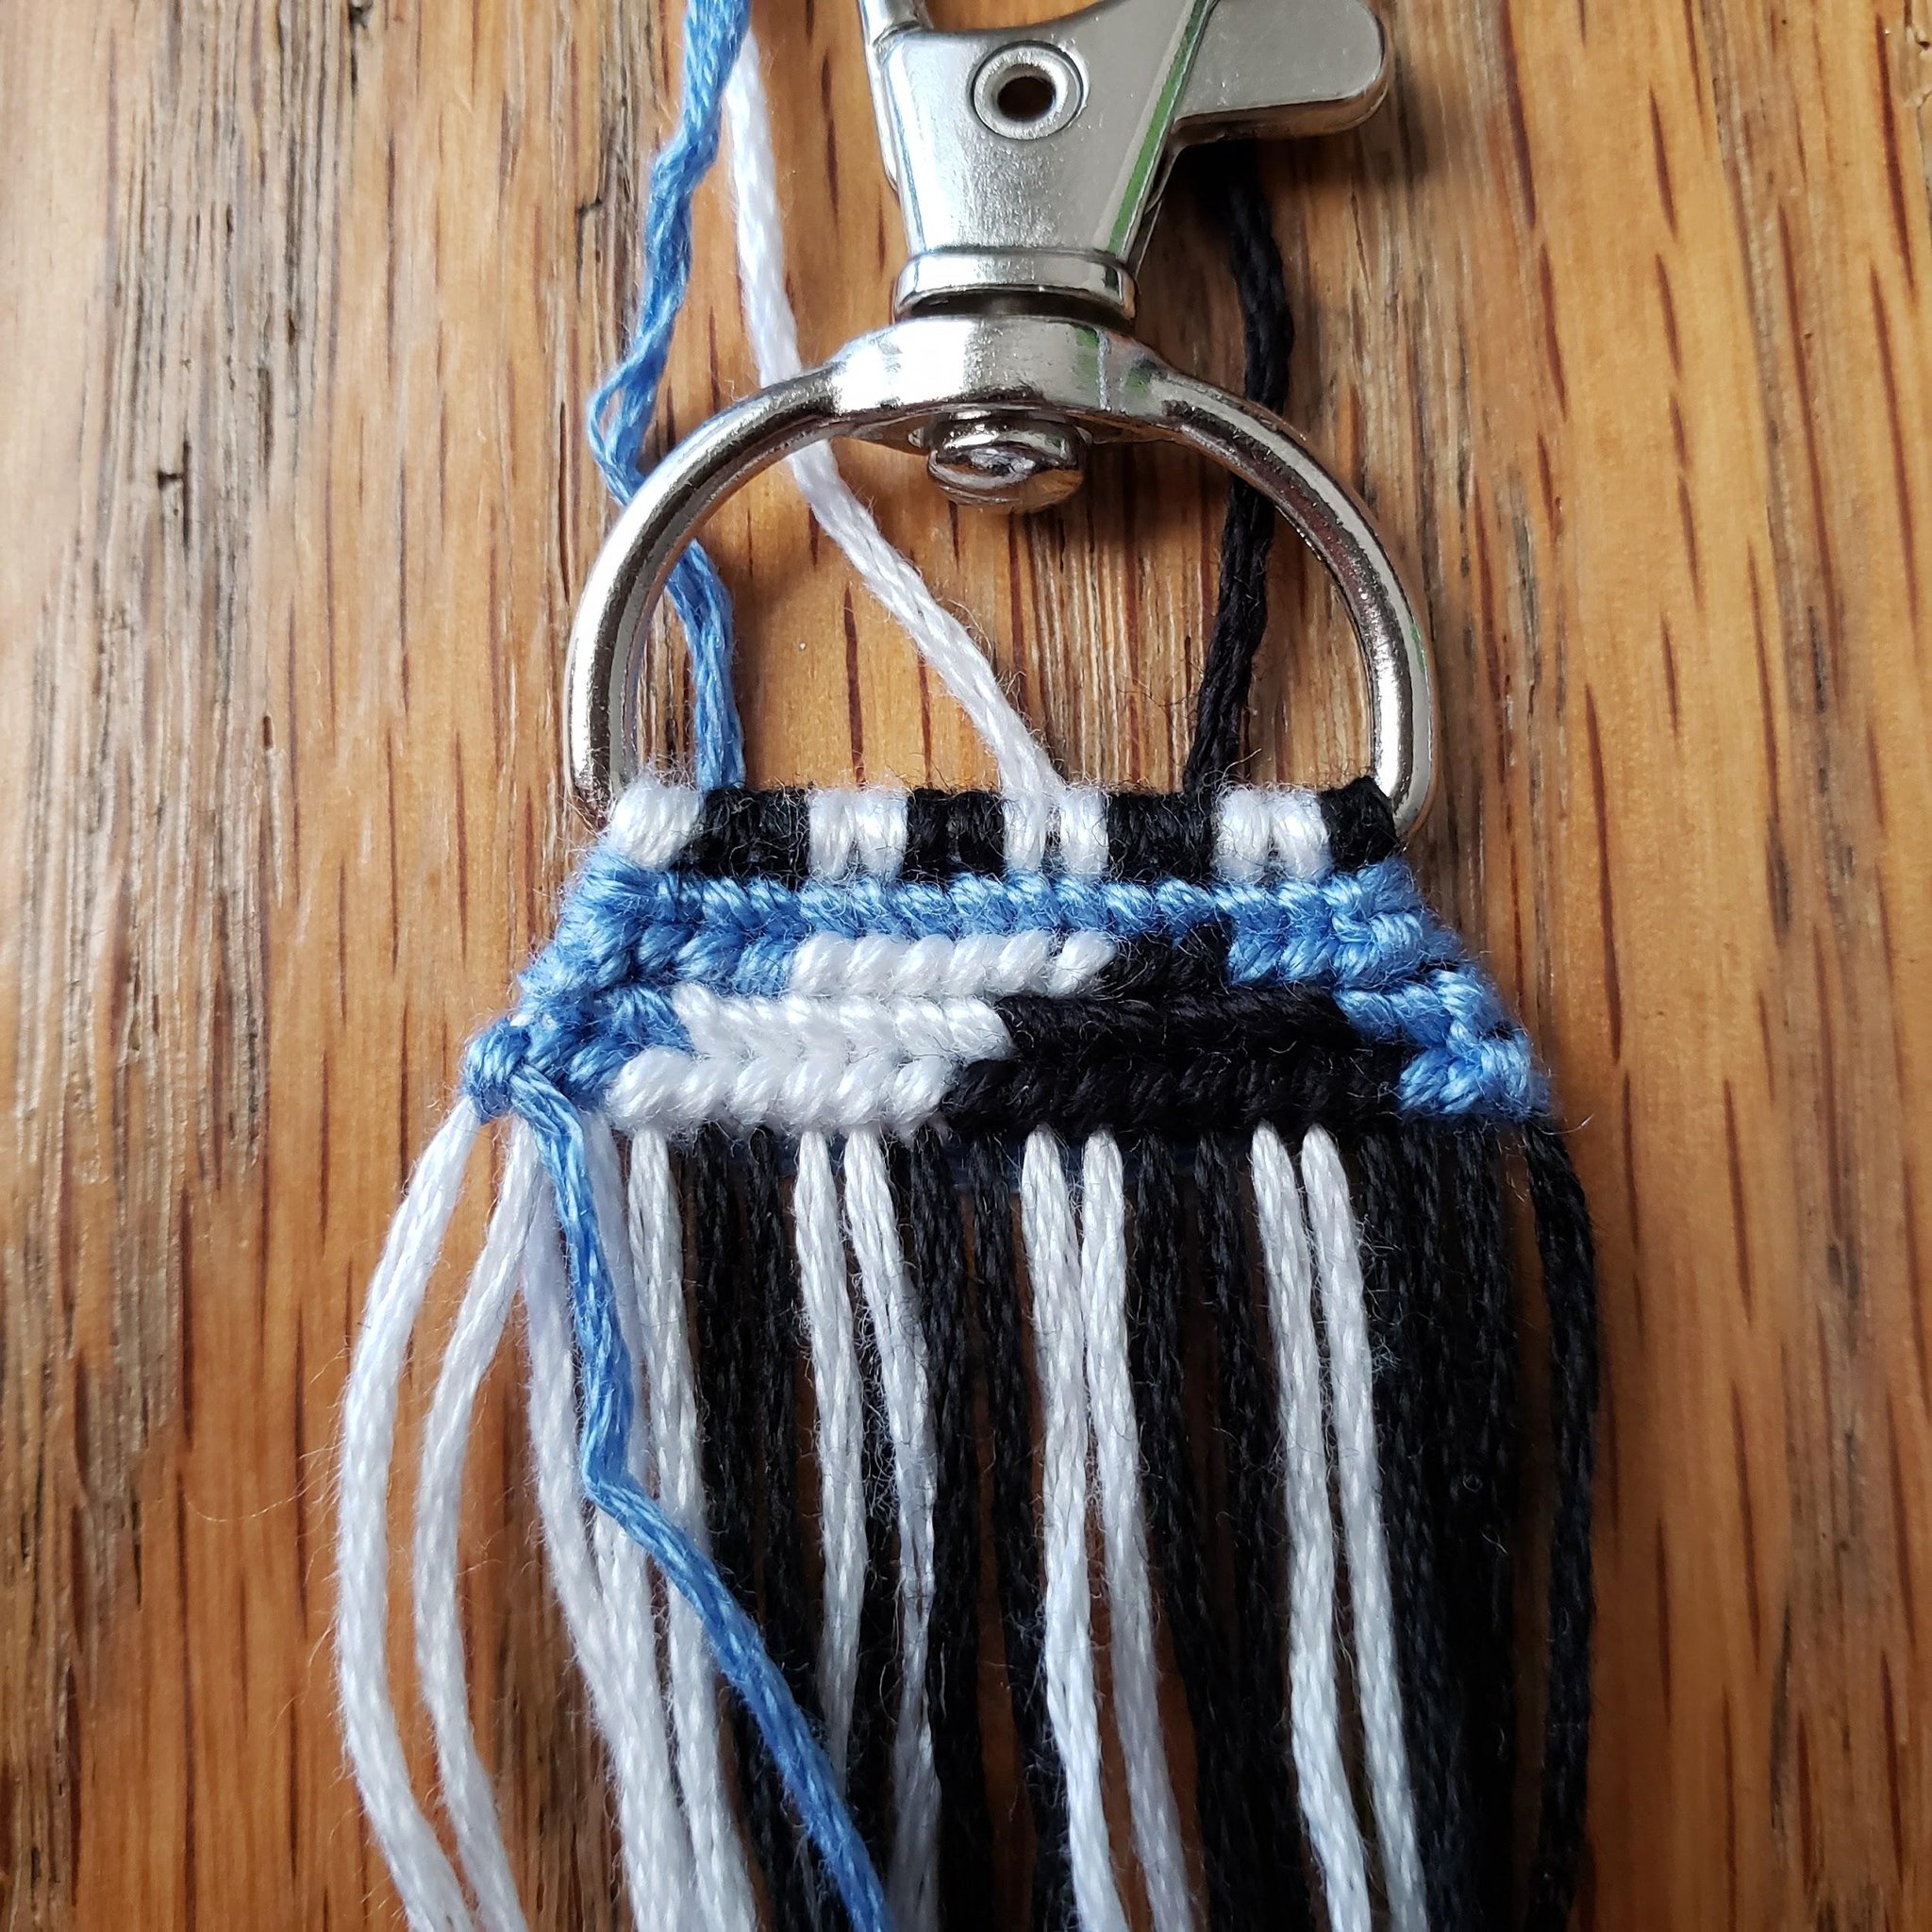
This next row will have 2 more knots than the previous row. To start this row, first pull 1 base thread to the left, away from the remaining base threads in the rightmost cluster. Make a knot onto the remaining threads in the cluster, then make another knot onto the thread you pulled out of the cluster. You should have 2 knots underneath the last knot of the previous row.
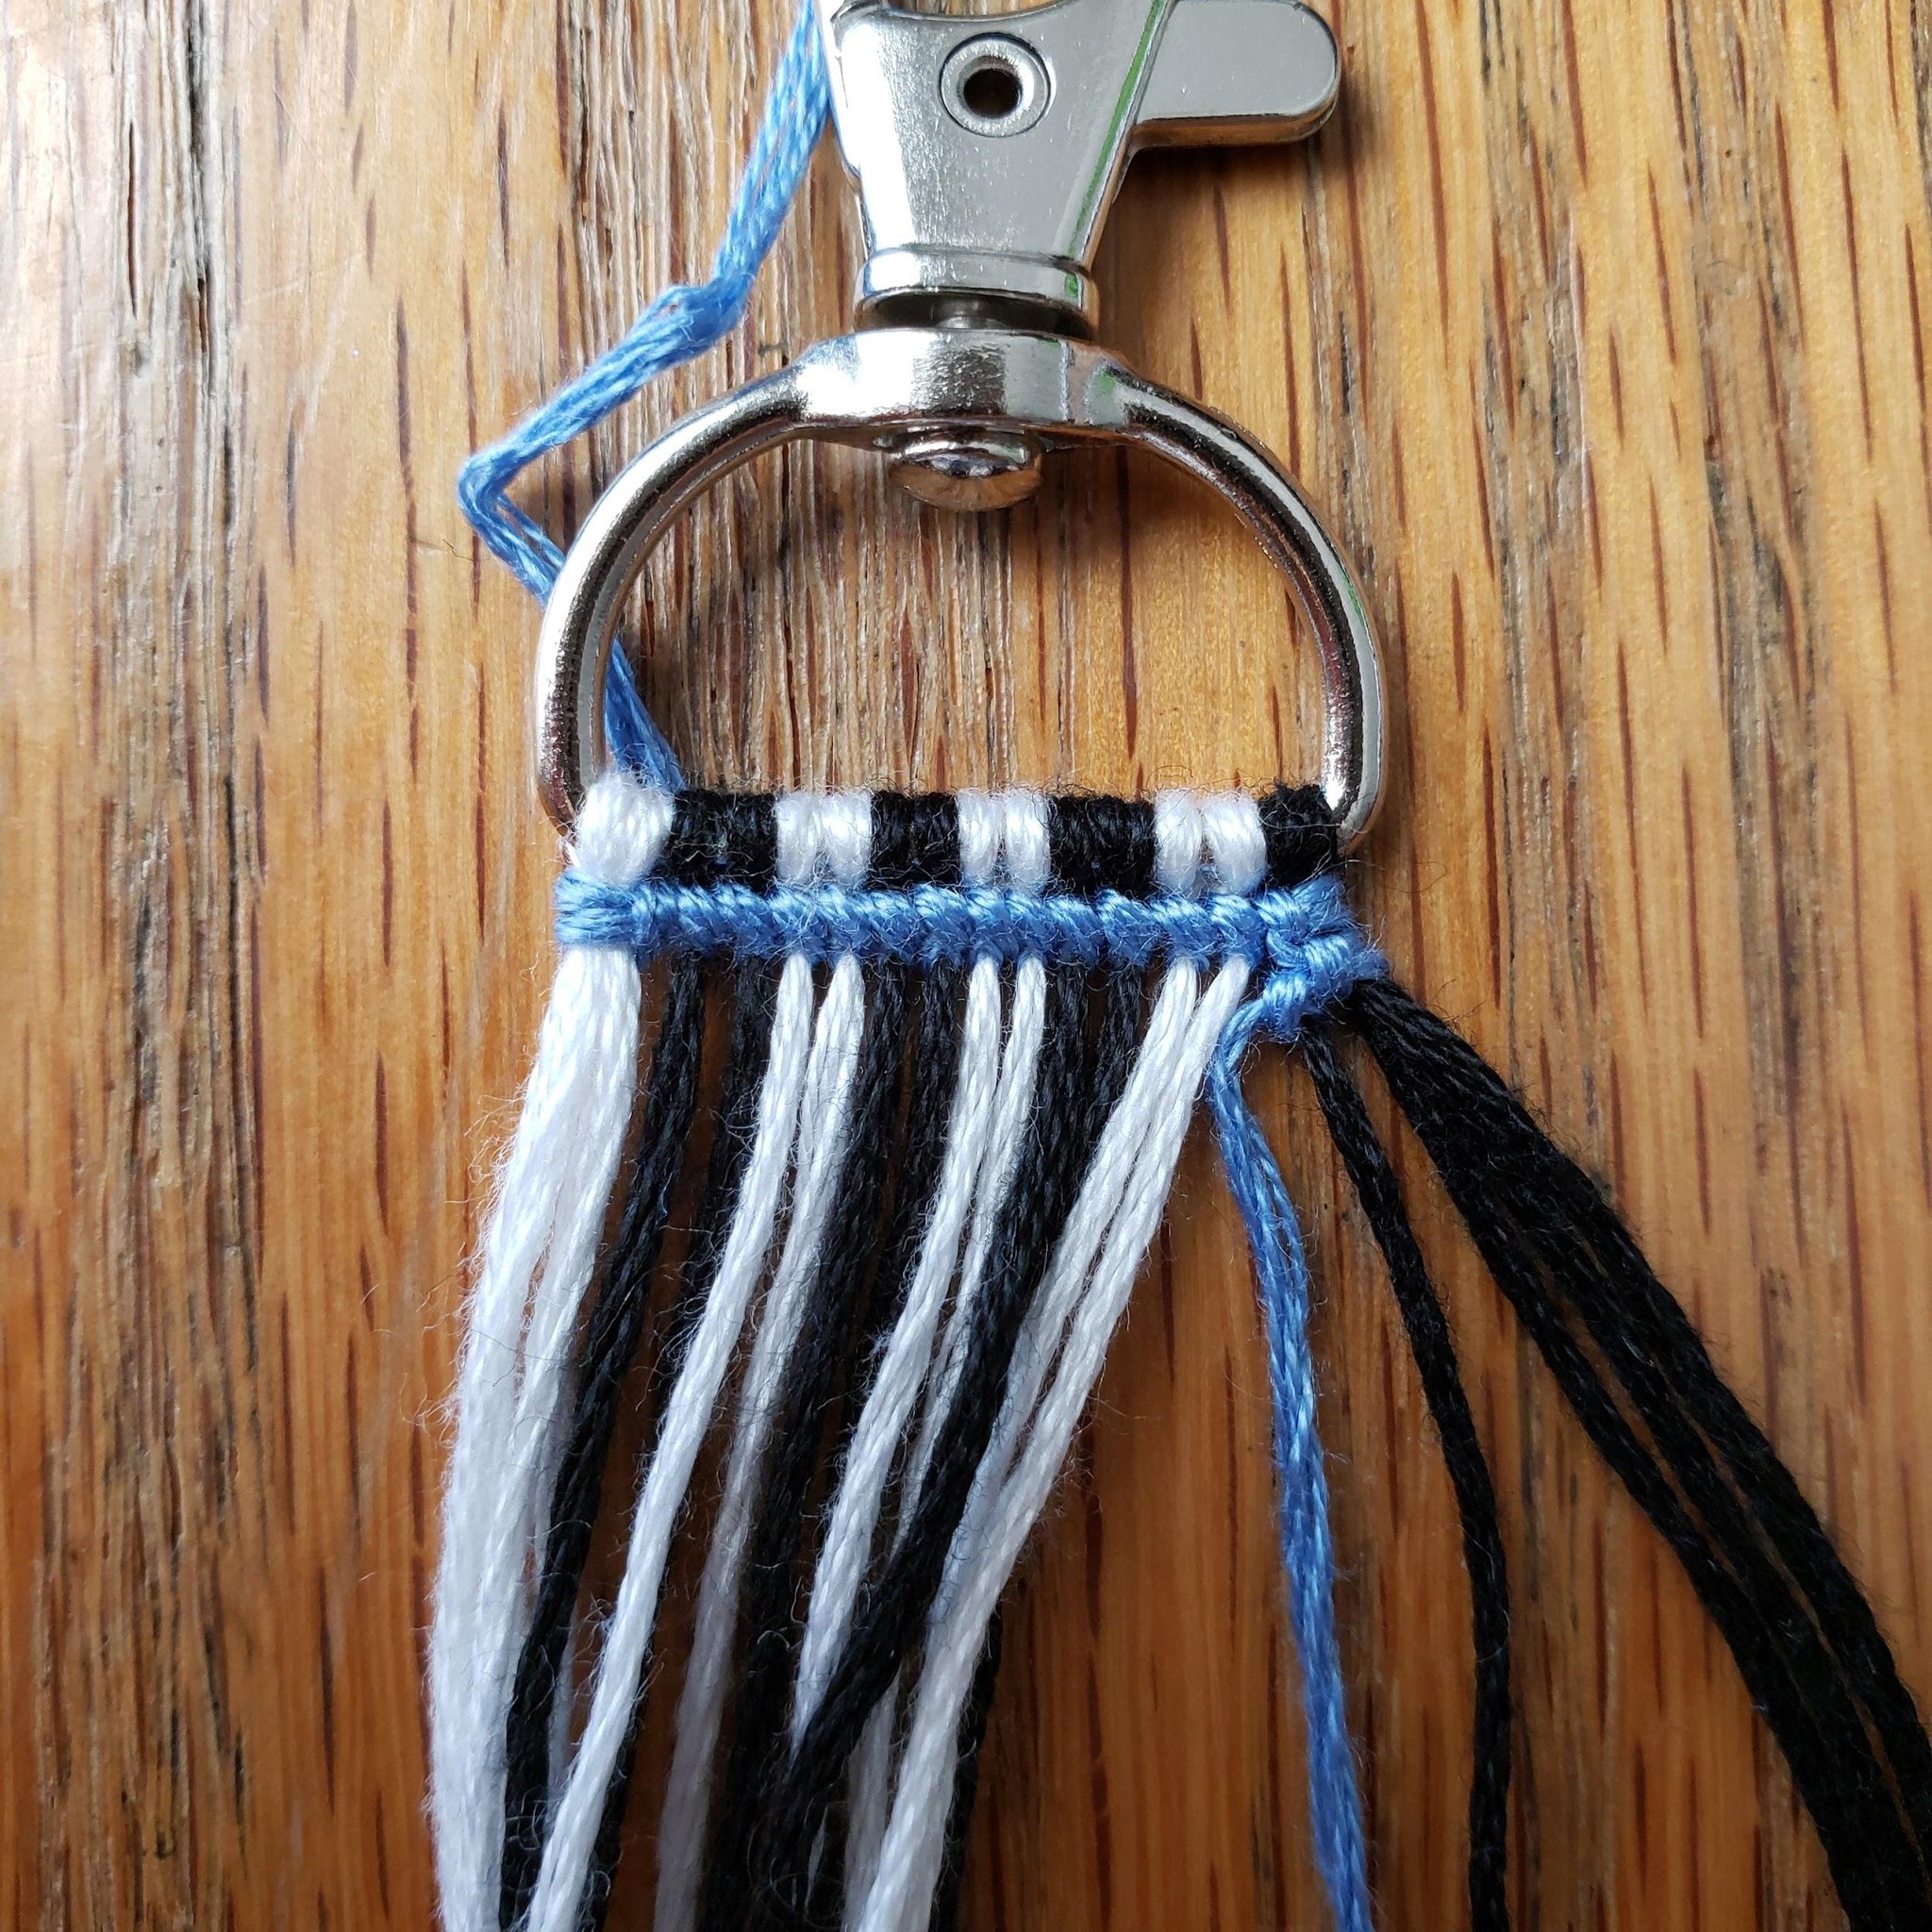
Knot onto the remaining single base threads in the row as you normally would. By this point, you should have the same amount of knots in your second row as you have in your first row.
Repeat the same process used to start the row, but reversed. Pull one thread from the leftmost cluster to the right, away from the remaining thread(s). Make 1 knot onto this thread, and make the final knot of the row onto the remaining leftmost thread(s). You should have 2 rows finished, the second row with 2 more knots than the first row. In my keychain, my first row has 14 knots and my second row has 16 knots.
Repeat this process of adding 2 knots per row until you are only knotting onto 1 base thread on each edge.
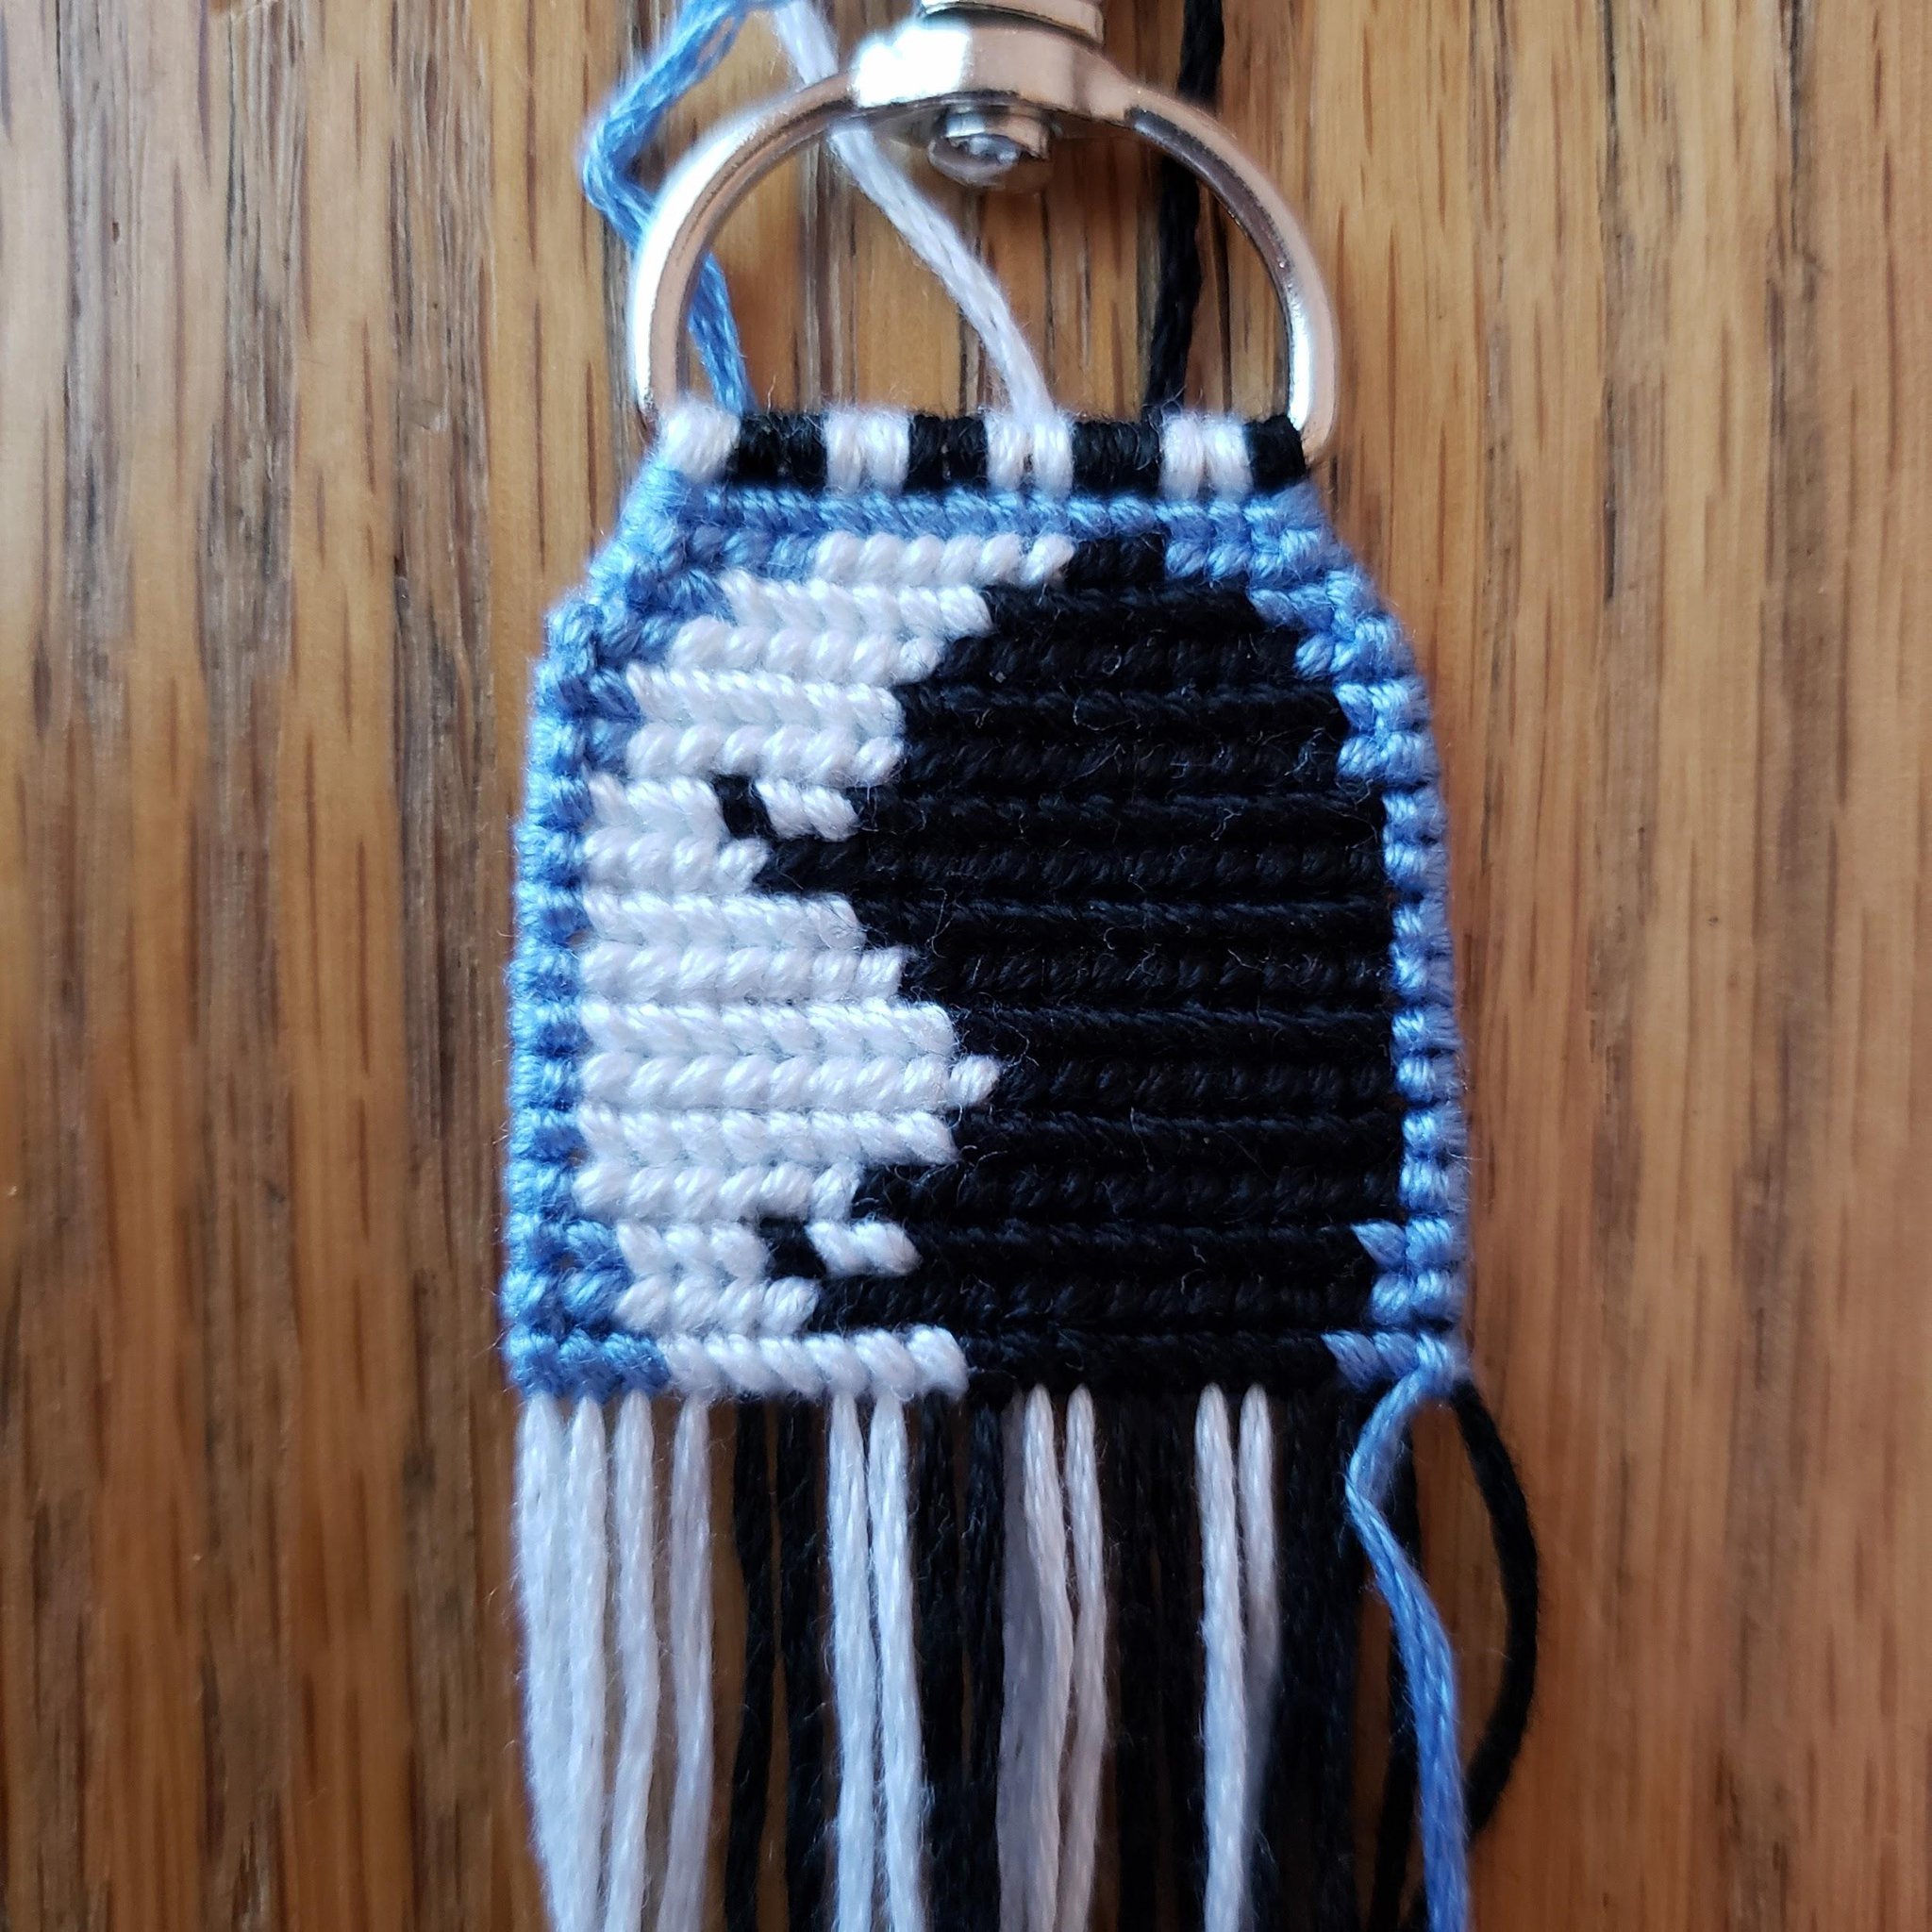
Knot your next couple of rows normally, until you reach the row where you want to start making your keychain less wide.
Begin the row by making your first knot onto the first 2 base threads of the row.
Make the rest of the knots in the row how you normally would, until you reach the last 2 base threads of the row. Make 1 knot onto both of these last 2 threads. This row should have 2 less knots than the previous row.

Repeat this process as many rows as needed until you have completed all the rows in your keychain.
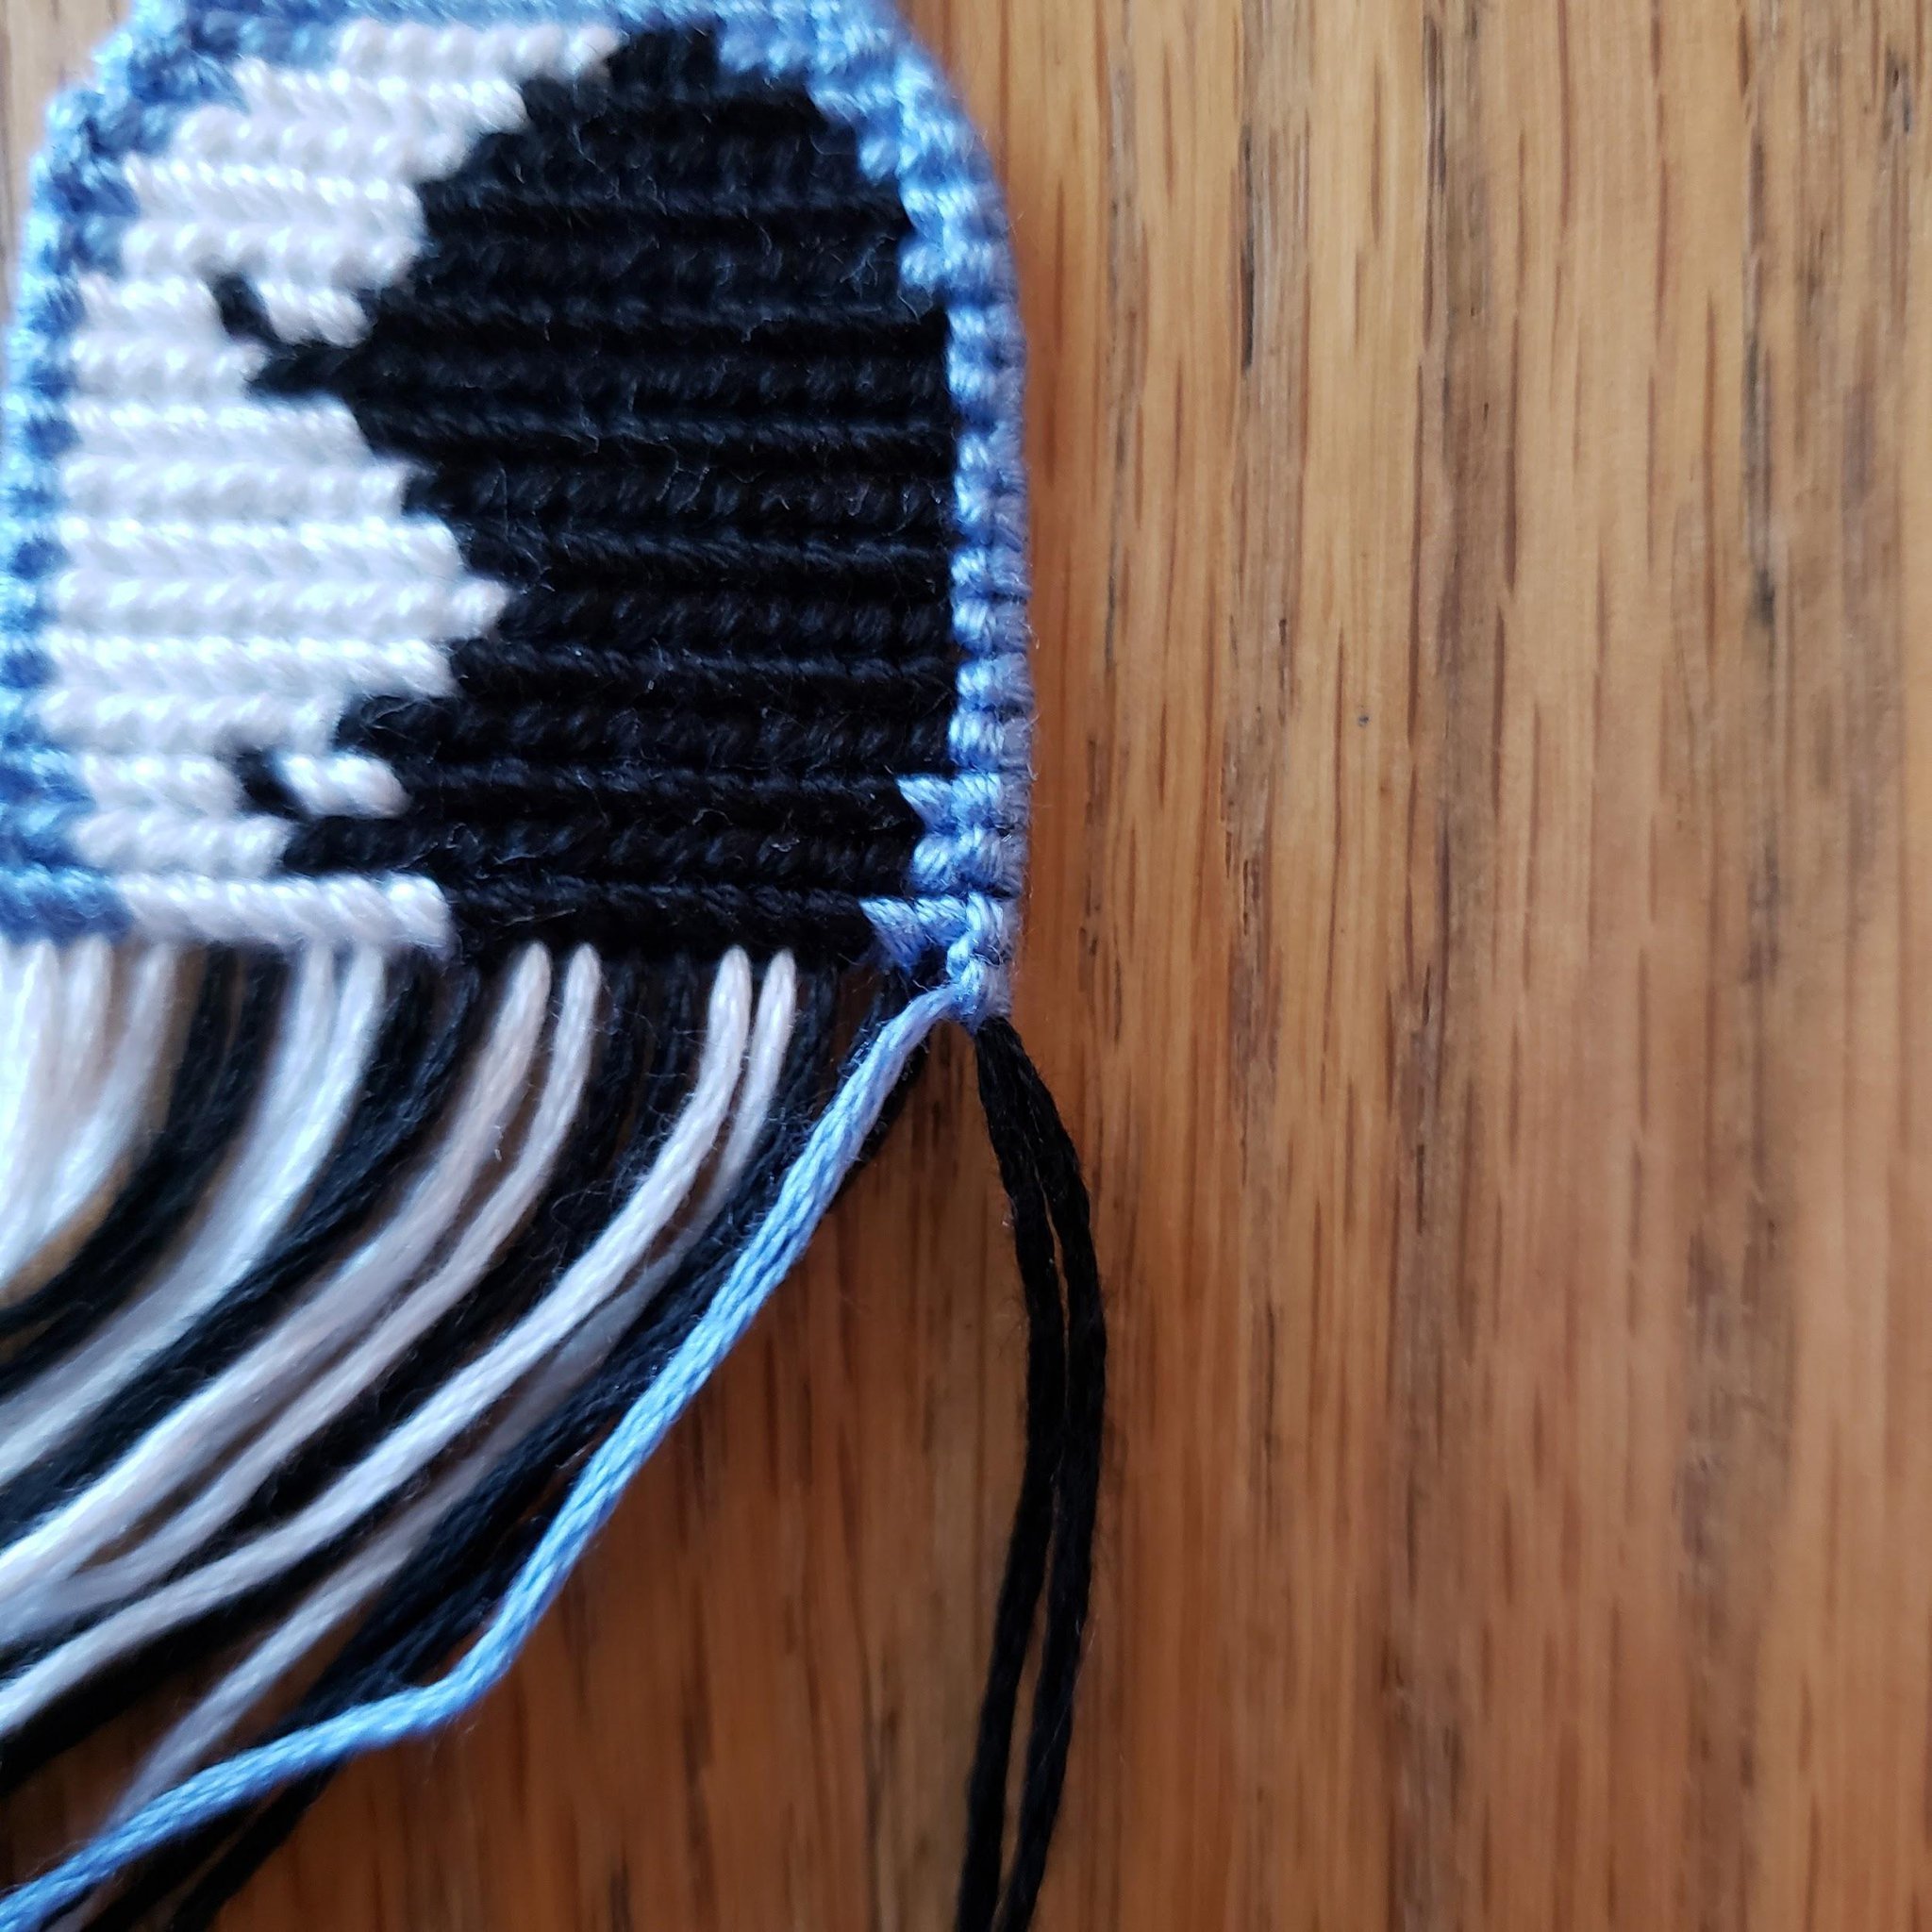
Make a backward knot (crossing the knotting thread under the base threads instead of over) onto your rightmost base thread cluster.

Crossing the knotting thread under the base threads instead of over causes the resulting knot to look smooth, instead of having a bump like a regular knot.
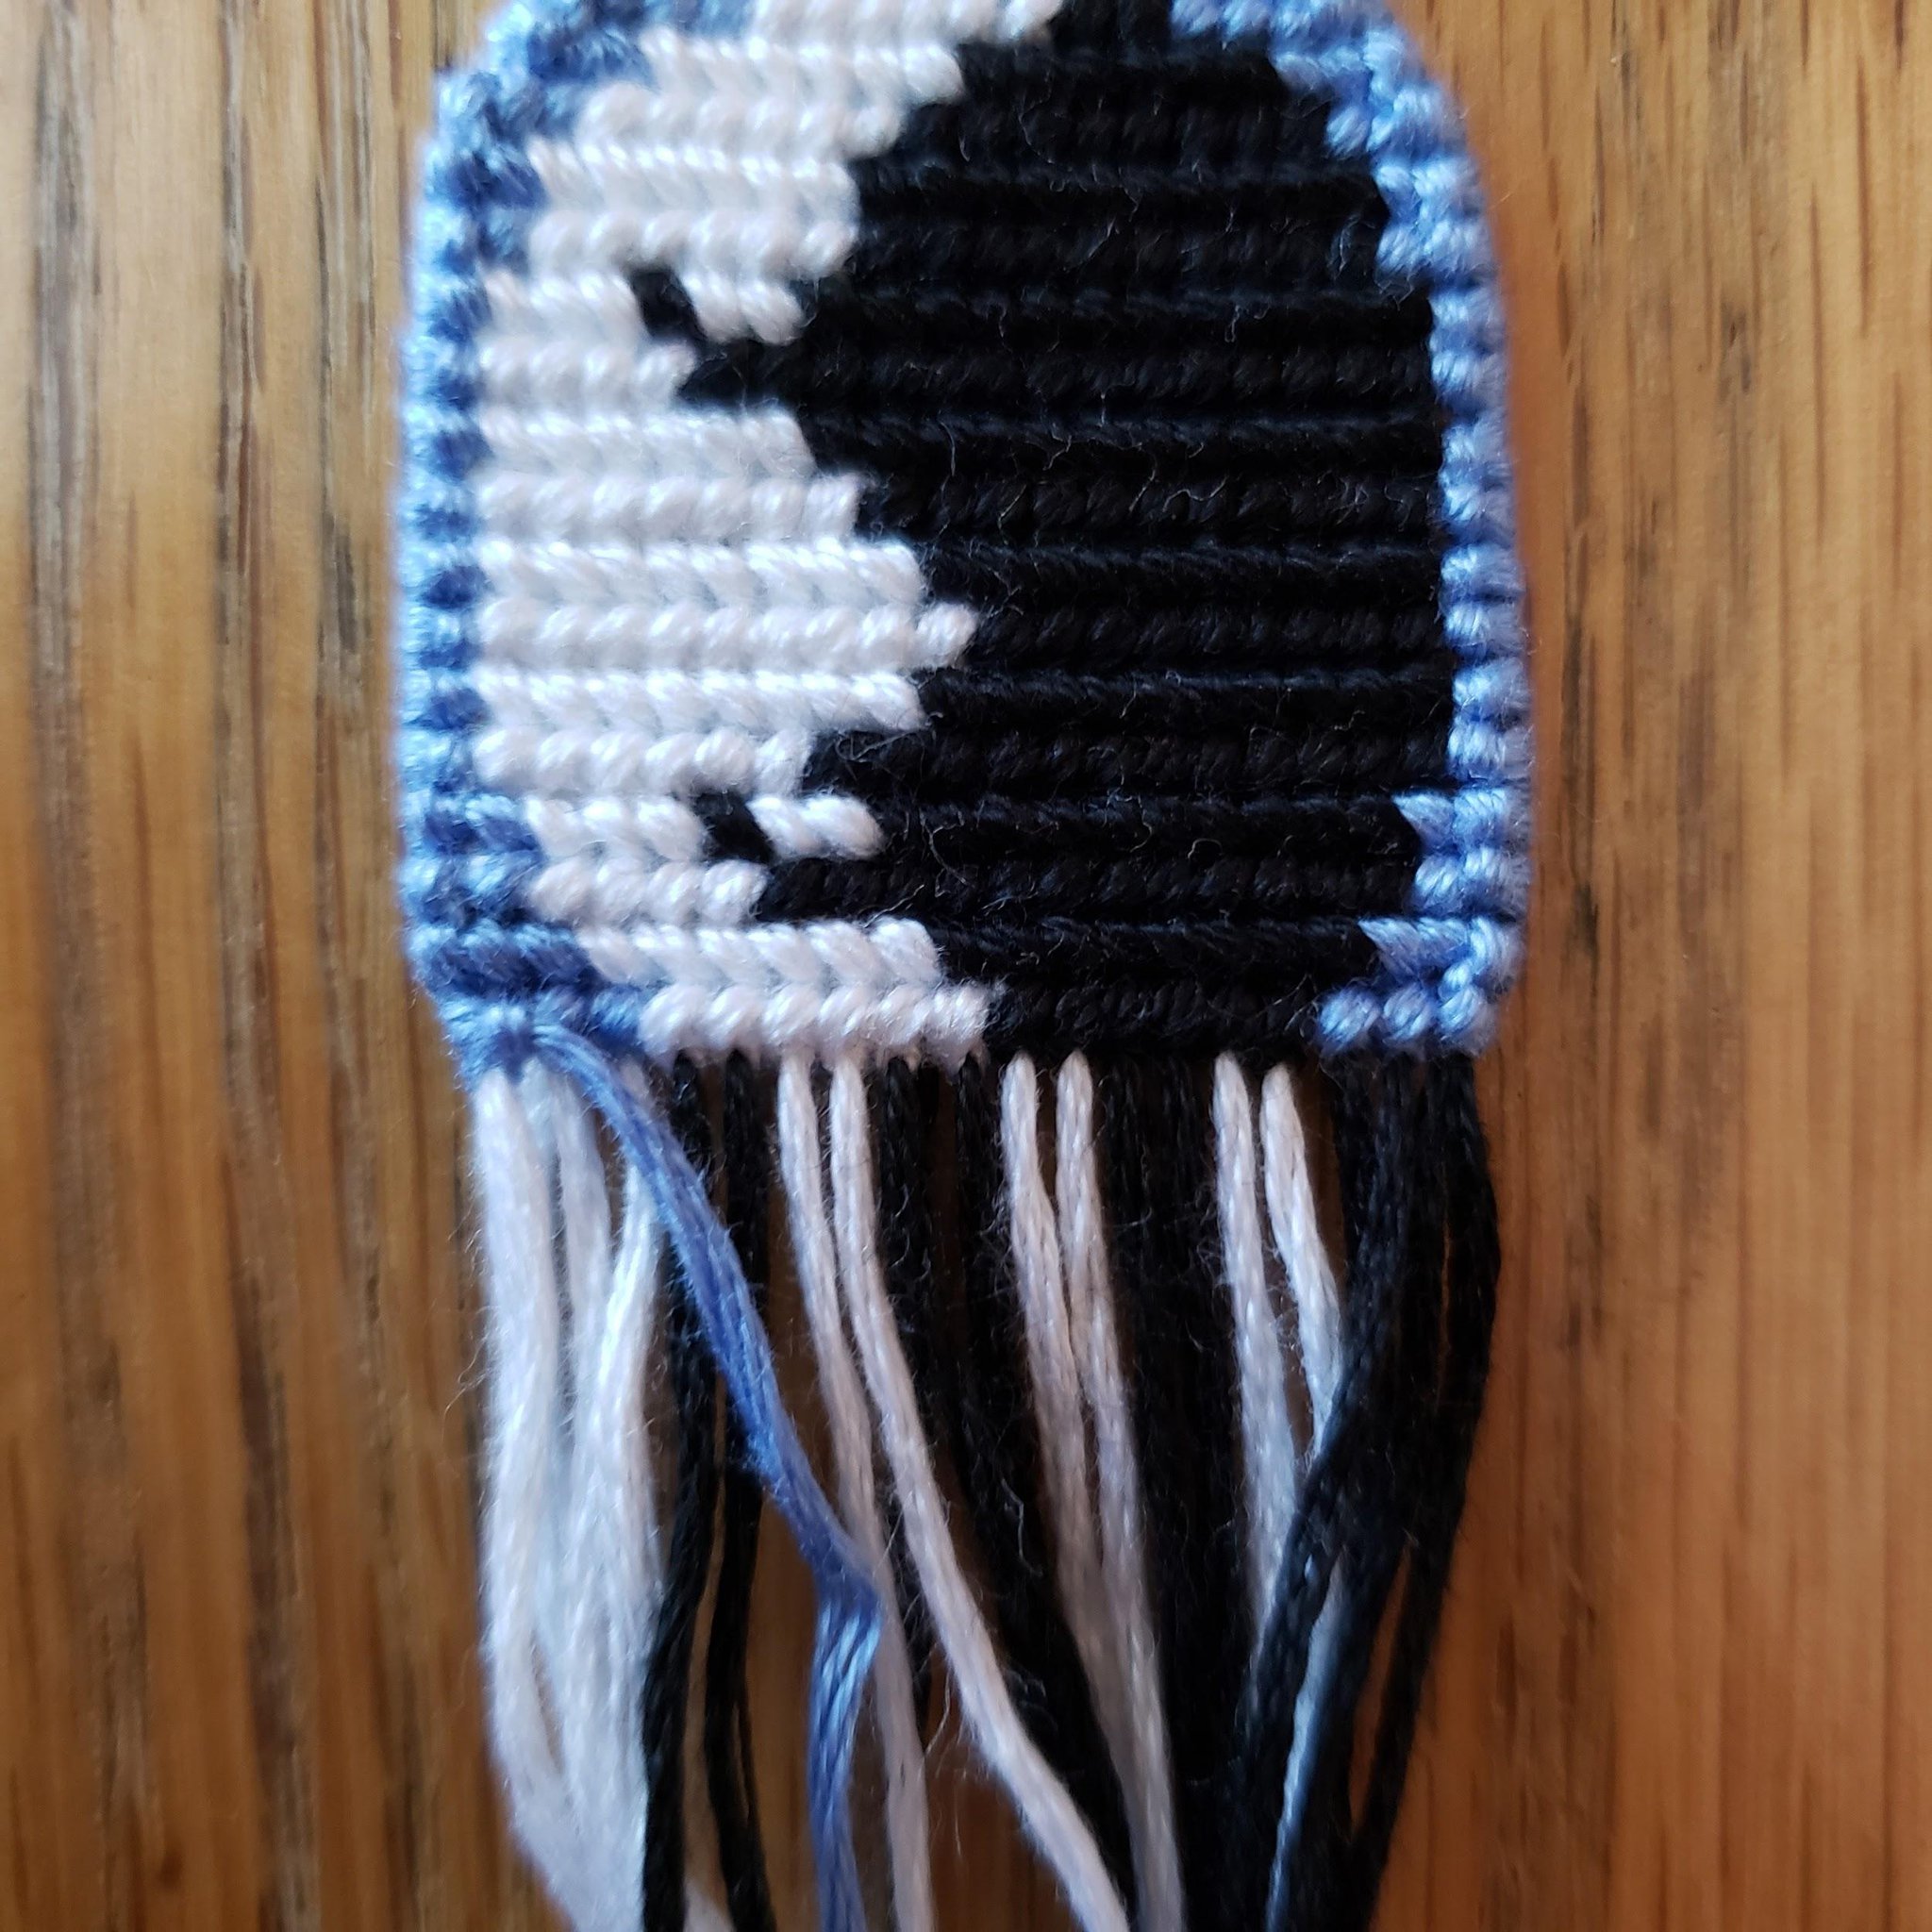
Repeat this process with the remaining threads on the right. Each knot should be onto the previous knotting thread as well as the other threads previously knotted onto. This means that each new knot should be onto 1 more thread than the previous one. I like to leave some threads lose in the center, so for my keychain I knotted 8 threads together on the right, 8 together on the left, and left 4 loose in the center.
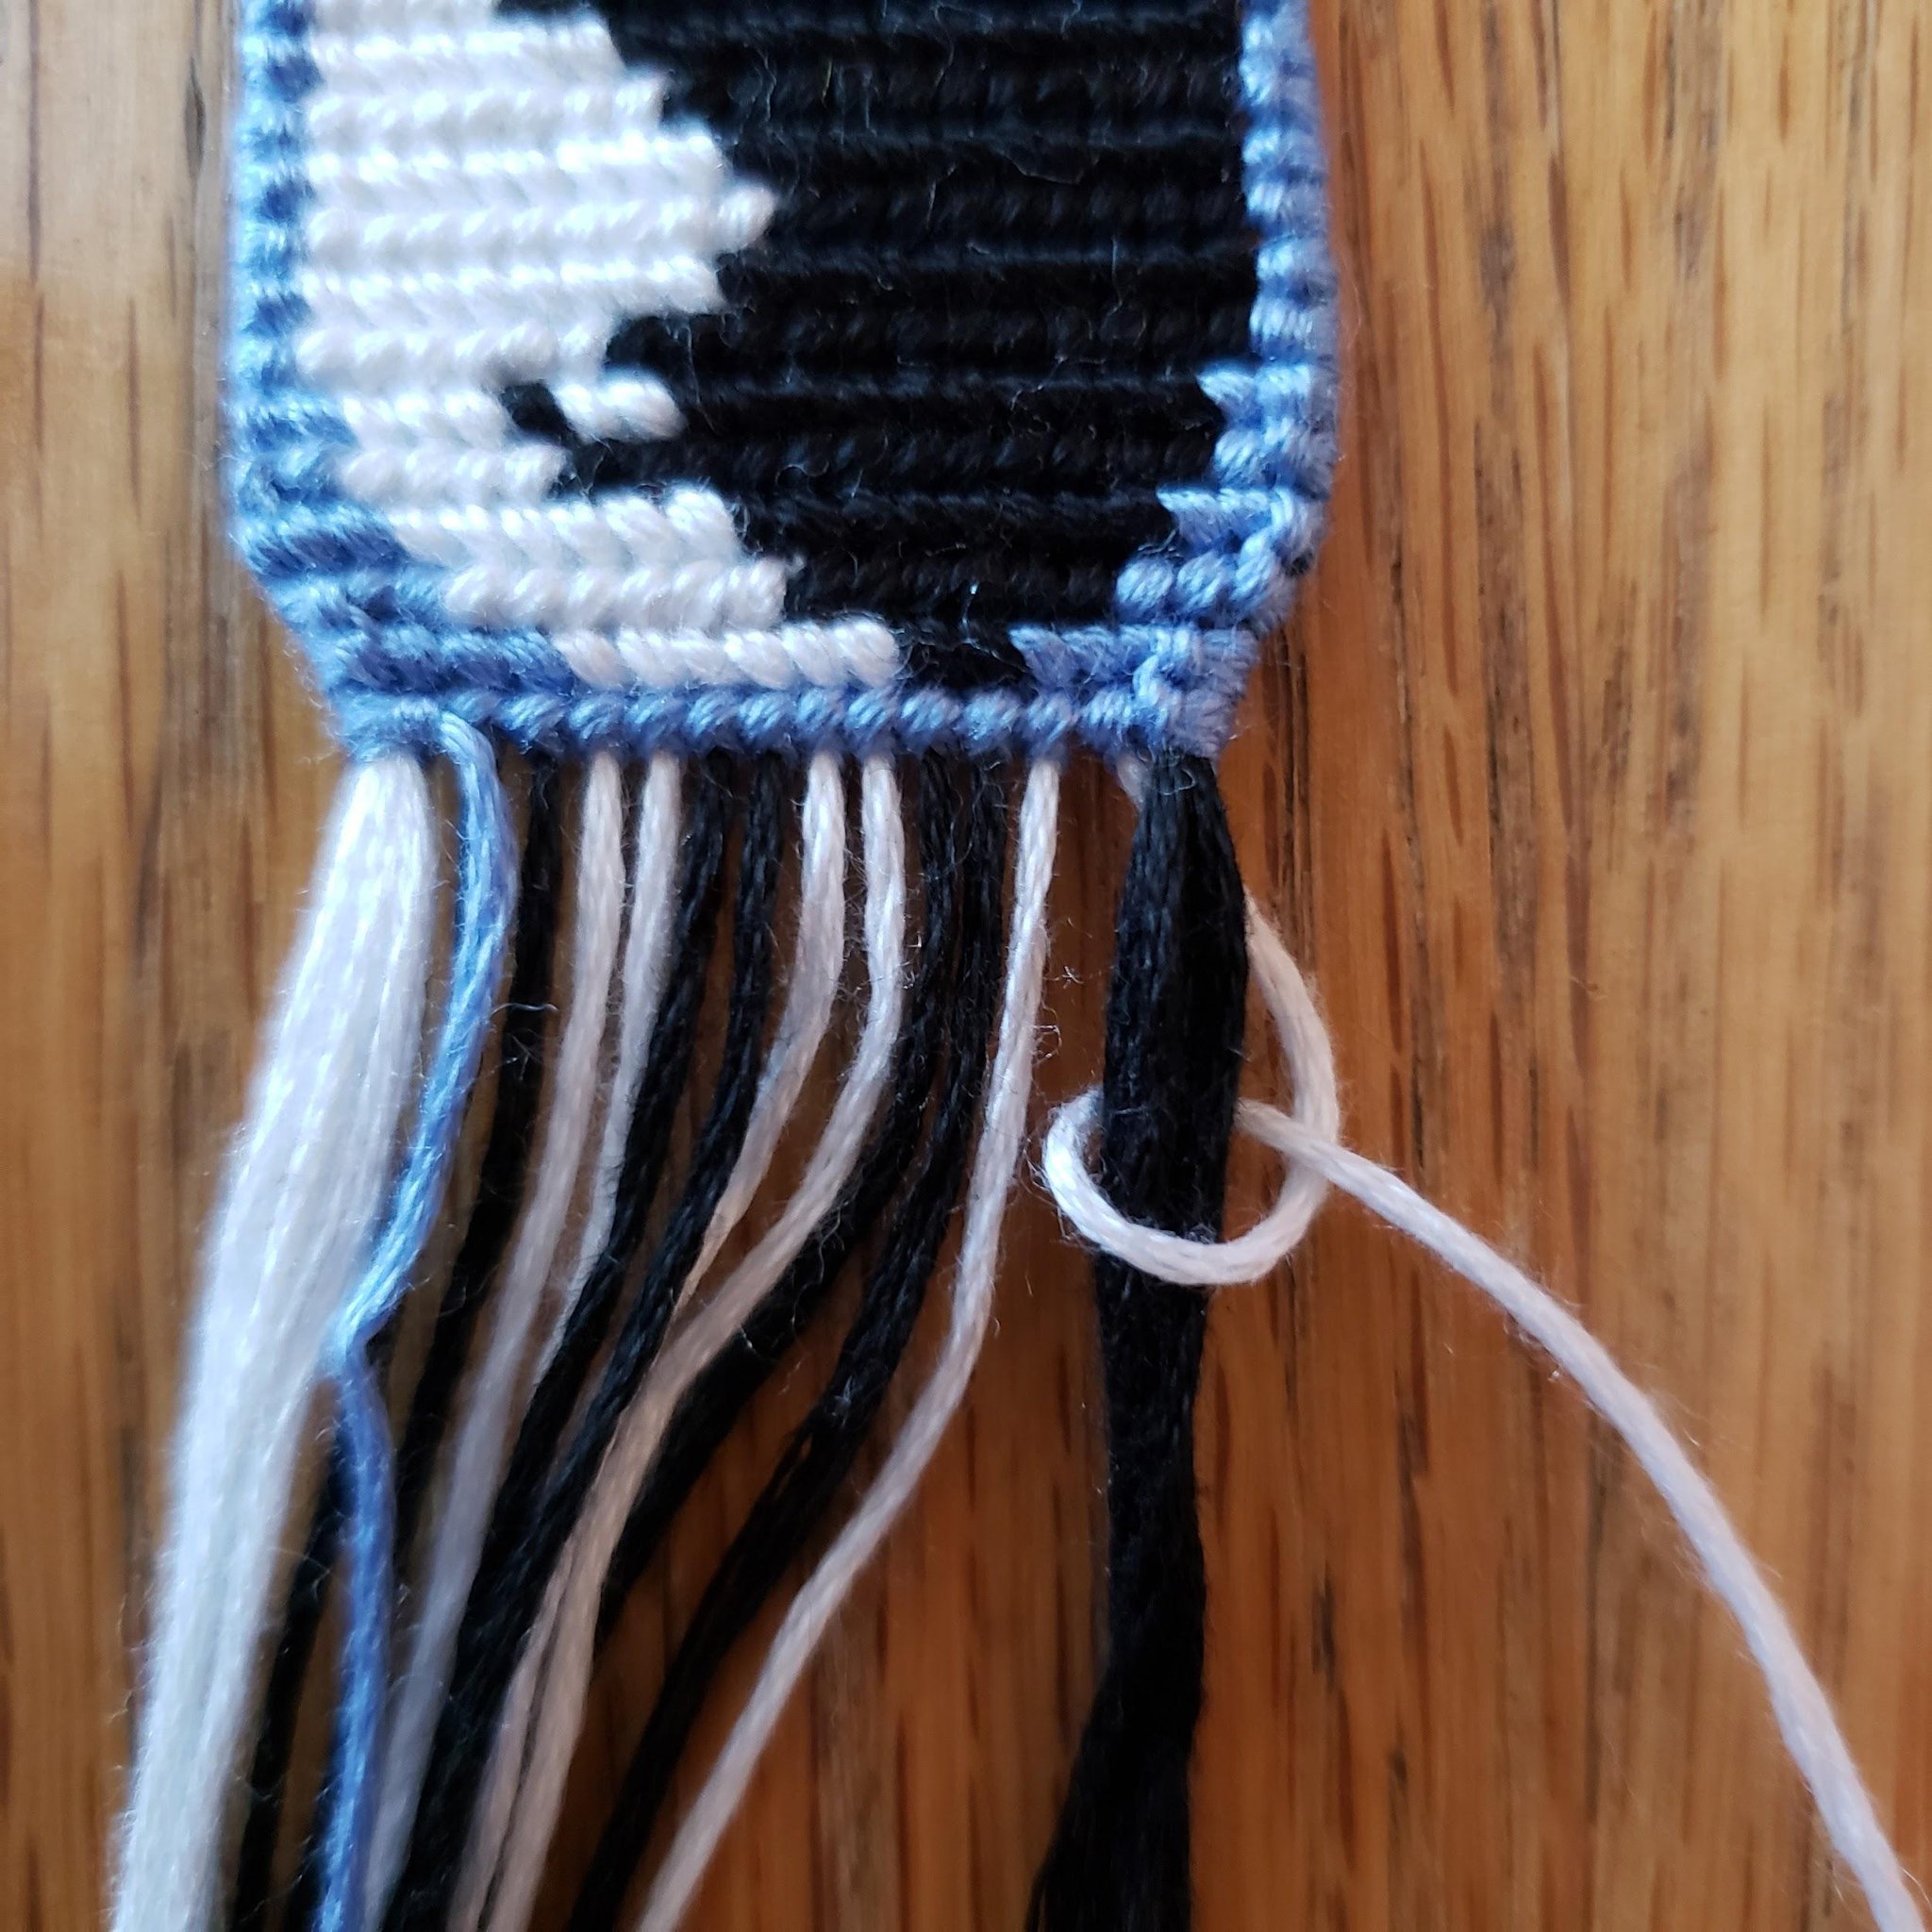
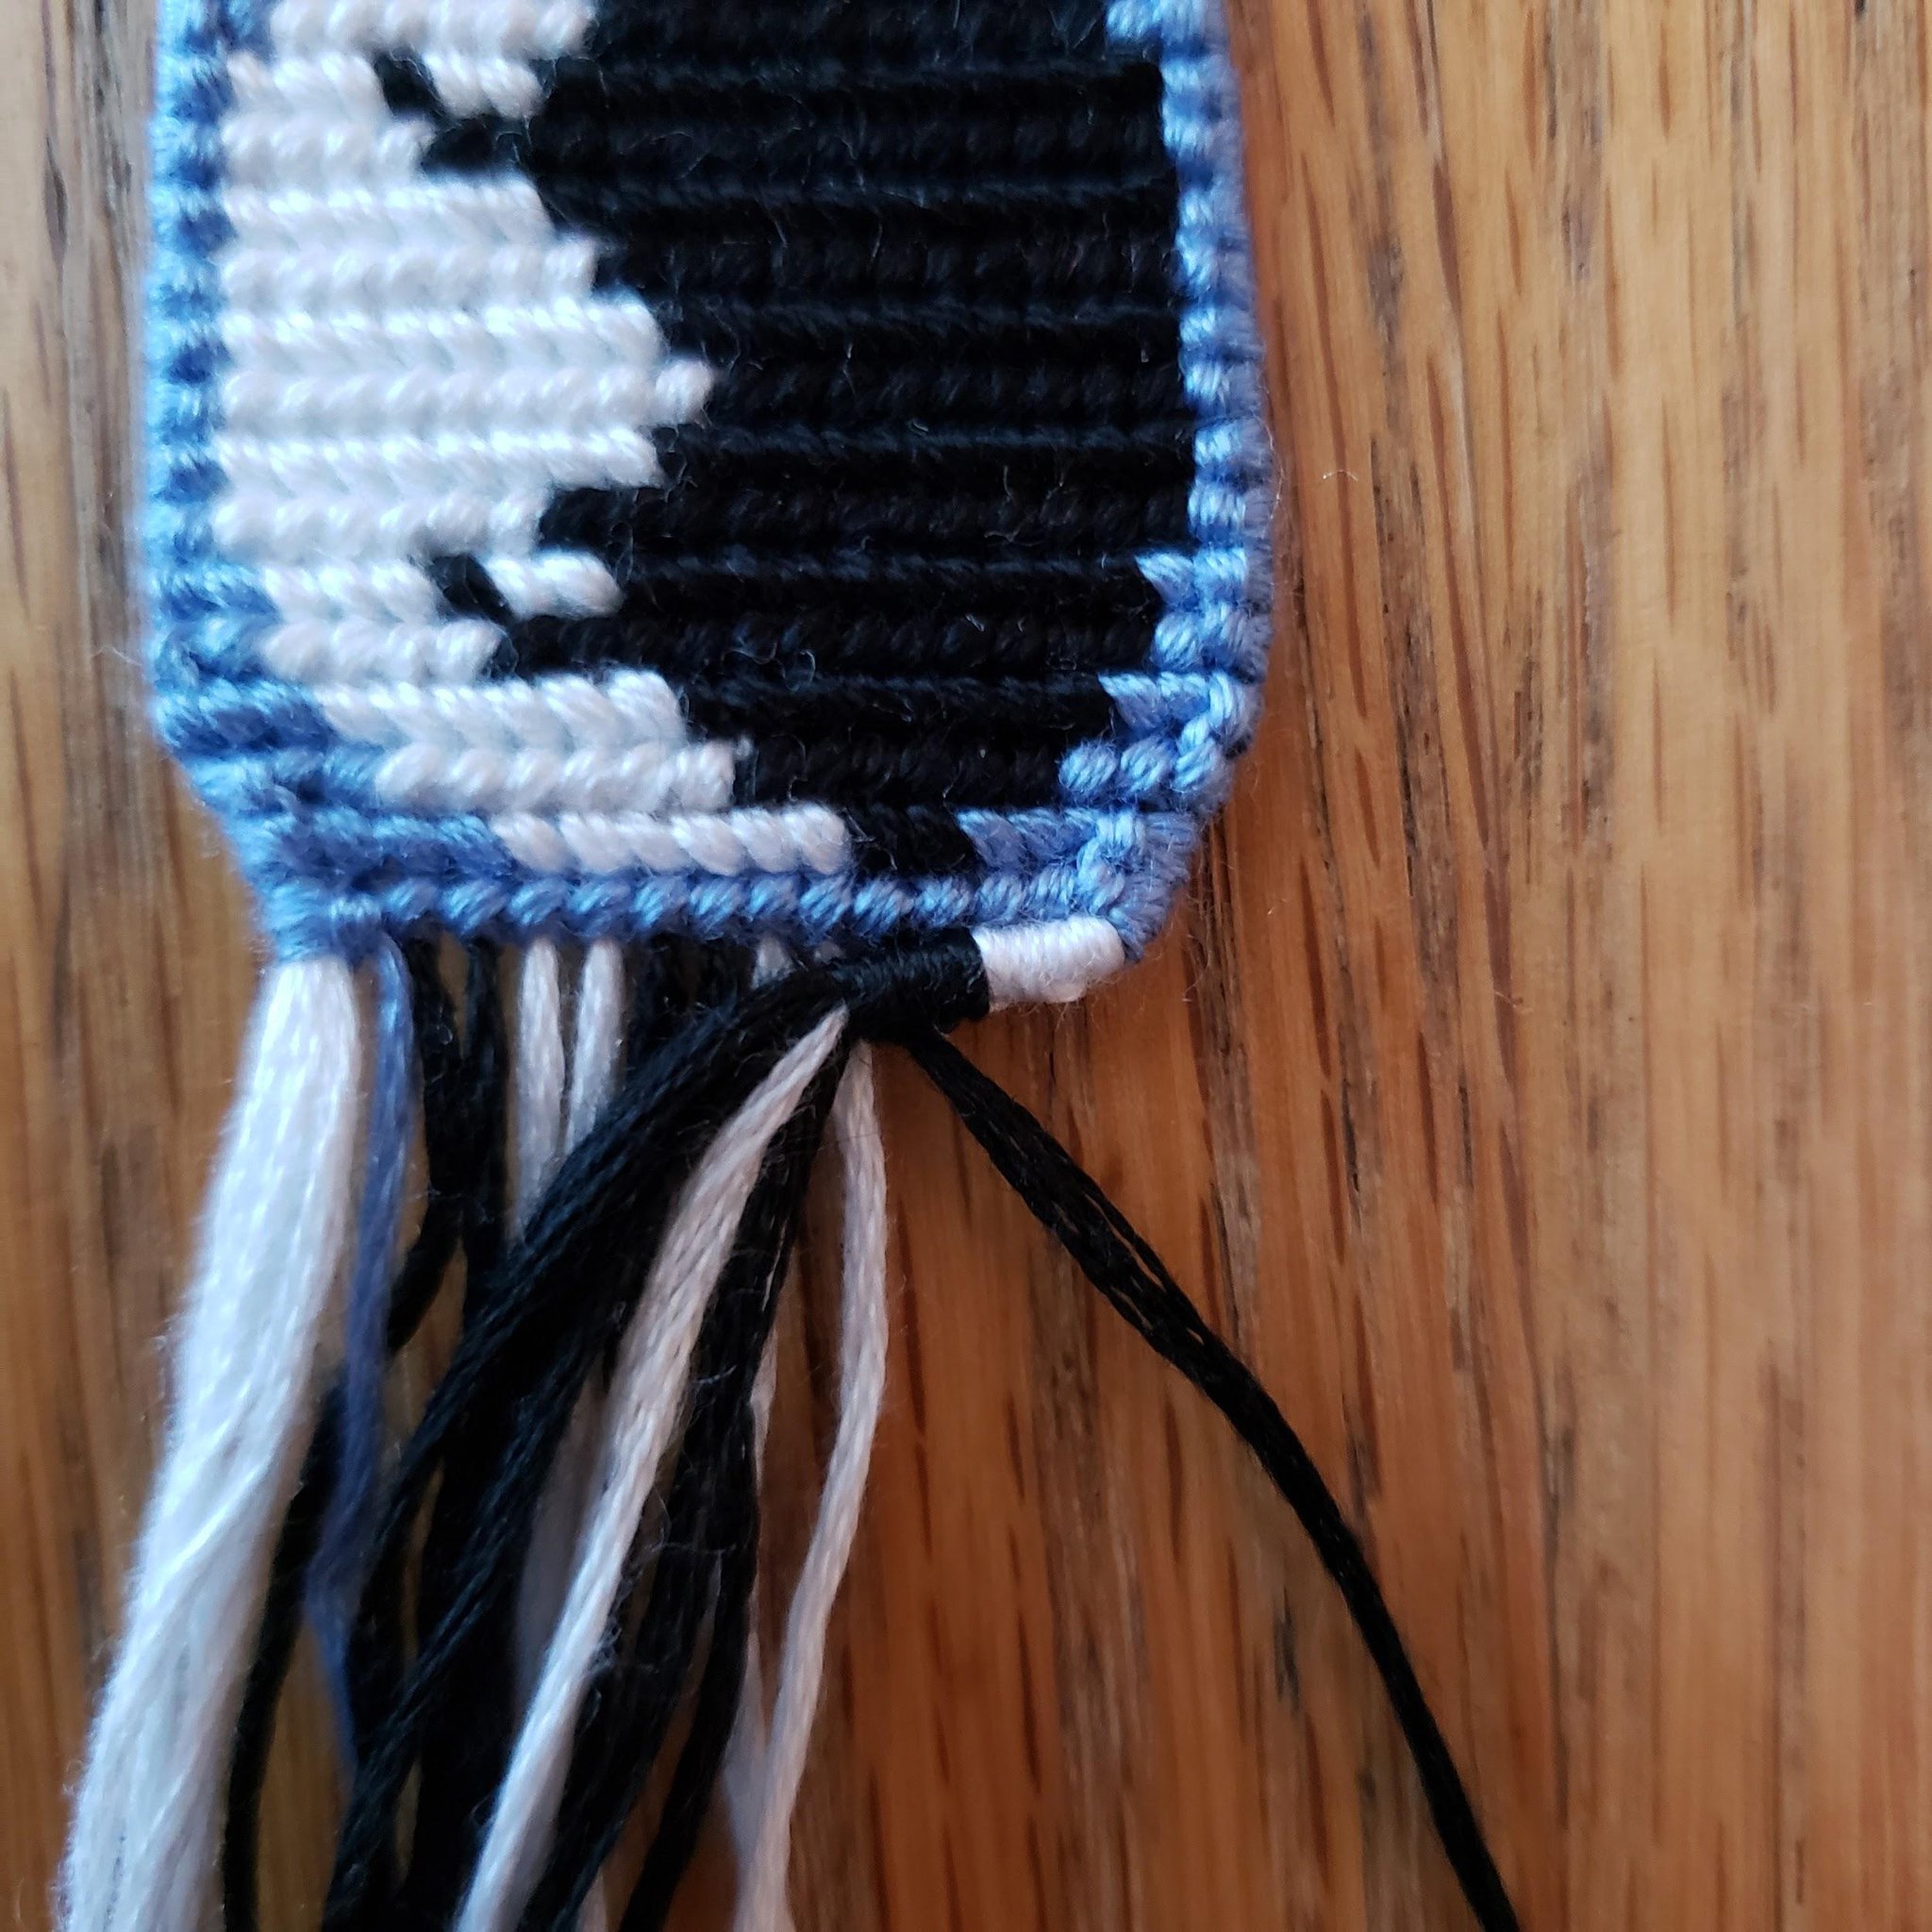
Repeat this process reversed on the left side of the keychain, making forward knots on this side (still making sure to cross your knotting thread under the base threads instead of over).
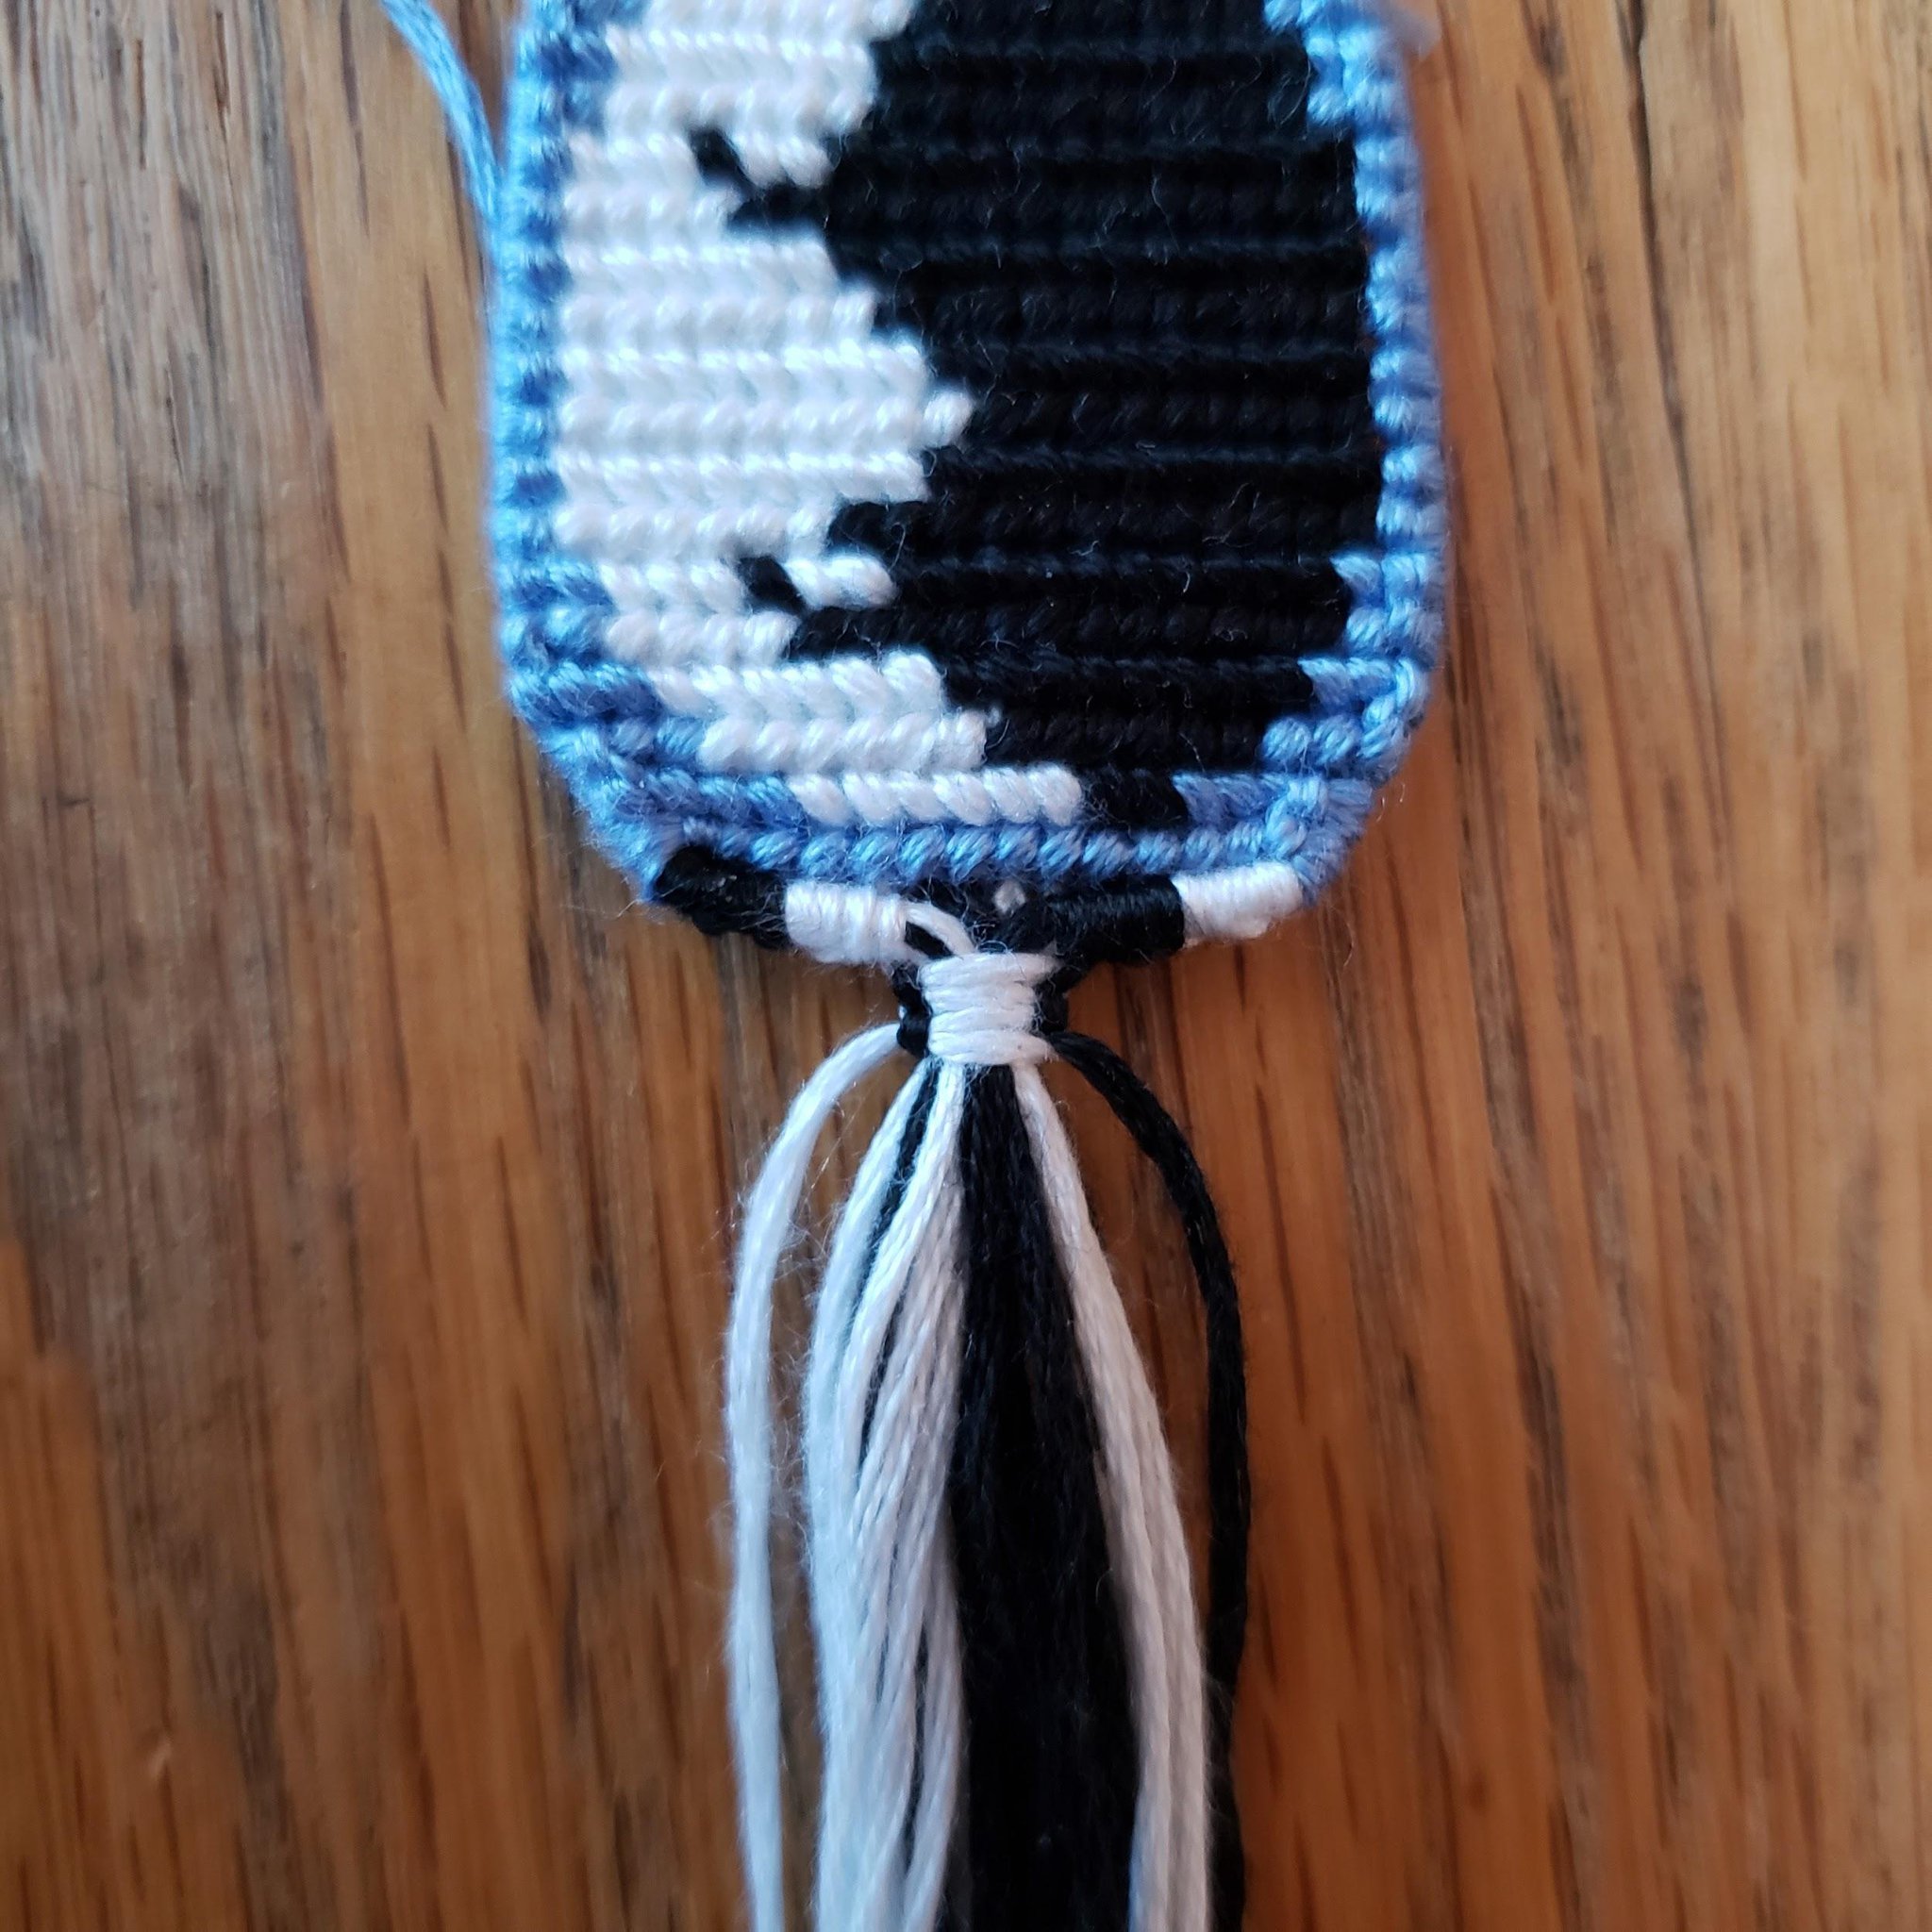
Use 2 threads to make 2 square knots over the remaining threads in the keychain. Trim your threads and finish your keychain how you normally would.
Odd Number of Base Threads
Tie on your lark’s head knots and add your leftmost loop-over thread(s) as normal.

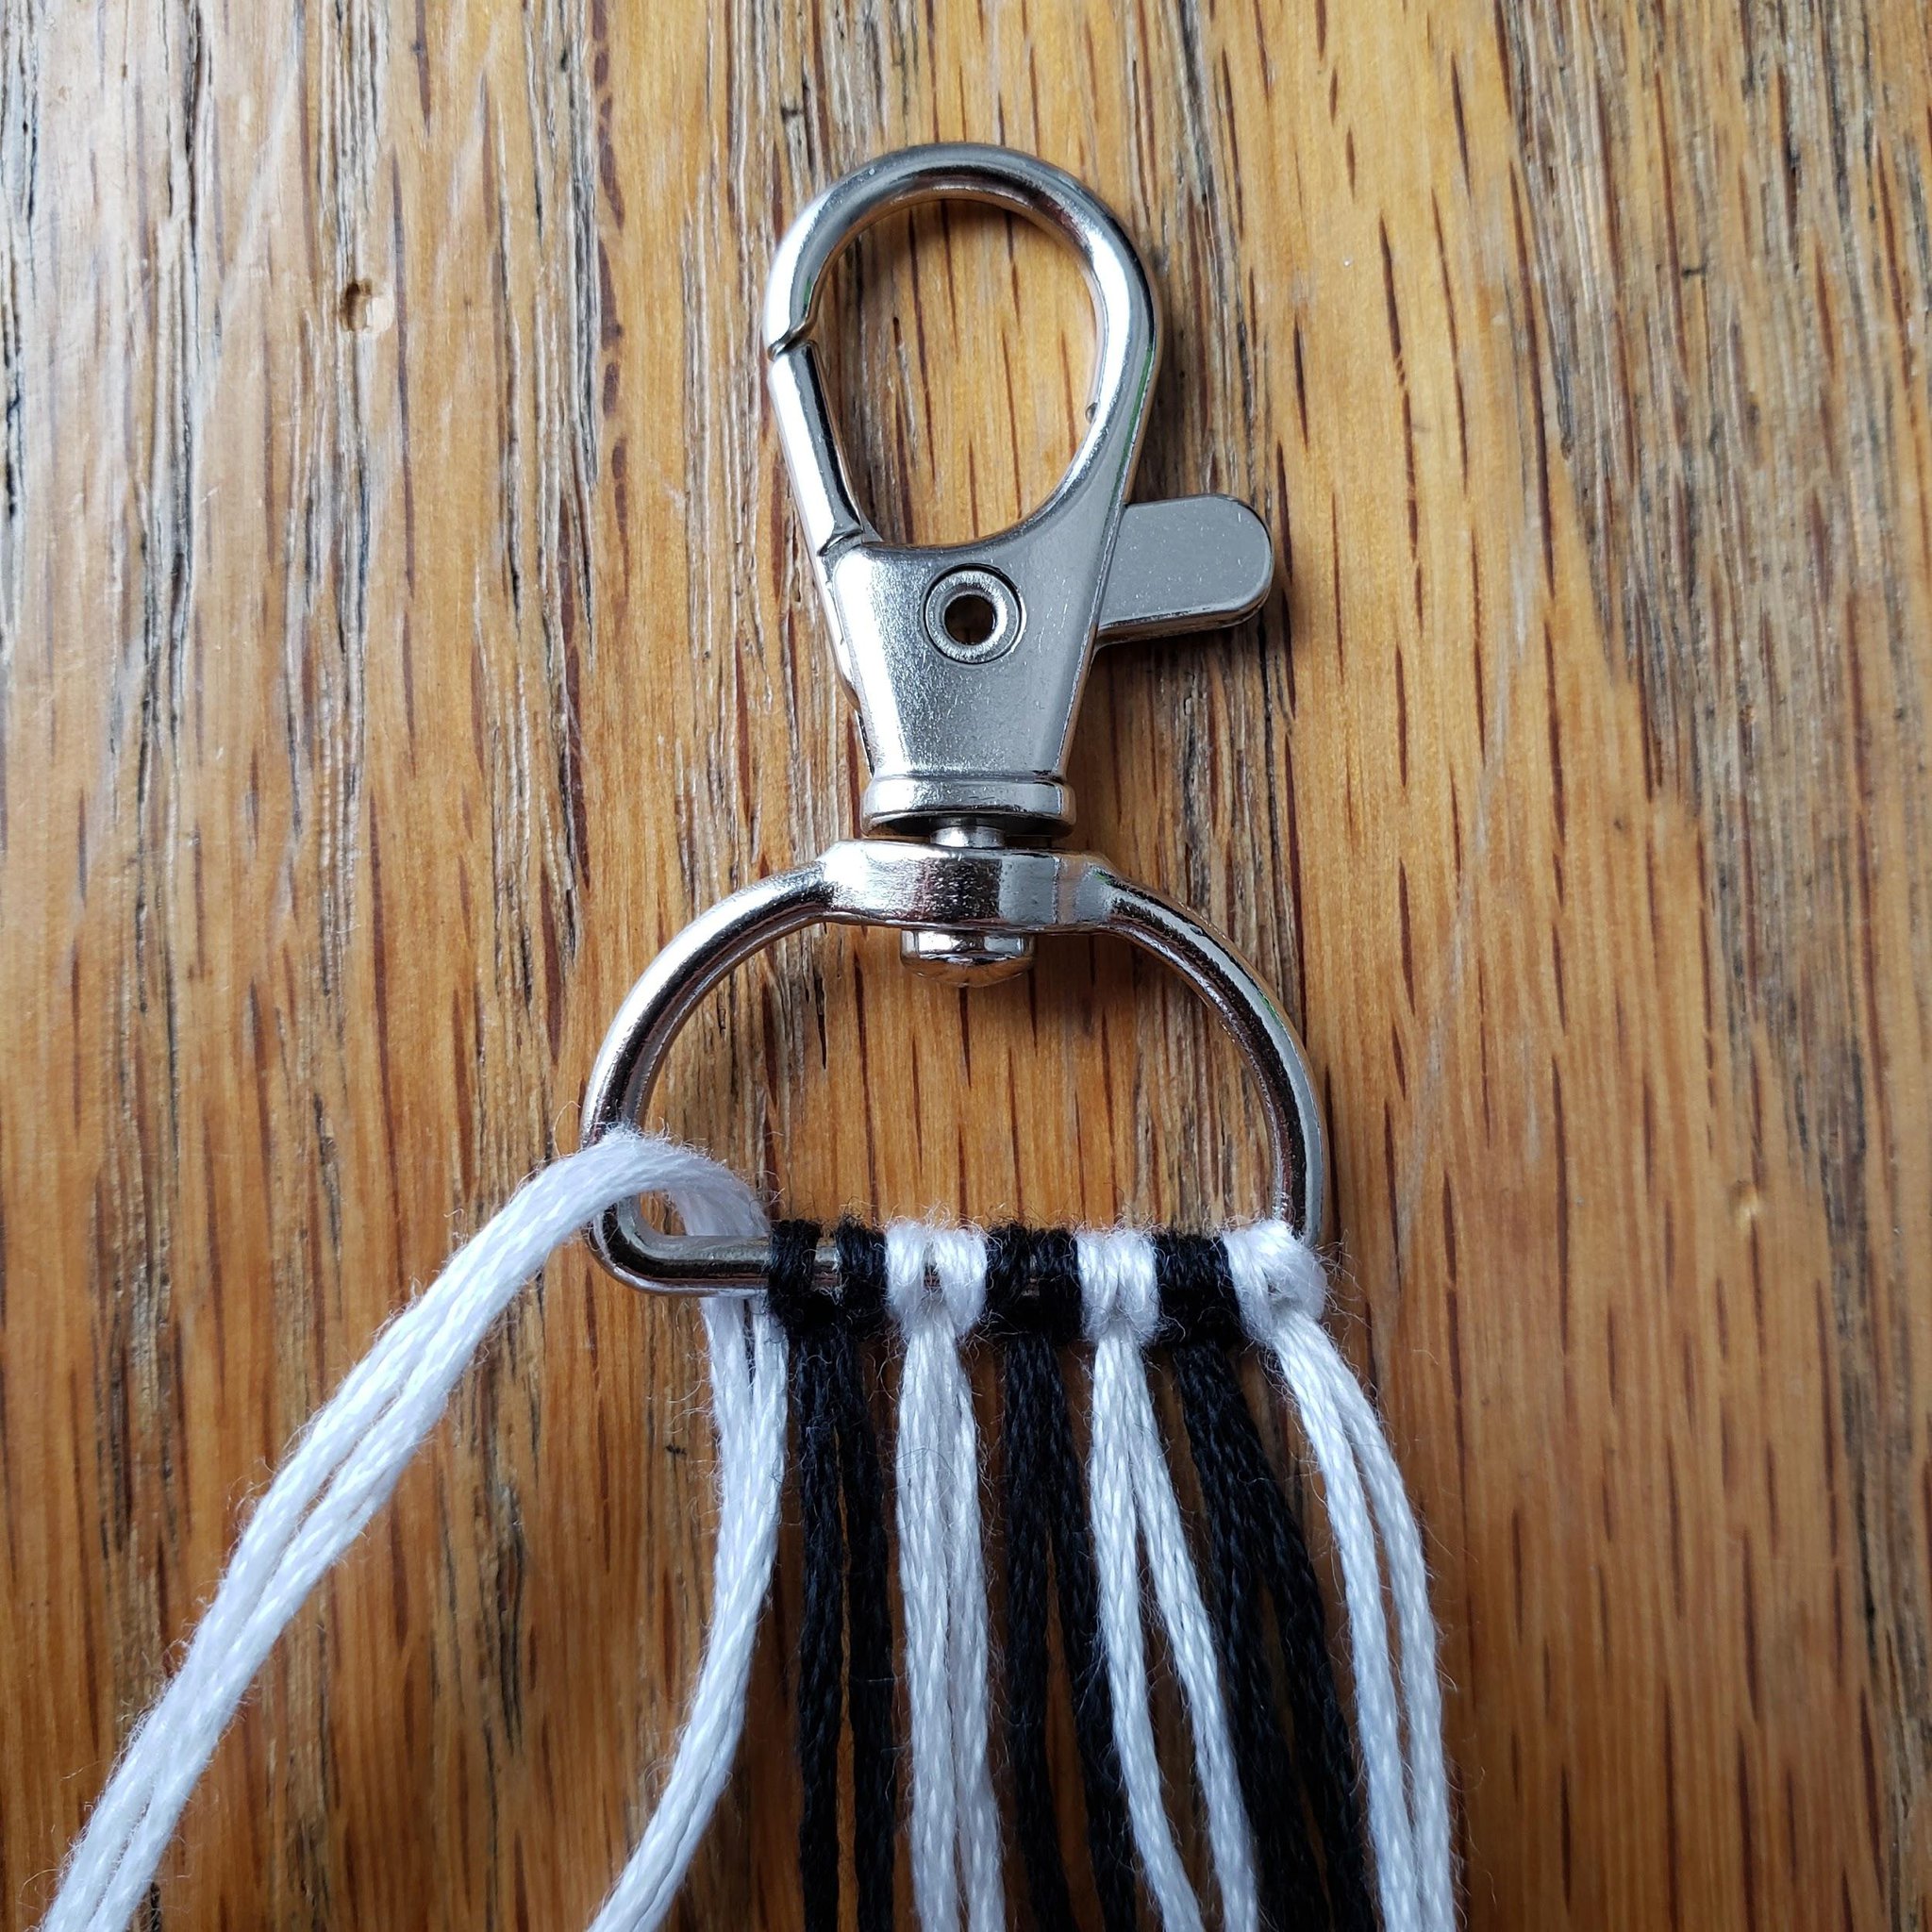
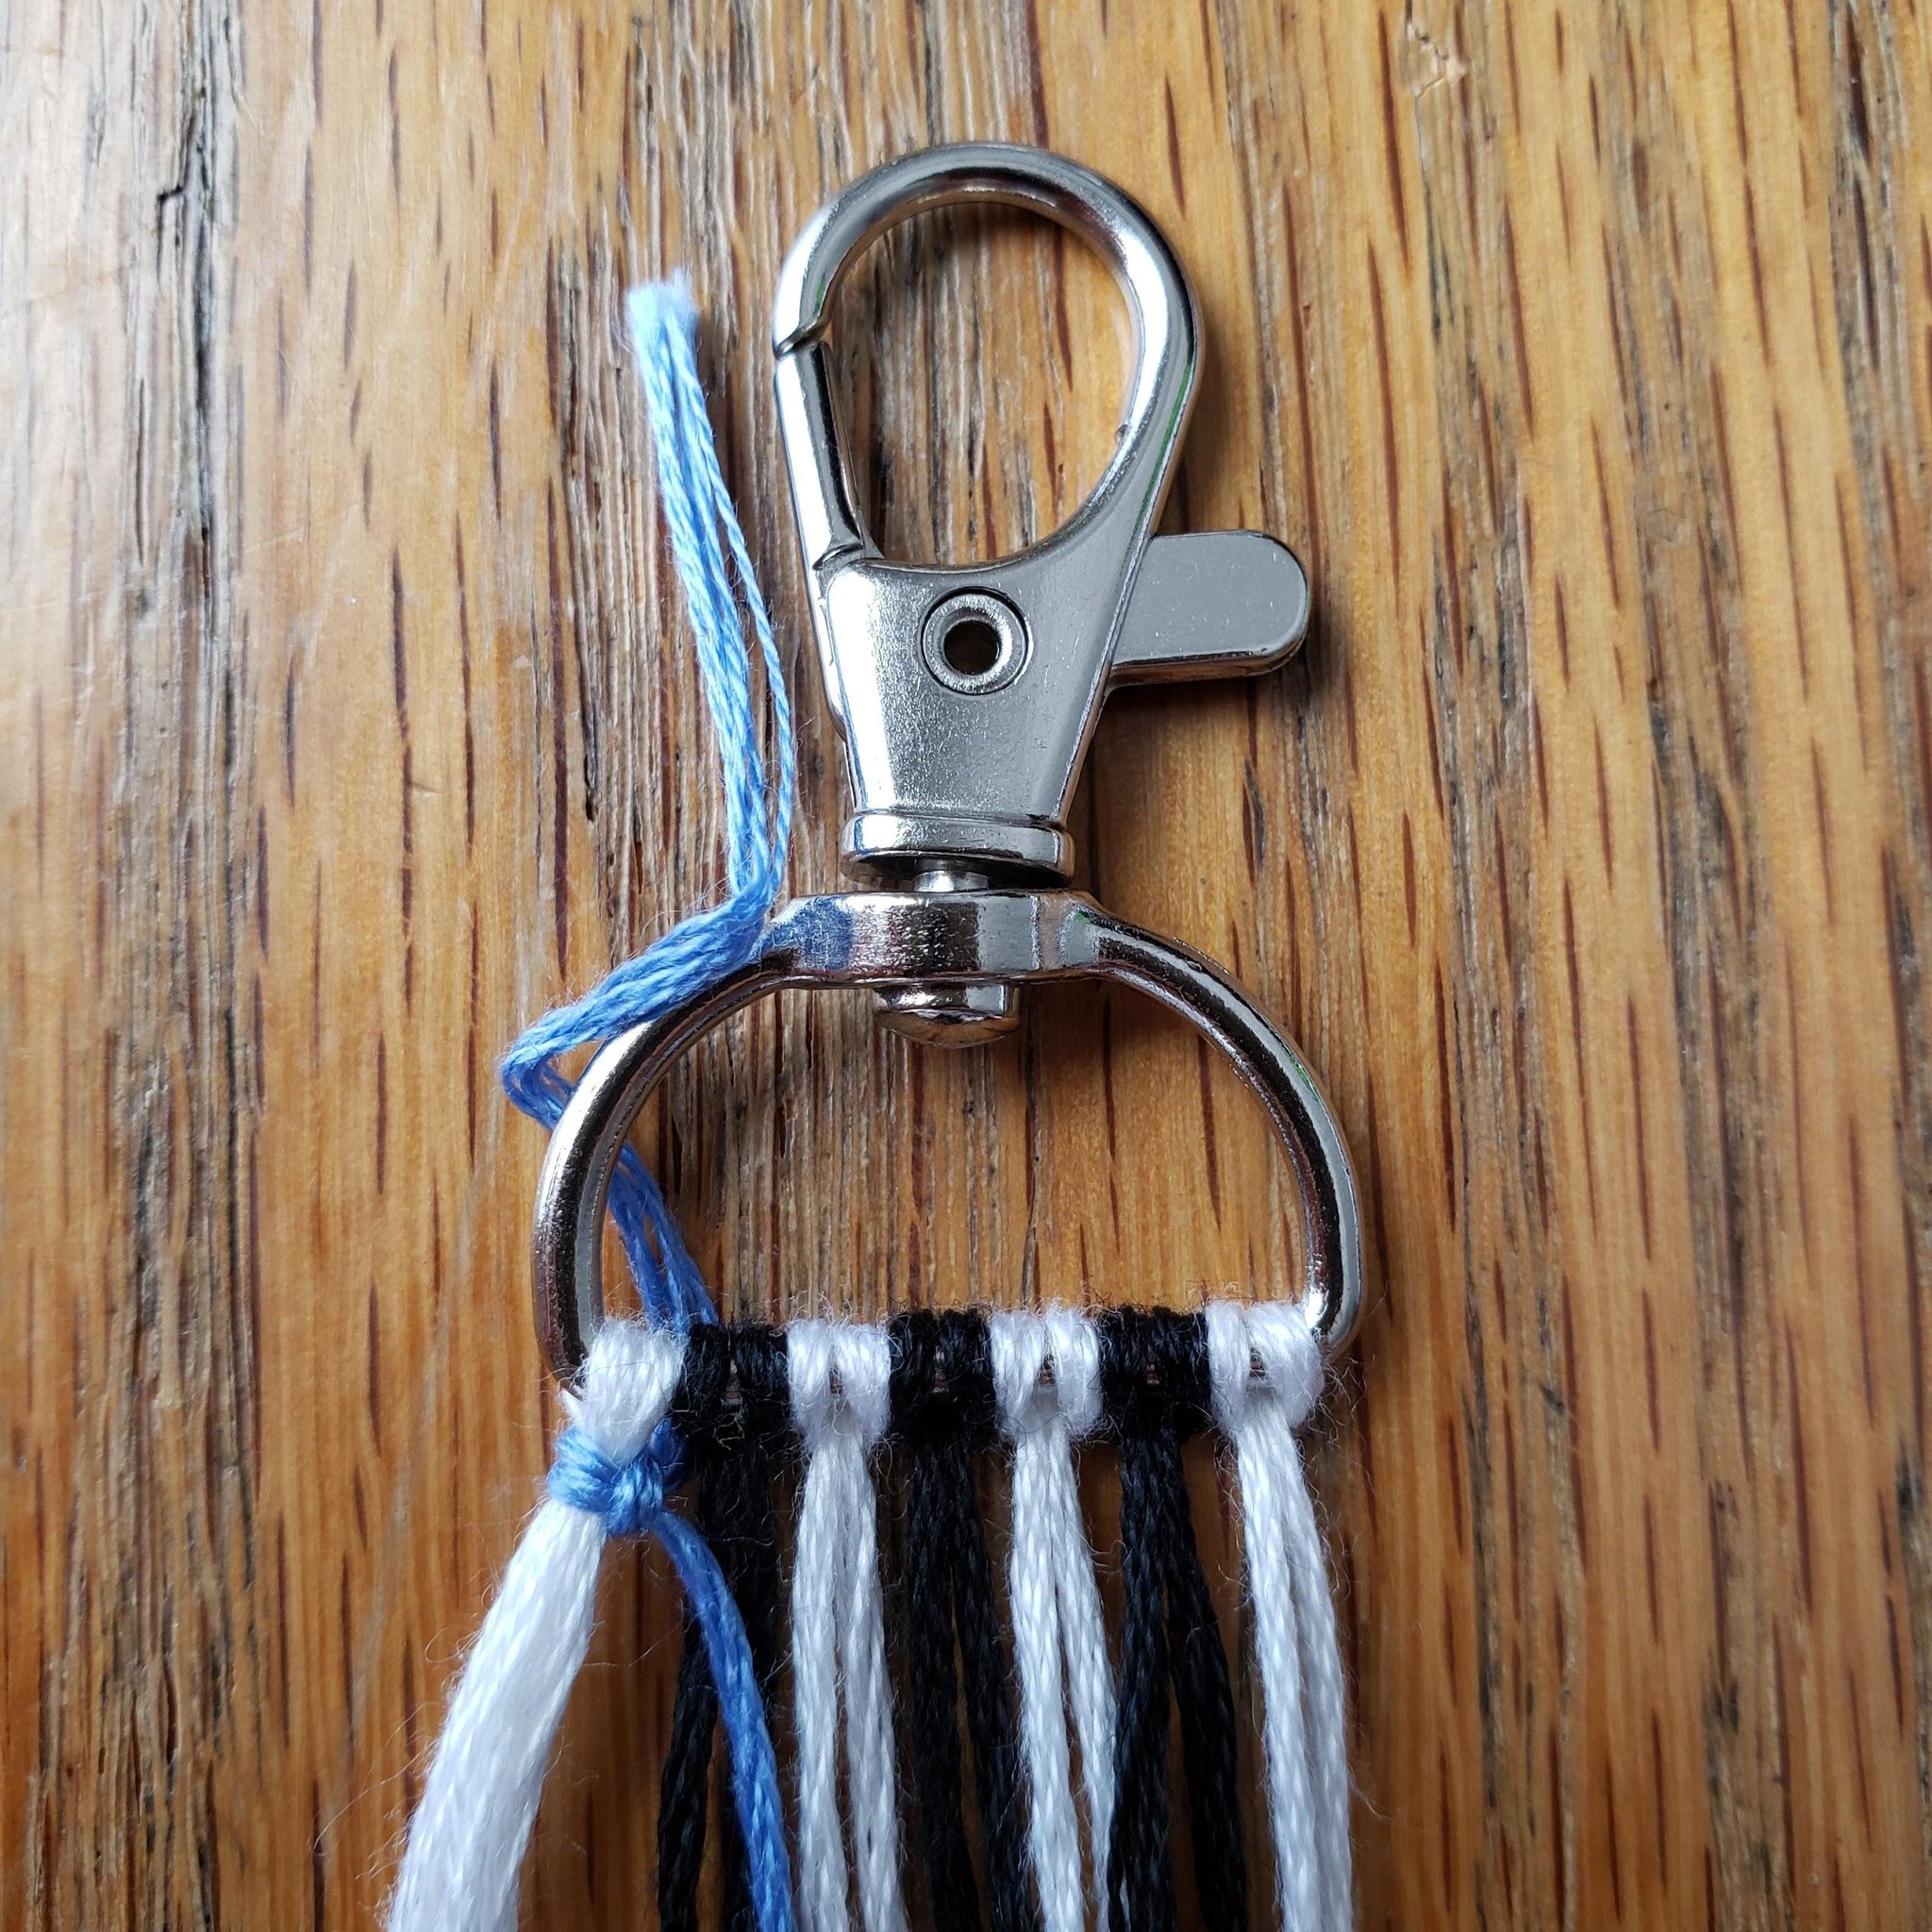
Use your knotting thread to add an additional base thread. Insert the short end of your knotting thread under your keychain ring, having it extend out the bottom with the other base threads of the keychain. In this photo, the long end of the knotting thread is pointing up, above the base threads.
Use the long end of your knotting thread to make your first knot onto your leftmost loop-over threads. Do not include the base thread created by your knotting thread in this first knot.
Knot onto the base thread created by the knotting thread as you would any other normal base thread. From this point on, the process of making a shaped keychain with an odd number of base threads is the same as with an even number of base threads.