Rate Tutorial
If you are looking to challenge yourself, learn new techniques, or even improve your bracelet making this tutorial will give you many ideas. Each technique has a brief explanation of what it is if you want more detailed tutorials they will be linked. All photos in this are by users on braceletbook, I have asked for their permission to use their photos and I have labeled all of their photos with their username correctly if they weren’t already watermarked. There are some other braceletbook tutorials that you can find on alphas, reading patterns, shaped patterns, etc which couldn’t be linked so check them out if you would like.
Table of contents
These are the different techniques in this tutorial in order so if you would like to skip to one of them specifically look through this list.
1. Shaped Bracelets
2. Alpha+Normal technique
3. Straight edges technique
4. Flat alpha technique
5. Adding beads/charms to your bracelets
6. Cutting patterns to make them shaped
7. Tripling/Doubling/halving patterns
8. Upside down alpha technique
9. Brick Stitch alpha
10. Adding a border to your bracelets
11. Switching colours in a normal bracelet
Shaped Bracelets
Shaped bracelets look really nice, and they can be both alpha and normal.
-There is currently no formal shaped alpha tutorial for all alpha patterns however Alex innovations did make a shaped evil eye tutorial; this tutorial explains the technique; and from that you can apply the shaped alpha technique to any pattern.
-For the shaped normal bracelet you use the triangle ends technique to make the shaped part. The triangular ends aren’t too hard to learn. The shaped normal tutorial is on bracelet book as well as in the video linked below.
SHAPED BRACELETS TUTORIAL by Masha Knots (@Racoon).
TRIANGLE ENDS by Masha Knots (@Racoon).

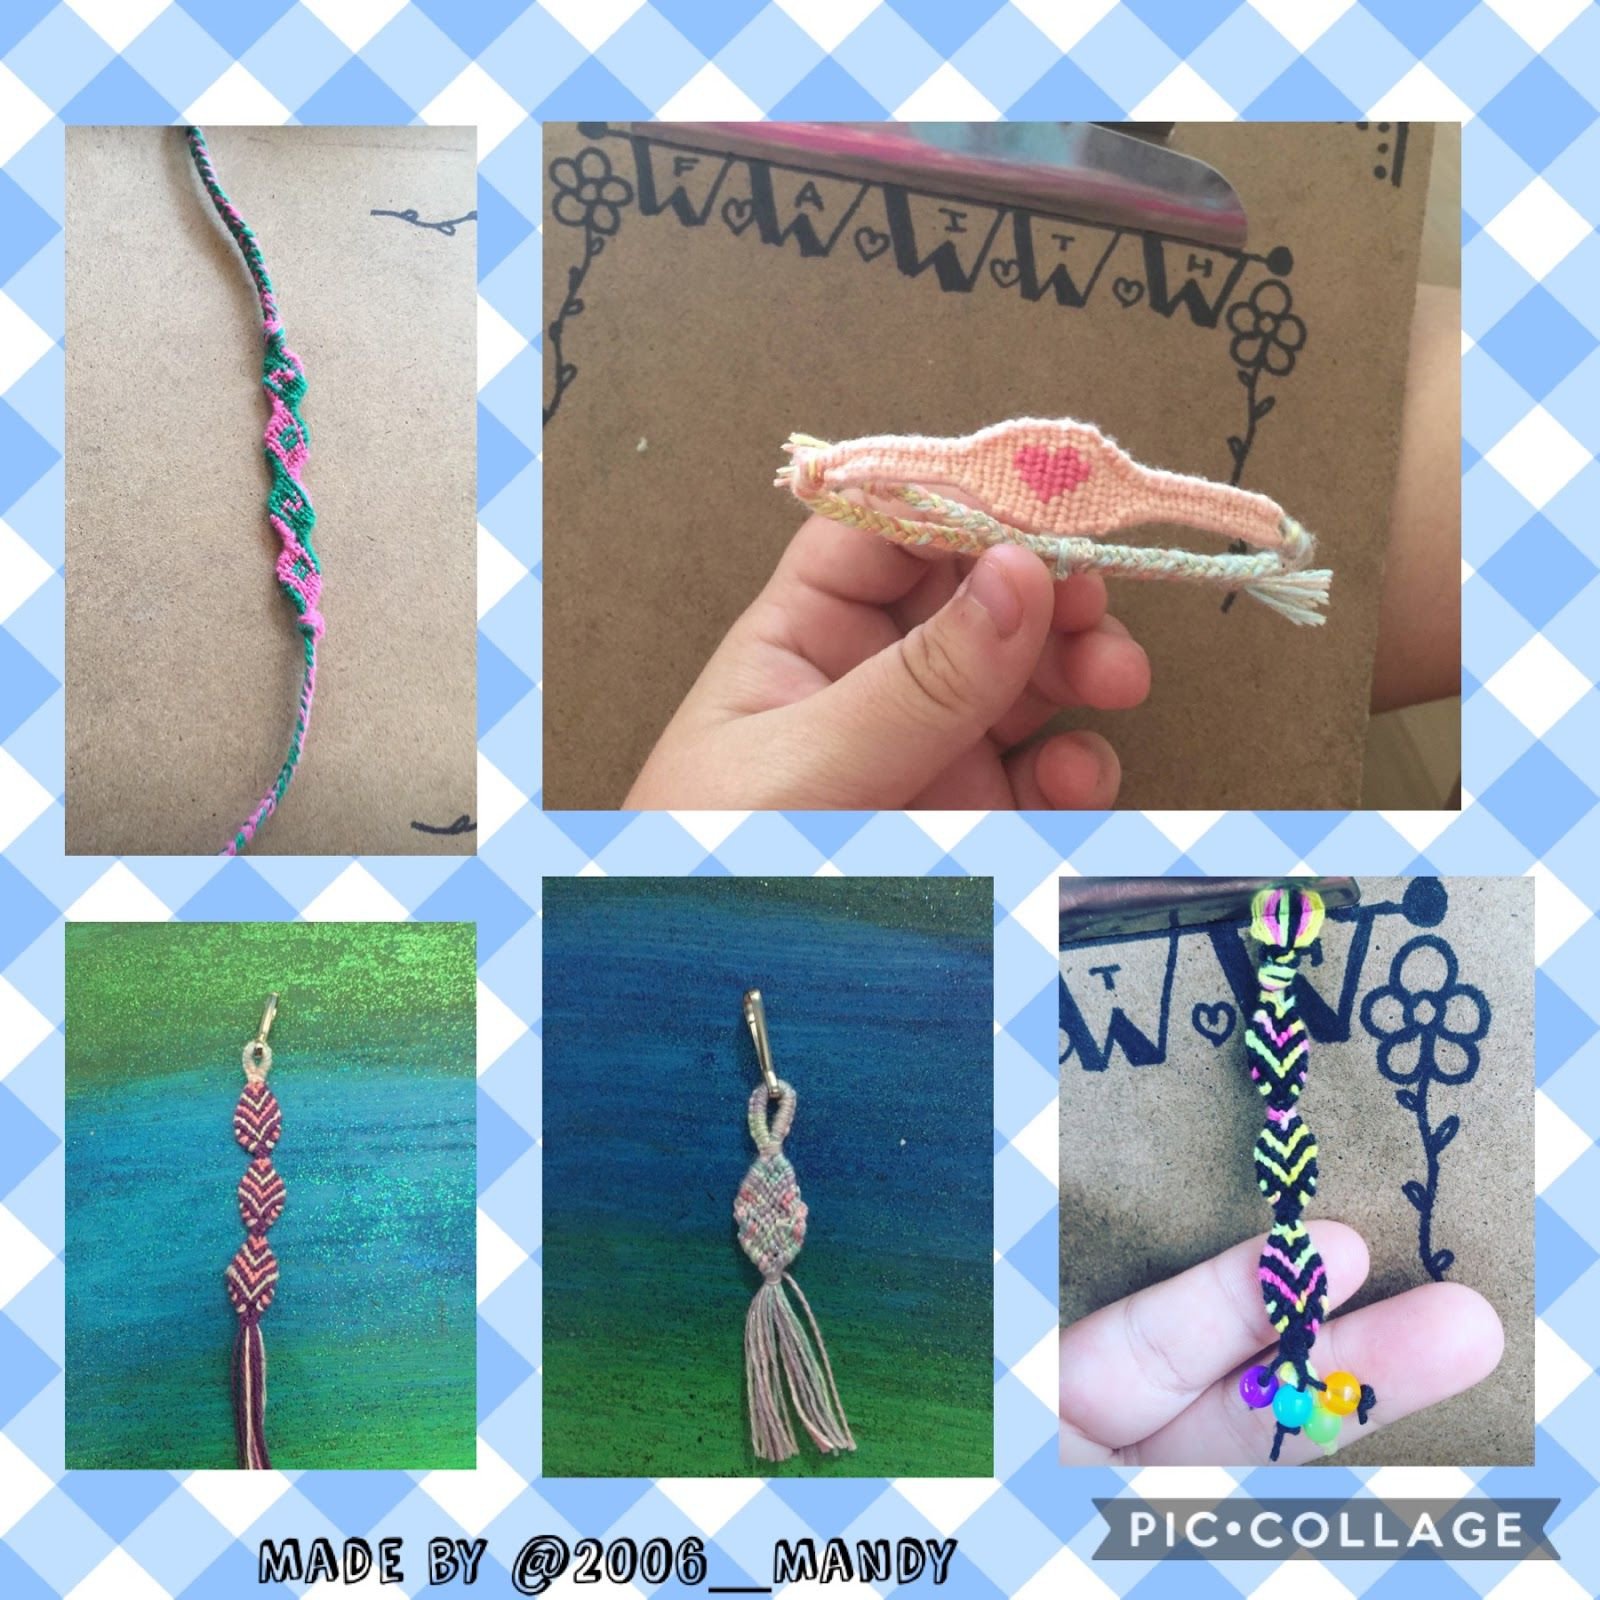
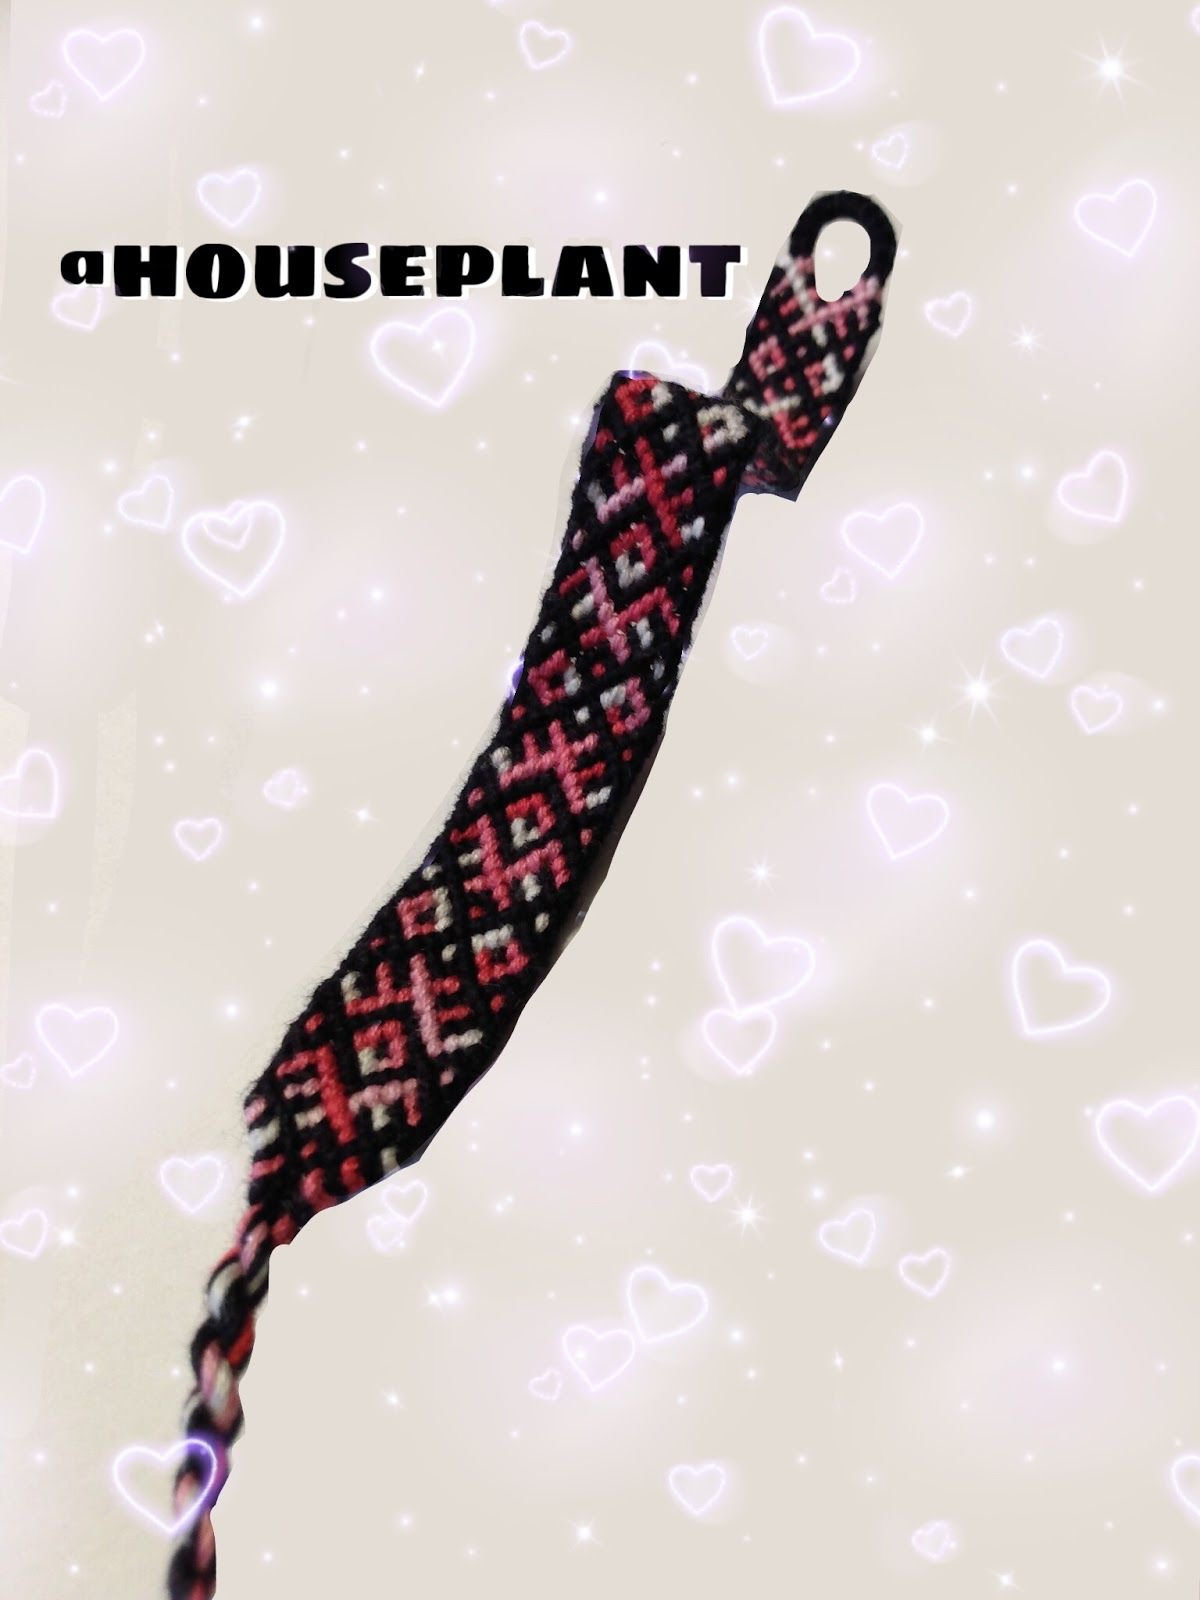
Alpha+normal technique
This technique consists of combining an alpha pattern and a normal pattern into one bracelet. If you want to understand what I’m talking about, you can view the photo on the left. You can either start with the alpha part or normal part and knot up until the point where you want to switch. If you did the first part normal, you would want to make sure it is flat when you switch to the alpha.
-When you switch to an alpha the strings become the base strings, and you will need to add a leading string before knotting the alpha part.
-When you switch to a normal pattern you will need to get rid of the leading string if you were making an alpha and then you will start knotting the normal pattern like a normal friendship bracelet.
Knotting Dangerously by Megan Morris (@Margaron).
Straight Edges Technique
Bracelets tend to curve depending on the pattern and many people do not like that; luckily the straight edges technique fixes this. The technique is nearly the same for both normal patterns and alphas. To create straight edges you need to make backward forward knots on the left edge and forward backward knots on the right edge. For alphas it is no problem but for normal patterns it can be an issue when the two strings you are knotting with are not of the same colour on the edges. When this happens you need to add an extra string to each side of the bracelet and make the backward forward/forward
backward knots using the strings that are sticking out on the edge. A better description of how to do this can be found in the video below.
backward knots using the strings that are sticking out on the edge. A better description of how to do this can be found in the video below.
HOW TO KEEP EDGES STRAIGHT by Masha Knots (@Racoon).
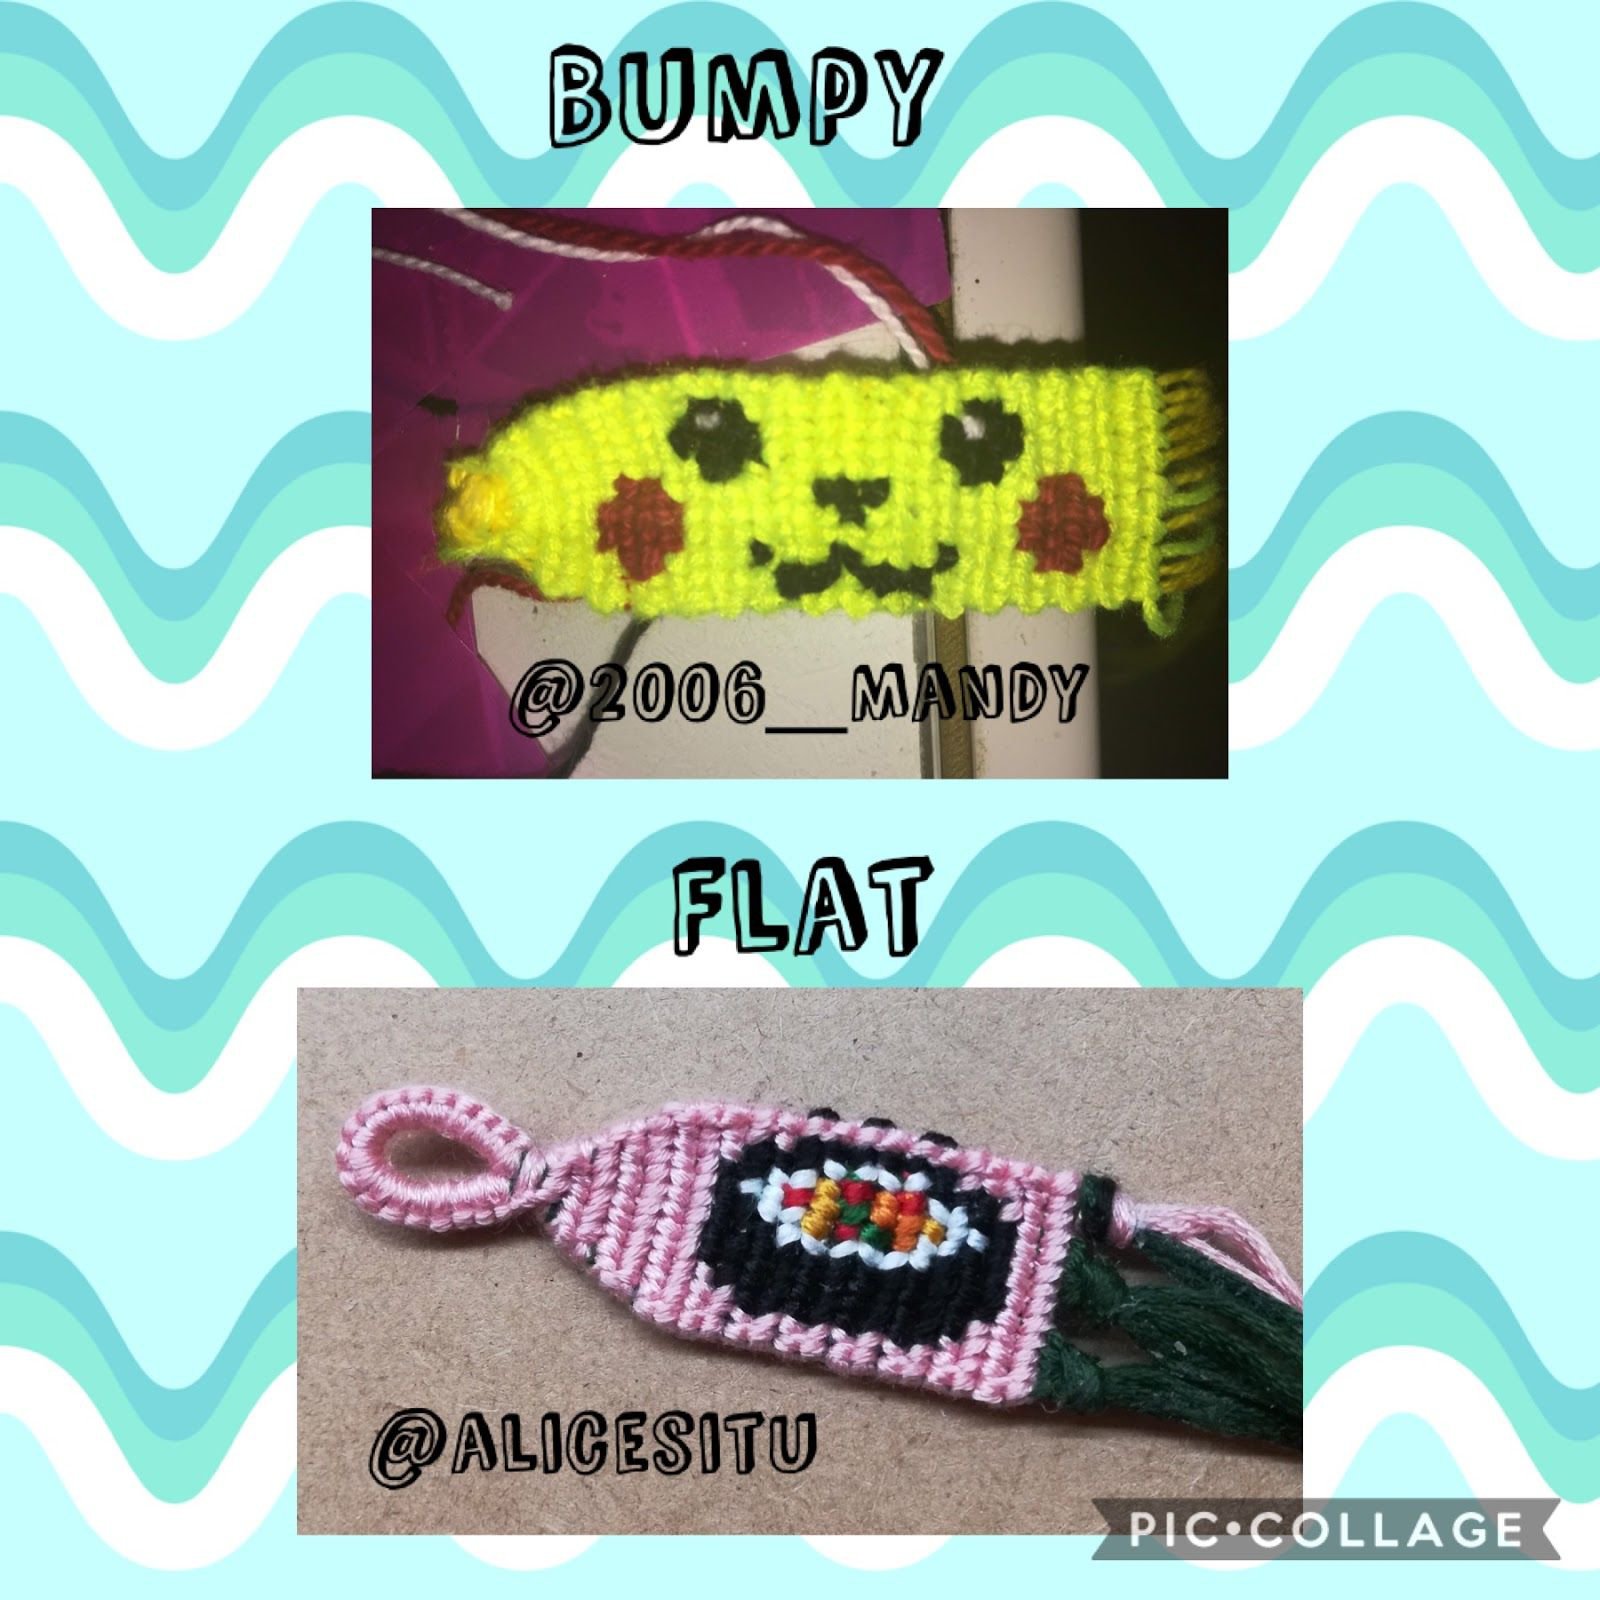
Flat alpha technique
Without using the flat alpha technique your bracelet will feel bumpy, and you will feel where you colour switched. To make a flat alpha you will need to make a certain colour switch which isn’t just putting away the old leading string and using the new one. You need to:
1. Put the old leading string up on top of the bracelet.
2. Make one half of the knot with the new leading string and then put it up as well.
3. Take the old leading string and put it across to the right if you are on a forward knot row or across to the right if you are on a backward knot row.
4. Make the second half of the knot with the new leading string.
5. Place the old leading string underneath the bracelet away.
6. Continue knotting.
For a more detailed explanation, there is a tutorial on bracelet book for the flat alpha technique as well as many video tutorials for you to watch.
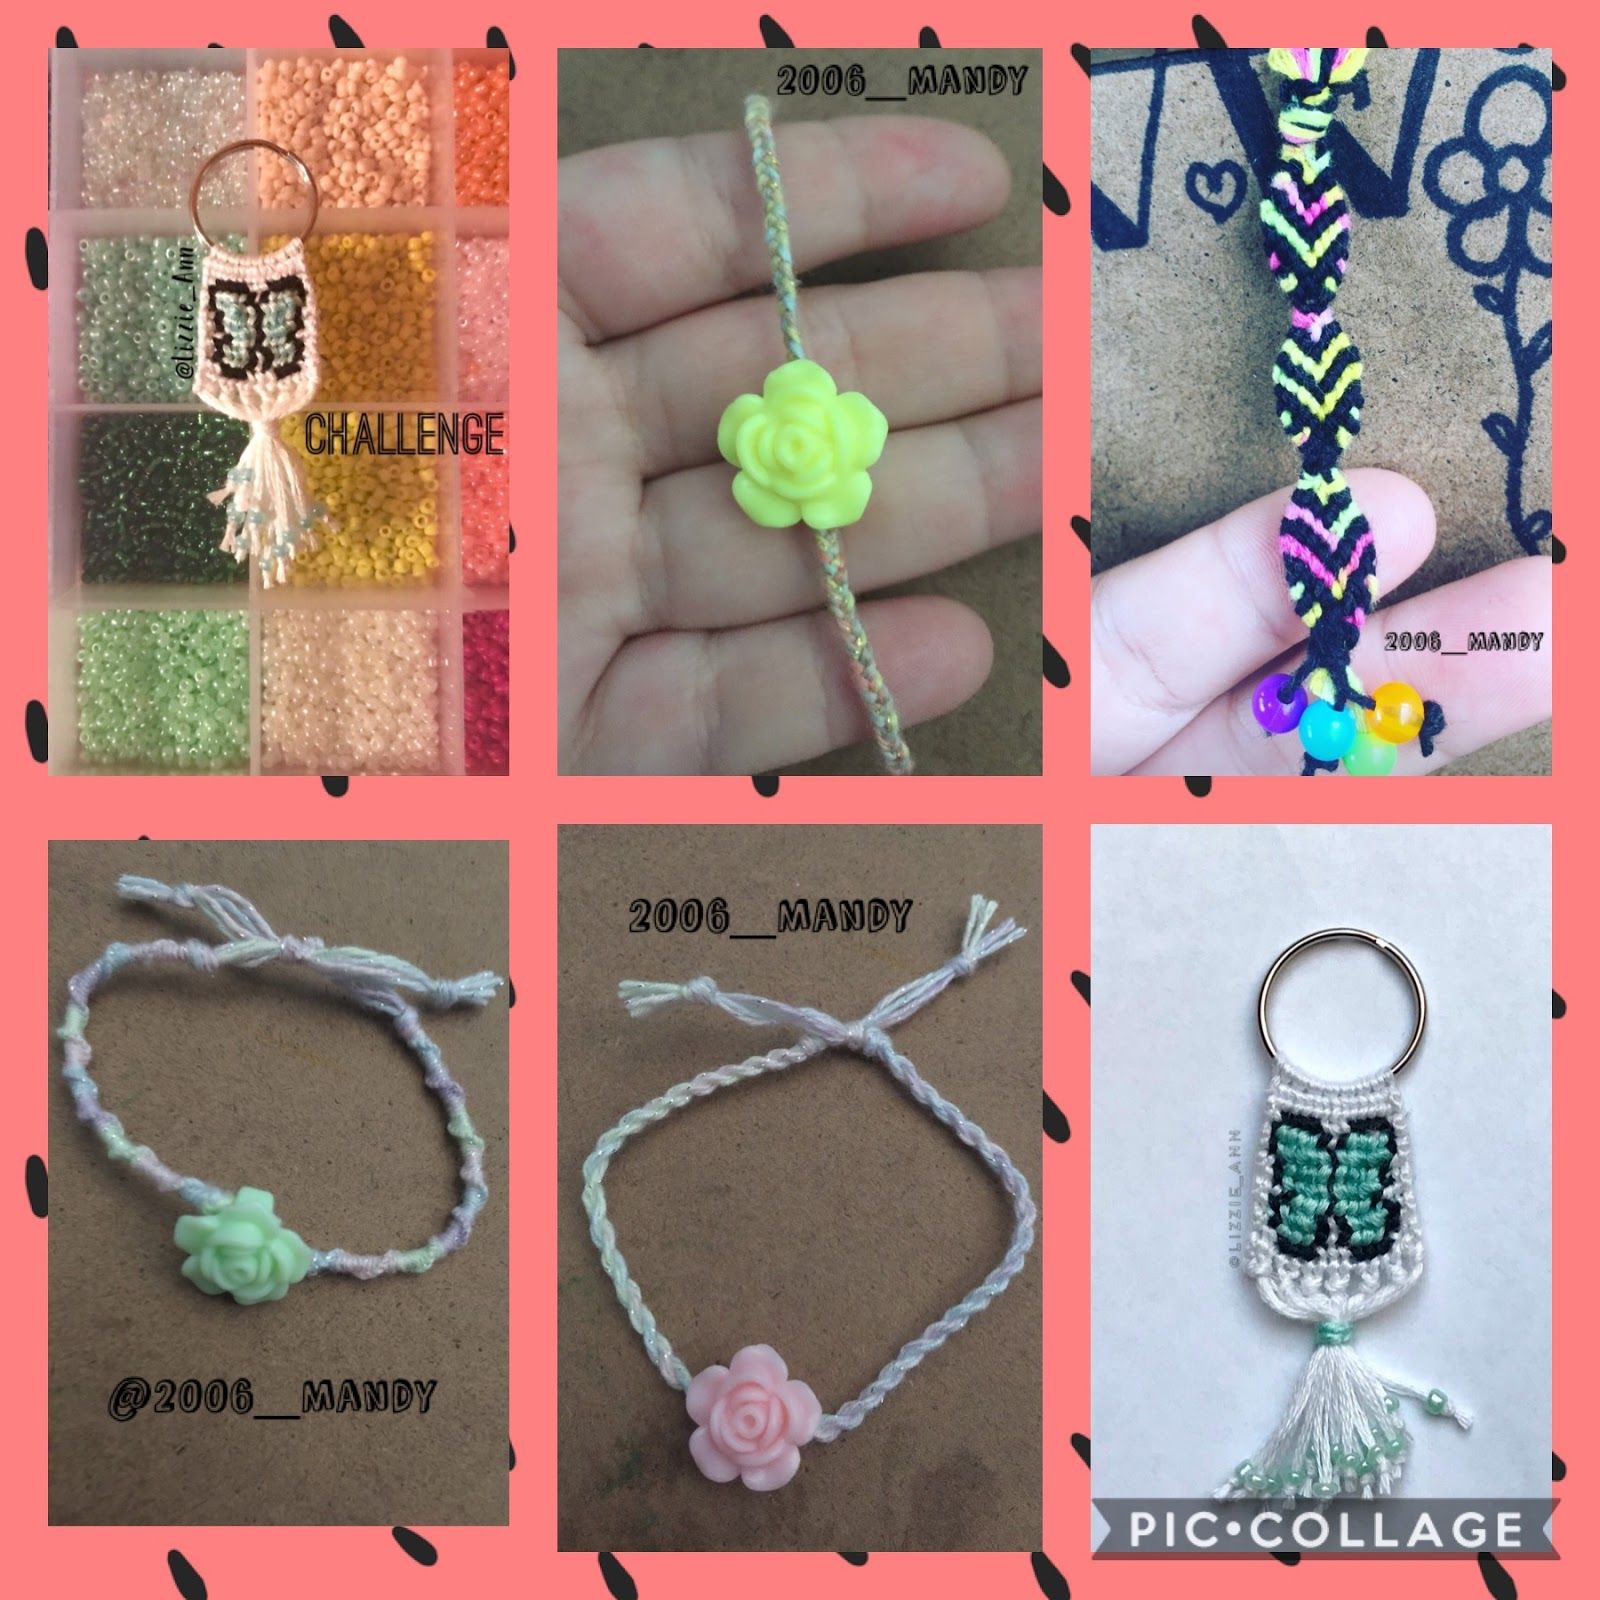
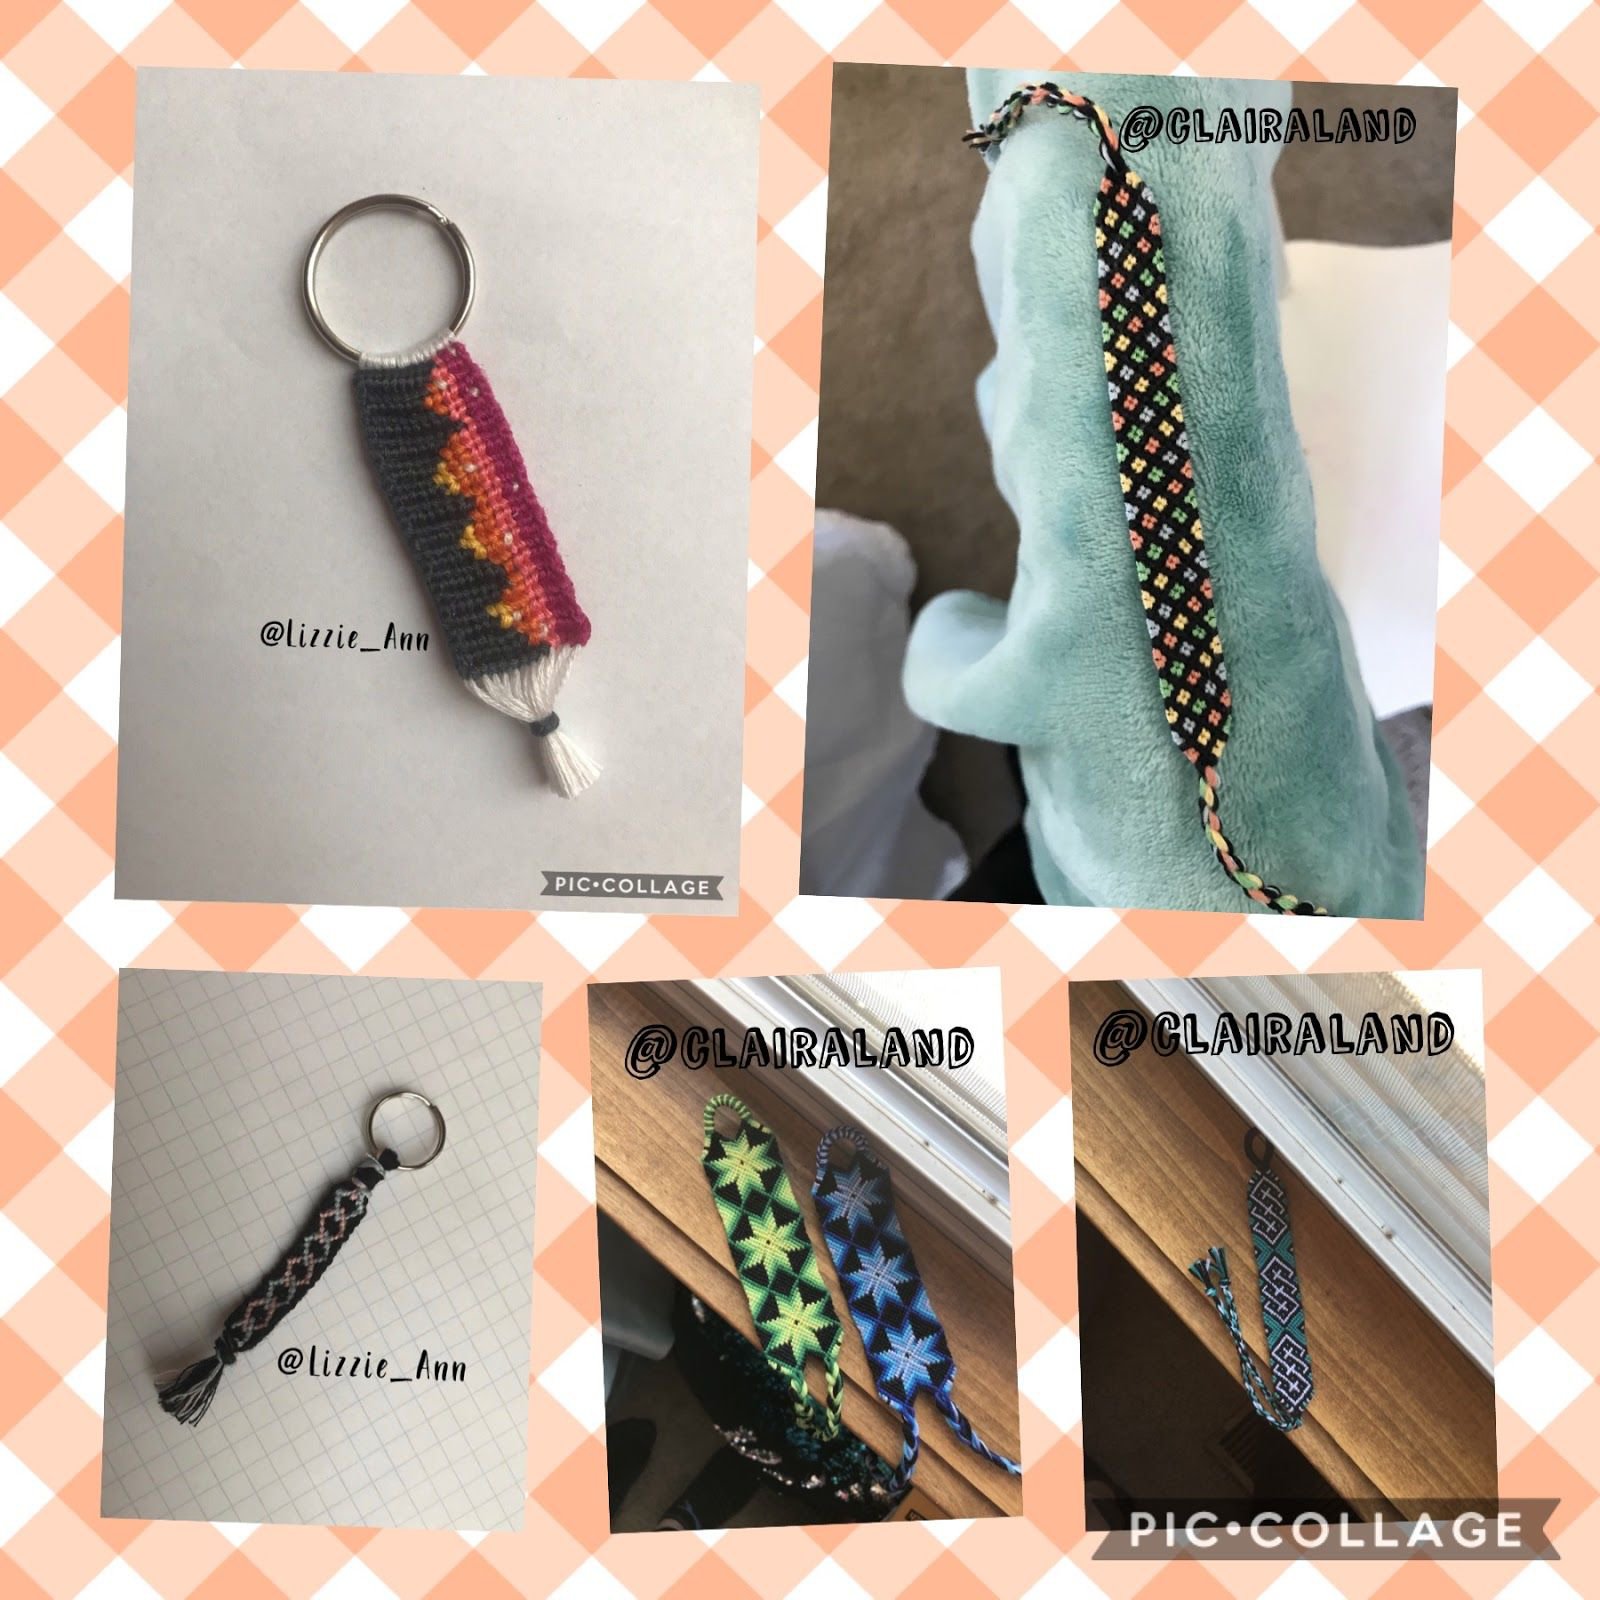
Adding beads/charms to your bracelets
Adding beads/charms to your bracelets can really add to your bracelets. It is something that can be experimented with in many different ways. Here are some ideas that you can try:
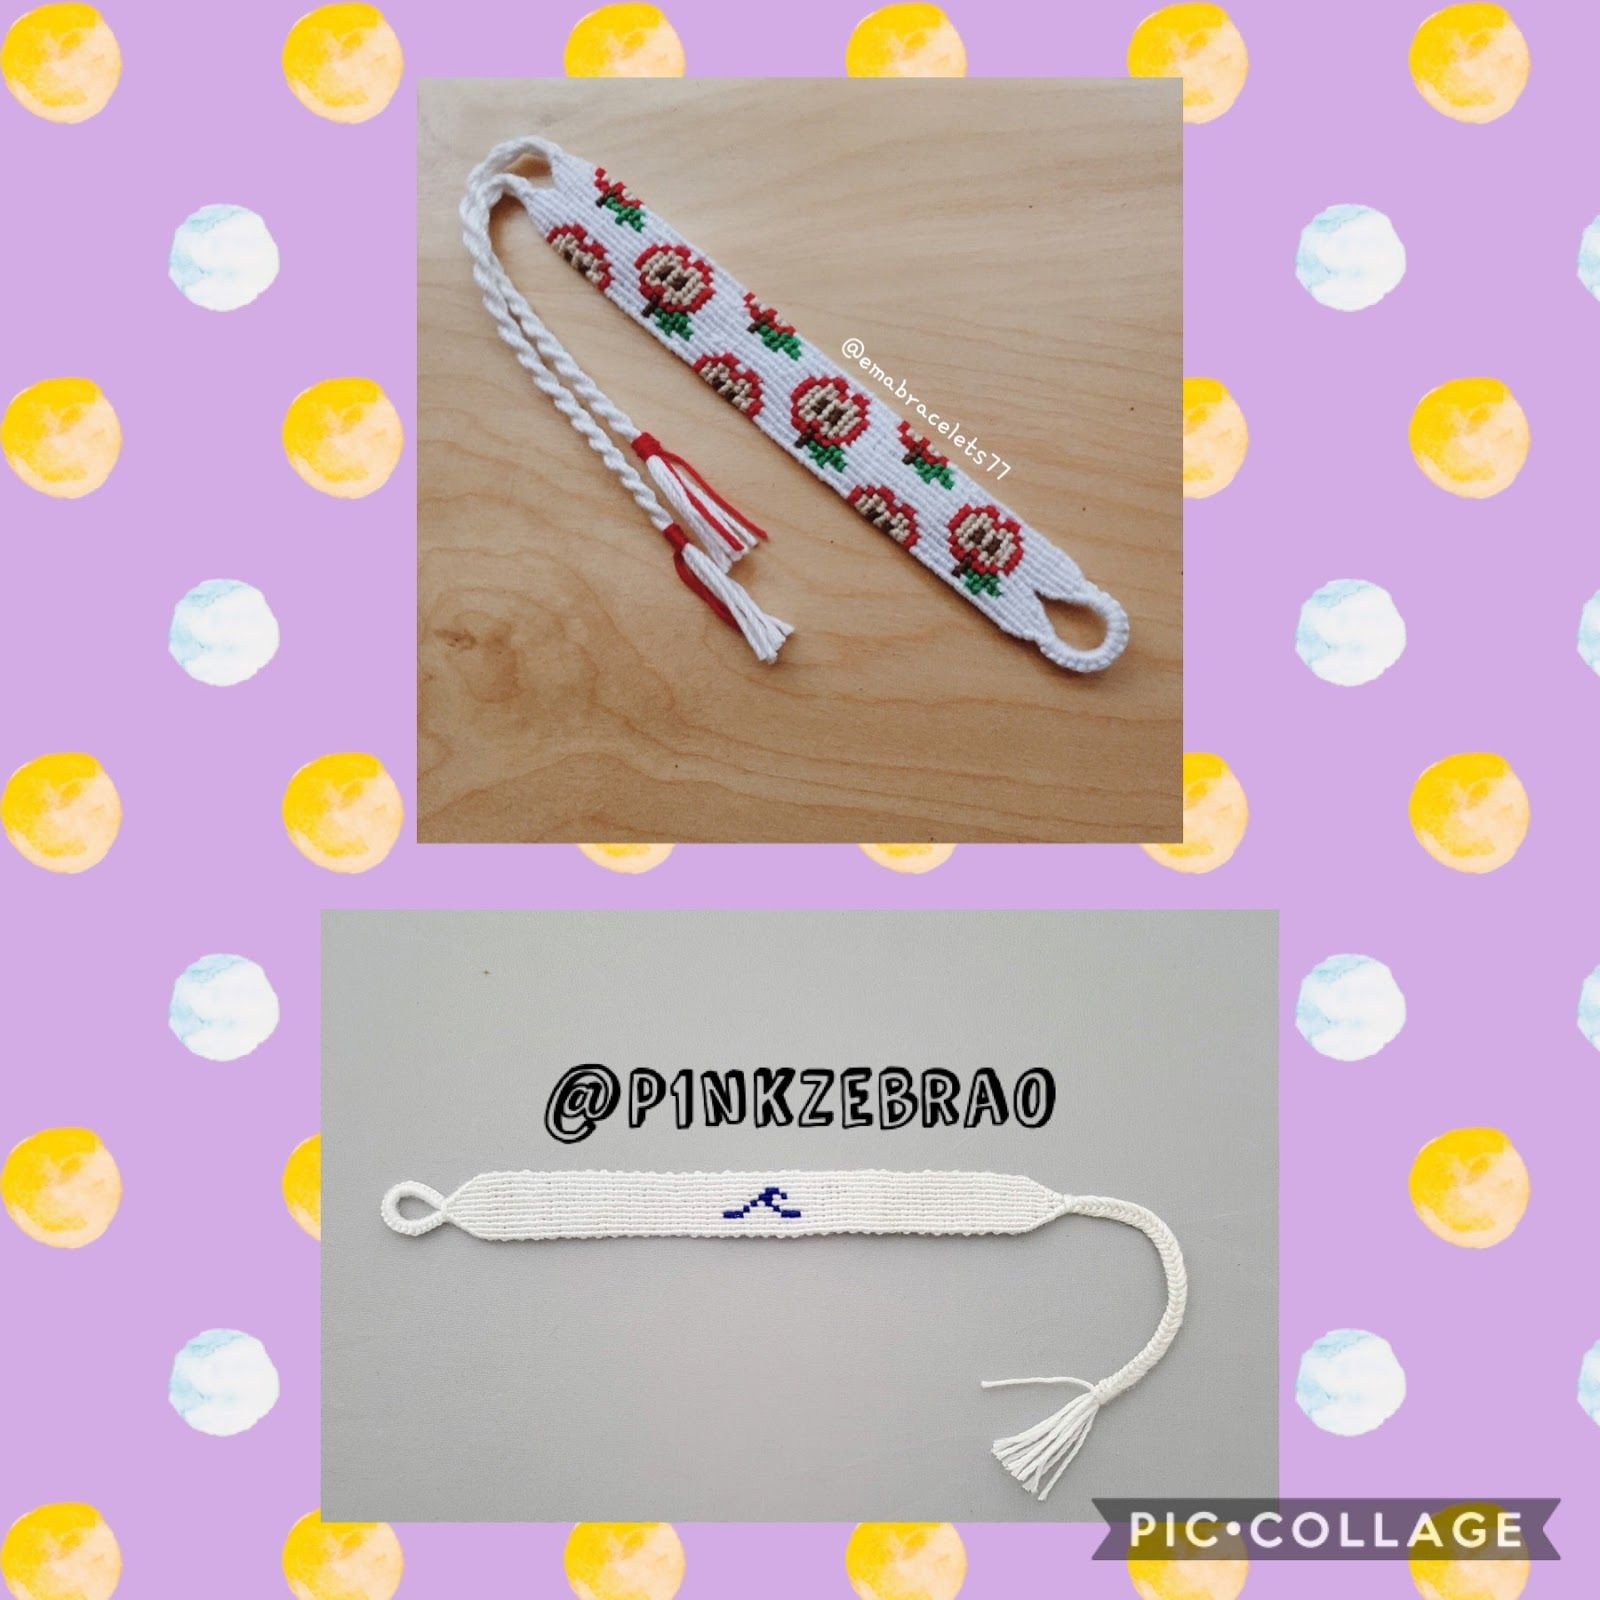
-You can add beads into your bracelet ties or on the ends of a keychain like in the butterfly keychain on the left made by @Lizzie_Ann. -You can also add beads into a bracelet by placing them on one of your strings and knotting around them.
-You can even make a bracelet with a charm in it.
-You can add beads into your bracelet ties or on the ends of a keychain like in the butterfly keychain on the left made by @Lizzie_Ann. -You can also add beads into a bracelet by placing them on one of your strings and knotting around them.
-You can even make a bracelet with a charm in it.
USING CHARMS IN BRACELETS TUTORIAL - WITH BEEBEECRAFT by Masha Knots (@Racoon).
ADDING CHARMS Tutorial by BeyondBracelets.
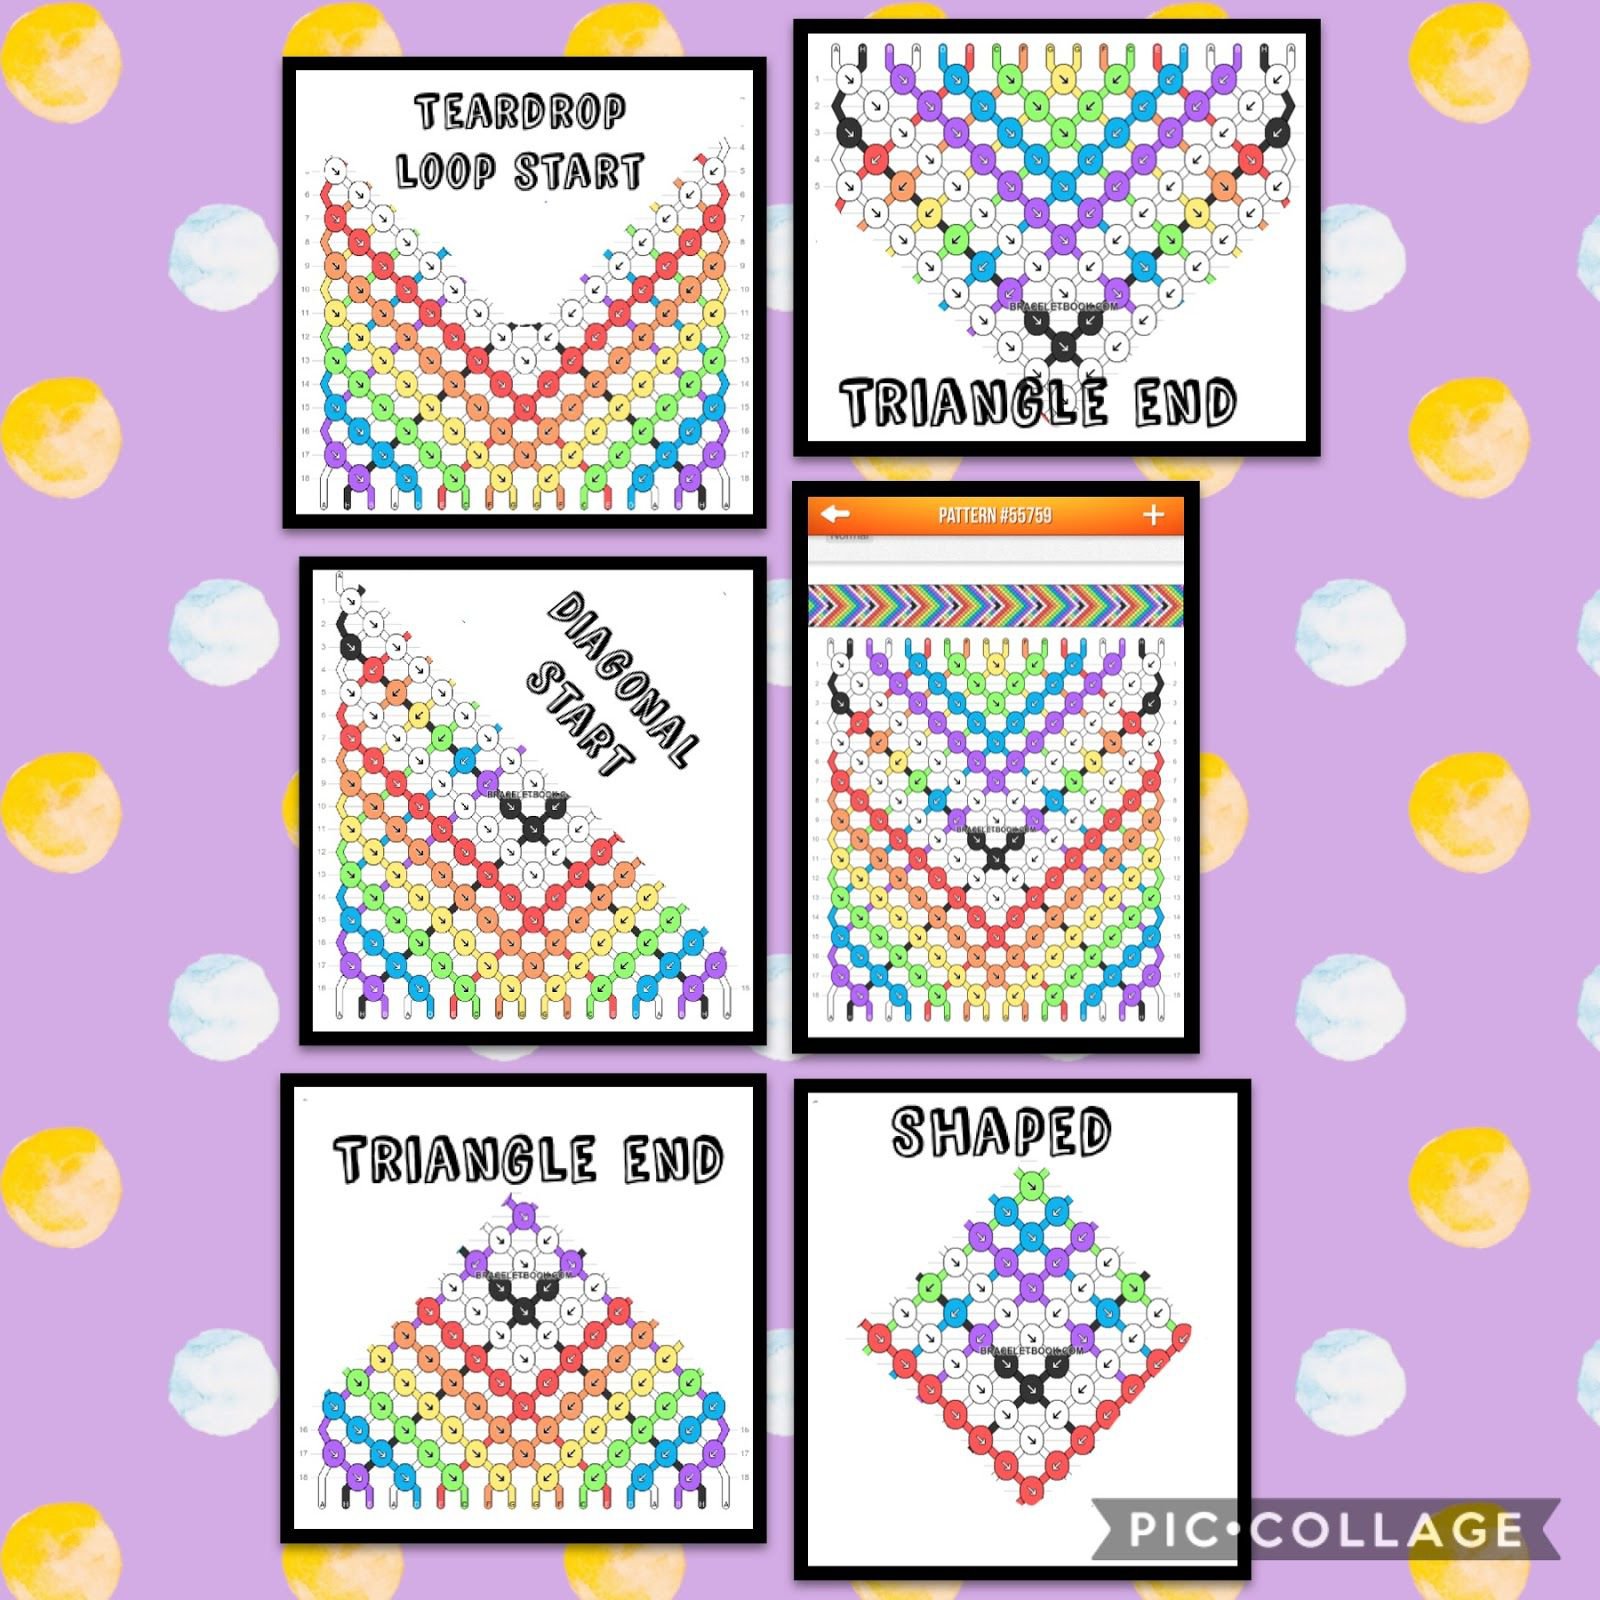
Cutting your patterns to make them shaped
If you don’t already know you can cut patterns to make them shaped in any way possible. This means even a simple normal pattern that you really love can be turned into a shaped bracelet. When you make a triangle end you are cutting the pattern, when you make a loop you are cutting the pattern. To cut the pattern you have to find a shape in a pattern. Sometimes a shape is visible in a pattern other times it's not. Based on the shape that you can find of the pattern that will determine your start and end not all patterns are perfect for triangle ends. To make a shaped pattern out of a normal pattern you must be able to see a diamond like shape that goes in and out once you do cutting the pattern becomes easy. Below I have given some examples.
In this pattern it was fairly easy to find many shapes. Using a photo editing app such as picsart while helping with cutting out the pattern (I used the draw feature to colour out the knots that would be needed). I found many different shapes in it. A diagonal start, triangle ends, shaped, and a teardrop start. Not all shapes will be easily prevalent in every pattern. It is important not to cut out the strings that go into the knots so you will know what order to bring out your strings when you start knotting.
In this pattern it was fairly easy to find many shapes. Using a photo editing app such as picsart while helping with cutting out the pattern (I used the draw feature to colour out the knots that would be needed). I found many different shapes in it. A diagonal start, triangle ends, shaped, and a teardrop start. Not all shapes will be easily prevalent in every pattern. It is important not to cut out the strings that go into the knots so you will know what order to bring out your strings when you start knotting.
SHAPED BRACELETS TUTORIAL by Masha Knots (@Racoon).
Skip ahead in the following video to 10 minutes if you know how to make the shaped bracelet and only want to learn how to cut patterns.
Skip ahead in the following video to 10 minutes if you know how to make the shaped bracelet and only want to learn how to cut patterns.
MORE ON TRIANGLE ENDS by Masha Knots (@Racoon).
This video is on triangle ends but shows how you can cut your patterns and is an extension of the shaped patterns tutorial.
This video is on triangle ends but shows how you can cut your patterns and is an extension of the shaped patterns tutorial.
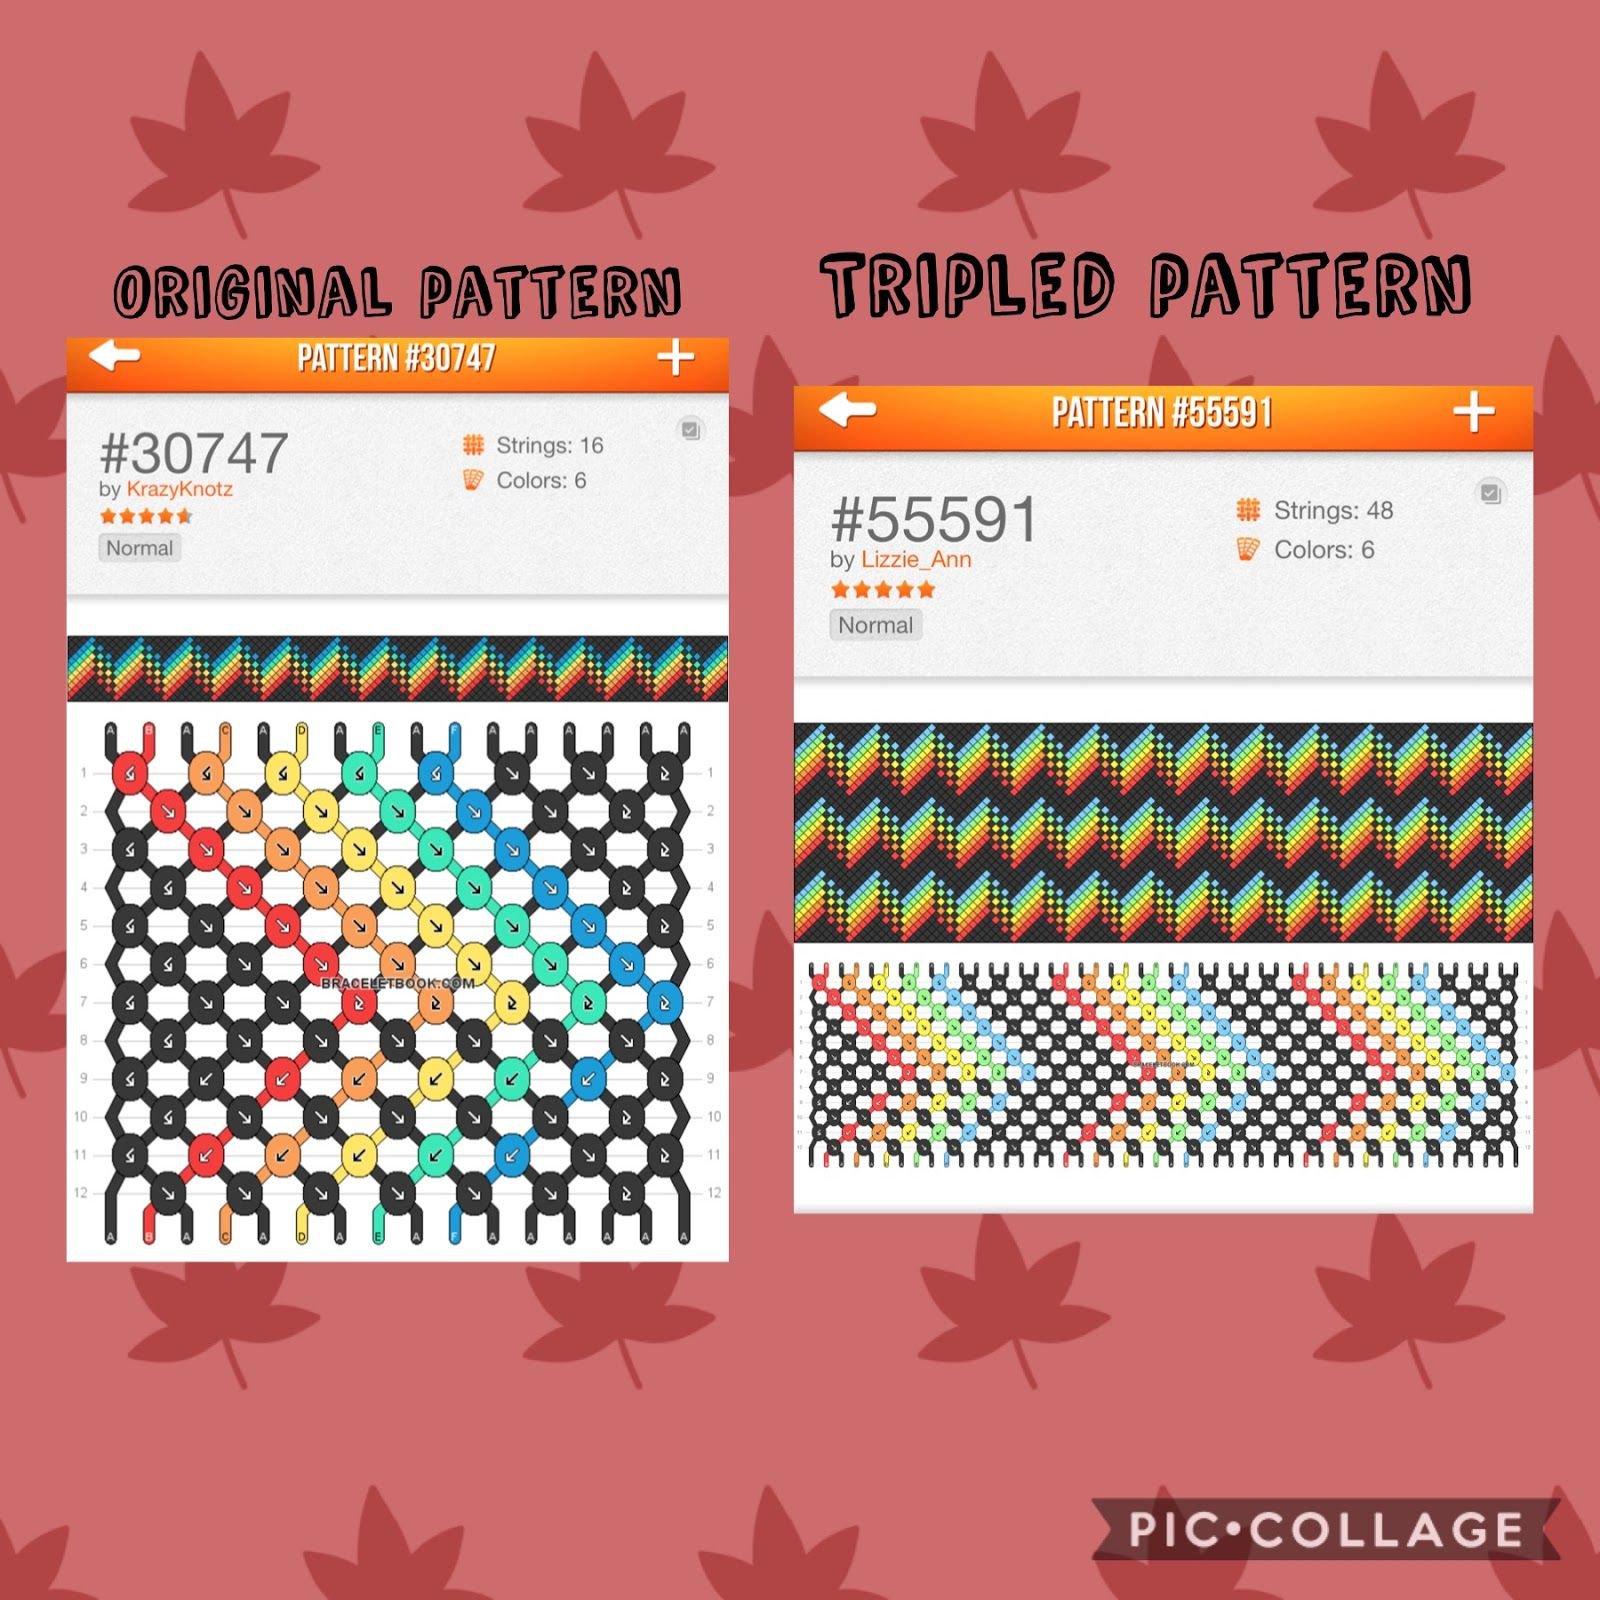
Tripling/Doubling/halving patterns
If you really like a pattern but it’s too thin or thick to your needs you can double and half the pattern. Masha knots has provided a really well structured tutorial for this linked below. In the photo the original pattern was a single zig zag but the pattern by @Lizzie_Ann was tripled this can be done to almost any pattern.
HOW TO DOUBLE AND HALVE PATTERNS by Masha Knots (@Racoon).
The video does not include how to triple but you can multiply/divide the width of any pattern as many times as you want using that technique.
The video does not include how to triple but you can multiply/divide the width of any pattern as many times as you want using that technique.
Upside down alpha technique
This technique makes it so your alpha looks like a normal alpha back looks like. All you need to do is put the leading string underneath the base string instead of on top and then continue making your knots. Watch the tutorial linked below for more information.
Upside-down Style Mountain Alpha Tutorial by Megan Morris (@Margaron).
The video explains how to do a mountain bracelet but the technique can be applied to any alpha pattern.
The video explains how to do a mountain bracelet but the technique can be applied to any alpha pattern.
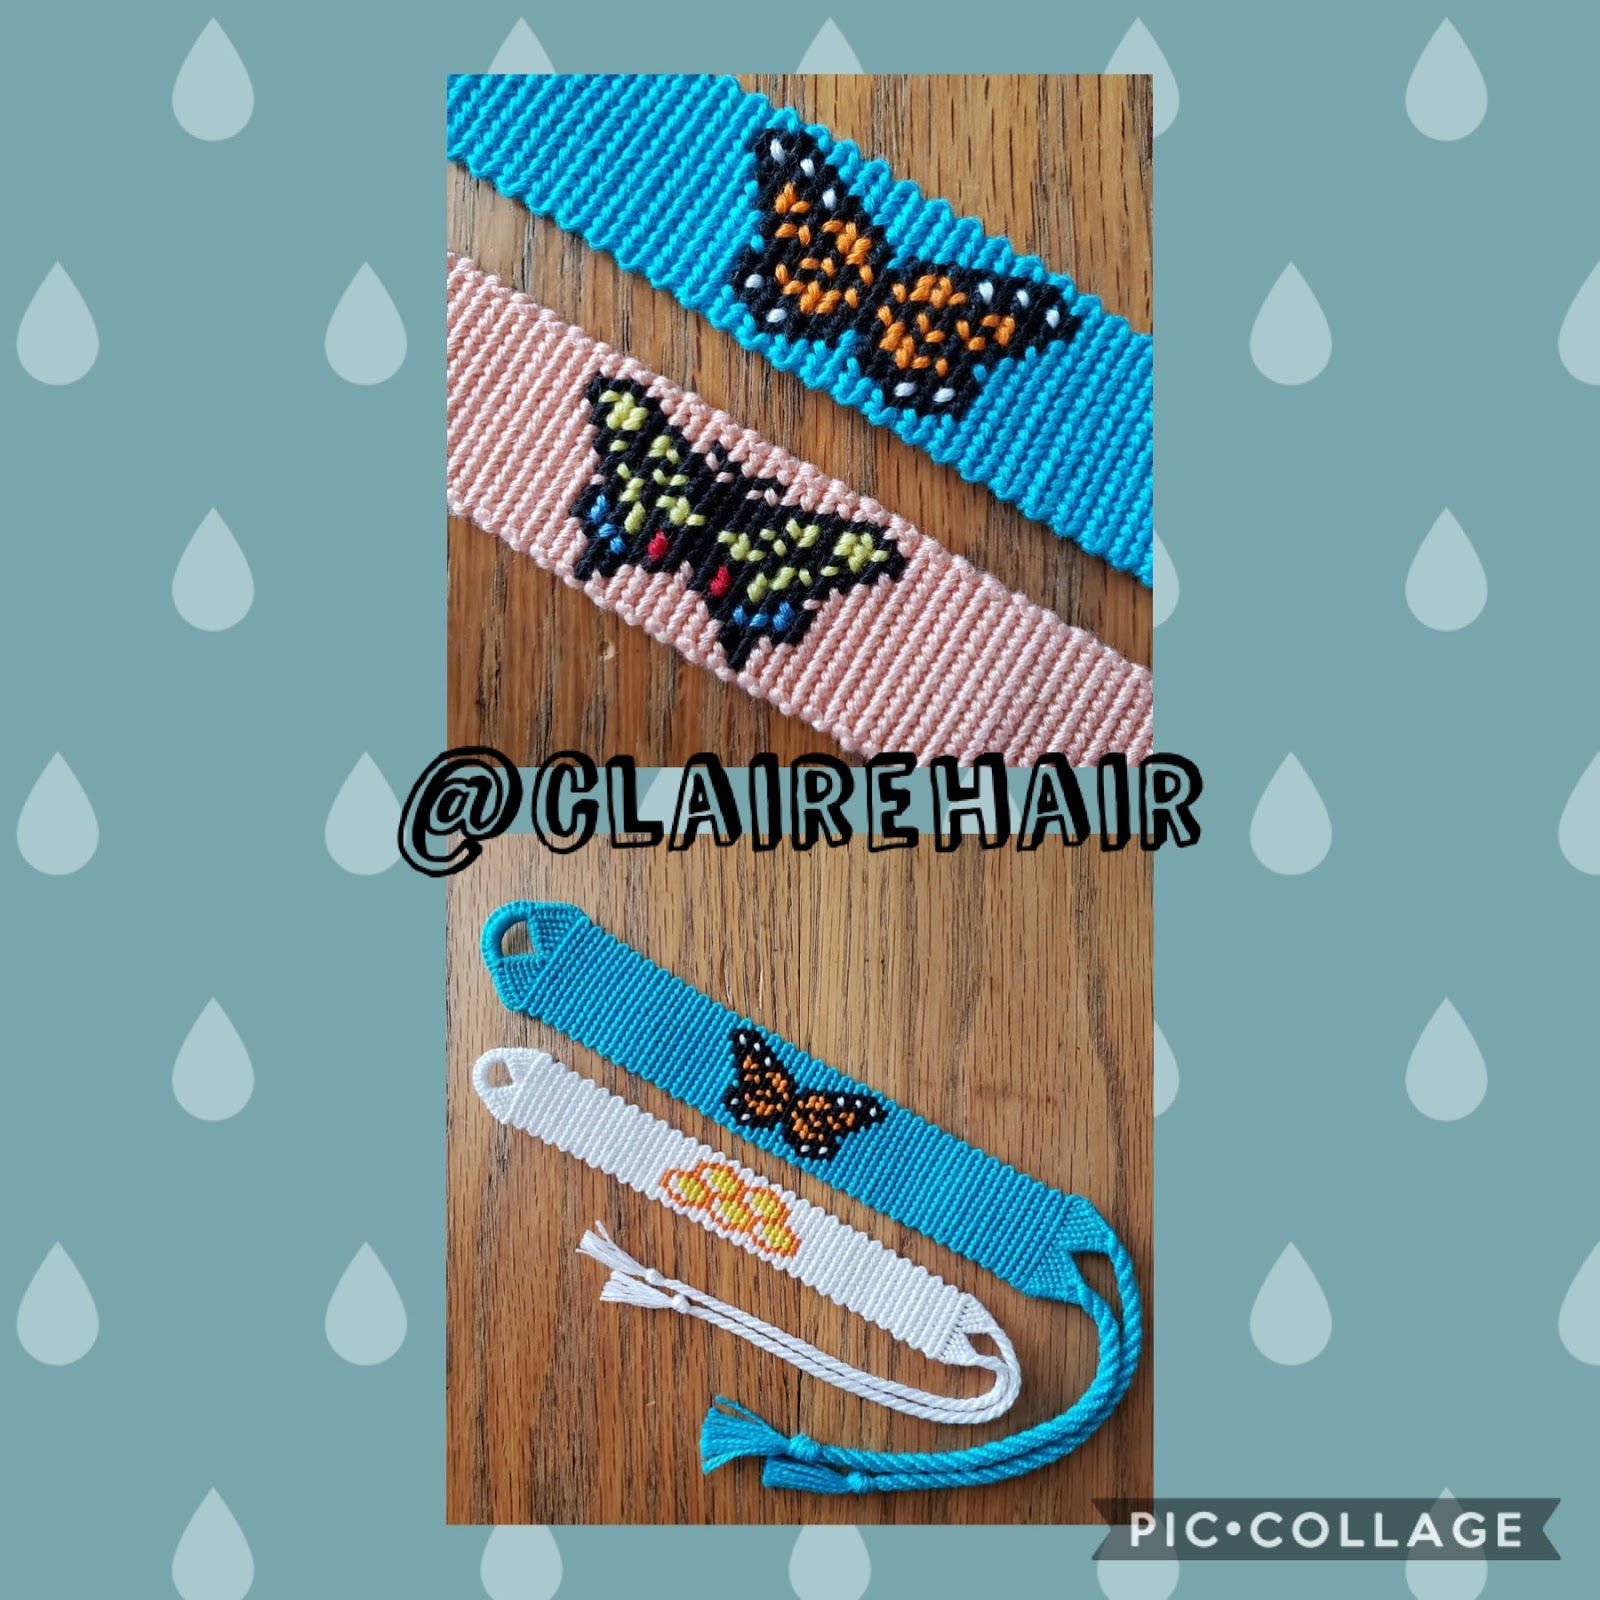
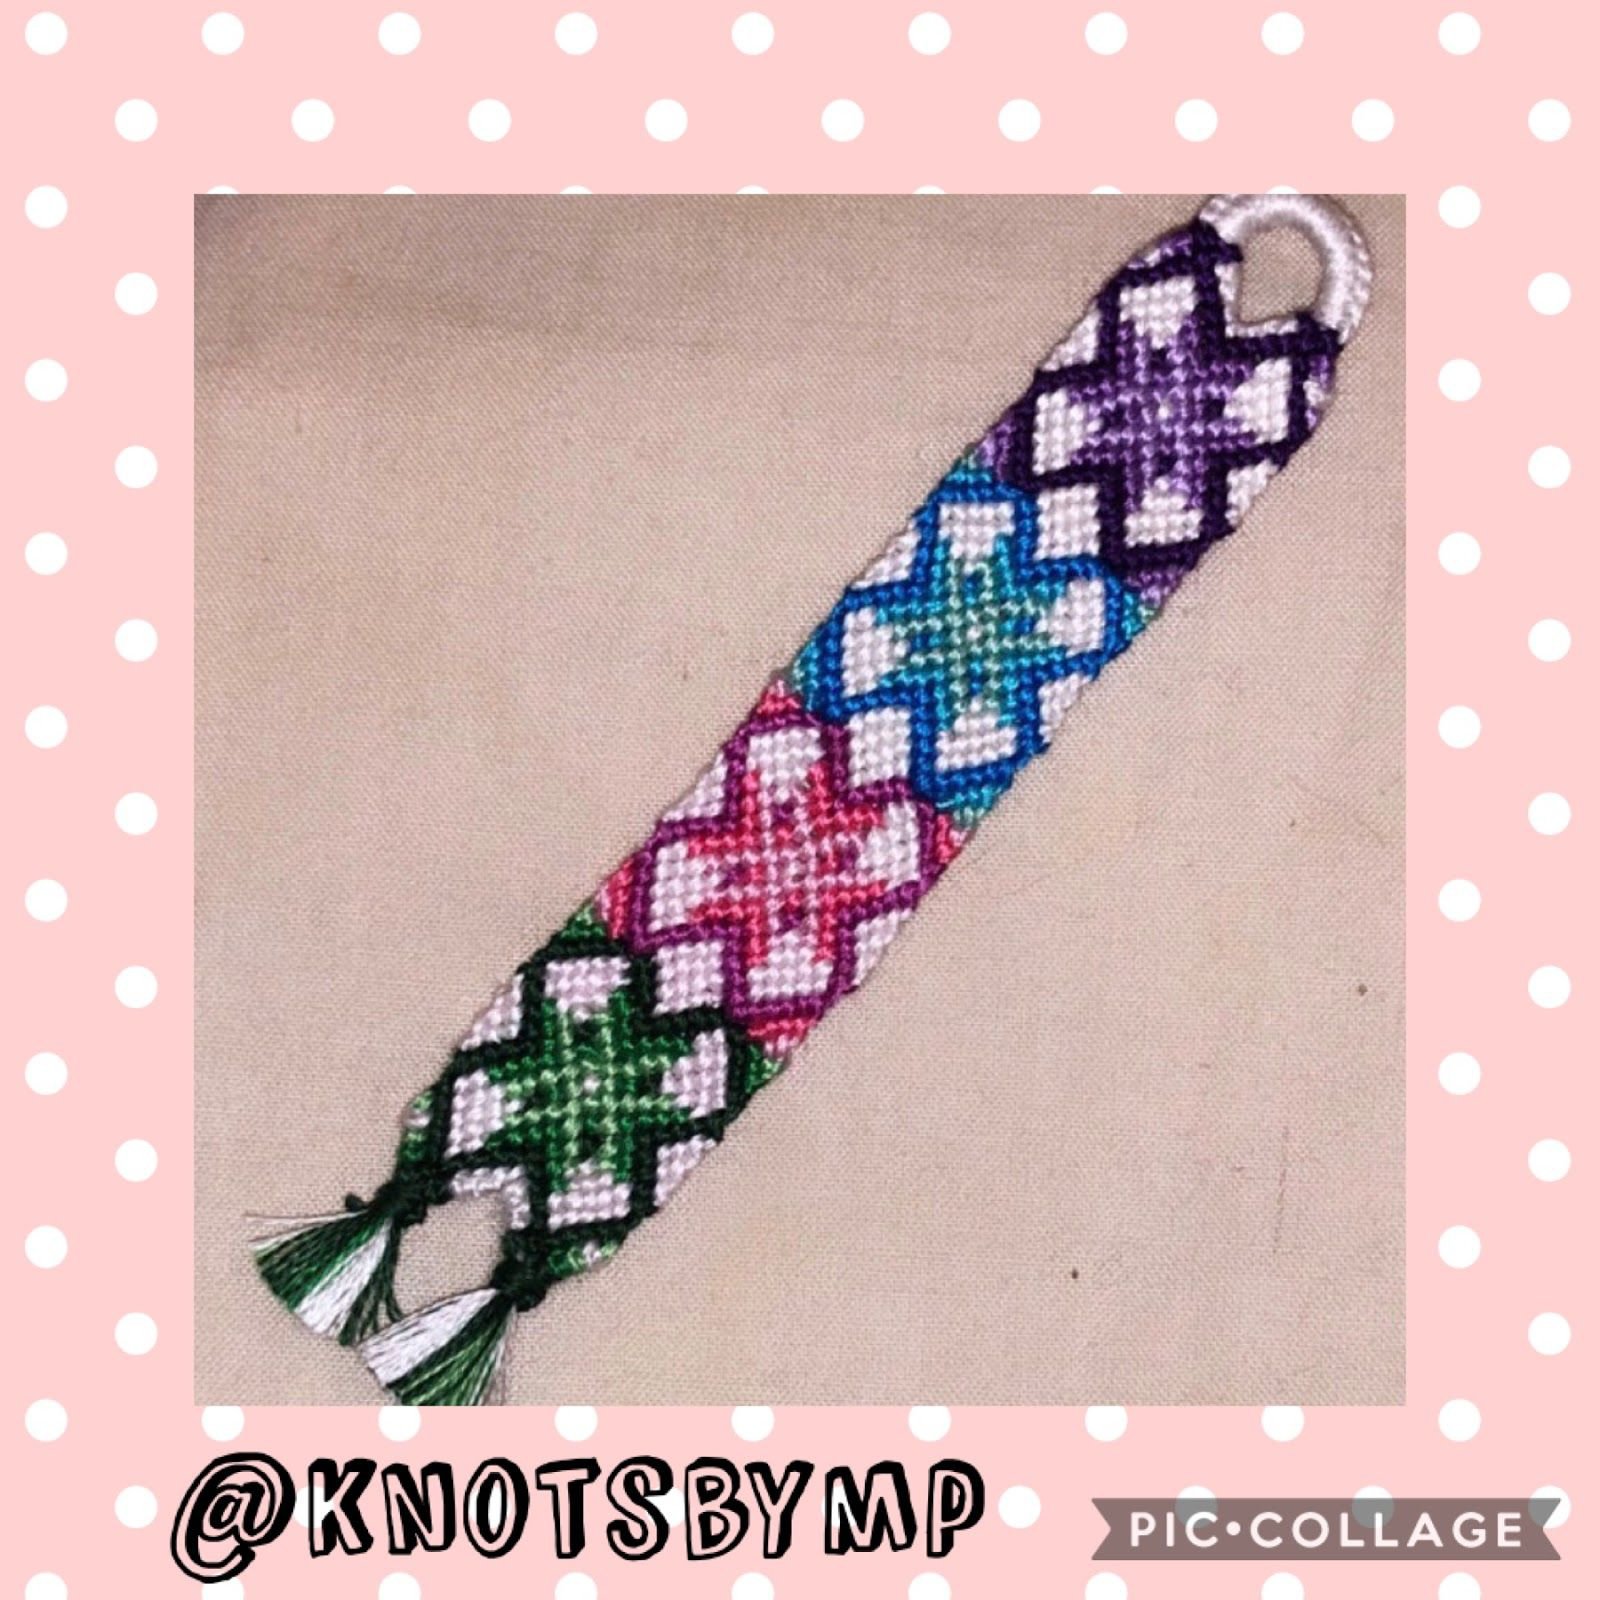
Brick stitch alpha
@clairehair has come up with an amazing technique called the brick stitch alpha. She has a brief tutorial on her Instagram page which can be found in her bio on braceletbook. If you need more details on it Megan Morris on YouTube (@Margaron on bb) has created a video which explains it further. This technique was called the brick stitch alpha because the knots are in the form of bricks as you can see in the photos on the left.
The best way to describe this technique is that it uses kandi patterns.Search up kandi patterns to find some examples of what I am talking about. The pattern is read exactly like a regular alpha pattern; the only difference is the structure of the knots itself. You make each knot onto 2 base strings until the last base string and that will only be one base string, then on the second row you knot onto one base string before knotting onto 2 base strings at a time for the rest of the row. This process repeats and is what makes the alpha look like bricks.
The best way to describe this technique is that it uses kandi patterns.Search up kandi patterns to find some examples of what I am talking about. The pattern is read exactly like a regular alpha pattern; the only difference is the structure of the knots itself. You make each knot onto 2 base strings until the last base string and that will only be one base string, then on the second row you knot onto one base string before knotting onto 2 base strings at a time for the rest of the row. This process repeats and is what makes the alpha look like bricks.
KNOTTING DANGEROUSLY by Megan Morris (@Margaron).
This video on the brick stitch alpha is not a full tutorial but is the best source of information for this technique other than Claire's instagram story.
This video on the brick stitch alpha is not a full tutorial but is the best source of information for this technique other than Claire's instagram story.
Adding a border to your bracelets
You can add a border to any bracelet; to do so in a normal bracelet you add an extra string on both sides. Then you do backward forward knots on the left edge and forward backward knots on the right edge on every other row with the extra string you added on the edges. Adding a border to your normal pattern bracelet is a great way to use the straight edges technique in a pattern where the knots are not all forward backward/backward forward on the edges.
Alex innovations has created a good video tutorial which you can watch for a more detailed explanation of this technique.
Alex innovations has created a good video tutorial which you can watch for a more detailed explanation of this technique.
How to Add a Border to Your Bracelet by Alex Innovations (@innovate).
Switching colours in a normal bracelet
This technique can be really nice and opens the possibility to many options. Switching colours in a normal bracelet is the same as a normal colour switch in an alpha or the same as replacing your strings when you need to.
CHANGING COLOURS IN A NORMAL PATTERN by Masha Knots (@Racoon).