Rate Tutorial
Hi everybody. My name is @tiassie and some of you asked me how I make straight edge endings on keychains. This could also be applied to bookmarks, patches, wall hangings. The process is not difficult but I would suggest at least intermediate skill level.
Step 1
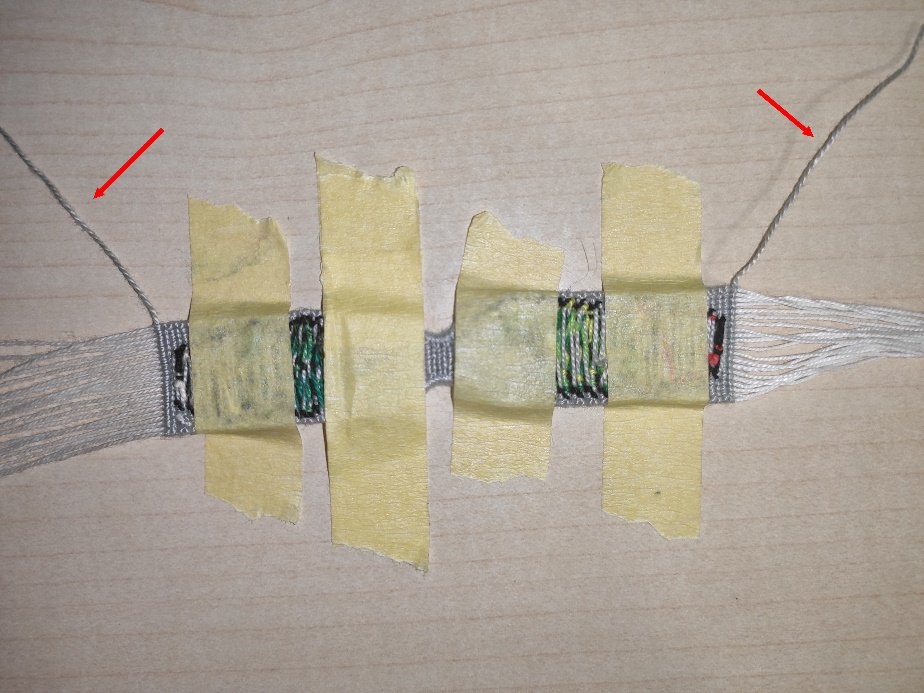
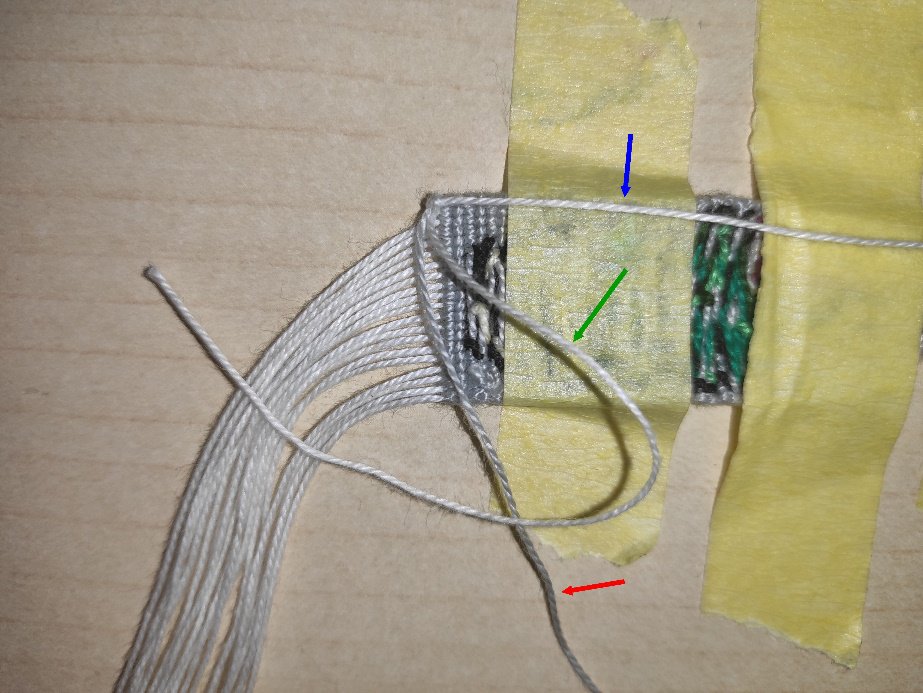
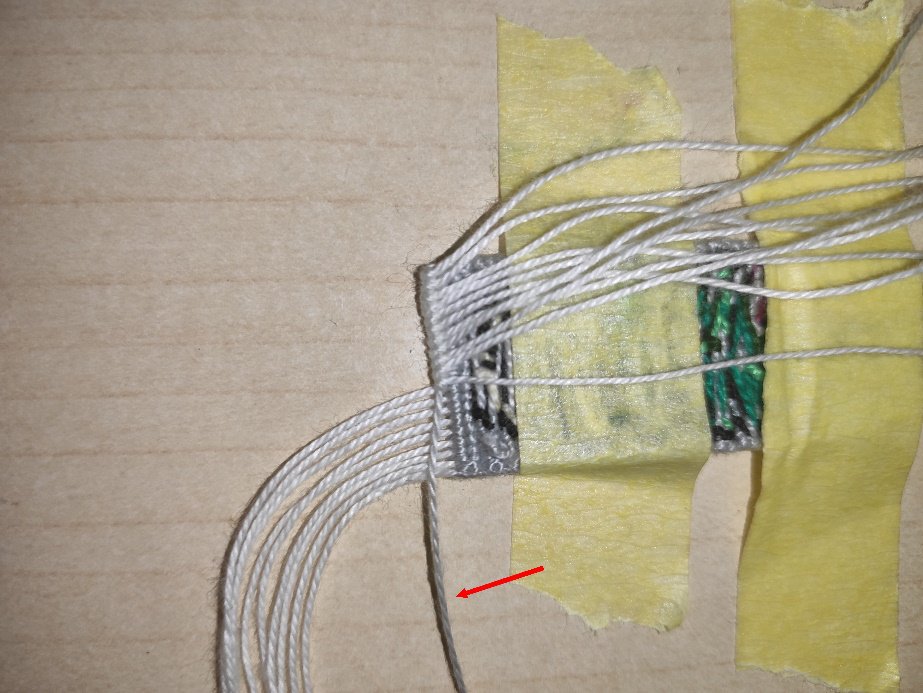
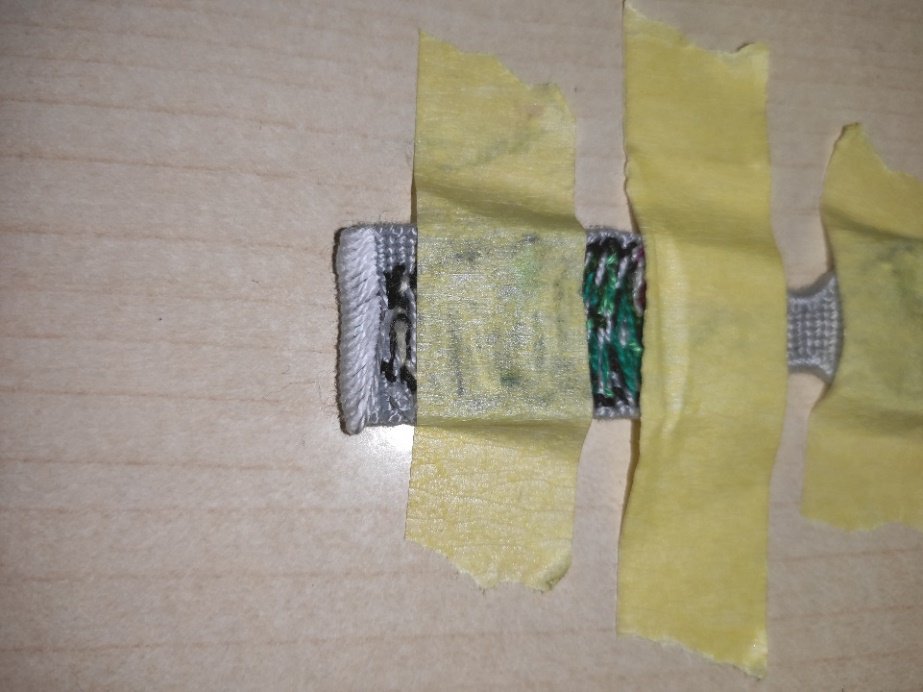
Turn your finished work sideways with back side facing up. If you're using straight edges technique don't make your last knot bf/fb but make regular forward or backward knot so your leading string ends up sticking out as you can see on the picture (grey sting – red arrows).
Step 2
The basis of this technique is making forward-backward or backward-forward knots with your base strings on the leading string.
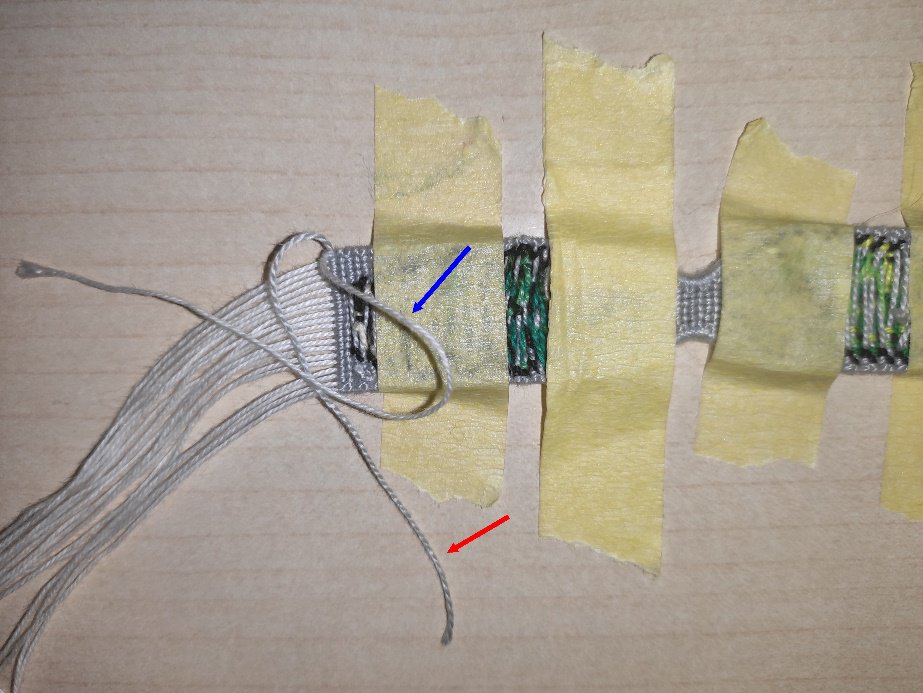
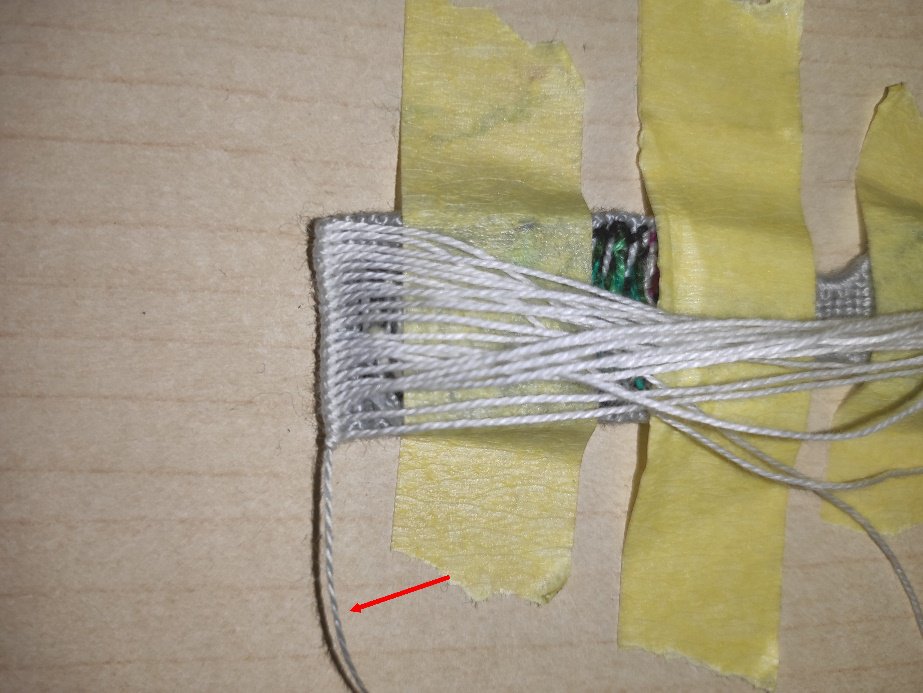
Gently pull on a leading string (grey – red arrow) so it turns parallel to the last row you made, this will represent your new ''base'' string on which you will make the knots. Now make the first half of a backward-forward knot with base string (white – blue arrow) on a leading string.
Gently pull on a leading string (grey – red arrow) so it turns parallel to the last row you made, this will represent your new ''base'' string on which you will make the knots. Now make the first half of a backward-forward knot with base string (white – blue arrow) on a leading string.
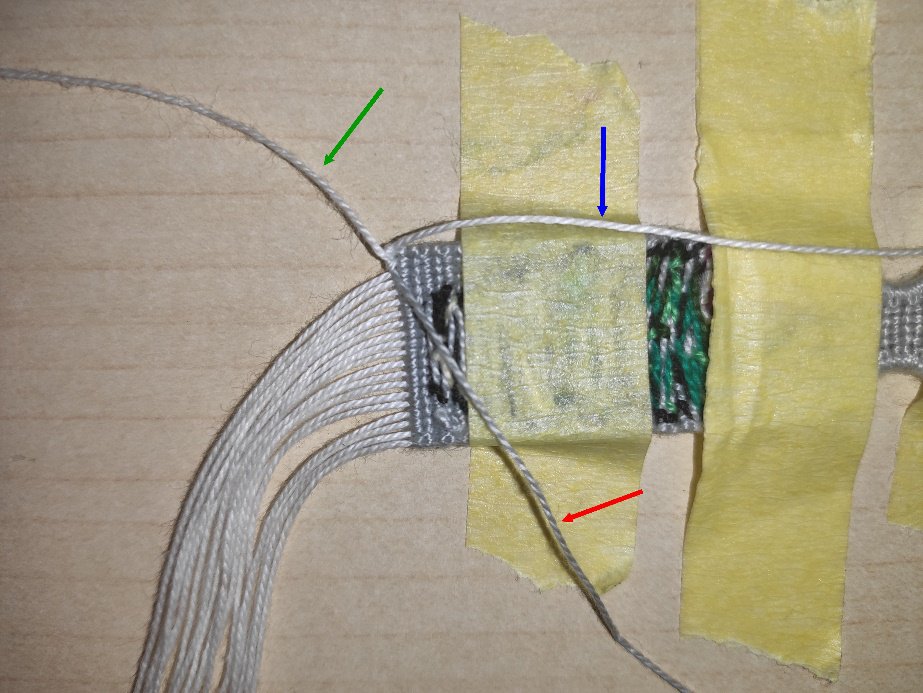
Now you made half of a knot and it should look something like this. Your leading string (grey – red arrow) is secured and pointing down and will make a base for straight edge ending. The base string (white – blue arrow) is sticking up and will be used to make remaining half of a knot.
Step 3
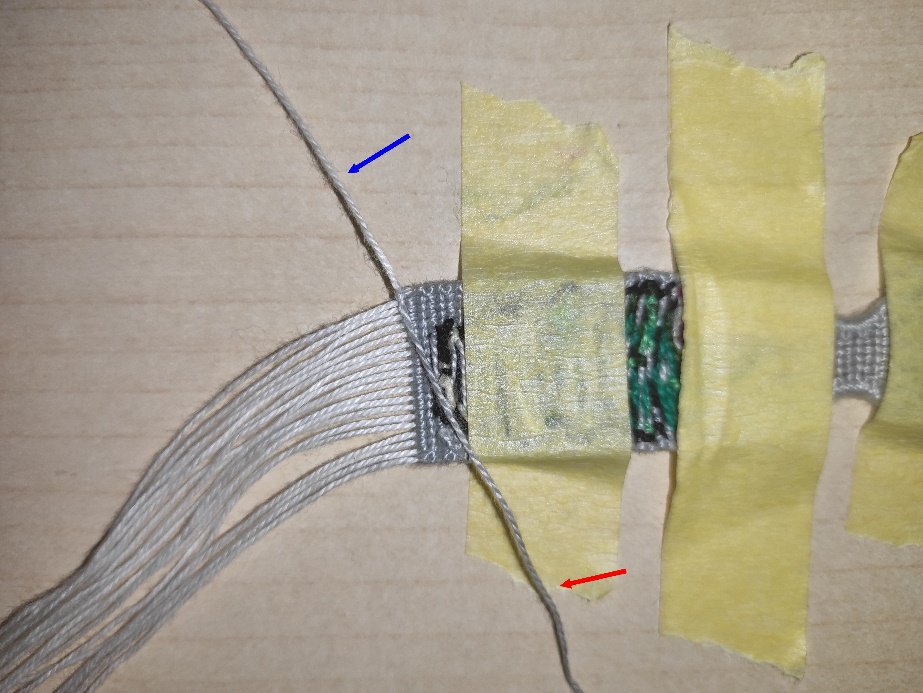
Make the second half of a backward-forward knot with a base string (white – blue arrow) on a leading string (grey – red arrow). This is a bit hard to do and may look weird so make sure to keep the tension even. As you continue making the edge it will start to look better so don't worry too much.

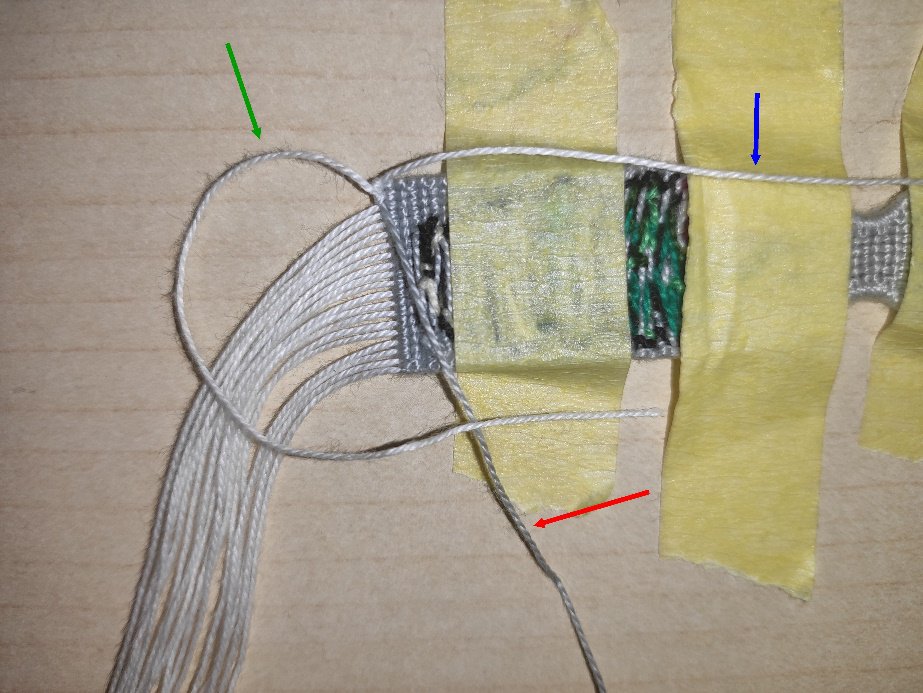
Congrats! You completed your first knot. Now your base string (white – blue arrow) is pointing inward and you'll not need it anymore. You have to repeat that with all base strings.
Let's go through that again, shall we.
Let's go through that again, shall we.
Step 4
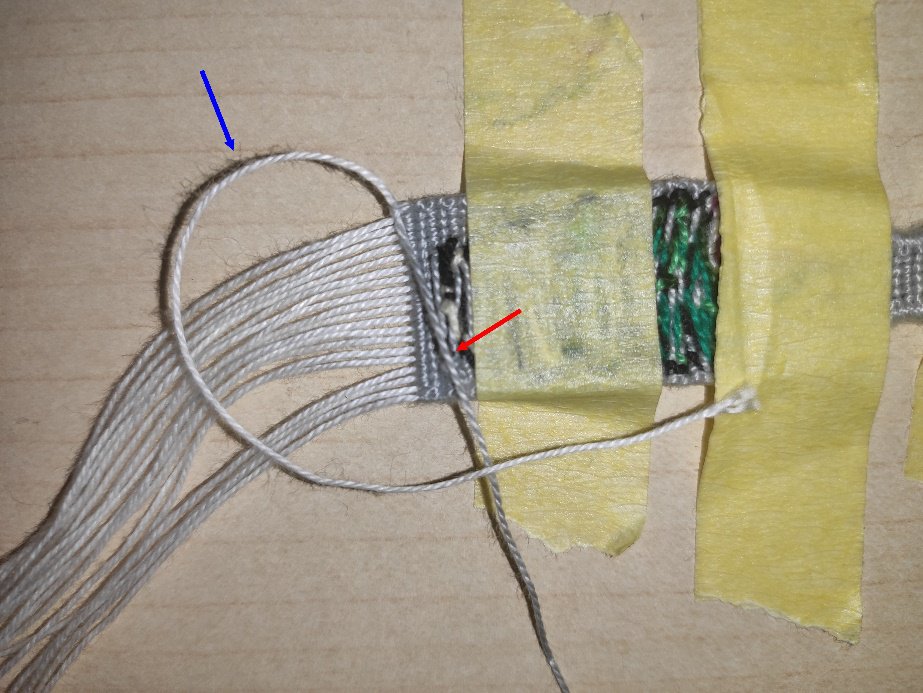
As you can see on the picture the leading string (red arrow) lies over base strings so when it's time to make knots with a base string make sure you untuck the base string so it lies on the right side of the leading string. That way the edge will look nicer and will be closer to the last row of knots.
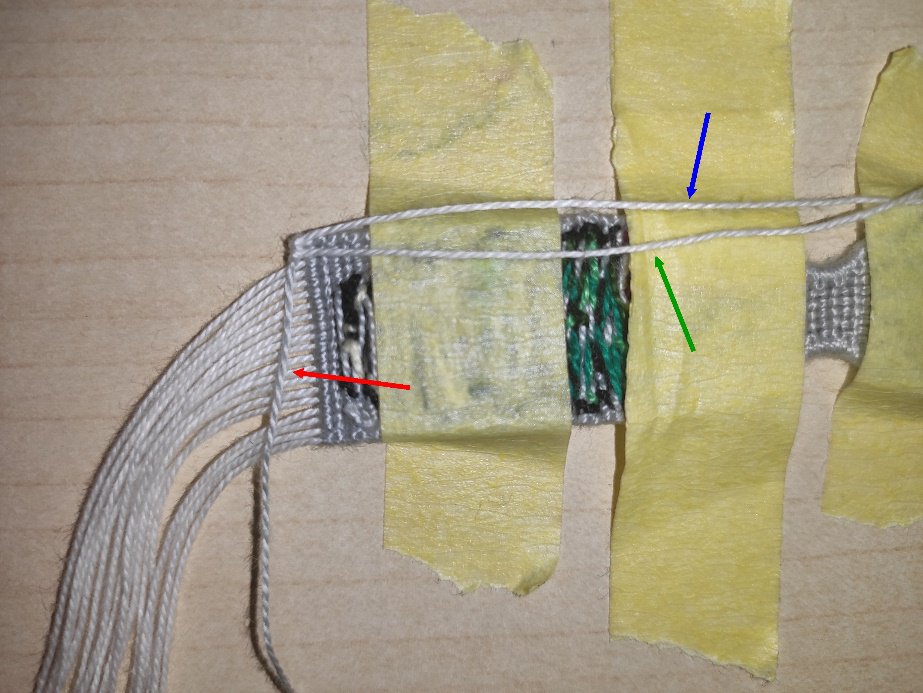
Grey string (red arrow) is your base for the knots, you succesfully started straight edge and made one knot with first base string (blue arrow). Now you need to repeat that with all the base strings. Take next base string (green arrow) and make the first half of a backward-forward knot on the leading string (red arrow).
Grey string (red arrow) is your base for the knots, you succesfully started straight edge and made one knot with first base string (blue arrow). Now you need to repeat that with all the base strings. Take next base string (green arrow) and make the first half of a backward-forward knot on the leading string (red arrow).
First half of a knot is done, as you can see the first base string (blue arrow) stayed where you left it, the leading string (red arrow) is still pointing down and is the base for all your remaining knots.
Step 5
Now you need to make remaining half of a knot. You already made the first half of a backward-forward knot so now it's time for a second half of a backward-forward knot with a second base string (green arrow) on a leading string (red arrow).
Step 6
The knot is done. The leading string (red arrow) continues to be a base for the knots, second base string (green arrow) joined the first base string (blue arrow). That's all there is to this technique. Just make backward-forward knots with base strings on a leading string.
The leading string (red arrow) stays pointing down and the base strings all turn direction and are pointing inwards.
In my case I was making the edge on the left side, so I had to make backward-forward knots with base strings on a leading string. If you're making edge on the right side you would do forward-backward knots.
Step 7
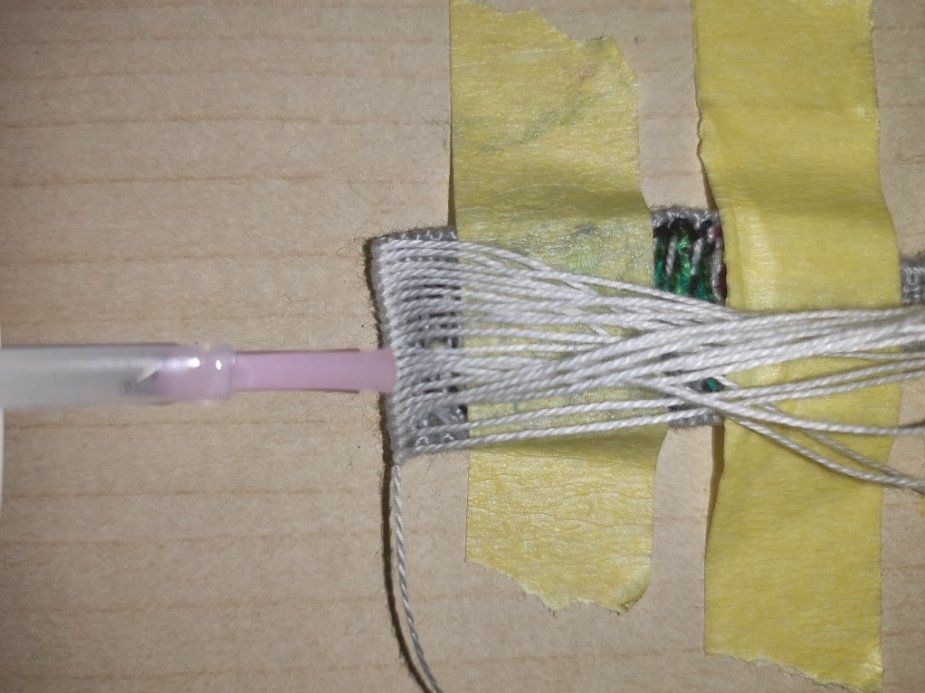
Now it's time to clean it up. Put some glue or clear nailpolish on the knots you just made.
Step 8
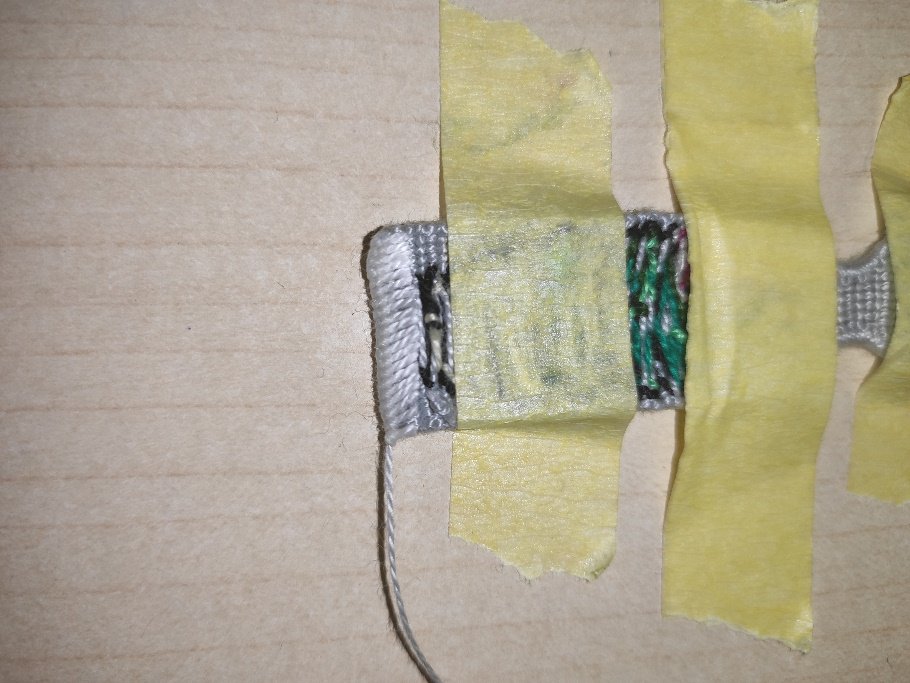
And trim the base strings.
Step 9
Tuck the leading string inwards and secure it with glue or nail polish.
Step 10
Well done! You made the edge.