Rate Tutorial
Introduction
Hi all! I hope you are well, I am @Rocio123 and today I want to show you an ending (that several of you have asked me) and it works very well for a little longer patterns. This technique can be used in any pattern, but in normal patterns it is a bit strange. I hope you like it and with nothing more to say let's get started.
Step 1
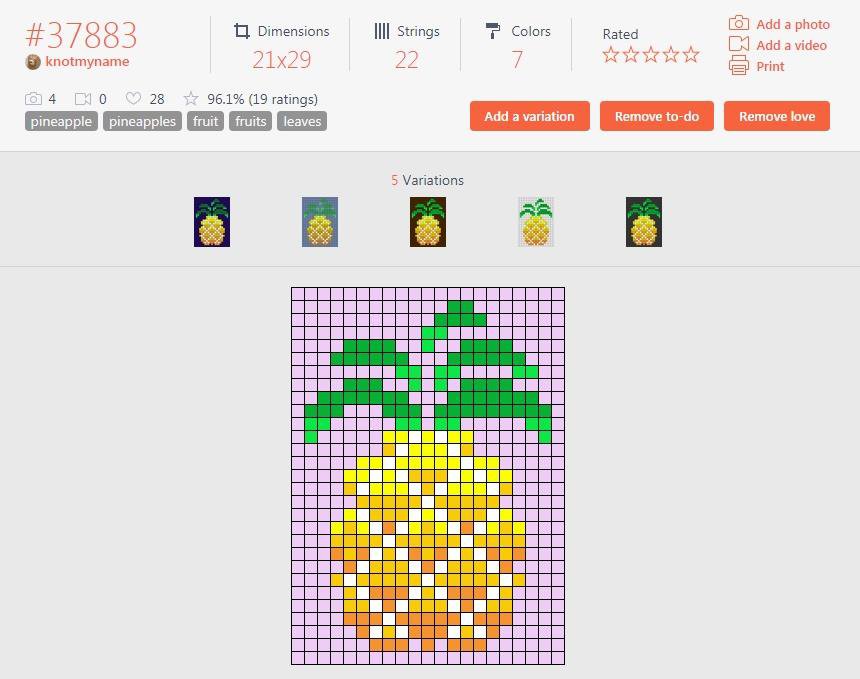
Well the first thing to do is look for the pattern you want to make in my case I use the pattern #37883 by @knotmyname.
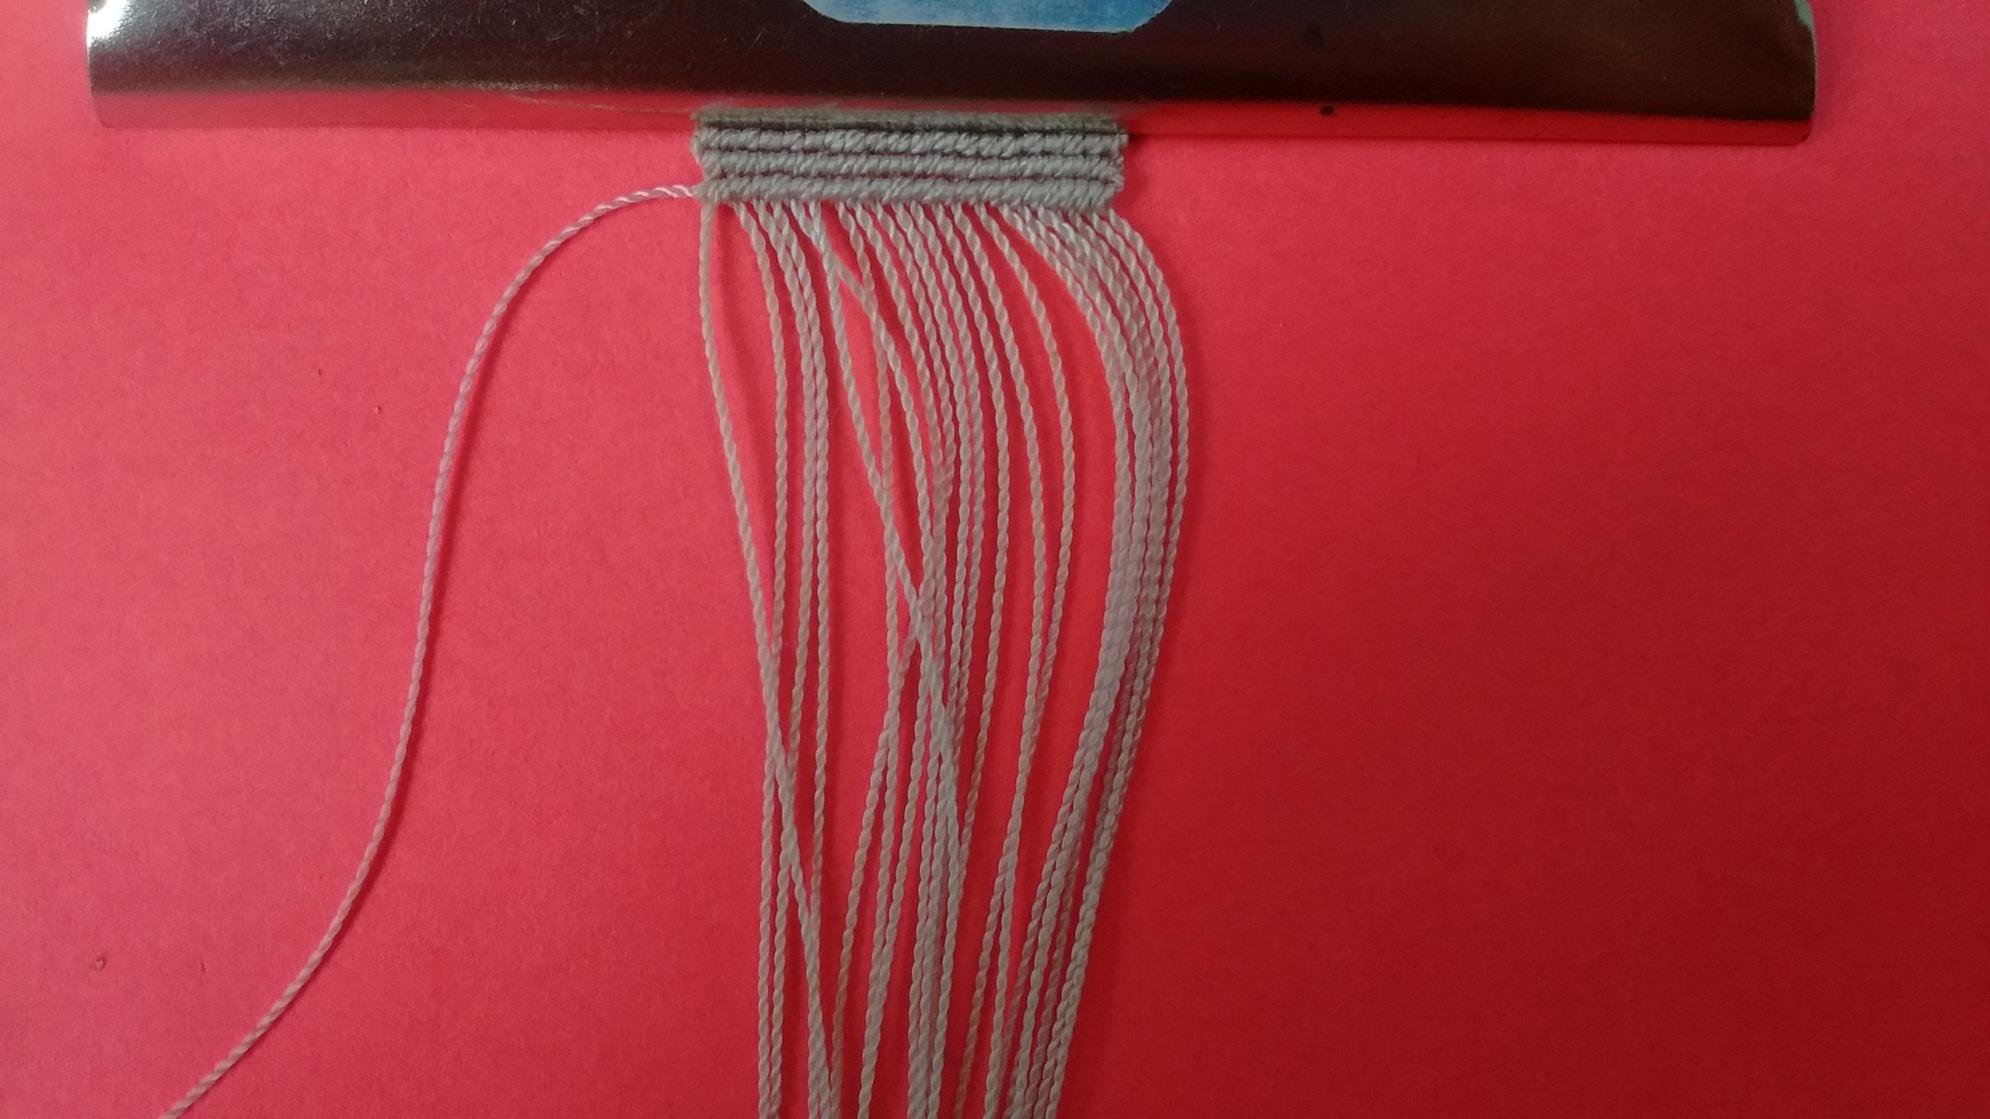
Step 2
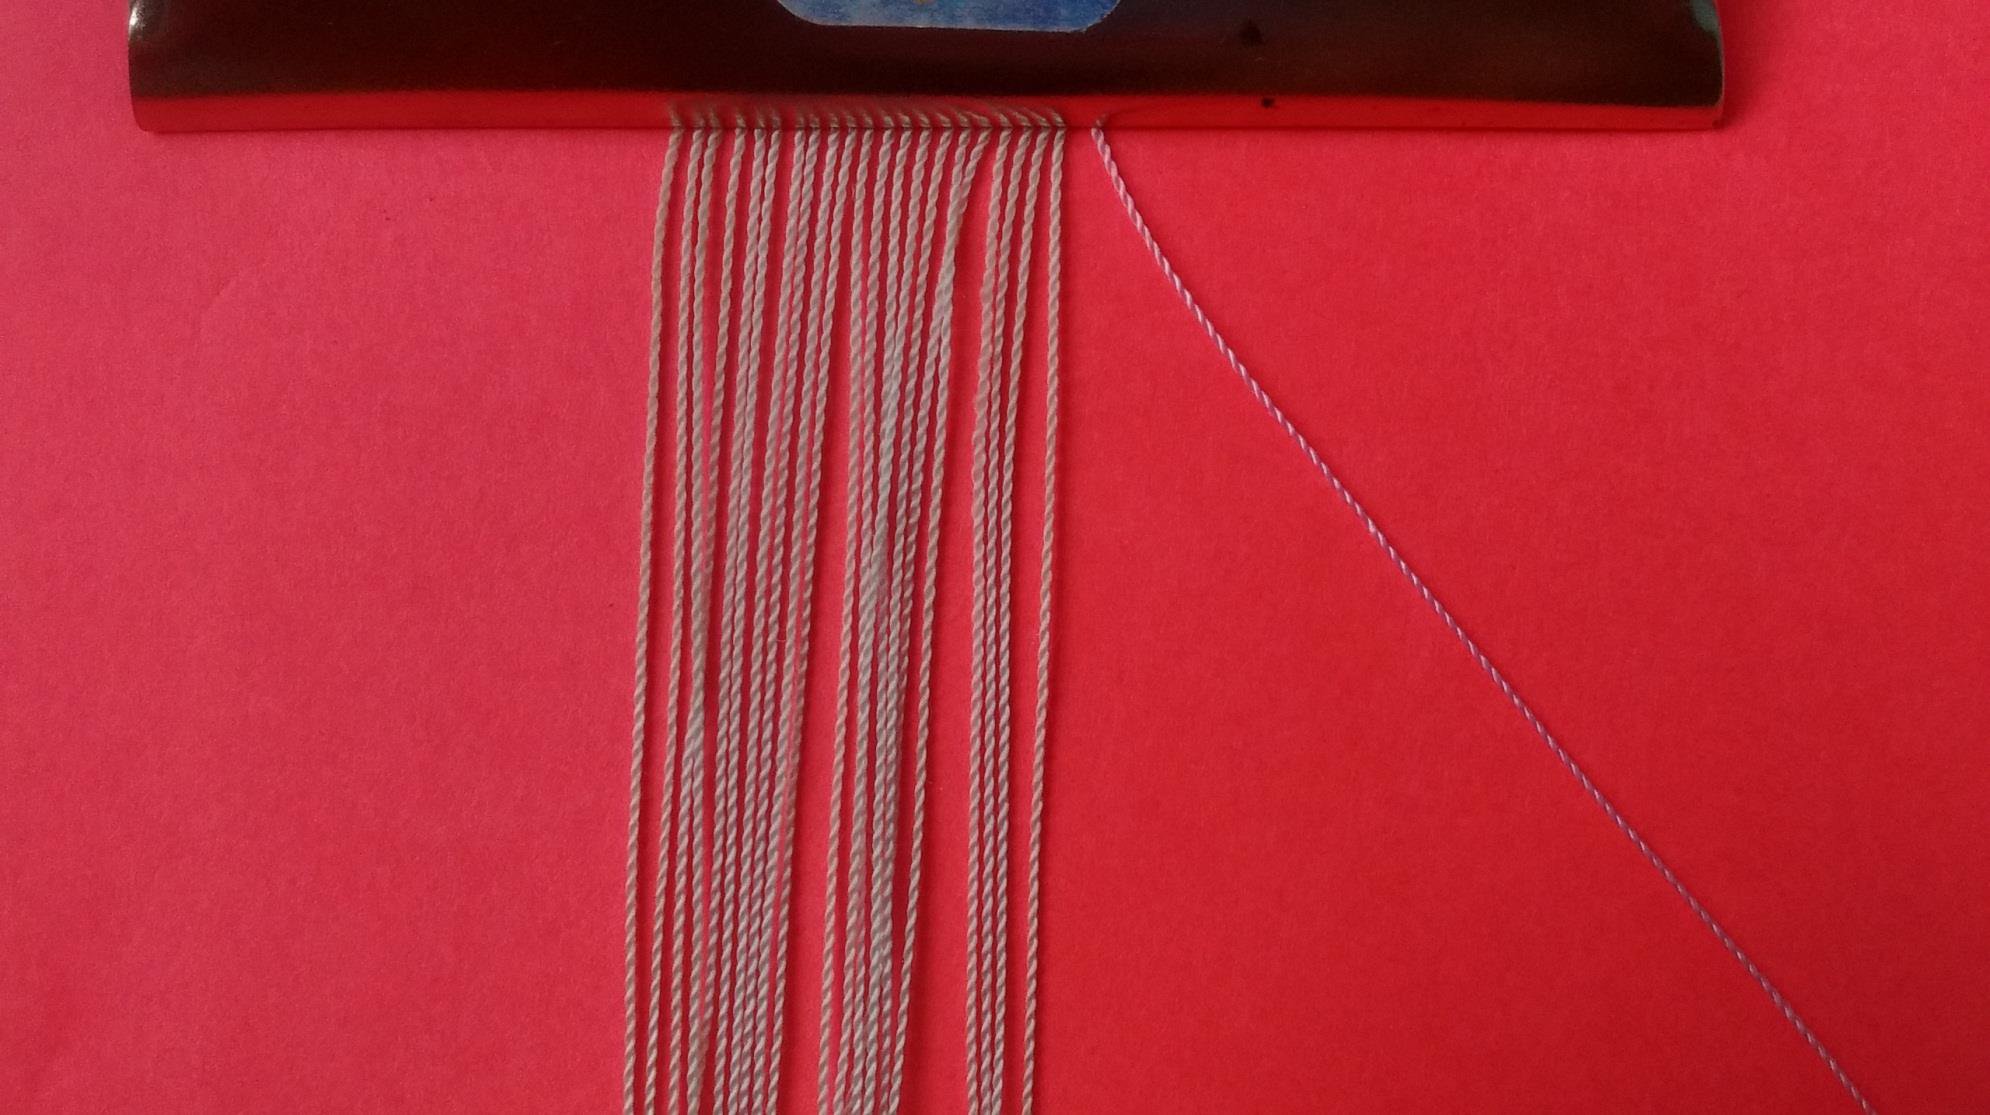
The next thing is to cut the base thread and arrange it where you are most comfortable (save a little for the strap of the bracelet) then you are going to add the first colored thread that uses the pattern.
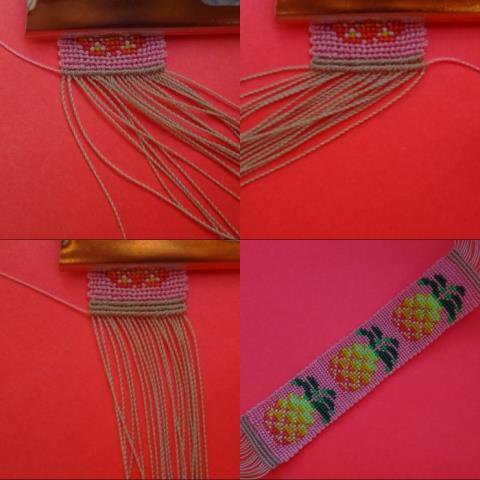
Step 3
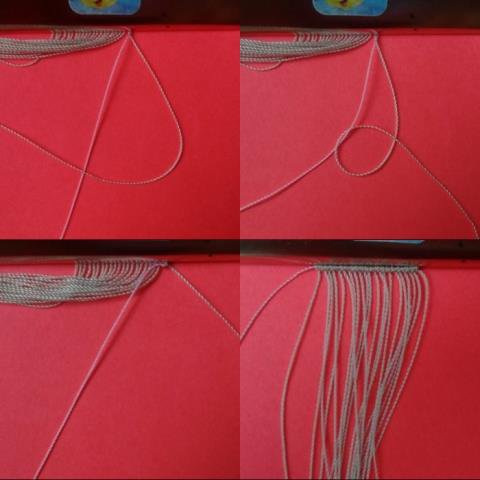
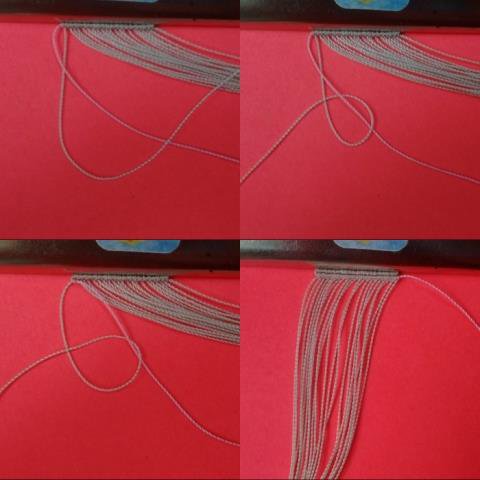
With that same thread you will make the knot you want with all the base threads you can guide yourself with the images (THE FIRST 3 STEPS WILL BE REPEATED 2 TIMES).
Step 4
Now you bring the colored thread to the opposite side and start knotting all the base threads.
And finally you will make the knots again on the opposite side with all the base threads. Once you're done, start with the pattern.
Step 5
When you are done with the pattern you have to do exactly the same as at the beginning. (With the colored thread you make the knots that I already taught you previously and then do it to the right or to the left depending on the position of the colored thread).
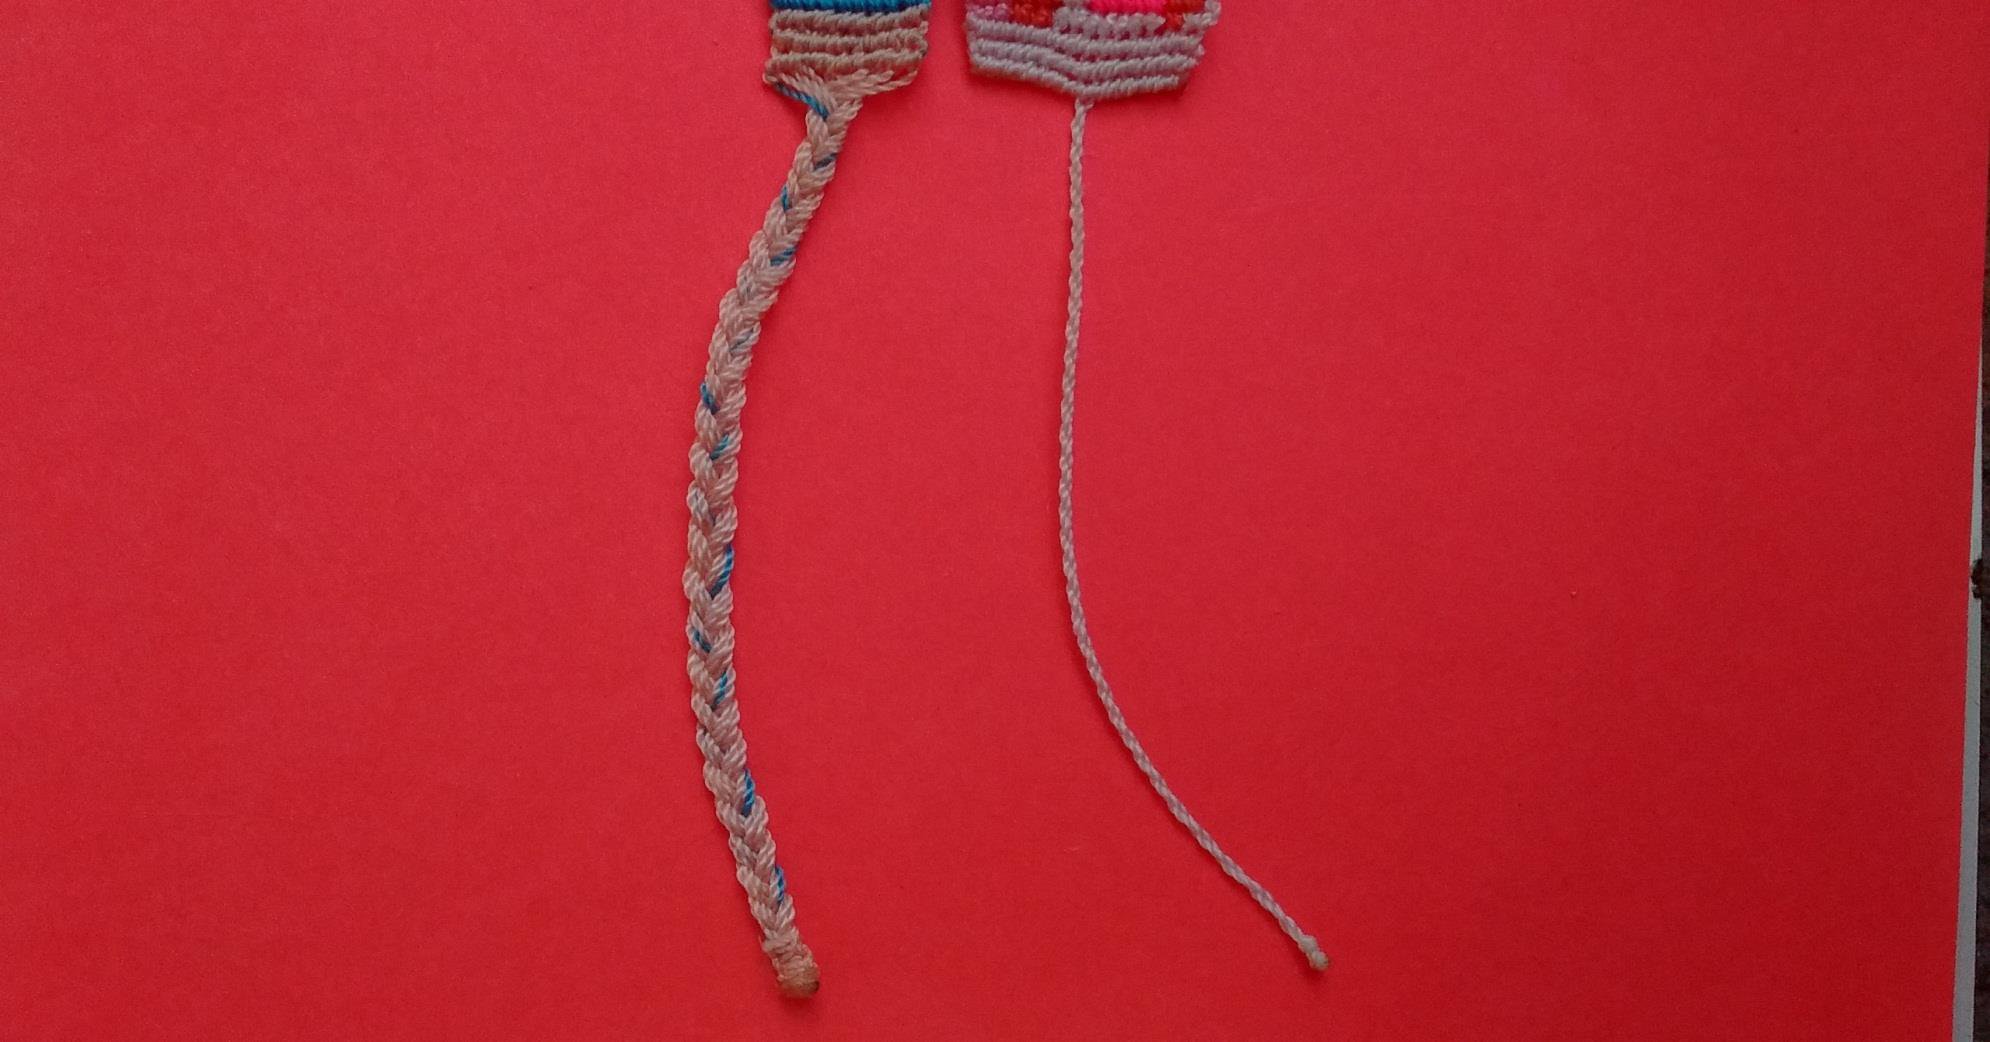
Step 6
You're almost done! Well continuing to the left side I will leave you 2 ways to make the mooring. When you do, you will have your bracelet ready! Thank you very much for reading this tutorial I hope you have understood what it explains, if you have any questions you can leave it in the comments; well I say goodbye, it was a pleasure to do this tutorial. See you soon! ♥.
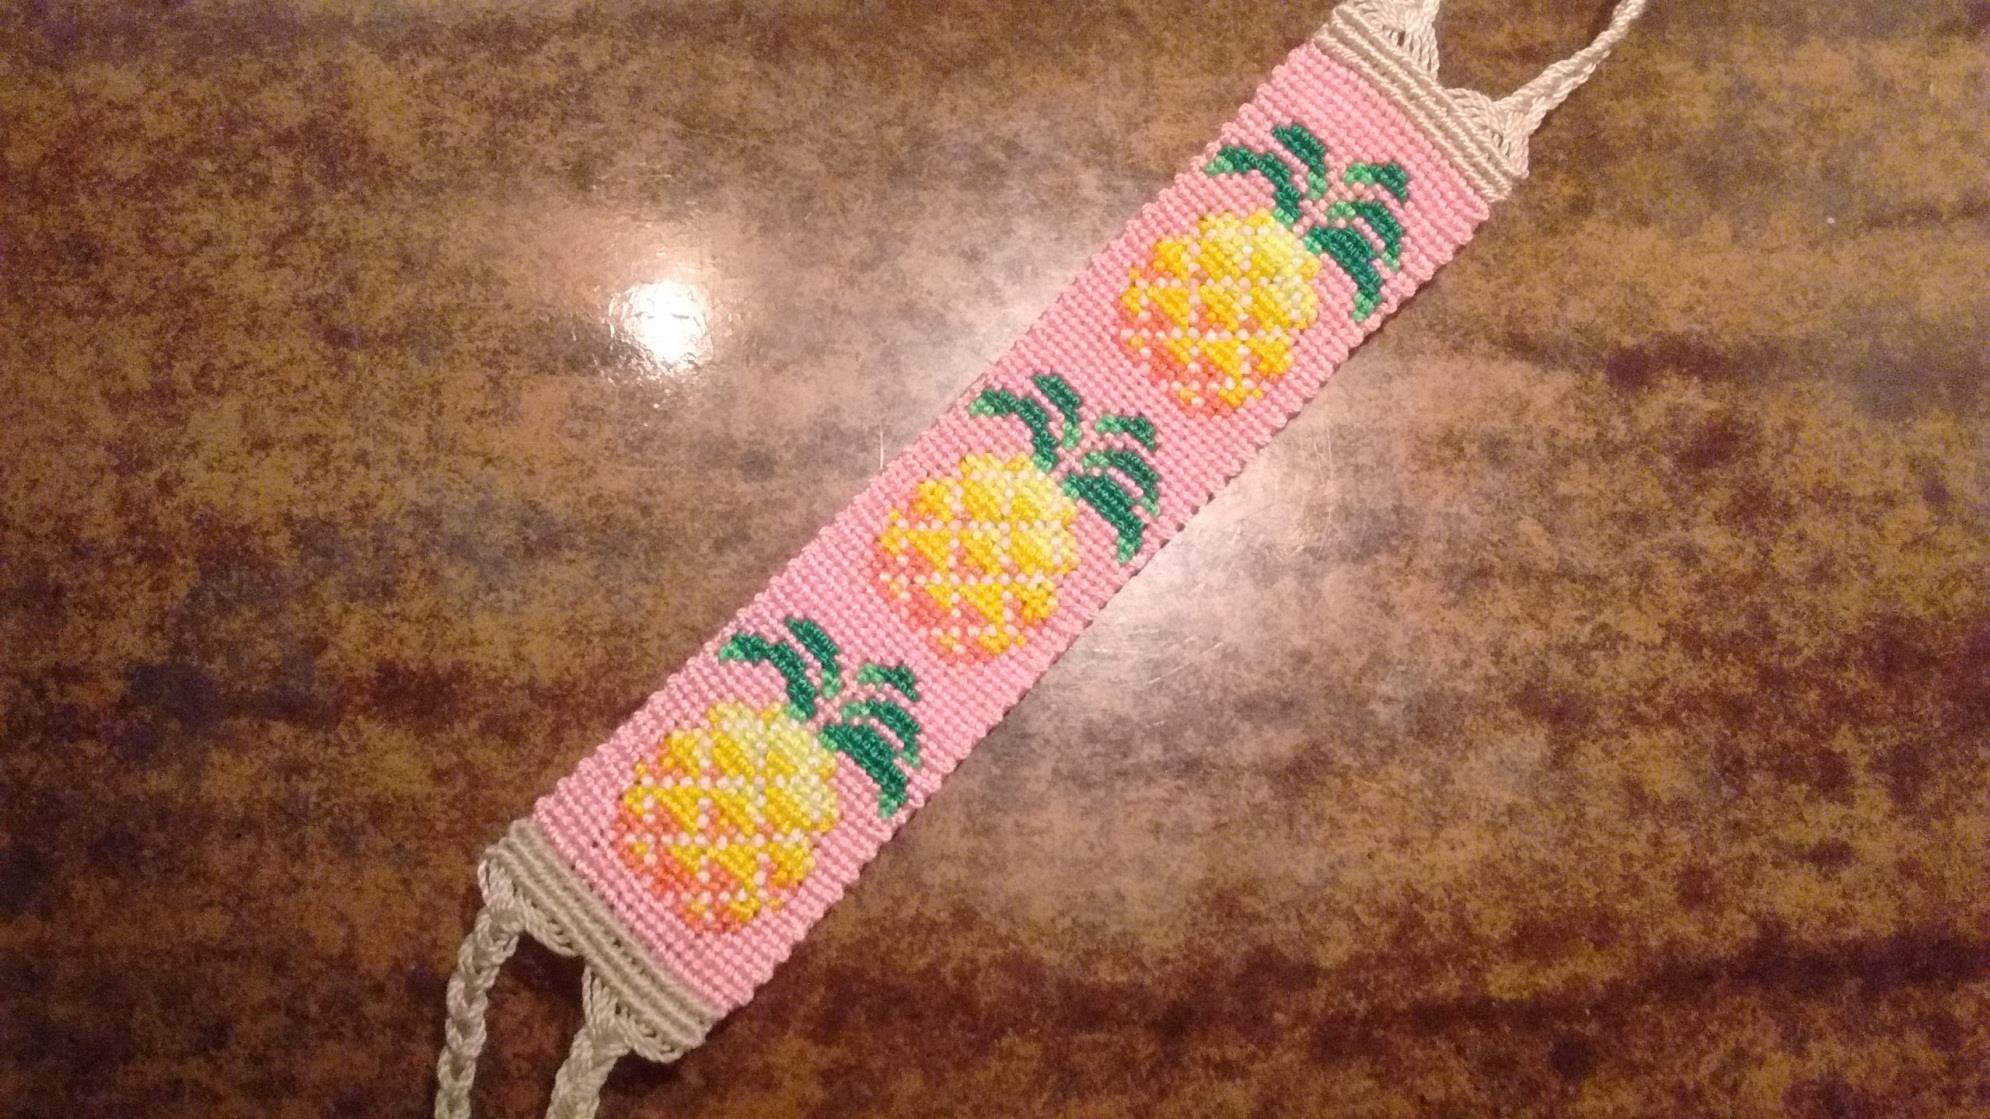
I forgot and this is what my bracelet looks like.