Rate Tutorial
What is a teardrop loop?
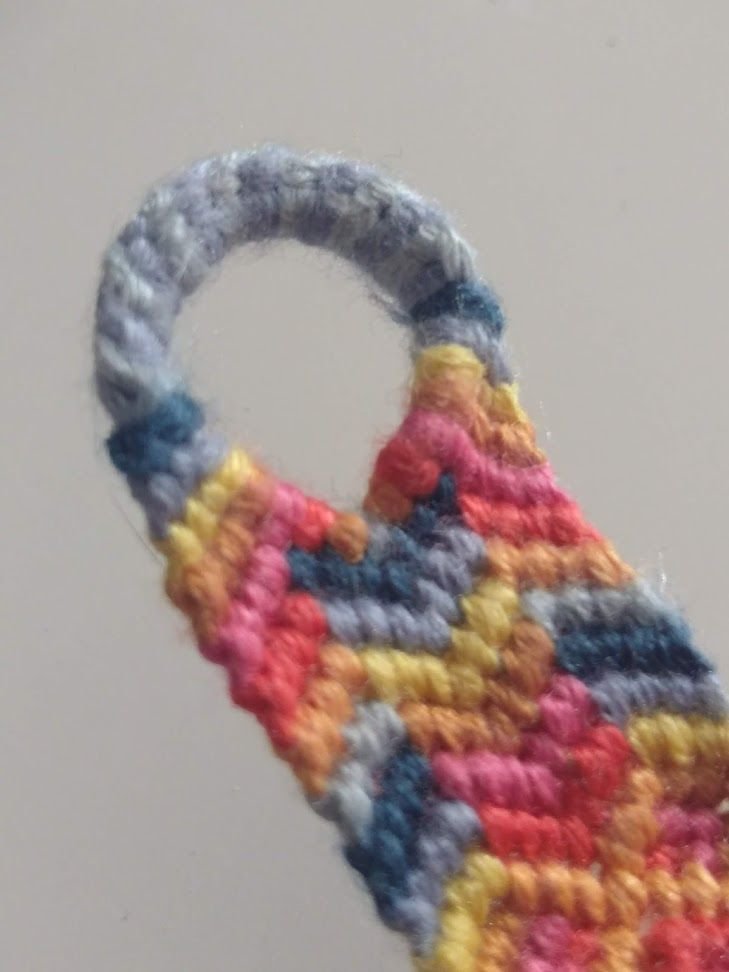
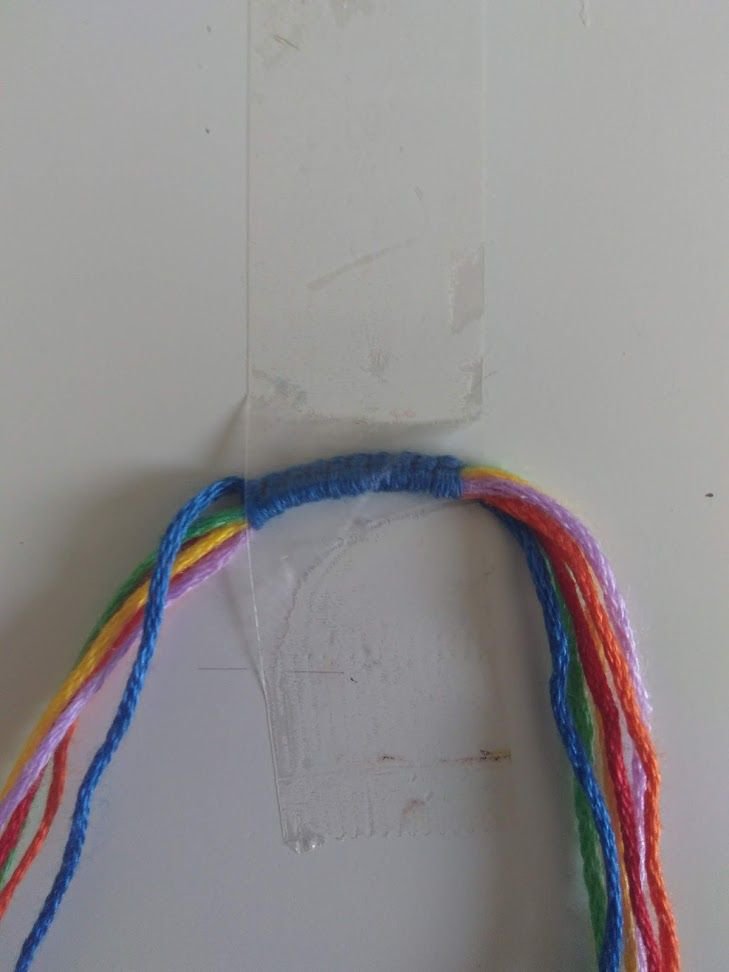
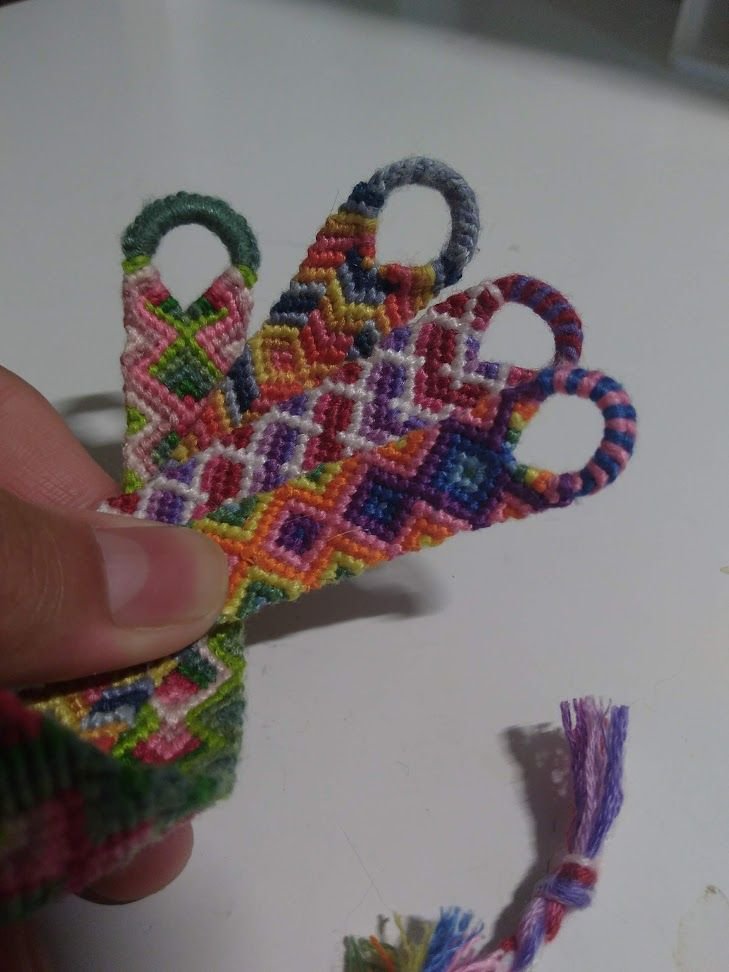
A teardrop loop is a loop that, when made, creates an upside-down teardrop shape, which is pictured to the left. It helps even out the strings when they are put together in a loop.

Step 1
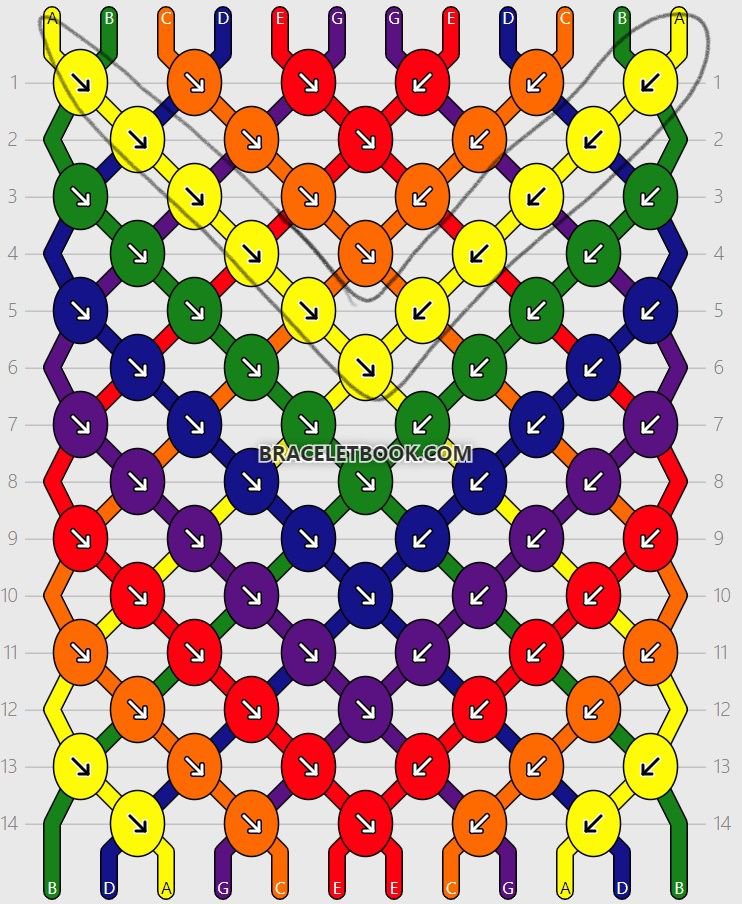
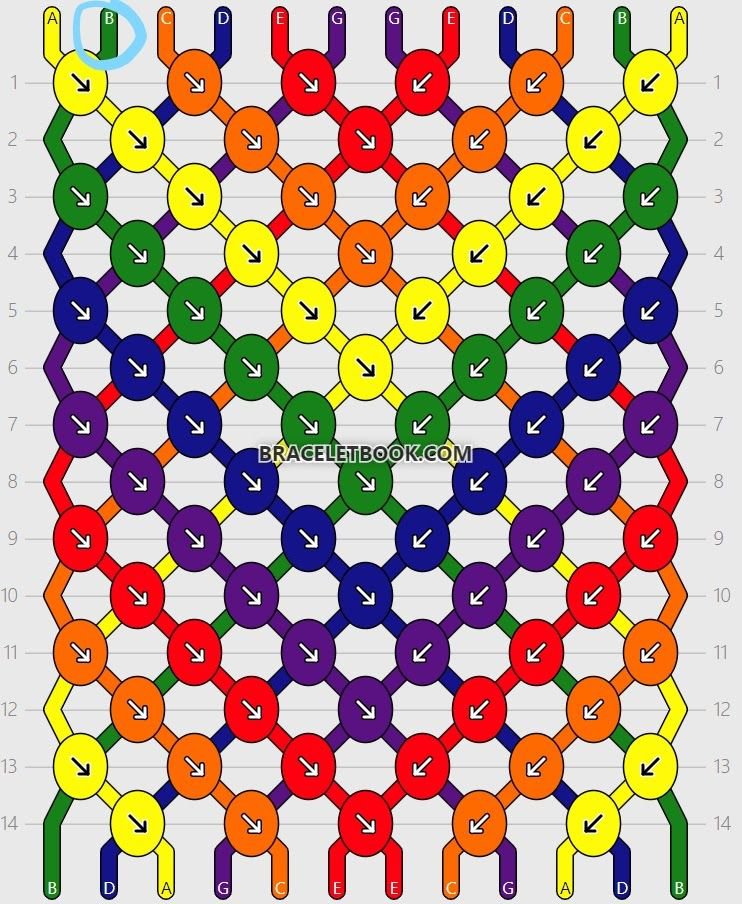
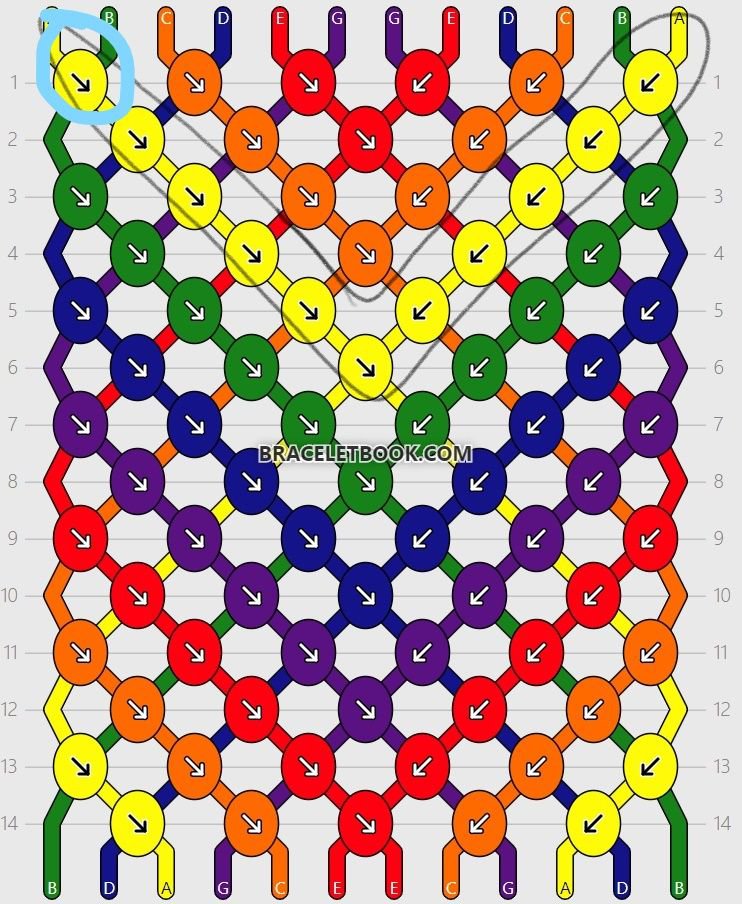
Choose any type of pattern you’d like, however patterns that have an even number of strings for each color are much easier to work with. Patterns with an odd number of strings for each color can be doable but needs a bit more work in producing a loop. I am using pattern #70, since it is a simple pattern to use when making starts and finishes.
Step 2
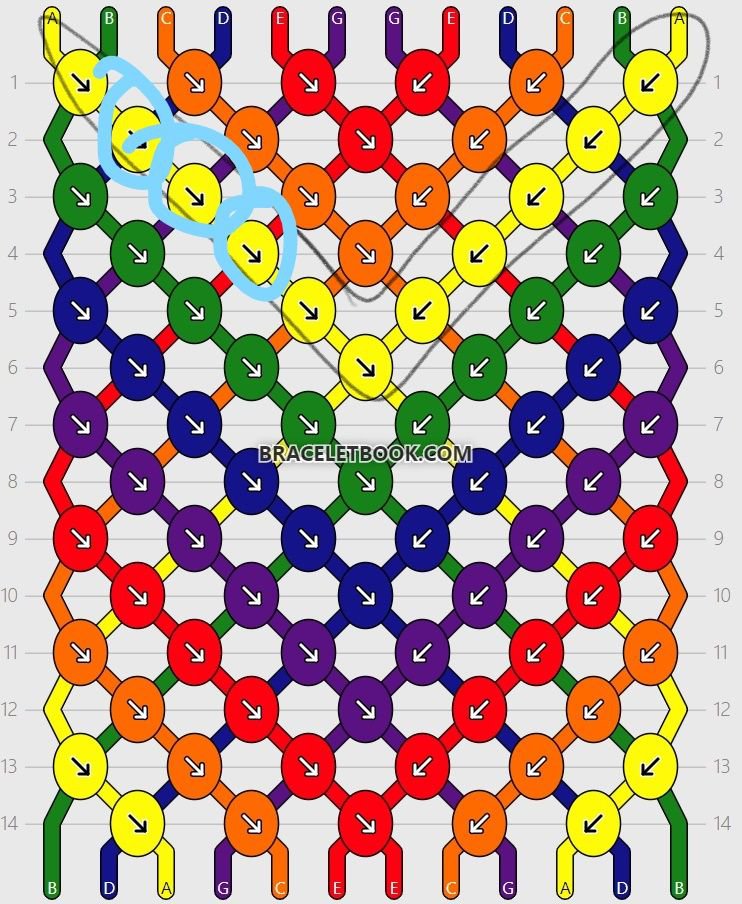
Find a point in the pattern that creates a V-shape or arrow. You can make the V anywhere, but I prefer to make mine in an area where the pattern naturally forms into a V.
Step 3
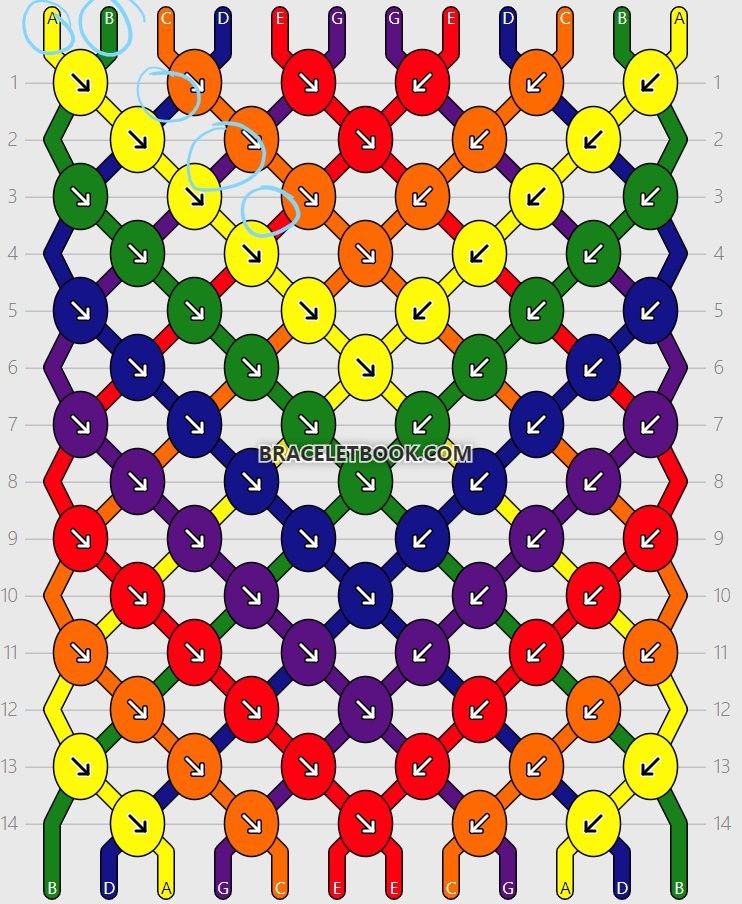
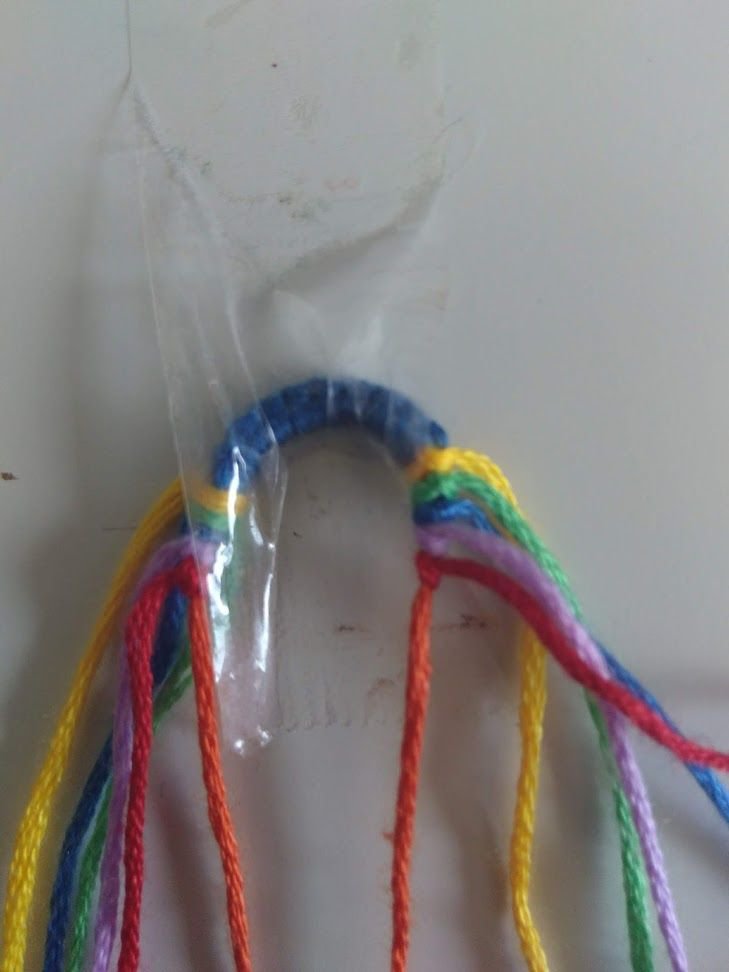
With the V-shape you just outlined, find pieces of string that stick out above the pattern. With this, you can start making your teardrop shape.
The string at the end of the line of strings that stick out at the top shouldn’t make any knots, in this case orange.
The string at the end of the line of strings that stick out at the top shouldn’t make any knots, in this case orange.
Step 4
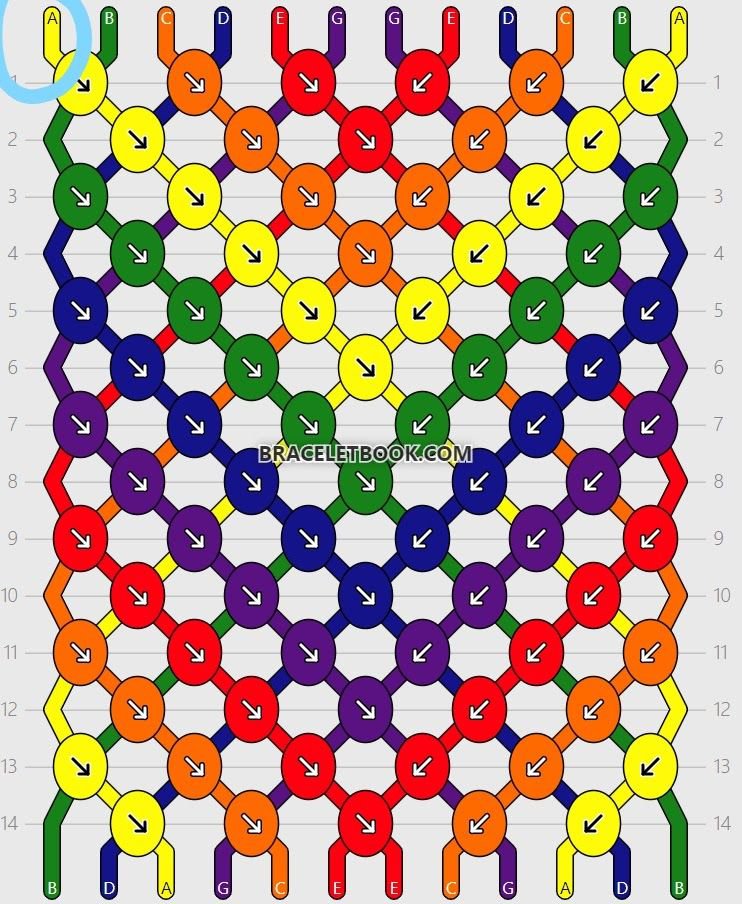
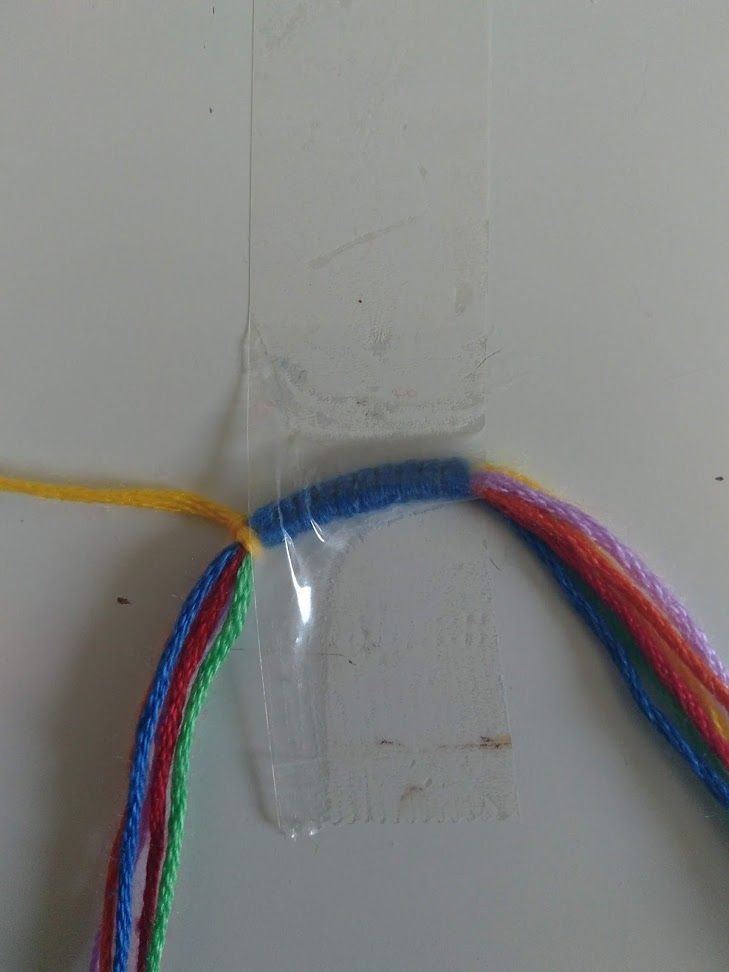
The string on the farthest left corner will be the first string you bring out with a forward-backward knot, in this case the yellow string.
Step 5
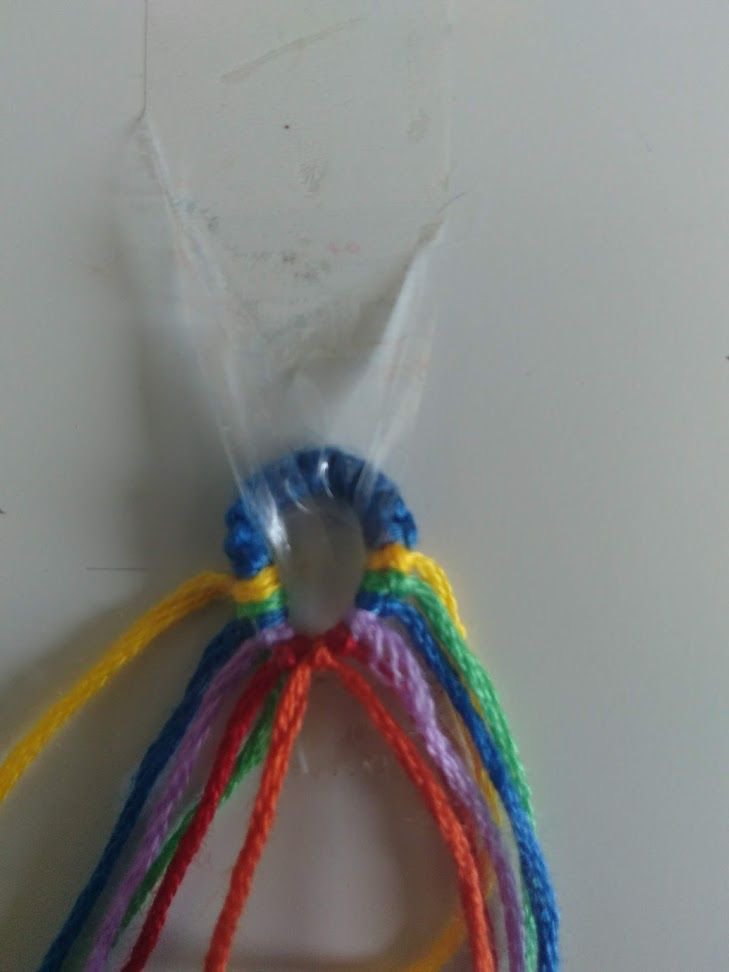
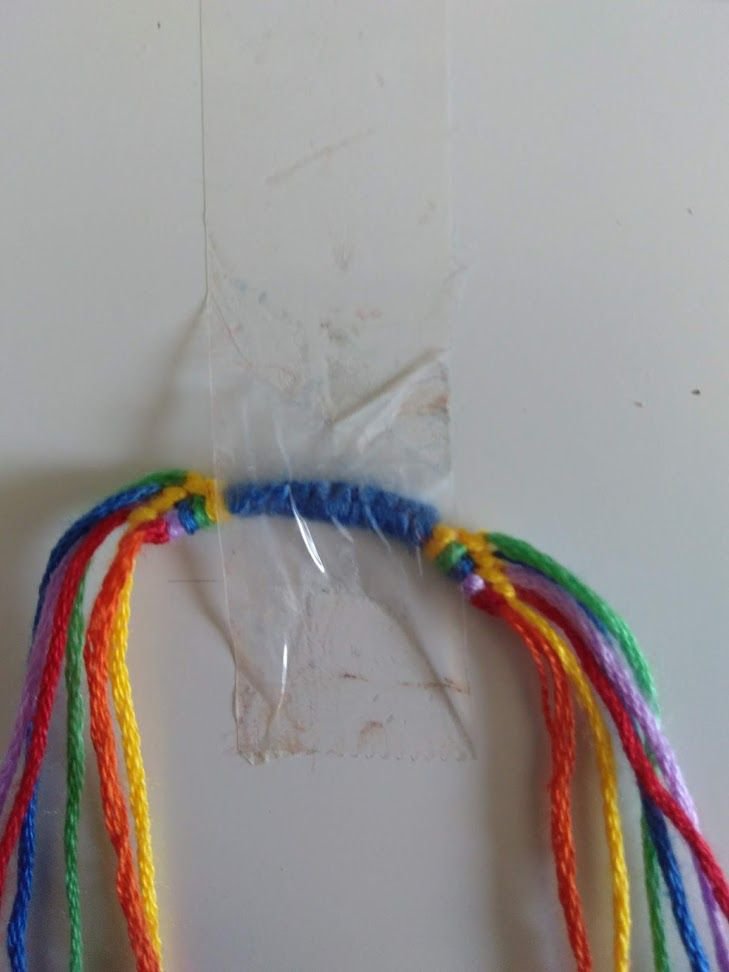
Tape down your strings as shown in the picture. There should be a basic loop in the area taped down.
Step 6
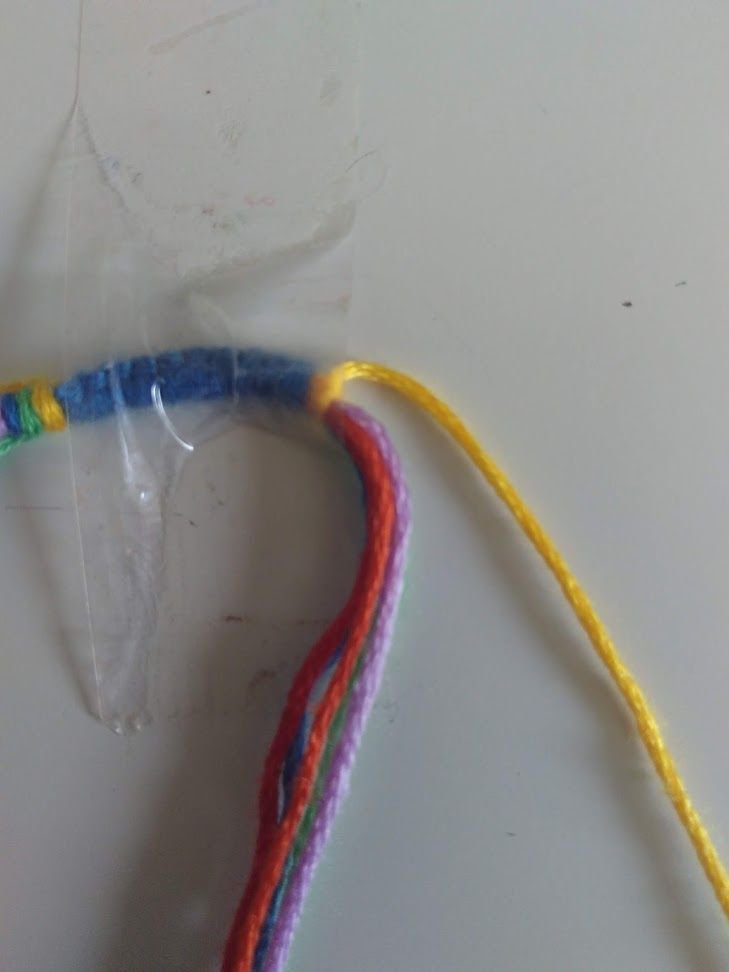
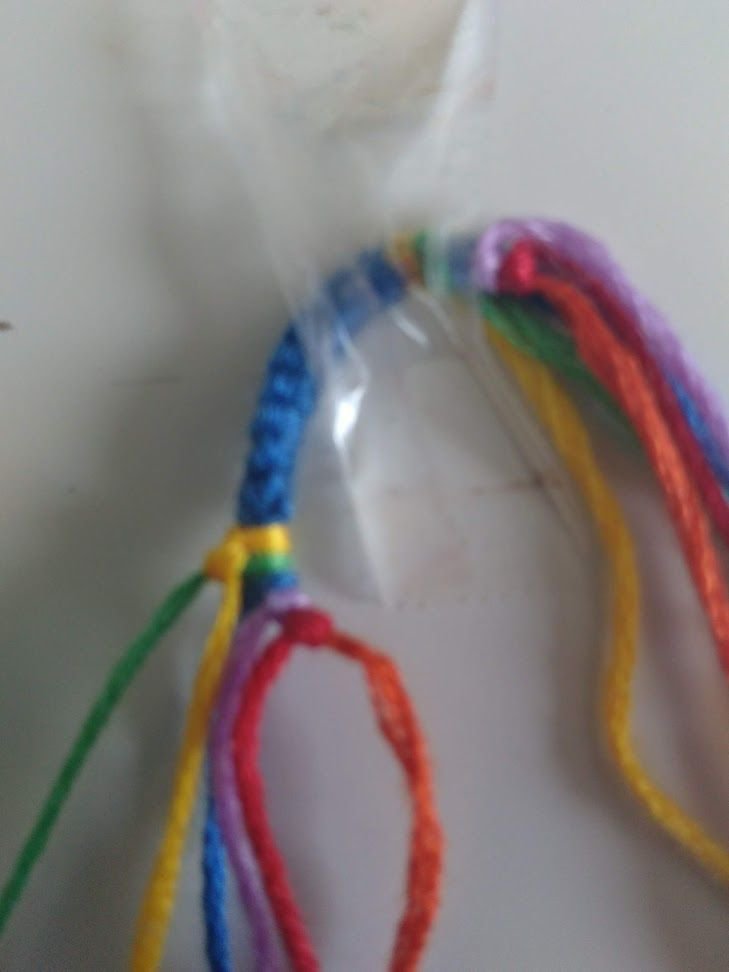
Make a forward-backward knot on the entire left side of the loop with the yellow string. We use that color because it was the string on the farthest left of the V-shape we created.
Step 7
Next, look at the second farthest left string, in this case green. With this one, we make a forward-backward knot on the entire left side excluding the previous string brought out.

Step 8
Make forward-backward knots on the left side following the pattern, excluding the strings that have been used to knot already. The string that shouldn’t have any forward-backward knots is at the end of the V-shape you created, in this case orange.
Step 9
Mirror the knots on the right side with backward-forward knots. Some bracelets may have different strings that aren’t mirrored on the right or left sides, but the knots are always the same.
Step 10
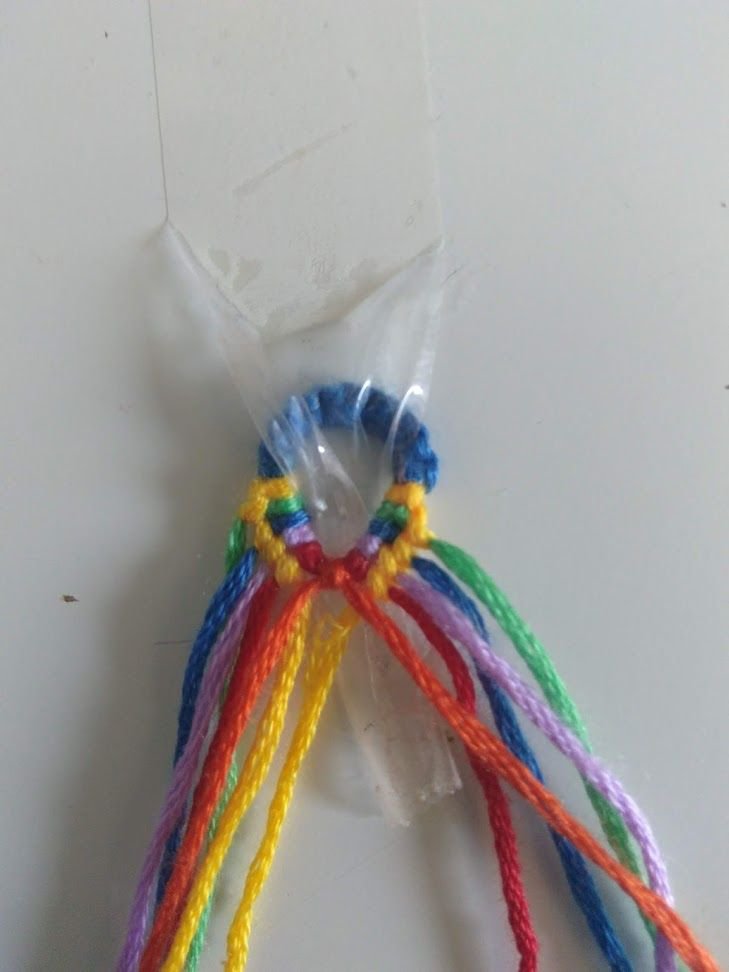
Now the teardrop loop should look like this. At this point, you can tie any type of knot with the orange strings, as they are the same color and start knotting or add the first “row” to give a bit more structure and then make any type of knot in the center.
Option 1
This is what option 1 looks like. I prefer the second option, so I’ll give an example of it.
Option 2
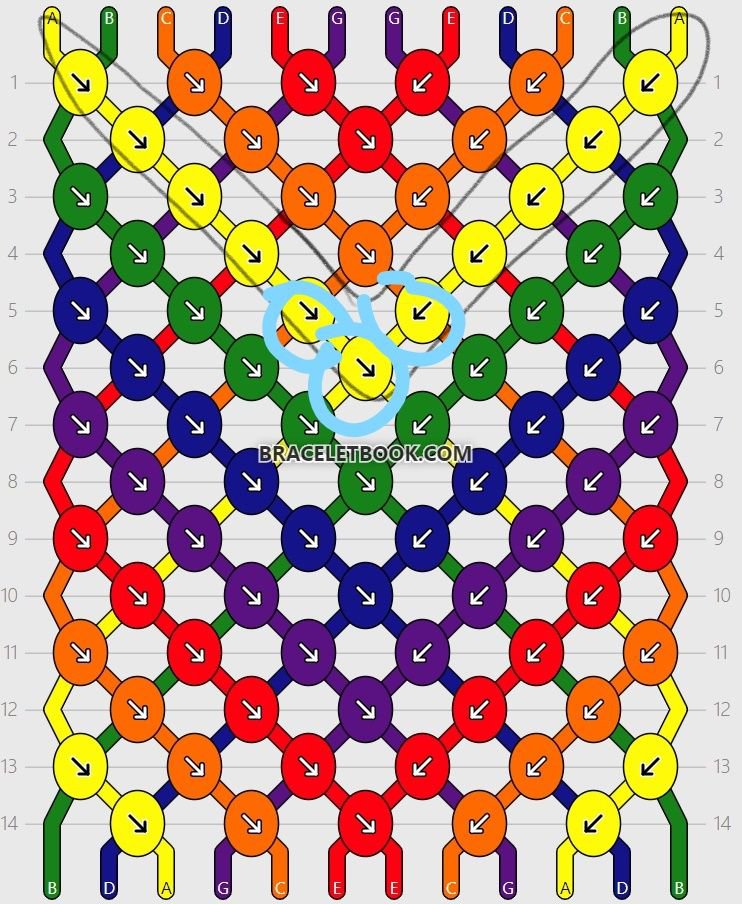
Following your pattern, find the farthest knot to the left. In this case, it’s a forward knot with the yellow string.
Option 2: Step 1
Following the pattern, make a forward knot with the yellow knot.
Option 2: Step 2
Following the pattern, make knots with the yellow string until you reach the orange string. Mirror the same process on the right side with backward knots.
Option 2: Step 3
This is a rough idea of what your teardrop loop should look like. Next, tie the orange strings with any knot you want tightly.
Option 2: Step 4
This is what the loop should look like now. The final step is to do the last two knots and bring the yellow strings together.
Option 2: Step 5
These are the last few knots to perform to finish the loop: a forward knot on the left side, a backward knot on the right, and a forward knot to keep the loop together.

Option 2: Step 6
Your teardrop loop is done!
Conclusion
What do you think of this tutorial? Please let me know if you need clarifications in the comments, I’ll be happy to help you out!
Video 1.
Video 2.
52 Comments