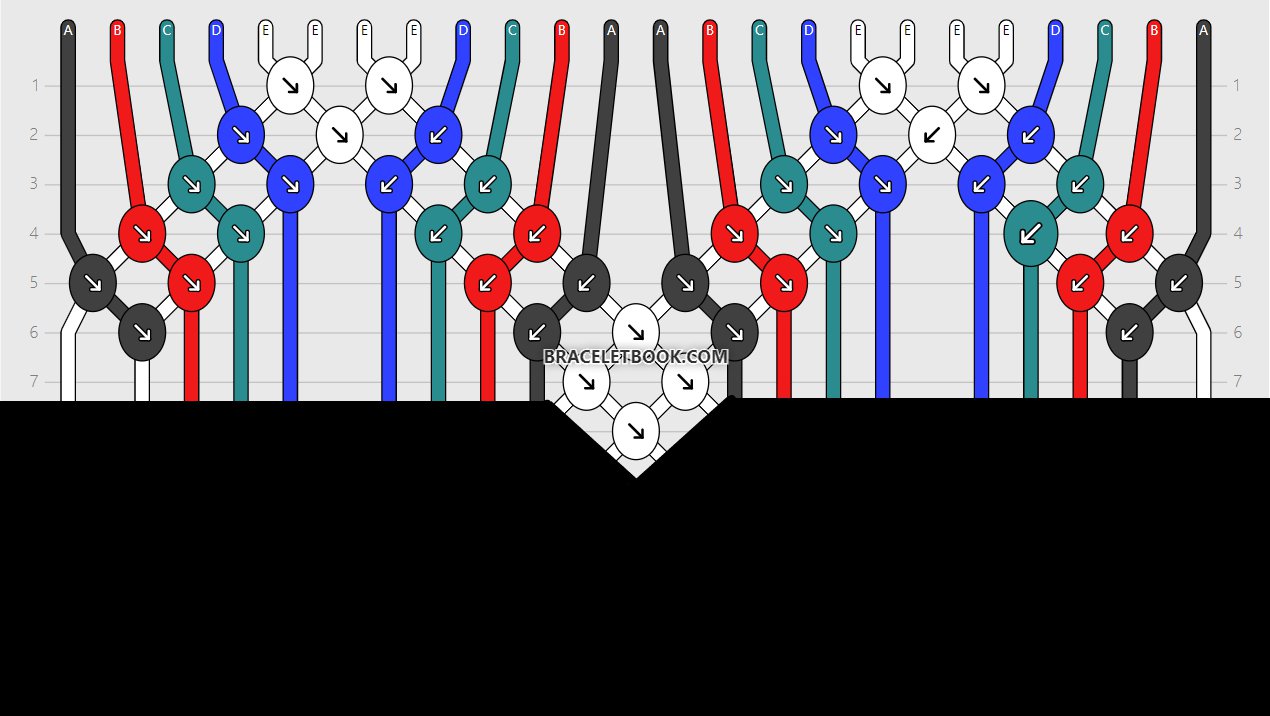
Rate Tutorial
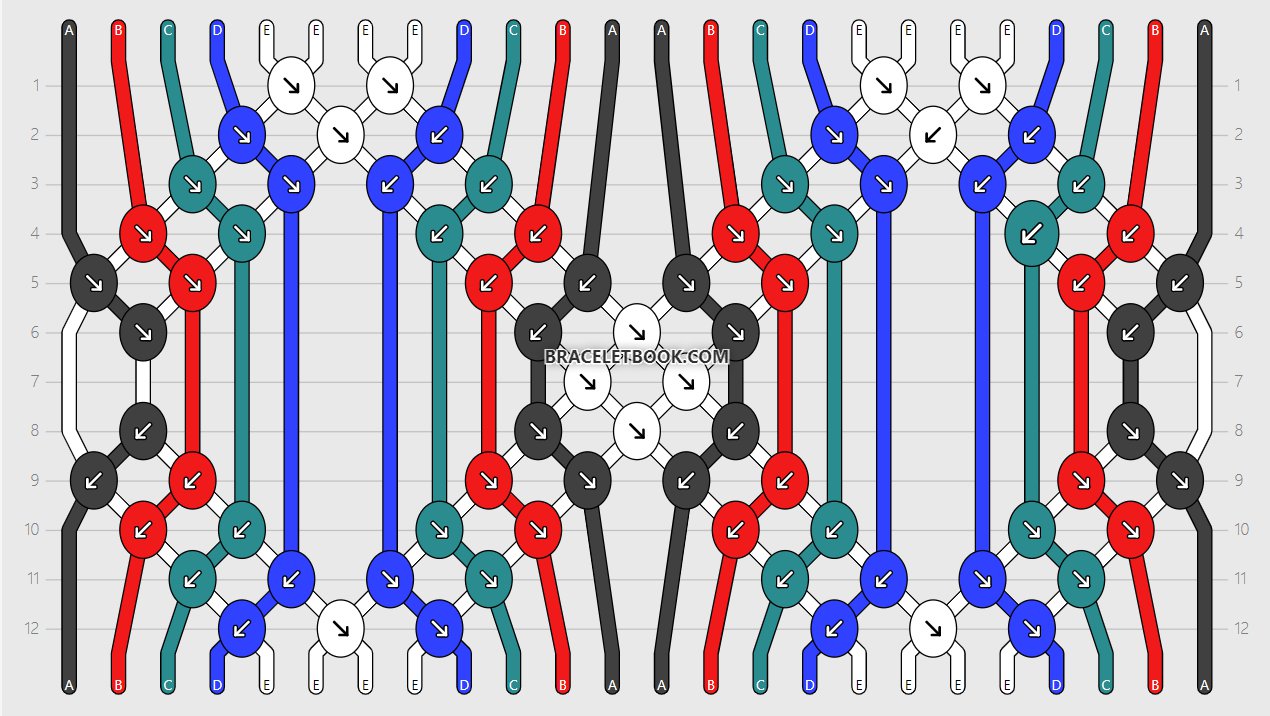
This bracelet is for the intermediate/ advanced people. I will show you how to segment knot this pattern, because in this case it’s much easier than knotting row by row.
To start the bracelet, cut your strings 150-180cm (60-70 inches) each, exluding the color E, which can be a little bit shorter since you won’t use it too much.
To start the bracelet, cut your strings 150-180cm (60-70 inches) each, exluding the color E, which can be a little bit shorter since you won’t use it too much.
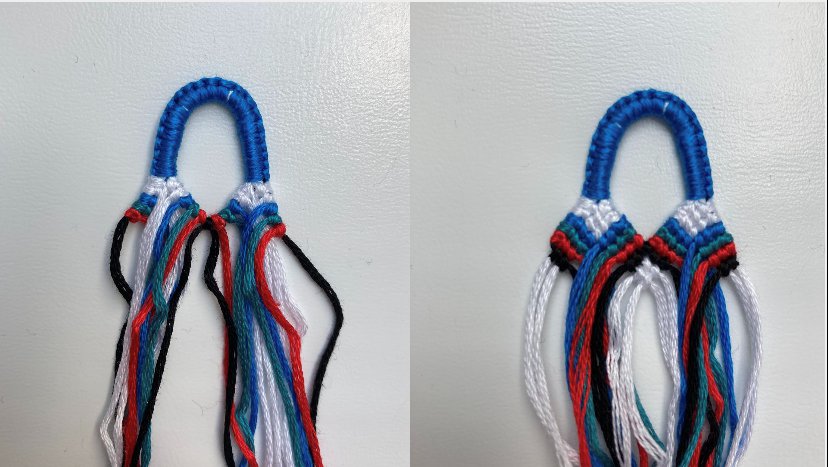
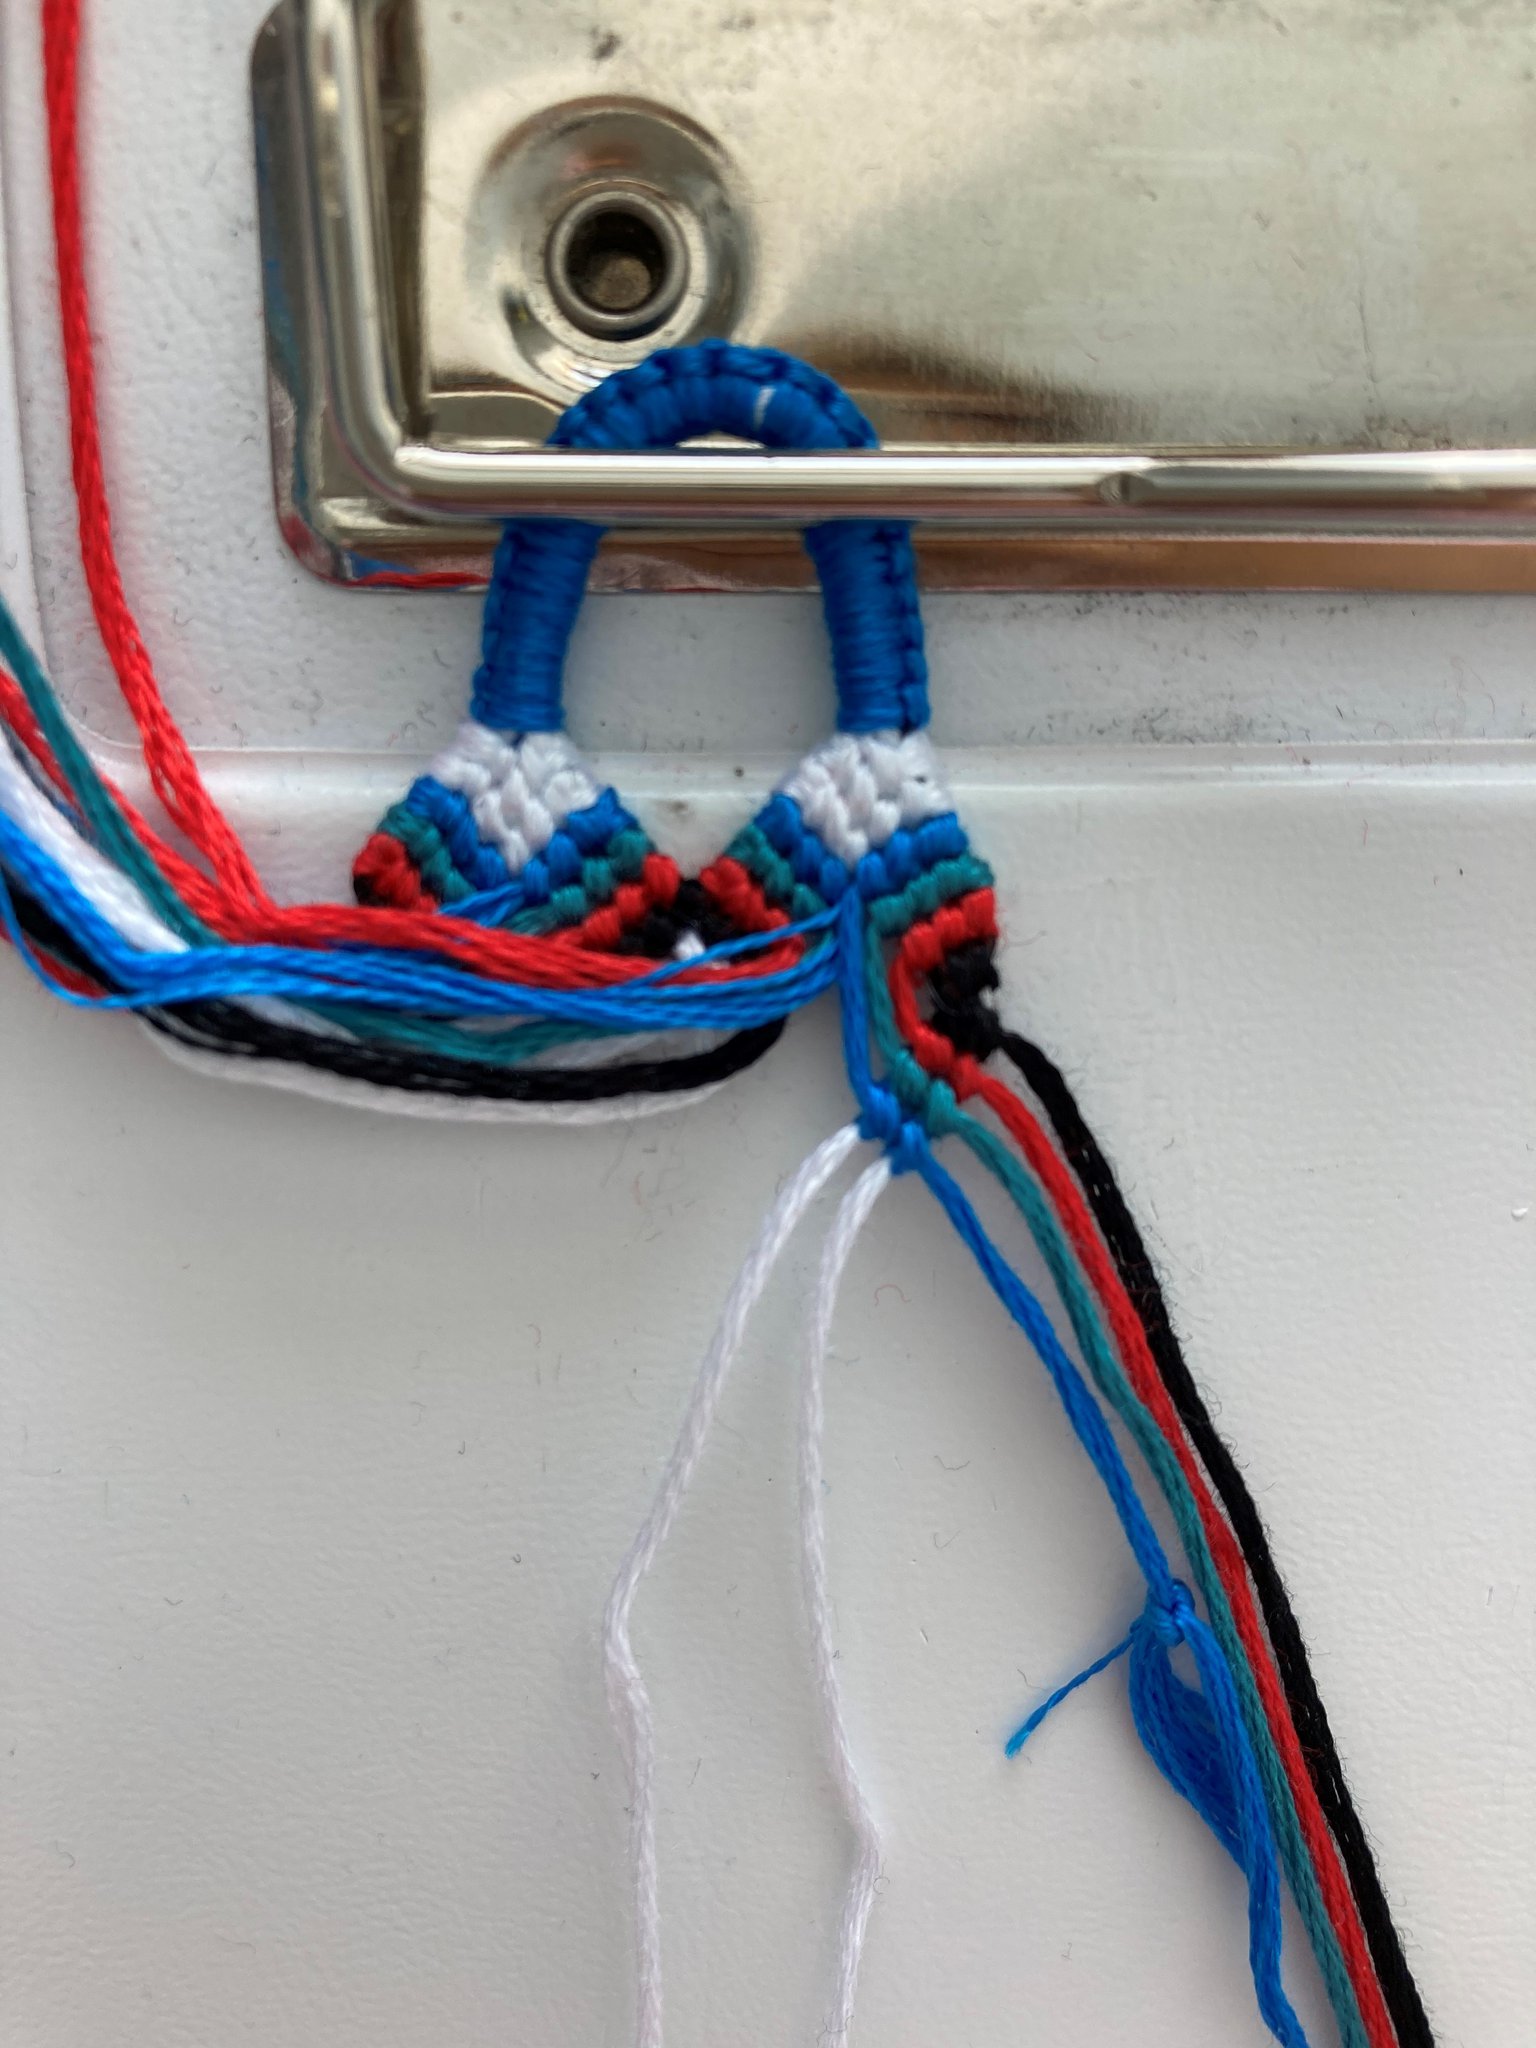
1. The easiest way to start this pattern is to do two triangles with a loop. Tutorial for this can be found on Masha Knots’ youtube channel.
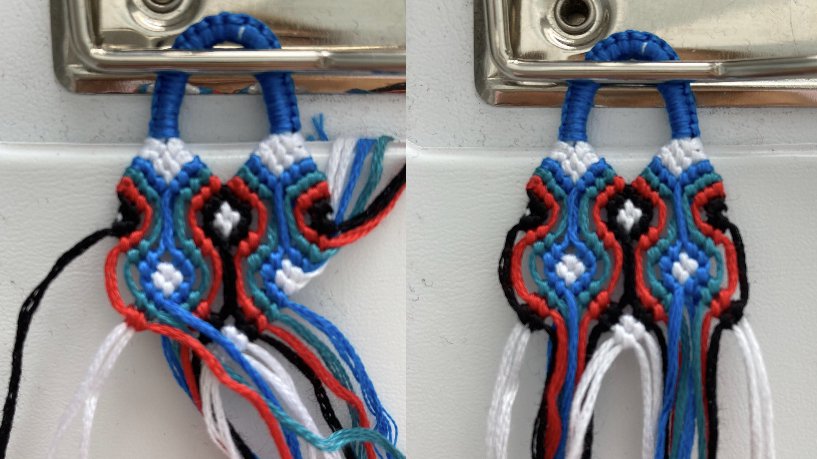
2. When you’re done making the loop, knot the pattern to the point shown in the picture.
3. Take two white strings from the right and make 2 forward knots with black string.
4. Take the red string and do the same thing but be careful not to pull the string too hard, because it would make the bracelet bumpy.
4. Take the red string and do the same thing but be careful not to pull the string too hard, because it would make the bracelet bumpy.
5. Continue making forward knots with the teal and blue strings.
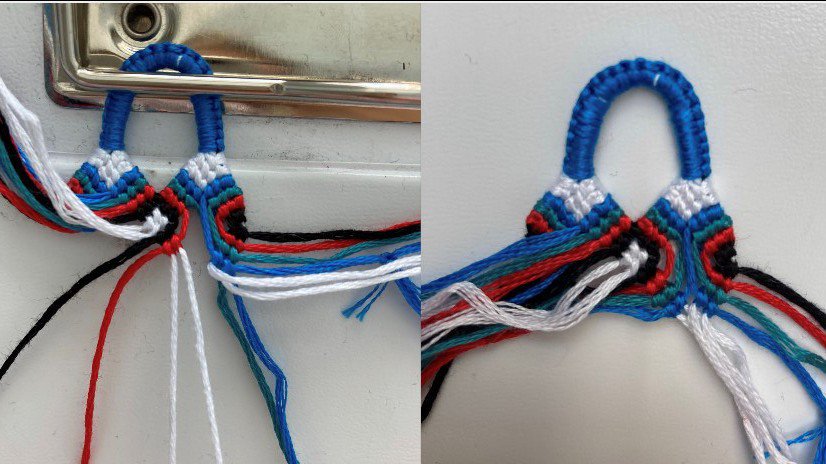
6. Do the same thing on the left side.
7. Connect the left side eith the right side by making 4 forward knots with white strings.
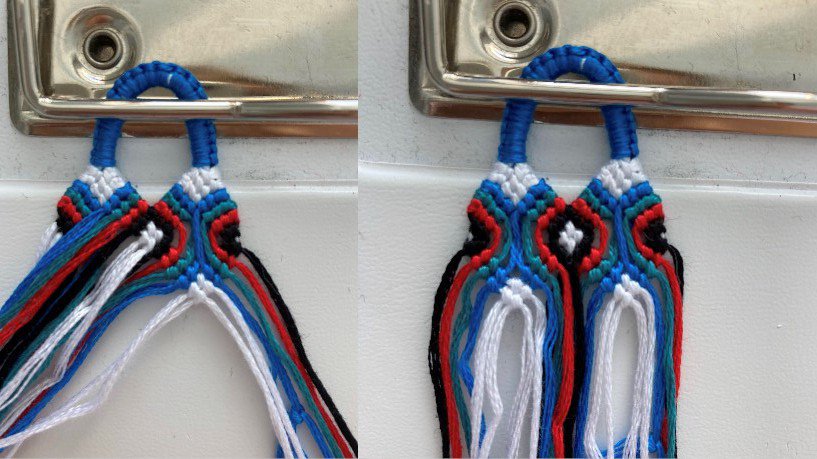
8. Repeat steps 3-7 on the left side of the bracelet.
8. Repeat steps 3-7 on the left side of the bracelet.
9. Take the two white strings on the inside and carefully make forward knots with blue, teal, red and black strings.
10. Do the same on the other side and connect the white strings.
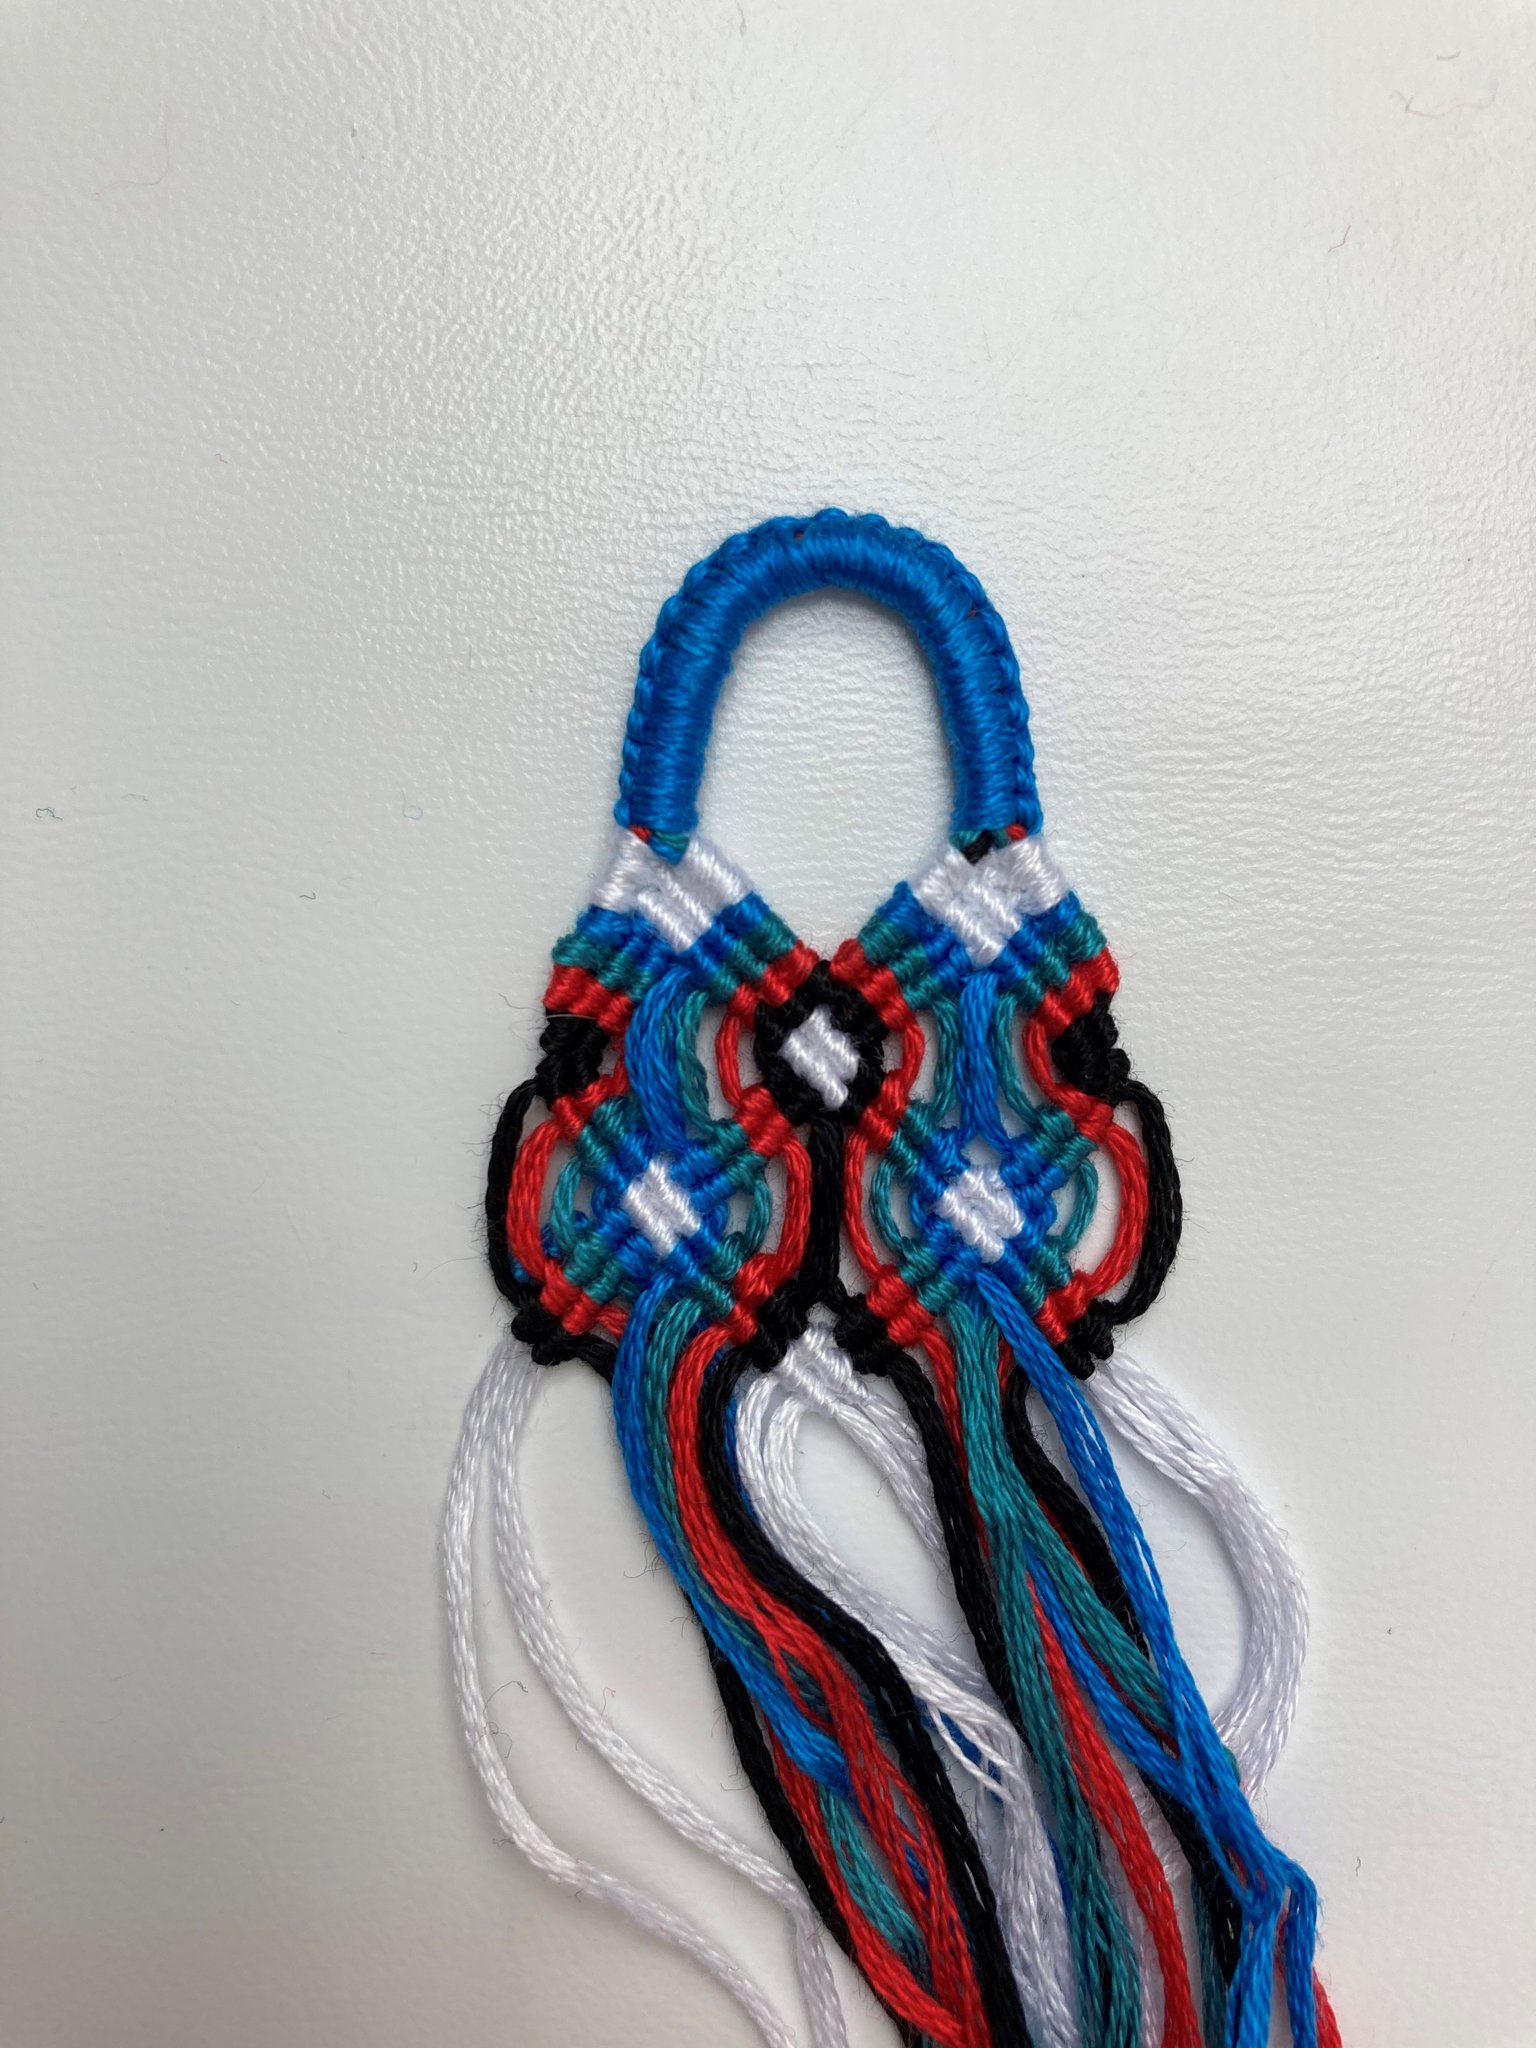
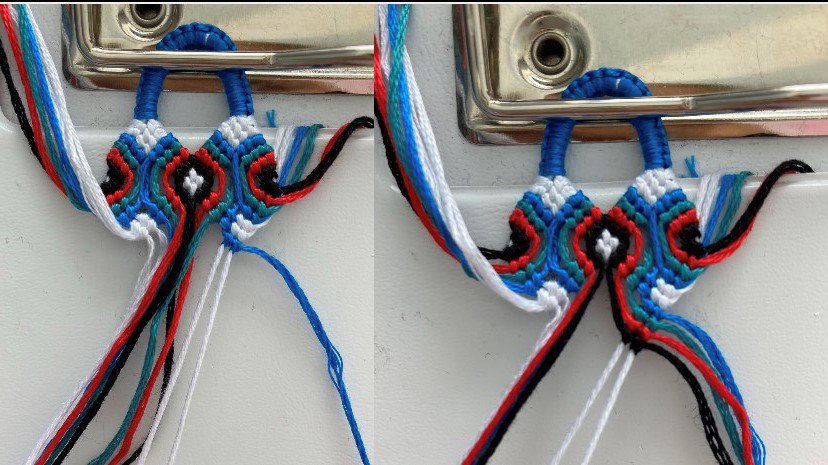
11. Take the two white stings on the outside and carefully make forward knots with all your coloured strings. Keep your knot tension pretty loose to prevent your bracelet from becoming bumpy.
12. Do the same thing on the right side.
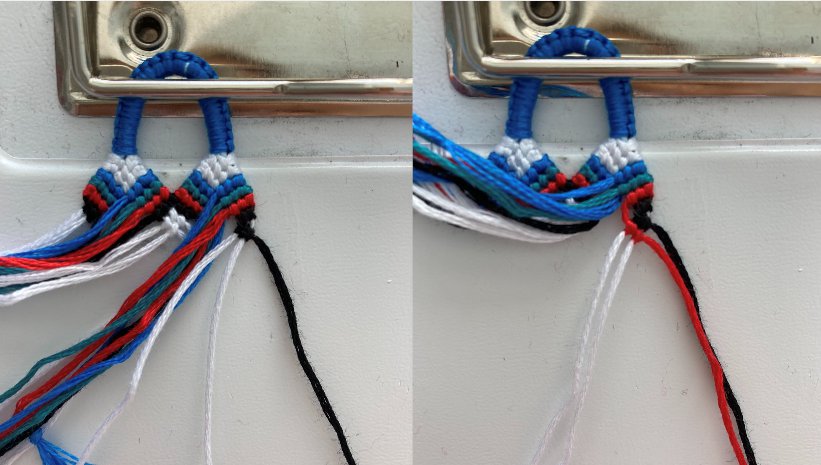
13. Repeat all the steps untill the bracelet reaches your desired length.
This is how the back of the bracelet should look like.
If you have any specific questions about this pattern, feel free to message me!
12. Do the same thing on the right side.
13. Repeat all the steps untill the bracelet reaches your desired length.
This is how the back of the bracelet should look like.
If you have any specific questions about this pattern, feel free to message me!
29 Comments