Rate Tutorial
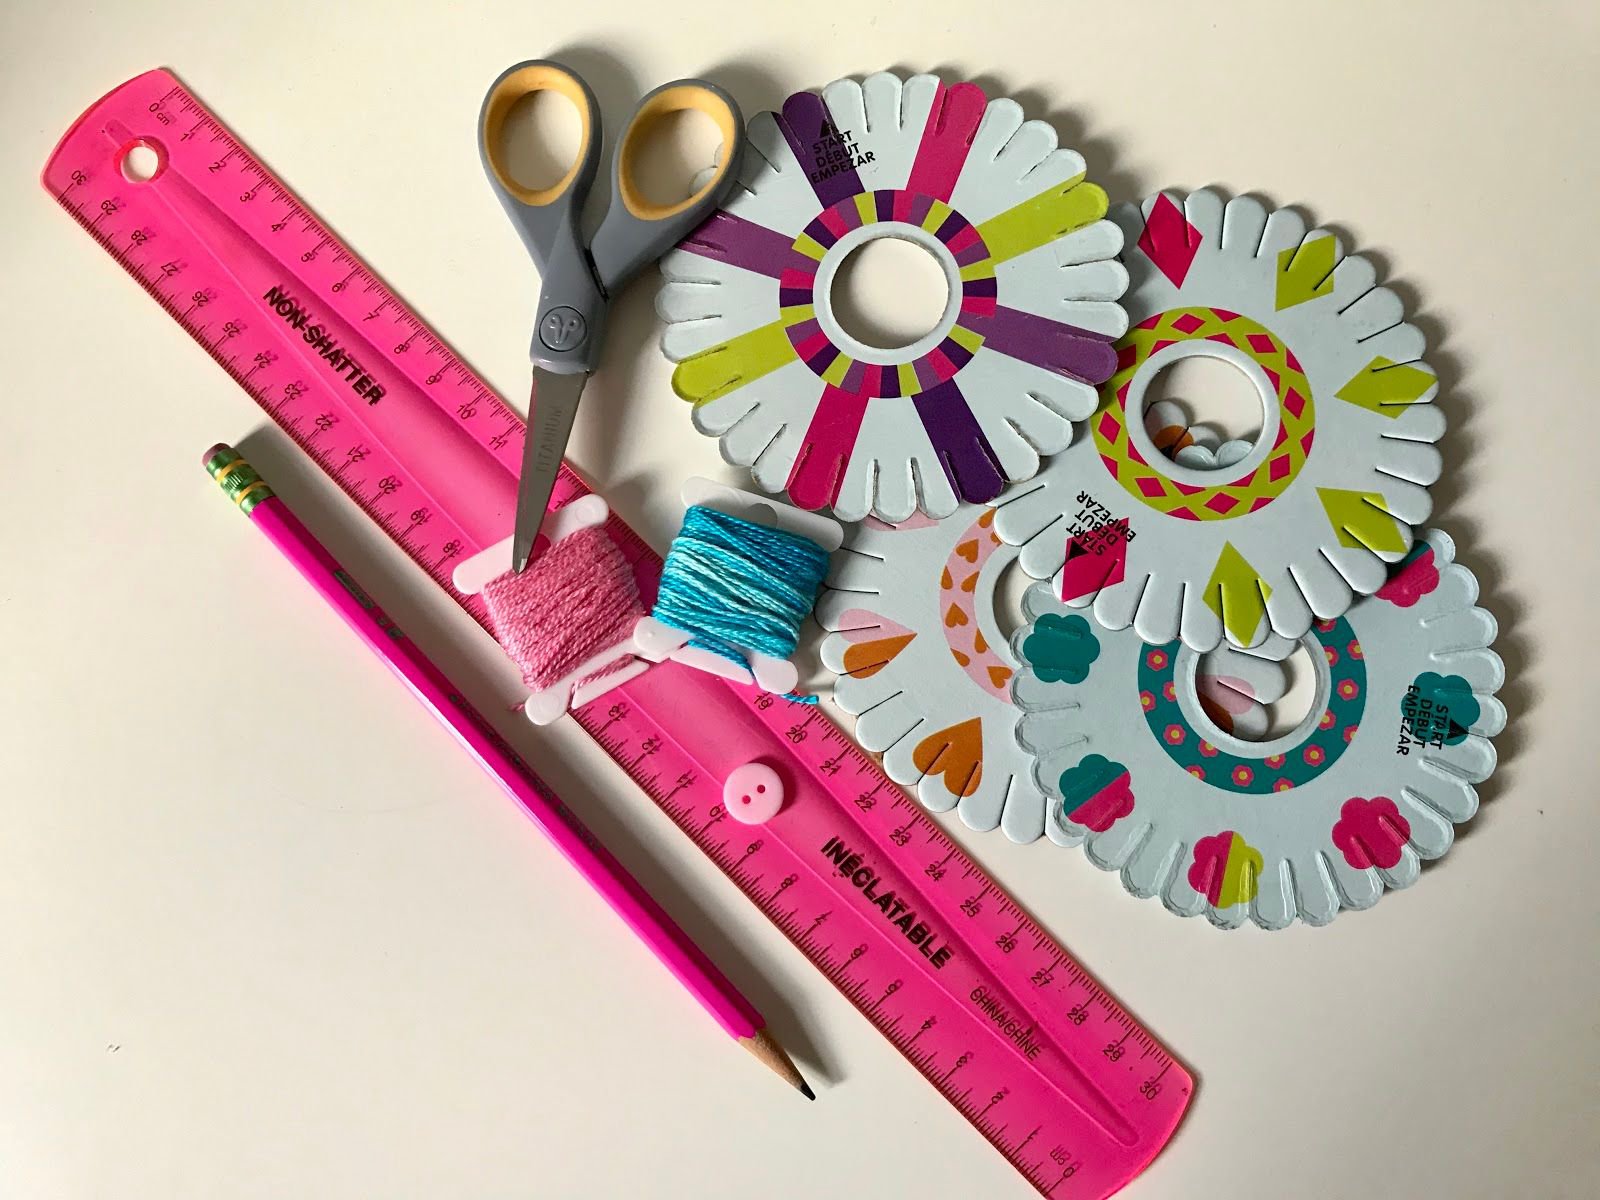
What you will need
● A bracelet wheel
● String
● Scissors
● A ruler
● A pencil
● A button (Optional)
● String
● Scissors
● A ruler
● A pencil
● A button (Optional)
Before we start
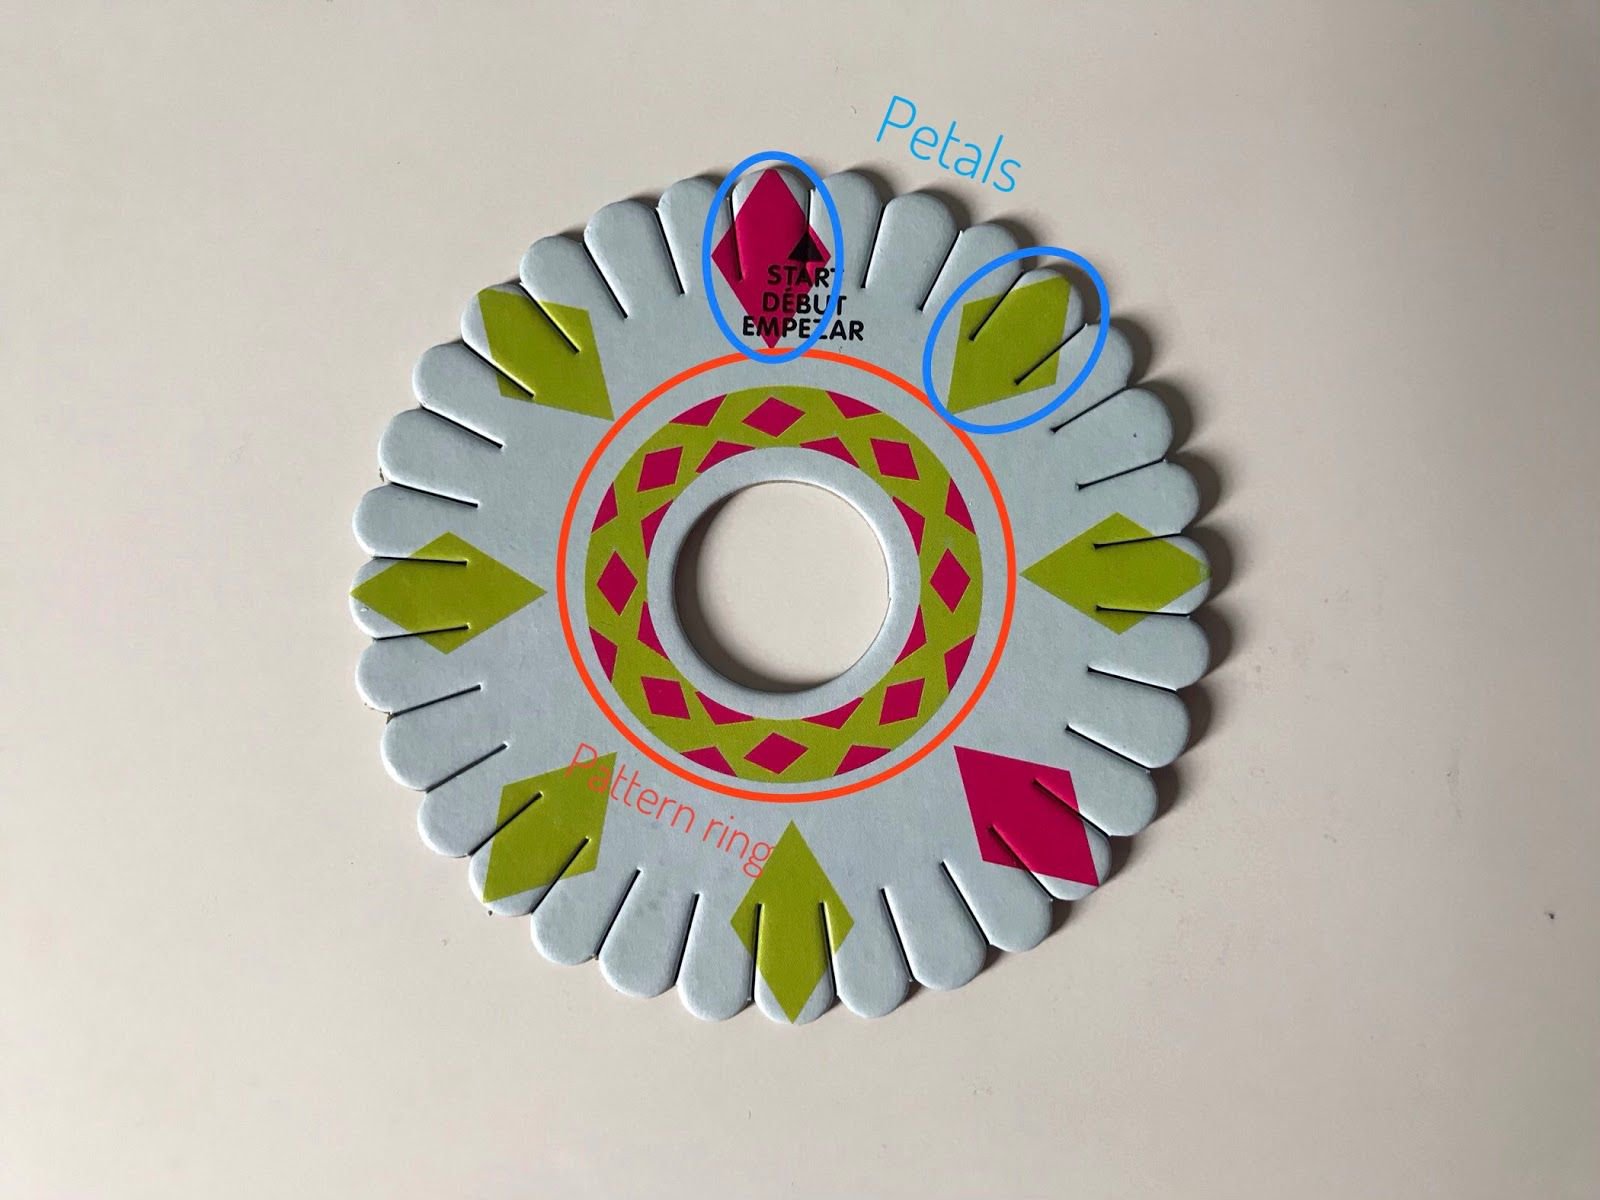
I will be using the diamond pattern as an example, but each wheel works the same way. In the middle of each wheel, you will find the pattern ring(circled in red), this shows you the design it makes. The shape that has 2 notches in each are called petals(circled in blue) and they show you what color of string to use.
Step 1: Prepare the floss
First, count the number of colors in the pattern and then cut a 20 inch (50 centimetres) length of string for each notch in the corresponding color. For example, the diamond pattern uses 4 pink pieces of string for the diamond and 12 green pieces of string for the background. Feel free to use any colors you want, I will be using a color-shifting blue for the background and pink for the diamonds.
Step 2: Looping the end
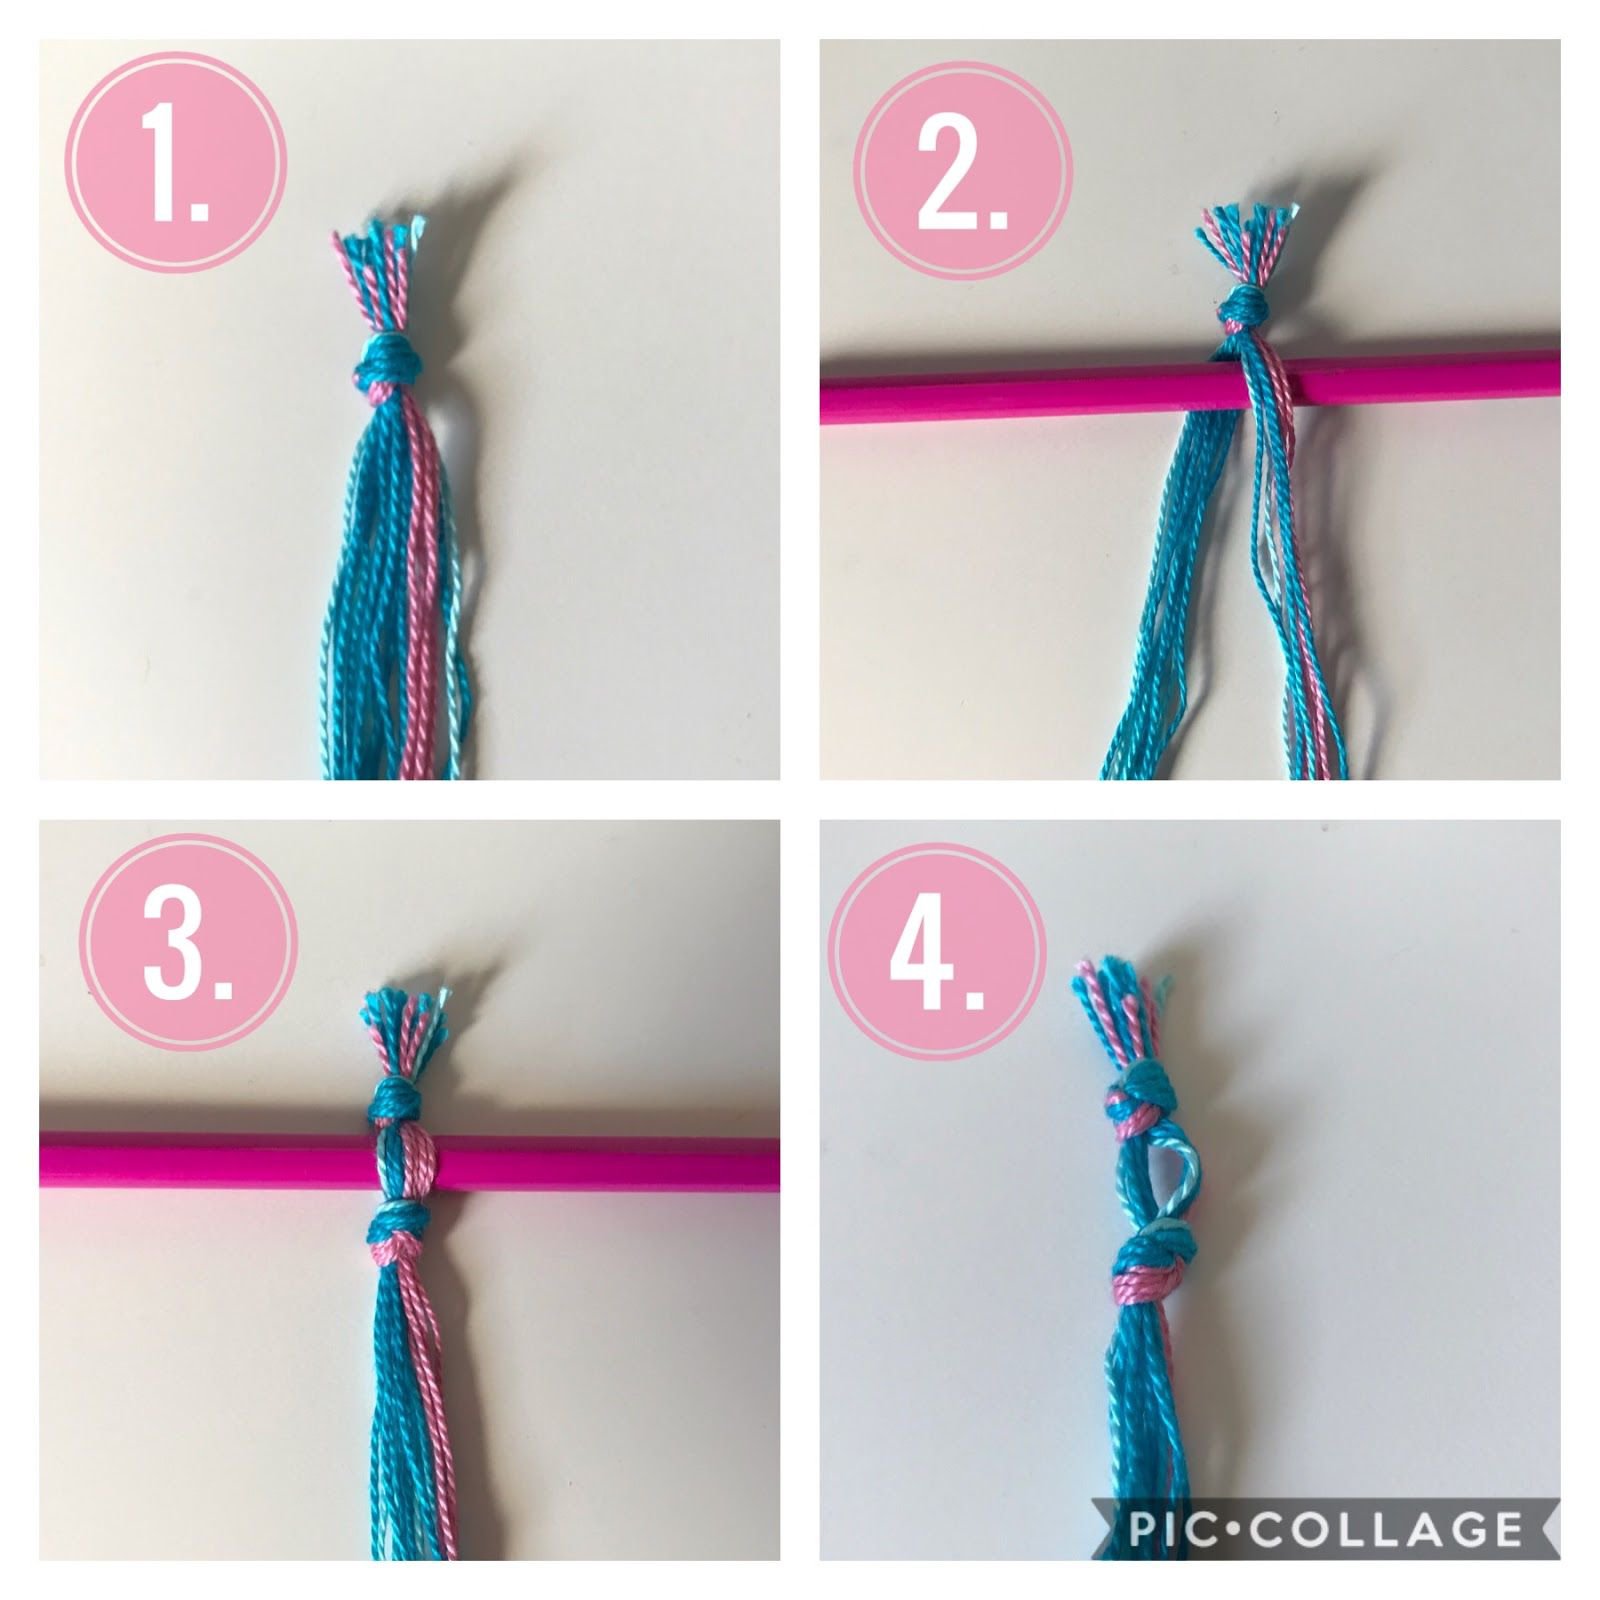
Before you start, you need to create a loop at the end of the bracelet so you are able to wear it. To do so, follow the steps below.
1. Line up the ends of all the pieces of string and knot them together with a knot.
2. Divide the pieces into 2 equal groups and put them around a pencil.
3. Take all the pieces together and then knot them together close to the pencil.
4. Slide the loop off of the pencil, you have just made the closure for your bracelet!
Step 3: Prepare the wheel
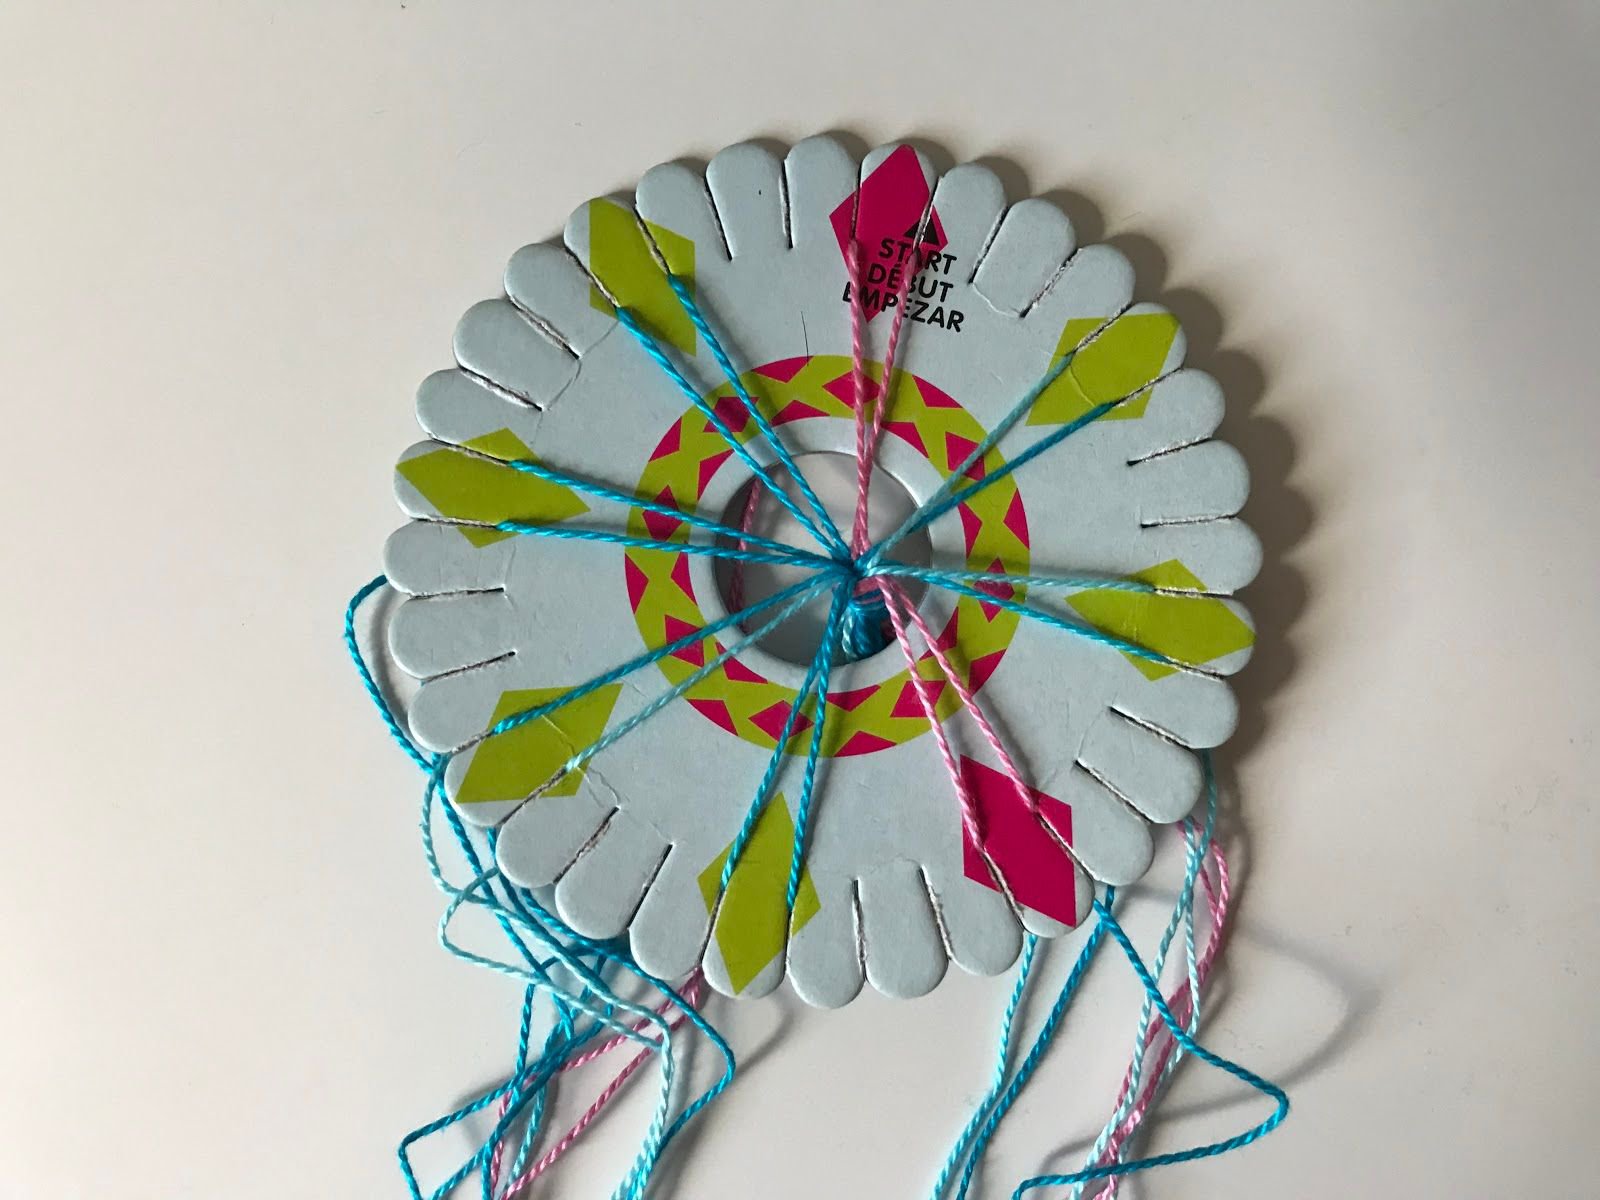
Place the loop in the center of the wheel, then pull each strand and hook it into a notch of the matching color. You are now ready to start making your bracelet!
Step 4: Making the bracelet
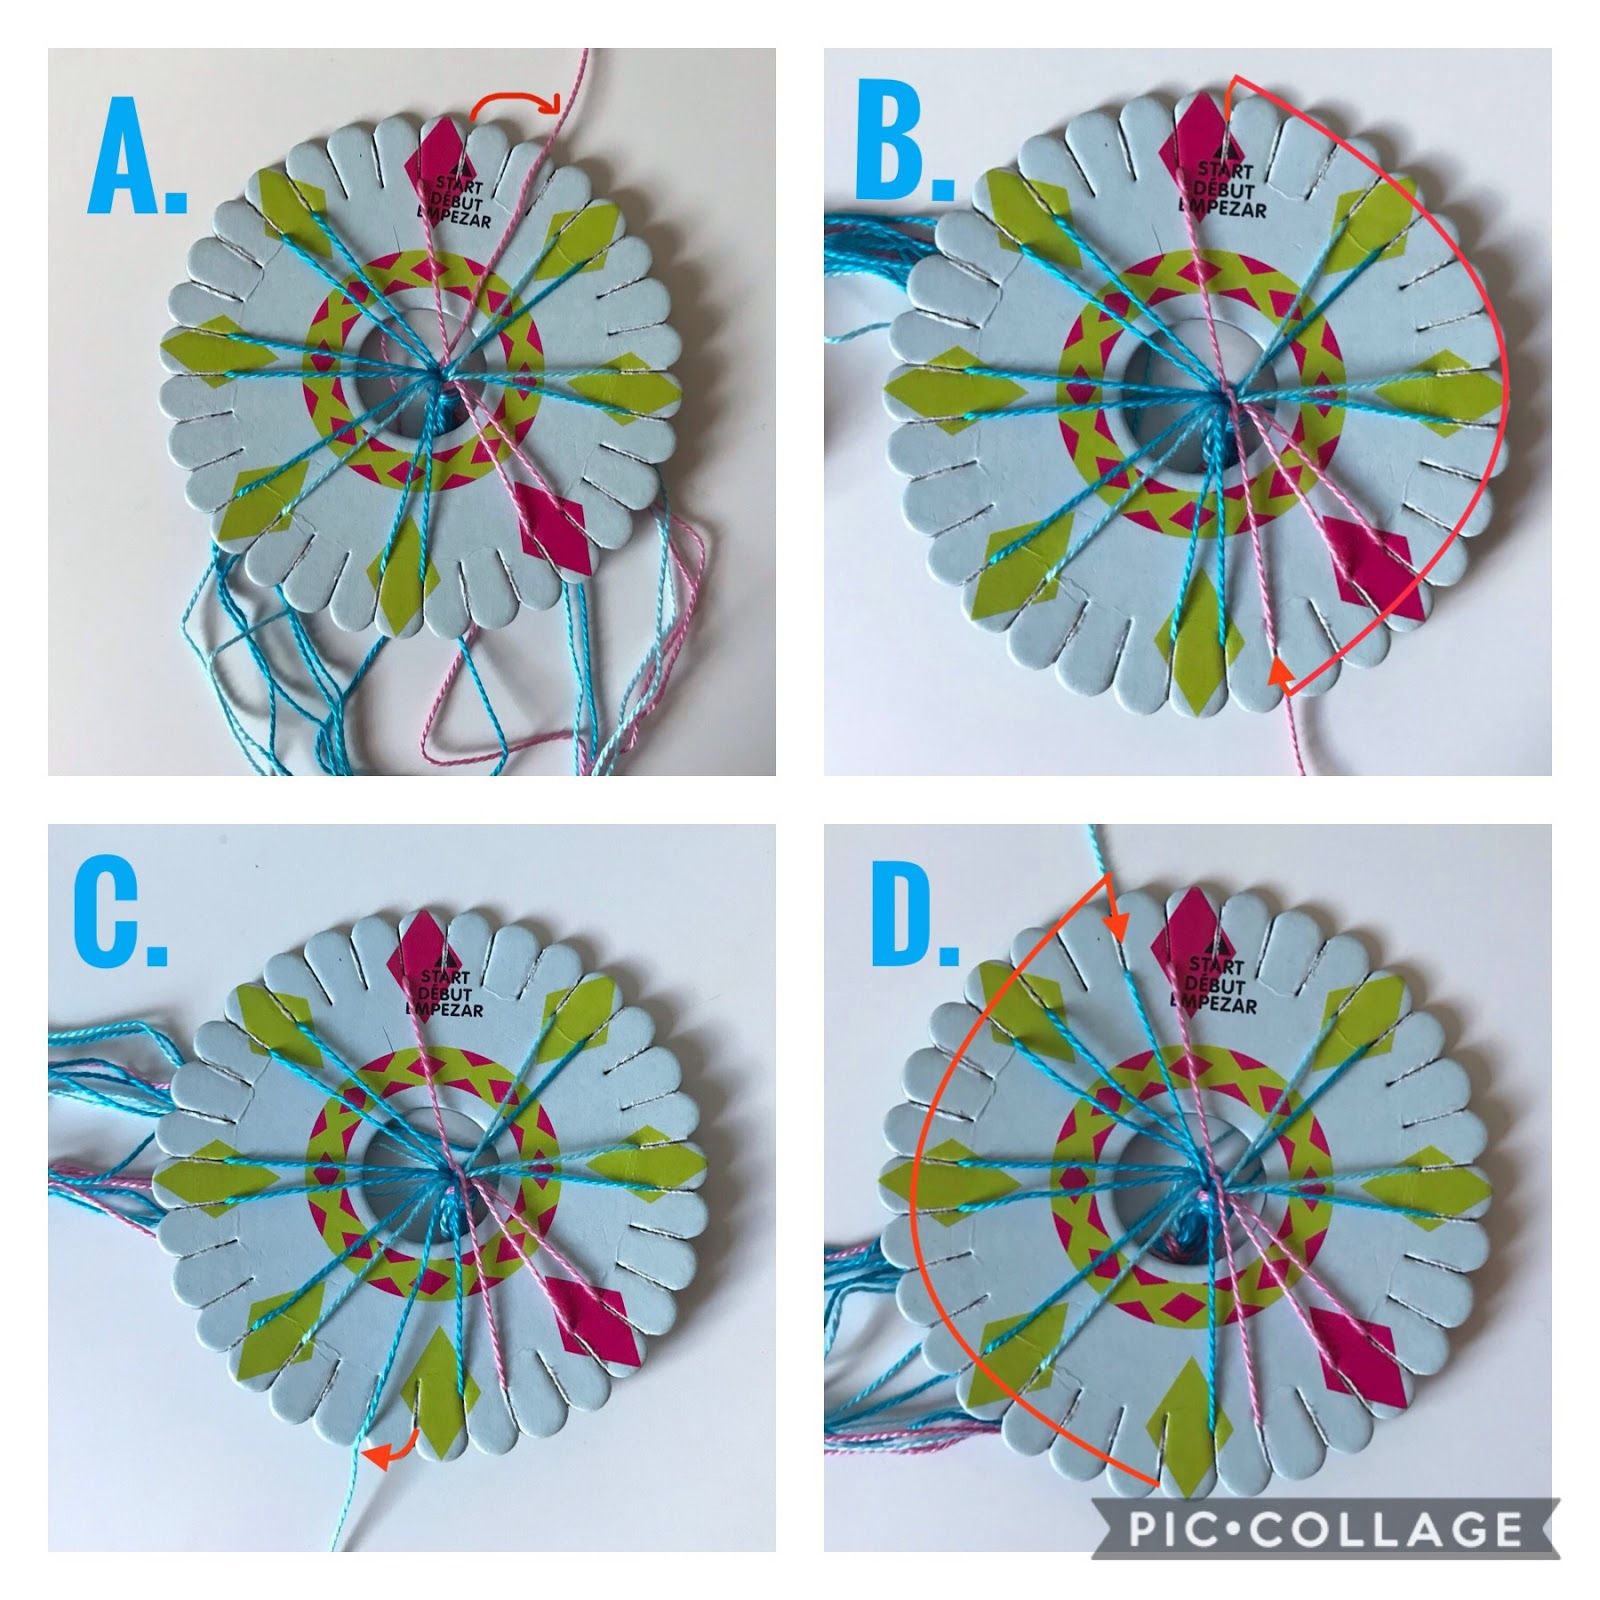
Find the start arrow and turn the wheel so it is at the top of your wheel. To make your bracelet you will need to unhook one strand at a time and rehook it into another notch. Rotate the wheel COUNTER-CLOCKWISE as you are working.
A. Unhook the string from the “start notch”.
B. Move the string to the right of the petal directly opposite the top petal. Notice that you skipped 3 petals along the way.
C. Unhook the string on the left of the group of 3.
D. Move the string up into the notch left of the single string at the top. Then, rotate your wheel COUNTER CLOCKWISE so that the next petal is at the top.
Repeat steps A-D until your bracelet is the length you want.
Step 5: Finishing the bracelet
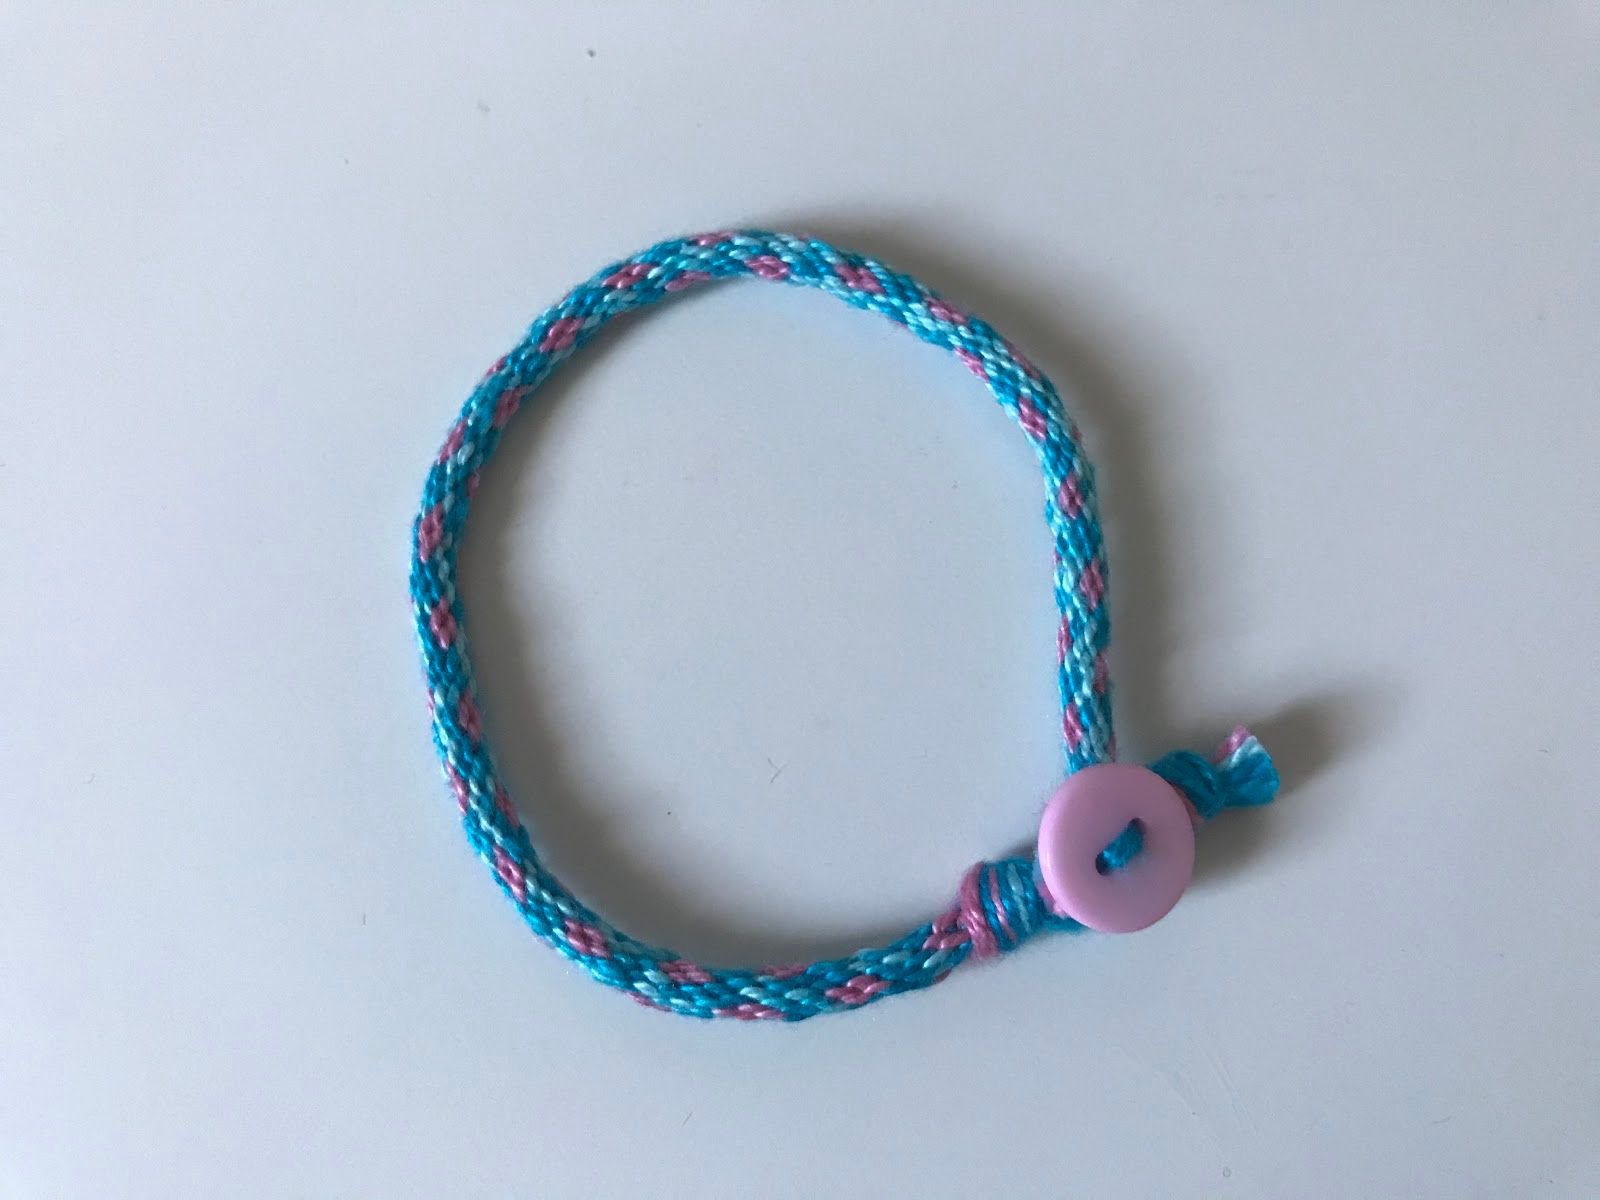
Once your bracelet is the length you want it, unhook all the strings from the wheel. Then add a button, @WWJCD has a great tutorial for adding a button to your bracelets called “Ending bracelets with a button”. If you don’t want to add a button, tie a double knot at the end, or a knot big enough to fit through the loop. Congrats, you finished your bracelet!
Tips and tricks!
● When moving the floss from the top, remember to move from the right and replace it to the right!
● When moving the floss from the bottom, remember to move from the left and replace it to the left.
● Keep track of your place by holding the wheel with your thumb to the left of the petal you are working with.
● Untangle your loose strings often, so they don’t turn into a giant knot!
● If you need to take a break, place the end of the string into the notch where you will start when you return.
I hope this tutorial was helpful! If you have any questions, message me or leave a comment and I’ll try my best to answer it!