Rate Tutorial
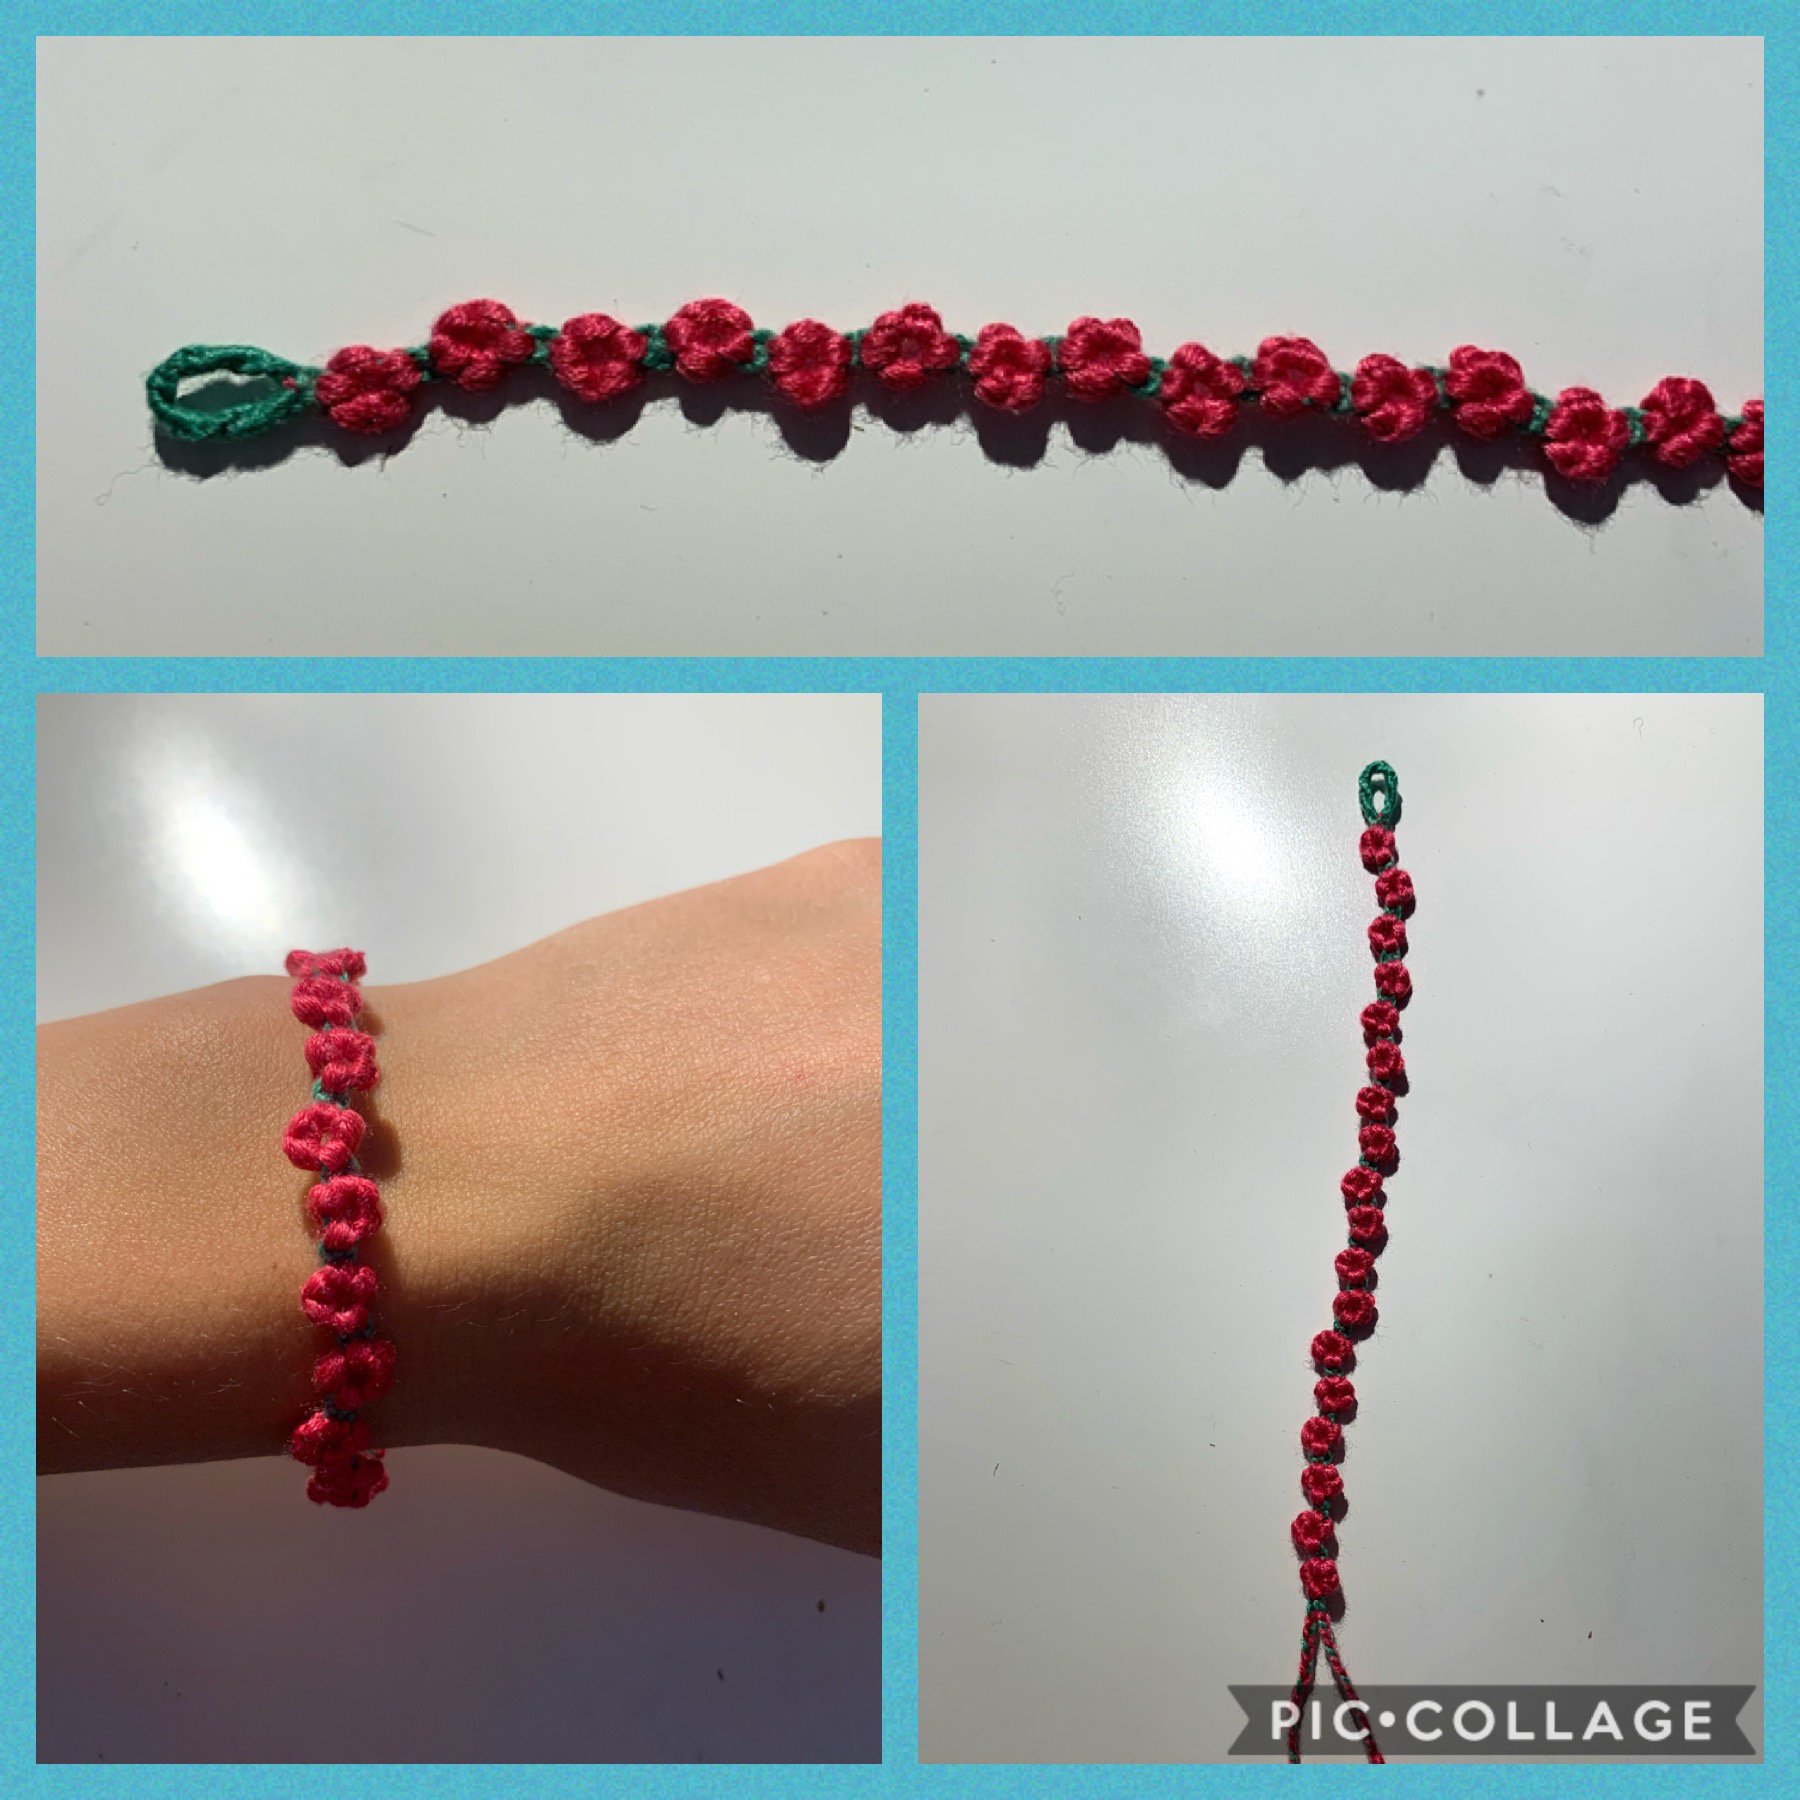
Flower chain bracelet
This bracelet looks really pretty when finished. It is a little fiddly but stick with it as the final result is worth it.
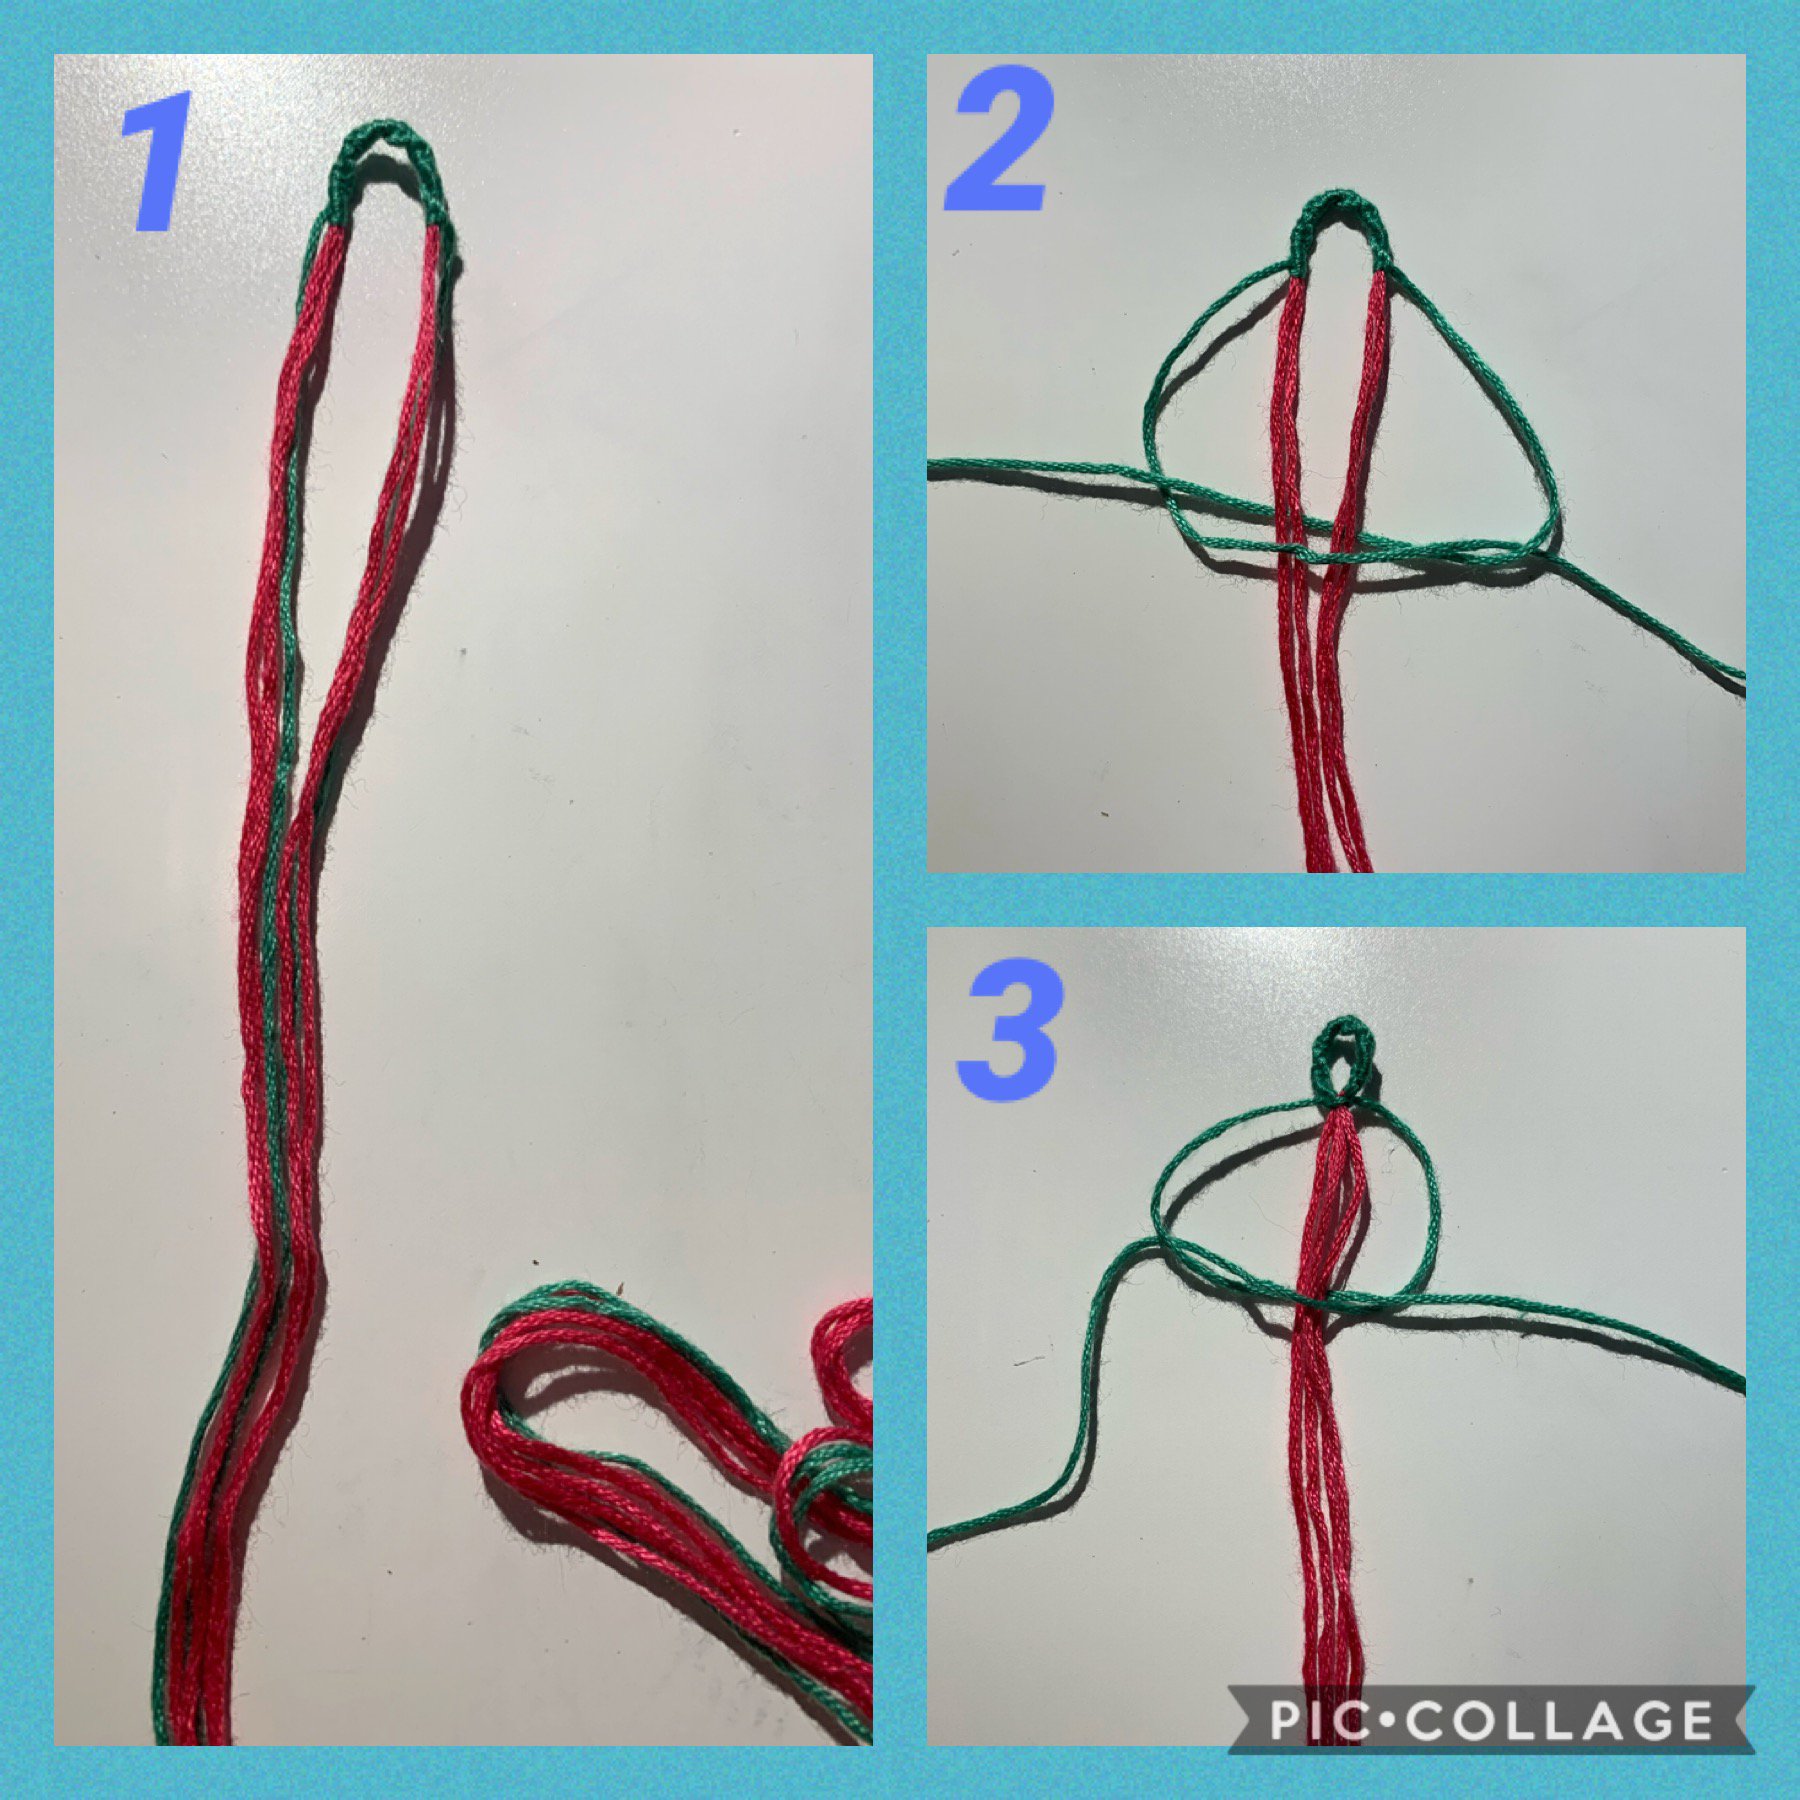
1. Cut 3 lengths of string 2m each. Two of the strings should be the colour of the flower and the other string green. Either tie these strings in half with a knot or make a loop in the middle to start.
2. Make the first half of the macrame square knot by taking the left green string over the pink then bringing the right string over the first string then under the pink and back through the first loop. Pull the knot tight.
3. Make the second half of the macrame square knot by doing the opposite of step two starting with the right string.
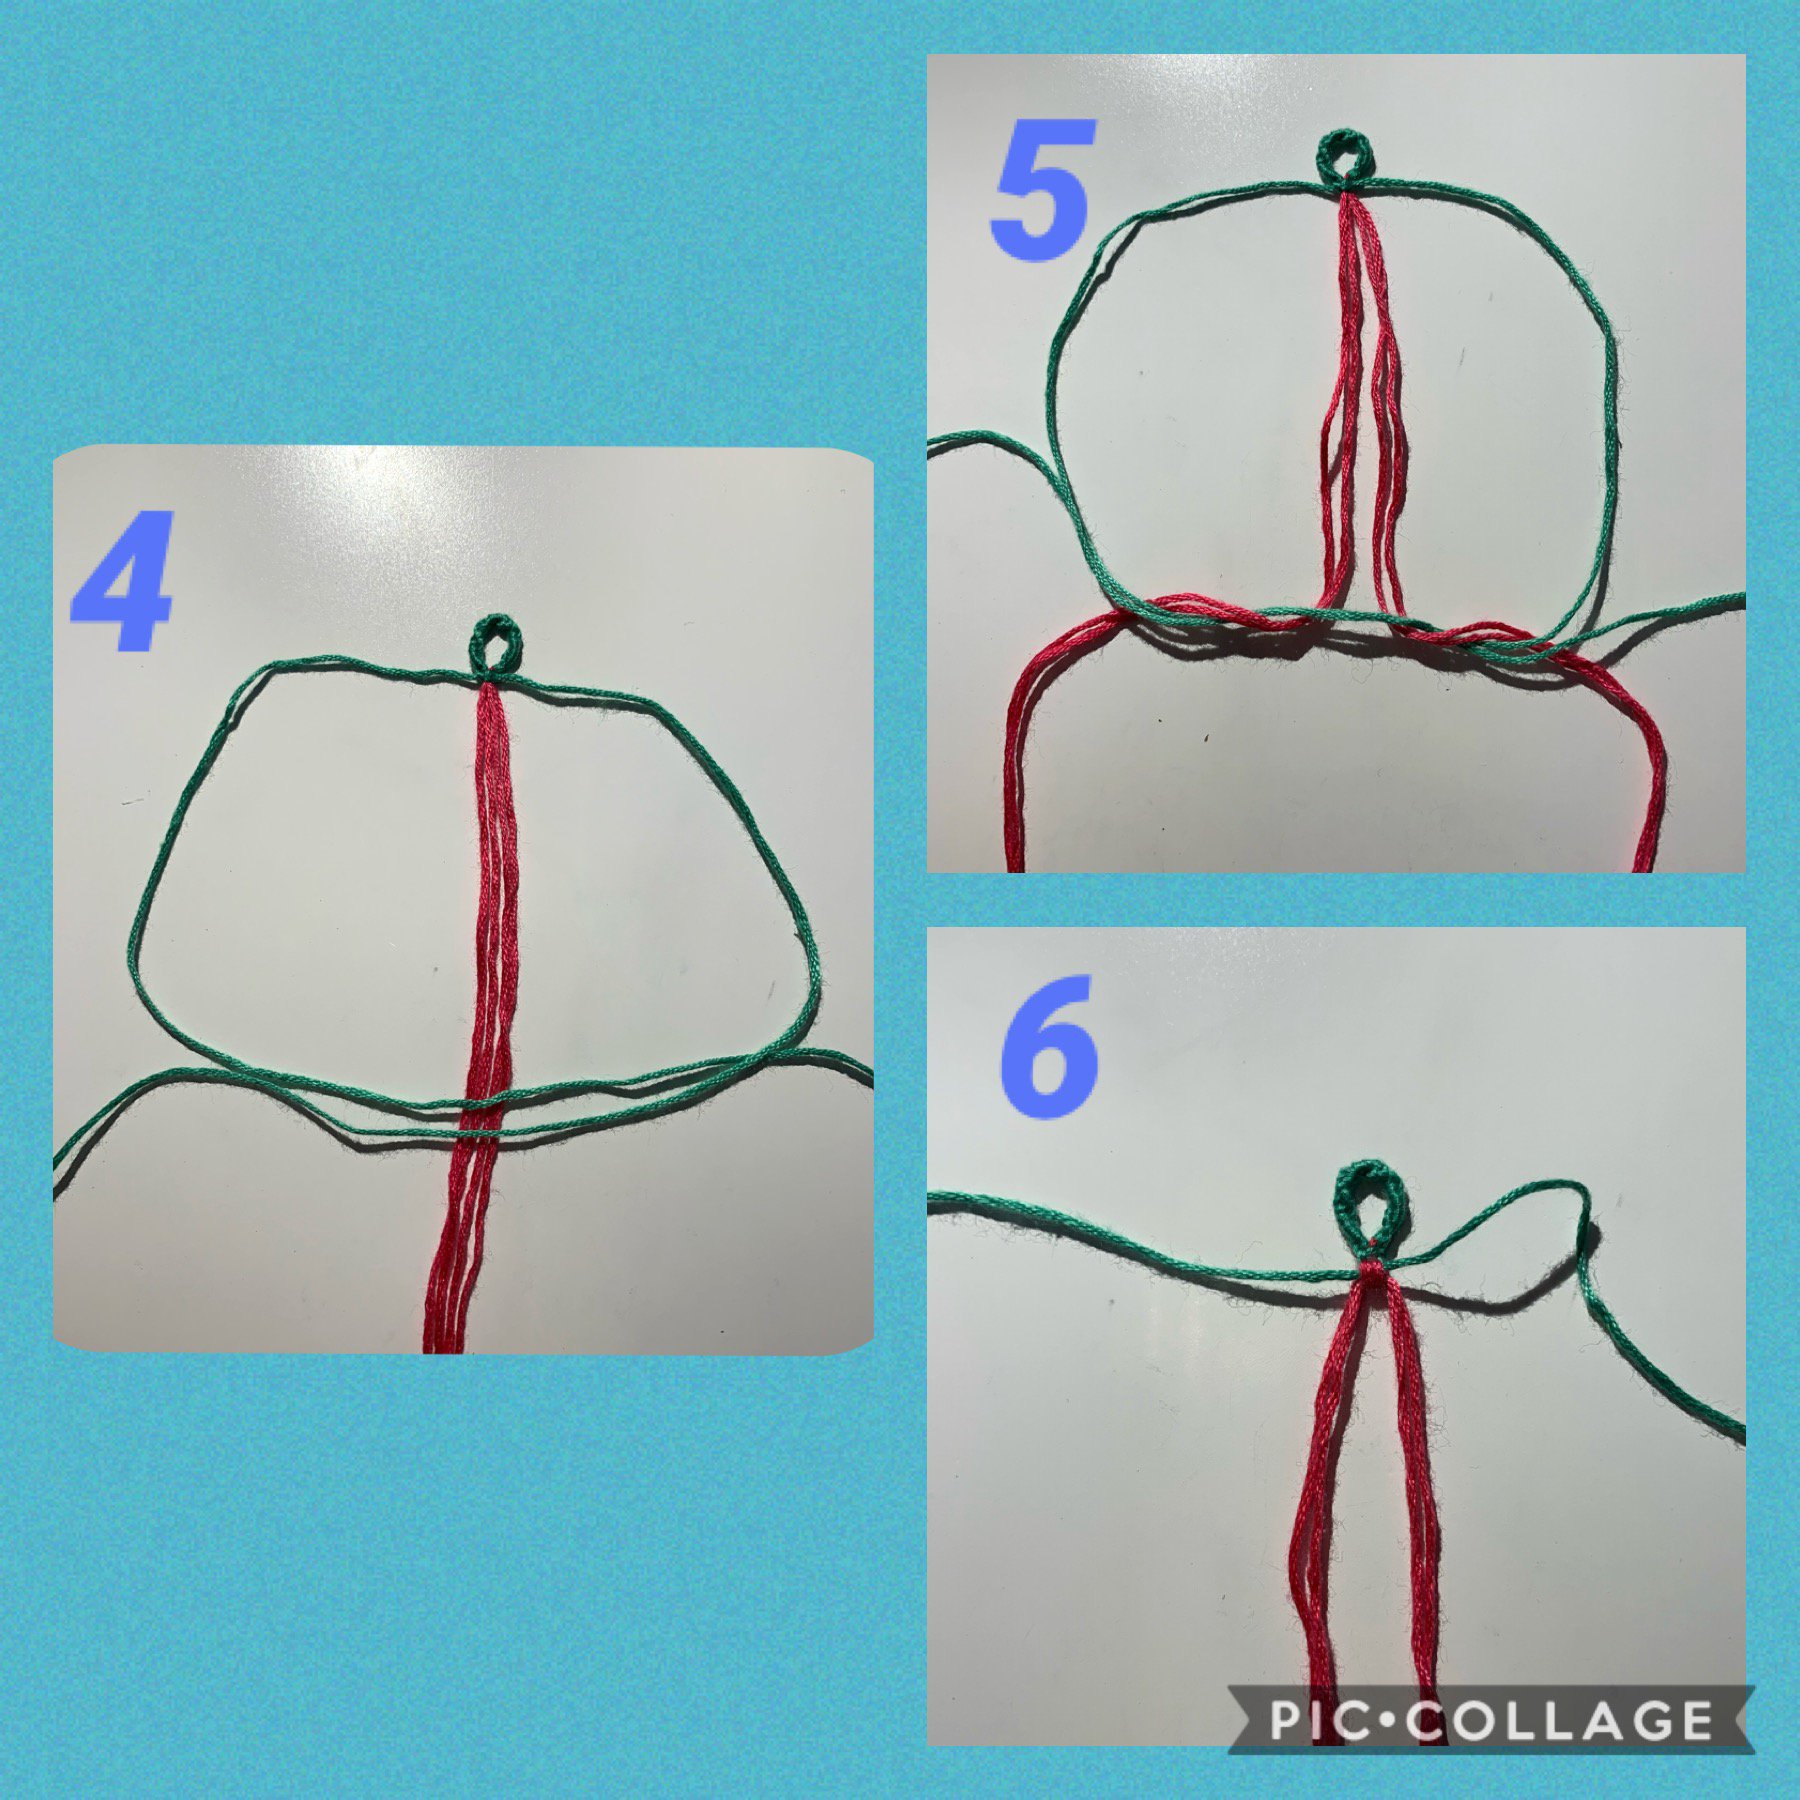
4. Lay the green strings over the pink middle as shown in the photo.
5. Take the 4 pink strings and use them as two strings of two (this makes the flower look bigger as the thread is thicker) and bring them up over then under the green strings like in the photo.
6. Pull all the strings tight slowly and carefully so they create the first petal.
5. Take the 4 pink strings and use them as two strings of two (this makes the flower look bigger as the thread is thicker) and bring them up over then under the green strings like in the photo.
6. Pull all the strings tight slowly and carefully so they create the first petal.
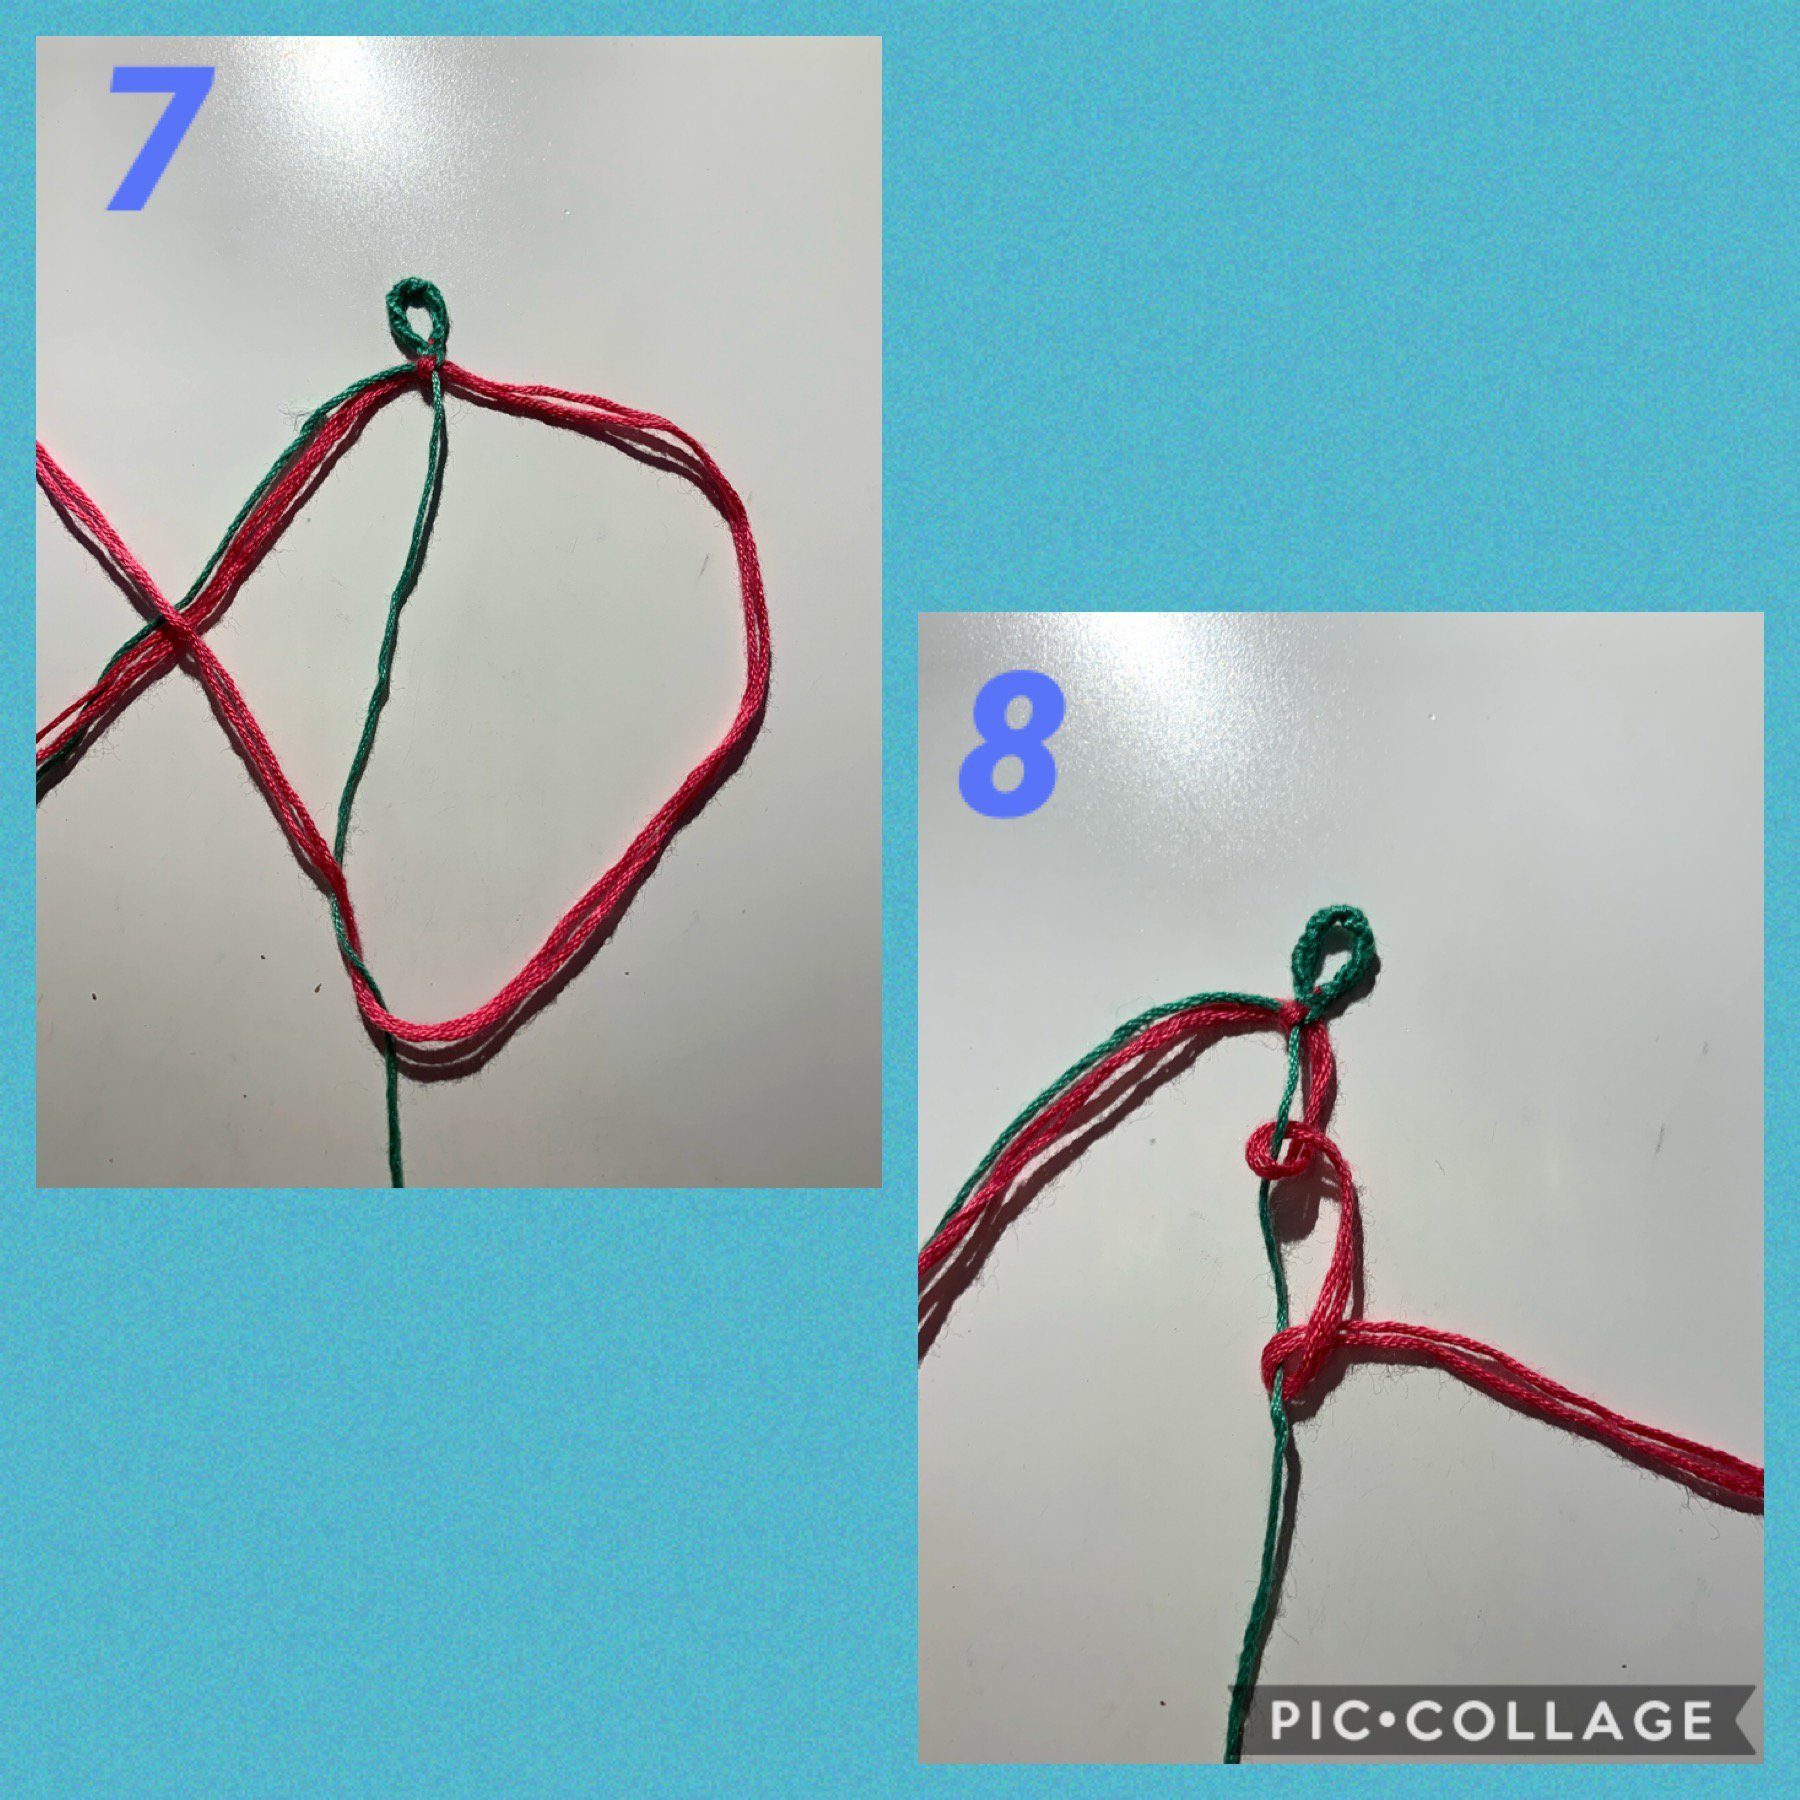
7. Take the right pink string (both of them) and do the first half of a backward forward knot.
8. Complete the backward forward knot and make sure it is twisted to the right side.
8. Complete the backward forward knot and make sure it is twisted to the right side.
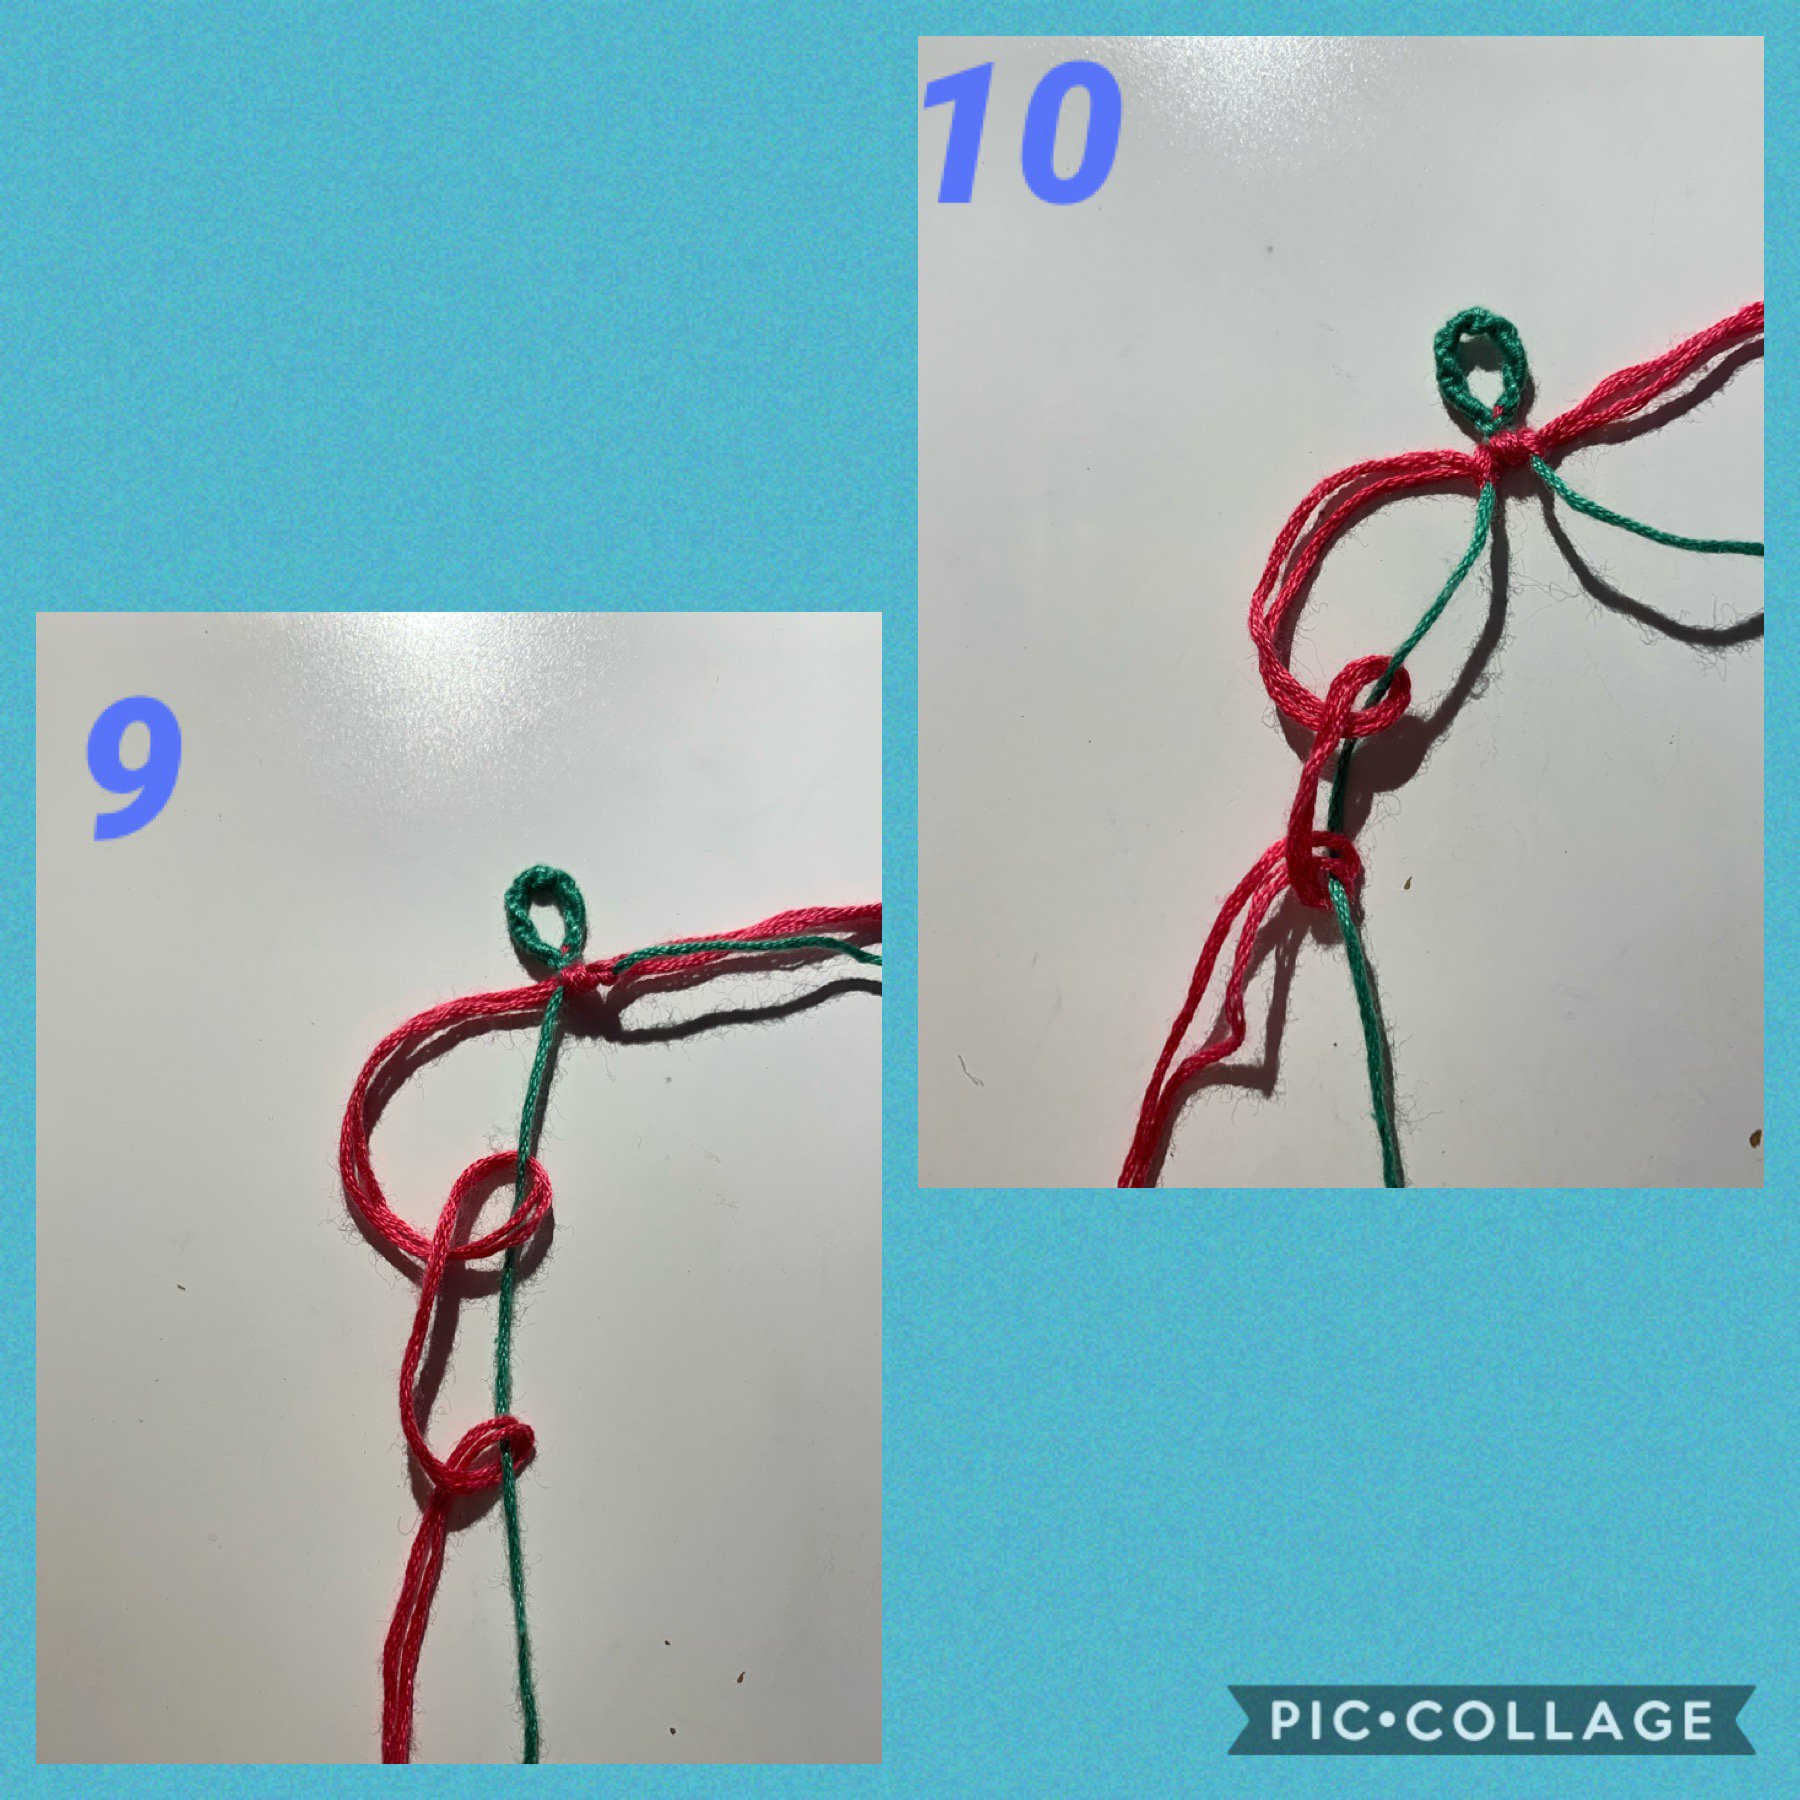
9. On the left side use the pink string to make a forward backward knot onto the left green string.
10. Use the pink string to make another second forward backward knot onto the green string.
10. Use the pink string to make another second forward backward knot onto the green string.
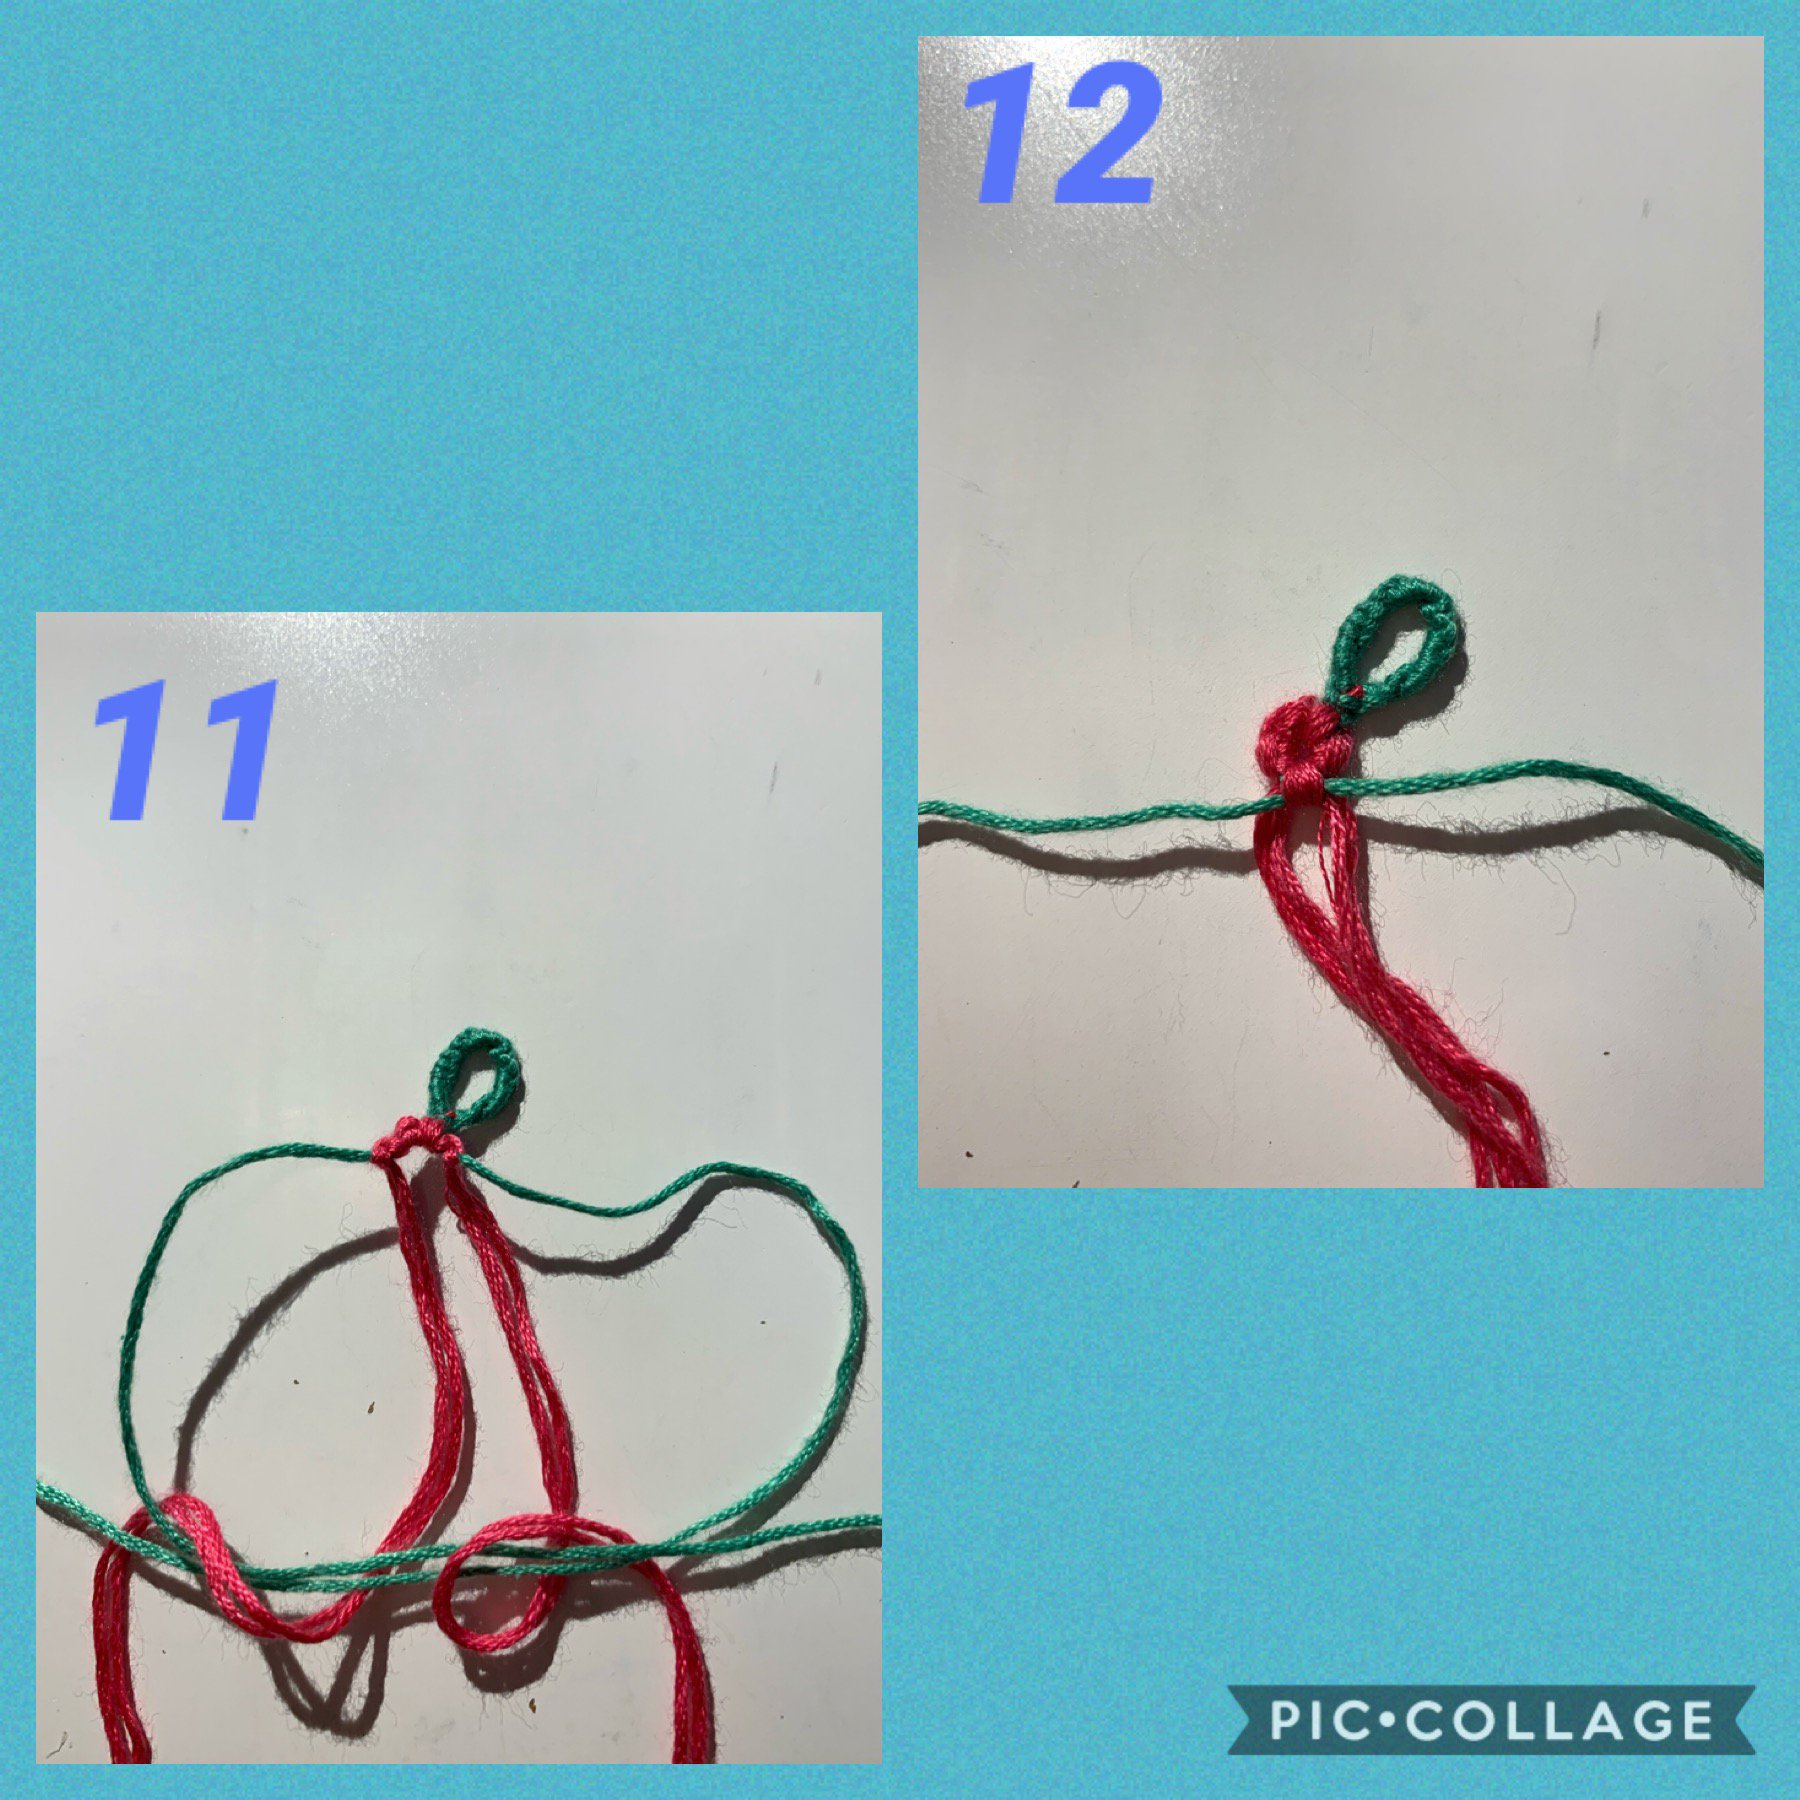
11. Repeat the steps 4 and 5 to make the bottom petal of the flower.
12. Pull the knot tight.
12. Pull the knot tight.
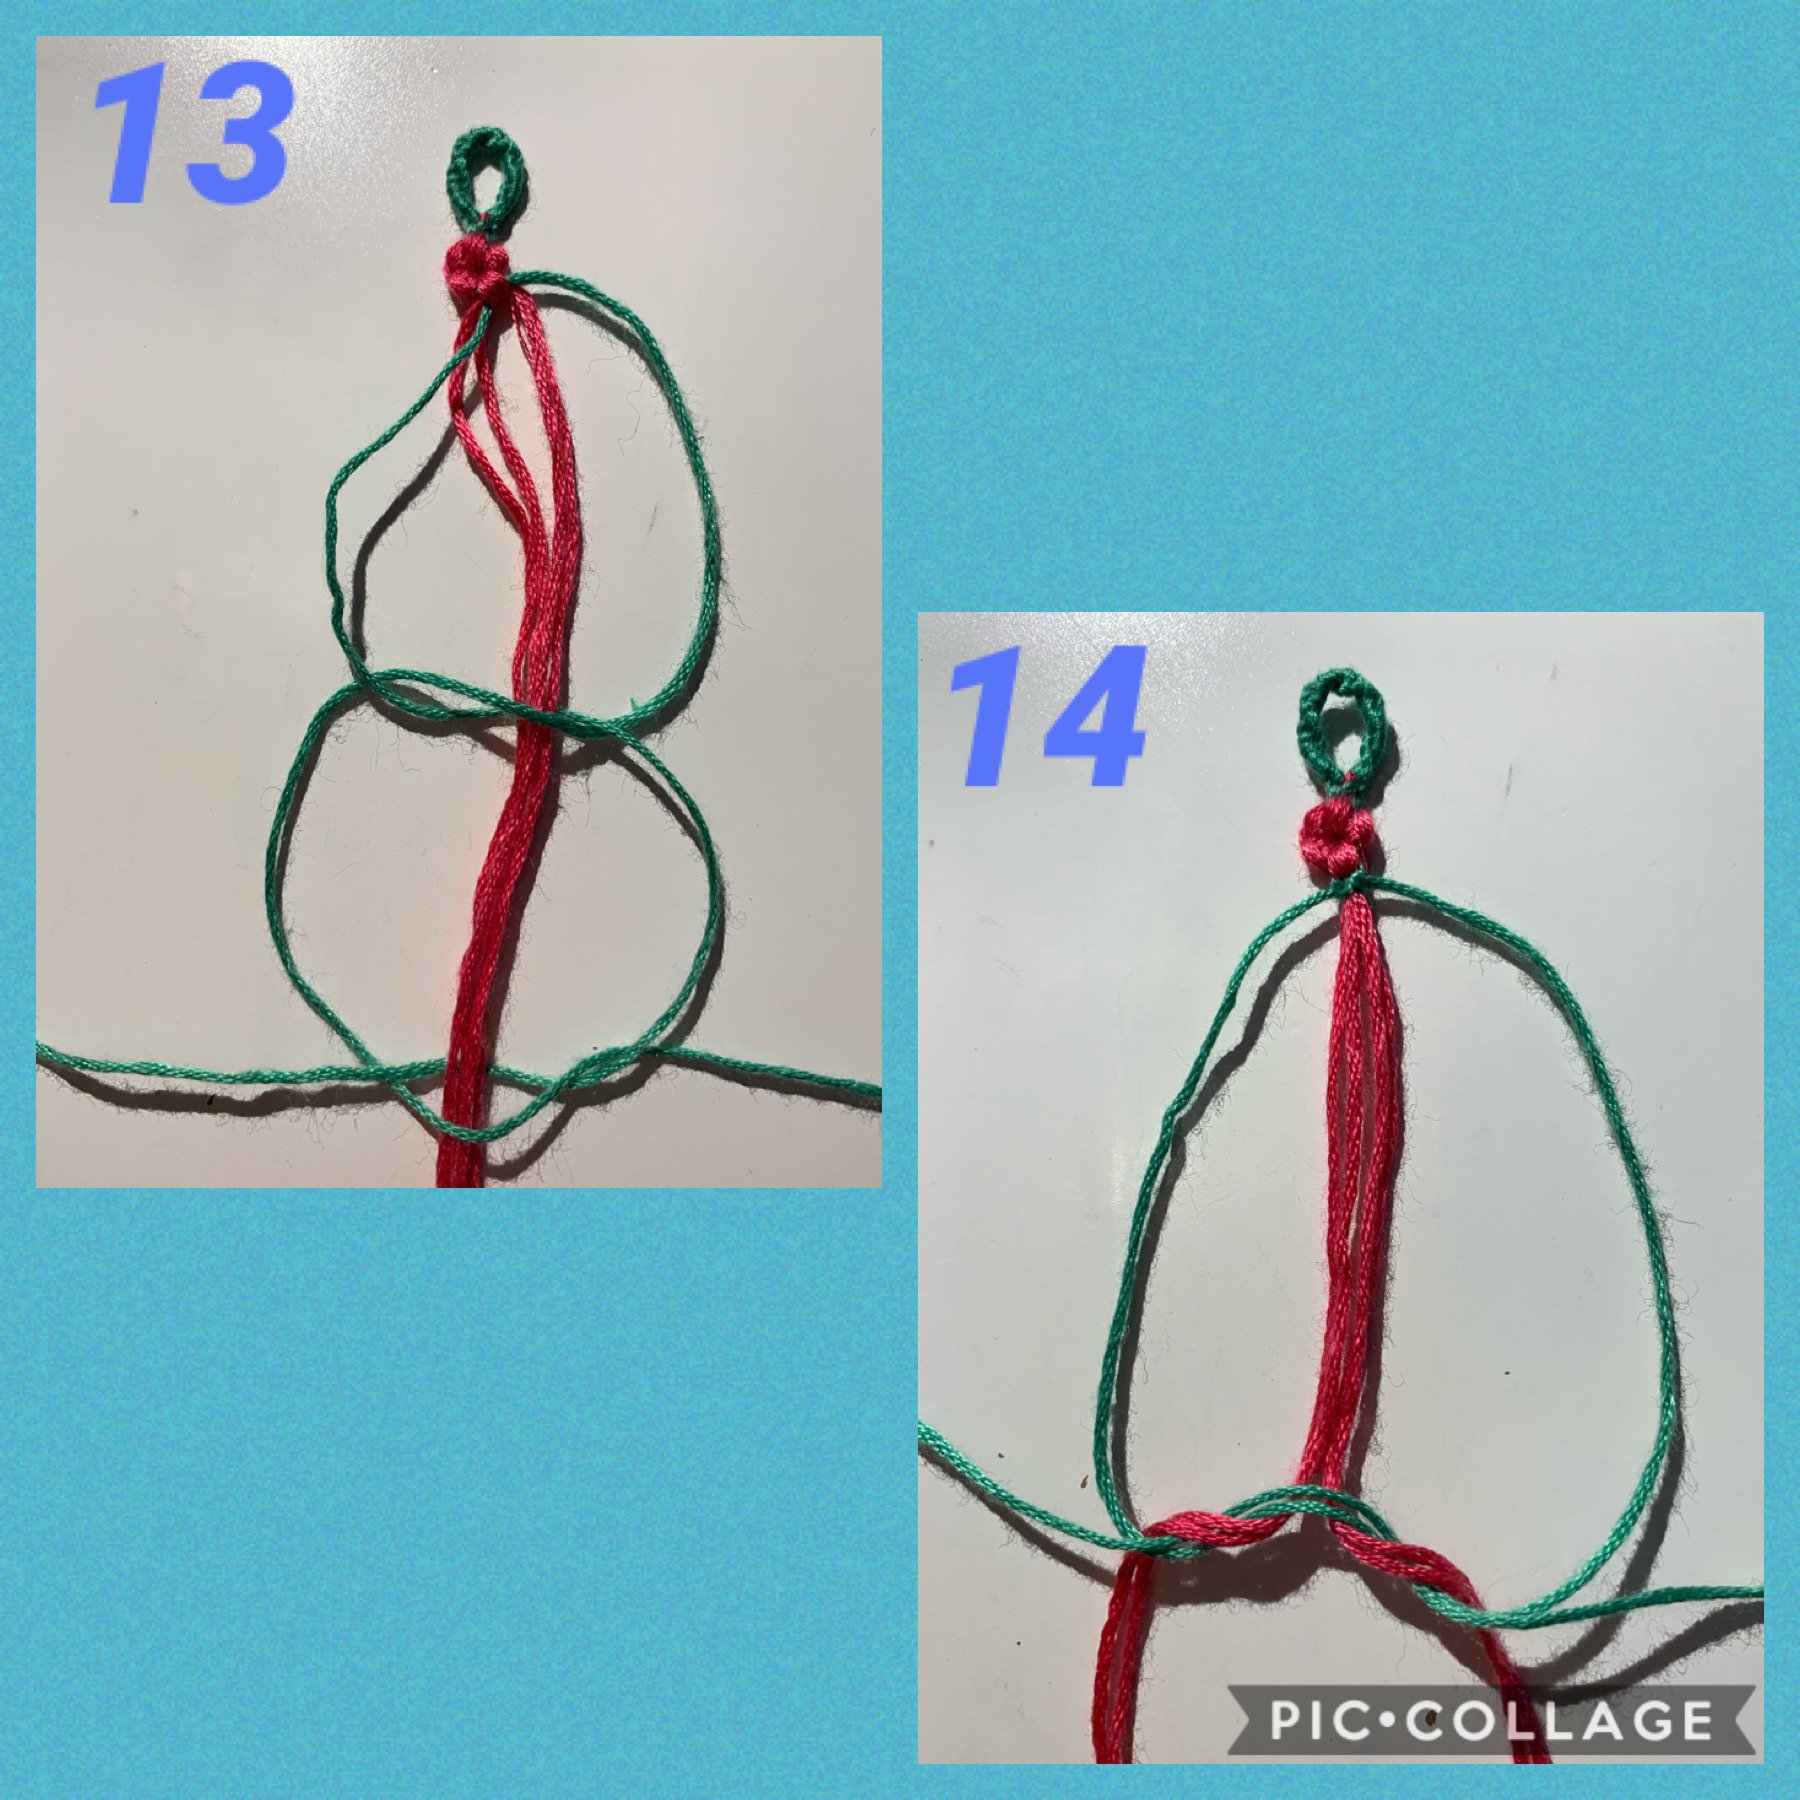
13. Make a macrame square knot starting with the opposite side to the last square knot.
14. Repeat steps 4, 5 and 6 to make the top petal of the next flower.
14. Repeat steps 4, 5 and 6 to make the top petal of the next flower.
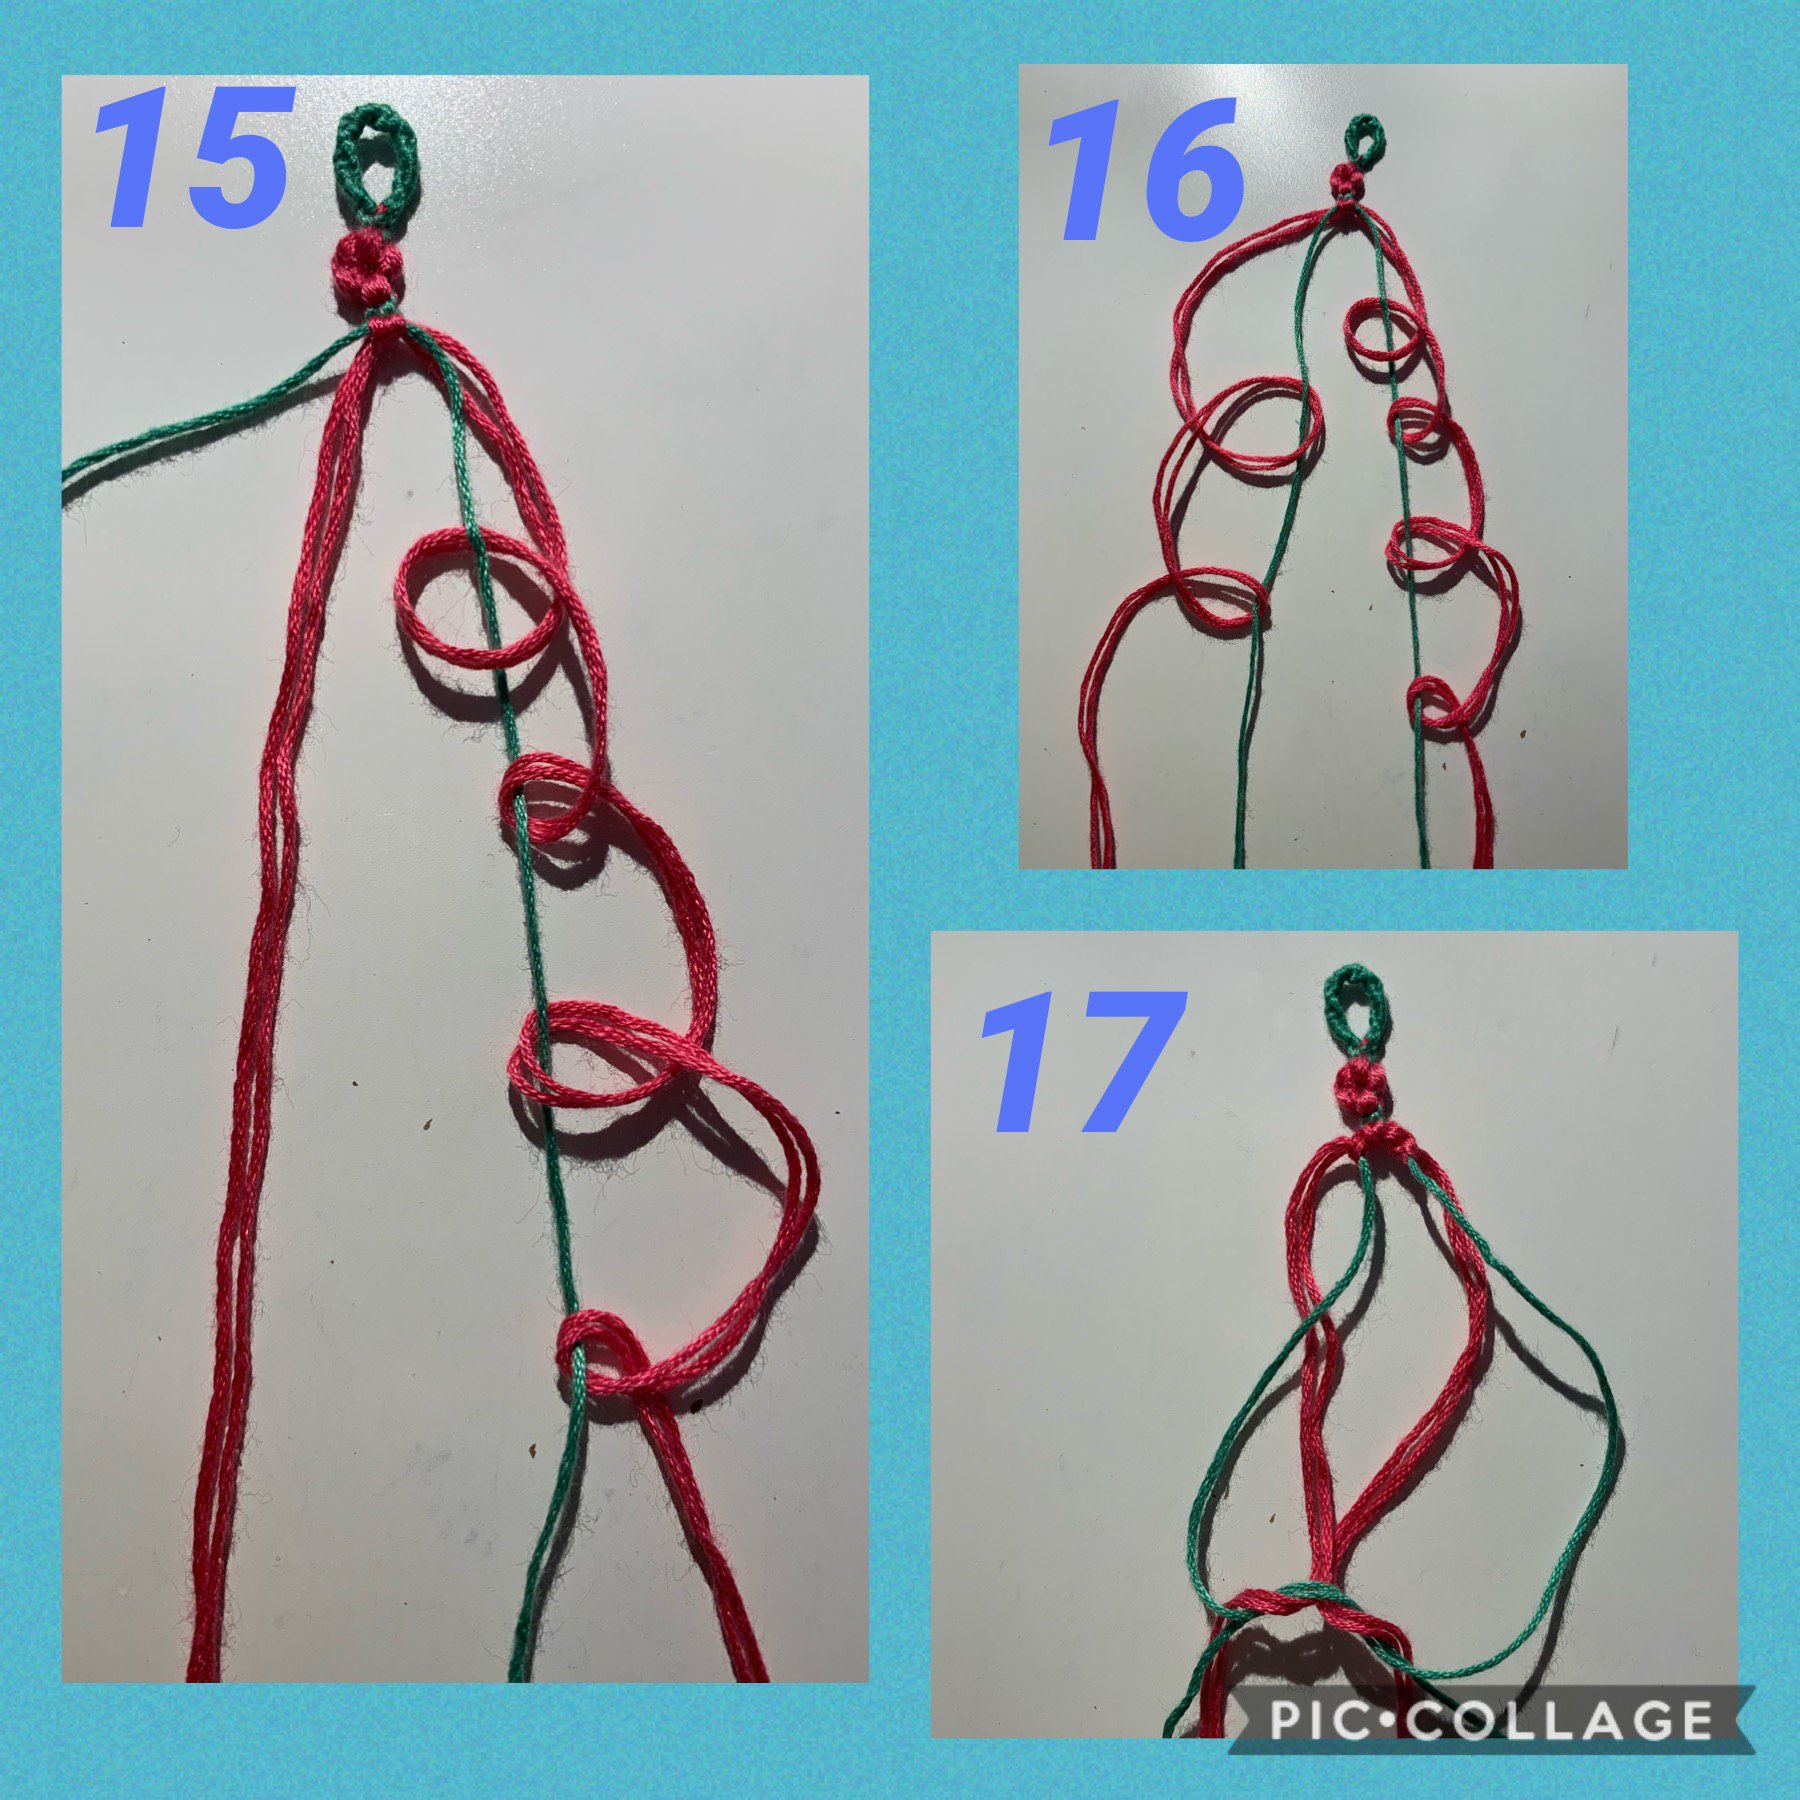
15. Make two backward forward knots on the right side with the pink onto the green.
16. Make one forward backward knot on the left side with the pink onto green.
17. Finish the second flower by repeating steps 4, 5 and 6 to make the last petal.
16. Make one forward backward knot on the left side with the pink onto green.
17. Finish the second flower by repeating steps 4, 5 and 6 to make the last petal.
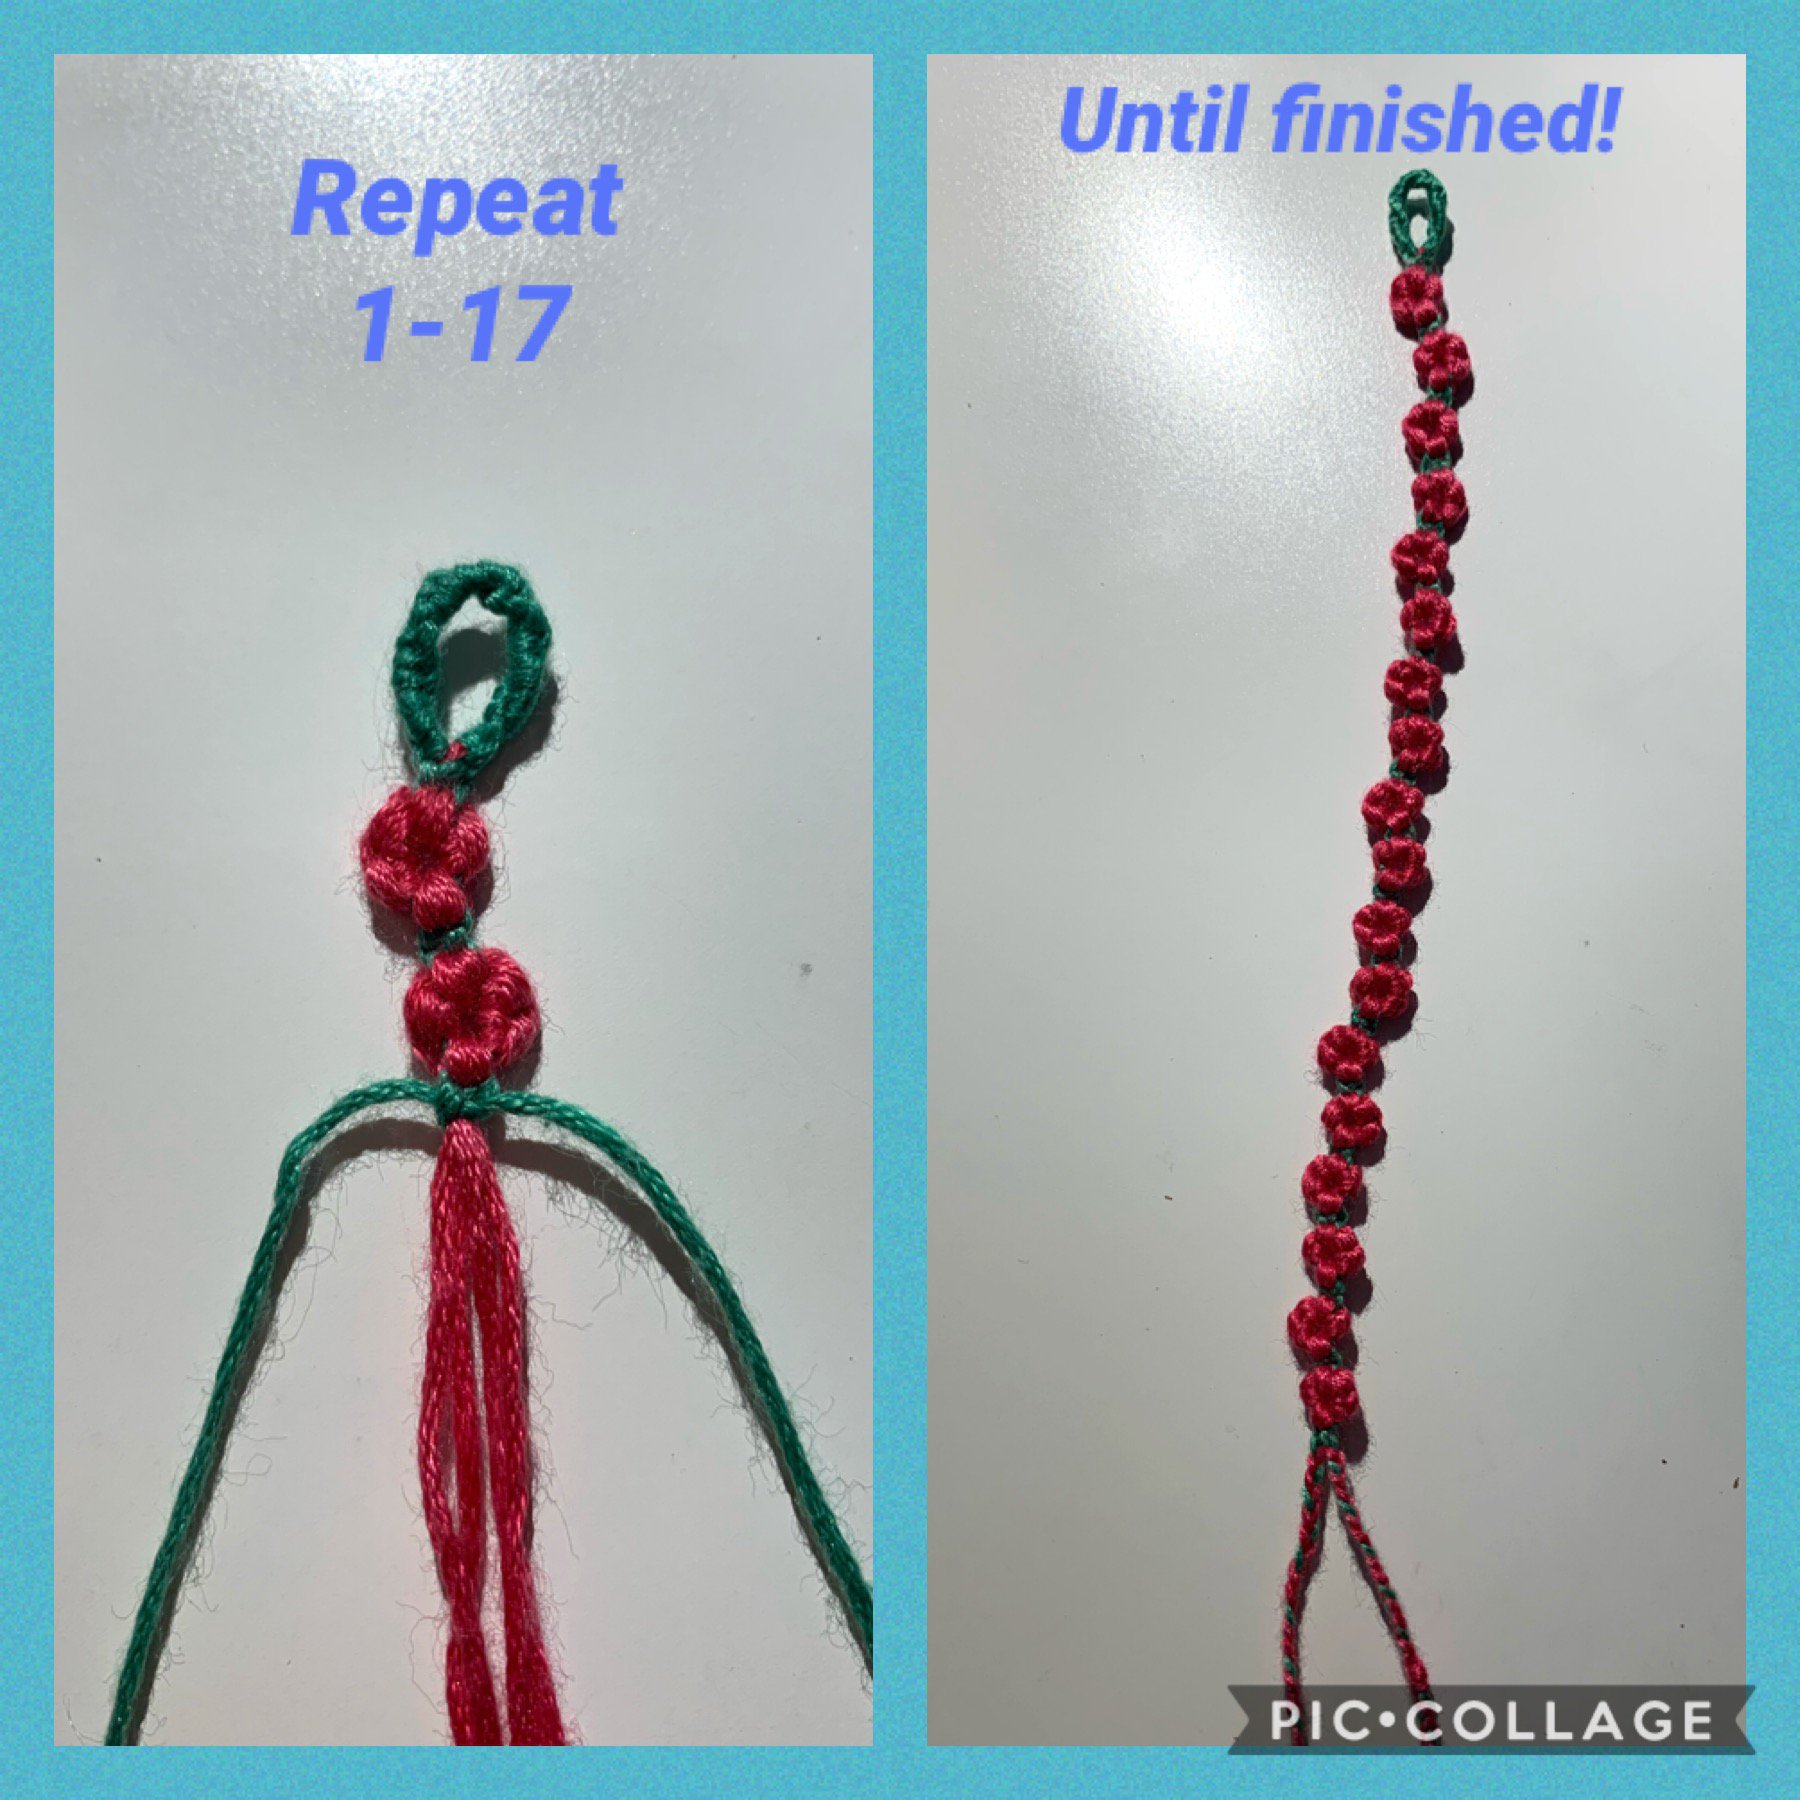
Repeat these steps to complete your bracelet 😊.

And your bracelet is now completed! 🎉