Tying to Keychains?
Reply
|
vanillasky
Bracelet King
 |
12 years, 8 months ago by vanillasky
I have a couple of different bracelet patterns I'm looking to do simply as...keychains! The one issue I have, though, is trying to figure out how to attach the round keychain loop thingies to the bracelet. How would you recommend doing that? Would I tie it in before or after the bracelet's done, and...how could I do it so that it looks nice? 😛 I'd really appreciate a bit of help. Thanks! 🙂
|
|
lyra2245
Bracelet King
 |
12 years, 8 months ago by lyra2245
is the bracelet already made??
|
|
vanillasky
Bracelet King
|
12 years, 8 months ago by vanillasky
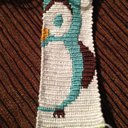
Yeah, the first keychain I made is already done, it looks a little odd because all I could think of to attach the key ring was to create a little loop (like you would for the tying of any other bracelet) and stuck it through the loop, but now there's all this excess loop...hopefully that makes some kind of sense! xDBut yeah, I'm pretty much searching for some way to do it next time I work on a keychain so it doesn't turn out weird like this Snoopy one i've done. 🙂 |
|
Adik
Bracelet King
 |
12 years, 8 months ago by Adik
There is a keychain tutorial in the tutorial section i think 🙂
|
|
vanillasky
Bracelet King
|
12 years, 8 months ago by vanillasky
I checked there, I can't quite find it! Is it under a different name or something, maybe? I tried searching the names of them for "keychain" in there somewhere but didn't spot it. 😛
|
|
lyra2245
Bracelet King
|
12 years, 8 months ago by lyra2245
its the "alphabet tutorial" i believe
|
|
blueisbest
Bracelet King
 |
12 years, 8 months ago by blueisbest
It would be the same as the tutorial for the safety pin brooch. This tutorial has you starting the bracelet on safety pin (or in your case a keyring). Although the tutorial is done with an alpha, you can do it with a normal pattern. You can kind of see the method I used for normals on my picture of pattern #10886. You just make the loops over previously made loops if a color has other colors between it.There is another more complicated method for making alphas that are larger than your keyring (usually 17 or more knots wide). You would start as if you were making a normal alpha bracelet except your base strings should be twice as long and you should make the pattern upside down. Once you have finished the pattern you will add the keyring. First, using your background color, knot across the bracelet in this fashion: For a pattern 17 knots wide you will be making 13 forward knots. The first forward knot is on strings 1 and 2, the second is on strings 3 and 4. Make 9 normal forward knots across strings 5-13. The second to last forward knot is on strings 14 and 15. The last forward knot is on strings 16 and 17. Insert the keyring between the "double" knots with strings 3-15 inside the ring and strings 1,2,16, and 17 outside the ring. The next row of knotting will be the same as the row I just described. From there you can begin knotting normally and repeat the alpha pattern you are using, this time facing the right direction with the keyring being the top of the pattern. What you will end up with is a double sided keychain (That's why we did the pattern upside down first.) You can finish the bracelet by tying the base strings from the beginning and the end together and hand sewing the sides together so the two patterns are connected. If your bracelet is more than 17 strings wide add normal forward knots to the beginning and end of the row I previously explained. So, 21: forward knot on string 1, forward knot on string 2, then your third forward knot is on strings 3 and 4, your fourth forward knot is on strings 5 and 6, 9 normal forward knots on strings 7-15, forward knot both string 16 and 17, forward knot on both 18 and 19, forward knot on string 20, forward knot on string 21. The keyring again would go between the "double" knots with strings 1-4 and 18-21 outside the ring. The advantages of this method are you don't see the messy backside of multicolor alphas and the top edges by the keyring are straight. The method in the brooch tutorial causes the top edge to be curved because of the shape of the keyring (Like my picture of pattern #10885). The disadvantage of course is that your keychains take twice as long to make because you complete the pattern twice, one for the front side and one for the back. Also, not all keyrings are the same size, so you will have to see what works for you. It just means you will change the number of normal forward knots between the two "double" knots. So, sorry this is so long, but I hope it was helpful. Let me know if you have any questions or if you need me to explain anything I said better. |
|
vanillasky
Bracelet King
|
12 years, 6 months ago by vanillasky
At long last, I got the motivation to work on my first keychain and I was successful! 😄 I thank everyone so much for the help, now I can do these in addition to the bracelets. Whoo!
|
Reply