Rate Tutorial
Introduction:
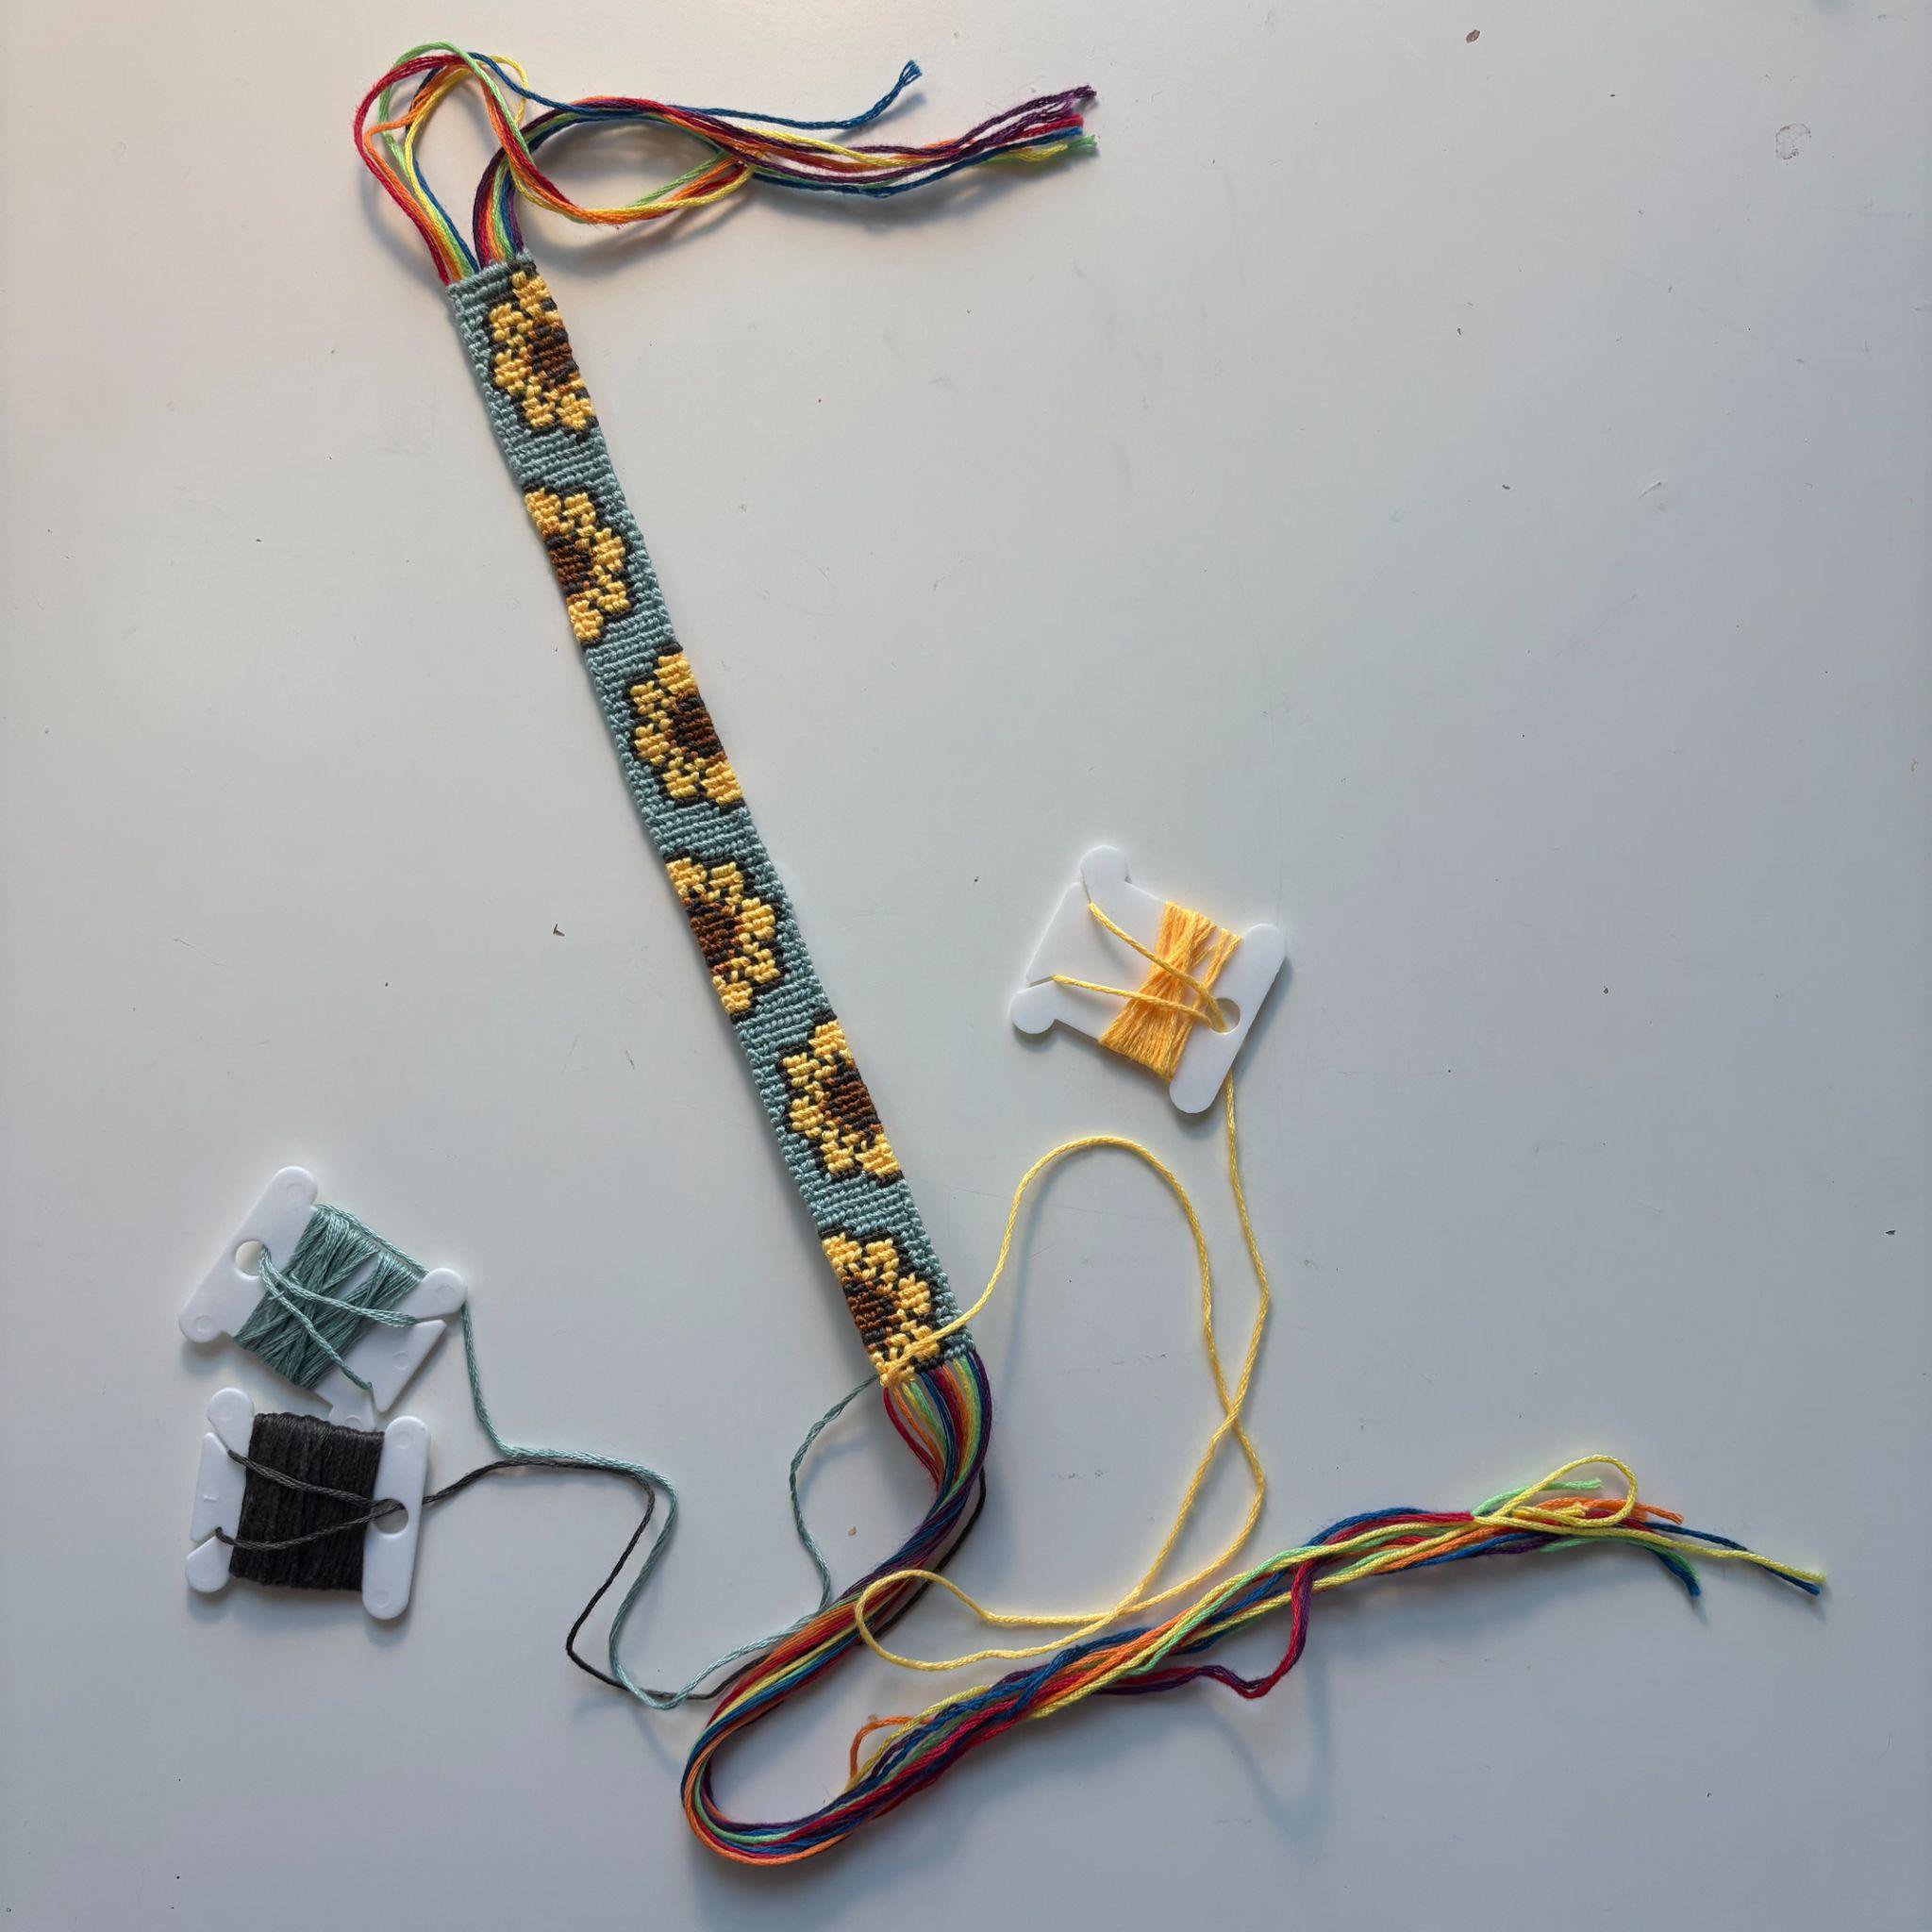
For this technique, you will need some tape, your unfinished alpha bracelet with at least 5 inches of extra base string on either side, and glue if you want it. The alpha will need to have more rows than usual, often around 95-115 rows. Leave the last 2-4 rows unfinished.
You’ll need to know how to make an alpha bracelet and how to tie a square knot.
You’ll need to know how to make an alpha bracelet and how to tie a square knot.

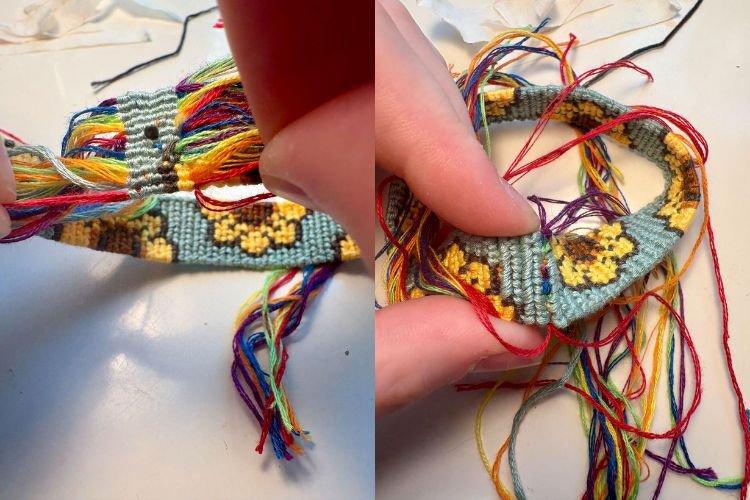
Step 1:
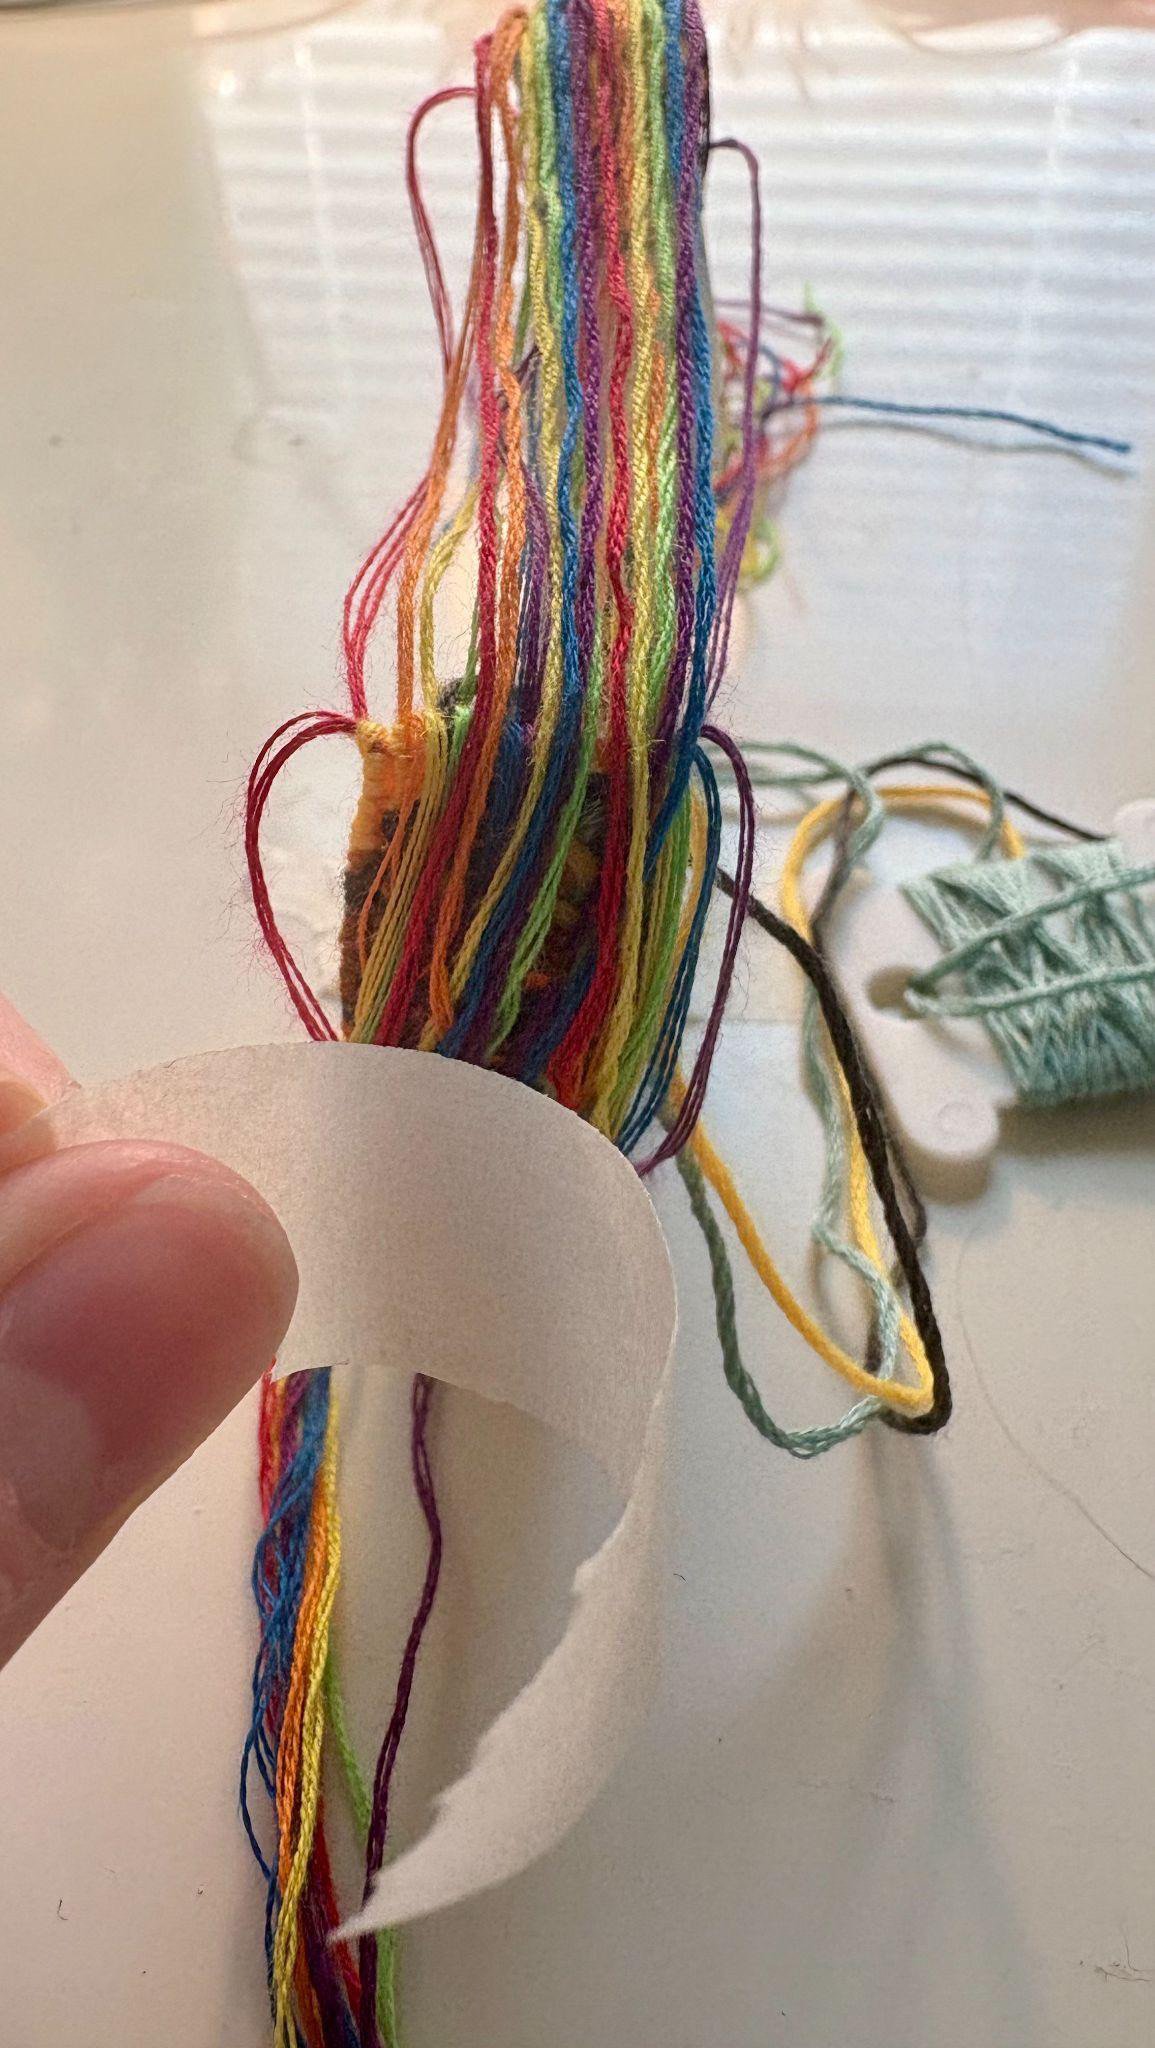
Loop your bracelet so that the “bad” side is on the outside. Split the base threads in half and tape one half to the bad side of the bracelet. Do this to both the beginning and the end of the bracelet.

Step 2:
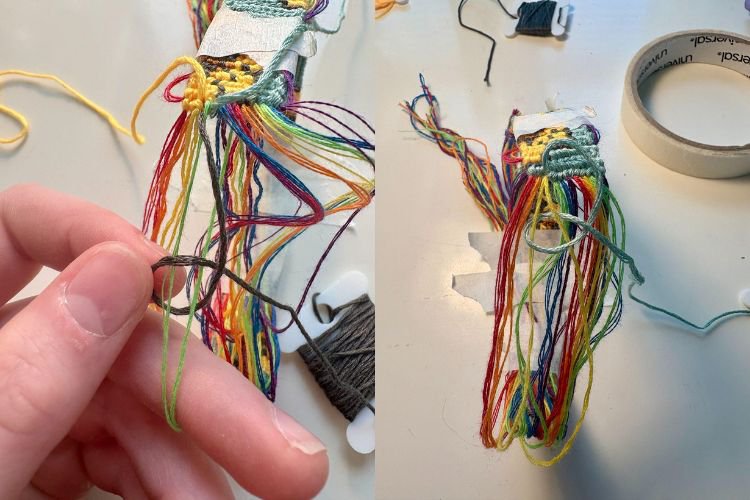
Organize each of the untaped base strings so that it is next to its opposite side. I’m using different colors of base strings to make it more clear which ones need to match up.
Step 3:
Once you have organized each base string, tape them down. Make sure to leave around 4 inches in between the ends of the bracelets.

Step 4:
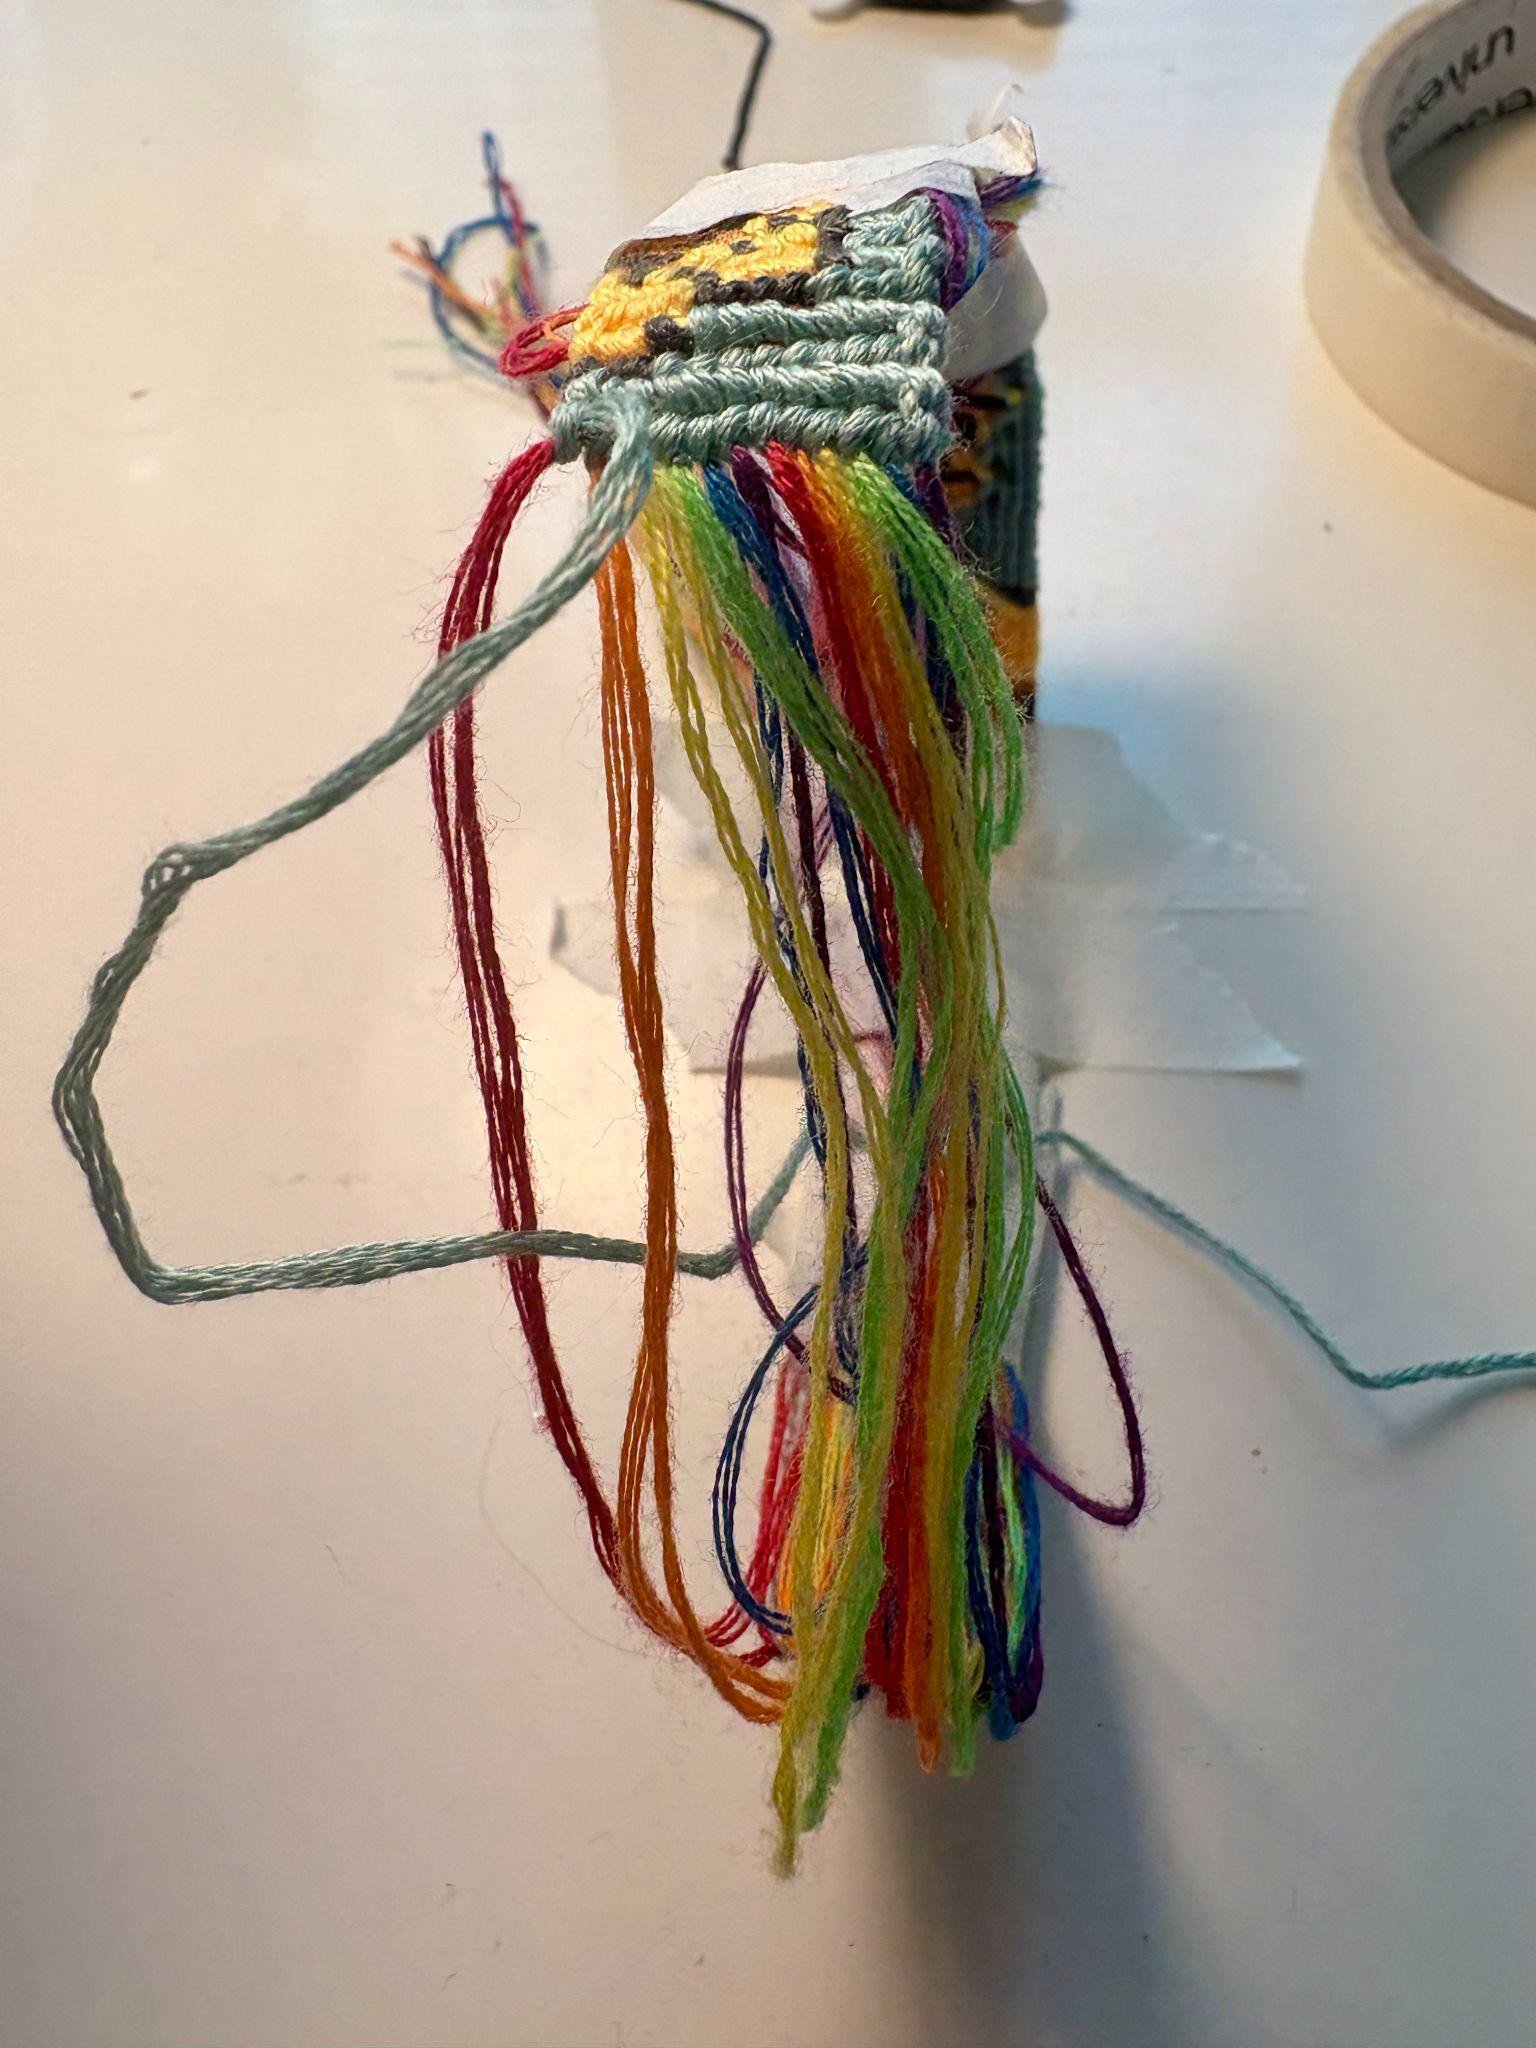
Flip the bracelet loop inside out. The tape should now be on the inside, and the “good” side of the bracelet should be on the outside.
Tape the loop to your work surface.
Tape the loop to your work surface.
Step 5:
Start knotting another row like you would normally, starting where your leading string left off, but now you knot on 2 half strings instead of 1. One base string should be going up, and the other should be going down.
I recommend doing 2-4 rows like this. I’ve found that only one row makes it easier for it to come undone, and more than 4 makes the next step too difficult.
I recommend doing 2-4 rows like this. I’ve found that only one row makes it easier for it to come undone, and more than 4 makes the next step too difficult.
Step 6:
Flip the bracelet back to the “bad” side and make sure the leading string goes in between the base strings and to the “bad” side.
Step 7:
Pull the ends of the base strings so that the ends of the bracelet meet. I have to pull each string individually, otherwise it doesn’t go anywhere. Check if there is any of your base string sticking out on the “good” side and pull that string until it is gone. This process can take a while, but this is what makes it seamless.

Step 8:
All that’s left now is securing the strings. Get rid of all the tape.
Starting on the opposite side of the leading string, tie square knots for every set of base strings and cut off excess. Leave around 5 cm at the end so the knots don’t come undone.
For the side with the leading string, put the leading string in between the two closest base strings. Tie a square knot using those two base strings. Repeat with the next two base strings until the leading string is secured under at least five knots, and then cut it.

Step 9:
Glue the knots and ends with fabric glue if you want to.

Step 10:
Now you’re all done! 🎉
This also works to permanently attach it to someone’s wrist if you do steps 7-9 while it is on the wrist. I’ve done this with a couple of bracelets, and they still haven’t fallen off after 8 months (it’s much harder to do to your own wrist though).
This also works to permanently attach it to someone’s wrist if you do steps 7-9 while it is on the wrist. I’ve done this with a couple of bracelets, and they still haven’t fallen off after 8 months (it’s much harder to do to your own wrist though).