Rate Tutorial
This technique could be used for shaped bracelets, or bracelets with multiple triangle starts where you only want one loop. It is highly recommended that you are comfortable with making triangle starts before using this tutorial.
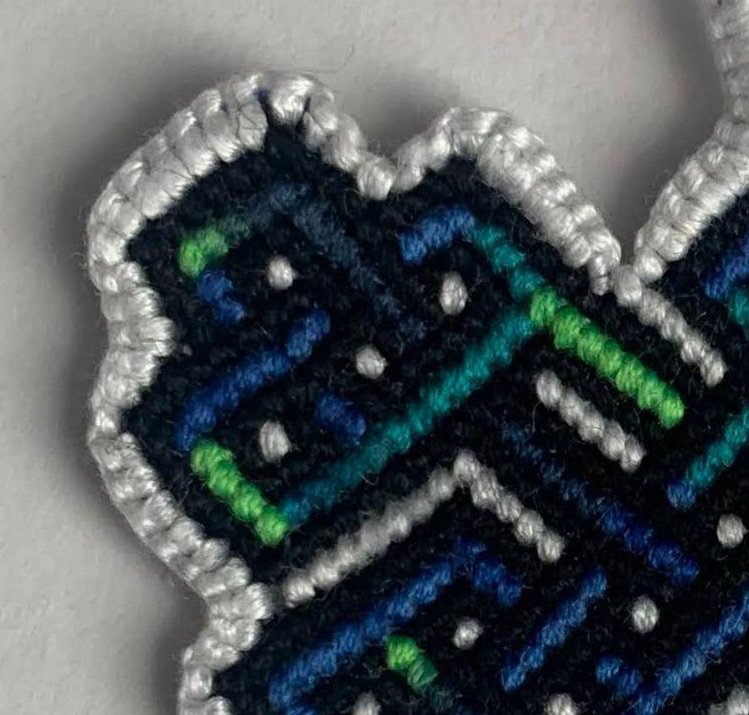
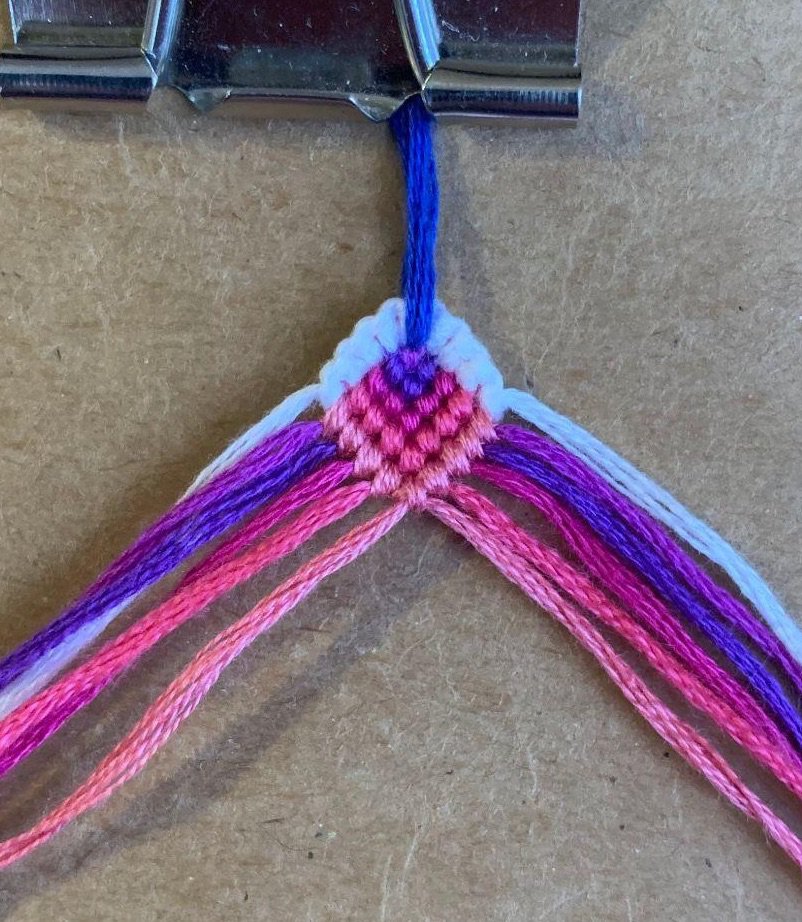
Here is an example of this used to make bracelet #186642. Pictured below are two of these triangle starts next to each other.
To do this, your strings must be double length and folded in half.
Here is an example of this used to make bracelet #186642. Pictured below are two of these triangle starts next to each other.
To do this, your strings must be double length and folded in half.
Step 1
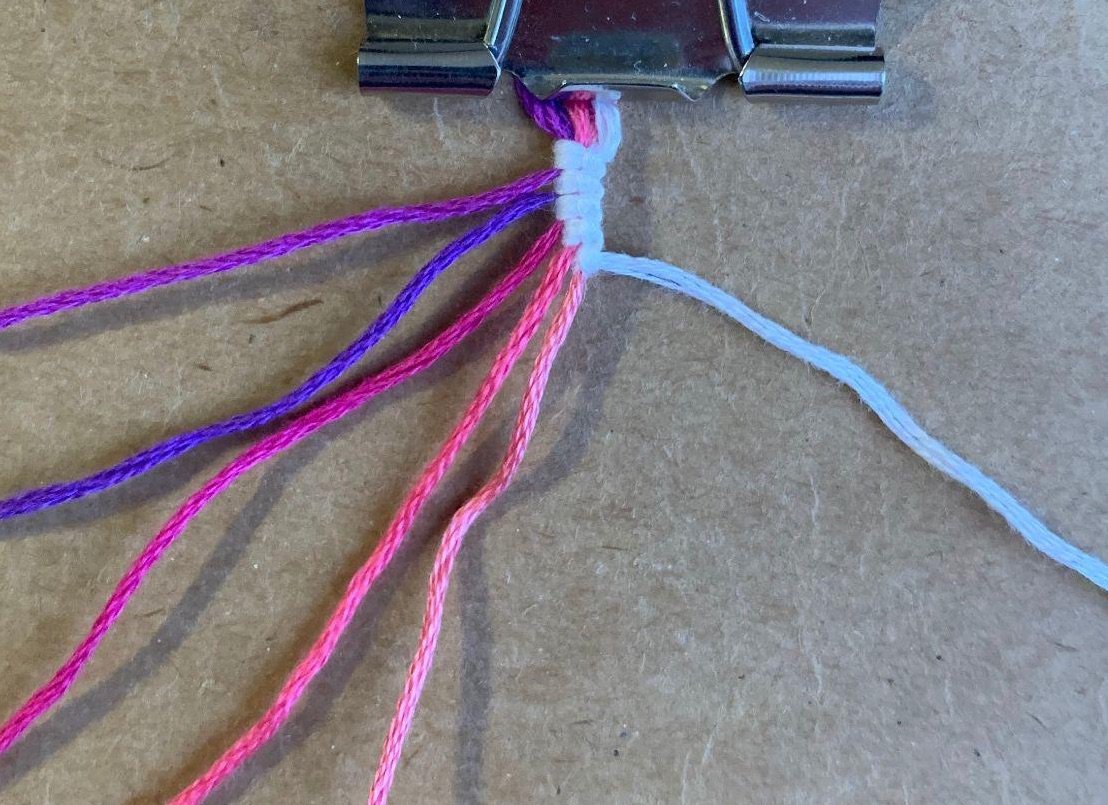
Fold your strings in half and find the center. Make one backwards forwards knot onto all the strings with the color you want your border to be. Remove the first color in your pattern, and make another backwards forwards knot. Continue like this until all of your strings have been removed from the main knot.
Step 2
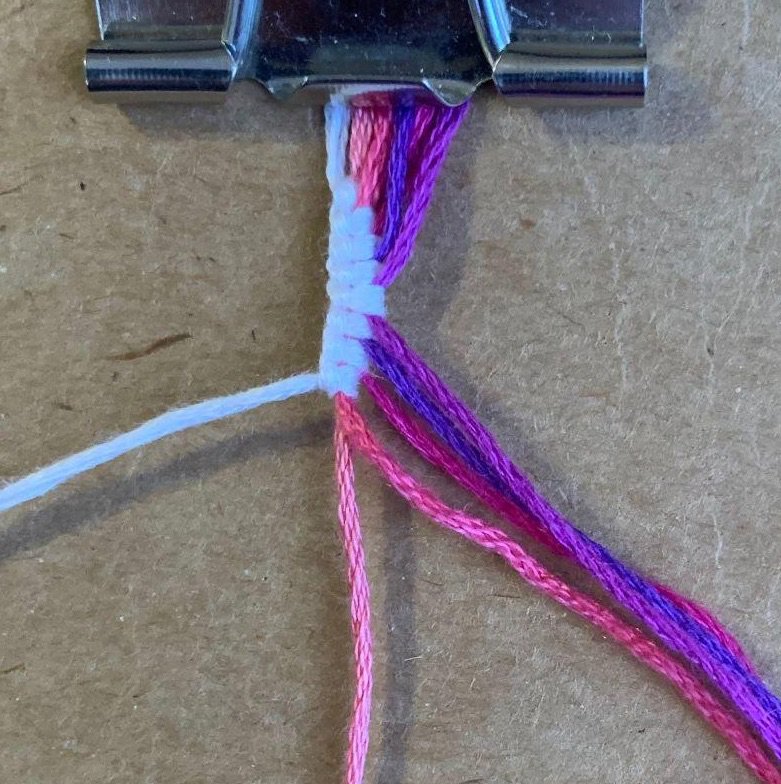
Flip your string around to the other side so you can make the other half of the triangle start. Remove the first string in your pattern on this side, and then make a forwards backwards knot. Continue until all your strings have been removed from the main knot.
Step 3
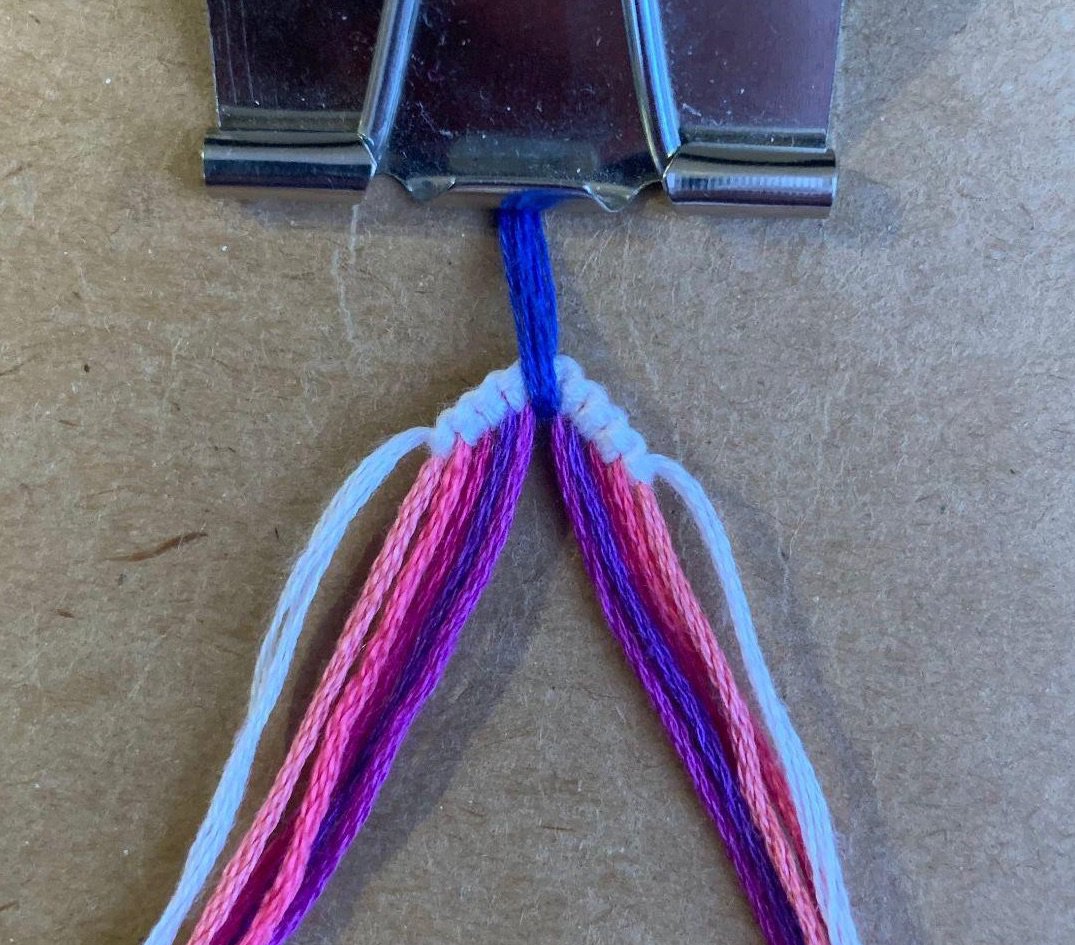
Take a piece of scrap string, loop it through the center, and tie it. This will be removed at the end, and gives you a way to attach the bracelet to something while you tie it.
Step 4
Begin tying your bracelet like you normally would in a triangle start. When finished, cut the scrap piece of string and pull it out.

Complete.