Making bracelets with dexterity issues
Reply
|
dorianBay
Beginner
 |
10 months, 2 weeks ago by dorianBay
Hello there! I've tried making my first bracelet today and it was challenging and it ended up being scrapped. I have dexterity issues in my hands because of my disability, however I would still love to make bracelets. I had trouble keeping my strands fixed on the table because I tend to pull on the strings while tightening the knots, which lead to my rows being unaligned and messy. Another issue was keeping track of which strands went where on my desk. Because of the way I tied the knots, the strands would overlap and get tangled. By the time I'd untagle them, I wouldn't know which ones went on which side. Does anyone have any advice on how to make friendship bracelets while having dexterity issues? Thank you for your help. |
|
BabyWren12
Bracelet King
 |
10 months, 2 weeks ago by BabyWren12
I don’t personally have dexterity issues so my ideas might all be useless but i’ll give it my best shot 😓were you taping your strings down on the table? in general i find that is too loose for me too but two things that DO work is using a binder clip on a clipboard/thin hardcover book (i use where’s waldo lol) or attaching it to a waterbottle, specifically a full waterbottle that i hold between my legs for separating your strings, i’ve seen some people use a piece of cardboard that they cut slits on the end of and then put their strings in there. that way they stay in order! lmk if this works!! |
|
halokiwi
Moderator
 |
10 months, 2 weeks ago by halokiwi
I would recommend using a binderclip (more secure than tape) and thicker yarn (thicker yarn is easier to work with then embroidery floss).
|
|
Alt64_
Advanced
 |
10 months, 1 week ago by Alt64_
Hello! I'd like to help with my experience and perspective. I recommend starting with a small, simple pattern, with just a few threads, so you can learn how to use the threads and knot properly. I recommend a pattern you can complete in 1 or 2 days and feel satisfied with the result. I also recommend using a hooked board or a hooked folder; it will help a lot when securing the threads.It's always worth remembering: good lighting, good posture, stretching your fingers and warming up your hands, a quiet place where you can concentrate and relax, and above all, lots of patience. As a beginner, frustration is normal, but you'll see that with dedication, you'll produce work you'll be proud of, whether for yourself or as a gift for someone special. I hope my words help you, and I'm sure we'll help if you have any further questions. Big hugs! |
|
dorianBay
Beginner
|
10 months, 1 week ago by dorianBay
Hi, everyone! Thank you so much for your advice and kind words!Over the past few days I've been hard at work with my first bracelet and I tried out what you have recommended. To secure the bracelet to my desk I used a hardback book, which kept it from moving even with my strong pulling. To keep my strings from getting mixed up I tried using a comb which essentially works the same way as a piece of cardboard with slits cut out. I ended up figuring out how to pair up my strings and spread them out across my desk not to mix them up, as well as reading the pattern to see where each of the strings go if I did mix them up. I used the comb to arrange and secure my strings when I had to take breaks from making the bracelet, however. That worked really well! I also kept my string number fairly small, as I did a chevron which consisted of six strings. The bracelet started off really messy but as I kept working and noticing my mistakes, it's later rows started making the actual chevron pattern. Once again, thank you so much! I'm really excited to keep making bracelets! |
|
goregirl
Bracelet King
 |
10 months ago by goregirl
Hi! Fellow dexterity challenged person here. I’ve got swan neck deformity and hitchhiker thumbs. Anchoring your strings properly is what helps me. Paperweights are useless to me and safety pins are a no go for me too. Some others use tape or binder clips/clipboards. I use both. As for the alignment you can use a ruler to straighten your lines, I use a gift card because I don’t have a ruler 😂 As for the keeping track of which knot: pick patterns with distinct colors and avoid multiple strings of the same color if you can’t tell which string you’re on. If you can’t do that: just look very closely at the last knot to see which string you just used, use a magnifying glass if you have to. As for the tangling it drives me nuts so instead of letting long strings free dangle while I knot, I keep all of my strings on bobbins 😂😅 Sure it will definitely take longer to make the knots when you’re holding onto bobbins but for me it’s better than having to repeatedly untie a million knots and tangles that can be inevitable with long strings. Dexterity tips: I wish I could offer more about this but I haven’t figured it out for myself yet. All I currently do is pick patterns like alphas because complex normal patterns are hard for me to keep the tension tight in the first half of the knot (to prevent gaps in bracelets). Best of luck
|
|
SickOfIt
Professional
 |
9 months, 3 weeks ago by SickOfIt
Heyy, I also don't have dexterity issues but the way I've always made bracelets is I have a pillow in front of me and I use a long pin to pin down my bracelet into the pillow. I've not seen this method be very popular but I have no idea why? It's so much more comfier laying on your bed braiding on a pillow rather than keeled over a desk uncomfortably. It also gives you ample space to disperse your strings. Hope this helped even a little x 😇 😇
|
|
Sparkle11
Skiller
 |
9 months, 3 weeks ago by Sparkle11
I’m also a beginner, so I don’t know if these tips will help, but I do have dexterity issues (kind of? it’s a chronic pain thing, kind of like carpal tunnel but not exactly that) so hopefully I can help? I have been starting my bracelets with a loop- I do patterns that use each color an even number of times (for example, how the chevron pattern has one string of each color on each side) and just cut a really long string of each color and bend it in the middle so each side is 1 of the strings. Since I tie the strings together to start, this makes a loop at the top, and instead of taping it down to a table I put a clip or carabiner through the loop and then clip that to something solid, like a full water bottle or something that’s harder to move. If the clip can rotate the bracelet can flip around which is annoying, but I think that’s because I often clip the bracelets to my wallet wristlet thing which has a rotating clip, so I don’t know if it would be a problem with a normal carabiner thing. This makes it easier to anchor the bracelet for me, and makes it more moveable and positionable so you don’t necessarily have to be hunched over if you place the anchor point above your lap (usually I do about mid-chest-level but whatever is most comfortable for you might be different). The strings also hang down in the air when not in use, instead of being flat to a board or table, which makes them easier to grip than trying to pinch them enough to pick them up from a flat surface. They can sometimes get a little tangled, but just smoothing them a bit should fix it, I’ve never had actual knots. The loop start means that you can make your bracelet have a sliding knot closure, so it can widen and tighten as needed to make getting it on and off easier without risking the bracelet falling off. I learned how to do this from a friend, so I don’t have a specific tutorial to recommend to you, but they should be easily findable under sliding knot or slip knot. I usually leave the tail end longer than normal, which makes the max size of the bracelet wider than normal, since being able to easily get the bracelet on and off without fighting it over my hand is more important to me than the fact that longer tails can get caught on things or get dirty/wet more easily than shorter tails do, but again that’s personal preference. Pro tip: the sliding knot won’t slide when it’s wet, not sure whether it’s because of friction or because the strings absorb water and expand or something, so if you want to take off or reposition your bracelet doing it before the bracelet gets wet is a good idea unless you want them to stay where they are until they naturally dry off. Also, if you need to undo a mistake, I recommend using a pin or an earring post/hook to unpick the knot instead of doing it by hand. Even that can require a decent chunk of fine motor control which can be annoying, but it’s better than poking at those tiny threads that are very smooth and hard to grab even when not tangled up with other strings. I hope these tips can help you, and I wish you all the best with your bracelet making! |
|
Sparkle11
Skiller
|
9 months, 3 weeks ago by Sparkle11
Since my strings are all tied in a knot together at the start of my bracelet, pulling hard on strings while tightening knots just pulls the big knot and shouldn’t move any one string, so although I’ve noticed unevenness in my bracelets from inconsistent tension in my knots (so some are much bigger than others, oops), I’ve never noticed a problem caused by misaligning the strings themselves
|
|
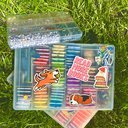
maddielolz
Professional
 |
9 months, 3 weeks ago by maddielolz
I'm a little late to this and I'm not sure if someone has already suggested this, but I got a BeadSmith macrame board for Christmas last year and it's really helpful for keeping strands separated and keeping tension in the bracelet!
|
Reply