Rate Tutorial

This method of knotting letters is unusual, unlike traditional bracelet tying. Rows of these bracelets aren't tied downwards, but straight - vertical. You can create friends names, nicknames, names of favorite bands or different images, symbols and shapes. It is based on the back threads through which you're going to be working with one working string. You can design your title easily on a grid paper.
You need to pick two colours. You're going to be writing the letters with the back strings (white strings on the picture above), while the working string is a background (black in the picture). Back strings don't need to be long, make them three times longer then the bracelet is going to be. On the other hand, The working string needs to be very long. For one bracelet You might need the whole 8 metre long embroidery floss. The best way is to twist it up into a shape of a ball for more comfortable tying- do not tangle it up! A good tip is to put it into a kinder egg, it won't tangle up and will be easier to work with.
Before staring with your bracelet you need to find a template or design your own. There are lots of alpha patterns on braceletbook that you can easily find. In the picture above, I used a font 6 knots high. You have to add at least 1 string on each side of the font to create a border, which means that my bracelet is 8 knots high. With the working string (black), make classic forward knots in a row to the right, and backward knots in a row to the left. Because we are making a row to the right, and then straight back to the left, the bracelet isn't tied downwards. This is an exception that brakes the rule of tying downwards.
When doing alpha patterns, you need to make sure that that your knots are properly tightened, especially when you're making the knots with your back strings afterwards. What happens when you're not tightening your knots enough is that your bracelet can twist and won't have nice edges. You need to make sure that the first and the last row are tied with the working (black) string, so the letter knots aren't tied all the way to the edges, as your bracelet might twist even more.
Same as with every bracelet, the first row might be a little difficult, you can use a clothes peg to hold it in place.Straight from the beginning, you need to tighten your knots properly, so the rows are straight.

The bracelets can be thin or thick, it depends on the number of back threads on the template you are working from. Using a grid, you can make your own designs with letters and pictures. In this other alpha bracelet I made I used a template that is 16 knots high.

The back strings don't have to be the same colour, you can use different tones of colours. The font will have a gradient. In this bracelet I used two back colours, one is for the body of this cute creature, and the second colour is for the feet.
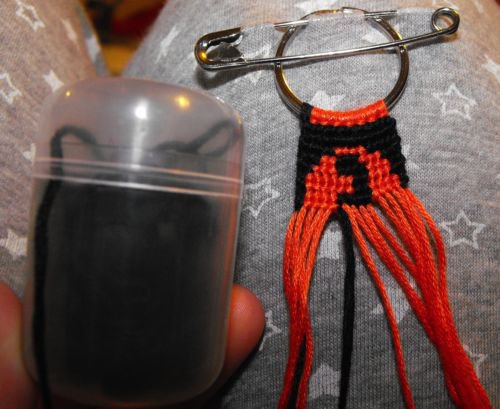
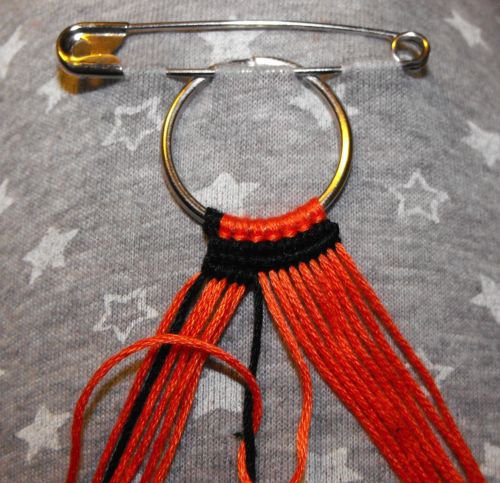
I will try to explain the specific procedure on this ninja keyring (pattern 208). Prepare 14 orange strings for your back string (or choose your color), and one black full string (don't cut it, use the whole embroidery floss!). Make one big knot on the top on the strings and fasten them to your pillow with a safety pin. The first and the last back string can be any colour, but it's best to choose the same colour as your background, so the back strings don't show through.
With alpha patterns, you only use forward and backward knots. With the working string (black),do forward knots throughout the whole row to the right, and for the next row you're going to be using backward knots, and then forward knots again.
Never tie two back strings together to make a knot. The leters/pictures are made out of the back strings (orange).
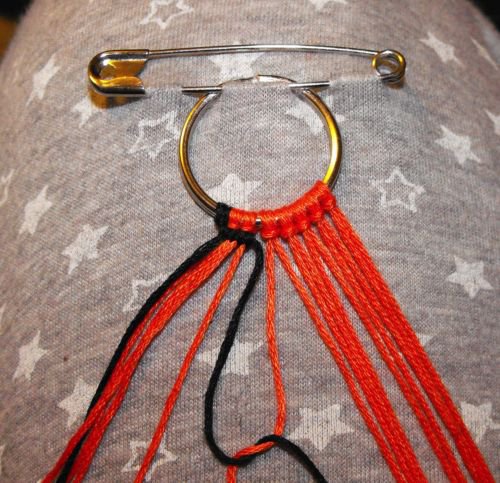
So we have 14 orange strings, and one long black string, the first few rows should be done with the main long string, On the picture i only did two as it isn't a bracelet but a keyring. After a couple of rows, the rows should be straight/vertical.
With alpha patterns, you only use forward and backward knots. With the working string (black),do forward knots throughout the whole row to the right, and for the next row you're going to be using backward knots, and then forward knots again.
Never tie two back strings together to make a knot. The leters/pictures are made out of the back strings (orange).
So we have 14 orange strings, and one long black string, the first few rows should be done with the main long string, On the picture i only did two as it isn't a bracelet but a keyring. After a couple of rows, the rows should be straight/vertical.
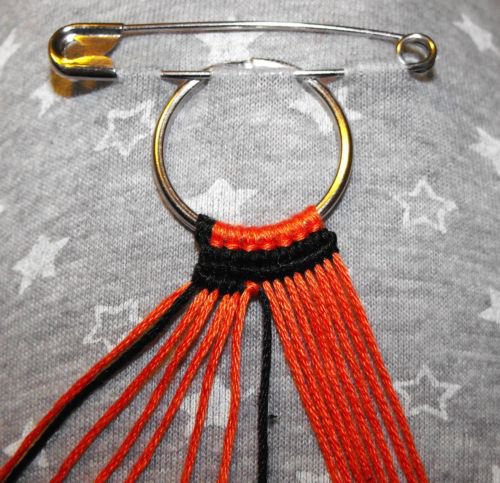
Make the first row with forward knots. Start tying them tightly straight from the beginning.
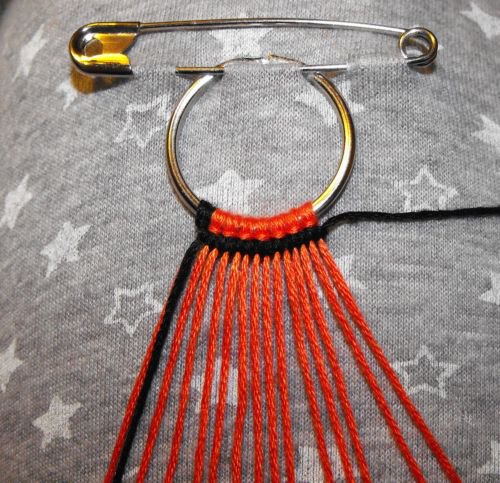
When you get to the end of the first row,make the first knot with the black string to the left (backward knot). I made another row of knots because my row wasn't straight after first row because I tied it tightly over the key-ring.
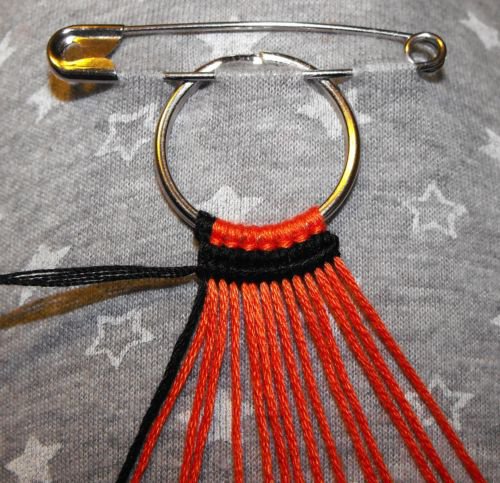
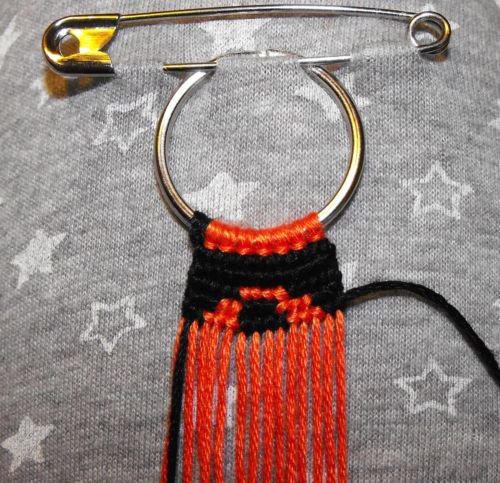
The first knot to the right, will be with the black string. We'll make another 4 forward knots and then make a backward knot with the orange string that is our 6th back string. The black string is now on the other side of the knot, and we make another 3 knots over our main black string. On this picture, I got to the phase where where I made my first orange knot, now we're going to take the main (black) string again and make knots until the end of the row.
This is how the orange knot should look.

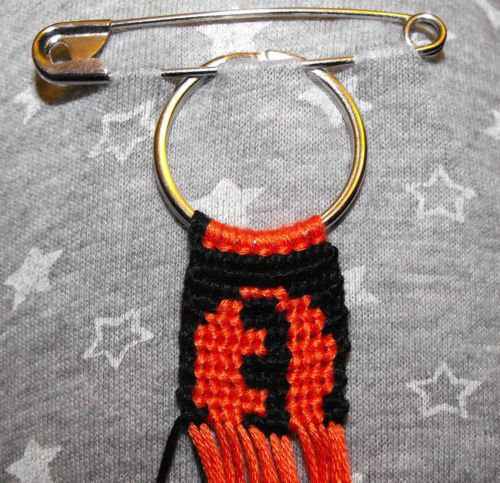
Another row starts with 3 black backward knots, then 3 orange forward knots, then 3 black backward knots, then 2 orange forward knots, and lastly 3 black backward knots. This will make a full row.
The black knots are always done with the same thread, but the orange knots are always done by a different orange string.
The black knots are always done with the same thread, but the orange knots are always done by a different orange string.
This row starts with 2 black forward knots, then 3 orange backward knots, then 4 black forward knots, then 3 orange backward knots, and lastly 3 orange backward knots.

This row is tied to the left. 2 black backward knots, 3 orange forward knots, 3 black backward knots, 6 orange forward knots, 1 black backward knot.
Continue tying from this pattern (pattern 208). Repeat this simple procedure until the bracelet/keyring is finished.
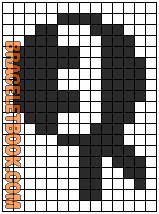
Use this grid to finish the bracelet.
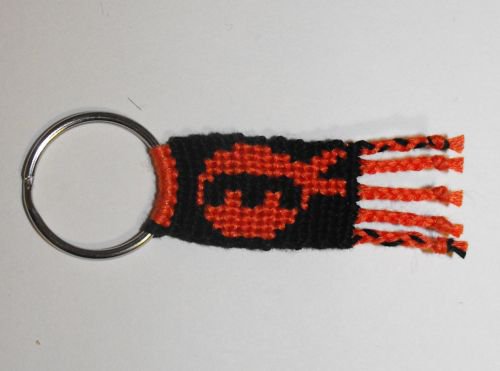
This is how it should look once it's finished.