Rate Tutorial
Introduction
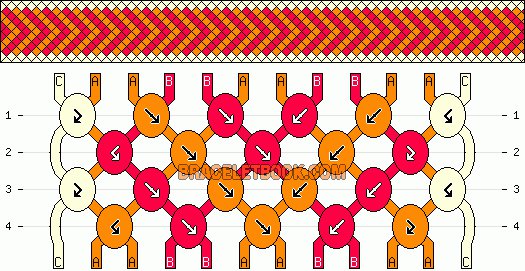
Here is the pattern I created for this tutorial.
If you can read patterns use it for your knotting, otherwise follow the instructions below.
If you can read patterns use it for your knotting, otherwise follow the instructions below.
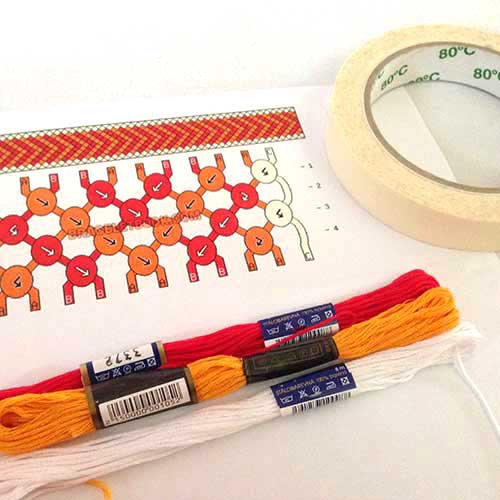
What you will need
- the pattern to follow
- strings in 3 colors, one for the border, two for the chevron
- masking tape, clipping board or a safety pin (feel free to use your own techniques for attaching the bracelet for your knotting)
- strings in 3 colors, one for the border, two for the chevron
- masking tape, clipping board or a safety pin (feel free to use your own techniques for attaching the bracelet for your knotting)
Step 1
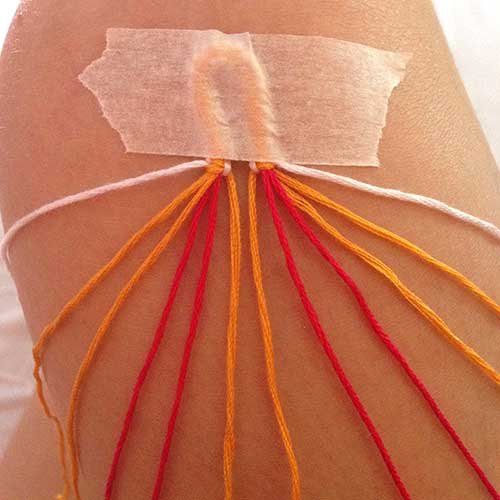
I use masking tape for my knotting because safety pins ruin the materials you pin your bracelet to, and clipboards are too big and hard to work on.
Masking tape holds well (make sure not to use cellar tape!). Also you can keep your first row straight as if working with a clipboard but you can knot on your knee! 🙂
I used a macrame buckle for this bracelet, there's a tutorial for it in the tutorial section if you want to use it.
Otherwise just make a big knot on the top to hold all the strings together and keep the string long enough to make some braids when you finish knotting.
Tape your strings below the knot if you want help with making the first row straight like with a clipboard!
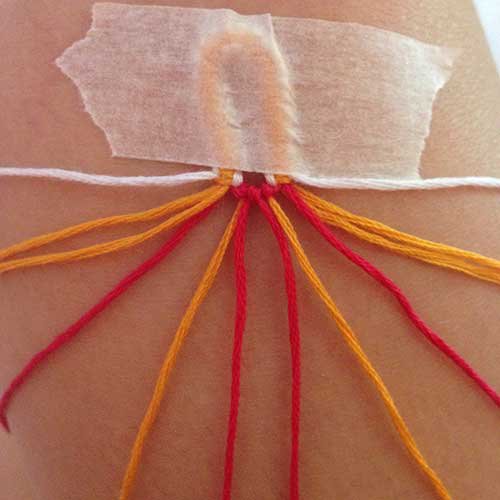
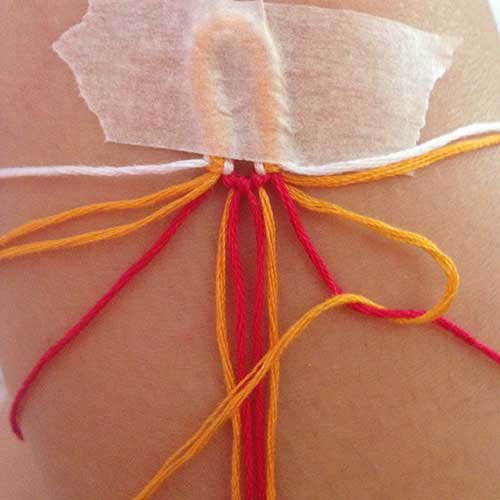
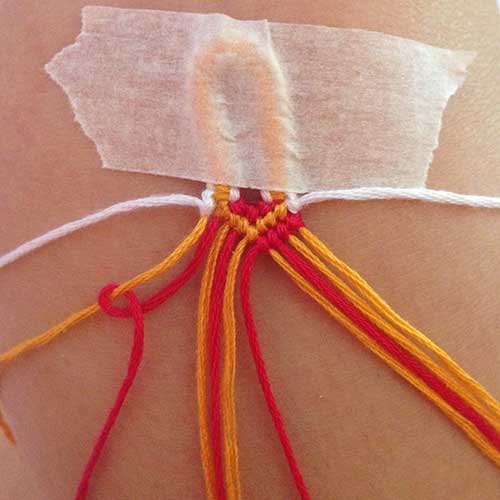
This is how you need to lay out you strings:
A - The border color (white)
B, C - The chevron colors (orange and red)
Color order:
ABBCCBBCCBBA
Masking tape holds well (make sure not to use cellar tape!). Also you can keep your first row straight as if working with a clipboard but you can knot on your knee! 🙂
I used a macrame buckle for this bracelet, there's a tutorial for it in the tutorial section if you want to use it.
Otherwise just make a big knot on the top to hold all the strings together and keep the string long enough to make some braids when you finish knotting.
Tape your strings below the knot if you want help with making the first row straight like with a clipboard!
This is how you need to lay out you strings:
A - The border color (white)
B, C - The chevron colors (orange and red)
Color order:
ABBCCBBCCBBA
Step 2
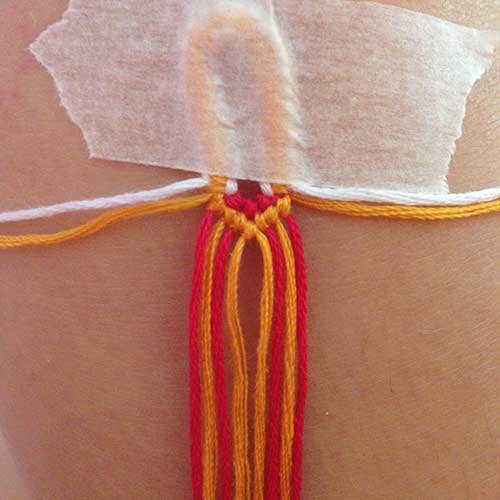
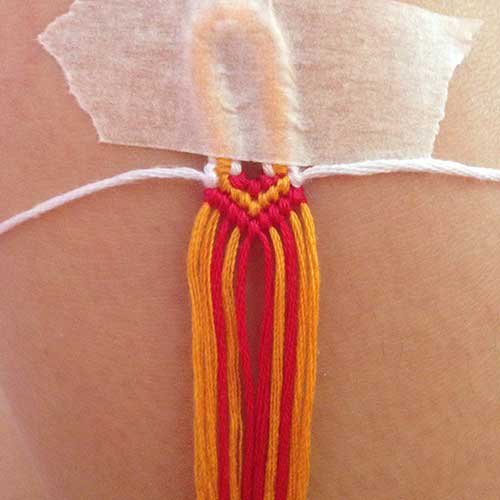
Once you’ve got your strings layered, take the 5th string from the right side and make a backward knot over the 6th string.
Now take the 5th string from the left and make a forward knot over the 6th string.
Connect the two knots together with a forward knot in the middle.
Now take the 5th string from the left and make a forward knot over the 6th string.
Connect the two knots together with a forward knot in the middle.
Step 3
Now take your 3rd string from right and make a backward knot over the 4th string.
Step 4
Make another two backward knots.
Do the same from the left. Take the 3rd string and make a knot over the 4th string and continue the row finishing with a middle forward knot.
Do the same from the left. Take the 3rd string and make a knot over the 4th string and continue the row finishing with a middle forward knot.
Step 5
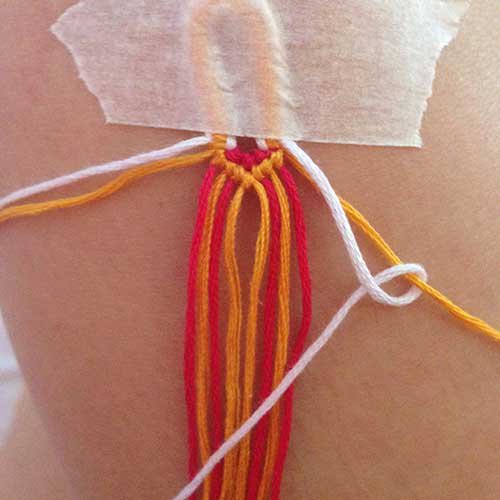
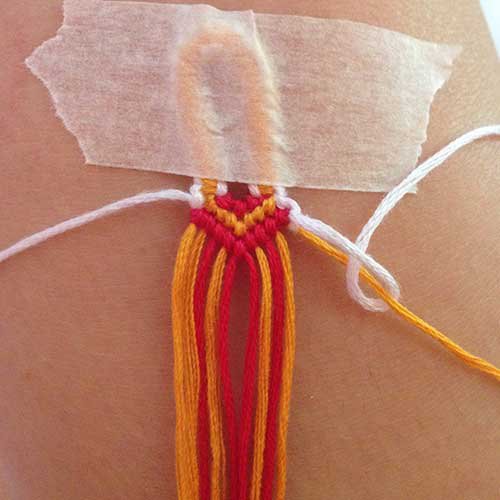
We are going to make the first border knot now. Take your right border string and make a backward-forward knot.
(The knot is made out of two half-knots, to make a backward-forward knot you need to make one backward half-knot and one forward half-knot)
(The knot is made out of two half-knots, to make a backward-forward knot you need to make one backward half-knot and one forward half-knot)

Step 6
Repeat on the left side only now you are going to make a forward-backward knot instead of the backward-forward one.
Step 7
You now know how to make forward-backward and backward-forward knots.
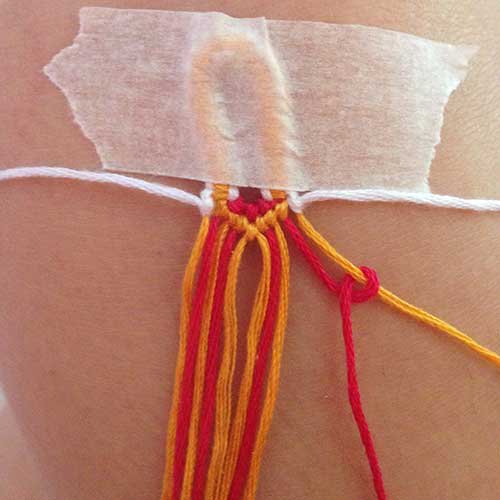
Take the 3rd string from right and make a forward-backward knot over the 2nd string from right.
Take the 3rd string from right and make a forward-backward knot over the 2nd string from right.
Step 8
Repeat on the left side.
Take the 3rd string from left and make a backward-forward knot over the 2nd string from left.
Take the 3rd string from left and make a backward-forward knot over the 2nd string from left.
Step 9
Complete the arrow like you did with the first arrow.
Step 10
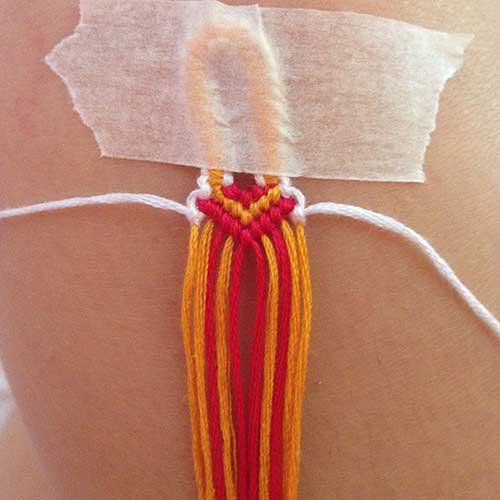
Now make a backward-forward knot with your right border string again.
Step 11
And a forward-backward knot with your left border string.

Step 12
Repeat steps 9-13 until your bracelet is long enough.
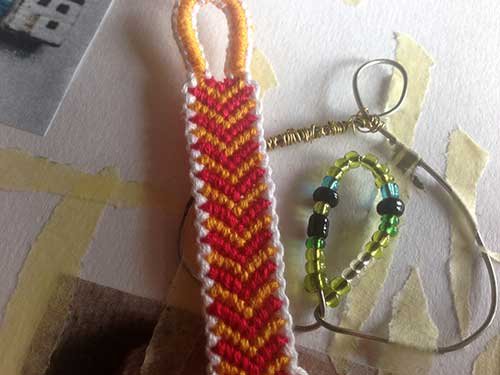
Done
This is how the finished bracelet looks!
Hope you had fun making it!
Happy tying!
Adik
Hope you had fun making it!
Happy tying!
Adik