Rate Tutorial
What you need
Graph paper, coloring supplies, pen/pencil
Step 1
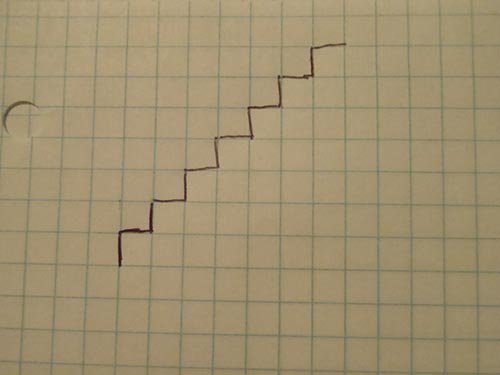
Draw a zig zag line to determine how many strings you want to use. Each square represents a knot so there are two strings being used per square. Since I drew a zig zag line along 7 squares, I'm going to have 14 strings. This line also determines the beginning of the bracelet.
Step 2
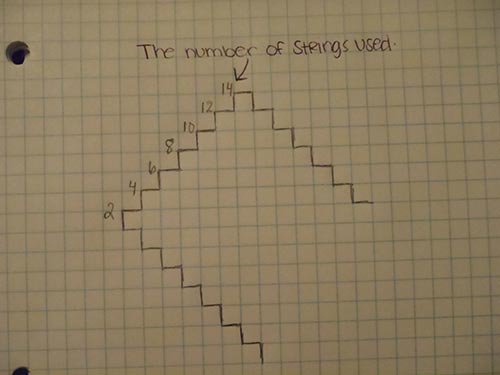
Now, draw zig zag lines coming from the top and bottom of the first line you drew. The length of these lines depends on the pattern you're making. Some patterns repeat after a few lines while others repeat after 30 or more lines. For simplicity, I'll make mine repeat after 14 lines.
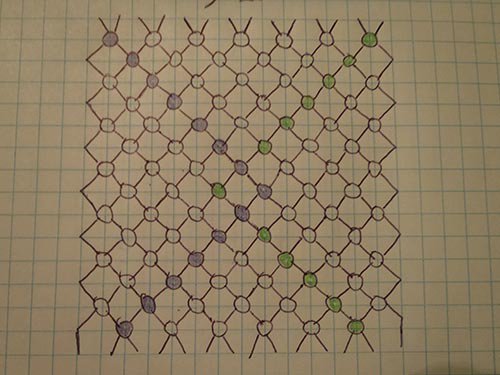
Step 3
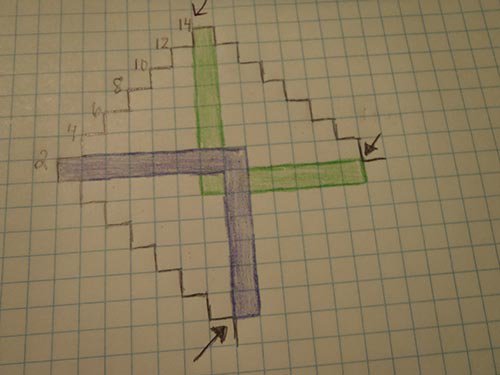
Time to make your design. So it's easy to follow, I'll draw simple lines. NOTE: Make sure your design ends on an EVEN numbered row (my end is indicated by the two arrows at the bottom.)

Step 4
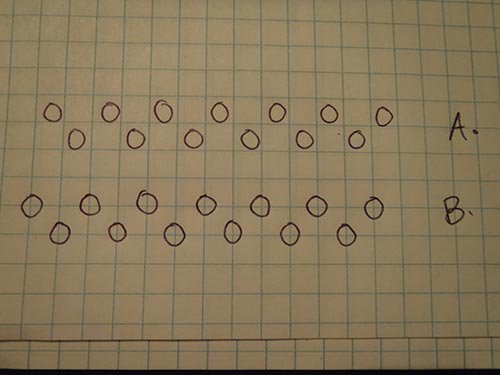
Once you're satisfied with your design, it's time to make the pattern grid. To do this, first make the same number of circles as you drew your first zig zag line at the beginning to indicate how many strings you're using. Like the squares, each circle represents a knot, so each circle uses 2 pieces of string. Since I made my line across 7 squares, I drew 7 circles (your number may be different.) You can use either choice A or B it doesn't matter, though it may be easier for you to do choice A. In the tutorial I use choice B. With A, the circles are inside of the squares while in B they're drawn at the intersections.
Step 5
Next you're going to want to draw in the next line of circles. You will use one less circle for even numbered lines. Draw these circles in between the circles you drew in the first line.
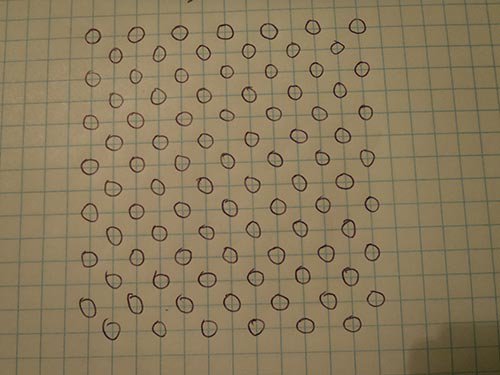
Keep going until you made the same number of lines it takes your pattern to repeat. Remember to end on an even numbered row. Mine ends after 14 lines so I'll make 14 rows of circles.
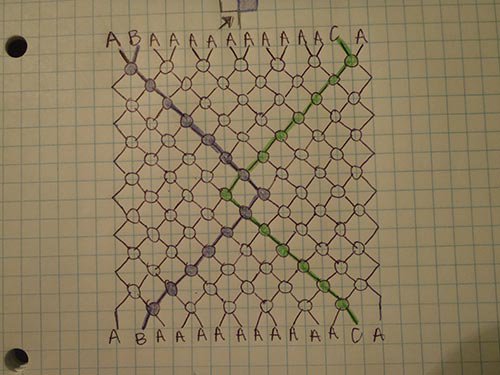
Step 6
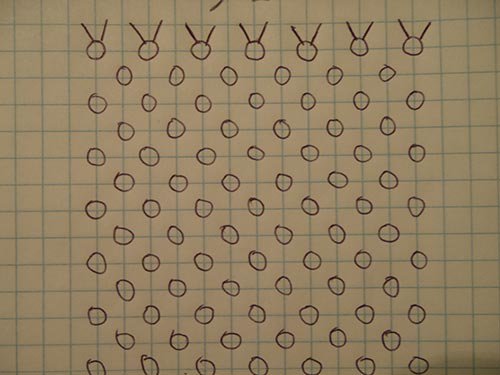
Time to draw in the lines that connect the circles. First draw 2 lines coming from each circles you drew in your first line. These lines represent your string and these strings at the top represent the starting position of each string.
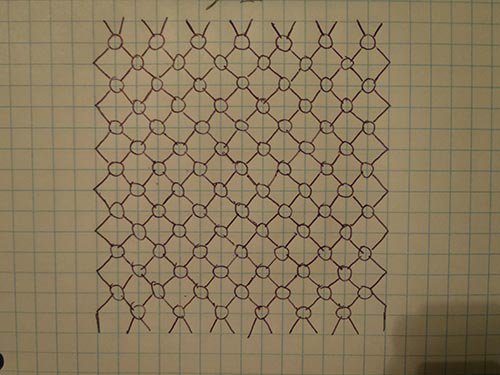
Draw in the rest of the lines. Notice the lines coming from the circles on the beginning and end of the rows. This line is the string you put aside on even rows and bring back on odd rows. Make ending lines at the bottom like you did at the top.
Step 7
Draw in your design to match the one you made earlier. Don't get confused. Even though I used 2 colors, there are 3 colors in my design.
Step 8
Time to figure out how many strings you need of each color and the placement of your string. Some patterns may be more difficult to figure out than others. When you finish, make sure your bottom strings are in the same placement as they are at the top.

Step 9
Fill in the circles with which knot should be used based on how you colored in the circle and on which way the string advanced.
There you have it. All you have to do now is go to the generator and copy the same knots you used.
If you have any questions, feel free to message me. I'll get back to you as soon as I'm online. 🙂
There you have it. All you have to do now is go to the generator and copy the same knots you used.
If you have any questions, feel free to message me. I'll get back to you as soon as I'm online. 🙂