Rate Tutorial
Materials
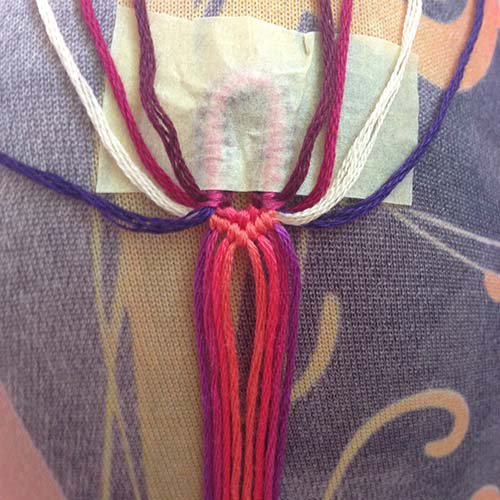
You will need strings in 8 colors for this tutorial.
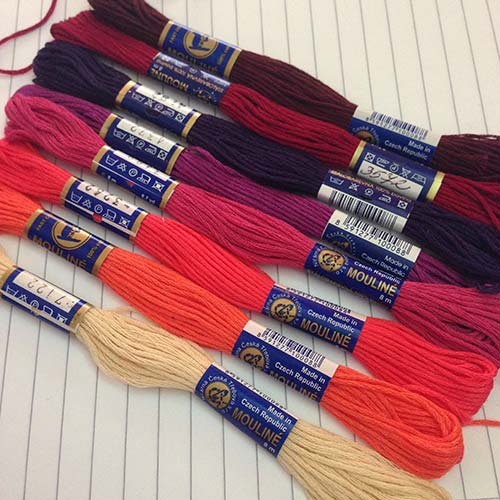
Order your strings from string A to string H in the color order you want to have in the finished bracelet.
When you’ve got your strings ordered. Set them up in this color order:
ABHCGDFEEFDGCHBA
ABHCGDFEEFDGCHBA
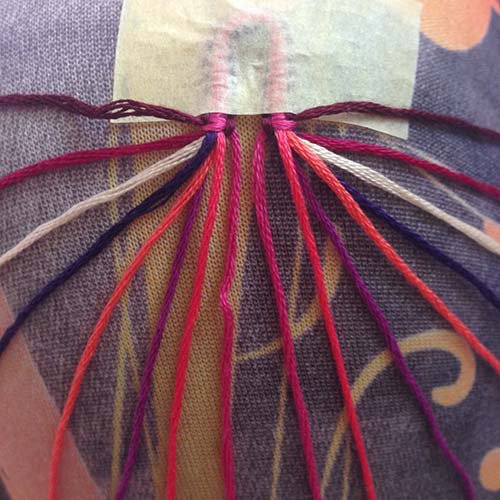
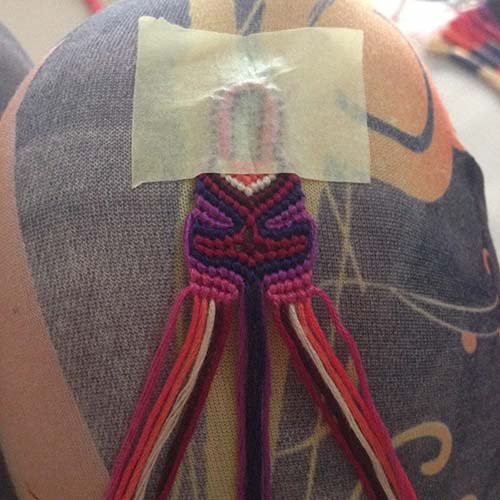
I use masking tape for my knotting because safety pins ruin the materials you pin your bracelet to, and clipboards are too big and hard to work on.
Masking tape holds well (make sure not to use cellar tape!). Also you can keep your first row straight as if working with a clipboard but you can knot on your knee! 🙂
I used a macrame buckle for this bracelet, there's a tutorial for it in the tutorial section if you want to use it.
Otherwise just make a big knot on the top to hold all the strings together and keep the string long enough to make some braids when you finish knotting.
Tape your strings below the knot if you want help with making the first row straight like with a clipboard!
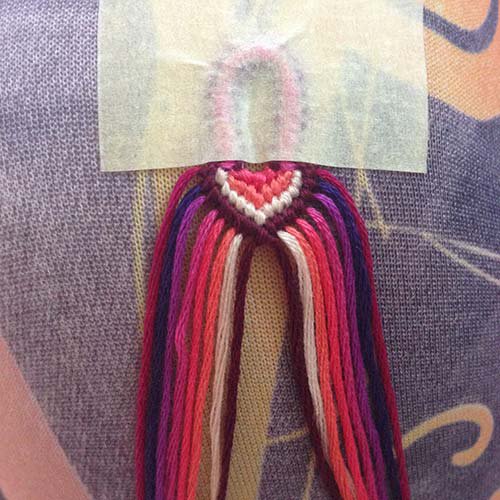
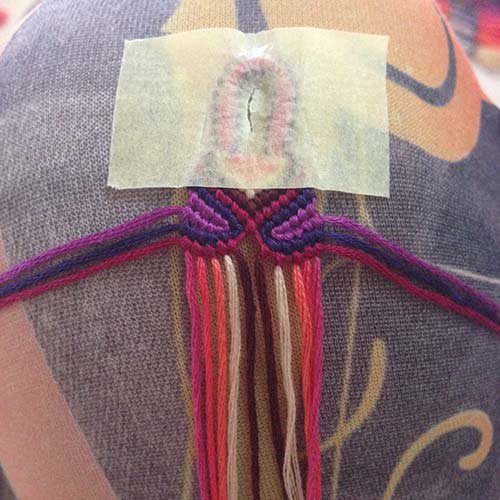
Divide the strings in two sections from the middle.
We are starting in the right section. Take the second string from left and make a backward knot over the first string from left.
Masking tape holds well (make sure not to use cellar tape!). Also you can keep your first row straight as if working with a clipboard but you can knot on your knee! 🙂
I used a macrame buckle for this bracelet, there's a tutorial for it in the tutorial section if you want to use it.
Otherwise just make a big knot on the top to hold all the strings together and keep the string long enough to make some braids when you finish knotting.
Tape your strings below the knot if you want help with making the first row straight like with a clipboard!
Divide the strings in two sections from the middle.
We are starting in the right section. Take the second string from left and make a backward knot over the first string from left.
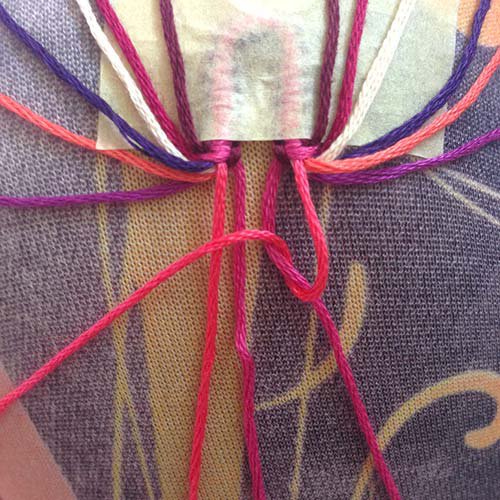
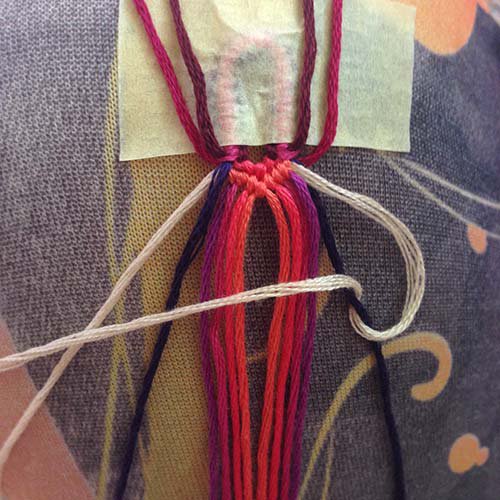
We are now going to work on the left section. Take the second string from right and make a forward knot over the first string from right.
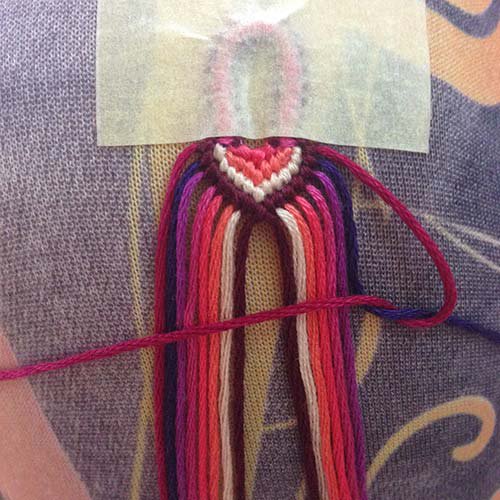
When you’ve got that done, connect the two knots with a forward not in the middle.
When you’ve got that done, connect the two knots with a forward not in the middle.

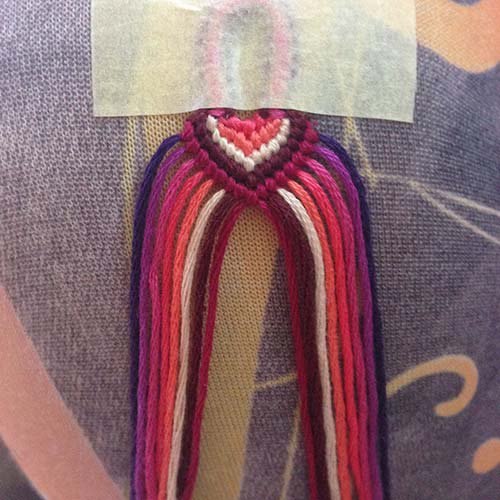
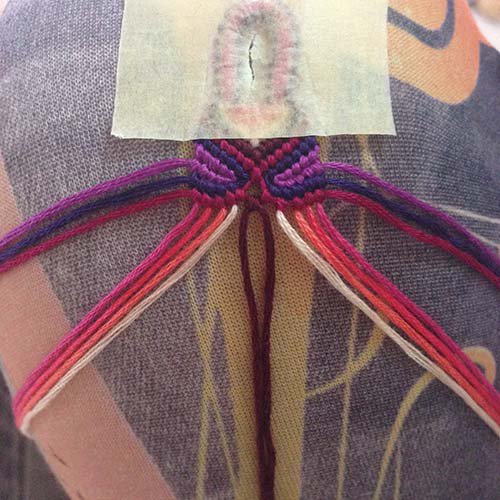
We are now going to make the second arrow.
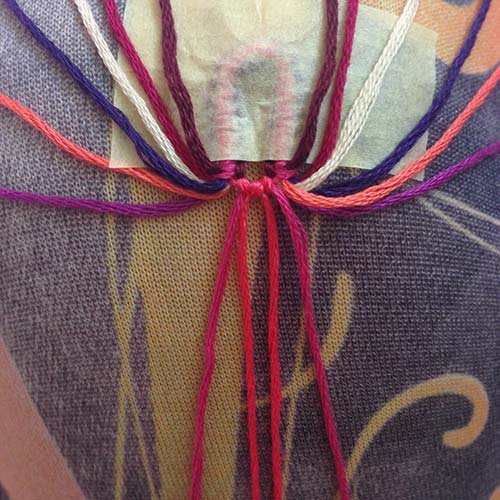
Take the 4th string on the right from the middle and make a backward knot over the 3rd string from the middle.
Make another two backward knots with the same string.
Take the 4th string on the right from the middle and make a backward knot over the 3rd string from the middle.
Make another two backward knots with the same string.
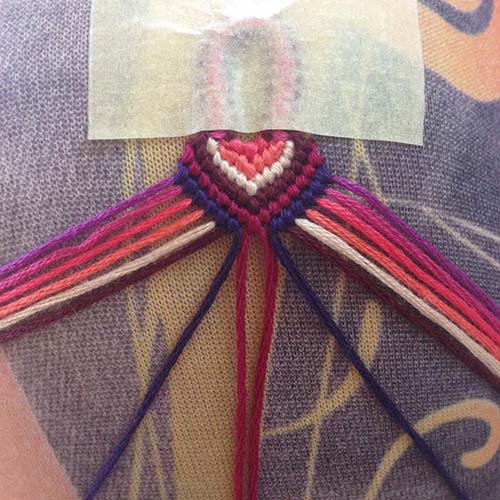
Do the same from the left. Take the 3rd string and make a knot over the 4th string and continue the row finishing with a middle forward knot.
Take the 3rd string from right and make a backward knot over the 4th string.
Continue with 4 more backward knots with the same string.
Continue with 4 more backward knots with the same string.
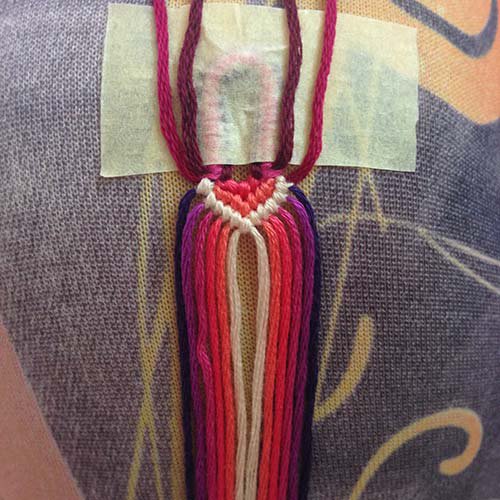
Now mirror your steps to the other side.
Take your 3rd string from left and make a forward knot over the 4th and make another 5 forward knots finishing with the middle knot.
Take your 3rd string from left and make a forward knot over the 4th and make another 5 forward knots finishing with the middle knot.
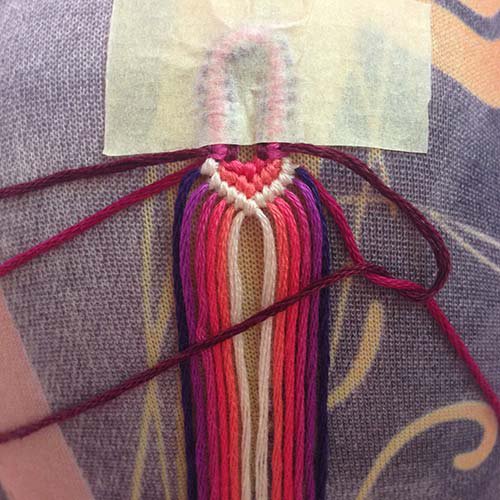
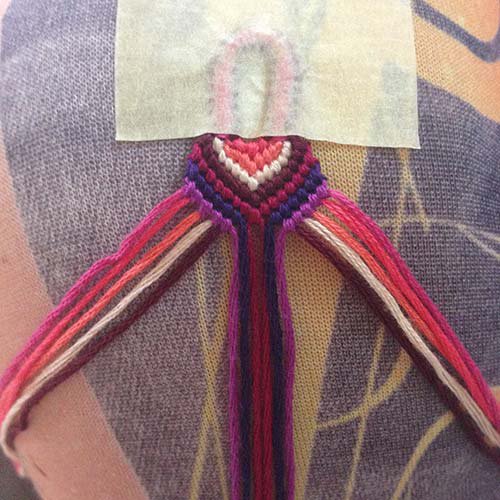
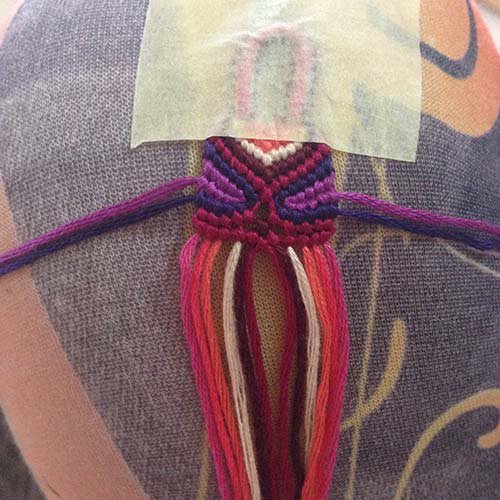
Now make a normal arrow starting with the right string and making 7 backward knots all together.
Do the same from the left, finishing with the middle knot.
Another arrow.
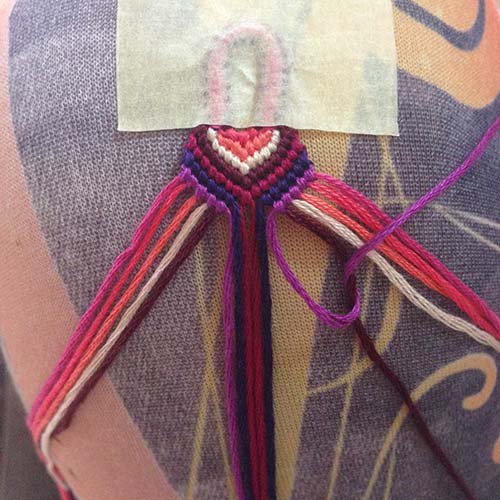
Taking the first string from right make 7 backward knots.
Taking the first string from right make 7 backward knots.
Now with the first string from left make 8 forward knots, connecting the arrow.
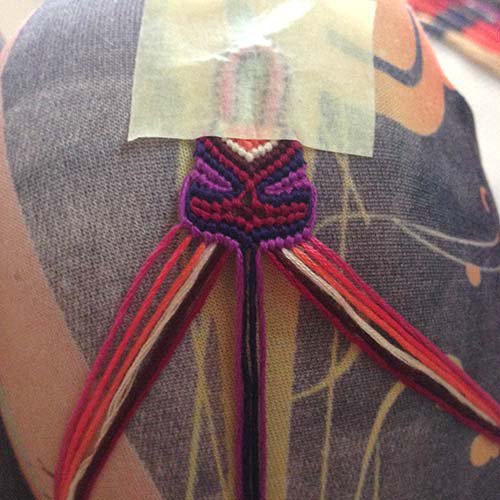
This time we are not going to finish the arrow.
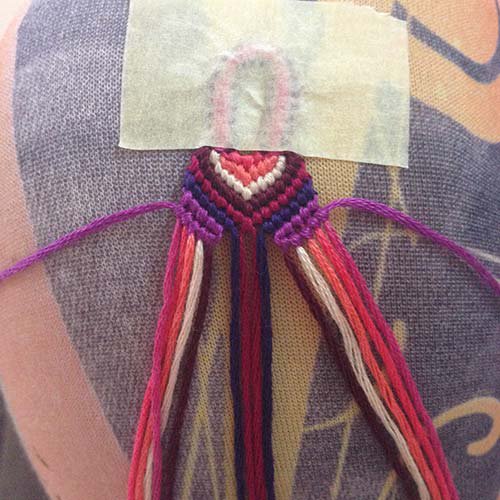
Take the first string from right and make 6 backward knots with it.
Now take the first string from left and make 6 forward knots with it.
Leave the arrow unconnected.
Take the first string from right and make 6 backward knots with it.
Now take the first string from left and make 6 forward knots with it.
Leave the arrow unconnected.
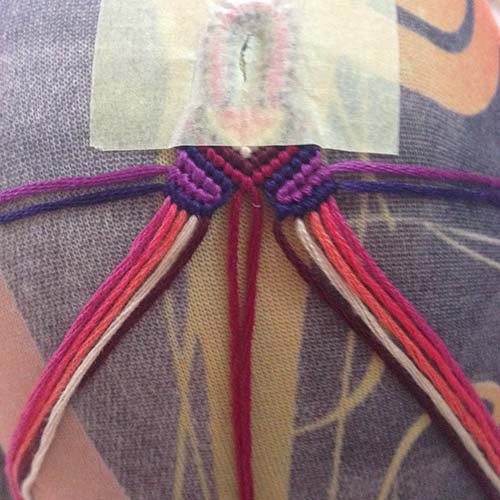
Repeat the previous step, only do just 5 knots from each side.
Now take the right string you were using in the last step.
Make 5 forward knots, taking the string to the right side again.
Don’t worry if you’re doing the knots upwards, you’re doing it right 😉
Make 5 forward knots, taking the string to the right side again.
Don’t worry if you’re doing the knots upwards, you’re doing it right 😉
Repeat on the other side.
Remember this step, you are going to repeat from here at the end of the tutorial until the bracelet will be long enough.
Remember this step, you are going to repeat from here at the end of the tutorial until the bracelet will be long enough.
Now take the 7th string from right (check the picture) and make5 forward knots leaving the last string on its own.
Make sure you don’t tie your first knot too tight, leave the string laying around the first wave. Do not tighten it to the previous knot.
Repeat on the other side just mirrored.
Make sure you don’t tie your first knot too tight, leave the string laying around the first wave. Do not tighten it to the previous knot.
Repeat on the other side just mirrored.
With the middle strings, repeat the step above, leaving the last two strings untouched.
Connect the middle strings with a forward knot.
Starting with the 3rd string from both sides, make an arrow connecting the two strings with a forward knot in the middle.

Repat with the 2nd strings from both sides.
Now take the first string from right and make 6 backward knots, do not make a knot over the middle string.
And repeat from the other side, making 6 forward knots.
And repeat from the other side, making 6 forward knots.
This is where you need to repeat the steps from the first wave we made.
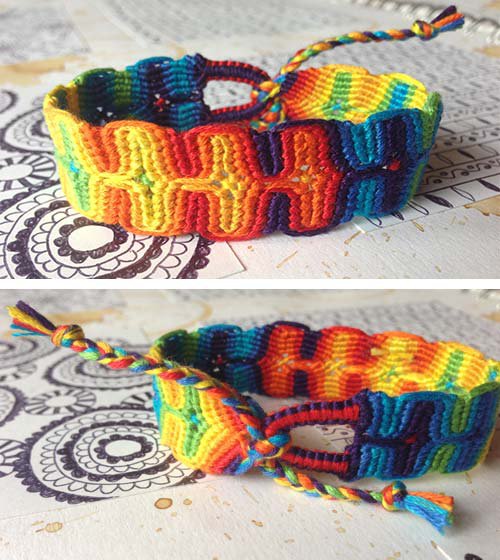
And this is how the finished bracelet looks like!
Happy tying everyone!
Adik
Happy tying everyone!
Adik